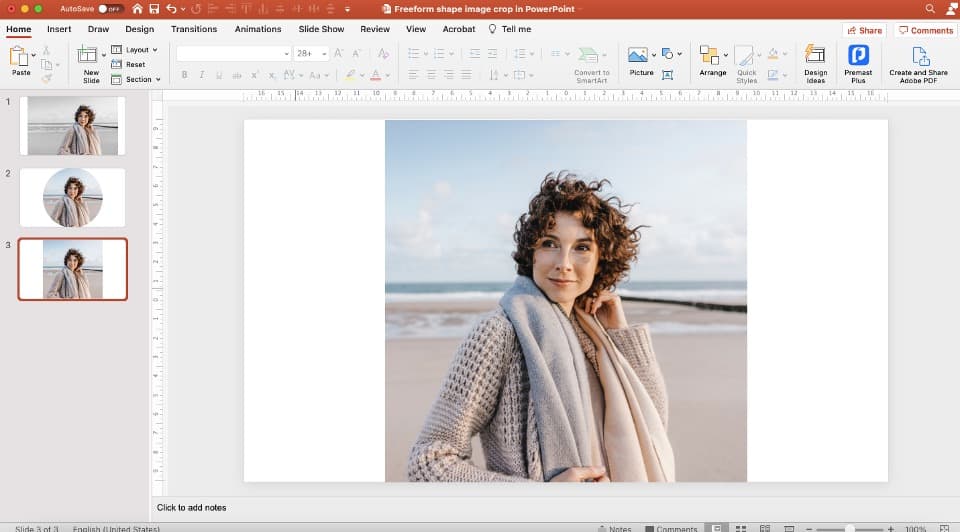
![How to Crop a Picture in PowerPoint? [Step-by-Step Guide!]](https://artofpresentations.com/wp-content/uploads/2021/04/Featured-Image-How-to-crop-an-image-in-PowerPoint.jpg)
The ability to crop and edit images in PowerPoint is by far one of the most underrated qualities of PowerPoint! You can not only insert images to it, but you can also crop the images into a pre-built shape, custom shape, or even to a smaller size! But, you may be wondering, how exactly do you crop a Picture in PowerPoint?
Here’s how to crop a picture in PowerPoint –
- Select the picture.
- Then, click on the “Picture Format” ribbon.
- Next, click on “Crop”. You will notice black crop handles around the edges of your image.
- Adjust the image crop area using the crop handles.
- Finally, click on the “ESC” key on your keyboard.
I have also provided a detailed explanation with images in the article below in order to help you understand the exact process further. Additionally, in this article, we will take a look at other innovative ways we can use the “crop” feature in PowerPoint!
So, let’s get started!
1. How to Crop a Picture in PowerPoint?
Preparing almost any presentation requires the addition of pictures and image, and in many cases, these images need to be cropped in some form or another. Lucky for us, Microsoft PowerPoint has multiple cropping options available to its users.
Below, I’ll show you the simplest way to crop a picture in Microsoft PowerPoint, step-by-step:
Step-1: Click on the ‘Crop’ option from ‘Picture Format.’
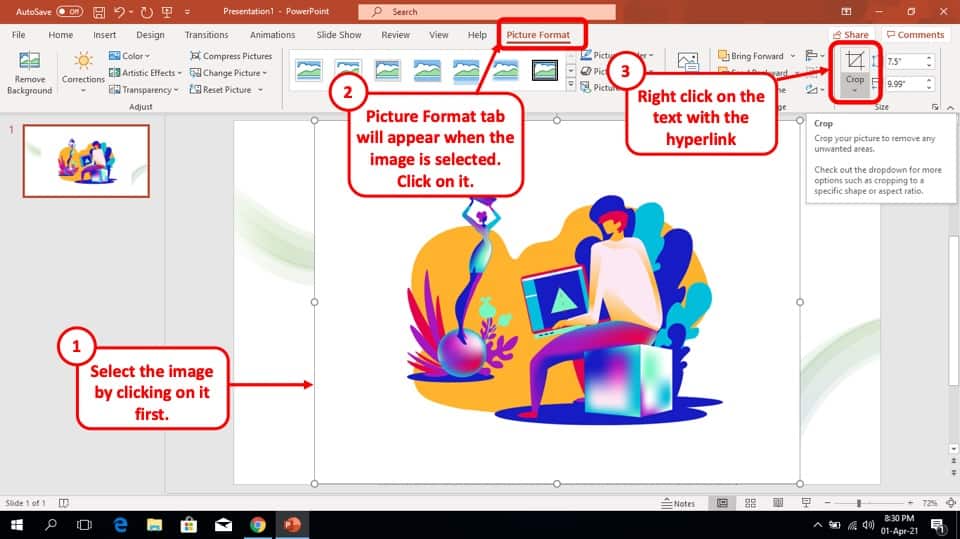
For cropping out unwanted portions of your picture, first select the picture and click on the ‘Picture Format’ option from the ribbon. After that, at the top right corner of your screen, find and select the ‘Crop’ option.
Step-2: Crop the Picture using the Crop Handles
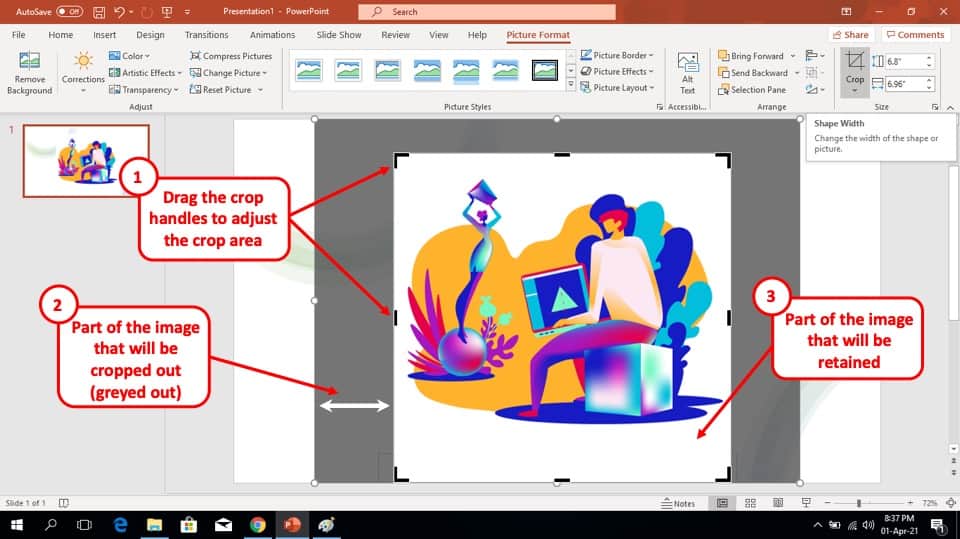
As soon as you click on the ‘Crop’ icon, you will notice the crop handles appearing on the edges and sides of the picture. You can just crop the picture by dragging the crop handles using your mouse.
The cropped-out portions of the picture will appear as shaded, which will help you identify the cropped portions.
Step-3: Press the Escape Key.
Now simply press the ‘ESC’ button on your keyboard and you are done cropping the image in PowerPoint.
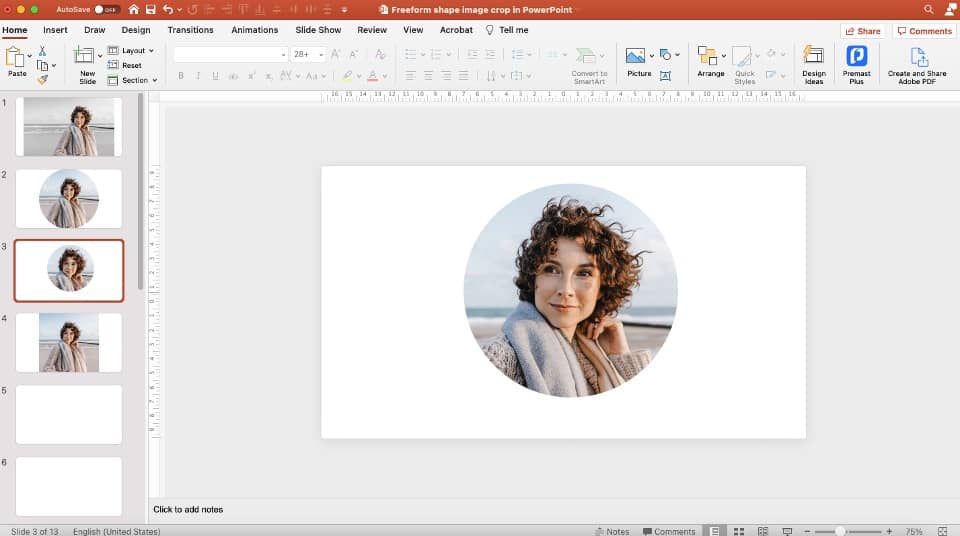
2. How to Crop a Picture into a Shape?
PowerPoint allows users to crop their pictures in a variety of shapes. The basic shapes include square, circle, rectangle etc. There are also some of the more unique shapes such as trapezium, cross, lightning bolt, arc, chord etc.
Follow the steps below and learn how to crop a picture into different shapes using Microsoft PowerPoint:
How to Crop a Picture into a Circle?
First, let’s understand how you can crop an image into a circle.
Step-1: Crop the picture to a 1:1 Aspect Ratio
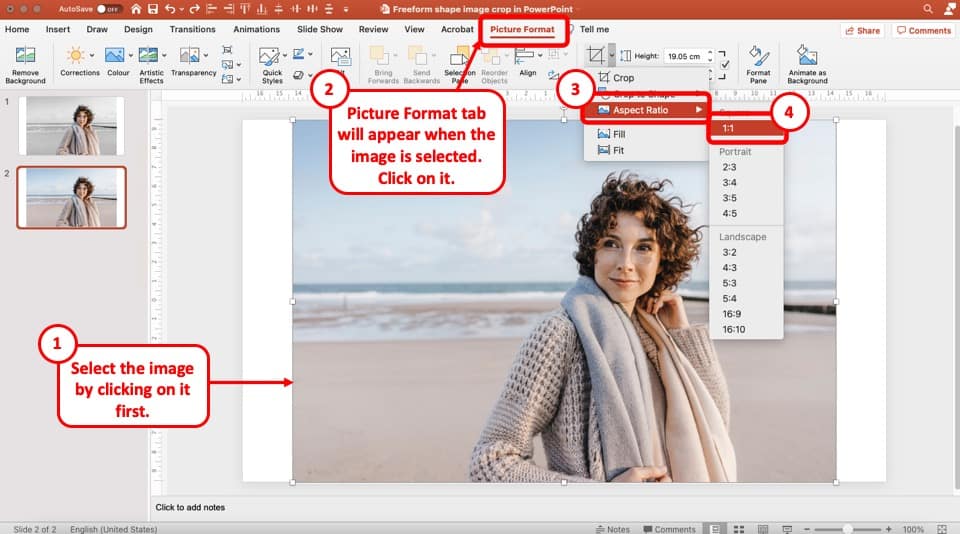
At first, select the picture you want to crop and from the ribbon, click on the‘Picture Format’ option. On the top right corner, you will find the ‘Crop’ option with an arrow mark just below it.
Click on the arrow mark and from the dropdown, place your cursor on ‘aspect ratio.’ From there, select the 1:1 aspect ratio under ‘Square’.
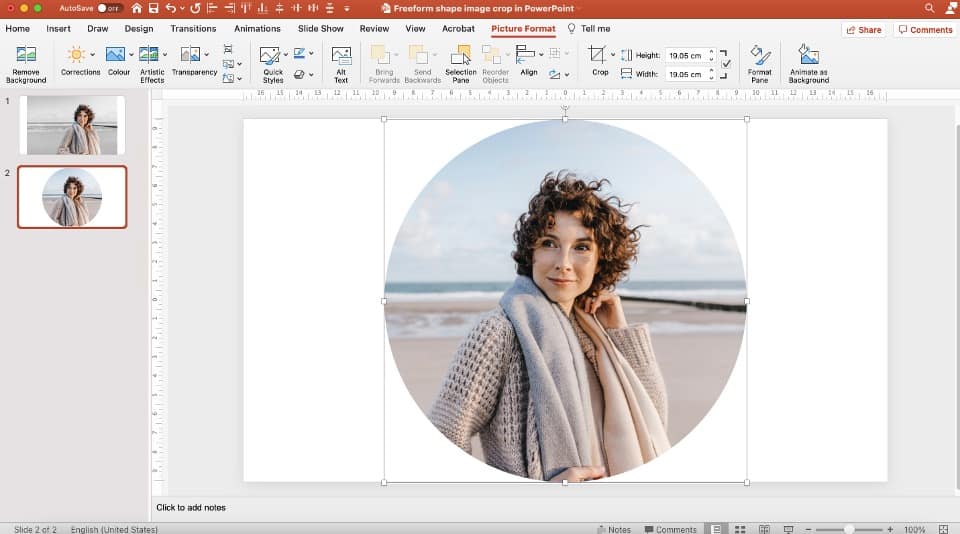
Step-2: Crop the Picture to Oval shape.

After that, click on the arrow mark bellow the ‘Crop’ button again and scroll to ‘Crop to Shape.’. From the basic shapes, select the ‘Oval’ shape.
Step-3: Press ‘esc’ to finish off
Now, press ‘esc’ on your keyboard to successfully crop the picture into circle shape.
Remember!
In order to crop the picture into a perfectly circular shape, it is important to have it in a 1:1 aspect ratio before using the oval shape since an oval with a 1:1 aspect ratio is actually a perfect circle.
How to Crop a Picture into a Square?
Pictures that you use in your presentation slides often needs to be in a perfect square shape. Microsoft PowerPoint has a built-in tool to directly crop a picture into a perfect square shape. This saves you the trouble of having to do it manually, like in most other applications. Here’s how to do it:
Step-1: Select the ‘Crop’ option
Just as before, select the picture you want to crop and click on ‘Format Picture’ from the ribbon to find the ‘Crop’ option.
Step-2: Crop the picture to a 1:1 Aspect Ratio
On the top right corner of your screen, you will find the ‘Crop’ option with an arrow mark just below it. Click on the arrow mark and from the dropdown, place your cursor on ‘aspect ratio.’ From there, select the 1:1 aspect ratio under ‘Square’.
Step-3: Crop the image into a square shape.
Lastly, click anywhere outside the image or press the ‘esc’ button on your keyboard and voila! You are done cropping the image into a square.
How to Convert a Square Image to Circle?
If you have a square image which you need to convert a circle than don’t worry because Microsoft PowerPoint has your back! Follow these easy steps and convert any square image to circle:
Step-1: Select the ‘Crop to shape’ option.
First, select the square shaped picture and click on the ‘Picture Format’ option to find ‘Crop.’ Click on the arrow mark beneath it and from the dropdown menu place your cursor on ‘Crop to shape.’
Step-2: Select the Oval Shape
Select the ‘Oval’ shape from the chart that appears after clicking on the ‘Crop to shape’ option. As the picture was a square one, to begin with, selecting the ‘Oval’ shape will automatically crop it to a circle.
Step-3: Convert the image to circle
Simply click outside the image or press the ‘esc’ button on your keyboard to complete the conversion of the image from a square to a circle.
Intersect an Image with Shape
Intersecting an image with a shape can be quite fun and help you make your presentations more visually attractive. It can be a little tricky to accomplish, so you’ll need to carefully follow the steps below:
Step-1: Select and Insert a Shape
The first step is to select the shape you want to intersect the image with. To do that, go to the ‘Home’ tab from the ribbon, where you’ll find a range of shapes in the ‘Drawing’ section. Select the shape you want to use and insert it on top of your photo using your mouse.
Step-2: Go to ‘Shape Format’

This is the part where it gets a little tricky. First, click on the picture to select it. Then holding the shift key, click on the shape you’ve just inserted on top of the picture. You will find the ‘Shape Format’ tab on your ribbon to click on.
Step-3: Click on ‘Merge Shapes’
From the dropdown menu, find and click on the ‘Merge Shapes’ option.
Step-4: Click on ‘Intersect’
Click on ‘Intersect’ to finish intersecting the image with your shape.
3. Cropping vs Resizing an Image: What’s the Difference?
When it comes to editing images, cropping and resizing are two of the most commonly performed tasks out there. Although both of these might sound a lot similar, they are actually very different concepts.
The key difference between cropping and resizing an image in PowerPoint is that cropping involves removing a certain unwanted portion out of the image. Whereas, resizing, as the name suggests, is simply changing the size of the image or customizing its resolution.
While creating presentation slides, both cropping and resizing tools come in handy and are widely used. It is important to have clear idea about the size and dimension of the image you are using while performing any of these tasks.
For example, if you want to upload your presentation on the internet, it is better not to use images with high resolution, as they are likely to take longer to load. In such a case, the best thing you can do is to resize the image into smaller dimensions, so that it can load faster.
On the other hand, cropping is the best way to go if you want to insert a certain portion of your image into the slide. A picture can be both cropped and resized at the same time but, it is always better to crop an image before resizing it.
Having a basic idea on these will not only prevent you from uploading/inserting a blurry image, but also ones that don’t fit properly or go well with the slides.
Microsoft PowerPoint offers a range of options to its users for cropping an image. From simply leaving a certain portion out of your image to freeform cropping, cropping in different shapes, aspect ratios, there are plenty of options available.
On the other hand, you can also resize your image using Microsoft PowerPoint to a preferred height and width. While resizing your image, you also have the option to maintain or not maintain the aspect ratio of the image.
4. How to Resize a Cropped Image?
After successfully cropping an image, you might want to resize the image to a certain resolution or dimension. No need to worry Microsoft PowerPoint is equipped with a quick resizing tool to come to your aid. Just follow the simple steps below:
Step-1: Select Picture Format
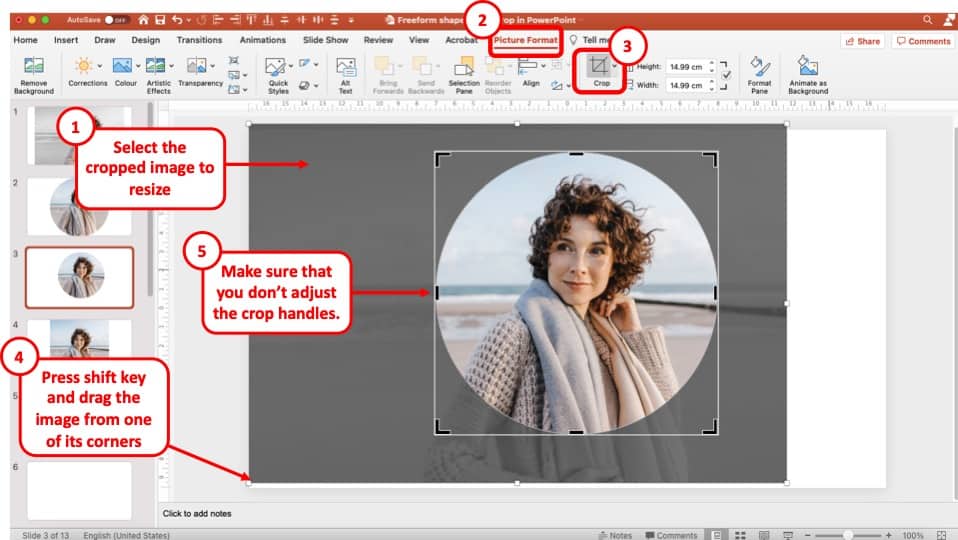
Firstly, select the picture that you have already cropped and go to the ‘Picture Format’ tab from the Ribbon. Then, click on Crop. Since you are using an image that has already been cropped, you will now be able to see both cropped and visible part of the image.
Note that cropped part of the image will be greyed out.
Step-2: Resize the image by dragging it from the corner
Now, all you need to do is resize the image. To do that, hold the shift key on the keyboard and drag the image from one of its corners. Make sure that you resize the image and not the crop handle (which will otherwise change the crop area).
Pro Tip!
Remember to press the “Shift” key on the keyboard when resizing the image. This will ensure that the aspect ratio of the image is always maintained the image gets resized proportionately!
Step-3: Press ‘ESC’ key once resizing is complete
Once you are happy with the resizing of the image, simply press the escape key on your keyboard. You will now notice that the crop area remains the same, however, the image will have resized showing a smaller part of the image (or bigger depending on how it has been resized).
5. How to Crop a Picture to a Specific Size?
Cropping an image to a specific size might come in handy when you want to insert an image to a very specific portion of your slide. This is something every PowerPoint user should learn how to do, as there are often empty spaces left on your slides to fill out. So without further ado, find out the steps to it below:
Step-1: Click on the ‘Format Picture’ option.
Select the picture that you want to crop and right-click on it. A dropdown menu will appear, from which you will have to select the ‘Format Picture’ option.
Step-2: Insert the specific size for cropping.
From the ‘Format Picture’ panel, you will find the ‘Picture’ icon at the very right. Here, under the ‘Crop’ section, you’ll find another section called ‘Crop position.’
Insert the specific size and measurement in which you want your image to be cropped. You can also drag the picture to fit within your cropped area using a cursor.
Step-3: Crop the picture to your specified dimensions
Simply click anywhere outside the image or press the ‘esc’ button on your keyboard to finish the cropping. That’s how easy it is!
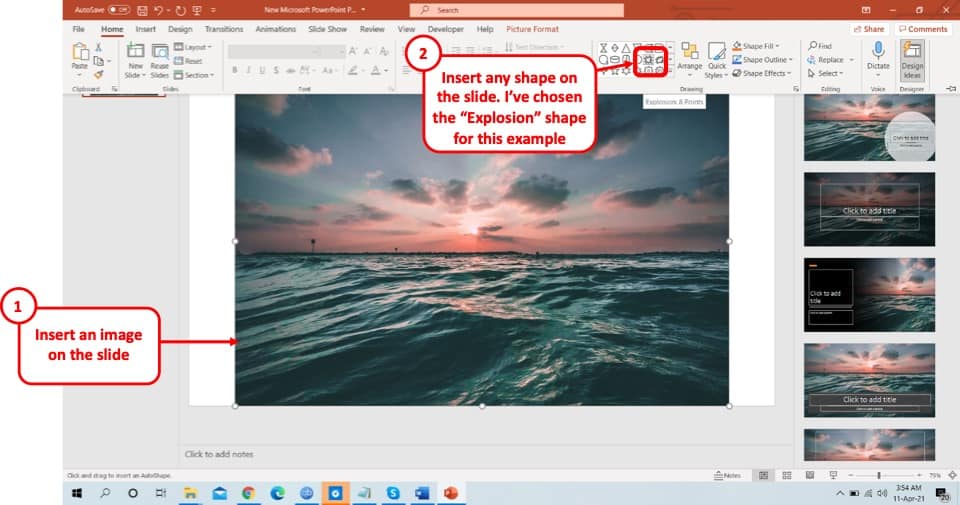
6. Freeform Crop of an Image in PowerPoint?
Freeform cropping of an image is not directly available on PowerPoint. However, you can still do it by drawing a freeform shape over the image and then intersecting the image with that shape. This might sound a little difficult, but I’ll break it down in the steps below:
Step-1: Selecting the ‘Freeform:Scribble’ option from Shapes and drawing the Freeform shape
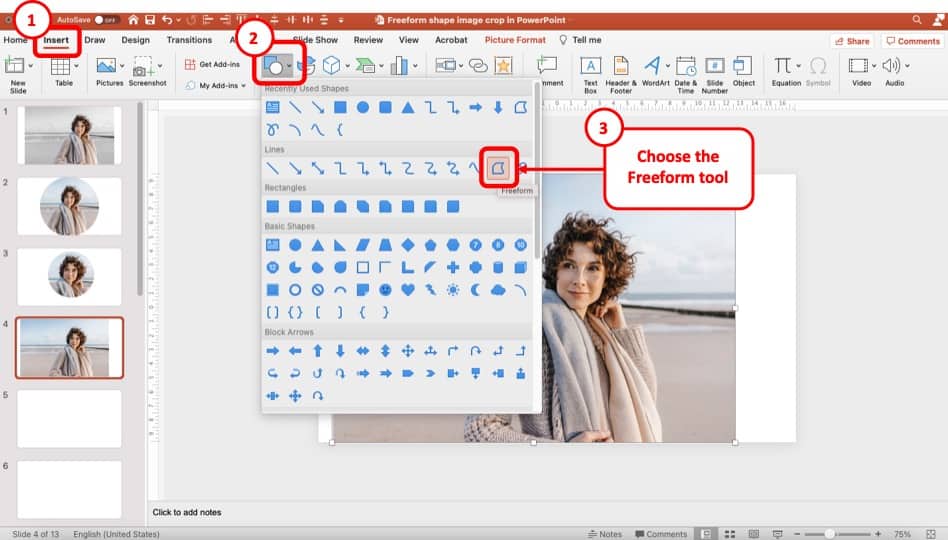
Go to the ‘Home’ tab from the Ribbon and from its ‘Drawing’ section, find and select the ‘Freeform:Scribble’ shape. Now draw your freeform shape over the image using your mouse or touchpad.
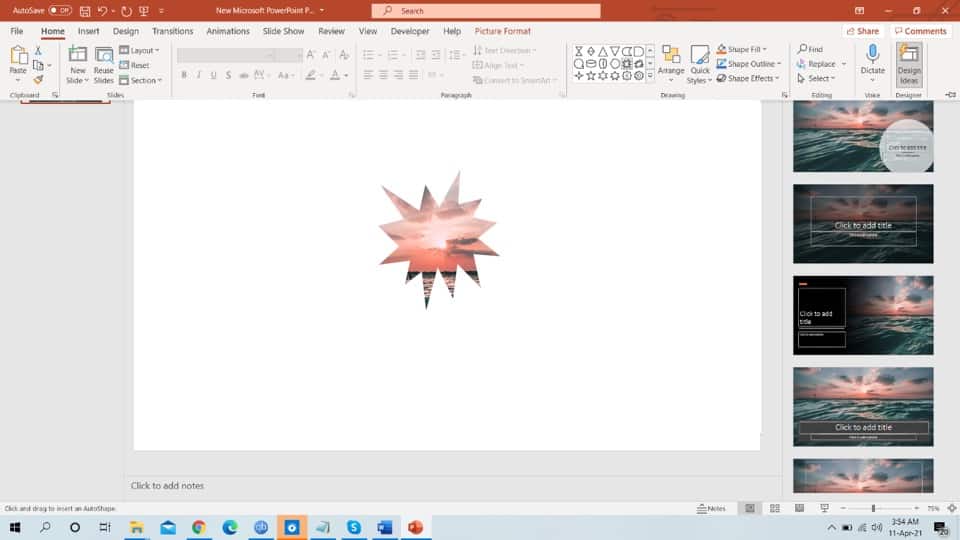
Step-2: Go to ‘Shape Format’
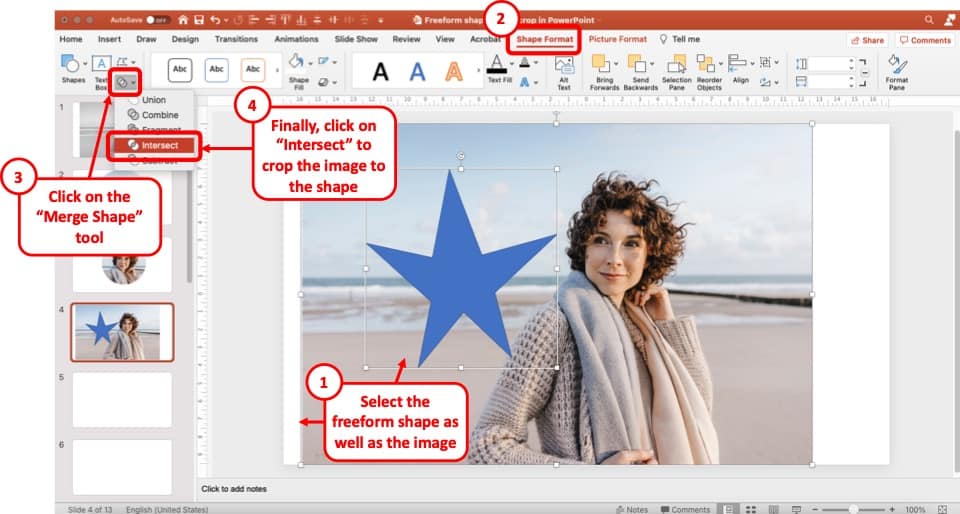
Now all you have to do is intersect the image with this shape. To do that, click on the picture to select it. Then holding the shift key, click on the freeform shape you’ve just inserted on top of the picture. You will find the ‘Shape Format’ tab on your ribbon to click on.
Step-3: Click on ‘Merge Shapes’
From the dropdown menu, find and click on the ‘Merge Shapes’ option.
Step-4: Click on ‘Intersect’
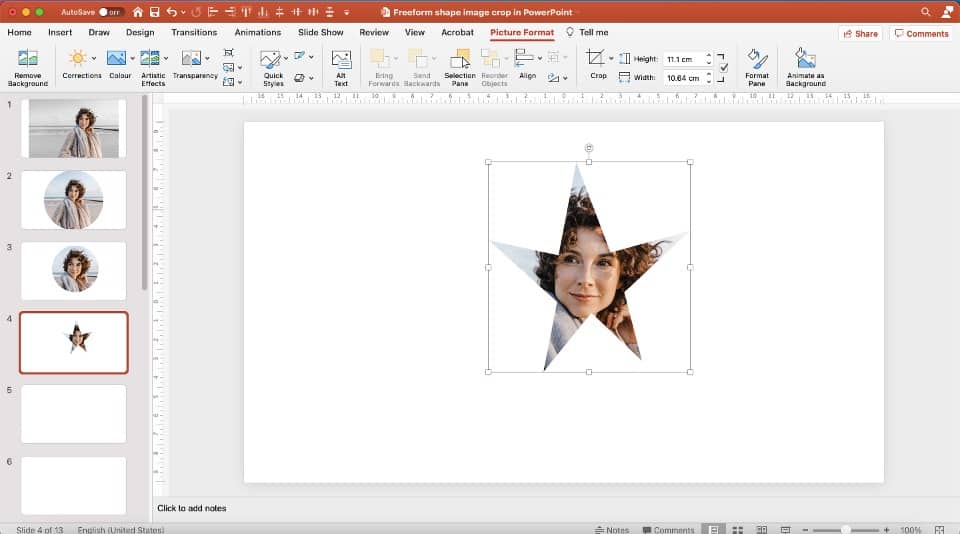
Click on ‘Intersect’ to finish the freeform crop of your image.
7. How to Crop an Image to an Aspect Ratio
Cropping an image to a specific Aspect Ratio on Microsoft PowerPoint is actually a lot easier than it sounds. Just follow the simple steps below:
Step-1: Select the ‘Crop’ option.
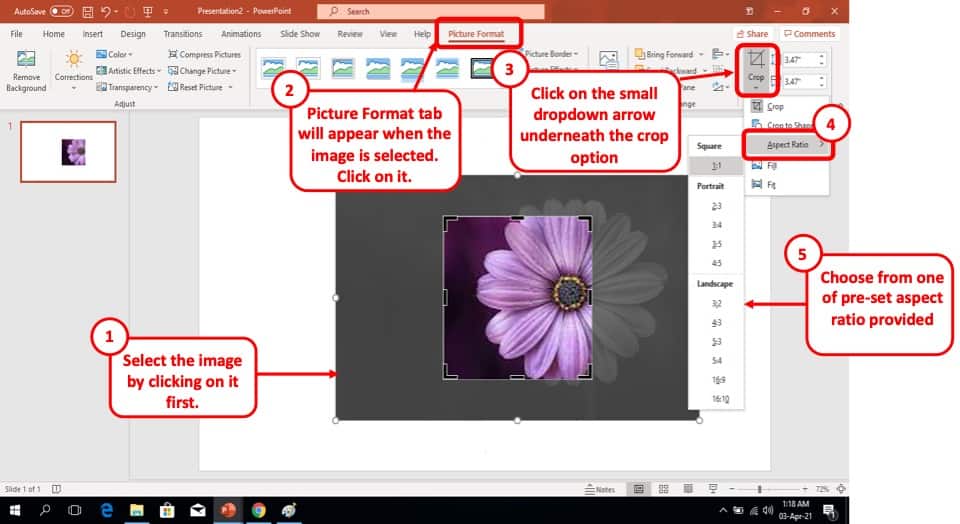
Select the picture you want to crop and click on the ‘Picture Format’ tab to find ‘Crop’ option. Click on ‘Crop’ and a dropdown menu will appear on your screen.
Step-2: Selecting Aspect Ratio.
From the dropdown, place your cursor on the ‘Aspect Ratio’ option to find a list of aspect ratios to choose from. Click on your desired aspect ratio and drag the image to fit the portion you want to keep within the frame.
Step-3: Image Cropped to the aspect ratio
Finally, press the ‘esc’ button on your keyboard to finish cropping your image into the specified aspect ratio.
More PowerPoint Related Topics
- How to Give a Presentation Successfully on Zoom? [A Complete Guide!]
- Change the Style of Your Bullet Points and Stand-out from the Crowd!
- 7 EASY Tips to Always Make your Presentations Attractive! (Even if You are a Beginner)
- How to Reduce the Size of Your PowerPoint File? The Perfect Method!
- Auto Create Your PowerPoint Slides using Design Ideas Feature!
- Main Features of PowerPoint! [I Bet You DIDN’T Know These]
Credit to Mary Markevich for the Featured Image of this Article