Microsoft PowerPoint is convenient, user-friendly, and easily accessible. It has reshaped the methods of digital content presentation in schools, offices, or elsewhere all over the world. One of the most talked-about problems that users face while using PowerPoint is large-sized PowerPoint files.
Some of the most common reasons for PowerPoint file size to increase are using multiple images, using large images, or embedding elements such as fonts, video or audio directly in the presentation file. An easy way to reduce the file size is to use special compression programs designed for PowerPoint files.
There are many methods to reduce a PowerPoint file size and make it suitable for sharing with others. Almost all the methods aim towards the same objective of reducing the file sizes. Also, some expert use of PowerPoint mechanics could help with reducing file size as well.
Large file sizes can be a real pain in the rear end. So, let’s look at how can we deal with this problem.
A Quick Note Before We Begin – if you want to make jaw-dropping presentations, I would recommend using one of these Presentation Designs. The best part is – it is only $16.5 a month, but you get to download and use as many presentation designs as you like! I personally use it from time-to-time, and it makes my task of making beautiful presentations really quick and easy!
Why do PowerPoint File Sizes become So Large?
It is not uncommon to have a presentation that is really big in size! If you have dealt with such a PowerPoint file, you know how annoying it is when you are unable to send such a file over an email!
But, what exactly causes the PowerPoint presentation to increase in size?
Well, as it turns out, there is no one single reason for the file size to increase. There could be several possible reasons. Sometimes, there may be multiple reasons at play for increasing the file size of a PowerPoint file.
However, in my experience, I’ve seen that the single most common cause of an increase in file size of a PowerPoint presentation is using too many images or using images that are extremely large in size or both!
Some of the other reasons include –
- High-resolution image files
- Not converting the file to PPTX format
- Direct Copying and pasting of Videos
- Usage of audio files in PowerPoint
- Usage of embedded fonts
- Embedding video files instead of using links
These are some of the mistakes that users make which causes the file size to increase. Not only beginners, many advanced users also overlook these issues rather than solving them.
A few tweaks while preparing your PowerPoint presentation could make your hard work more fruitful.
How Big is Too Big for a PowerPoint File?
Before we understand how to fix the file size issue in PowerPoint, it is perhaps important to know how big is too big when it comes to a PowerPoint file size!
On average, most PowerPoint presentation files range between 4 MB to 10 MB in size. PPT files with over 50 MB can be considered too big in size as it increases the load time. A good size for your PowerPoint file is 4 MB or less.
The reason I recommend keeping your file sizes below 4 MB is that it is easier to share your presentation with employees in a corporate organization. Many businesses use Microsoft Outlook as their primary email client and set the 4 MB limit for accepting files from external sources.
That said, PowerPoint files with up to 10 MB will also work just fine other than the above reason.
Generally, anything above 50 megabytes is considered too big. For all practical purposes, it slows down the PowerPoint application on your computer and increases the load times. This can be really frustrating.
To combat this issue, ensure that the embedded images should not exceed 250 kilobytes each. PowerPoint presentations that include audio files should be kept under 2 megabytes per slide.
How to Reduce the Size of a PowerPoint File?
Now that you have understood what causes large file size in PowerPoint, it is important that we fix the problem and reduce the file size. However, knowing how to overcome this problem could be a bit tricky for beginners at first.
There are some basic yet highly valuable workarounds to keep file sizes at a minimum. I am going to talk about those tweaks descriptively so you don’t have to struggle anymore!
1. Use PPT Compressors Apps or Websites
Removing or replacing any content of your file can solve the problem but it may not be viable all the time.
Furthermore, removing some sections of your file can also be frustrating and it can hamper the way you designed your presentation. You may perhaps not find a suitable image for your project available in lower size. Even if you do find it, the process can be timeconsuming and tedious.
In such cases, you can use PPT compressor apps or websites to decrease the overall file size.
There are plenty of PowerPoint compressing apps and websites available. Most of them offer paid plans and free service but with limited features.
The free version, in most cases, will do the job for you so you don’t have to worry about the cost.
This is perhaps the easiest method of all the described solutions in this article. Although success is not guaranteed, it is still worth a try as the process is very simple and doesn’t take too much of an effort.
Later in this article, I am going to discuss the best ppt compressors available. You just have to pick the one that suits your requirement.
2. Compress Existing Images in your PowerPoint file
Images are the most space-consuming components of a PowerPoint file. Thus, compressing image files can be one of the quickest ways to reduce PowerPoint file size. When it comes to compressing an image in PowerPoint, there are two ways –
2.1 Compress Select Images in PowerPoint
PowerPoint allows you to compress images directly in PowerPoint. You can choose to compress certain pictures and leave the more important ones. This will make sure your presentation remains more relevant.
To compress images in PowerPoint, follow the below process –
Step 1 – Select the Image and Choose to Compress
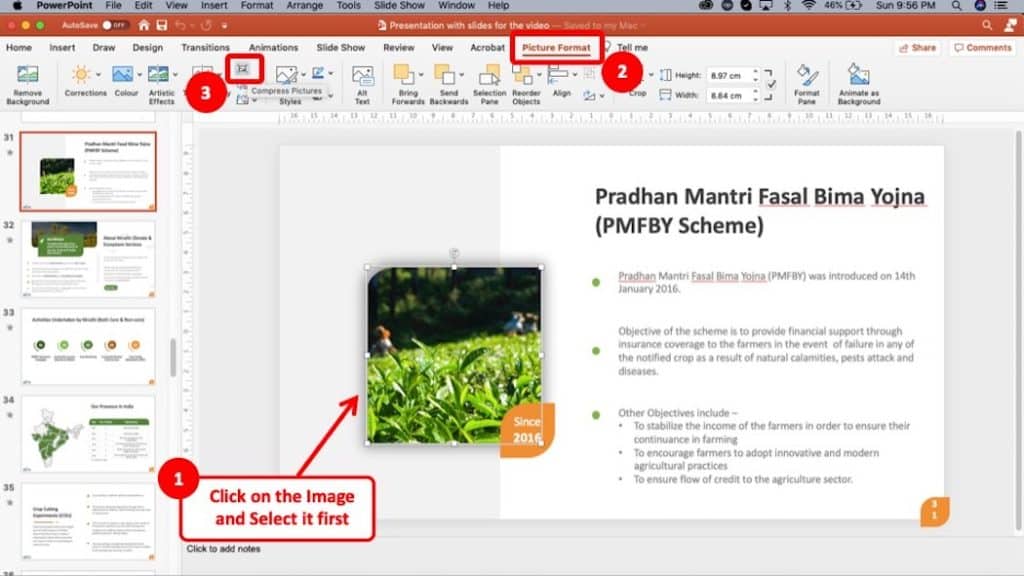
To compress any particular picture, select the picture. Then click the “Picture Tool“, and then click “Format“. Then, select the “Compress Pictures” option.
For Mac users, select the image by clicking on it. Then, go to the “Picture Format” tab, and then click on “Compress Pictures” icon.
It may be difficult to locate the icon for “Compress Pictures” option at first, but you can follow along as indicated in the above image.
Step 2 – Change the Settings and Compress

Now a pop-up menu shall appear.
Here you can change the settings for picture compression.
First, based on how you are going to give the presentation, you may want to choose the picture quality. Here’s a decision matrix to help you choose the right picture quality option –
| S. No | Purpose of the PowerPoint Presentation | Picture Quality |
| 1 | To be viewed on a small screen/sent over email | 96 PPI |
| 2 | To be viewed on a 50 to 75 inch TV screen | 150 PPI |
| 3 | A good quality color print out needs to be taken | 220 PPI |
| 4 | To be displayed on a large projector screen | 330 PPI |
If you cropped the image, make sure Delete cropped areas of pictures is checked.
Lastly, make sure you select the “Selected Pictures Only” option.
You can compress as many images as you want using this process. If anything goes wrong, just undo then repeat the above process.
2.2 Compress All Images in PowerPoint
Sometimes, we need to compress all the images on the presentation. For such cases, this method is rather easier to implement.
The steps for this method are exactly the same as described in the previous method. You just need to make a minor change.
In the pop-up menu after selecting “Compress Pictures”, uncheck “Apply only to these pictures” and select “All pictures in this file“, and then click “OK“. Make sure you choose your desired output PPI settings. This will compress every picture in the PowerPoint file.
3. Use Links for Videos
Videos are great to deliver your presentation emphatically. So you may consider including video files to your PowerPoint presentation.
Embedding videos directly into your PowerPoint file will greatly increase its size. So an alternative way to do it is just linking the video to your PPT file. This will serve the same purpose as embedding a video but without increasing the file size.
How to Link Videos in PowerPoint on Windows PC?
To link videos on Windows PC, click “Insert“, then choose “Video“, and finally “Video on my PC“.
From here on out, you can choose to directly insert the video in your file or link the video. To link the video, click on the arrow on the right side, click ‘link to file’ from the drop-down menu. This will link the video to your PowerPoint file.
The process is similar to that on a Mac with marginal difference. In case something is unclear, make sure to check out the screenshots below.
How to Link Videos in PowerPoint on Mac?
Inserting Video Links in PowerPoint on Mac is pretty simple.
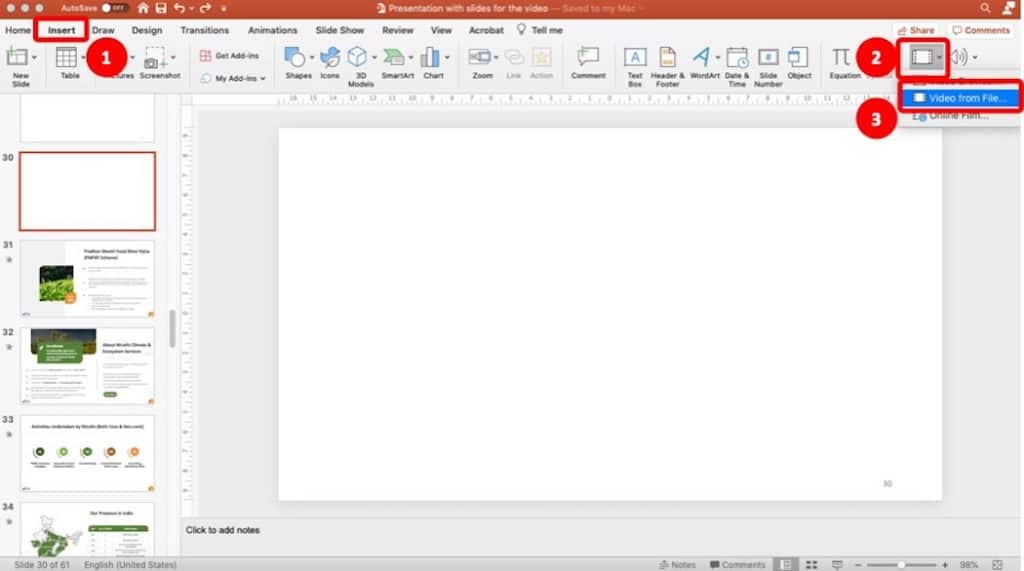
First, click on “Insert” tab. Then, click on “Video“, and then choose “Video from File” option.
A window will pop-up which will ask you to choose the file.
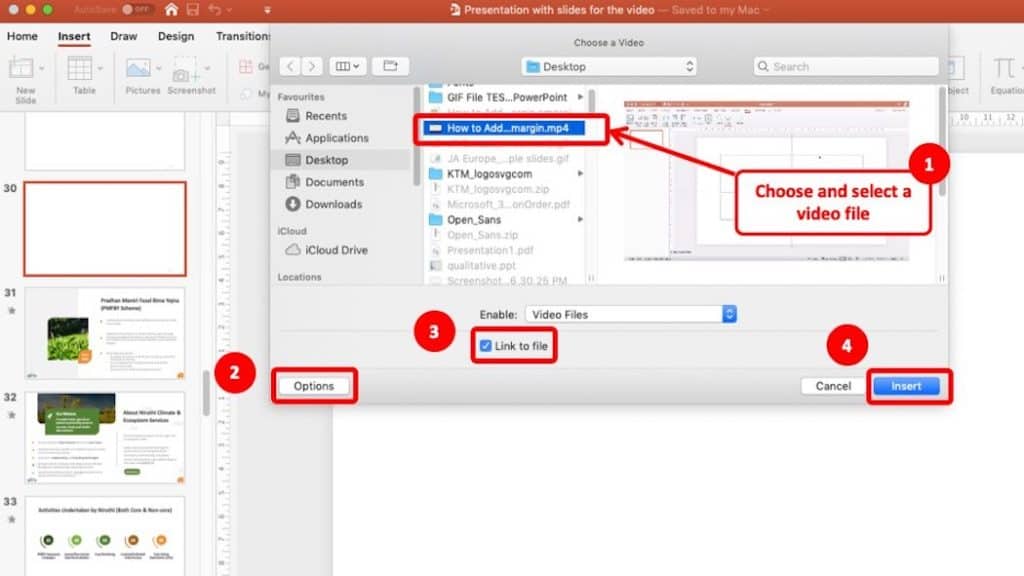
In the window, first click on the video file that you want to import in PowerPoint.
Then, click on “Options” button in the lower left corner of the window. Finally, make sure the “Link to file” option is checked before you click “Insert“.
As mentioned above, this will have the same effect as embedding a video file, however, the size of the presentation file will not increase.
Pro Tip: Make sure that you keep the PowerPoint presentation file and the video file in the same folder. Furthermore, when linking the video to your PowerPoint file, you will also need to share the video file along with presentation in the same folder.
4. Compress the Embedded Videos
If you prefer directly inserting your videos and embedding it in PowerPoint instead of using links and don’t want your files to increase in size, you can try compressing the videos. This will make sure that your presentation runs smoothly while also the file size remains fairly small.
You can use PowerPoint built-in video compressor or any third party website or software. To compress your video file using PowerPoint on Windows, follow the steps mentioned below –
- Open the folder that contains the video and embed the video in PowerPoint
- Click on the “File” tab.
- Then, click “Info“
- Under the “Multimedia” section, select “Compress Media“
- Select the required resolution to reduce the file size and click “Compress“.
Now your video will compress to your desired suitable size.
It is important to note that PowerPoint on Mac currently does not support video compression.
However, you can use any third-party software or any online tool to compress videos. They are super easy, so you are less likely to face any difficulties.
While there are quite a few applications that can do the job for you, my favorite ones are ApowerCompress and HandBrake, and follow the tutorial on how to compress videos.
These apps are designed for basic users, not advanced ones. They are super easy, you can’t miss it. Both these applications are super helpful!
HandBrake is great for both Windows and Mac, while ApowerCompress works best with Windows.
5. Save the Presentation in Low PPI (Windows Only)
Saving a low PPI copy serves the same purpose as image compression, although it’s not the same. This reduces the overall quality of the PowerPoint presentation instead of certain images. It’s a bit more hassle-free since you don’t have to decide which images to compress and which not.
Many PowerPoint templates available on the internet are very high resolution which isn’t necessary for presenting your project. You can use them and later just reduce the PPI for optimal file size.
When saving your PowerPoint file, select “File“, then click “Save As“. In the window that pops-up, look for the “Save Options“. Click on the “Advanced Tab“, and make sure that the “Discard Editing Data” is checked.
Finally choose the default resolution, the lowest one, or the one that balances both file size and quality. This will save your file in a low PPI and you won’t face any stuttering or playback issues during the presentation.
6. Save the PowerPoint File as PDF
Generally, PowerPoint files are saved in pdf format. This ensures that the file remains universal, user, and device friendly.
Saving as pdf also offers the lowest file size than any other format. Huge file sizes can be a major hindrance to a successful slide presentation. So saving in pdf format serves multiple purposes such as keeping the file size minimum and being device friendly.
To save a file as pdf, click “File“, then choose “Save As“. In the dialogue box that appears, enter a name for the file. Select the file type as “PDF“, then click ok.
Note that you can also compress images in this process. Just click on the tool button at the bottom of the dialogue box. Select “Compress Pictures” from the drop-down menu. Thus you can save files as pdf as well as compress images if necessary.
If the file is already saved in any other format, you can easily convert them to pdf. The PPT compressor tools discussed later in this article also offer a pdf conversion facility. You can choose the one that suits you and convert it easily, thanks to its super user-friendly interface.
7. Delete the Images and Graphics in the Notes Master
High-resolution images and videos may not be the only reason behind the big file size. Hidden images and graphics in the master view section can also contribute to this cause. Notes master is a feature in PowerPoint that allows you to tweak the ‘notes pages’ view to conveniently modify your presentation.
If you forget to clean unnecessary files from notes master views before saving your file, the final file size can be unnecessarily huge. You can simply remove all the graphics or images that you don’t need in your presentation to lower the file size.
To go to the notes master view of your presentation, click on ‘view’ then select ‘notes master’. Check for any unnecessary graphics and pictures and remove them. You can ignore any default PowerPoint templates as their impact on your file size is minuscule.
8. Remove Images from the Slide Master
‘Slides master’ is another of the three options in the master view feature besides ‘notes master’ and ‘handout master’. This feature lets you modify your PowerPoint slides easily without any hassle.
Any images in the slide master that you use and don’t, all are included in the final version of your presentation. The only thing they do is increase the file size and nothing else. So removing any unused images from the slide master can decrease the file size.
Click “View“, then click “Slide Master” to navigate to the slide master. Look out for unused pictures or media files and delete them. This will help you reduce file sizes without making any major changes to your PowerPoint presentation.
9. Check for Embedded Fonts or Graphics
Embedding anything, graphics, videos, or even fonts shall increase the file size. If you need to share the PowerPoint file with anyone, there is no way other than directly embedding these kinds of stuff into your file. Because if they don’t have that particular font or graphics, links will not work.
However for your personal use or any presentation always you can opt to not embed fonts. This will save a lot of space in your device. Go to file>options and select the ‘save’ tab. Uncheck the ‘Embed fonts in the file’.
When adding any picture, use the ‘insert’ tab on the ribbon instead of ‘drag and drop’. Because doing so might cause the image to lose compression. Also, you can link them to the file instead of adding them to the file to reduce size. Click on the arrow beside the Insert dialog box and then select ‘Link to File’.
Why Does PowerPoint File Size Increase after Saving it as PDF?
A common problem that users often face is pdf files increasing in size (contrary to what we want to do). This issue is prevalent in the Mac operating system. Sometimes file size increases up to 7 times. This is a very frustrating problem for mac users.
One of the explanations of this problem is that ppt files are zip files that are compressed by default. When converted to pdf, the file loses compression resulting in a large file size. This is due to the disruption of the built-in XMP code in the PPT format which works great for Windows but doesn’t work as well for Mac OS.
Another explanation is that this can sometimes occur due to embedded fonts. Files that include embedded fonts rather than linked fonts increase in size after conversion to pdf.
If you are a Mac user, you can also reduce the print quality to ‘medium’ to compensate for the size increase.
Best PowerPoint File (PPT) Compressor Applications
Overall compressing ppt files is always better than removing contents. There are plenty of ppt compressors available. But finding the right one at the right time can be a headache if you’re not familiar with these tools. So, let me share with you my TOP 3 PPT compressor applications –
1. WeCompress
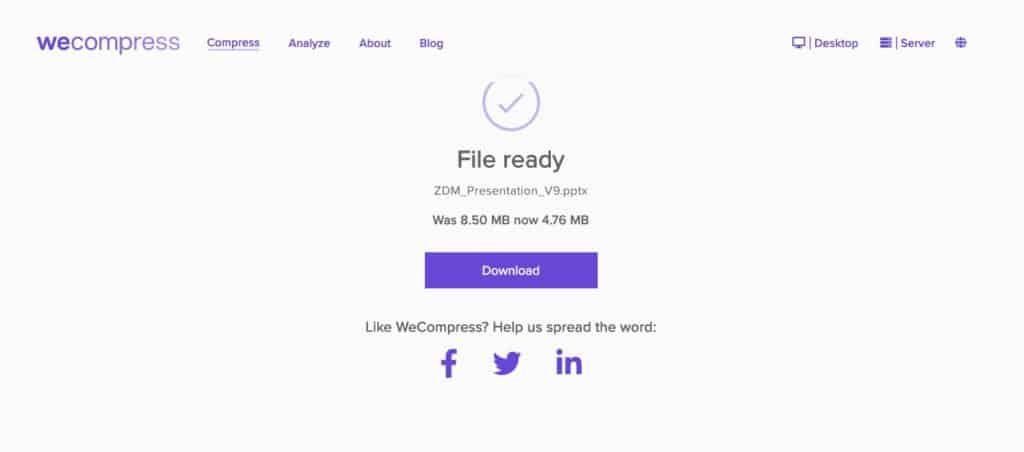
WeCompress is one of the highest-rated PPT compressors out there. It is online and free. Besides PPT compression, they also offer other large varieties of file compression services. They are free without any advertisement or any other terms and conditions. Wecompress is serving over two million customers worldwide for more than a decade.
WeCompress is partnered with Adobe® PDF Library to work inside a pdf file with ease. This shows their dedication and enthusiasm toward their job. You can try them anytime as they are always free.
2. SmallPDF
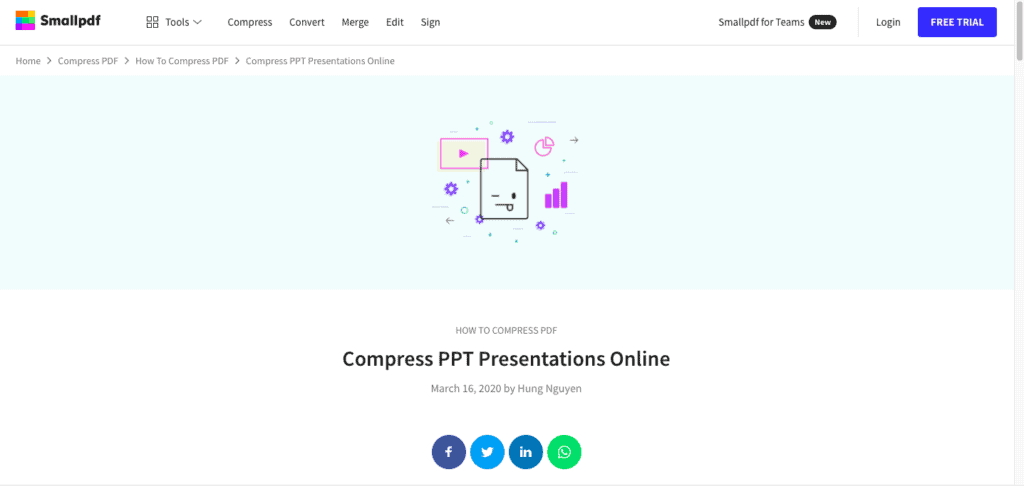
Smallpdf is an online compression tool provider from Switzerland. Although they are fairly new, they’ve managed to build a customer base of more than twenty million worldwide in just five years. They offer a free limit of 5 GB which is more than enough for pdf files.
They also have a conversion, editing, split, and merge tools available for their customers. Smallpdf has visitors from every country in the world and this is not an exaggeration. This may be the reason they offer their service in 24 languages for the convenience of every user.
While SmallPDF is simply awesome at the tools that it provides, the only drawback of using this tool for PPT compression is that the output file is a PDF file. That may not necessarily work for some of you.
3. CloudPresso
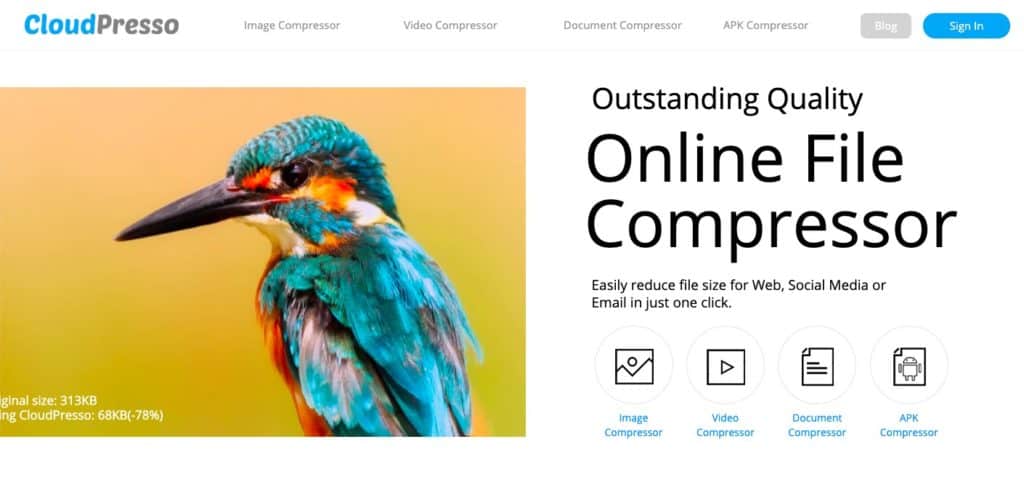
Cloudpresso is another online ppt compressing tool that provides fast and reliable service. Its user interface is simple and easy. You just need to upload the file and click to convert. It’s that easy!
Cloudpresso uses state of the art compression technology that retains the original quality while reducing the size to a noticeable extent.
If you were to pick one of the above 3 tools, my favorite option would be WeCompress. That’s what I use, and that’s exactly what I would recommend.
Problems with Large PowerPoint Files
By now, you have surely realised that there are a number of ways in which you can compress the file size of a PowerPoint presentation. If that is not enough, let me share with you some of the issues of having a PowerPoint file with a large size (and hopefully motivate you to compress your files going forward).
Large PowerPoint files can cause several problems. Some of them are as listed below –
- Occupy Precious Hard Disc Space
- Hamper the performance of other applications
- Difficult to email
- Playback performance might lag
- Longer download and upload time
- Longer load and save times causes frustration while working on a presentation
- Can cause PowerPoint to Freeze
- Can cause other software to run slow
- Can make your file corrupt
Final Thoughts
Large-sized PowerPoint files can be frustrating for anyone. Preparing PowerPoint presentations is time-consuming and takes hard work. If playing the file or mailing it to a colleague or coworker is hampered due to excessive size then all that hard work could be foiled in an instant.
Some common reasons behind this are mentioned here. Also basic solutions like Converting formats, image compression, linking videos are discussed.
Online ppt compressor tools are highly useful to reduce file size. They are very common but can be difficult to source in times of need. Keeping that in mind I also talked about the top PPT compressors that you can use.
Creating a perfect presentation is an arduous task, so you wouldn’t want to be bothered with this common problem when it has so many common workarounds.
If you have finished reading this article you should not worry about why do PowerPoint files get so big & how to reduce the size.
I sincerely hope that PPT size will not be an issue for you after reading this article. Do check out some of the other articles on our website. We’ve got some amazing content so make sure you bookmark this site!