
Printing a Google Slides presentation is not always as simple as it seems. In fact, there are many different ways to print your Google Slides presentation. You can even print them with presenter notes! Some methods will give you more pages per slide than others.
If you are looking for a quick answer, here’s how to print your Google Slides presentation –
- Click on the “File” tab
- Select “Print Settings and Preview”
- Adjust the presentation settings
- Click on “Print” in the toolbar above the presentation
- Adjust the printer settings from the panel on the right
- Click “Print” on the panel on the right.
In this article, I will show you how to print Google Slides in a detailed step-by-step manner. I will also share with you how to print your presentation with presenter notes, and how to adjust the settings in order to have multiple slides printed on one page.
Plus, I will share some ninja printing tips that you will love! So, let’s get to it!
1. How to Print Google Slides?
You might find yourself in a situation where you need to print your Google Slides presentation. You may want to share it with someone who doesn’t have access to the internet, or you might just be running out of ink on your printer and don’t know what else to do.
Whatever your reason, you can implement the steps mentioned below to print Google Slides presentation.
Here is a step-by-step tutorial on how to print Google Slides –
Step-1: Open your presentation in Google Slides
The first step of the process is to go to the Google Slides home page and open the presentation your want to print.
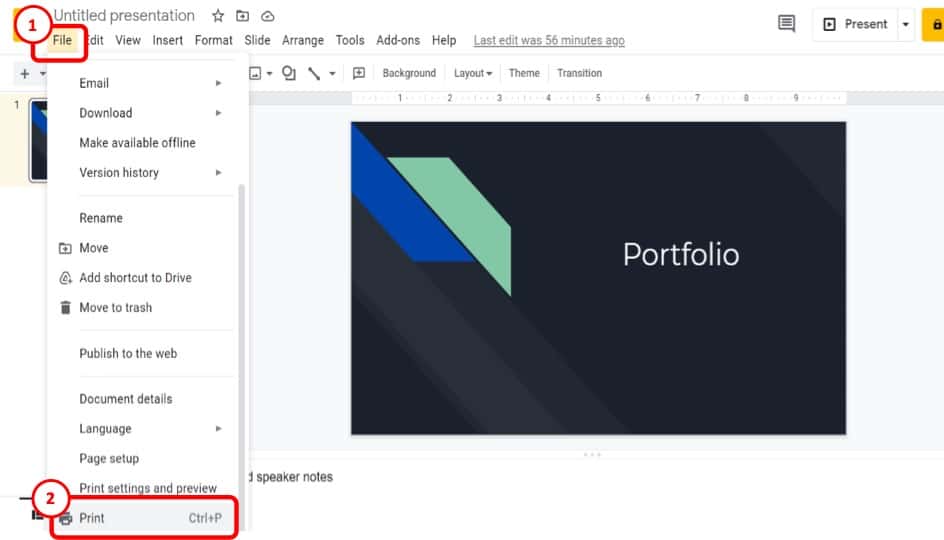
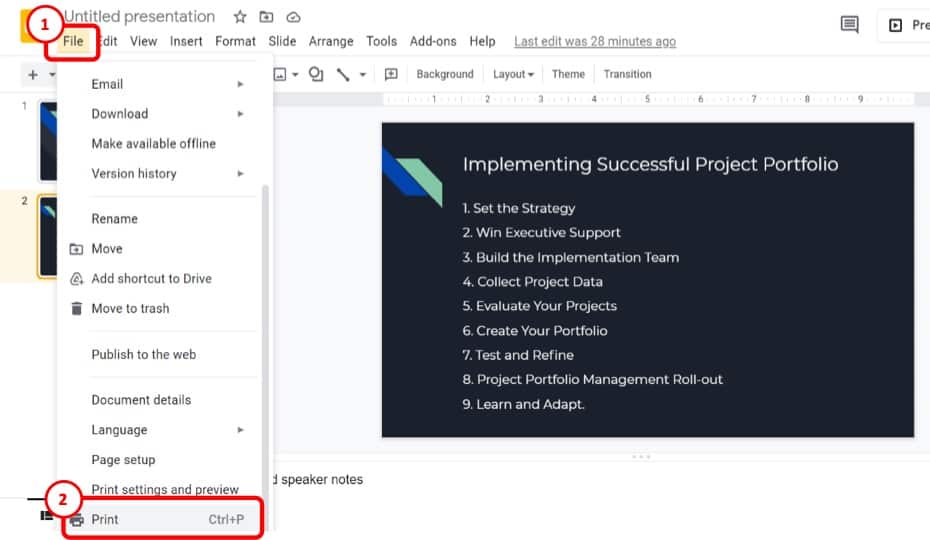
Step-2: Click on the “File” tab and preview the presentation
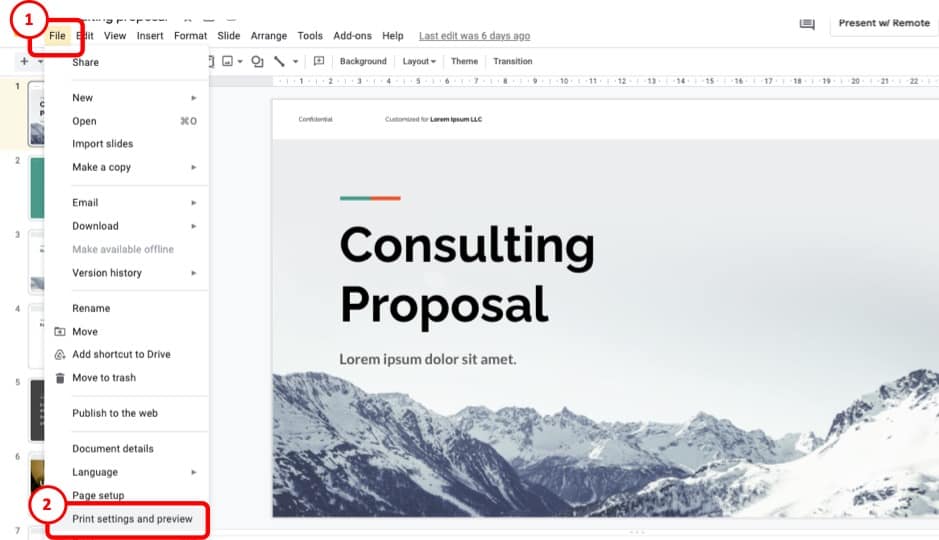
From the top left corner of the screen, click on the “File” tab and then scroll down near the end of the toolbar and select “Print settings and preview”. It will display a preview of the presentation with options to change settings.
Step-3: Make necessary adjustments
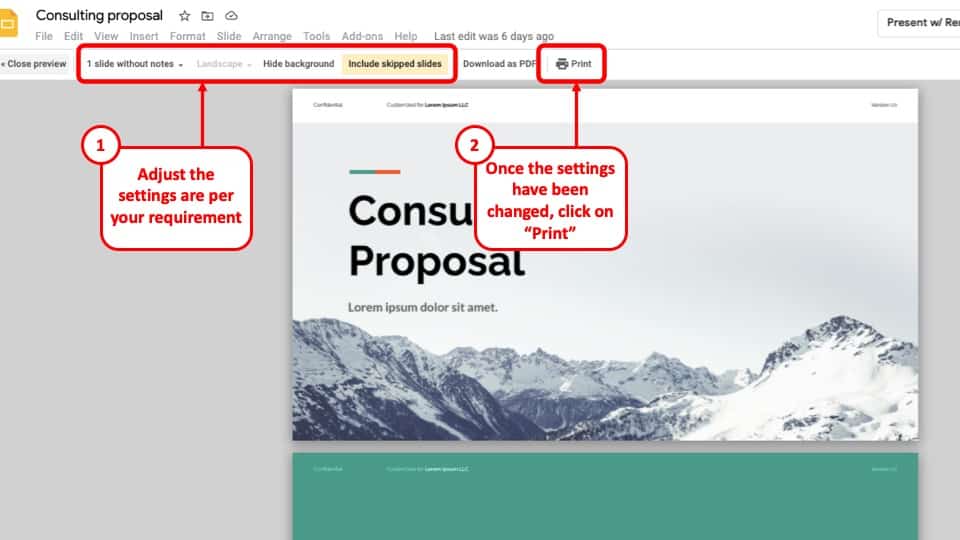
In the preview adjust orientation by clicking “Landscape”. To further adjust, select “1 slide without notes” as the most common orientation of printing Google Slides.
Step-4: Click on the “Print” button
With orientation chosen, click on the “Print” button located at the end of the toolbar.
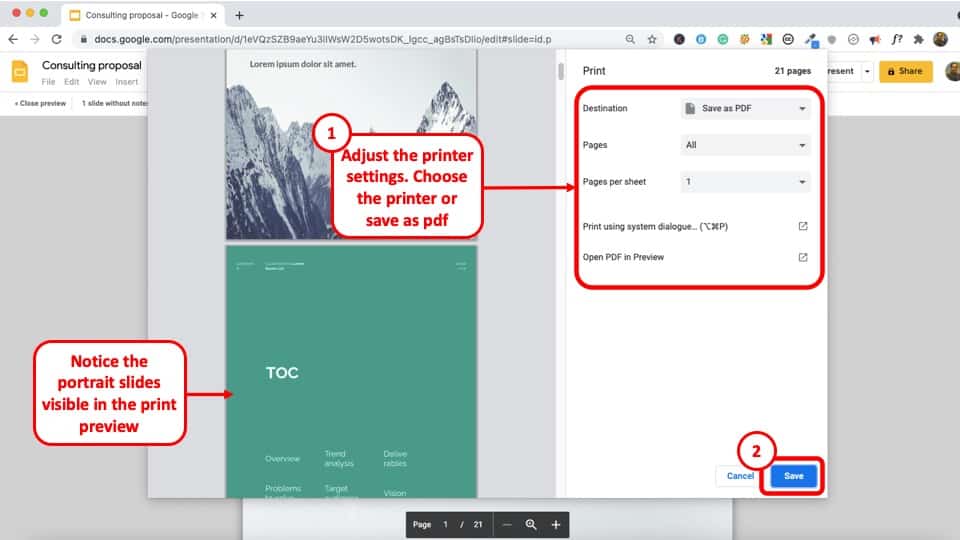
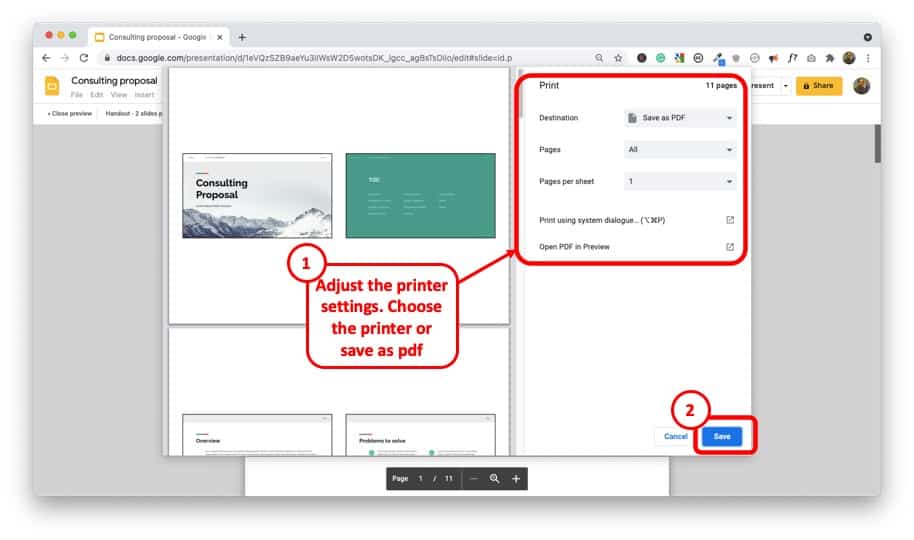
Step-5: Choose print settings
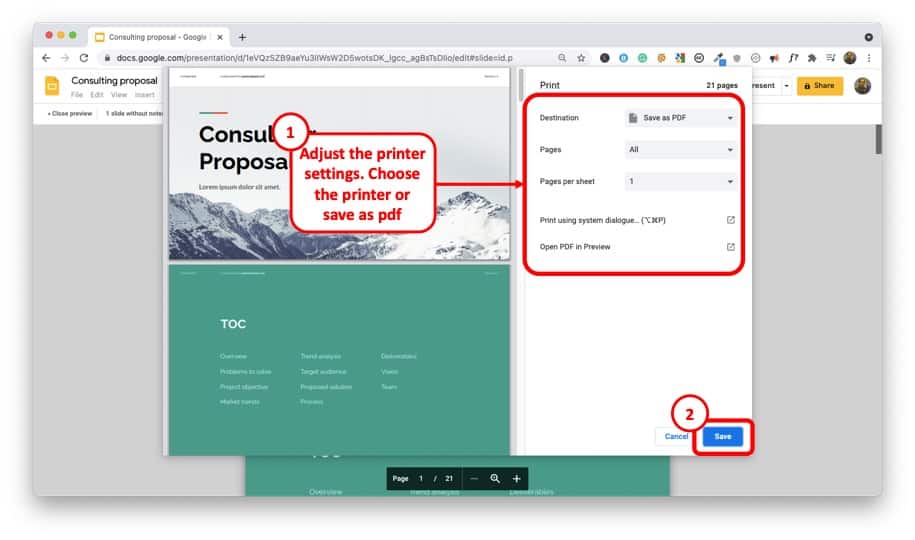
Upon clicking the “Print” button, a pop-up will appear on your screen. Here, you can select the destination, pages, copies, and color of your printout.
Step-6: Click on the blue “Print” button to start printing your presentation
With all the necessary steps done, all that’s left is to click the blue “Print” button at the end of the sidebar.
Then just watch as your printer prints out your Google Slides!
2. How to Print Multiple Slides per Page on Google Slides?
While printing a presentation can mean you end up using a lot of papers real fast! So, a quick and effective way to print Google Slides yet save on some printer paper is to print multiple slides on a single page of the printer.
This will not only be an eco-friendly solution, but it will also save up a lot of paper and expenses.
If this is what you are interested in, then here’s a step-by-step tutorial on how to print multiple slides per page on Google Slides –
Step-1: Click on the “File” button and go to print settings
After opening the particular presentation. Click the “File” tab at the top left corner of the screen. Then scroll down near the end of the toolbar and select “Print settings and preview”. This will display a preview of the presentation with options to change settings.
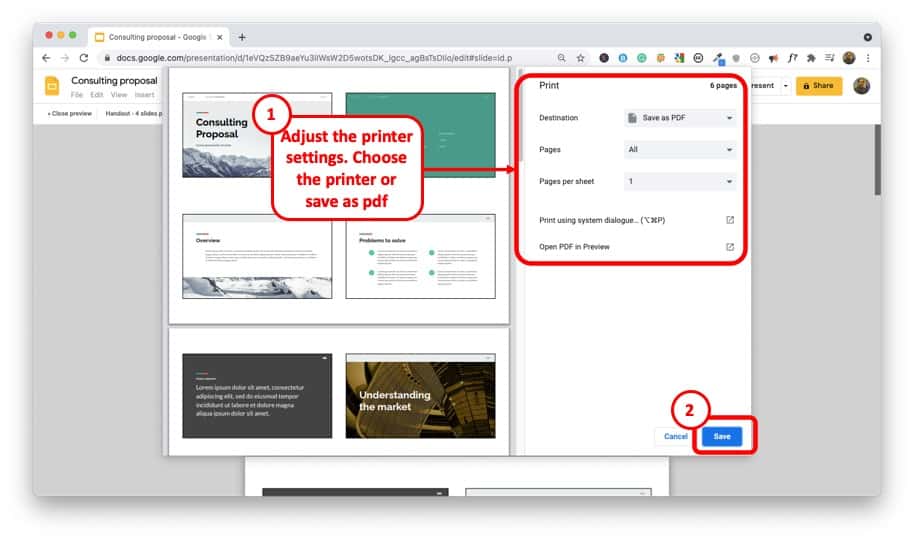
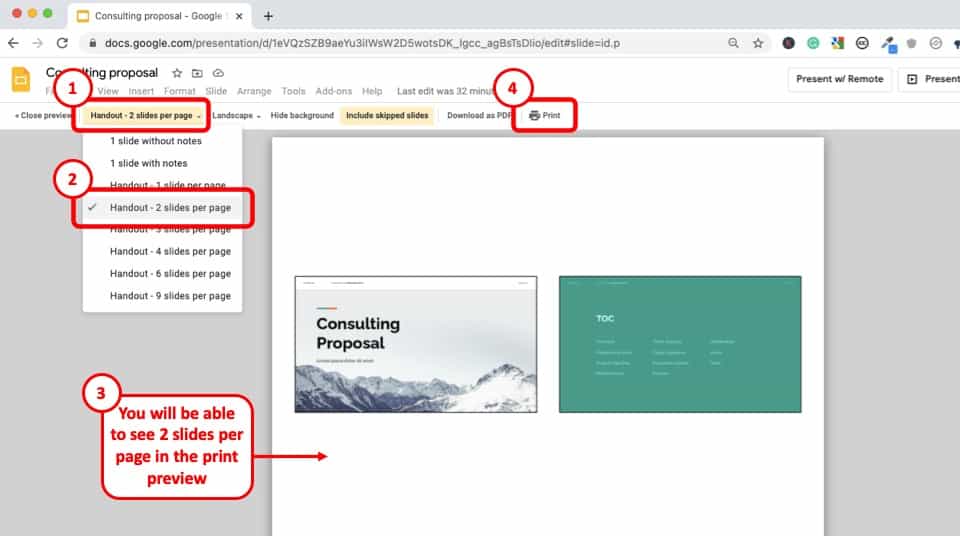
Step-2: Choose the number of slides you want to print

On the preview window, click on the button that says “1 slide without notes”. It will show a list of options to choose from. Select “Handout- 4 slides per page” to choose the number of slides on one page.
This will show the slides like in the picture shown above. As you can see, the first 4 slides are arranged on one page to print.
Step-3: Print the Google Slides
After clicking on the “Print” tab on the toolbar, a window will pop up. As mentioned before, you can select the destination, pages, copies, and color of your printout here.
When it is all decided, just click on the blue colored “Print” button to print multiple slides per page on Google Slides!
3. How to Print Google Slides with Notes?
Speaker notes are an effective way for the presenter to remember key points of the presentation. If you wish to print the slides along with the speaker notes, this option is also available in Google Slides. There are ways to ensure these speaker notes show up in the printed handout as well.
Here, is a step-by-step tutorial on how to print Google Slides with notes.
Step-1: Click on the “File” tab and select “Print settings and preview”
As done before, click on the “File” tab and then select “Print settings and preview” near the end of the toolbar. The preview window will open.
Step-2: Choose to Print “1 slide with Notes” Option
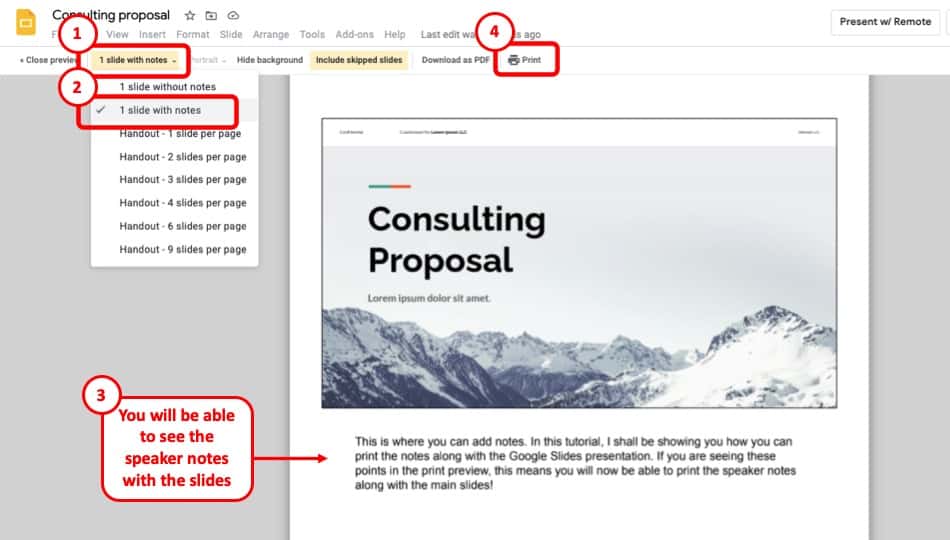
Click on the button that says “1 slide without notes”. A list will show. From the list, select “1 slide with notes” as the printing style. This will show the preview of the slide to be printed with notes.
Step-3: Click on the “Print” button
Once the desired settings are set, Right click on the “Print” button to open the final settings window.
Step-4: Adjust the Printer Settings and Click “Print”
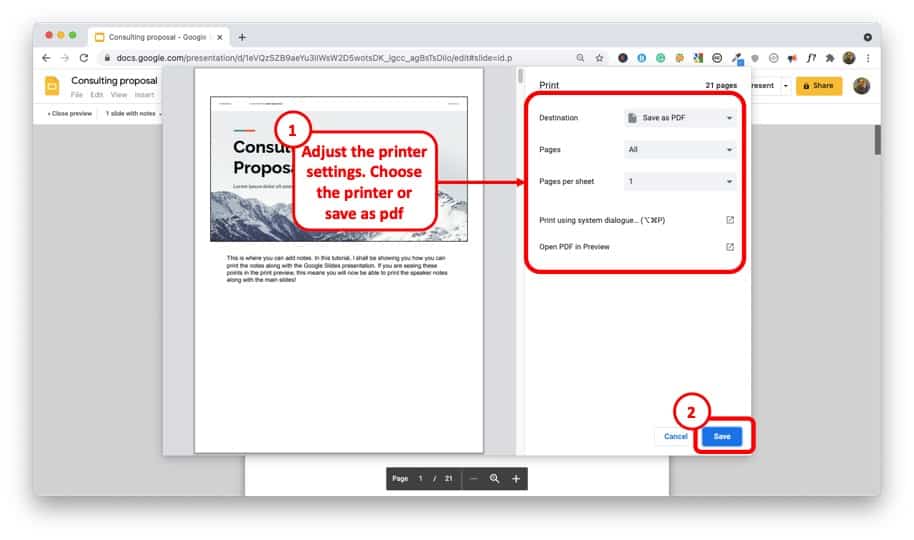
After making some final decisions about the destination, total pages, copies, and color of the printout. You should click on the blue “Print” button at the bottom of the new window that opens up.
With this order, the printer will print Google Slides with notes. There you have it!
4. How to Print Google Slides in Portrait?
Whenever a presentation is opened in Google Slides, it is in horizontal or landscape mode. This happens by default, as most presentations are preferred in this screen orientation.
It is, however, possible to change the screen orientation from landscape to portrait or vertical mode. It is a fast and simple process in Google Slides. Given below is a tutorial on how to print Google Slides in portrait mode.
Step-1: Open your presentation in Google Slides
The first step of the process, as before, is to go to the Google Slides home page and open the presentation your want to print in Portrait.
Step-2: Click on the “File” tab and then on Page Setup
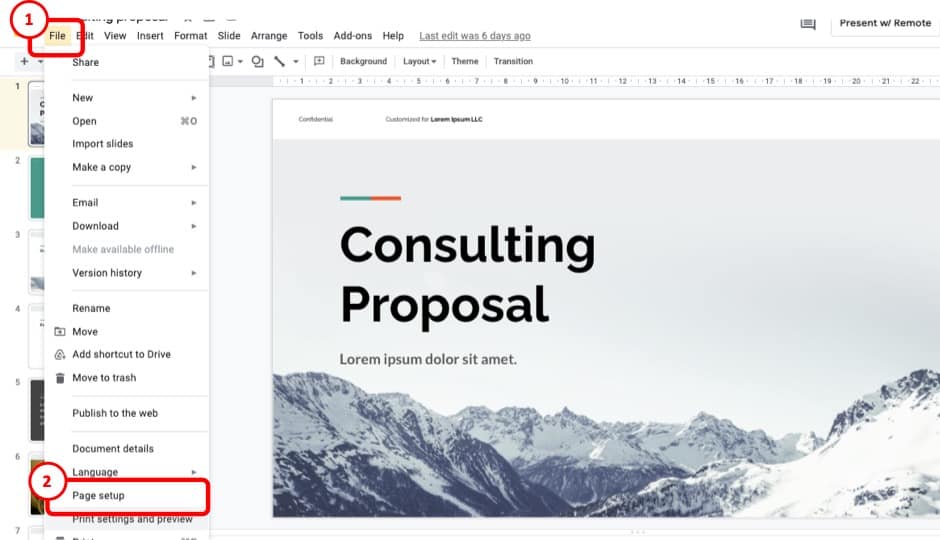
Click on the “File” tab on the top left corner. Then scroll down the list of activities and click on the “Page setup” option. It will display some screen orientation with a drop-down list.
Step-3: Choose the type of page setup
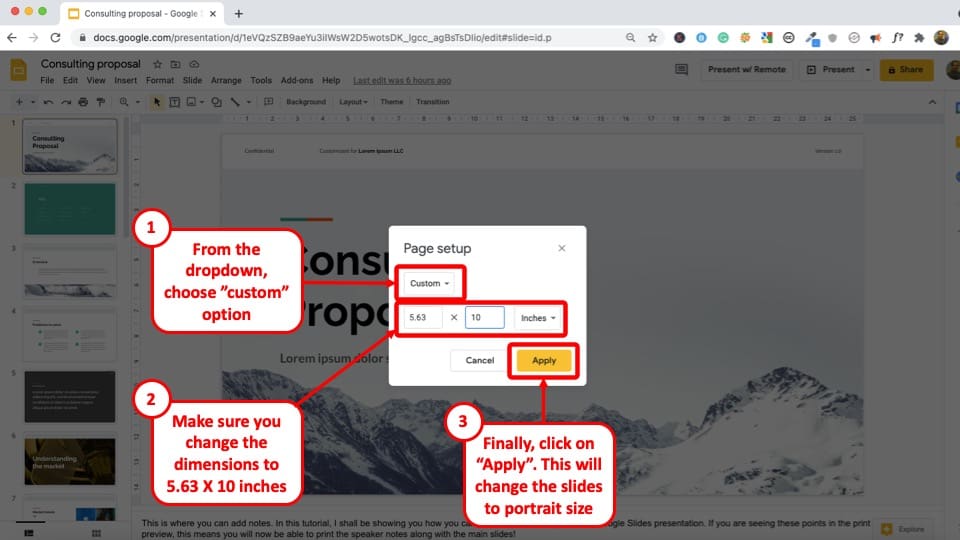
If you click on the tab that says “Widescreen 16:9”, the list will drop down. Select “Custom” at the end of the list. This option will allow you to customize the dimensions you want for the presentation.
Step-4: Customize your Slide
In the two boxes, the first one is for width, and the second box represents height. There is a third box for measurements, like inches, centimeter, points, and pixels.
The standard dimensions for the default slide are 10 x 5.63 inches. To acquire a vertical or portrait slide, you can just swap the measurements. The swapped measurement (5.63 x 10) is shown in the picture below.
Step-5: Click on the “Apply” button
Once you are done with selecting the desired measurement, click the yellow “Apply” button at the bottom of the pop-up box. And you are done! It is easy to change the presentation in Google Slide from landscape to portrait.
Step-6: Click on “Print” to print the slides in portrait layout
Once you are done working on the presentation on the Google Slide in portrait mode, just follow the previous tutorials to print the presentation however you like.
Be sure to click on the “Print” button. You can print it with notes or without notes. You can even print the presentation with multiple slides on one page.
5. Can you Print Google Slides with Comments?
Currently, there is no direct way to print Google Slides presentation with the comments on the page.
However, there is almost always a workaround! Here’s what you need to do when you need to print a Google Slides presentation with the comments –
Step-1: Open the Slide containing the comments
The first thing that you need to make sure is that the slide that contain the comments are open. Furthermore, make sure that the comments are in expanded mode. Meaning, the comments are visible on the slide.
Step-2: Take a Screenshot
Next, take a screenshot of the screen. If you are using Windows PC, then you can use the snipping tool. For Mac users, you can use the shortcut cmd+shift+4.
Step-3: Save the Screenshot as an Image
As a next step, you need to save the screenshot as an image on your computer. Make sure you save it in an easily accessible location. Before saving it, make sure that you crop the parts that are not required such that only the Google Slides presentation part is visible on the image.
Step-4: Open the Image and Print it!
As a final step, print this image as you normally would print a presentation. This will allow you to retain the comments mentioned on the slide along with the Google Slides presentation.
If you have multiple slides that have comments present on it, then you will need to repeat the process for each slide. Unfortunately, it is a bit cumbersome as a process, but it does get the job done!
6. How to Print Google Slides as Full Page (without white border)?
Google Slides allows its users to print slides according to their preference.
You can print without making any changes, or adjust the orientation, or print with a speaker’s note or scale your slides to fit the paper. Users often get confused as to how to print Google Slides as a full page.
In order to save you some time, here is a step-by-step guideline that will enable you to print Google Slides as a full page.
Step-1: Open your presentation in Google Slides
Go to the Google Slides home page and open the presentation you want to print.
Step-2: Click on the “File” option at the top left corner of your screen.
After you have opened the presentation that you intend to print, move your cursor to the top left corner of your screen and click on the “File” option.
Step-3: Click on “Print”
At the end of the “File” panel, you will find an option that says “Print“. Click on that.
Step-4: On the right side of the preview, click “More settings.”
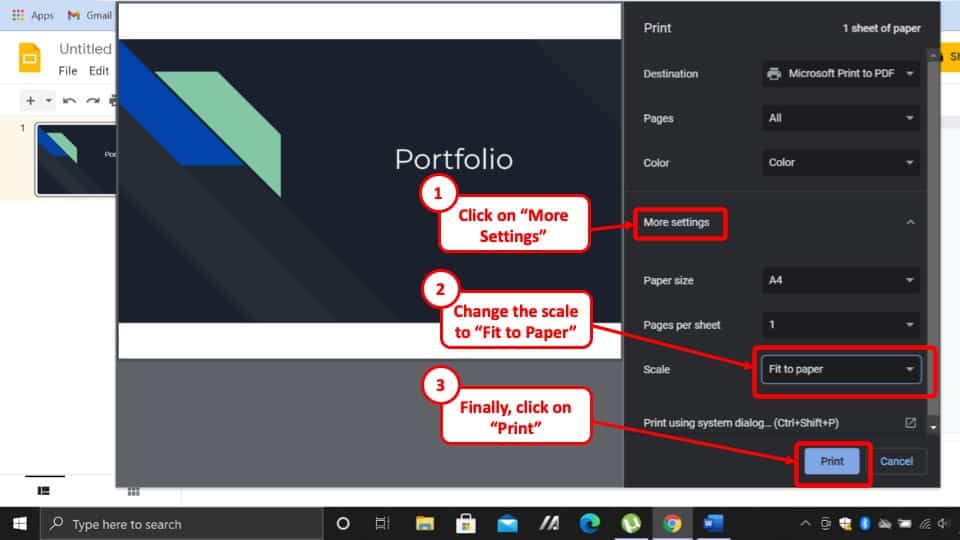
Once the preview has been generated, you will be able to locate an option that reads “More Settings”. Click on that.
Step-5: Change the scaling option from “Default” to “Fit to paper.”
At this point, you need to switch the scaling option from “Default” to “Fit to paper”. This option will adjust the slide according to the size of the paper.
Step-6: Click on the blue “Print” button at the bottom of the side bar
Once you are done resetting, all you have to do is click on the blue “Print” button, and you are done.
So, by following these quick and simple steps you can easily print Google Slides as full page.
7. How to Print Google Slides Double Sided?
People often tend to print Google Slides for the purpose of reviewing and learning. It is also published to support as a footnote for a presentation or lecture.
Double-sided prints are practical as they contain a lot more information without wastage of paper. As Google Slides is very feature-rich, it is easy for users to get lost in the pool of tools.
So, here is an easy and simple guideline that will enable you to print Google Slides on both sides of the paper.
Step-1: Choose the “File” option
After opening your presentation on Google Slides, slide your cursor to the top left corner of the screen and click on “File.”
Step-3: Select the “Print” option
As you scroll down the “File” panel, you will find an option that says “Print”.Click on it.
Step-4: Enable “2 slides per page” setting
After a new window with the preview of the slides has been generated, click on the “More settings” option, where you will find an option that reads “Two-sided”. Enable “Print on both sides”.
Step-5: Click on “Print”
Once the “Print on both sides” option is enabled, just click on the blue “Print” button, and you are good to go.
These simple and straightforward steps can enable you to print Google Slides on both sides of the pages.
8. How to Print Embedded Google Slides?
To print an embedded Google Slides presentation that you have found on a website, at first you have to download the presentation from the website and save it on your computer.
To learn how to download embedded Google Slides presentations, you can check out my article on this topic by clicking here. After you have downloaded the presentation from the website, you must open the file on Google Slides.
Here is a step-by-step description on how to print the downloaded presentation from Google Slides.
Step-1: Upload the presentation on Google Slides
To upload the embedded presentation you have just downloaded, open Google Slides on your browser and click on the “File” tab. Select “Open” and go to the “Upload” section to get the job done.
Step-2: Click on the “File” tab
After you have uploaded the embedded presentation on Google Slides go to the “File” tab again by clicking on it.
Step-3: Select “Print settings and preview” and review changes
As you scroll down on the “File” panel, click on “Print settings and preview”. This will lead you to a new window where you can change settings according to your likings.
Step-4: Click on the “Print” button
Once you are satisfied with how the preview looks, click on “Print” or press Ctrl+P, and you are done.
The process of printing embedded Google Slides is the same as regular Google slides. So, follow the above-mentioned steps to print slides efficiently.
9. How to Print Google Slides in Grayscale?
Google Slides is one of the most spectacular presentation applications that is equipped with loads of features designed specifically to ensure proper articulation of information.
This feature-packed application may initially seem overwhelming as you might struggle to find basic features like the “Print” option, for instance. Many users still find it challenging to print Google Slides in Grayscales.
So, in order to make it easier, here is a step-by-step breakdown of the entire process of printing Google Slides in Grayscale.
Step-1: Open your presentation on Google Slides
As before, the first thing you have to do is go to Google Slides and open your presentation on it.
Step-2: Go to the “File” option
After you have opened your presentation, click on the “File” option on the top left corner of your screen.
Step-3: Select “Print”
Scroll down on the “File” panel and click on the “Print” option.
Step-4: Click on “Color” and Choose “Black and White”
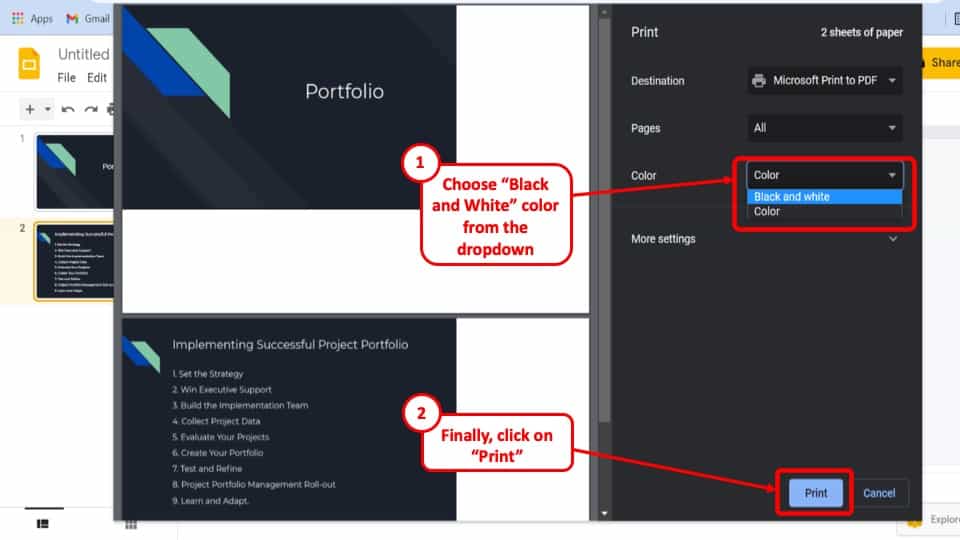
Once a new window with a preview of all the slides have been generated, click on “Color”, and a dropdown menu will appear. Click on the “Black and white” option to print your presentation in grayscale.
Step-5: Move your cursor and select “Print”
Once you are done switching from “Color” to “Black and white”, click on the “Print” button, and you are done.
So, follow these simple steps to conveniently print Google Slides in grayscale.
More Related Topics
- How to Fix Almost Anything on Google Slides! [A Comprehensive Troubleshooting Guide]
- Do Presentation Clickers Work with Google Slides? [Interesting Read!]
- How to Curve Text in Google Slides? Always Use THIS Trick!
- How to Use the Eyedropper Tool in Google Slides? [Even When This Tool Doesn’t Exist!]
- 17 Pros and Cons of Google Slides! [Should You Even Use it?]
- How to Give a Presentation on Zoom? [Step-by-Step Guide!]
Credit to diana.grytsku for the featured image of this article