
Using a presentation clicker while giving your presentation is quite helpful in more ways than one. It not only allows you the convenience of moving around while delivering the presentation, but also allows you to completely focus on your presentation!
But, as you may have experienced, some presentation remotes don’t seem to work with Google Slides! That makes many of us wonder – “Do presentation clickers work with Google Slides at all?”
Most presentation clickers work with Google Slides. However, in some cases, you will need to install a free chrome extension called “Remote for Slides”. To download the extension, visit the chrome web store, search and add the extension. Once installed, you can click on the “Present with Remote” option.
In this article, I will guide you through the process of how you can set up your presentation clicker to work with Google Slides. I will also recommend some good clickers that I think you should check out and also teach you how you can use your smartphone as a presentation clicker as well.
So, let’s get started!
Can You Use a Clicker Remote with Google slides?
Giving a presentation is quite common for most of us be it for a class or for work! If you happen to be someone who has to create and deliver presentations with Google slides every once in a while, then perhaps it’s time for you to learn more about a presentation clicker and how to make it work with Google Slides!
Interestingly, you can use a clicker remote to present the google slides. Most presentation clickers or remotes will work when you plugin their receiver into the USB slot of your computer.
However, make sure that you don’t lose the USB receiver as most remotes won’t work without it!
Top 5 Best Presentation Clickers
Now that we know that a presentation clicker can work even with Google Slides, let me share with you a few options that you should consider if you are interested in buying a clicker for delivering presentations.
That said, if you are in a rush and want to know which one is the best, my recommendation would be to go with Logitech Spotlight Remote [links to Amazon]. It is the easiest one to use with a design that requires minimal explanation, and works in a plug-and-play model! It even works without the receiver, that way you don’t have to worry about losing the receiver!
1. Logitech Spotlight Presentation Remote [Most Complete]
Spotlight by Logitech is THE BEST presentation remote out there! It provides you with some of the most unique features. Some of these features include –
- Mouse-like cursor control
- Allows you to not only highlight but magnify elements on the screen (which is pretty cool!)
- Range of up to 100 feet
- Seamless connectivity – it really is seamless as it works even without a receiver via Bluetooth. That way, if you lose the receive it still works! (If you are like me, you’re bound to lose a receiver at some time!)
- Highly compatible – Works with not just Google Slides, but also with PowerPoint, and Keynote. It even works with PDF files and Prezi!
In my experience, the most helpful feature is its design! Other than the Power button, it only has 2 buttons which are used for next and previous slides. That way, you don’t get confused when presenting and end up showing slides that you aren’t meant to!
The best part is that it is not obnoxiously expensive! For all the features that it encompasses, Spotlight is quite affordable.
Check out the latest price by clicking on the button below.
2. Beboncool RF Wireless Presenter [Most Budget Friendly]
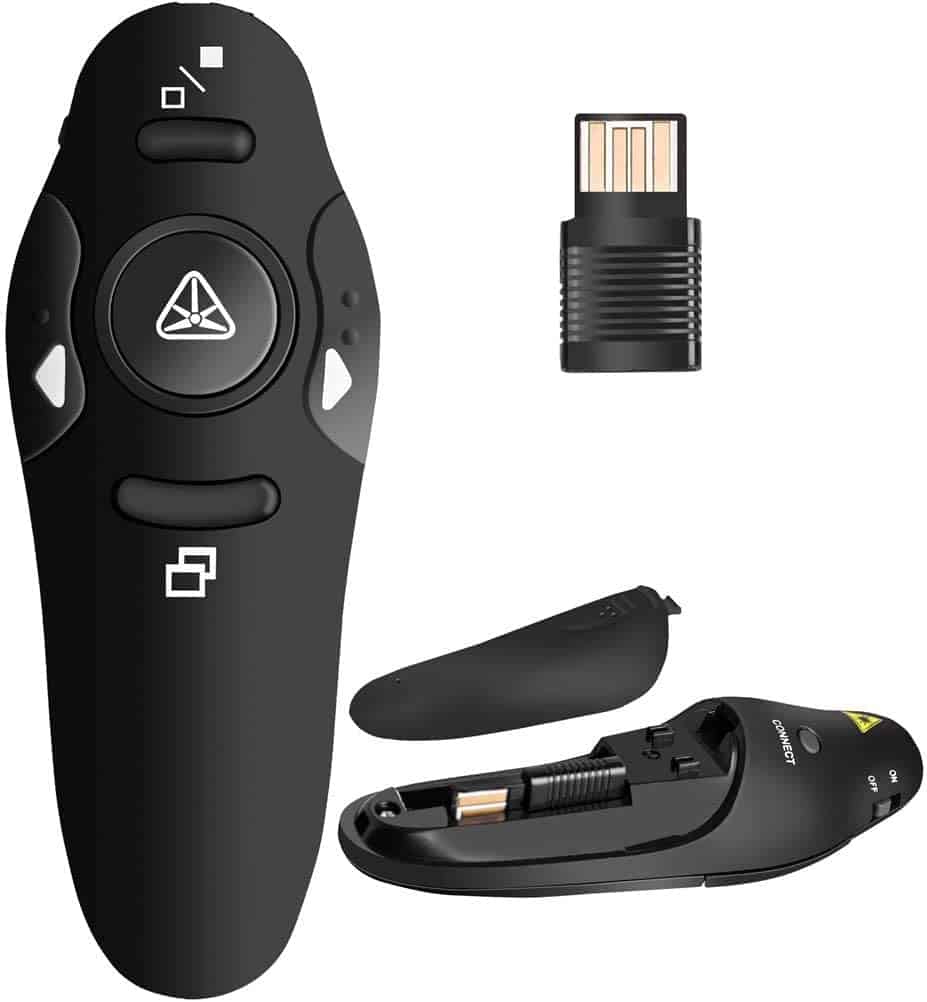
The Beboncool is pretty budget-friendly and also has an integrated laser pointer. It is made out of unique ABS material which is environmentally friendly.
To use it, you do not have to install any software. Just plugin and it is ready for some action – which is quite helpful.
It has all the standard features available on the remote. It works with both Windows and Mac. Furthermore, it can also be used with PowerPoint and Keynote along with Google Slides.
The only drawback (if we can call it that) is that it doesn’t come with a battery. So, you really can’t just unbox and use it directly! But, for most people, that shouldn’t be a problem I suppose.
Check out the latest price by clicking on the button below.
3. DinoFire Presentation Clicker [Most Ergonomic]
DinoFire pointer comes with quite a sleek and ergonomic design. It is comfortable to hold in your hands.
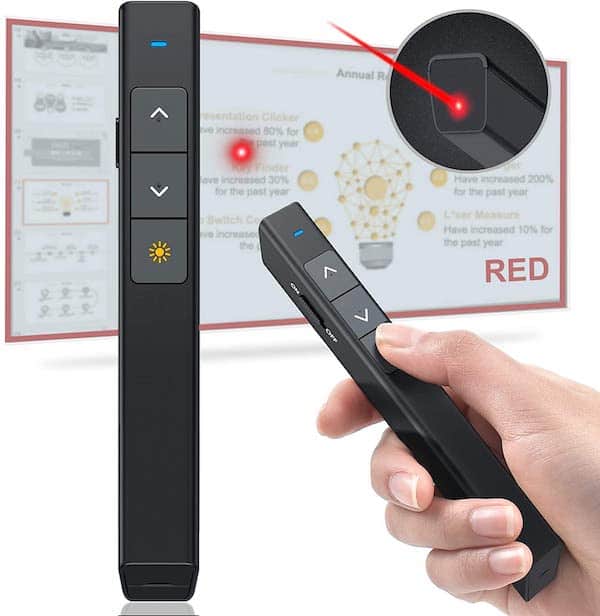
It has 3 clicky buttons and one integrated laser pointer. Some of the other features that it offers are as follows –
- Range of 100 feet
- Wide Compatibility – Works with all Windows operating systems, Mac and Linux. Furthermore, it also works with PowerPoint, Keynote, and Google Slides
- Magnetic USB receiver – this ensures that the receiver doesn’t accidentally fall off.
- 3-year guarantee on USB receiver – this is really cool! If you end up losing the receiver, the manufacturer will replace the receiver for you completely free for the first 3 years! This is one thing that I definitely loved about this clicker!
- Low power indicator – another helpful feature is the low power indicator. This feature ensures that your presentation clicker doesn’t ditch you in the middle of your presentation!
If you are looking for a presenter remote on a budget, I would recommend DinoFire presentation clicker with my eyes closed! Apart from being the most ergonomic, I also feel that this is the best all-round remote on a budget!
Check out the latest price by clicking on the button below.
4. DinoFire Presenter Remote with Air Mouse [Best Features on a Budget]
The DinoFire presenter remote with remote air is compatible with any USB A or USB type C device.
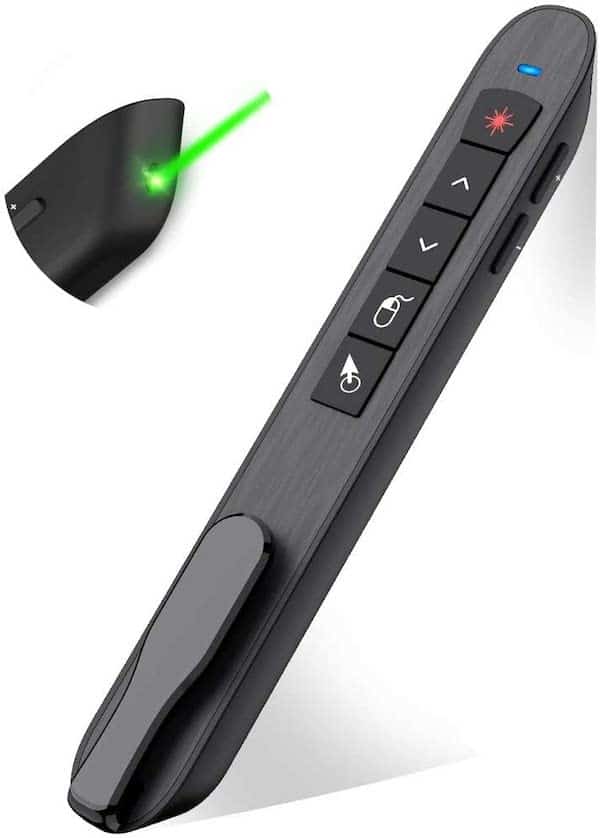
It is also a future-proof purchase for you as it works with Windows, Mac, Linux, and Android. Not only that, this two-in-one receiver will provide you 164 feet of wireless coverage. Besides being a presentation clicker, it can also be used as a mouse!
It actually comes packed with loads of features! Let’s take a look at some of the most helpful features –
- Rechargeable battery – you will never run out of power on this device as you can just plug it into an electric socket and use it. It takes about 1.5 hours to charge fully and runs for about 8-10 hours on operation.
- Also functions as a real mouse – with a click of a button, you can switch from a presenter to an air mouse!
- Green Light as a pointer – this presentation clicker comes with a green light. The advantage of green light is that it works even with TV screens. It is also far more powerful than a red laser light; thus easily visible.
- High range – Clicker range up to 50 feet, mouse range is about 80 feet, and light range is about 300 feet.
- Battery indicator – it also comes with a battery indicator that starts flashing red when the battery is low.
- Compatibility – this DinoFire presentation remote is compatible with Windows, Mac, and Linux. It also works with Google Slides, PowerPoint, Keynote, and a few other applications.
Check out the latest price by clicking on the button below.
5. Logitech Wireless Presenter R400 [Best Branded Remote on a Budget]
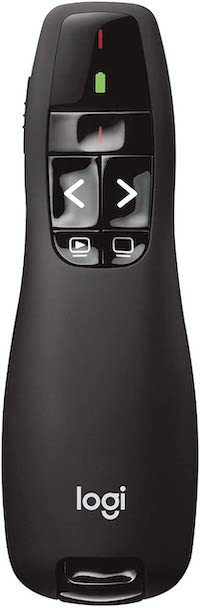
The Logitech R400 is perfect for professional usage and compatible with all windows versions. It has a strong red laser to highlight your presentation content. The most attractive part is that it has touch-sensitive buttons and 50 feet wireless coverage.
While it does come with most of the standard features, there are a couple of drawbacks to keep in mind though –
- It requires 2 AAA batteries to use
- It is only compatible with Windows
That said, you do get a trusted product with a fail-proof brand name like Logitech at quite a low price point!
Check out the latest price by clicking on the button below.
How to Use Your Phone as a Clicker with Google Slides?
If you don’t want to splurge on a clicker remote, then you can also use your phone as a clicker for Google slides! All you have to do is install a Google Chrome extension and you won’t have to pay any money for the clicker.
For Android
Below is the list of steps to give you a head start on how to use your phone as a clicker for Google Slides!
Step 1: Look for the “Remote for Slides” Extension
First thing first, you’ll have to install the Remote for Slides free chrome extension. Created by Google Developer Expert Henry Lim, this extension offers multiple features to help you ace your presentation.
Be it a forward or backward moving button, timer, or speaker note, this extension has it all! To install it all you have to do is launch the chrome browser and install the chrome extension.
Step 2: Add it to Chrome
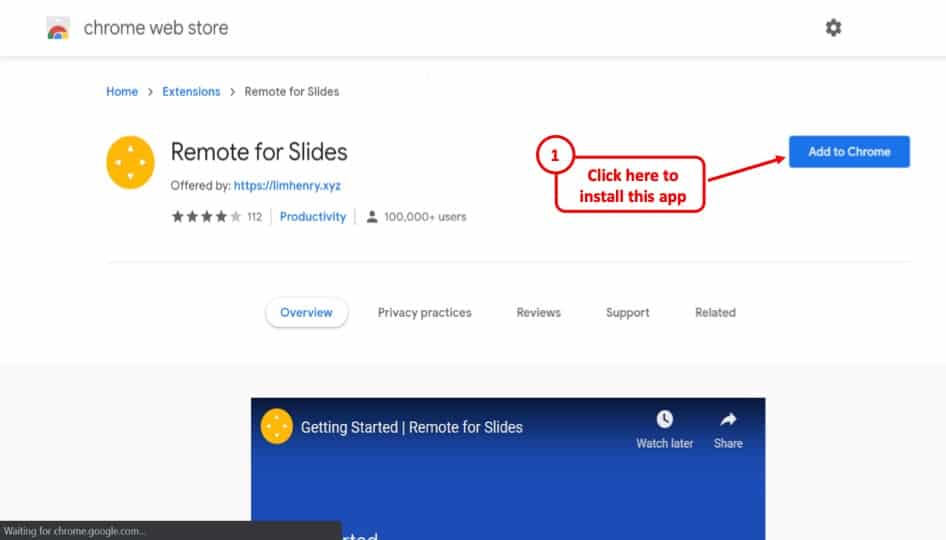
If you are done installing the extension, now it’s time for you to add it to chrome. In your chrome browser, you’ll notice an add to chrome button. Click the add button in the confirmation box. After clicking the button if “Added to Chrome” appears, it means the extension is ready to use!
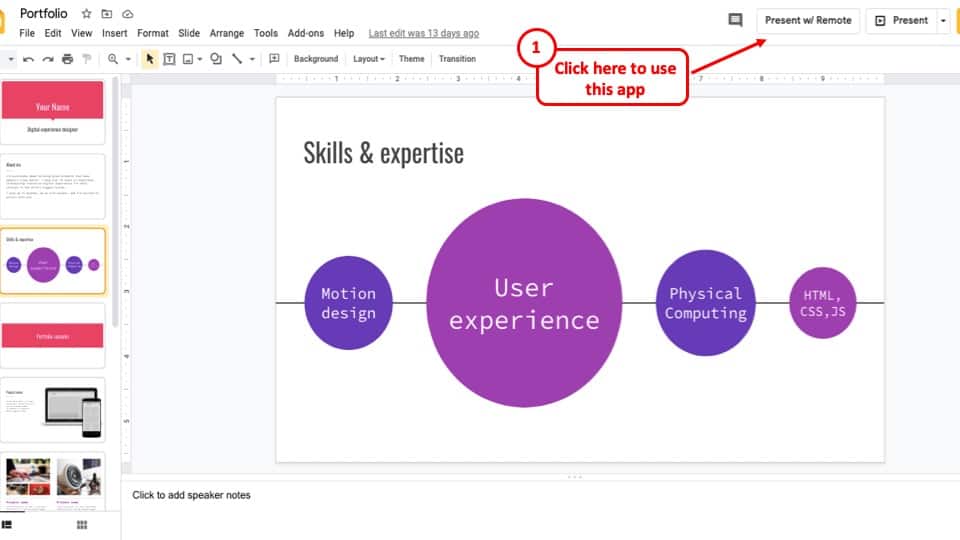
Step 3: Use it as a Remote
If you open your presentation using Google Slides you will notice the “Present with Remote” button on its top right. Wait till your presentation loads and use your phone as a clicker remote!
Now that you know the trick, start using the phone as a clicker remote in your next presentation!
Step 4: Open the Remote for Slides on your Phone
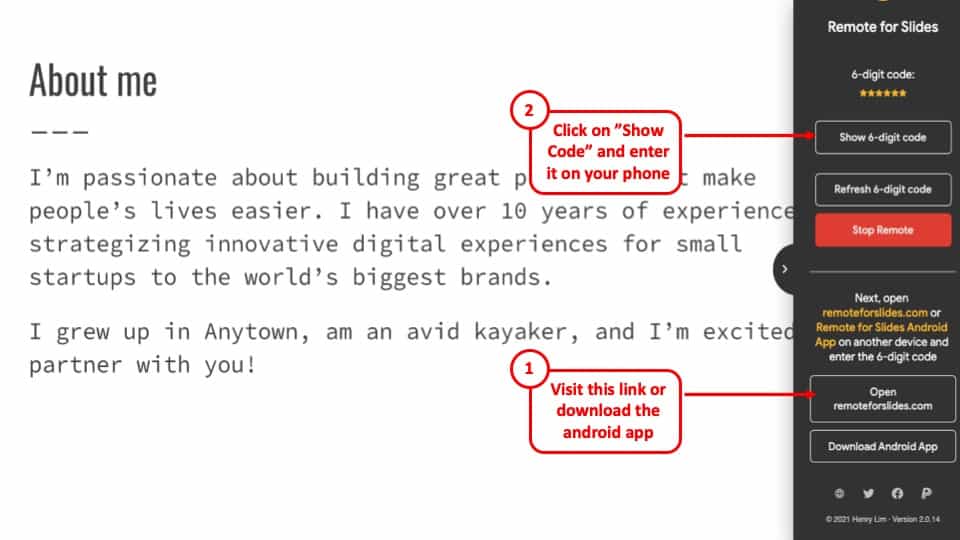
Once you click on “Present with Remote” option, Google Slides will enter in the presentation mode. You can open up the “Remote for Slides” pane, click on the link given using a browser of your phone. Then, enter the code and you will notice that your phone now converts into a presentation remote!
You can also download the android app so that you don’t have to keep using the link.
For iOS Devices
With Android out of our way, let’s find out how to use an iPhone as a clicker remote while giving presentations in Google Slides.
Step 1: Install the Google Slide app
Go to the apple store on your iPhone and install the Google Slide app. Once you are done with the install process, click the open button on your device.
Step 2: Sign-in
Now, it’s time to sign-in. Once you open the app, you will notice a sign-button at the bottom. Click it and sign-in to your Google account.
Step 3: Open the Presentation
After signing in to your Google account, click on the presentation you want to open. After it loads and opens on your device turn on the Apple TV using the Apple TV remote. After clicking the Apple TV on, swipe up on your screen and find the AirPlay Mirroring option.
Step 4: Bring the presentation on your screen
If you click on the AirPlay Mirroring option, a pop-up menu will appear. Now, select Apple TV to get your presentation on the screen. To make it full-screen click the right arrow on the menu and select “Present to external display”.
Step 5: Use thumbnails to move
After your presentation takes up the full screen, find the thumbnails right at the bottom and click to move your presentation. Once you are done presenting, turn off the AirPlay Mirroring.
And that’s all it takes to transform your iPhone into a remote clicker for Google Slides.
More Related Topics
- Are Google Slides Compatible with Microsoft Teams?
- How to Make Portrait or Vertical Slides in Google Slides?
- How to Fix the “Access Denied/You Need Permission” Error on Google Slides!
- How to Copy Color for your Google Slides? [Accessing the Eyedropper Tool!]
- Curve Text in Google Slides! [An EASY Method]