![Character Spacing in PowerPoint [All You Need to Know!]](https://artofpresentations.com/wp-content/uploads/2022/02/Featured-Image-Character-Spacing-in-PowerPoint.webp)
Contrary to traditional use, character spacing in PowerPoint can be helpful in making the text fit on the slide by stretching or compressing it yet keeping it aesthetically pleasing! But, how exactly do you adjust the character spacing in PowerPoint?
To change the character spacing in PowerPoint, first, select the text. Then, click on the “Home” tab, and from the “Font” group, click on the “Character Spacing” button. The type of character spacing you choose from the dropdown will be applied to the selected text on the slide.
In this article, we shall take a nuanced look at character spacing in PowerPoint and understand the topic in complete detail. You will get to know the various default options for character spacing that are available, how to apply them, and the options to create custom spacing in PowerPoint!
So, without any further delay, let’s get started!
1. What is Character Spacing in PowerPoint?
Let’s start with the basics so that we are all on the same page!
Character spacing is the amount of white space between each letter in a string of characters. Having the correct character spacing can make your text look good and ensure that it remains legible. Adjusting the character spacing can increase or decrease the amount of space taken by the same text.
To understand more about character spacing, check out this article about letter spacing on Wikipedia.
Microsoft PowerPoint allows you can control the character spacing in the text within a text box or a content placeholder. You can use the preformatted options to adjust the spacing between the characters in a PowerPoint text box. You can also create your custom character spacing for texts in your slides.
In the following sections, we shall learn both these options.
2. Where is the Character Spacing Button in PowerPoint?
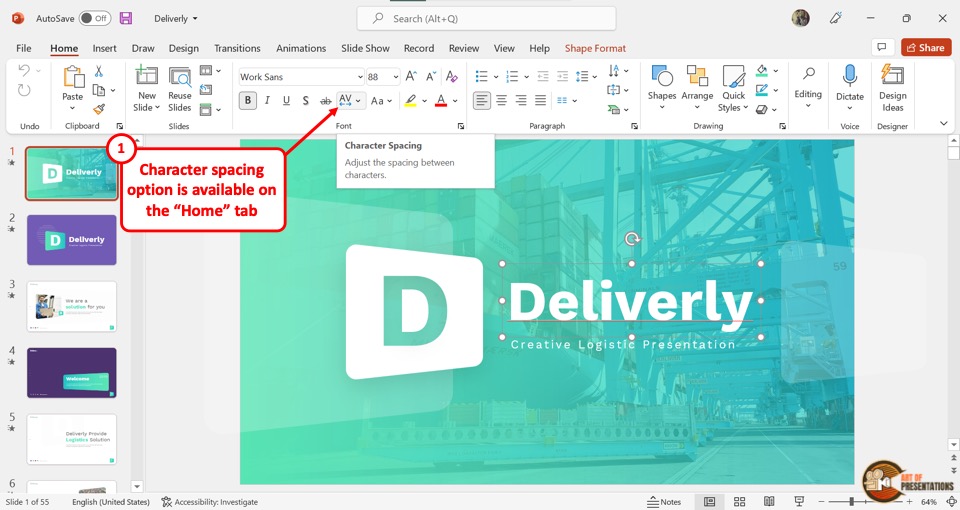
The “Character Spacing” option in Microsoft PowerPoint is available in the “Font” group of the “Home” tab in PowerPoint which is located in the menu ribbon at the top of the screen.
The “Character Spacing” button is the “AV” icon with a downward arrow next to it. By default, the option is grayed out. To access the “Character Spacing” option in PowerPoint, you have to first click on a text box.
3. How to Change Character Spacing in PowerPoint?
Microsoft PowerPoint offers the “Character Spacing” option which allows you to change the character spacing of the selected text.
You can also click on the “Font” dialog launcher to create custom character spacing for the text in your presentation.
3.1 Various Character Spacing Options in PowerPoint
In PowerPoint, there are five premade character spacing options to select from. These are “Very Tight”, “Tight”, “Normal”, “Loose”, and “Very Loose”. Besides, you can also click on the “More Spacing” option to customize the spacing between the characters as you like.
3.1a Very Tight

The first character spacing option is “Very Tight”. It has the least spacing between each character in a text box. The character spacing for “Very Tight” is condensed by 3 points.
3.1b Tight
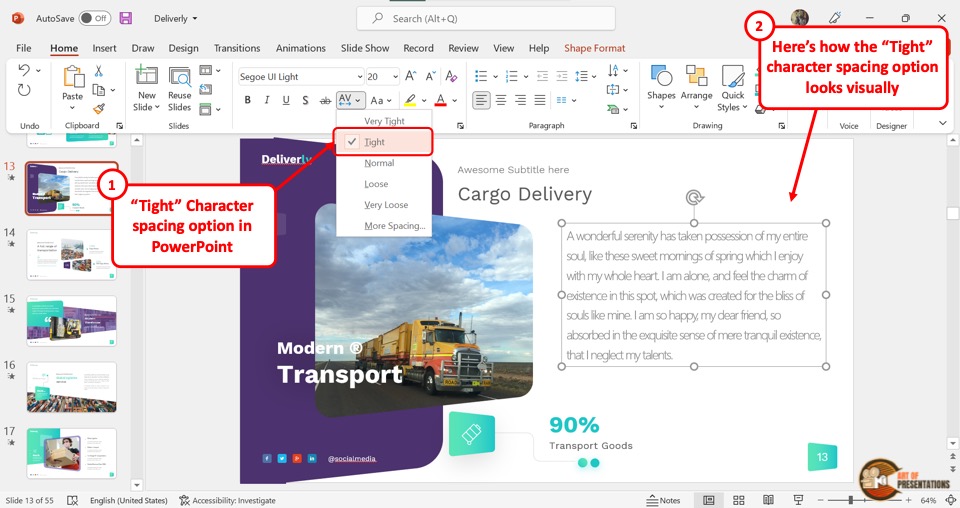
The second character spacing option, “Tight”, is relatively condensed. However, the characters are less packed compared to “Very Tight”. The character spacing is condensed by 1.5 points.
3.1c Normal

The “Normal” option is the default character spacing option in PowerPoint. The spacing between characters is neither condensed nor expanded. The “Normal” character spacing is the most suitable for reading text.
3.1d Loose
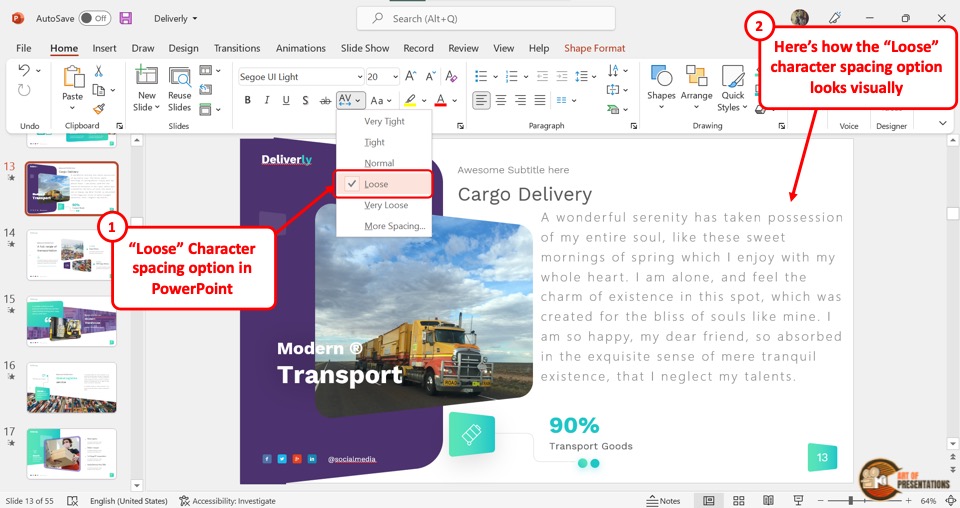
“Loose” is the fourth option in the “Character Spacing” dropdown menu. The spacing is relatively wide. The space between the characters is expanded by 3 points.
3.1e Very Loose
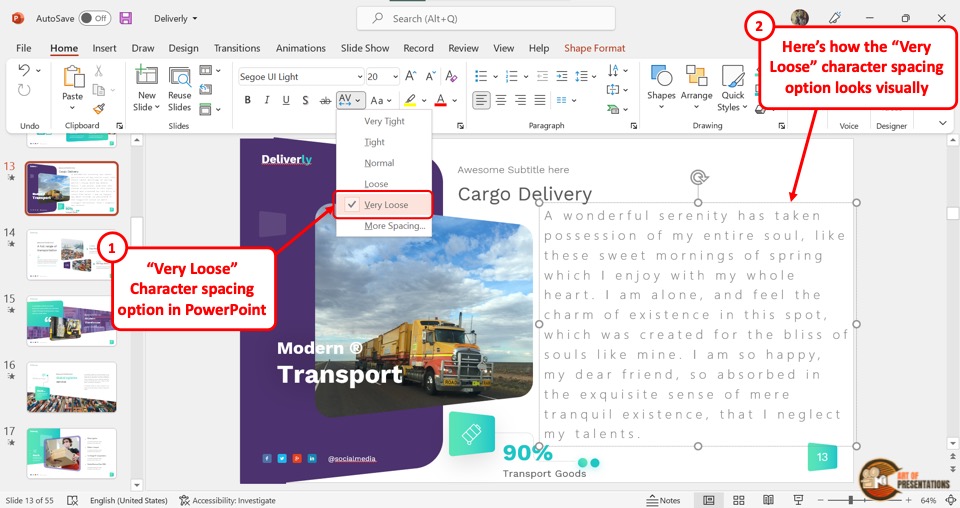
The fifth and last option, “Very Loose” has the widest gap between the characters in a text box. The spacing is expanded by 6 points.
3.1f More Spacing
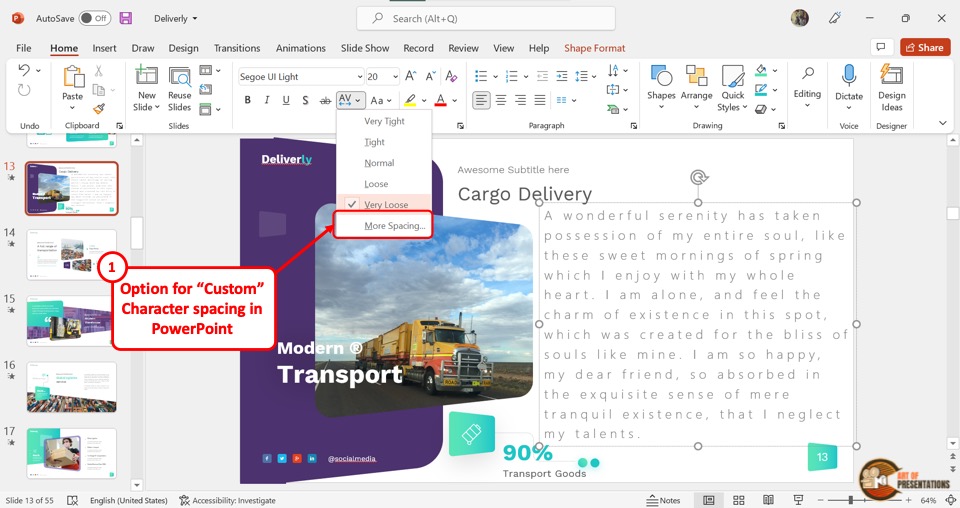
Besides the preformatted spacing options, you can also click on the “More Spacing” option to open the “Font” dialog box.
You can now customize the character spacing by choosing whether the spacing will be condensed or expanded. You can also select the amount of space between each character.
I will show you the exact steps on how to use the custom character spacing option a bit later in the article.
3.2 Changing the Character Spacing in PowerPoint
Changing the character spacing in PowerPoint is quite straightforward. All you have to do is follow the 2 quick steps.
Step-1: Click on the “Home” tab
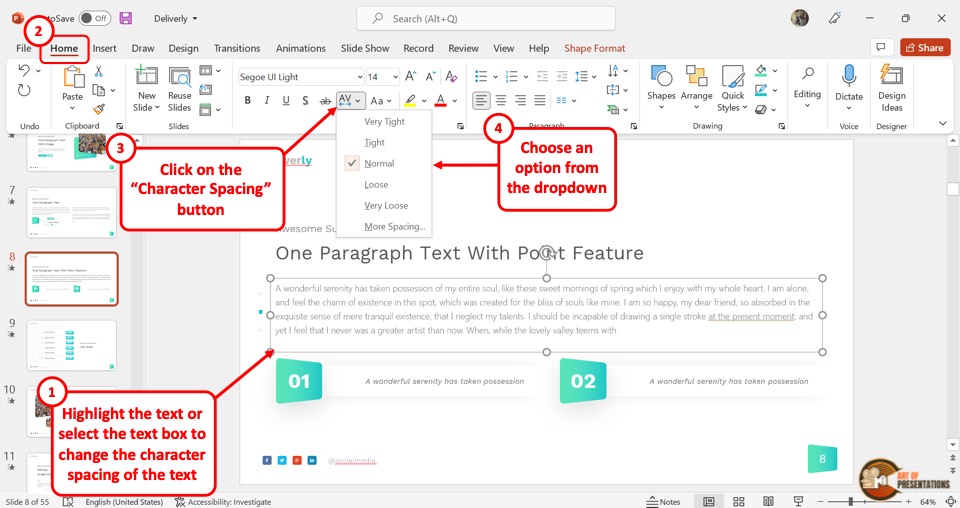
To change the character spacing, you have to first select the text or click on the text box that needs a different character spacing.
Then click on the “Home” tab in the menu ribbon which is located at the top of the screen.
Step-2: Click on the “Character Spacing” button
The next step is to click on the “Character Spacing” button which is the “AV” icon in the “Font” group of the “Home” menu.
This will open a dropdown menu containing the spacing options mentioned in the previous section. Now all you have to do is choose your preferred character spacing option from the dropdown menu.
4. Custom Character Spacing in PowerPoint
While Microsoft PowerPoint offers a few default character spacing options, they may not always match the visuals of your presentation.
You can customize your own character spacing using the “More Spacing” option in PowerPoint that we just saw in the previous section.
Here’s what you need to do to customize the character spacing of text in PowerPoint –
Step-1: Click on the “Home” tab
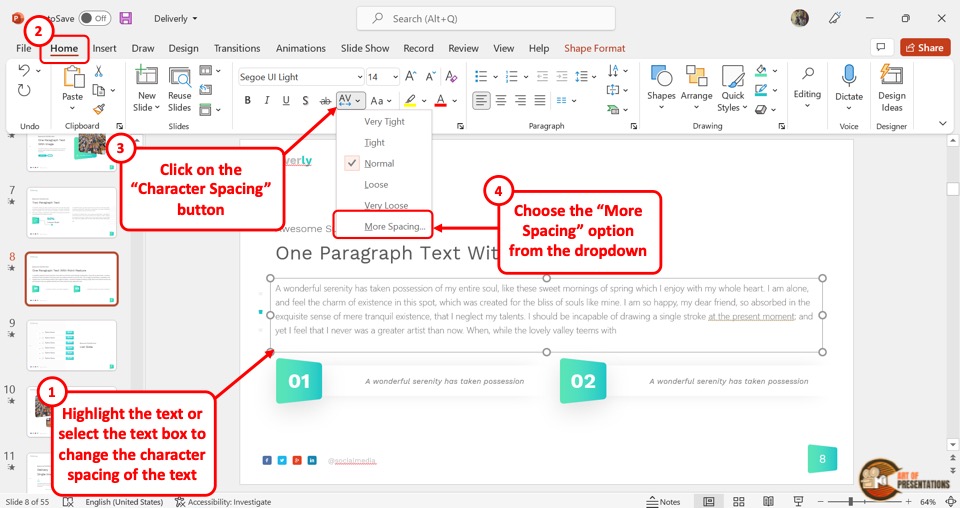
The first step is to select the text box in which you want to add customized character spacing. Then click on the “Home” tab in the menu ribbon.
Now, as before, click on the “Character Spacing” button, and click on the “More Spacing” option from the dropdown that appears.
This will open the “Font Dialog Box” window in PowerPoint.
Step-2: Click on the “Character Spacing” tab
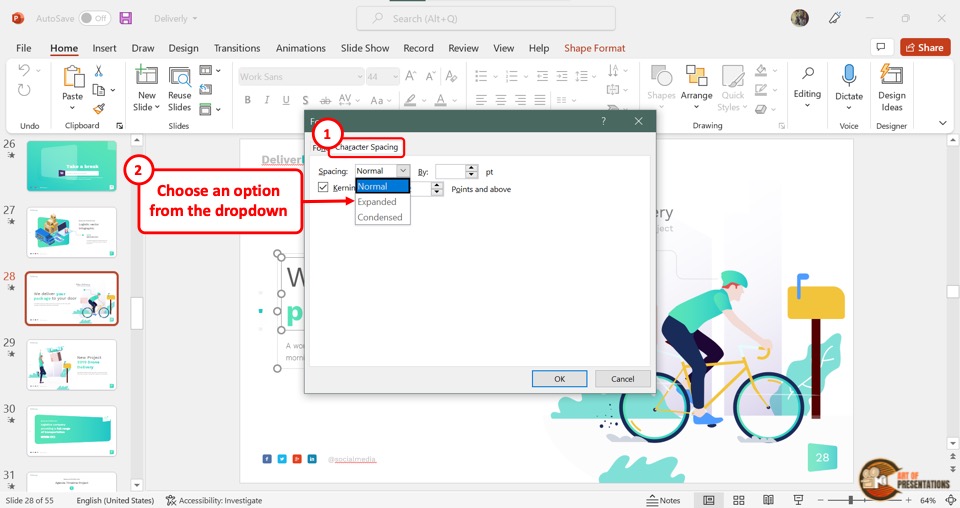
In the “Font” dialog box, make sure that the “Character Spacing” tab is selected from the top (as shown in the image above).
Step-3: Click on the “Spacing” box
In the “Character Spacing” tab of the “Font” dialog box, click on the “Spacing” option (as shown in the image in step 2). It will open a dropdown menu containing three options.
You can choose to go with “Expanded” to increase the spacing, or on “Condensed” to decrease the spacing. You can also click on the “Normal” option to keep the character spacing as default.
One thing to note here is that even if you choose normal, you will be able to adjust the character spacing slightly and create your custom spacing.
So, choose the option as per your preference.
Step-4: Enter the Custom Spacing Value
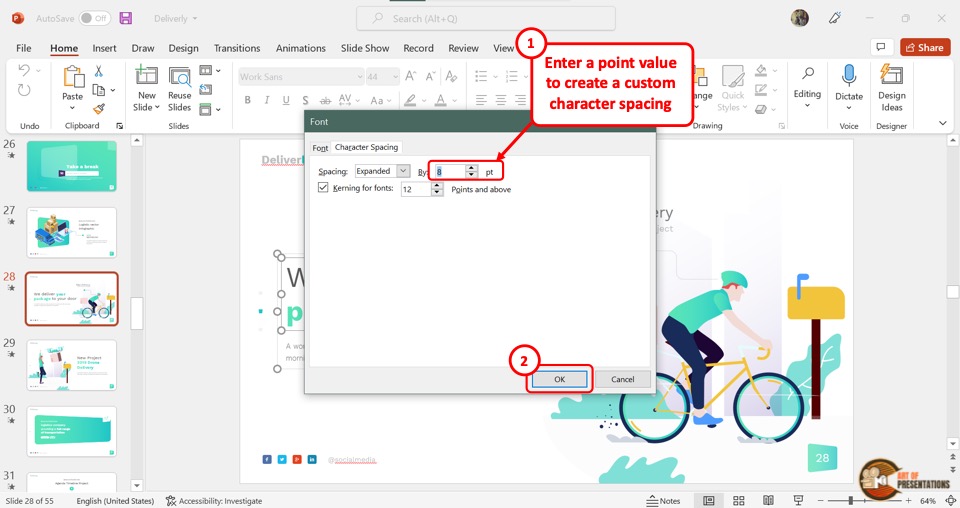
The next step is to click on the “By” box next to the “Spacing” box. Then enter a number between 0 and 1000. This number determines how much the character spacing should be changed in order to expand or condense the text.
Step-5: Click on the “OK” button
Now all you have to do is click on the “OK” button at the bottom of the “Font” dialog box to save the custom character spacing settings.
5. Kerning of Fonts in PowerPoint
It is important to note that “Kerning” is not the same as character spacing.
The kerning of fonts creates an adjusted spacing between each character rather than creating a similar amount of space between all the characters.
You may have perhaps sometimes noticed how the gap between letters like “V” and “A” is more than other characters in the text even when you are using the same font (especially when using “Serif” fonts). Kerning of text basically allows you to fix this space between specific individual letters.
To learn more, check out this article about Kerning on Wikipedia.
When creating a visually engaging presentation, you can easily enable “Kerning” in PowerPoint.
To enable Kerning in PowerPoint, first, select the text. Then, click on the “Character Spacing” button in the “Font” group on the “Home” tab. From the dropdown, click on the “More Spacing” option. From the window that appears, click on the “Character” tab, and enable “Kerning”. Finally, click “OK”.
Let me show the steps involved along with the images so that you can understand the process better.
Step-1: Click on “More Spacing”

The first step is to click on a text box where you want to use the kerning. Then click on the “Character Spacing” option. In the dropdown menu, click on the “More Spacing” option.
Step-2: Click on the “Kerning for fonts” box
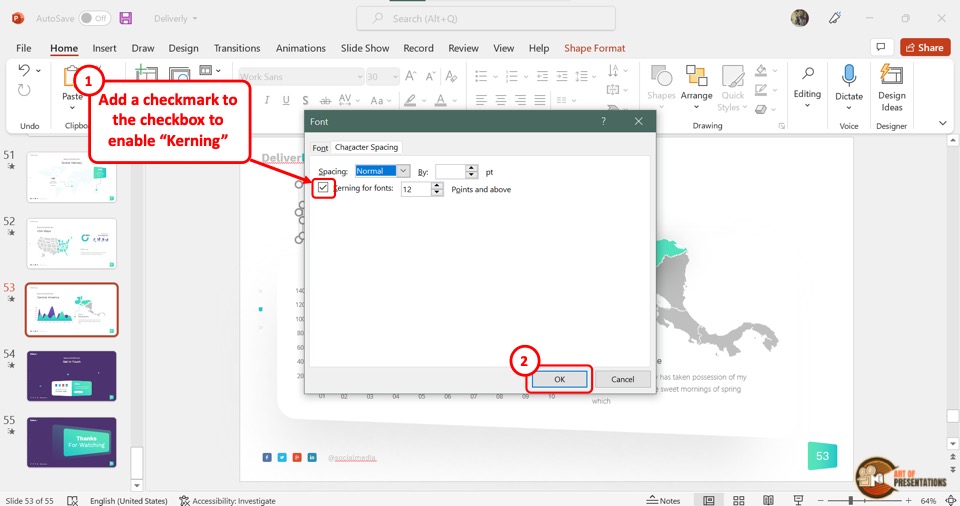
In the launched “Font” dialog box, click on the box on the left of the “Kerning for font” option to enable the feature. You will see a checkmark appear beside the option.
Now, click on the box on the right of the option to select the minimum font size for which kerning will be applied.
Step-3: Click on the “OK” button
Finally, click on the “OK” button at the bottom of the “Font dialog box” to apply the kerning to fonts (as shown in the image in step 2).
6. How to Justify Text Without Big Spaces in PowerPoint?
The “Justify” option in PowerPoint aligns the text within a text box such that the text is touching the text box on both left and right sides.
However, sometimes, doing so can create uneven spacing between each word. And, this can be really annoying to some people.
There is a quick fix to this problem. Basically, you will need to adjust the text box autofill options such that the text box changes shape according to the amount of text present in it. This will allow you to retain the justify text formatting and remove all the unnecessary space.
To justify text without big spaces, follow the below mentioned simple steps –
Step-1: Click on the “Format Shape” option
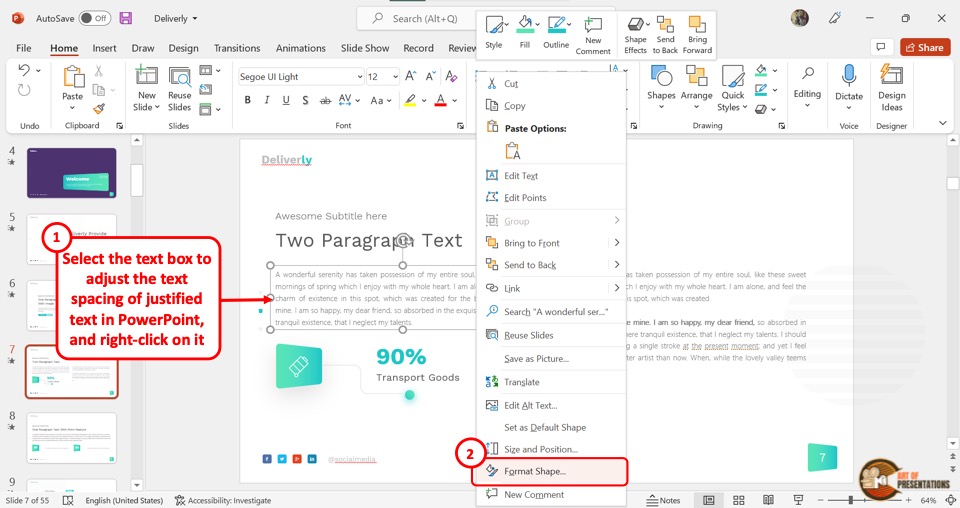
In the open slide, you have to first “Right Click” on the text box with “Justify” paragraph alignment. Then click on the “Format Shape” option from the right-click menu to open the “Format Shape” options in PowerPoint.
Step-2: Click on the “Text Options” tab

In the “Format Shape” sidebar on the right side of the screen, click on the “Text Options” tab. Then click on the “Textbox” icon which is the last icon under the “Text Options” tab.
Step-3: Click on the “Resize shape to fit text” option
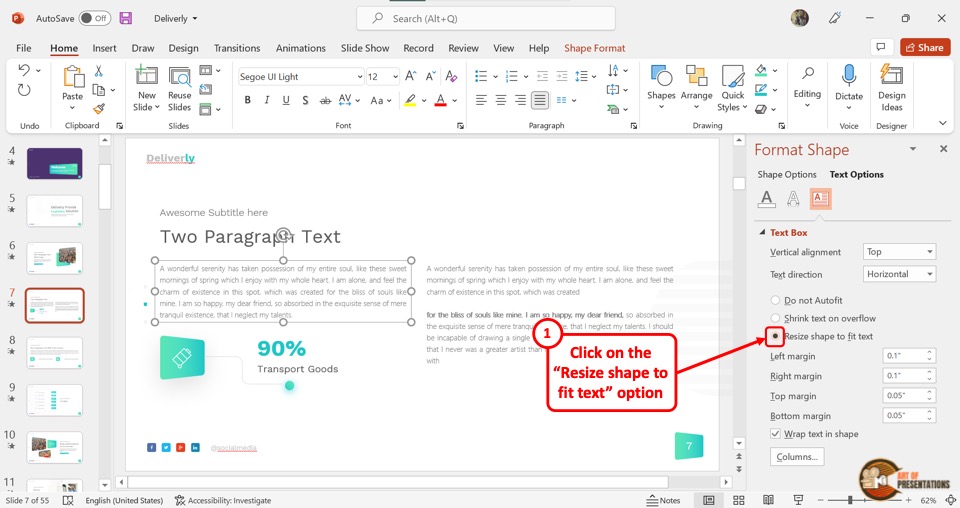
Now all you have to do is click on the “Resize shape to fit text” option. This will adjust the shape of your text box with the size of the text and eliminate any awkward spacing between words.
Credit to drobotdean (on Freepik) for the featured image of this article (further edited).