![How to Rotate Text in Google Slides? [A Helpful Guide!]](https://artofpresentations.com/wp-content/uploads/2021/08/Featured-Image-How-to-Rotate-Text-in-Google-Slides-Optimized.jpg)
Sometimes, you may need to rotate text in your Google Slides presentation to give just the perfect visual effect to your slides! But, knowing how to rotate text in Google Slides can be a bit confusing even if you have experience using the application simply because it is a function that is not used often!
To rotate text in Google Slides, select the text box. Then, click on the “Arrange” tab, click on “Rotate”, and choose a preset option from the dropdown. You can also “right-click” on the text box and click on “Rotate”. For more rotation angles, you can use the “Rotation Handles” to rotate the text.
In this article, I will show you multiple ways in which you can rotate text in Google Slides in a step-by-step manner. Plus, I will also share with you a few different ways you can use this feature.
So, let’s get started!
1. How to Rotate Text in Google Slides?
There are multiple ways in which you can rotate the text in your presentation in Google Slides. To be precise, there are 3 ways to do it.
You can either use the “Rotate” option in the drop-down bar of the textbox, or you can use the rotate handle of the textbox, or you can use the “Arrange” tab of the Google Slides window.
In the following section, I will describe the three methods in detail.
Method-1: Using the “Right-Click” option
To rotate the text in your Google Slides presentation using the “Rotate” option in the right-click menu, follow the easy steps described below.
Step-1: “Right-click” on the textbox
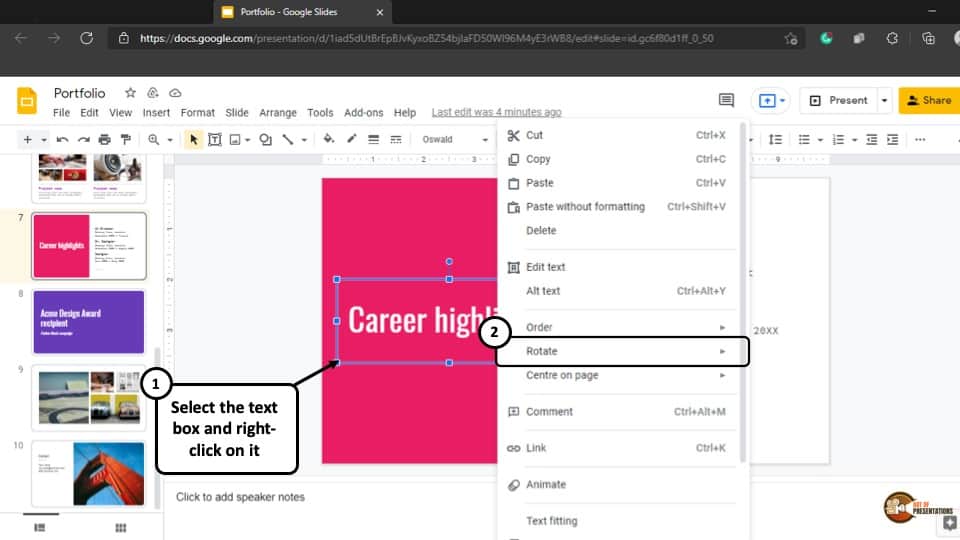
The first step of the process is to “Right-click” on the textbox that contains the text that you want to rotate. This will open a drop-down menu with several editing options.
Step-2: Select your preferred rotation style
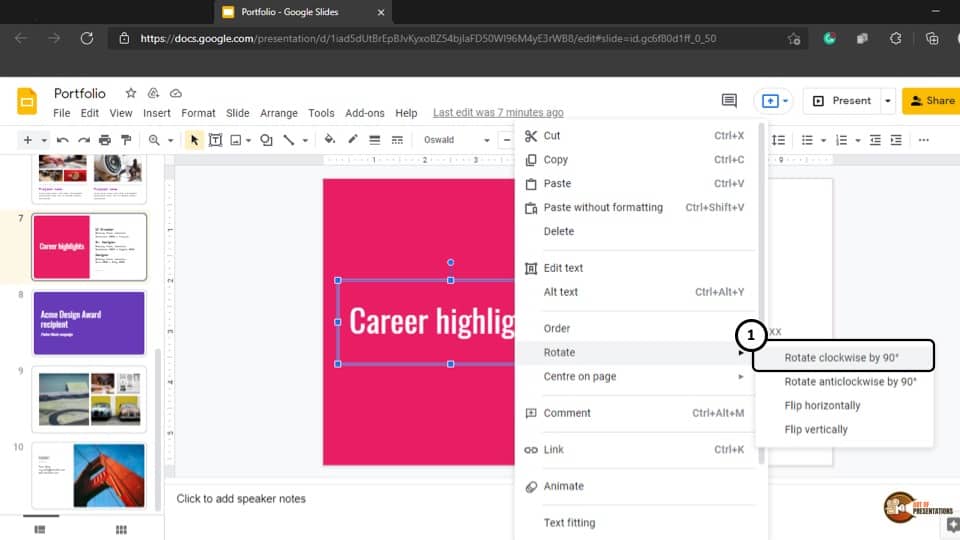
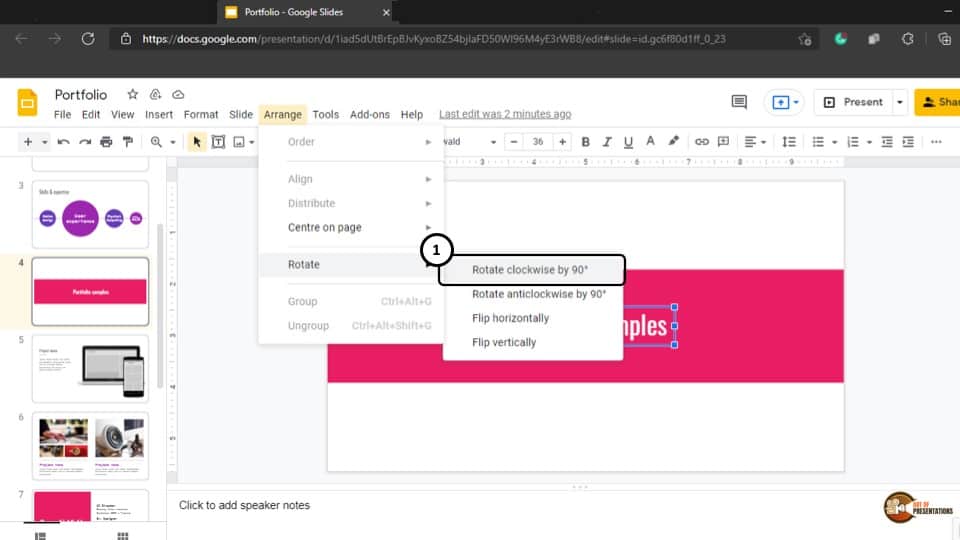
From the dropdown menu go to the “Rotate” option, which is the second option in the third section of the drop-down menu. After you have clicked on the “Rotate” option, you will be able to choose between rotating your text 90 degrees clockwise, or anticlockwise.
To rotate the text clockwise, click on the “Rotate Clockwise by 90°” style and to rotate anticlockwise, click on the “Rotate anticlockwise by 90°” option and the text will be rotated accordingly.
Method-2: Using the “Rotation handle”
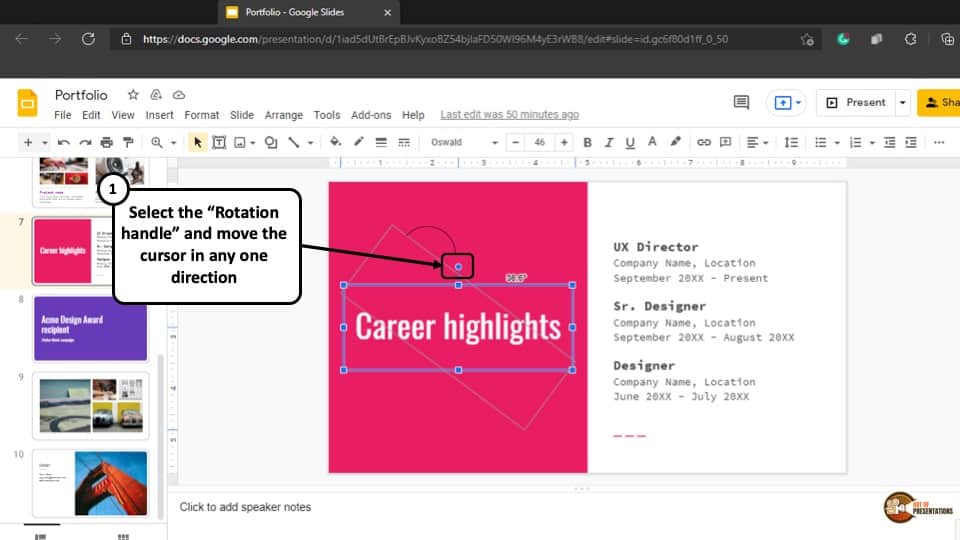
In the textbox that contains the text you want to rotate, there is a small circular handle leading to the top over the upper middle point of the textbox.
This small circular handle is called the “Rotate handle”. Simply select and hold the “Rotate handle” and adjust the rotation by moving the mouse of your computer, let go of the mouse once you have adjusted to your preferred angle of rotation and the text will be rotated accordingly.
Method-3: Using the “Arrange” tab
To use the “Arrange” tab to rotate the text in your Google Slides presentation, at first select the textbox that contains the text you want to rotate and then follow the simple steps described below.
Step-1: Select the “Arrange” tab
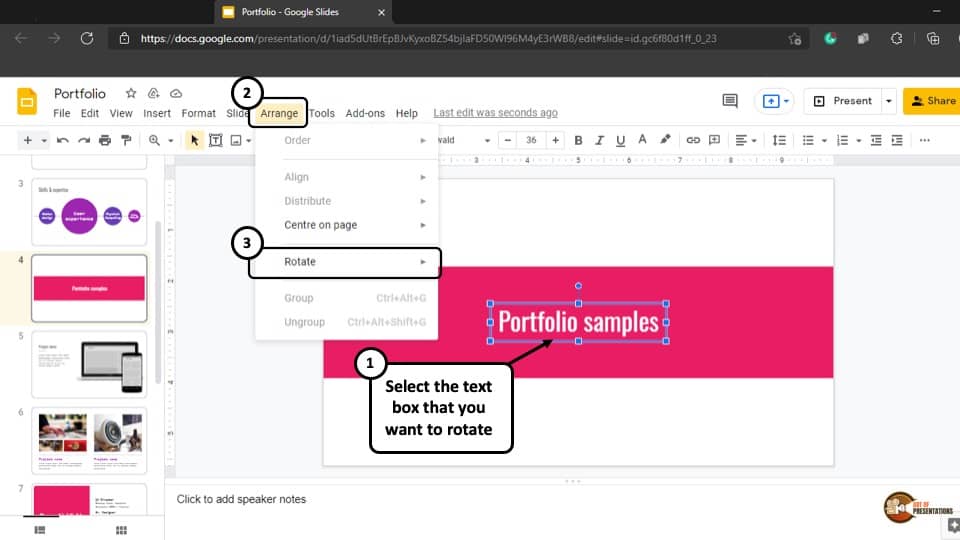
After you have selected the textbox, click on the “Arrange” tab, which is the 7th tab in the ribbon of your Google Slides presentation window. This will open a drop-down window.
Step-2: Select your preferred rotation style
This step is similar to the first method shown earlier. Now, all you have to do is select your preferred style of rotation from the “Rotation” option in the drop-down menu, and the text will be rotated accordingly.
2. How to Rotate Text in a Table in Google Slides?
In Google Slides you can not directly rotate the text that is present inside table cells.
However, there is a way to work around it. You can add a separate “Text box” on top of the cell of the table, write the text in the textbox, and then rotate the “Text box” itself.
The whole process is described below.
Step-1: Select the “Insert” tab
The first step of the process is to go to the “Insert” tab, which is the 4th tab in the ribbon of your Google Slides presentation. A drop-down menu will appear on your screen.
Step-2: Select the “Text box” option
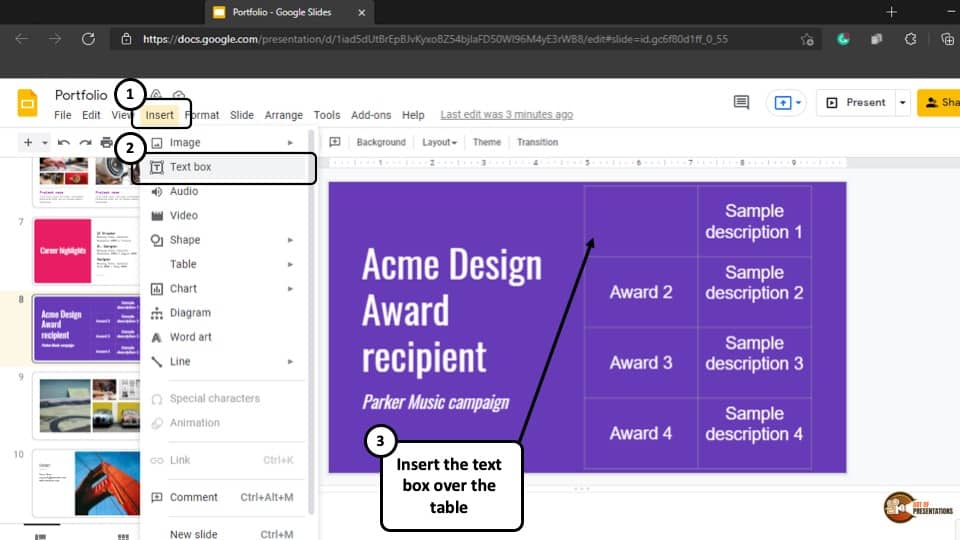
Now, select the “Text box” option, which is the second option in the drop-down menu. The cursor on your screen will change to a plus (“+”) sign.
Step-3: Insert the “Text box”
After the cursor changes to a plus sign, it means that you can now insert a “Text box”. Simply insert a new “Text box” in the cell and type in the text.
Step-4: Rotate the “Text box”
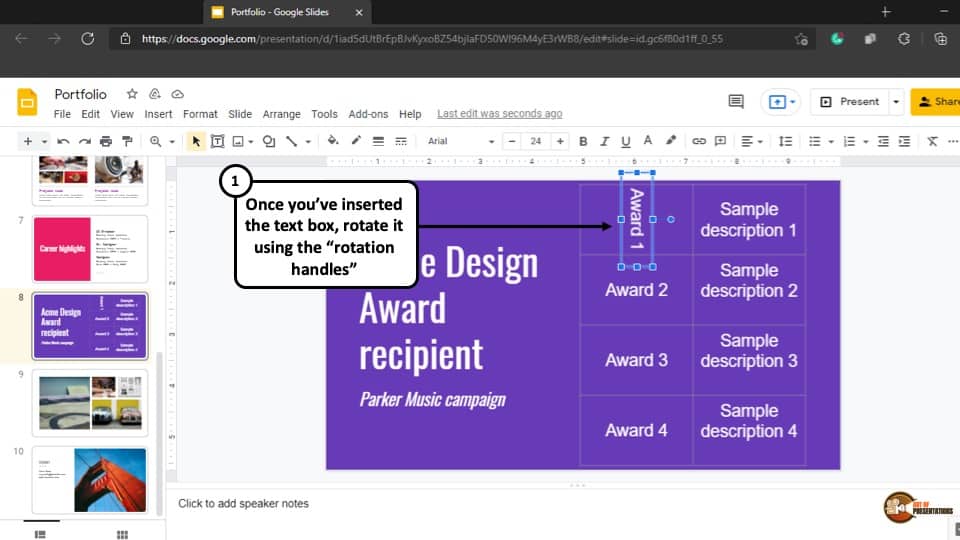
After you are done inserting the “Text box” into the cell of the table, simply rotate the “Text box” using any one of the 3 methods described in the previous section, and the text in the table will be rotated accordingly.
3. How to Write Text Vertically in Google Slides?
To write text vertically in your Google Slides presentation, all you have to do is rotate the textbox vertically clockwise or anti-clockwise and type in that “Text box”.
Here’s the detailed process described in the step-by-step manner –
Step 1 – Select the Text Box
The first step is to select the text box by clicking on it. Once you’ve done that, you can open the “Format Options”.
Step 2 – Open the Format Options
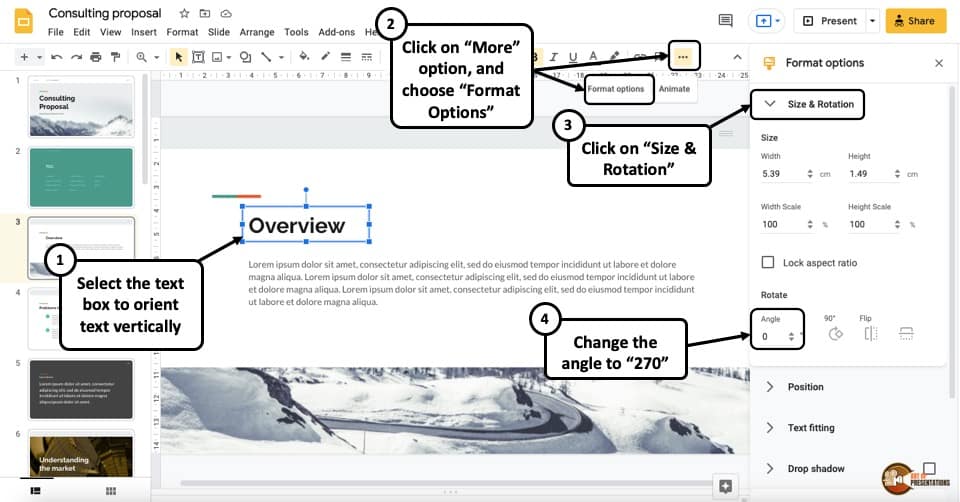
Once you have the text box selected, click on the 3 dots on the top right. From the dropdown, click on the “Format Options“. This will open a window pane on the right part of the screen.
There are multiple ways you can open this format options pane. You can also right-click on the text box and select format options (as shown in the previous section).
Step 3 – Rotate the Text Box
The next step is to rotate the text box such that the text is aligned vertically on the slide.
To do that, first click on the “Size & Rotation“. From the multiple options that become visible, change the angle. You can input the value to 270 degrees. (as shown in the image in step 2)
This way, the text will be rotated vertically and anything you write in that “Text box” will also be written vertically within that “Text box”.
Step 4 – Arrange the Text Box on the Slide
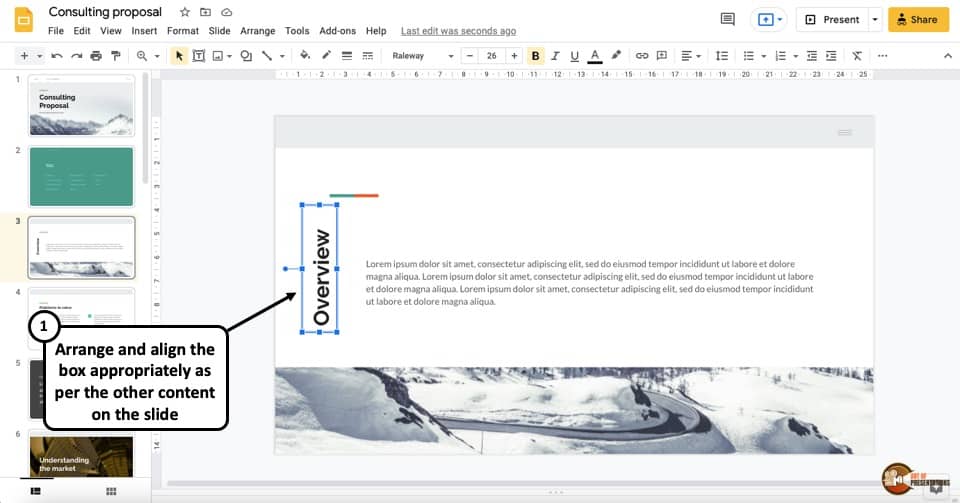
The last step is to arrange the text box appropriately on the slide such that the design looks cohesive and consistent.
4. How to Mirror Text in Google Slides?
To add the mirror effect for the text in Google Slides, you will need to enable the “Reflection” option. Here’s what you need to do in order to use the reflection option.
Step 1 – Open the “Format Options”
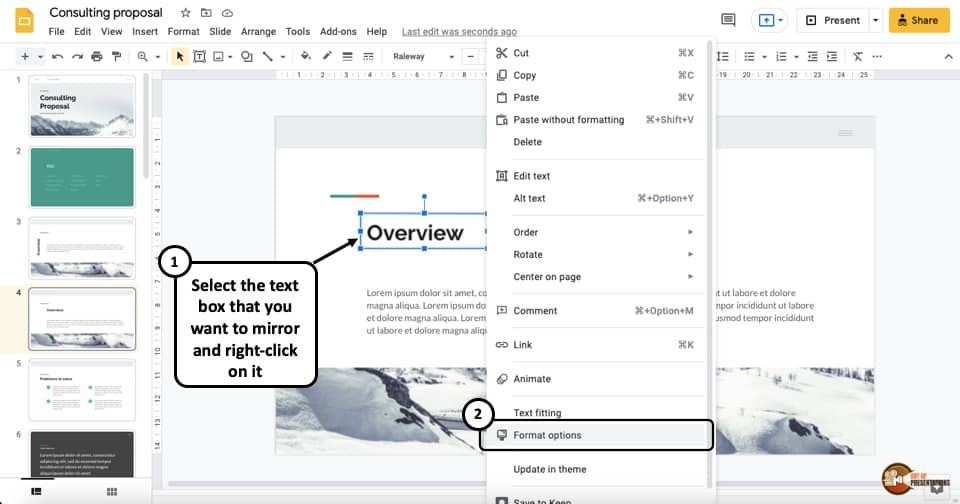
To access the “Reflection” option, you will need to access the “Format Options”.
So, first select the text box. Then, “right-click” on it. From the menu, click on “Format Options“. This will open the format options pane on the right part of your screen.
Step 2 – Enable “Reflection” Option
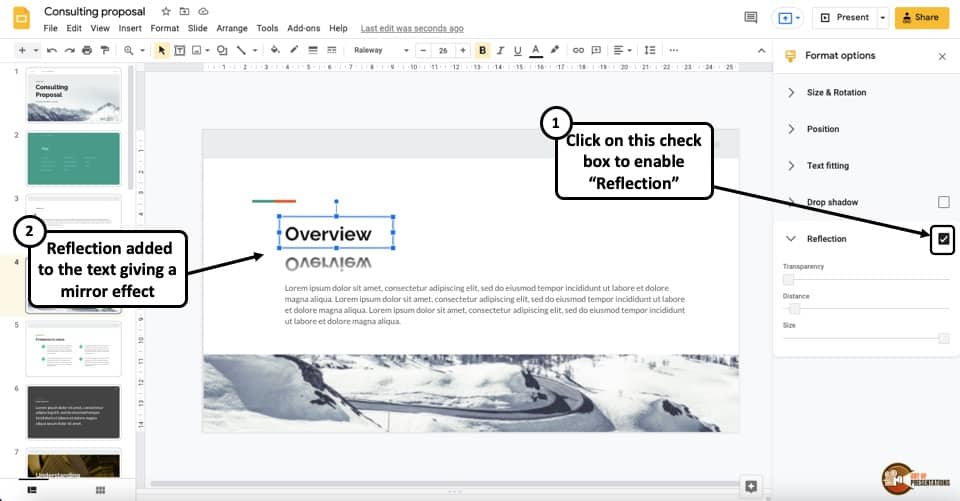
Once you open the “Format Options” window pane on the right, scroll down and click on “Reflection” tab. Make sure that the check box next is ticked so that the setting can be enabled!
As soon as you enable the “Reflection” option, you will notice that the reflection of the selected text will be visible. This will give the text a mirror effect.
Step 3 – Fine tune the Reflection Settings
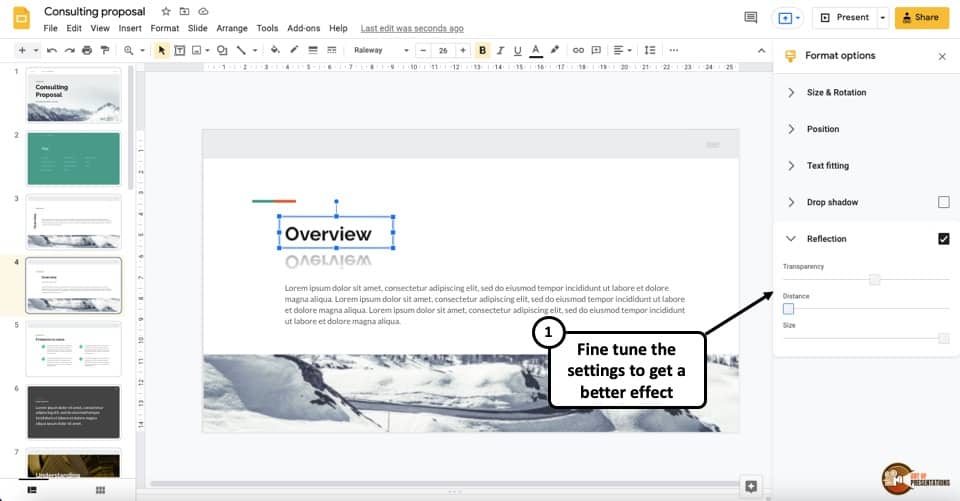
The last step is to fine tune the reflection settings. You can increase the transparency to give a subtle effect, and decrease the distance. Play with the settings to get the best results as per your requirement.
5. How to Flip Text in Google Slides?
The easiest way to flip text in Google Slides is to use the “Rotation” option from the drop-down menu after “Right-clicking” on the “Text box”. The process is described step-by-step below.
Step-1: “Right-click” on the “Text box”
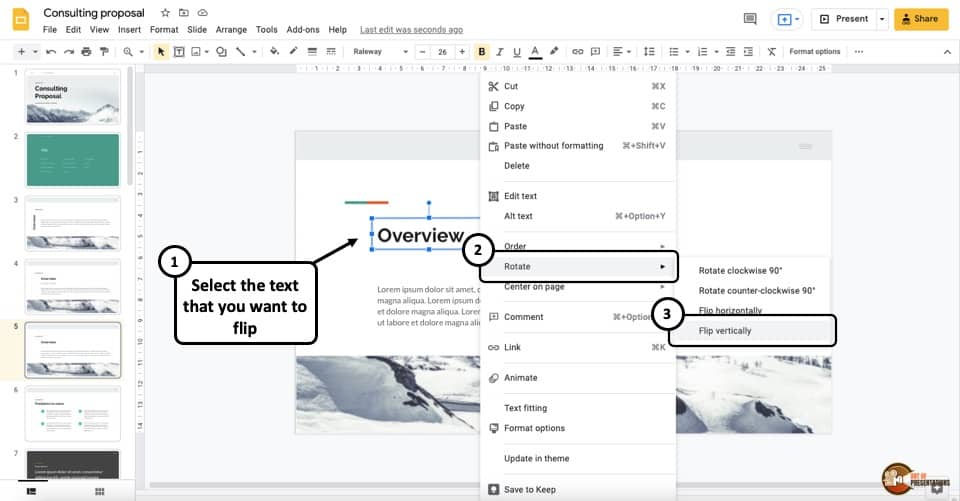
The first step of the process is to select the “Text box” and “Right-click” on it using the mouse of your computer. This will open a drop-down menu.
Step-2: Click on “Flip Vertically” or “Flip Horizontally”
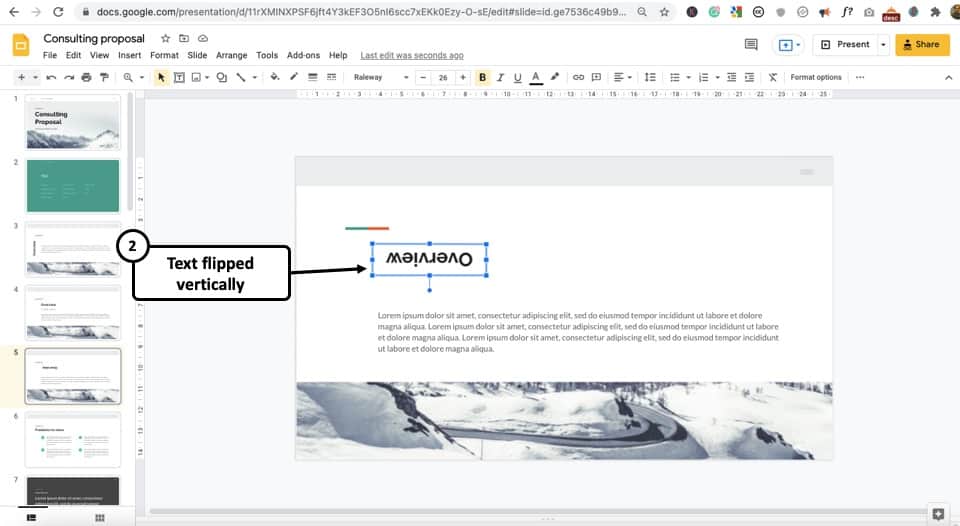
In this step, all you have to do is click on “Flip Vertically” or “Flip Horizontally” after placing your cursor on the “Rotate” option from the drop-down menu. The text will be flipped accordingly.
One thing to remember is that for a normal text box (at 0 degree orientation), you can only flip it vertically. Only the text box that is at an angle other than 0 or 180 degree can be flipped horizontally.
6. How to Write Text Backwards in Google Slides?
Similar to mirroring texts, there is no direct way to write text backward in Google Slides. However, you can still upload a screenshot of the text and mirror that image and it will have the same effect as a backward written text.
Follow the steps described below if you want to achieve this result –
Step 1 – Take a Screenshot of the Text
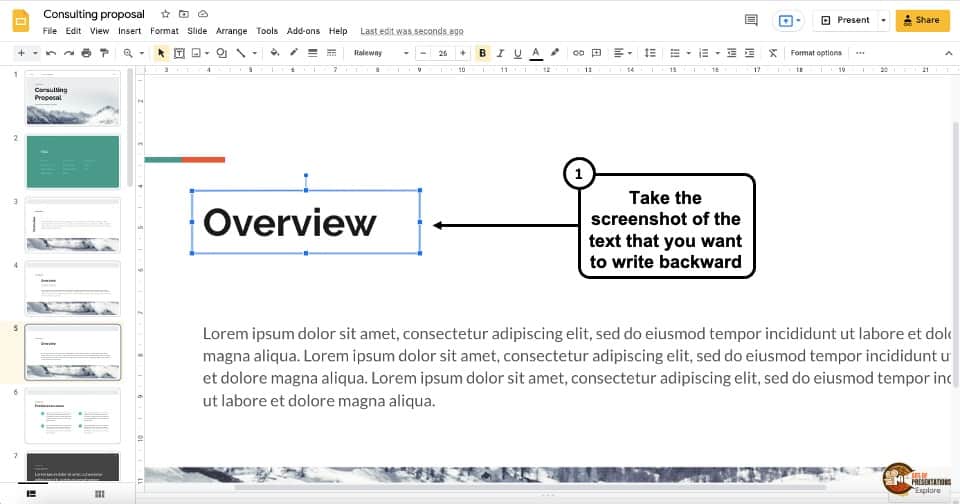
The first step is to take the screenshot of the text that you want to write backwards. If you are using Windows, simply press the “Print Screen” (PrtScn Key) on your keyboard. Then, open the paint application and press Ctrl+V to paste the screenshot.
For Mac users, you can use the keyboard shortcut Cmd+Shift+4 to take a screenshot on your computer. The screenshot taken will be automatically saved on the desktop.
Step 2 – Upload the Screenshot as Image
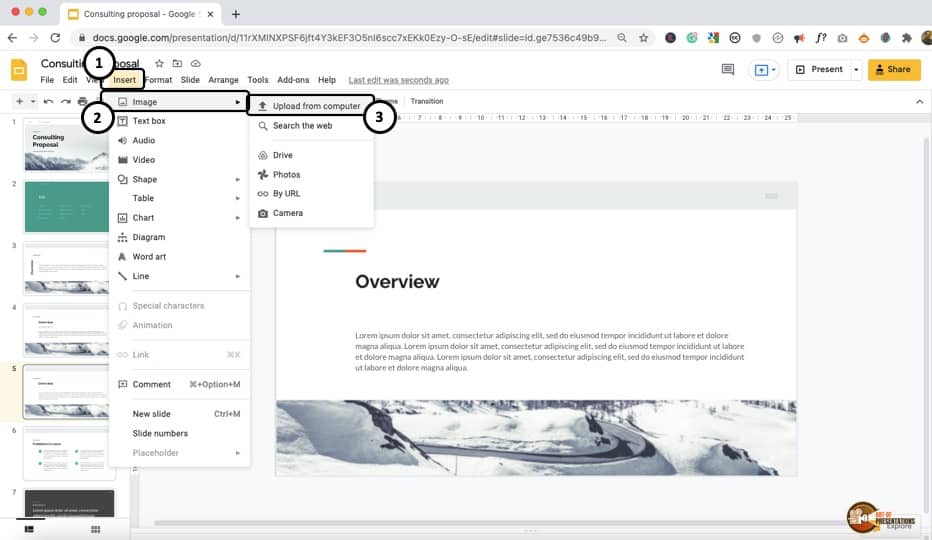
Once you have taken the screenshot, insert the image on your Google Slides presentation.
Click on “Insert“. From the dropdown, click on “Image” and then “Upload from Computer“. A dialog box will open up. Simply browse to the location where you have saved the screenshot, and click “Ok”.
Step 3 – Resize the Image
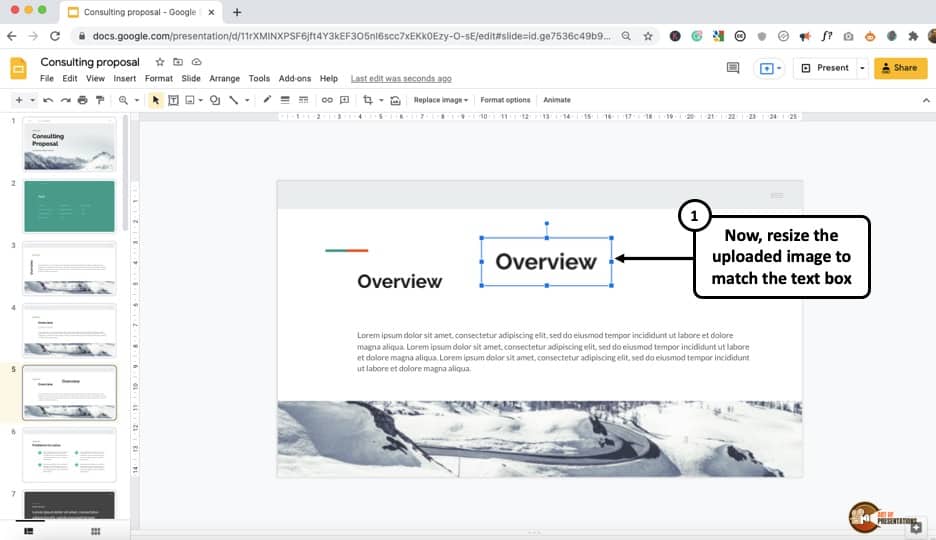
You will notice that the image has been automatically added to the slide.
Now, simply resize this image. If you have taken a screenshot of the complete slide, then you may want to crop the image first, and then resize it appropriately.
Step 4 – Rotate the Image
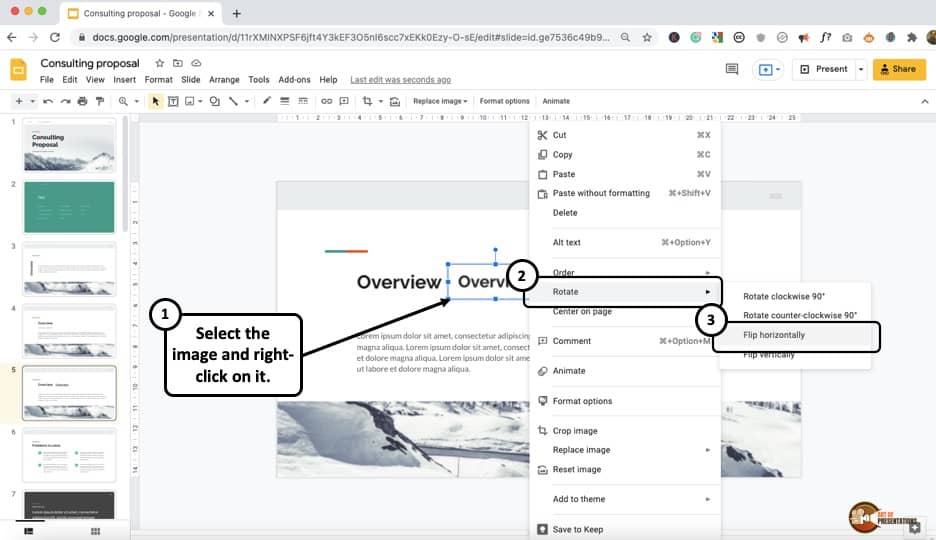
Once you have resized the image as per requirement, simply select the image and right-click on it. Then, from the options, click on “Rotate“. Finally, select “Flip Horizontally“.
Alternatively, you can also rotate the image by 180 degrees using any of the methods described above.
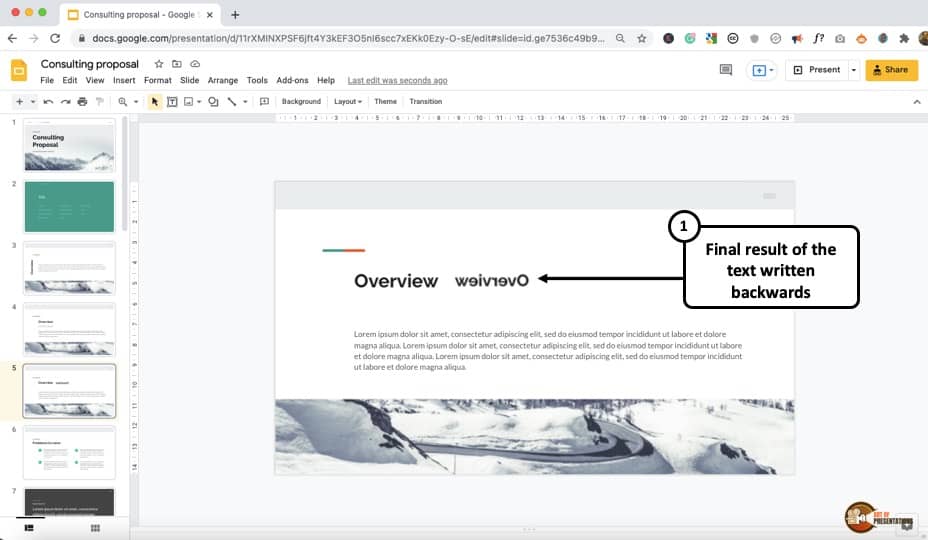
That’s it! You should be able to see the text written backwards.
There is just one drawback. Everytime you need to make any changes to the text, you will have to follow the complete process that has been described above.
So, make sure you choose the exact words that you want to keep in order to reduce the number of iterations.
7. How to Curve Text in Google Slides?
Again, there is no direct way to curve text in Google Slides. However, there is a solution to this. You can either insert a screenshot of the curved text in your Google Slides presentation or use third-party software and add-ons to do it.
I wrote a detailed article explaining the process in a step-by-step manner on how to curve text in Google Slides. Make sure you click on the link and check out that article!
Credit to drobotdean (on Freepik) for the featured image of this article (further edited).