![Using the Picture Placeholder in PowerPoint [Full Guide!]](https://artofpresentations.com/wp-content/uploads/2022/11/Featured-Image-Using-Picture-Placeholder-in-Powerpoint.webp)
In PowerPoint there are simple ways to add Pictures into your presentation to make it look more attractive. Sometimes we need to add more than one image in the same layout of the slide. The Picture Placeholder tool comes in handy for this purpose.
To insert a picture Placeholder in a Slide layout, open the View tab. Then, select the “Slide Master view” from the “Master Views” group. Now, click on the “Slide Layout” to insert the picture placeholder. From the menu, select the “Picture” option and draw the same into the slide.
Once you’re done adding the picture placeholder, you can click on the “Exit” button on the ribbon to close the slide master view.
Let’s take a look at some of the other tools and tips that you should be aware of when adding a picture placeholder in PowerPoint.
1. What is a Picture Placeholder in PowerPoint?
A Picture Placeholder in Microsoft PowerPoint is a pre-formatted container on a slide. This container makes it easier for you to add formatted pictures to each slide in the PowerPoint presentation.
The placeholders are created in the slide layouts in the “Slide Master” view and thus, it is consistent throughout the entire presentation. Then you use the picture placeholder in the “Normal” view.
If you are unfamiliar with how placeholders work in PowerPoint, check out my other article on “Placeholders in PowerPoint” to understand the full details!
One thing to note is that you should always remember to add a placeholder (instead of the image) in the slide master view (as we shall see in the remaining article). DO NOT add an image in the slide master. Otherwise, you won’t be able to move the image, edit it or even select the image in the normal view. (which kinda defeats the purpose).
2. How to Insert a Picture Placeholder in PowerPoint?
Using the “Slide Master” view, you can easily add a picture placeholder into a slide layout. To insert an image placeholder, follow the 4 quick steps.
Step-1: Click on the “Slide Master” option
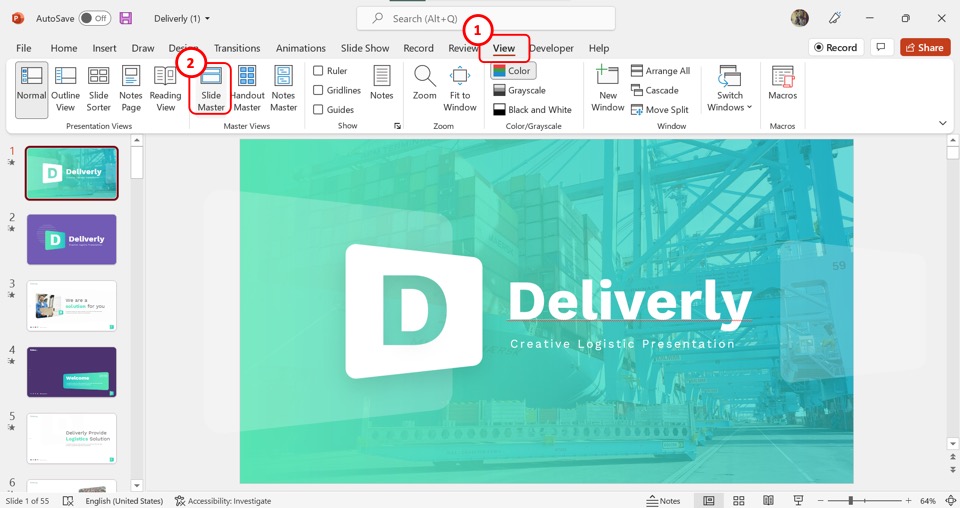
The first step is to open the “Slide Master” view. Click on the “View” tab in the menu ribbon located at the top of the screen. In the “View” menu, click on the “Slide Master” option.
Step-2: Click on the “Insert Placeholder” button
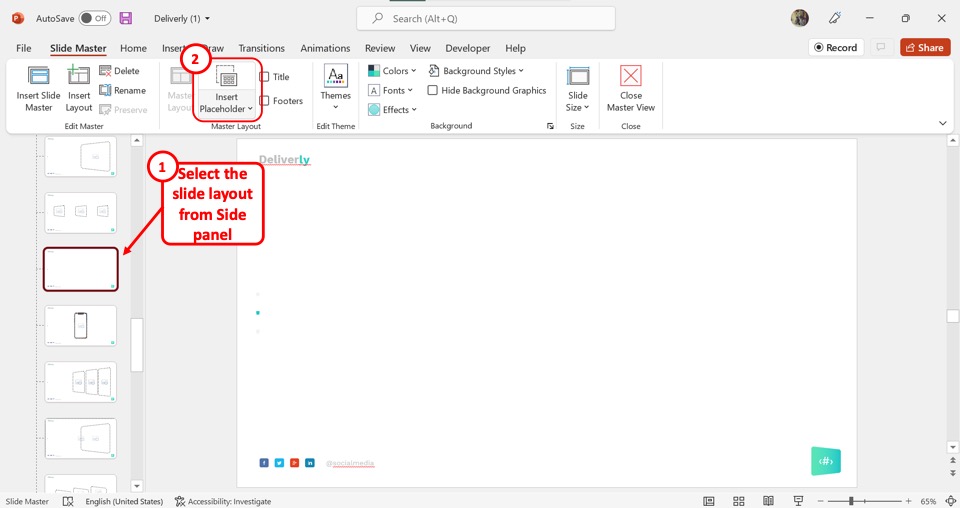
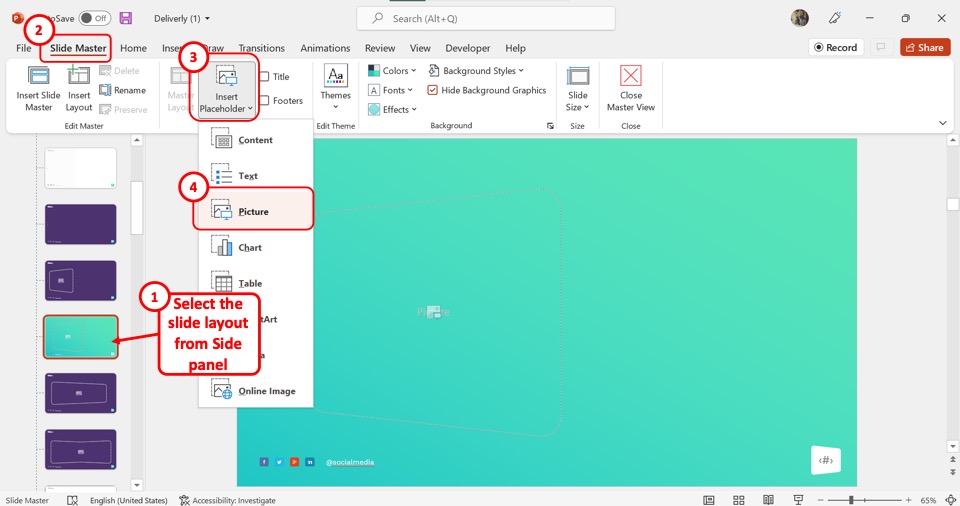
In the slide layout pane on the left side of the “Slide Master” screen, click on the layout where you want to add the placeholder. Then click on the “Insert Placeholder” option under the “Slide Master” tab.
Step-3: Click on the “Picture” option
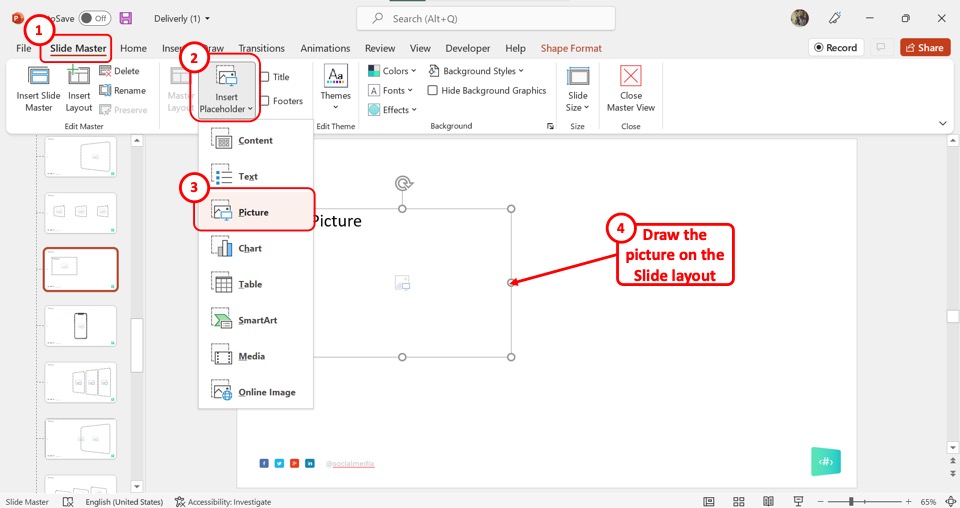
In the “Insert Placeholder” dropdown menu, click on the “Picture” option. Then draw the picture placeholder on the slide layout
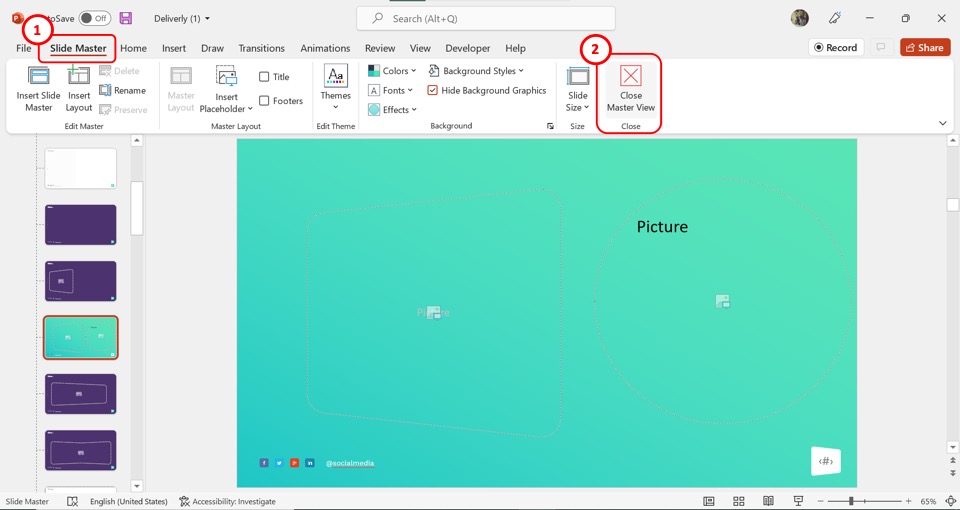
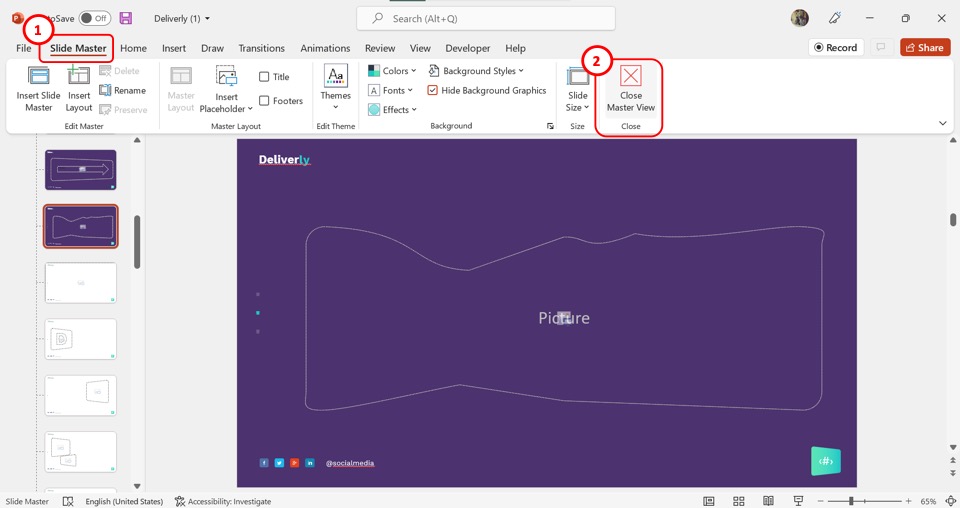
Step-4: Click on “Close Master View”
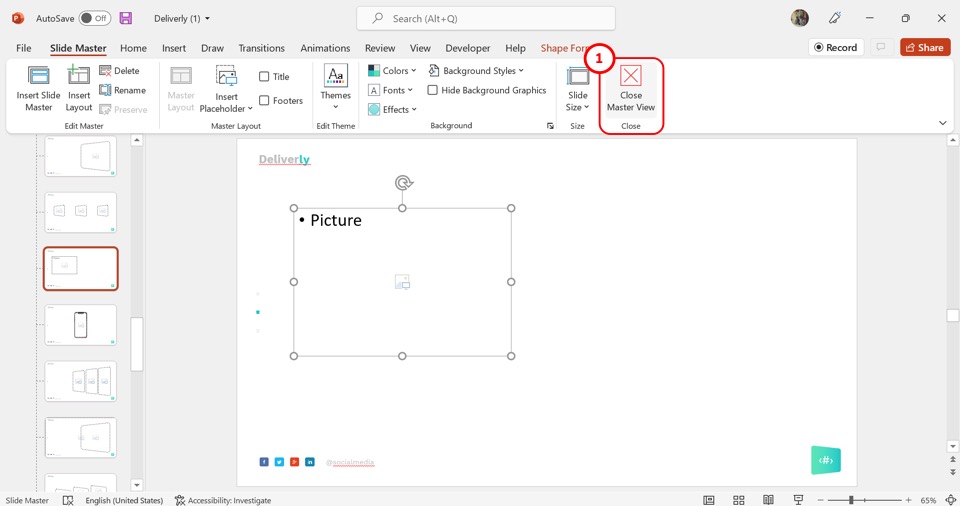
Now all you have to do is click on the “Close Master View” option to save the picture placeholder in the slide layout.
3. How to Format a Picture Placeholder in PowerPoint?
Using the “Format Shape” option in PowerPoint, you can format a picture placeholder in a slide layout. All you have to do is follow the 2 quick steps.
Step-1: Click on the “View” tab
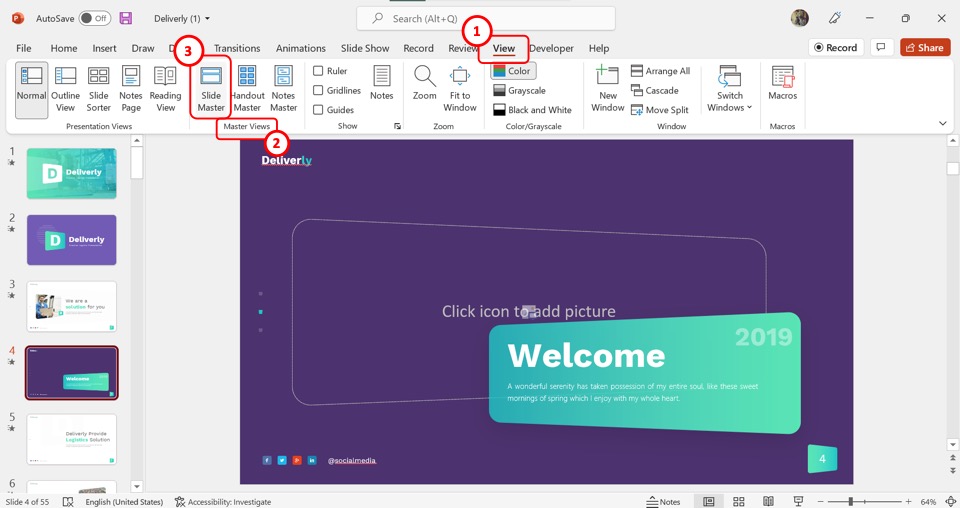
In the menu ribbon, click on the “View” tab. Then click on the “Slide Master” option in the “Master Views” group of the “View” menu.
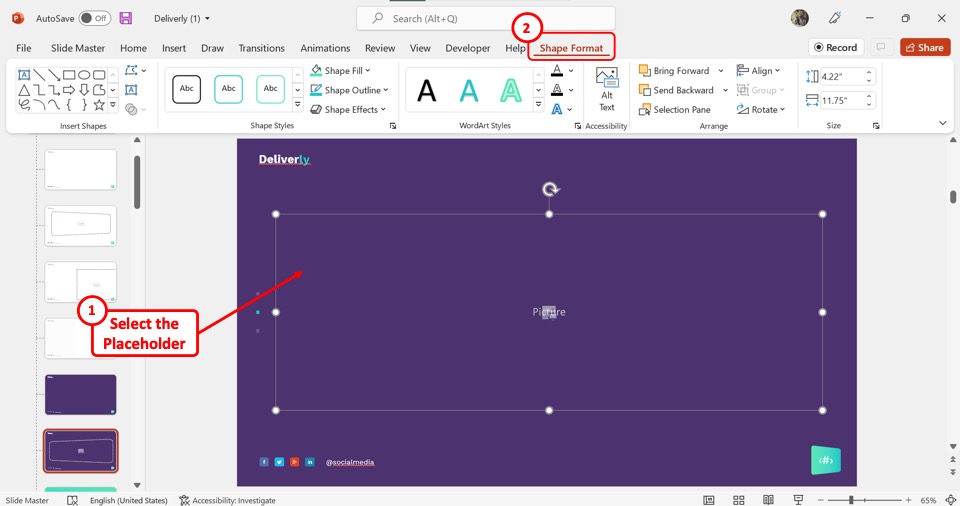
Step-2: Click on the “Shape Format” tab
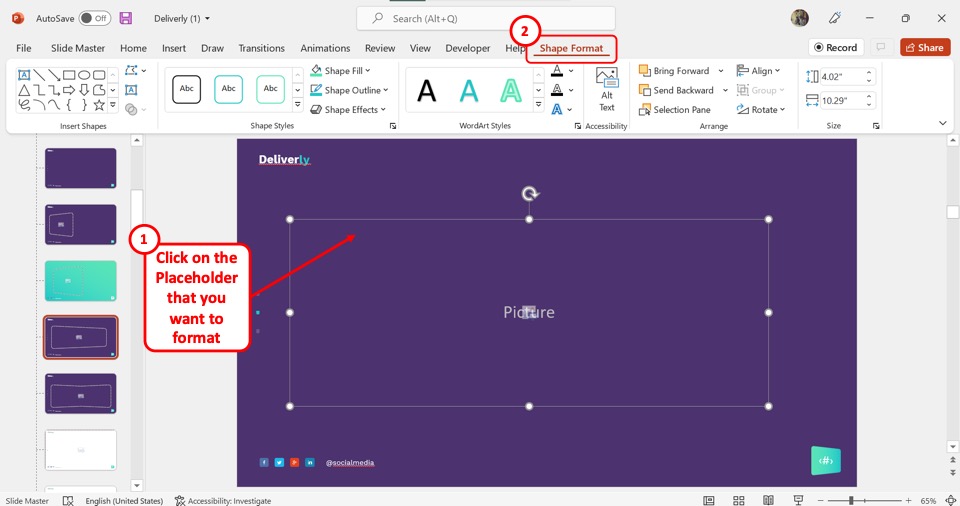
In the “Slide Master” view, click on the picture placeholder that you want to format. Then click on the “Shape Format”tab. You can now use the features available in the tab to format the placeholder.
4. How to Delete a Picture Placeholder in PowerPoint?
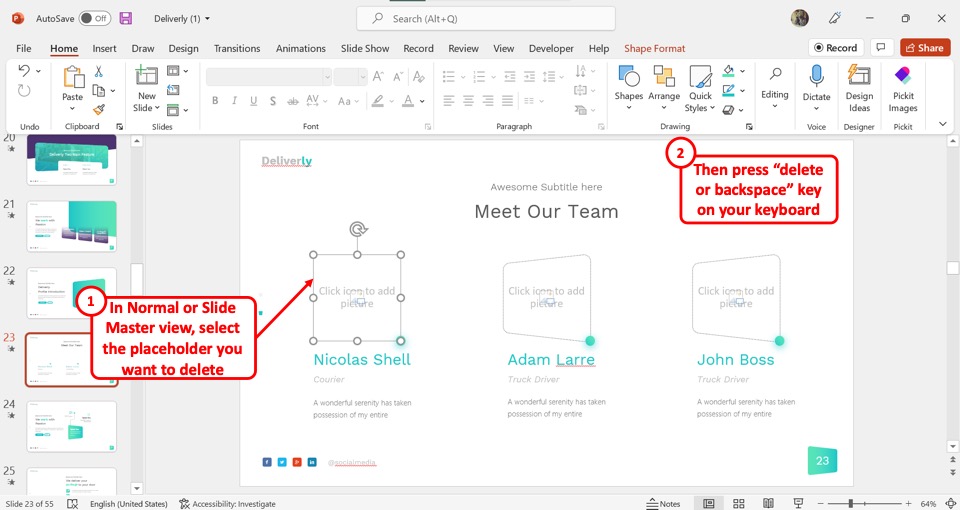
In PowerPoint, you can use the “Delete” key on your keyboard to delete a picture placeholder. You have to first click on the picture placeholder in a slide layout in the “Slide Master” view.
You can also click on a picture placeholder in a slide in the “Normal” view. Then all you have to do is press the “Delete” key or the “backspace” key on your keyboard.
5. How to Create a Circle Picture Placeholder in PowerPoint?
In Microsoft PowerPoint, the default shape of the picture placeholder is a rectangle. You can create a circle picture placeholder using the “Shape Format” option. To do so, follow the 6 simple steps.
Step-1: Click on the “Slide Master” option
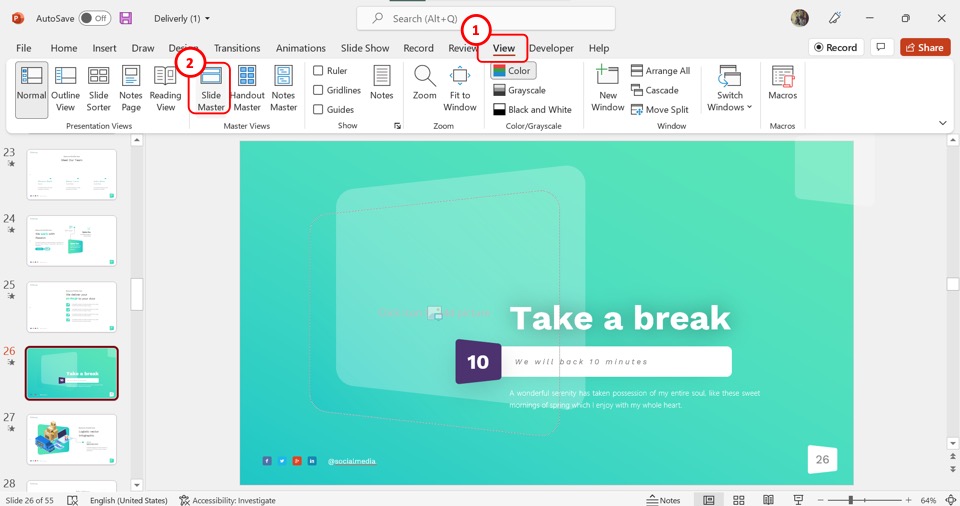
The first step is to click on the “View” tab in the menu ribbon located at the top of the screen. Then click on the “Slide Master” option in the “View” menu to open the “Slide Master” view.
Step-2: Click on the “Picture” option
In the slide layout panel in the “Slide Master” view, click on the slide layout where you want to insert the circle picture placeholder. Then click on the “Insert Placeholder” button in the “Slide Master” tab. Click on the “Picture” option from the “Insert Placeholder” dropdown menu.
Step-3: Click on the “Shape Format” tab

The next step is to click on the picture placeholder in the slide layout. Then click on the “Shape Format” tab in the menu ribbon.
Step-4: Click on the “Change Shape”
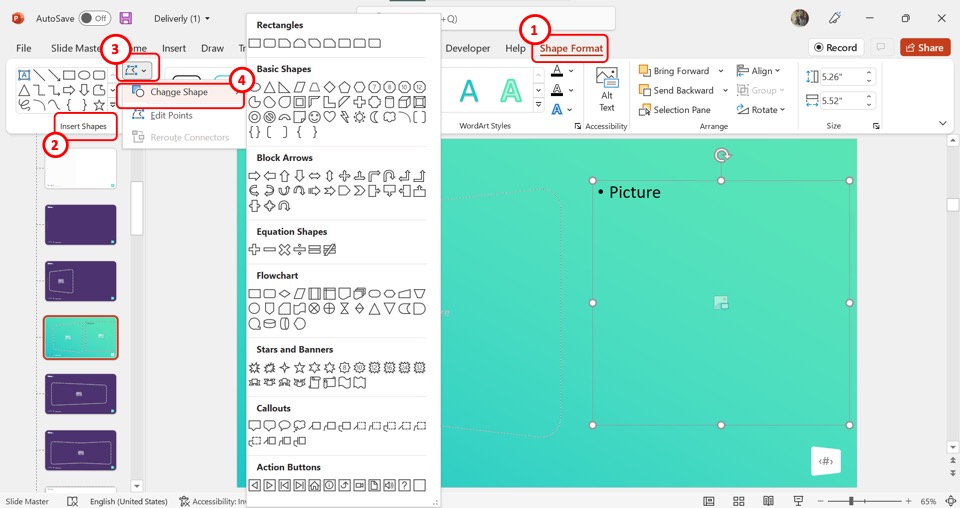
In the “Insert Shapes” group of the “Shape Format” tab, click on the “Edit Points” option. Then click on the “Change Shape” option from the dropdown menu.
Step-5: Click on “Oval”
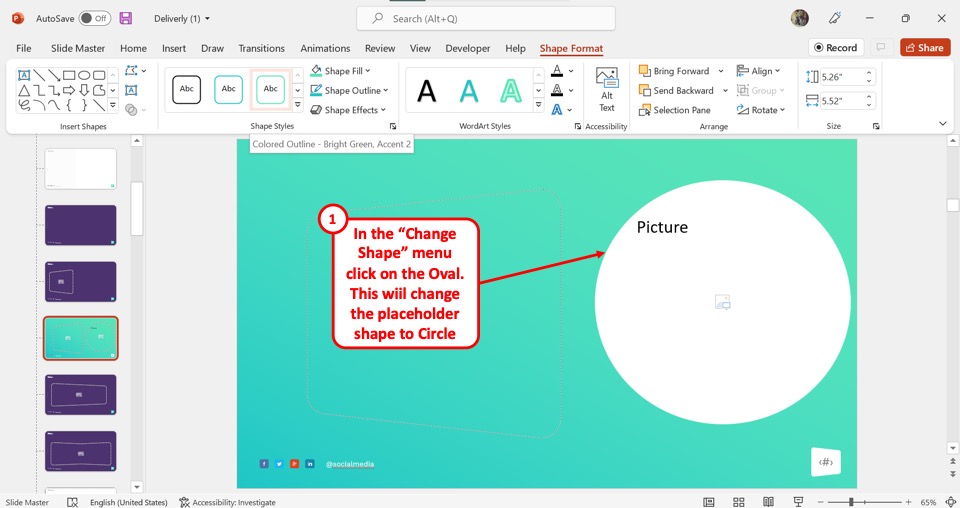
In the secondary menu by the “Change Shape” option, click on the “Oval” option under the basic shapes section. This will turn the picture placeholder into a circle from a rectangle.
Step-6: Click on the “Close Master View” option
Finally, all you have to do is click on the “Close Master View” option in the “Slide Master” tab to save the circle placeholder and return to the “Normal” view.
6. How to Create a Custom Picture Placeholder in PowerPoint?
The “Shape Format” option allows you to customize a picture placeholder in PowerPoint. To create a picture placeholder with custom shapes, follow the steps mentioned in section 5. To create a custom picture placeholder, follow the 4 quick steps.
Step-1: Click on the “Slide Master” option

In the menu ribbon located at the top of the screen, click on the “View” tab. Then click on the “Slide Master” option in the “Master Views” group of the “View” tab.
Step-2: Click on the “Shape Format” tab
The next step is to click on the picture placeholder that you want to customize. Then click on the “Shape Format” tab in the menu ribbon.
Step-3: Click on the “Edit Points” option
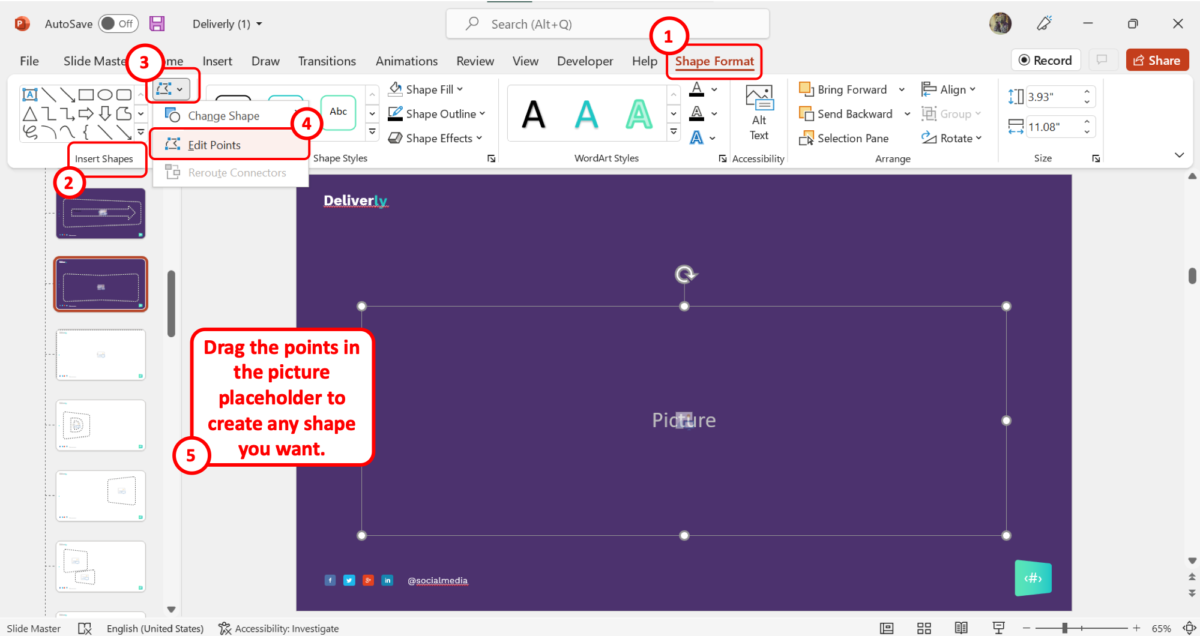
In the “Insert Shapes” group of the “Shape Format” tab, click on the “Edit Shape” option. Then click on the “Edit Points” option from the dropdown menu. Now you can drag the points in the picture placeholder to create any shape you want.
Step-4: Click on “Close Master View”
Finally, click on the “Slide Master” tab in the menu ribbon. Then all you have to do is click on the “Close Master View”option to save the customized picture placeholder and return to the “Normal” view.
7. How to Remove Image from a Picture Placeholder in PowerPoint?
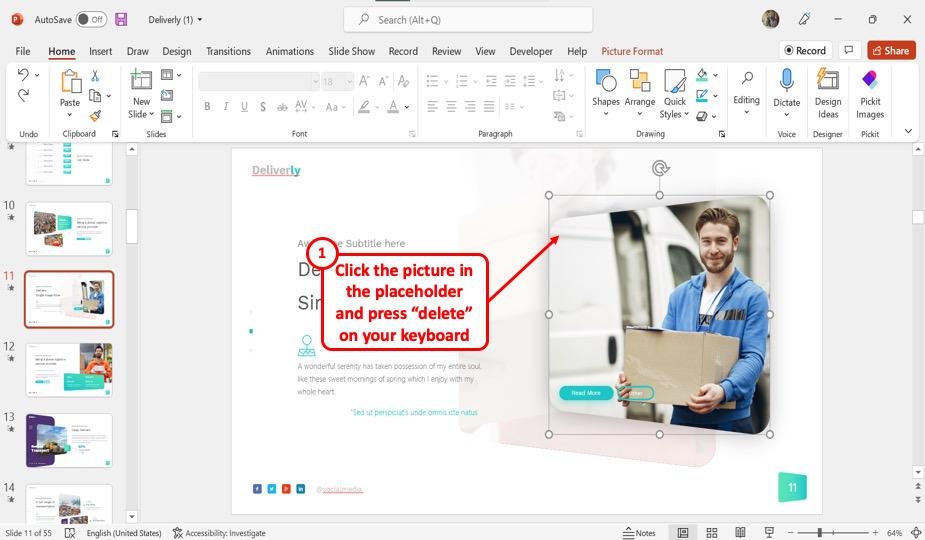
In Microsoft PowerPoint, you can only add or remove images from a picture placeholder in the “Normal” view. To remove a picture from a picture placeholder, all you have to do is click on the picture and press the “Delete” key on your keyboard. This will remove the image without deleting the placeholder in the slide.
8. How to Replace an Image from a Picture Placeholder in PowerPoint?
In the “Normal” view in PowerPoint, you can easily change pictures in a picture placeholder. The picture allows you to replace an inserted image with a different one without changing the formatting of the picture. To replace an image in a placeholder, follow the 3 easy steps.
Step-1: Click on the “Change Picture” option
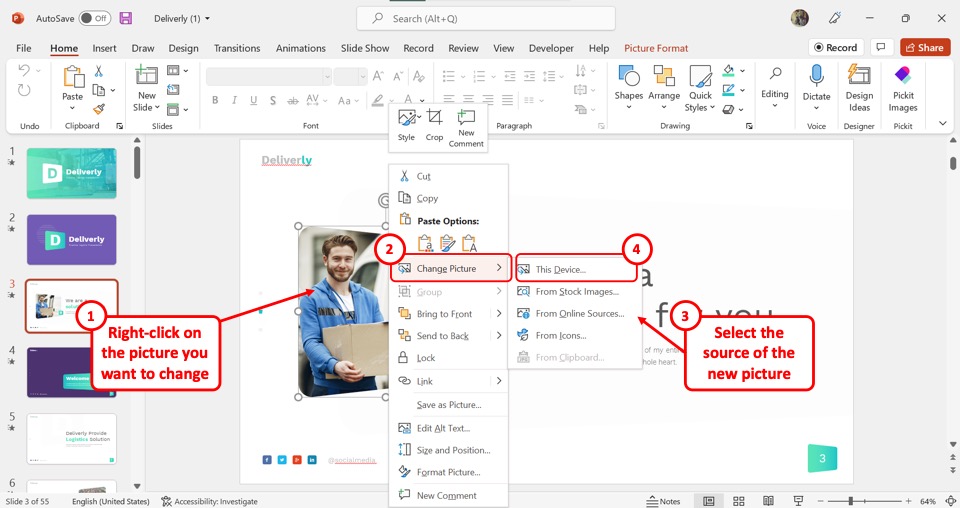
The first step is to “Right Click” on the picture that you want to replace. Then click on the “Change Picture” option from the right-click menu.
Step-2: Click on “This Device”
In the secondary menu by the “Change Picture” option, select the source of the new picture you want to add in the placeholder. To insert a picture from your computer, click on the “This Device” option (as shown in the image above).
Step-3: Click on the “Insert” button
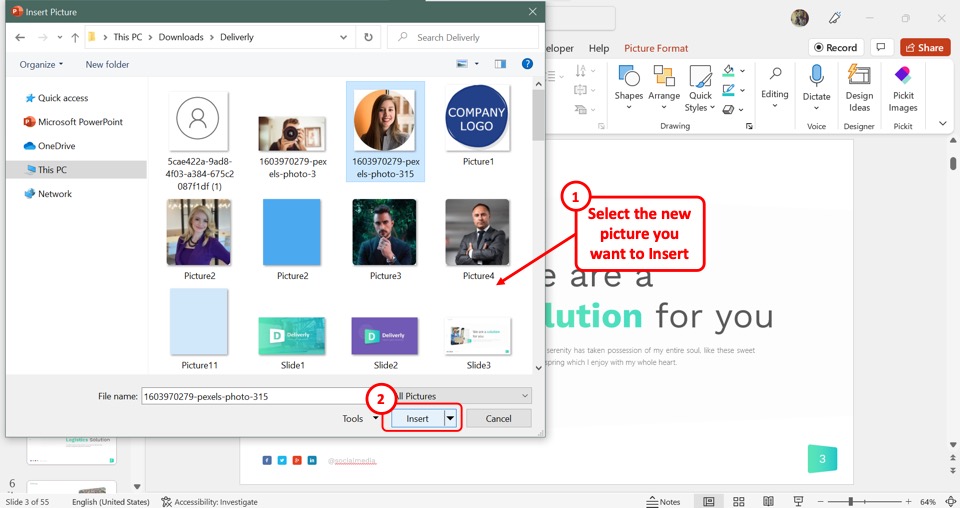
In the “Insert Picture” window, click on the picture that you want to insert. Then click on the “Insert” button at the bottom to replace the old picture in the picture placeholder.
Credit to katemangostar (on Freepik) for the featured image of this article (further edited).