![How to Take a Screenshot for PowerPoint? [Complete Guide!]](https://artofpresentations.com/wp-content/uploads/2022/11/Featured-Image-How-to-tae-a-screenshot-in-Powerpoint.webp)
Taking screenshots in Windows is a useful tool to have and learn. This is because sometimes we may not want to share our entire screen with an audience but only a section of it and put it into our PowerPoint presentations.
To take a screenshot, open the window from where you want to take the screenshot. Then, go to the PowerPoint file, and select the “Insert” tab. From the Images group, select the “Screenshot” option. Click on the Window that you previously opened and take your screenshot.
There are other ways to customize your capture, as listed in the article below. Read on to learn more about taking screenshots using different methods.
1. Taking a Screenshot Using PowerPoint
Microsoft PowerPoint offers a special feature that you can use to take a screenshot and insert it into the selected slide without having to save the screenshot first. To do so, you have to use the “Screenshot” option from the “Images” group of the “Insert” tab.
1.1 Method 1 – Available Window Screenshot
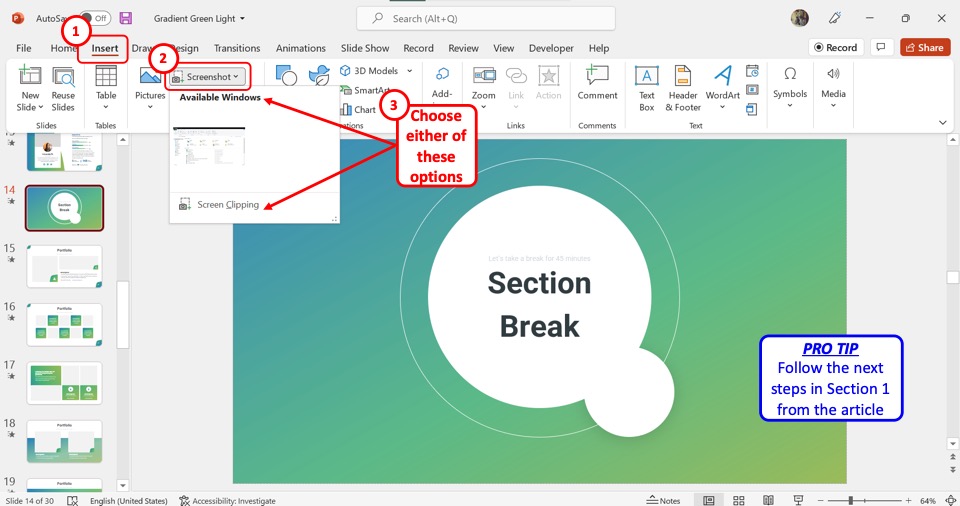
The “Available Windows” option in PowerPoint allows you to take a screenshot from any of the open windows on your computer. To take a screenshot using the “Available Windows” option, follow the 3 simple steps.
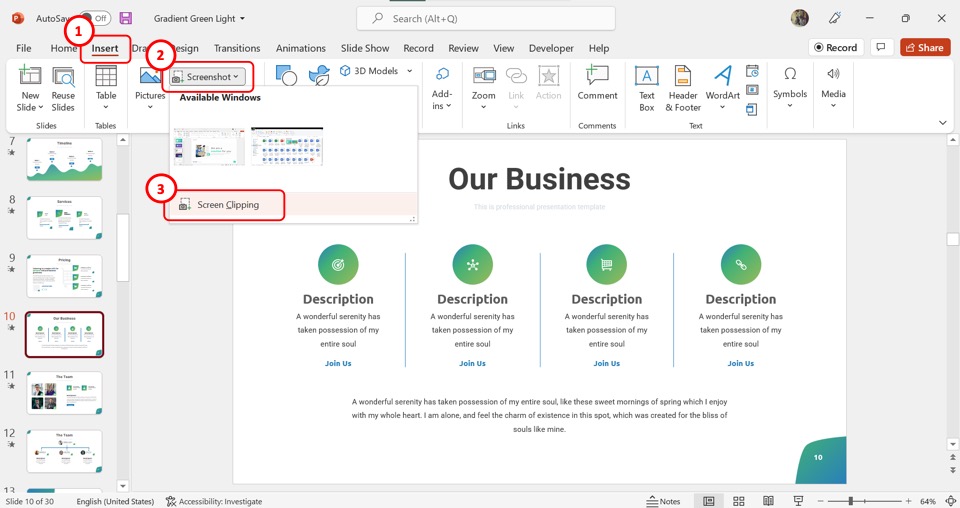
Step-1: Click on the “Insert” tab
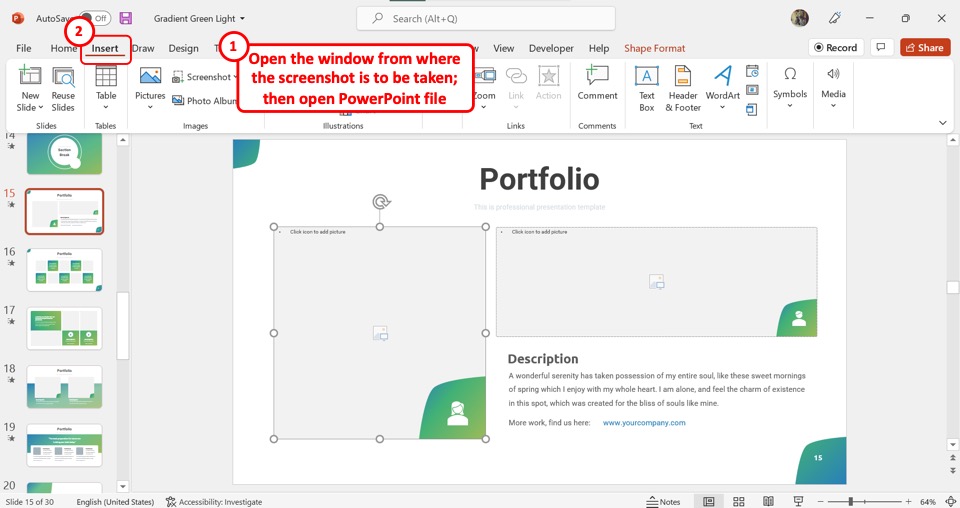
The first step is to open the window from where you want to insert the screenshot. Then open the PowerPoint file. In the menu ribbon located at the top of the screen, click on the “Insert” tab.
Step-2: Click on the “Screenshot” option
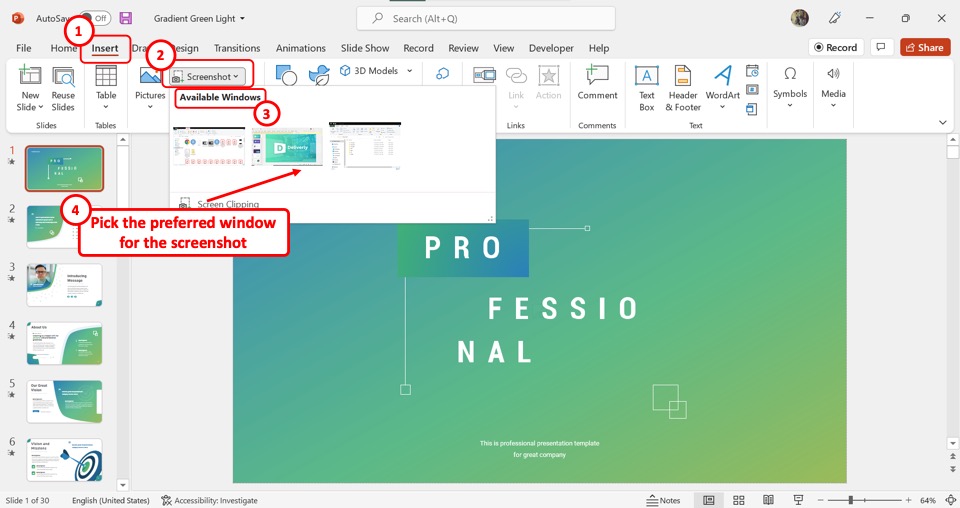
The next step is to take the screenshot. In the “Images” group of the “Insert” tab, click on the “Screenshot” option. In the dropdown menu under the “Screenshot” option, click on the preferred window from the “Available Windows” section.
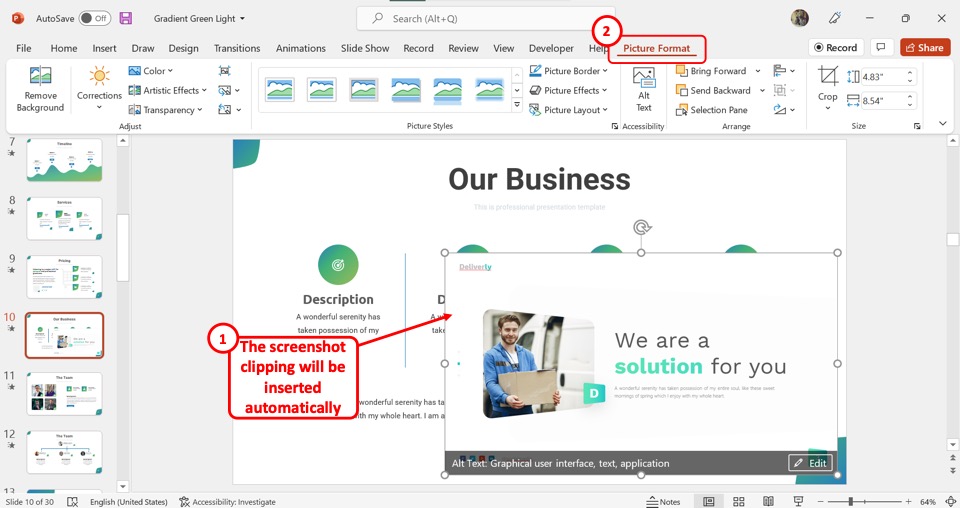
Step-3: Click on the “Picture Format” tab
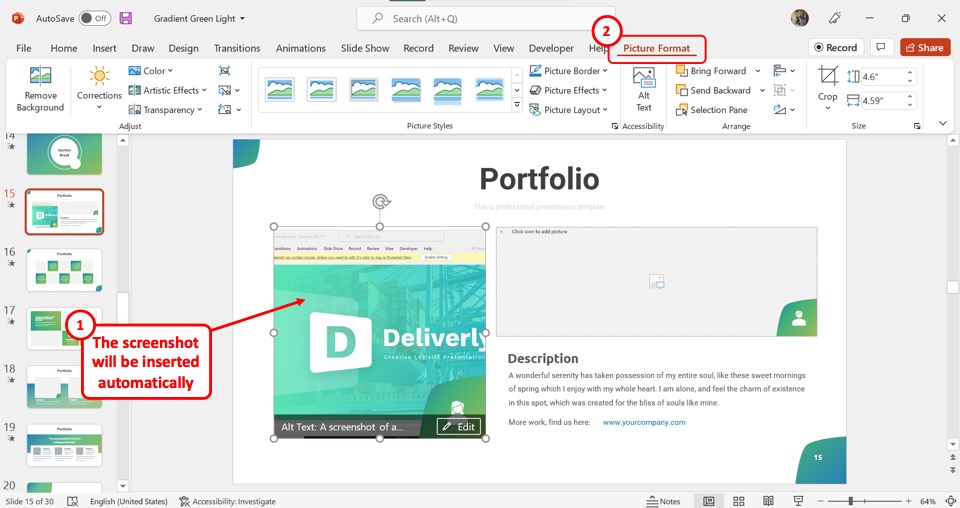
The screenshot will be automatically taken and inserted into the selected PowerPoint slide. Then all you have to do is click on the “Picture Format” tab from the menu ribbon located at the top of the screen to format the inserted screenshot.
1.2 Method 2 – Screen Clipping Option
Using the “Screen Clipping” option in Microsoft PowerPoint, you can directly take a screenshot and add it to your slide without the help of any other apps.
The feature allows you to take a screenshot from the open window on your computer which is automatically inserted into the slide. To add a screenshot using the “Screen Clipping” option, follow the 4 quick steps.
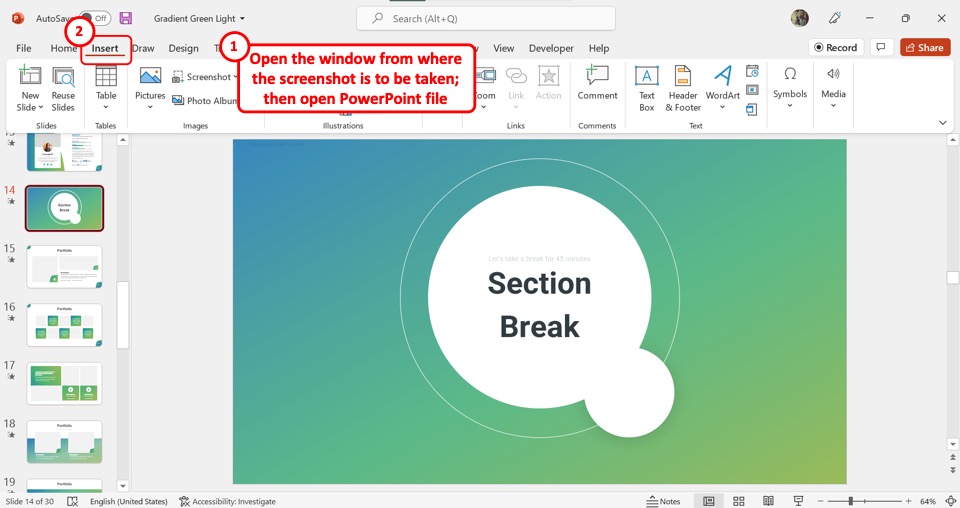
Step-1: Click on the “Insert” tab
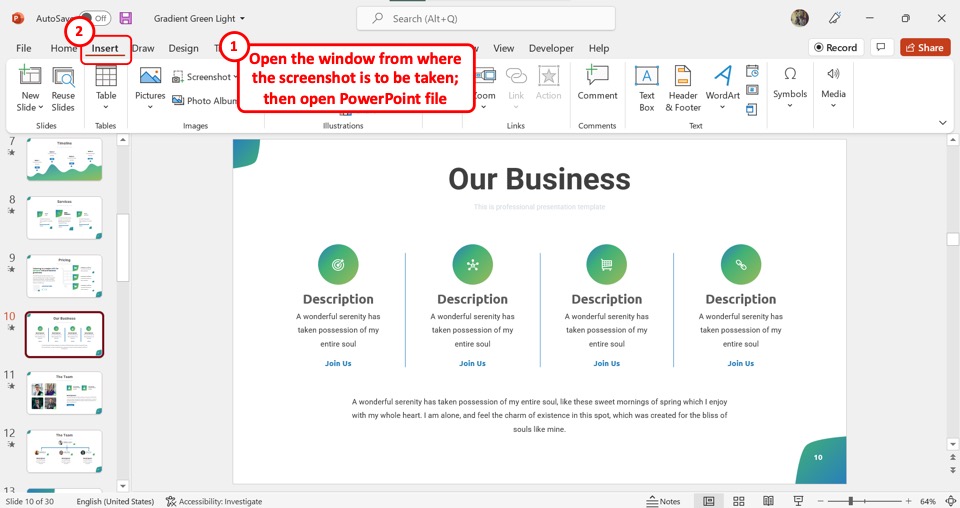
The first step is to open the window from where you want to take the screenshot. Then open the PowerPoint file. Click on the “Insert” tab from the menu ribbon located at the top of the screen.
Step-2: Click on the “Screen Clipping” option
In the “Images” group of the “Insert” tab, click on the “Screenshot” option. Then click on the “Screen Clipping”option from the dropdown menu under the “Screenshot” option. This will open the window right under the PowerPoint file.
Step-3: Drag the cursor to take the screenshot
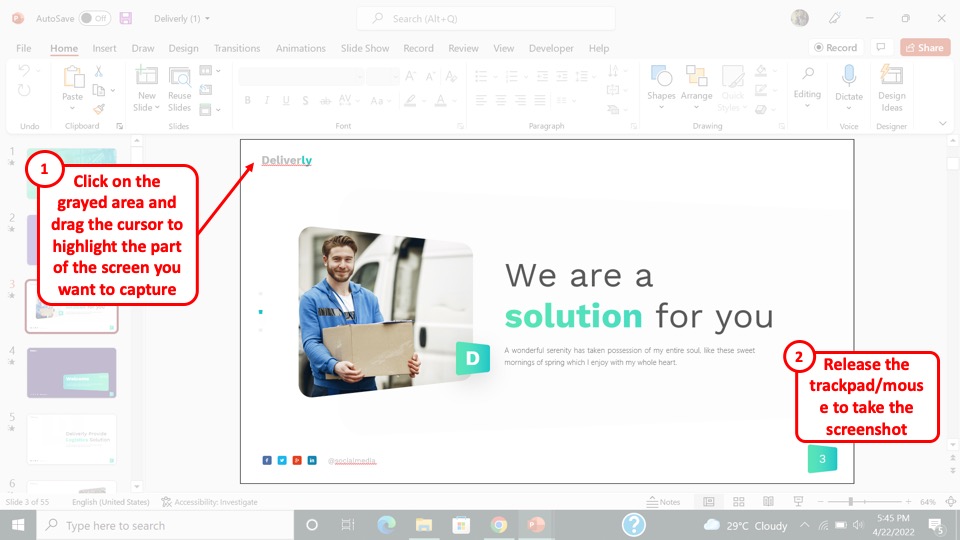
In the grayed-out window, you have to now click on the screen with the cursor and drag it to highlight the part of the screen that you want to capture. Then release the mouse or trackpad to take a screenshot of the selected part of the window.
Step-4: Click on the “Picture Format” tab
The screen clipping will automatically be added to the open slide in your PowerPoint file. You can now click on the “Picture Format” tab in the menu ribbon to format the screenshot.
2. How to Insert a Screenshot in PowerPoint?
In Microsoft PowerPoint, you can add a screenshot as an image in your slide. To do so, you can either use the “Screenshot” option or the “Clipboard” option in PowerPoint.
2.1 Method-1: Using the “Screenshot” Option
The “Screenshot” option in PowerPoint allows you to directly take and add a screenshot to the presentation slide without the help of another app. To insert a screenshot using the “Screenshot” option, follow the 2 simple steps.
Step-1: Click on the “Screenshot” option
The first step is to open the window from where you want to take the screenshot. Then open the PowerPoint file and click on the “Insert” tab from the menu ribbon.
Step-2: Insert the screenshot into the slide
In the dropdown menu under the “Screenshot” option, you can either click on a window under the “Available Windows” section or click on the “Screen Clipping” option to take the screenshot. Refer to section 1 to know more about which option you should use.
2.2 Method-2: Using the “Clipboard” Option
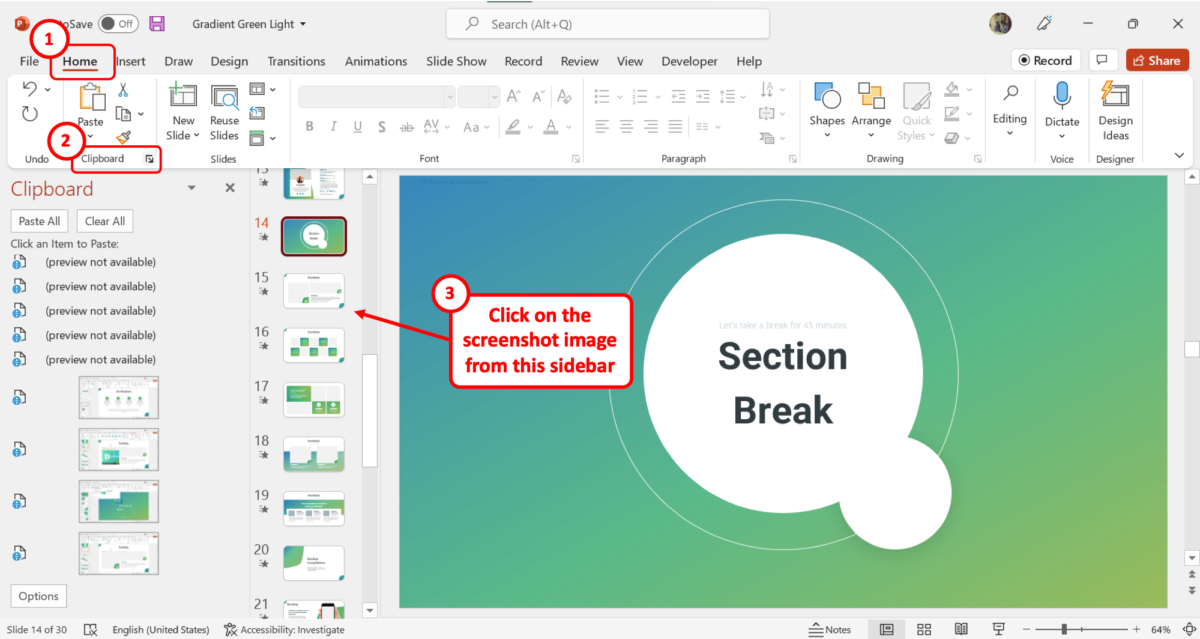
To insert a screenshot already taken on your computer into a PowerPoint slide, you can use the “Clipboard” option. You have to first open the “Clipboard” sidebar on the left side of your screen.
To do so, click on the dialog launcher icon at the bottom right corner of the “Clipboard” group in the “Home” tab. Then all you have to do is click on the screenshot image from the “Clipboard” sidebar to insert it into the slide.
3. Taking a Screenshot on Windows (Snipping Tool)
On a Windows computer, you can easily take a screenshot using the “Snipping Tool”. The tool lets you take a screenshot of the entire screen or a portion of it, and also edit the screenshot.
3.1 Method-1: Using the “Snip & Sketch” App
Using the “Snip & Sketch” app, you can access the snipping tool in Windows. To take a screenshot using the app, follow the 3 easy steps.
Step-1: Click on the “Snip & Sketch” app
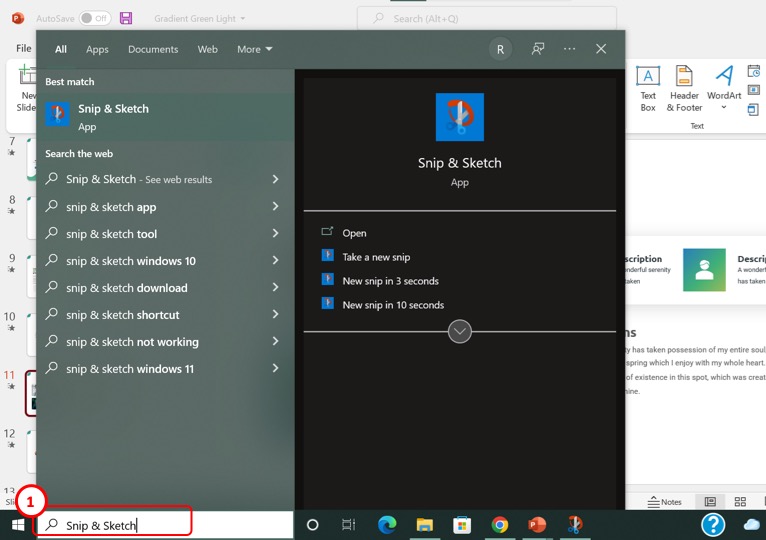
In the Windows search bar located in the left corner of the taskbar at the bottom of the screen, type in “Snip & Sketch”to find the app and open it.
Step-2: Click on the “New” option

In the “Snip & Sketch” app, click on the down arrow beside the “New” option located at the left corner of the top of the screen. In the dropdown list under the “New” option, select when you want to take the screenshot.
Step-3: Drag the cursor to take the screenshot
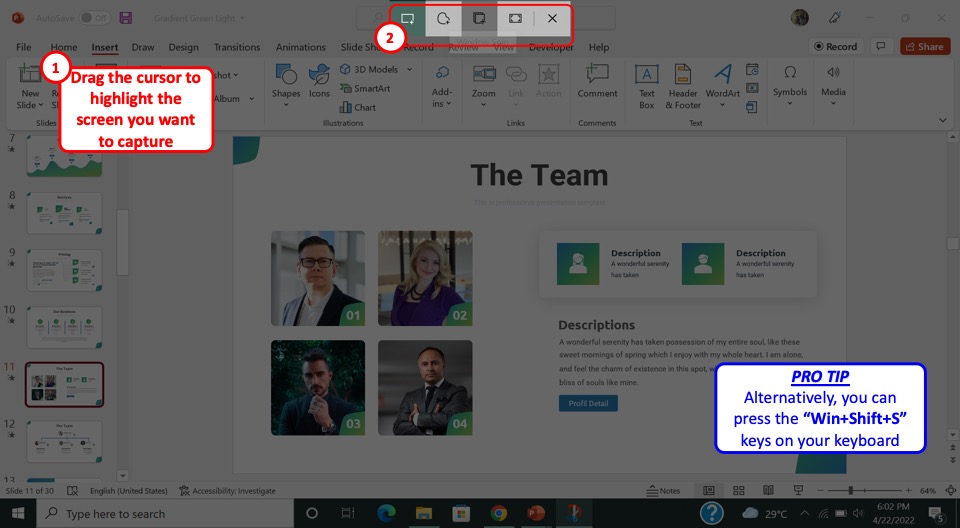
Finally, all you have to do is drag the cursor to highlight the part of the screen you want to capture. The selection tool is rectangle by default. You can also choose a different snipping tool from the toolbar at the top of the screen.
3.2 Method-2: Using the Keyboard Shortcut
To take a screenshot using the keyboard shortcut, all you have to do is press the “Win+Shift+S” keys on your keyboard.
In the grayed-out screen, drag the cursor to highlight the part of the screen that you want to capture. You can also select the shape of the screenshot from the toolbar at the top of the screen (as mentioned in the above image).
4. Taking a Screenshot on Mac
On a Mac device, you can take a screenshot using your keyboard only. There are different keyboard shortcuts that you can use depending on the part of the screen that you want to capture.
4.1 Method-1: Screenshot of the Entire Screen
To take a screenshot of the entire screen on a Mac, you have to press the “Shift+Command+3” keys on your keyboard. You can then click on the thumbnail in the corner of the screen to edit the screenshot.
4.2 Method-2: Screenshot of a Portion of the Screen
To take a screenshot of a portion of the screen, press the “Shift+Command+4” keys on your keyboard. Then click and drag the cursor to select a portion of the screen. Release your mouse or trackpad button to take a screenshot of the selected part of the screen.
You can now edit the screenshot by clicking on the thumbnail in the corner of your screen.
4.3 Method-3: Screenshot of a Window or Menu
To take a screenshot of a window or a menu, press the “Shift+Command+4+Space” keys on your keyboard. When the pointer changes to a camera icon, you can take a screenshot. All you have to do now is click on the window or menu to capture it.
Credit to cookie_studio (on Freepik) for the featured image of this article (further edited).