![How to Insert Checkbox in PowerPoint? [Complete Guide!]](https://artofpresentations.com/wp-content/uploads/2022/12/Feature-Image.jpg)
Presentations stand to benefit from a checklist which is known as a frequently used option helping the audience to properly visualize and digest the content. Fortunately, displaying an entire list with checkboxes and they check off as you work through each point, is an easy feature to use with Microsoft Powerpoint.
To insert checkbox in Powerpoint, click on “Options” from the “file” tab. Choose “Customize Ribbons” from the dialog box, scroll inside the “Main Tabs” box and click on the “Developer” option. Once the “Developer” tab is created, click on the “Checkbox” icon in the “Controls” group of the tab.
This article will also walk you through the steps on how you can use checkboxes in the slideshow as well as how to insert checkmarks using the “Symbol” option in the “Insert” Tab.
You can follow the complete guide below:
1. How to Insert Checkbox in PowerPoint?
In Microsoft PowerPoint, you can insert an interactive checkbox that you can use to check off items live in a presentation. To insert the interactive checkbox using the “Developer” tab, follow the 9 quick steps.
Step-1: Click on the “File” tab
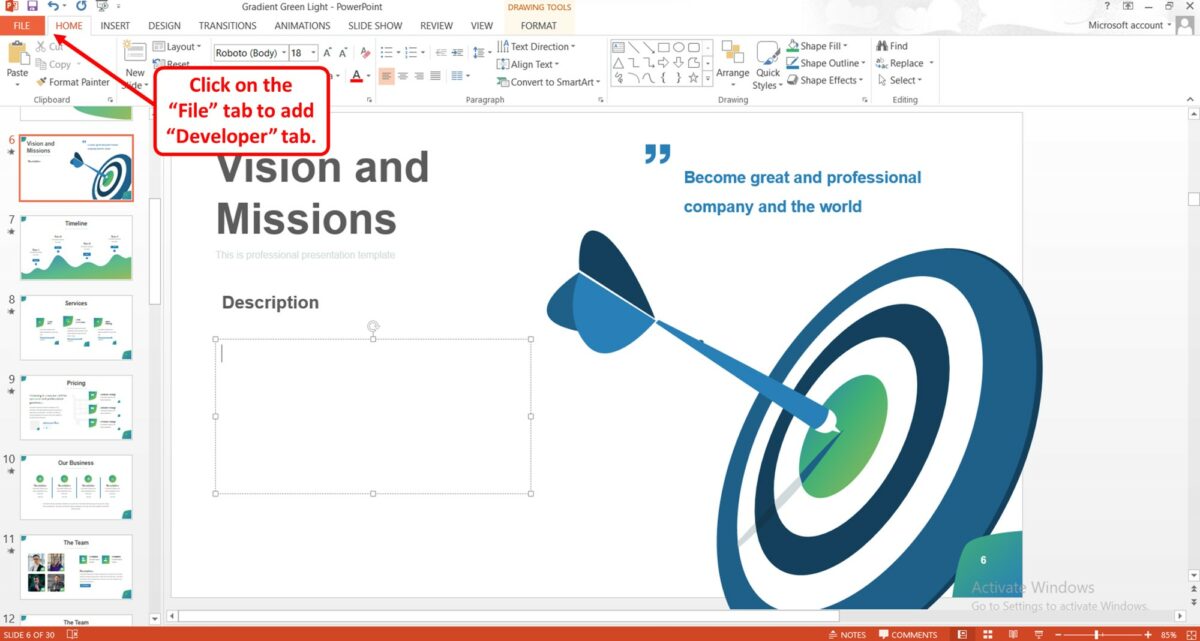
The first step is to add the “Developer” tab in the menu ribbon. Click on the “File” tab from the ribbon bar menu. It will open the file window.
Step-2: Click on “Options”

In the “File” screen, click on the “Options” options from the sidebar located on the left side of the screen. This will open a dialog box.
Step-3: Click on the “Customize Ribbon” option
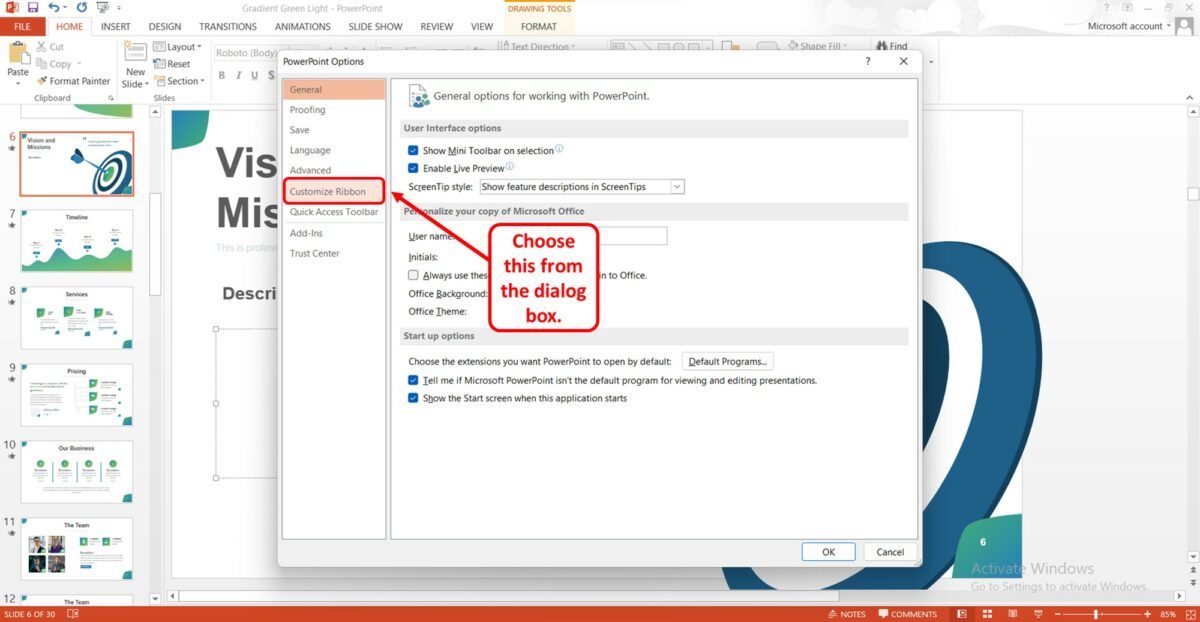
In the left column of the “PowerPoint Options” dialog box, click on the “Customize Ribbon” option.
Step 4: Click on the “Developer” option.
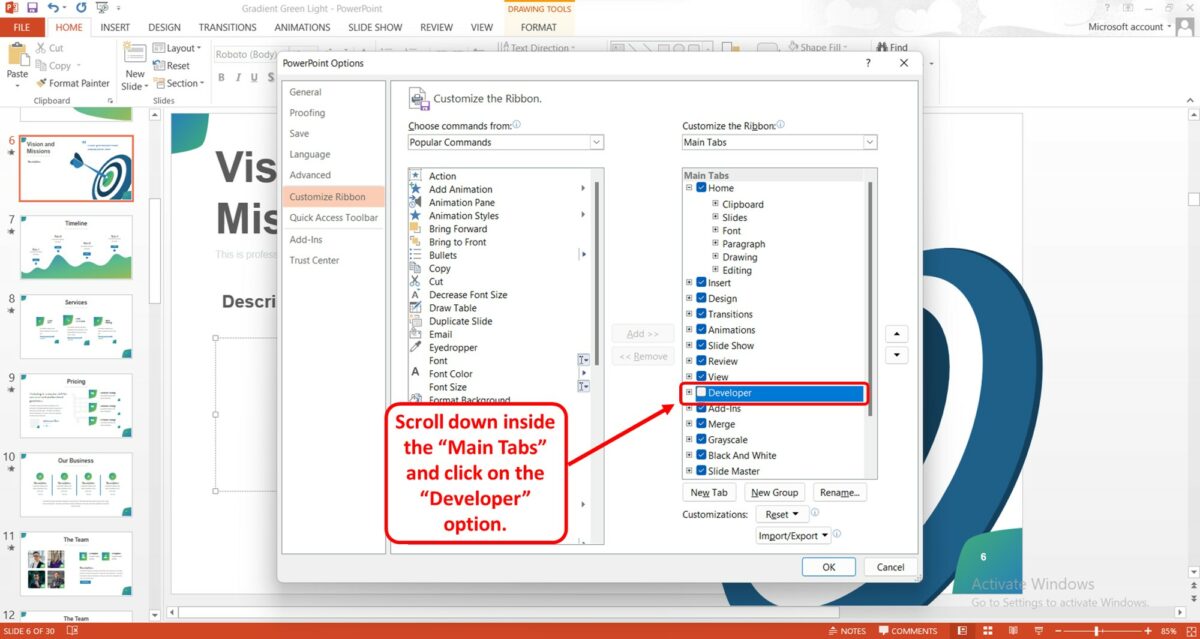
In the “Customize the Ribbon” column on the right side of the “PowerPoint Options” dialog box, scroll down inside the “Main Tabs” box. Then click on the “Developer” option. A blue checkmark will appear by the option when it is selected.
Step-5: Click on the “OK” option
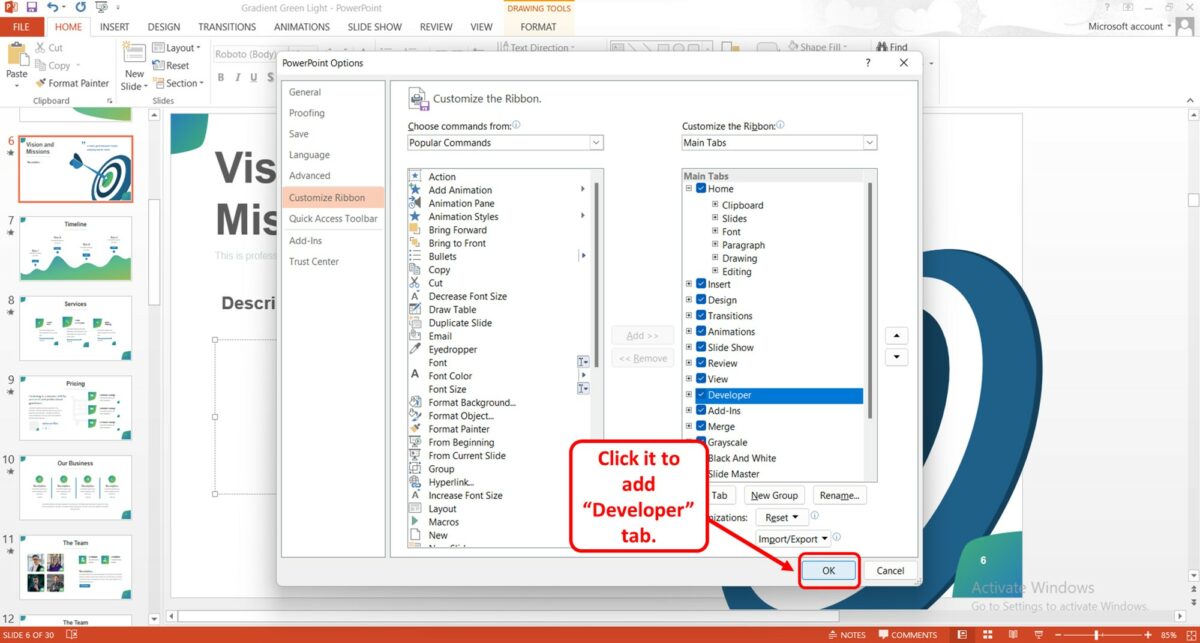
Now all you have to do is click on the “OK” option at the bottom of the “PowerPoint Options” dialog box to add the “Developer” tab in the menu ribbon.
Step-6: Click on the “Developer” tab
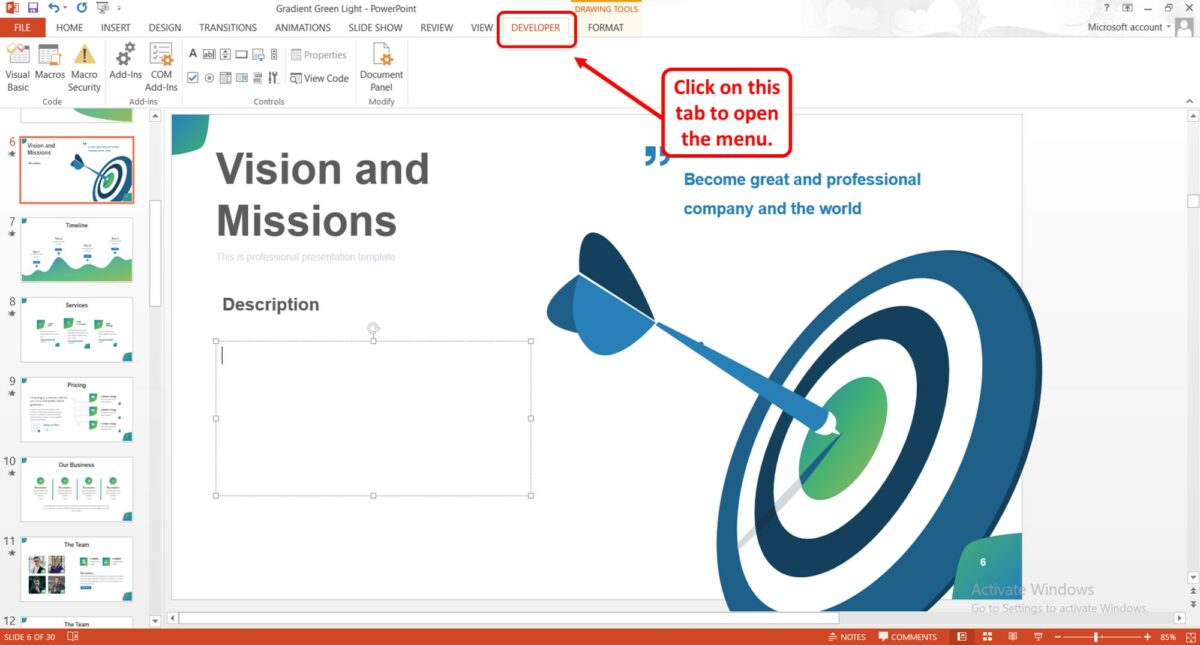
The next step is to open the “Developer” menu. All you have to do is click on the “Developer” tab from the menu ribbon to open the “Developer” menu.
Step-7: Click on the “Check Box” icon
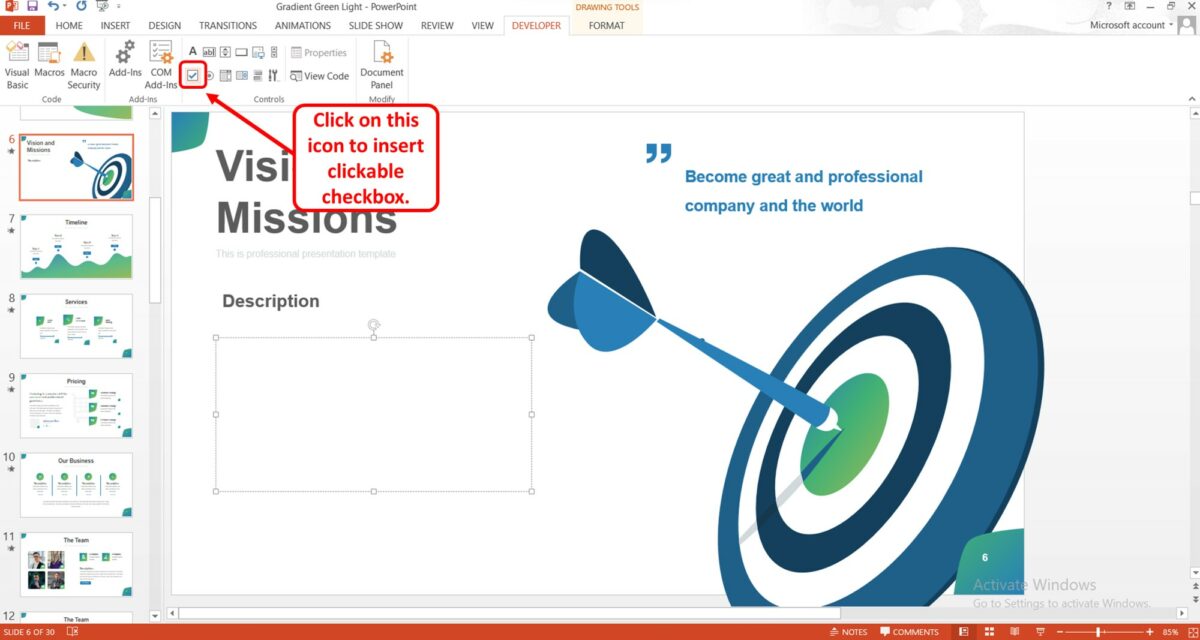
In the “Controls” group of the “Developer” menu, click on the “Check Box (ActiveX Control)” option to insert a clickable checkbox in the slide. It is the checkbox icon in the second row of the “Controls” group.
Step-8: Click on the “CheckBox object” option
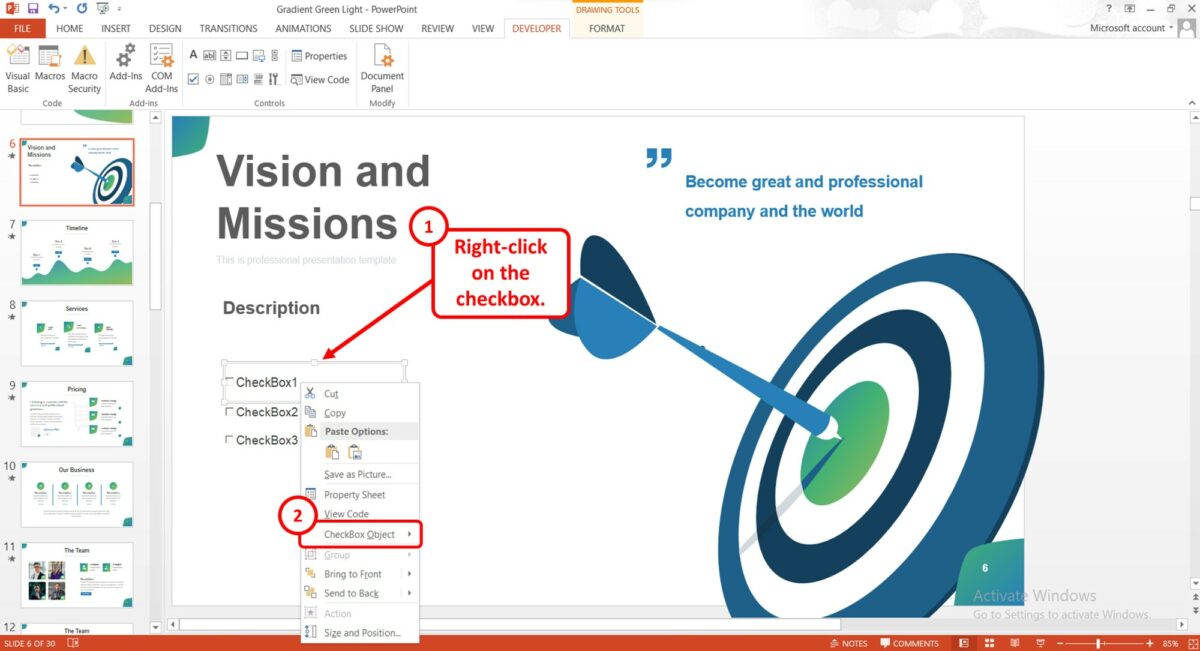
Now you can edit the text inside the “CheckBox”. All you have to do is “Right Click” on the checkbox. Then click on the “CheckBox Object” option in the right-click menu.
Step-9: Click on the “Edit” option
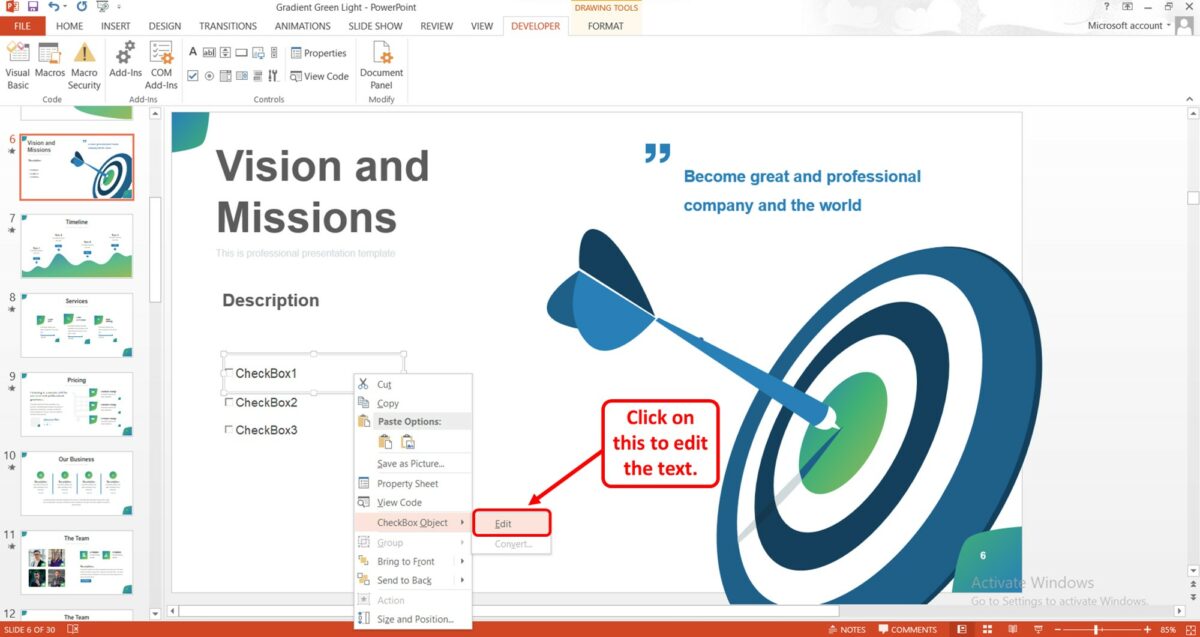
In the pop-up menu by the “CheckBox Object” option in the right-click menu, click on the “Edit” option. It will allow you to edit the text in the checkbox. You can remove all text from the checkbox.
1.1 How to Insert Checkbox in PowerPoint on Mac?
In PowerPoint for Mac, there is no “Developer” menu available. So, you cannot insert a clickable checkbox. However, you can use the “Animation” feature as a workaround. To do so, follow the 8 easy steps.
Step-1: Click on the “Insert” tab
Click on the “Insert” tab from the menu bar at the top of the screen. In the “Insert” menu, click on the “Shapes” option.
Step-2: Click on the “Rectangular” shape
In the second menu under the “Shapes” option, click on the “Rectangular” shape to create a checkbox.
Step-3: Click on the “Insert” tab
The next step is to click on the “Insert” tab. Then click on the “Icons” option in the “Insert” menu.
Step-4: Click on the “Check Mark” option
In the “Icons” dialog box, search for the check mark in the search box. Then click on your preferred check mark icon to insert the checkmark as an image.
Step-5: Reposition the checkmark
Now you have to move the checkmark into the checkbox. To do so, click and drag the checkmark over the rectangle checkbox. Then resize the checkmark icon to fit it inside the checkbox.
Step-6: Click on the “Animations” option
The next step is to add an animation effect to the checkmark. To do so, you have to first click on the checkmark to select it. Then click on the “Animations” option in the menu ribbon. Then select the “Appear” option.
Step-7: Click on the “Trigger” option
Click on the check mark in the “Selection Pane” sidebar on the right side of the screen. Then click on the “Trigger” option from the toolbar under the menu ribbon.
Step-8: Click on the “On Click of” option
In the pop-up menu by the “Trigger” option, click on the “On Click of” option. It will open another pop-up menu. Click on the “Box” option to add the animation effect to the checkmark inside the checkbox.
1.2 How to Insert Checkbox in PowerPoint on Android?
In the PowerPoint application for Android, you cannot add a clickable checkbox. However, you can draw a checkmark inside a checkbox during the presentation. To do so, follow the 3 quick steps.
Step-1: Tap on the “Insert” option
The first step is to expand the menu bar located at the bottom of the screen. Then select the “Insert” option from the menu bar.
Step-2: Tap on the “Shapes” option
In the “Insert” menu, tap on the “Shapes” option. It will open another menu bar for shapes. Tap on the “Rectangular” option in the menu bar to insert a rectangle box into the slide.
Step-3: Tap on the “Slideshow” icon
Finally, you can tap on the “Slideshow” icon at the top of the screen to start the presentation. Select the “Pen” icon from the presentation toolbar to draw a checkmark inside the rectangle checkbox while presenting.
2. How to Use Checkbox in PowerPoint Slideshow?
You can use a clickable checkbox in Microsoft PowerPoint to check off items from a list with the help of your audience. To use the checkbox during a presentation, follow the 2 easy steps.
Step-1: Click on the “Slide Show” tab
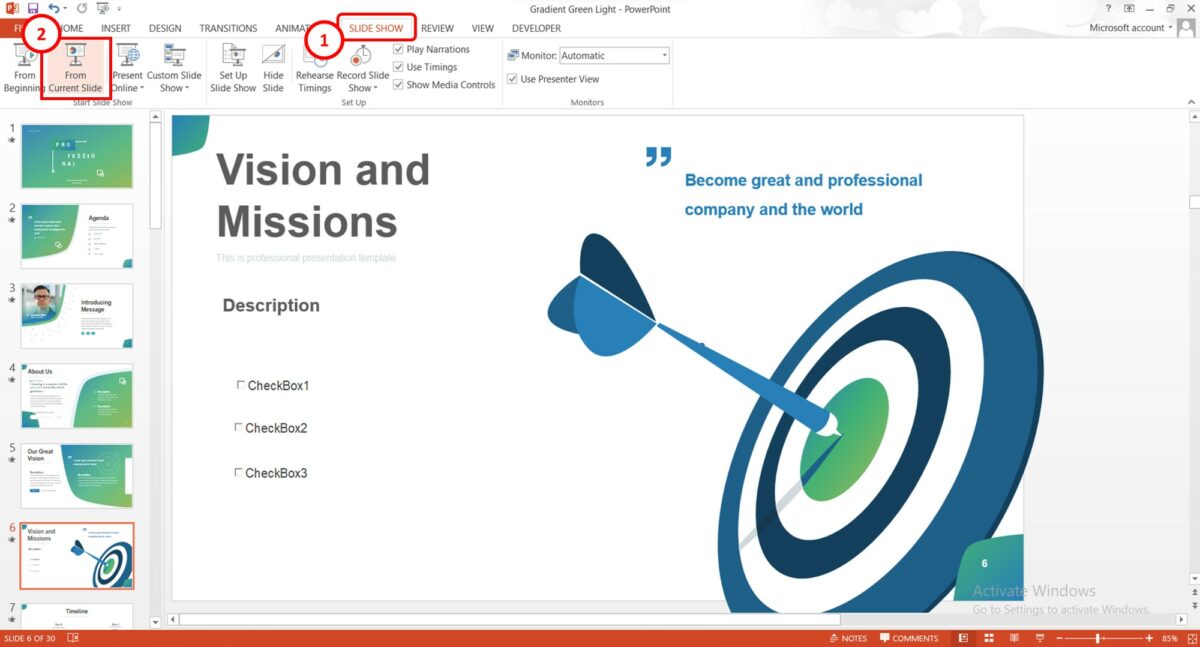
The first step is to start the presentation. Click on the “Slide Show” tab in the menu ribbon. Then click on the “From Current Slide” option in the “Start Slide Show” group of the “Slide Show” menu.
Step-2: Click on the checkbox

In the presentation view, you can now click on a checkbox to check off that item.
3. How to Insert Check Mark in PowerPoint?
To insert a checkmark in PowerPoint, you can use the “Symbol” feature. You can learn more about different methods to insert a checkmark in my article here. To insert a checkmark using the “Symbol” feature, follow the 4 simple steps.
Step-1: Click on the “Insert” tab
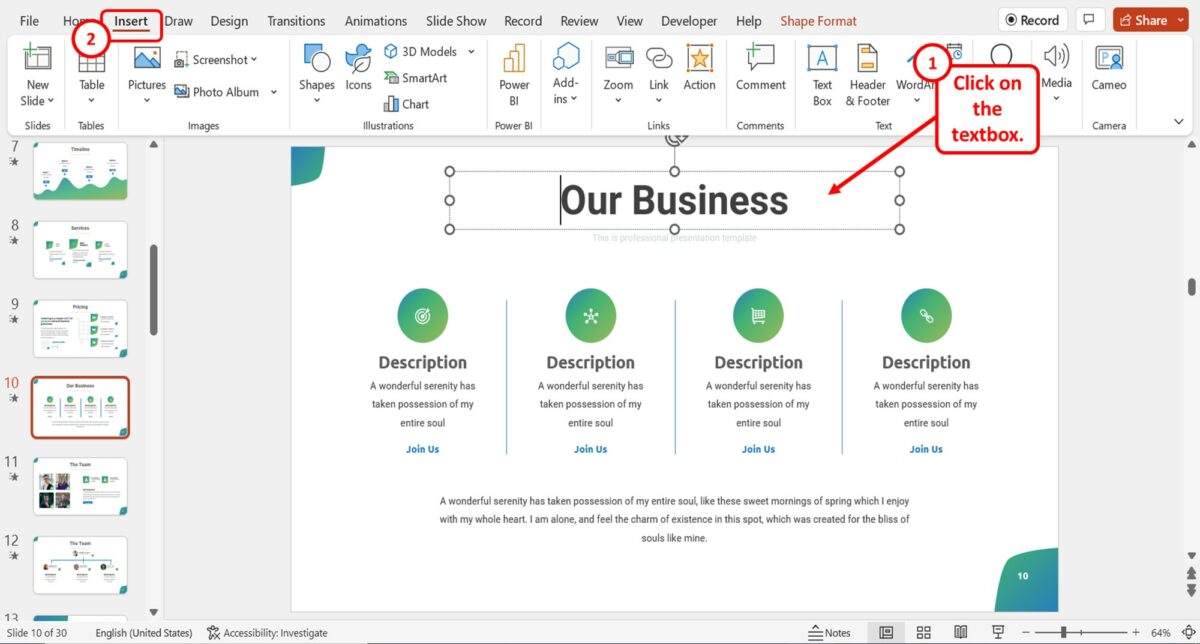
The first step is to click on the text box where you want to insert the checkmark. Then click on the “Insert” tab in the menu ribbon.
Step-2: Click on the “Symbol” option
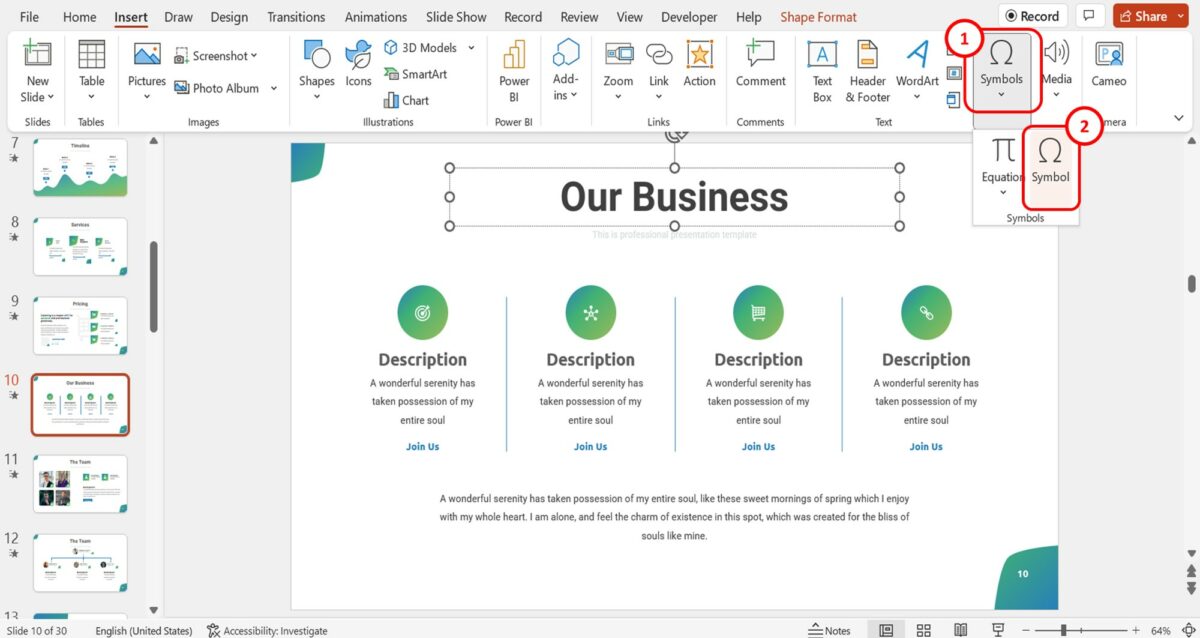
In the “Insert” menu, click on the “Symbols” button. Then click on the “Symbol” option in the dropdown list. This will open the “Symbol” dialog box.
Step-3: Click on the “Font” box
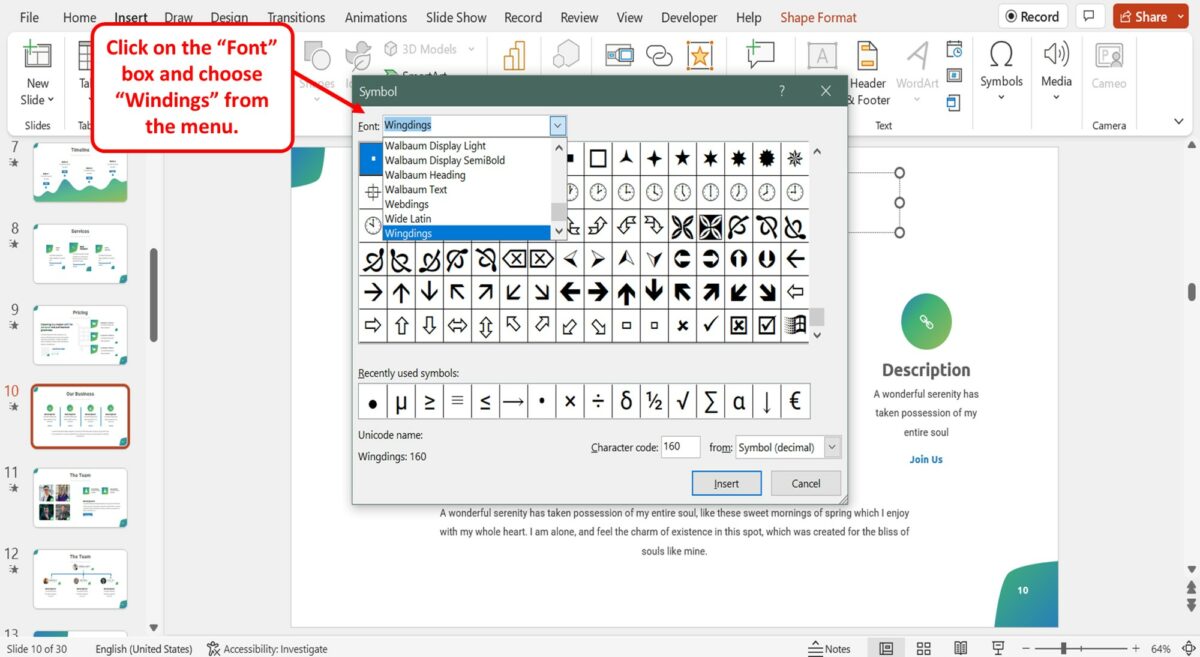
In the “Symbol” dialog box, click on the “Font” box at the top. Then click on the “Wingdings” option in the dropdown list under the “Font” box.
Step-4: Click on the “Insert” button
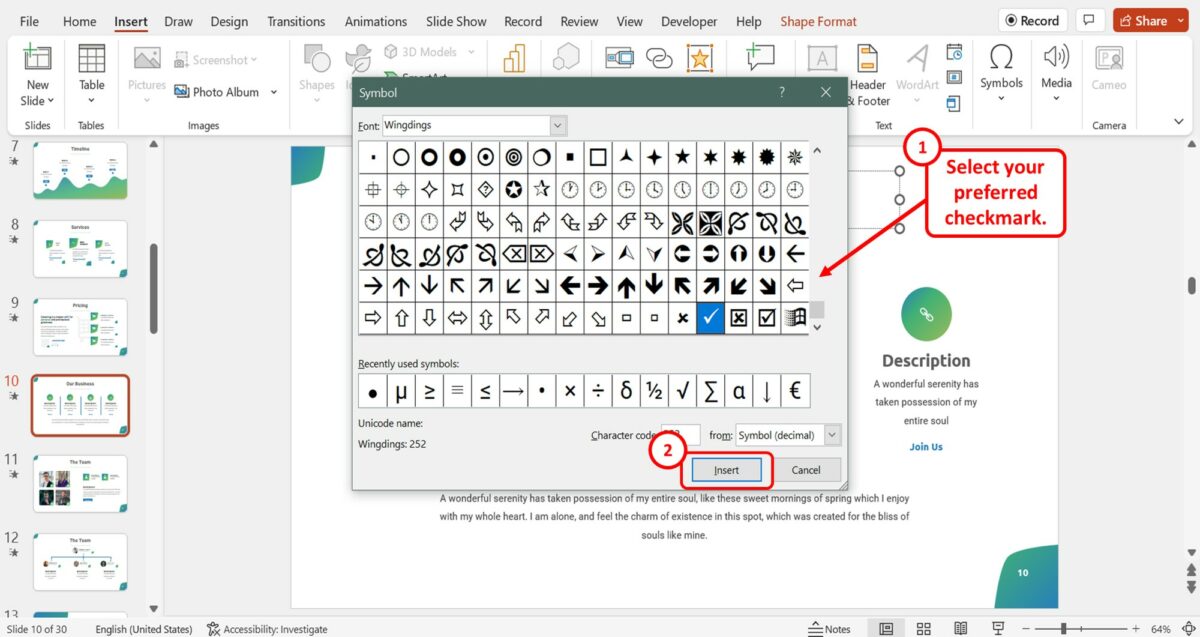
Now you have to scroll to the bottom of the symbols box to find the available checkmark options in PowerPoint. Click on your preferred checkmark to select it. Then all you have to do is click on the “Insert” button at the bottom of the dialog box to insert the checkmark in the selected text box.