![Insert Check Mark into PowerPoint [Step-by-Step Guide]](https://artofpresentations.com/wp-content/uploads/2023/01/ezgif.com-gif-maker-3.webp)
You can choose to add a check mark in a PowerPoint presentation in many different ways. One of the easiest ways is as below:
To insert a check mark in PowerPoint, click on the “Insert” tab. Then, click on the “Symbols” option in the “Symbol” group. From the dialog box that opens up, click on the “Font” option and change the font to “Windings”. Then, locate the check mark, click on it, and click “Insert”.
There are a few other ways you can insert a check mark in PowerPoint. In this article, I will show you all the different ways you can insert a check mark in your PowerPoint presentation. I will show you all the steps with pictures so that you repeat them on your presentation with ease!
So, without further ado, let’s get started!
1. How to Insert Check Mark in PowerPoint?
Checkmark symbols are frequently used in PowerPoint presentations. Checkmarks can be used for purposes like a bullet checklist, an image, or an icon.
You can also use one to check off an item in an interactive checkbox. There are several methods for inserting a checkmark into a PowerPoint presentation.
1.1 Method-1: Using “Copy and Paste.”
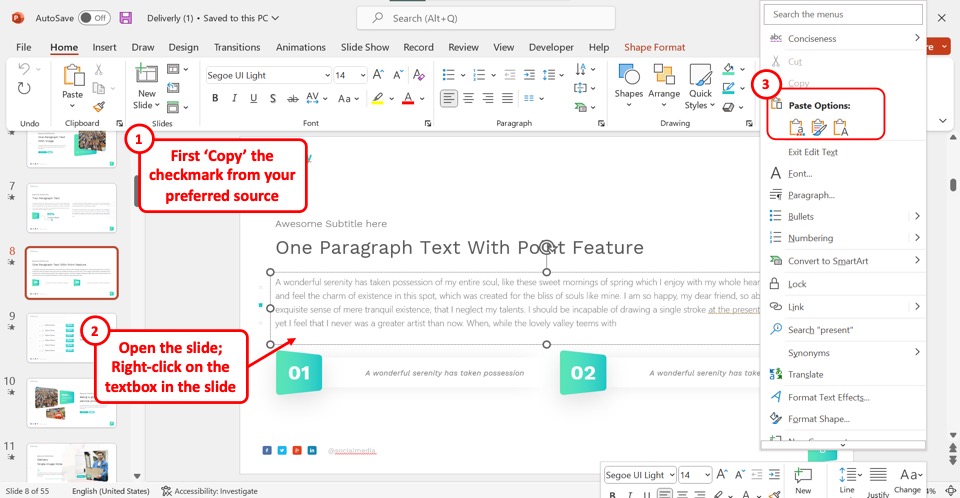
You can insert a checkmark in PowerPoint using the “Copy” and “Paste” features. To do so, you have to first copy the check mark symbol from your preferred source.
Then open the PowerPoint slide where you want to insert the check mark. “Right Click” on a text box in the slide. Then click on the “Paste” option in the right-click menu to insert copied the check mark.
1.2 Method-2: Using the PowerPoint Symbols
In the PowerPoint application, you can use the “Symbols” feature to insert a checkmark in the text box. To do so, all you have to do is to follow the 6 easy steps.
Step-1: Click on the “Insert” tab
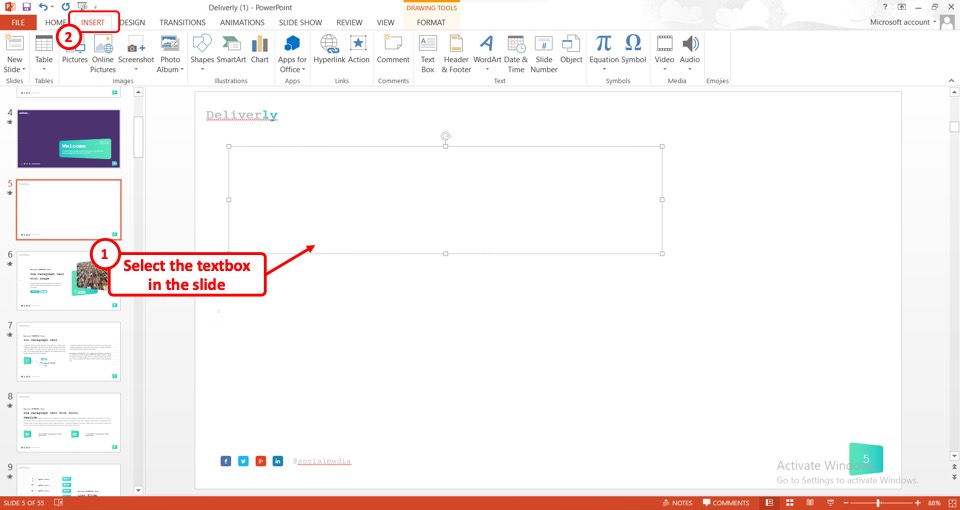
First, you have to select the text box where you will insert the check mark. Then click on the “Insert” tab in the menu ribbon at the top of the screen.
Step-2: Click on the “Symbol” option
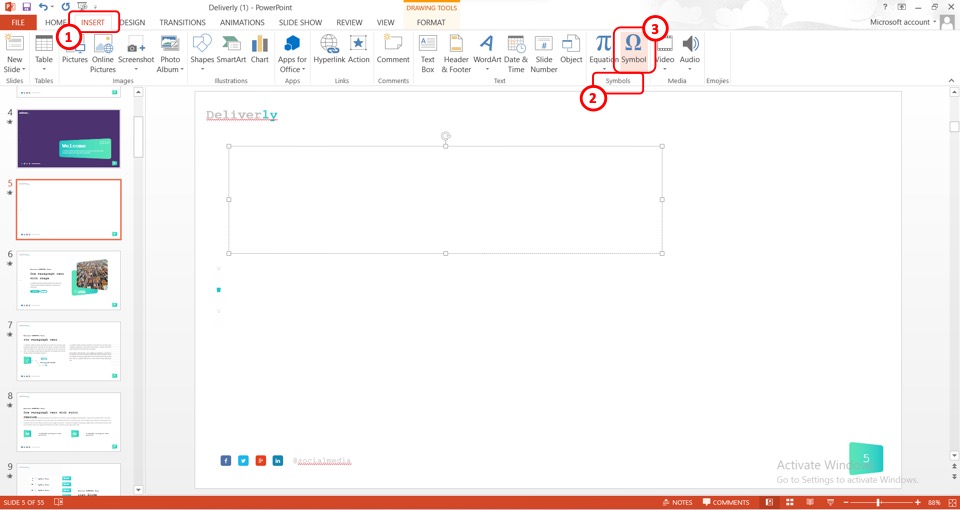
In the toolbar under the “Insert” tab, click on the “Symbol” icon. It is located in the “Symbols” group.
Step-3: Click on the “Wingdings” option
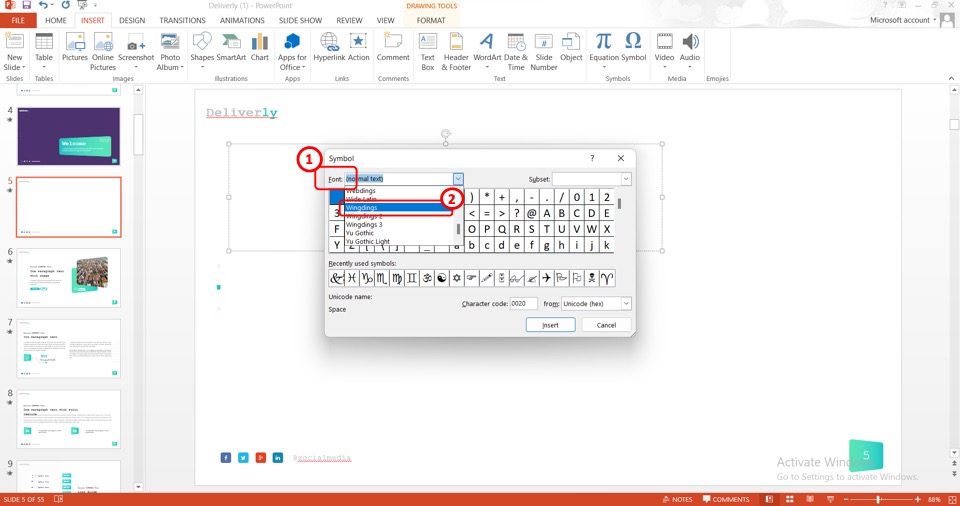
The next step is to change the font. To do so, click on the “Font” box in the “Symbol” dialog box. In the dropdown menu under the “Font” box, click on the “Wingdings” option.
Step 4: Click on the “Check Mark” Symbol
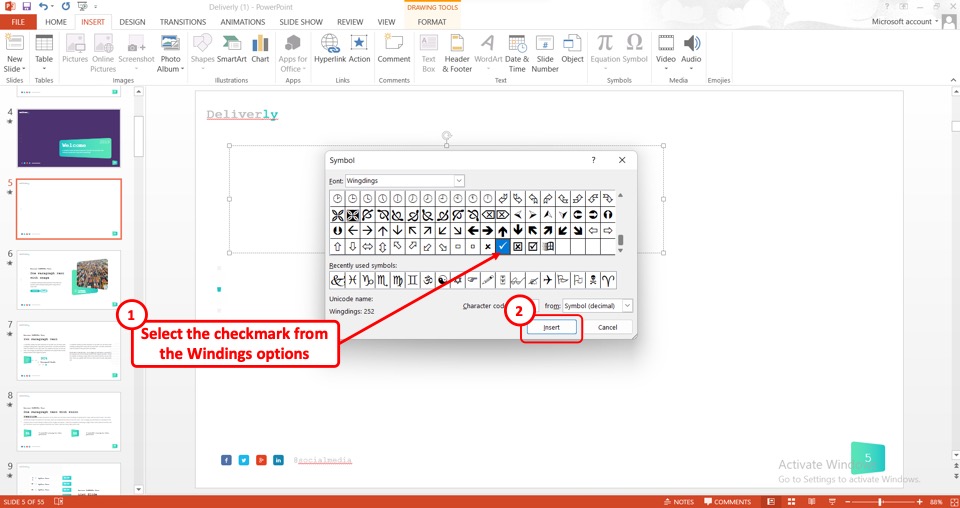
Once you click the “Wingdings” option, all the Wingdings symbols will appear in the dialogue box. Now you have to scroll down to find the “Check Mark” symbol. Then click on the “Check Mark” symbol.
Step-5: Click on the “Insert” button
Now all you have to do is to click on the “Insert” option from the dialogue box to insert the symbol in the selected text box (as shown in the above image).
Step-6: Click on the “Close” option
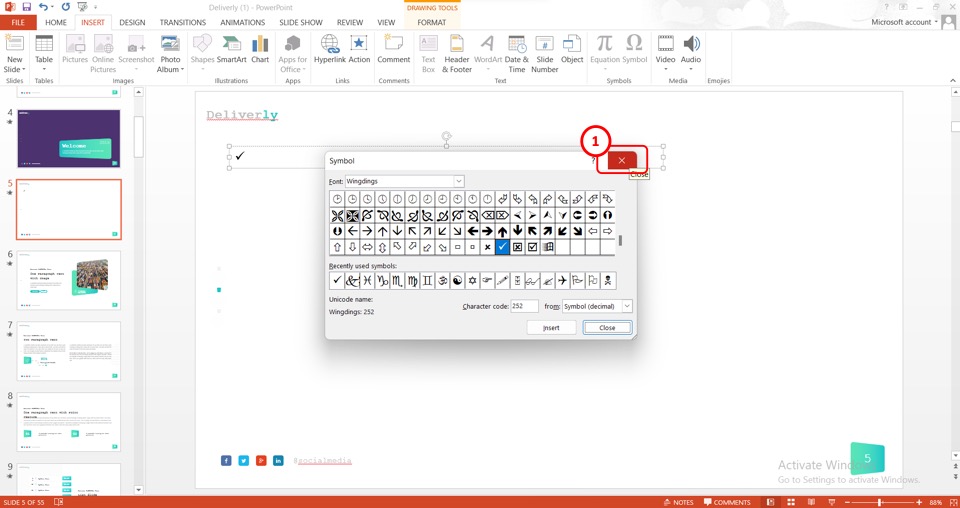
Finally, you can return to the main slide. To close the “Symbol” dialog box, click on the “Close” option which is the red “X” icon at the top right corner of the dialog box.
1.3 Method-3: Using an Emoji
You can insert the check mark in a PowerPoint slide using the check mark “Emoji”. To do so, follow the 2 quick steps.
Step-1: Press the “Win+.” keys

First, click on the text box where you want to insert the check mark emoji. Then you have to press the “Win+.” keys on your keyboard. It will open the “Windows Emoji Keyboard” dialog box containing emojis and Gifs.
Step-2: Click on the “Check Mark” emoji

Now you have to click on the search bar in the dialog box. Then type “Check Mark” on your keyboard in the search bar. You can find all the check mark emoji options Click on your preferred “Check Mark” emoji to insert the check mark emoji in the selected text box.
1.4 Method-4: Using the PowerPoint Icons
In Microsoft PowerPoint, it is very easy to insert a check mark. To do so, all you have to do is follow the 4 quick steps.
Step-1: Click on the “Insert” tab
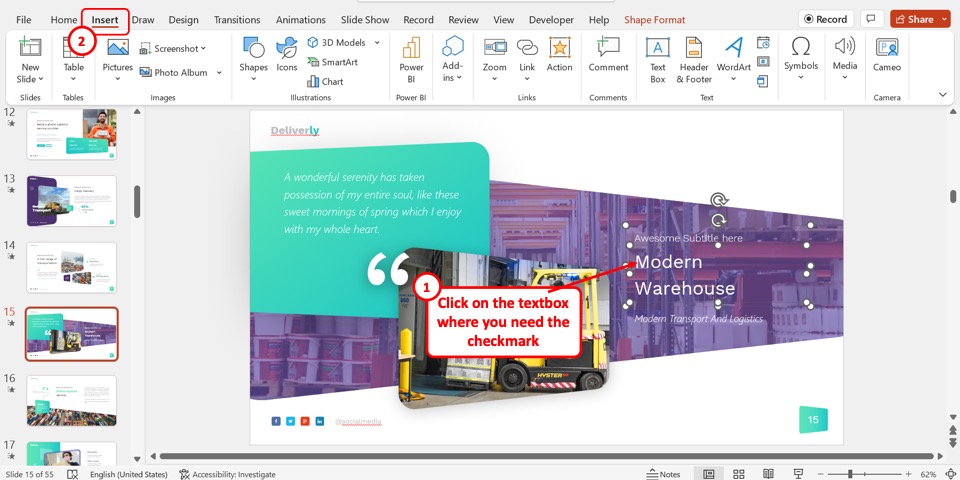
First, you have to select the text box where you want to insert the check mark. Then click on the “Insert” tab from the menu ribbon at the top of the screen.
Step-2: Click on the “Icons” option

In the “Insert” tab from the “Illustrations” group, click on the “Icons” option. A dialogue box will appear.
Step-3: Click on the search box
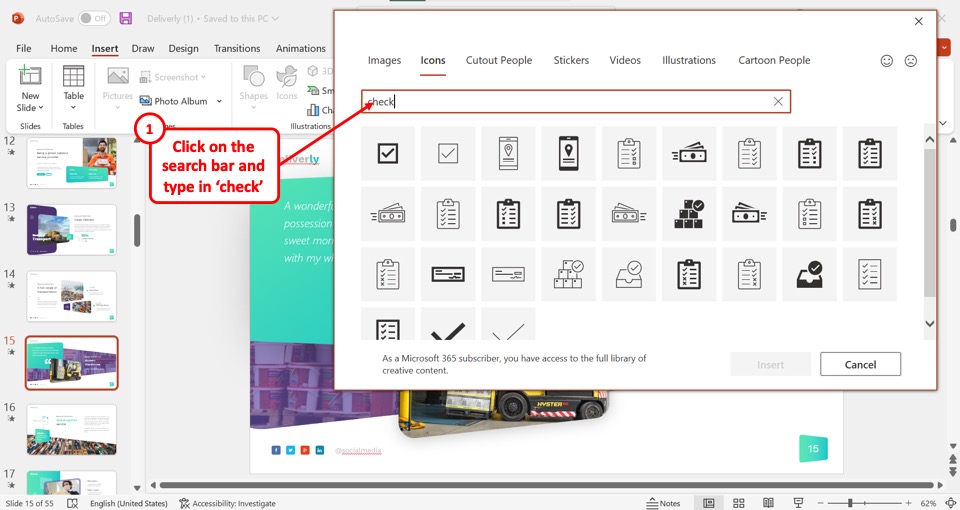
The next step is to click on the search box in the dialog box. Type in “check” in the search box to find all the check mark icons available in PowerPoint.
Step-4: Click on the “Insert” option
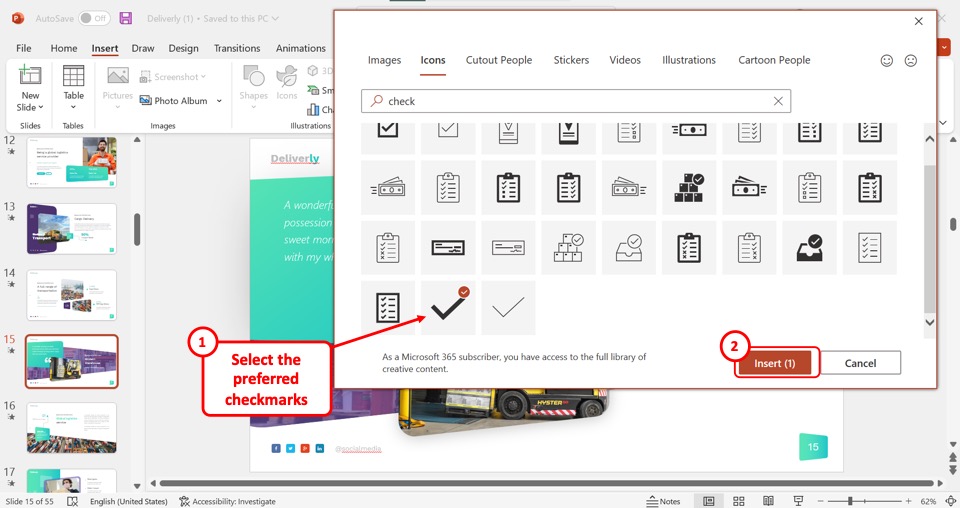
Now, you can select one or more preferred check mark icons from the suggested icons. Finally, click on the “Insert”option to insert the check mark symbol in the selected text box.
2. How to Insert Check Mark without a Text Box in PowerPoint?
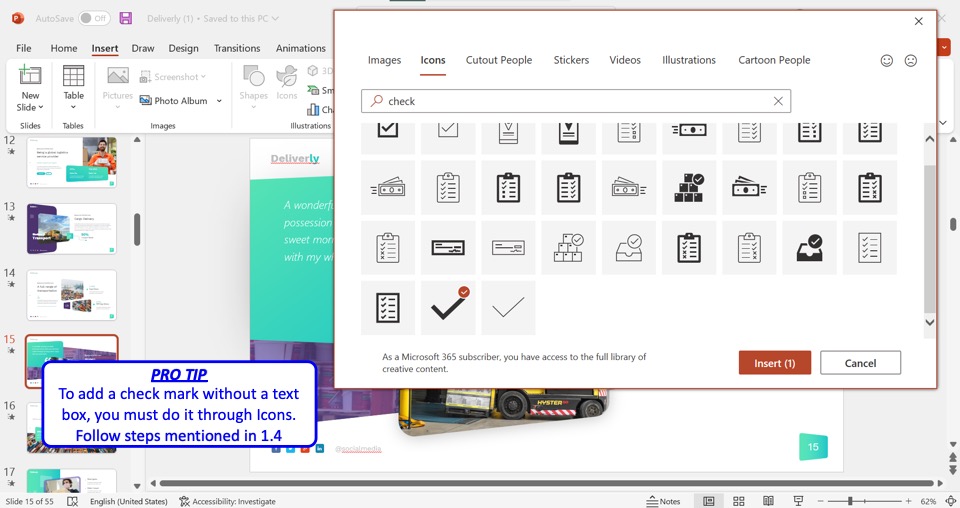
In Microsoft PowerPoint, you can insert a checkmark as a symbol, emoji, or an icon. However, since both the symbol and the emoji treat the check mark symbol as text, you can only add it in a text box. On the other hand, the PowerPoint icons are added as images on a slide.
To insert a checkmark without a text box, you have to insert it as an icon. To do so, follow the steps mentioned in section 1.4.
3. How to Insert Check Mark in a List?
You can insert a checkmark in a list using the “Bullets” option in PowerPoint. To do so, all you have to do is to follow the 2 easy steps.
Step-1: Click on the “Bullets” icon
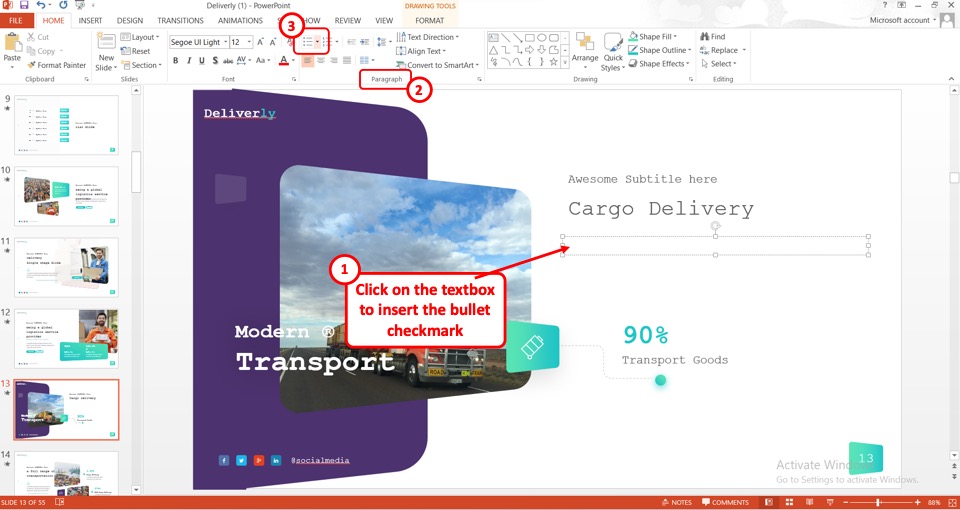
The first step is to click on the text box where you want to insert the checklist. Then you have to click on the “Bullets” icon in the “Paragraph” group in the toolbar located under the menu ribbon at the top of the screen.
Step-2: Click on the “Check Mark” Bullets

In the drop-down menu under the “Bullets”icon, click on the “Check Mark” bullets to insert the check mark in the selected bullet list.
4. How to Add Check Mark in a Checkbox in PowerPoint?
In an interactive checkbox in Microsoft PowerPoint, you can check off items during the presentation. To add a checkmark to check off items during a presentation, follow the 3 simple steps.
Step-1: Click on the “Slide Show” tab
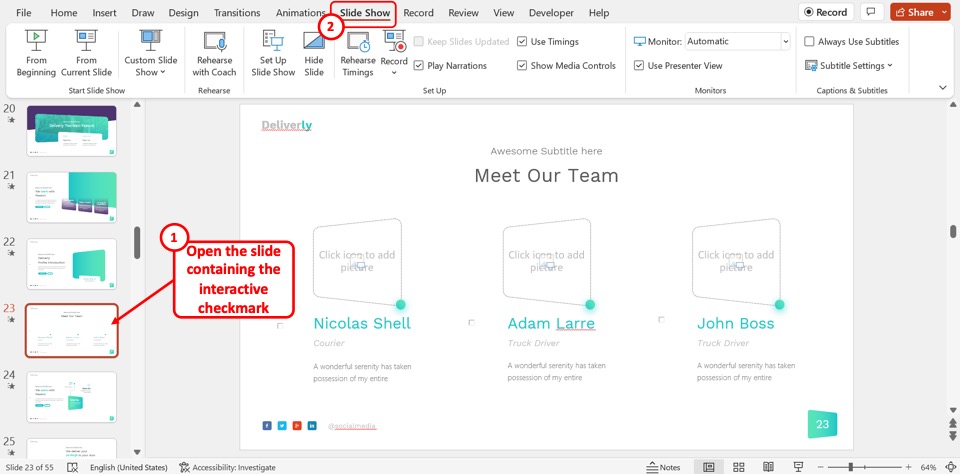
In the PowerPoint presentation, open the slide containing the interactive checkbox. Then click on the “Slide Show” tab in the menu bar located at the top of the screen.
Step-2: Click on the “From Current Slide” option
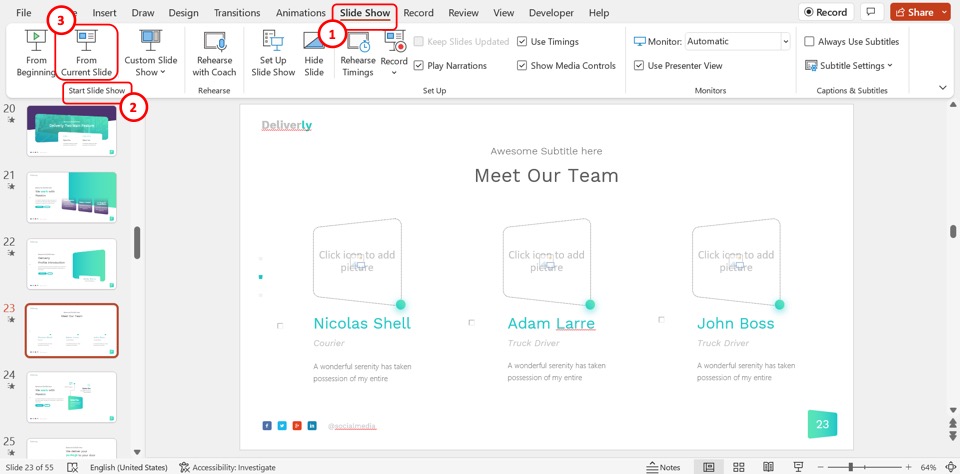
In the “Start Slide Show” group of the “Slide Show” menu, click on the “From Current Slide” option. Alternatively, you can press the “Shift+F5” keys on your keyboard to start the presentation.
Step-3: Click on the checkbox

Now all you have to do is click on a checkbox in the slide in the slide show view to add a check mark in the check box.
Credit to diana.grytsku (on Freepik) for the featured image of this article (further edited).