![How to Add Picture to a Shape in PowerPoint [Full Guide!]](https://artofpresentations.com/wp-content/uploads/2022/09/Featured-image-Add-a-picture-to-shape-in-PPT.webp)
How often have you seen a PowerPoint presentation and realized that your mind has wandered elsewhere? Why? Because it is so text-heavy and has no pictures or graphics to catch your attention.
Therefore, it is true that pictures and graphical representations play a very important role in presentations. In fact, 80% of people have now begun to move to pictures-only presentations. Better yet, use pictures in conjunction with the shape! But how does one add pictures to a shape in a presentation?
To add a picture to a shape in PowerPoint, first, select the shape. Next, click on the “Shape Format” tab, and choose the “Fill” option from the ribbon. From the dropdown, click on “Picture” to insert a picture in a shape. You can also use the “crop to shape” feature or the “Merge Shapes” option.
Still, find it difficult? Read on and find a step-by-step explanation of how to add pictures to a PowerPoint.
1. Inserting a Picture in a Shape
In Microsoft PowerPoint, you can add a picture into an existing shape inside a slide. You can also insert a new picture as a shape pre-formatted in PowerPoint.
Method 1 – Using the Shape Fill Option
The “Shape Fill” option in PowerPoint allows you to add color, pattern, picture, etc. into a shape in the presentation slide. To insert a picture into a shape using this feature, follow the 4 simple steps.
Step-1: Click on the “Fill” option
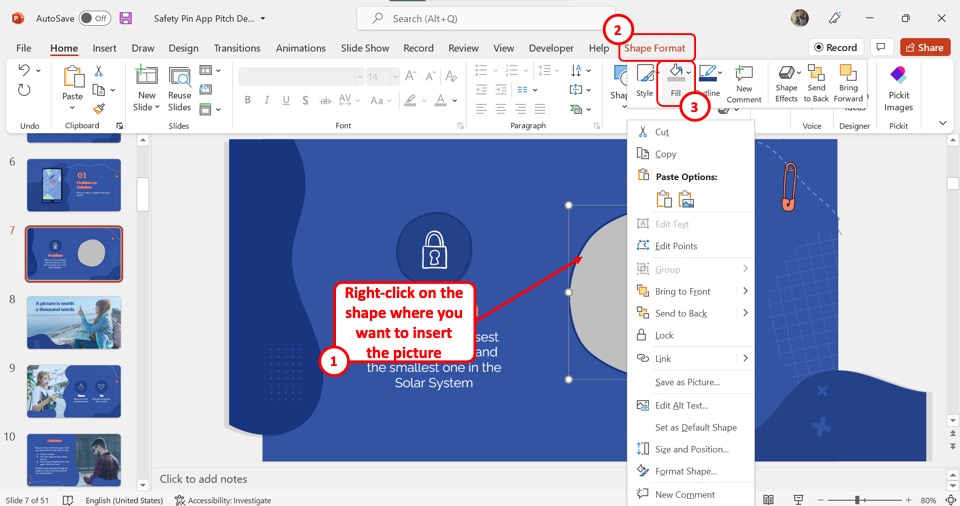
The first step is to “Right Click” on the shape where you want to insert the picture. In the pop-up menu, click on the “Fill” option.
Step-2: Click on the “Picture” option

In the dropdown menu under the “Fill” option, click on the “Pictures” option. This will open the “Insert Pictures” dialog box.
Step-3: Click on the “From a File” option
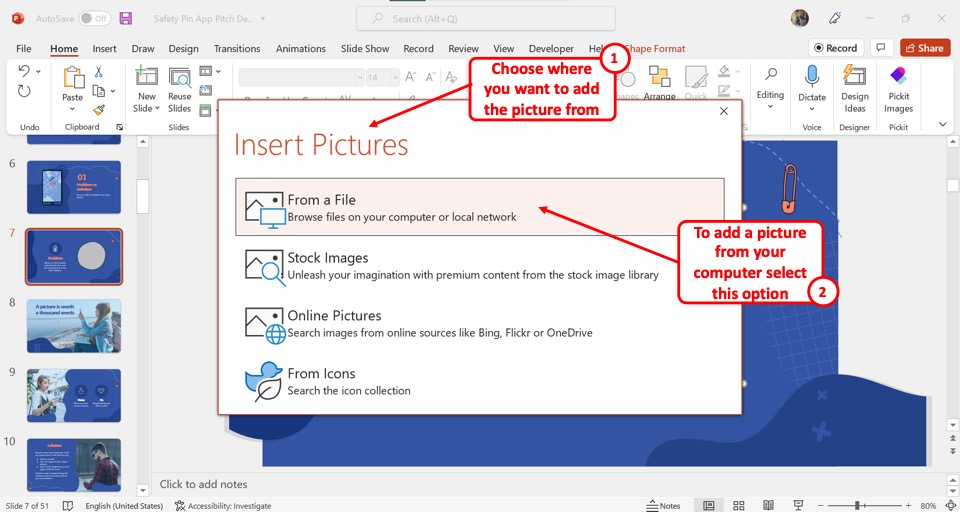
In the “Insert Pictures” dialog box, choose where you want to add the picture from. To add a picture from your computer, click on the “From a File” option.
Step-4: Click on the “Insert” button
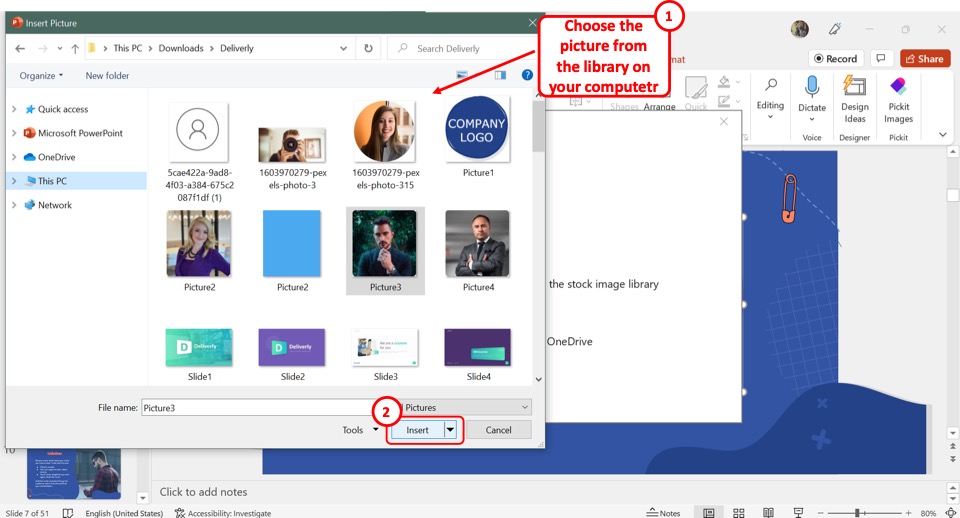
Now all you have to do is browse for the picture on your computer and then select it. Then click on the “Insert” button at the bottom of the dialog box to add the picture to the selected shape.
Method 2 – Using the Crop to Shape Option
When there is already a picture inserted into the PowerPoint slide, you can still add it to a shape. The “Crop to Shape” feature allows you to do that. All you have to do is follow the 3 quick steps.
Step-1: Click on the “Picture Format” tab
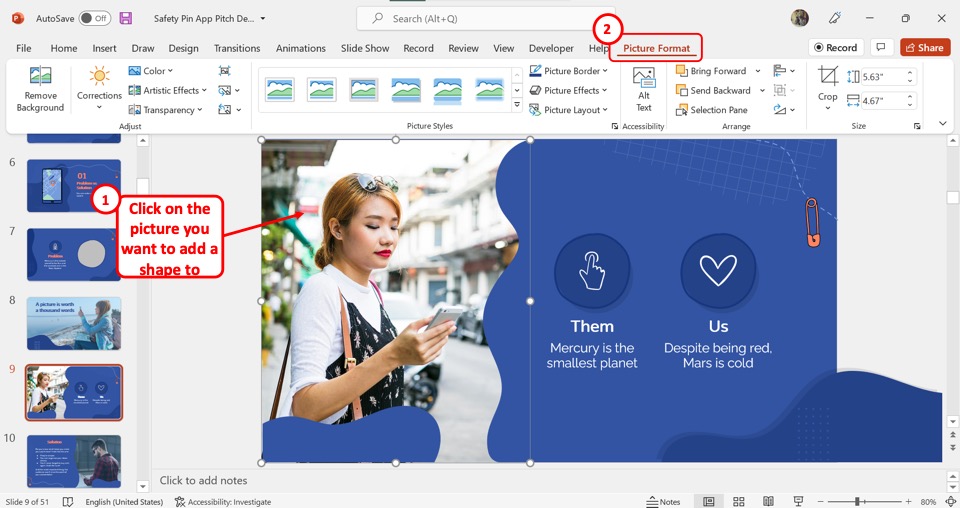
In the slide, click on the picture that you want to add a shape to. Then click on the “Picture Format” tab from the menu ribbon located at the top of the screen.
Step-2: Click on the “Crop to Shape” option
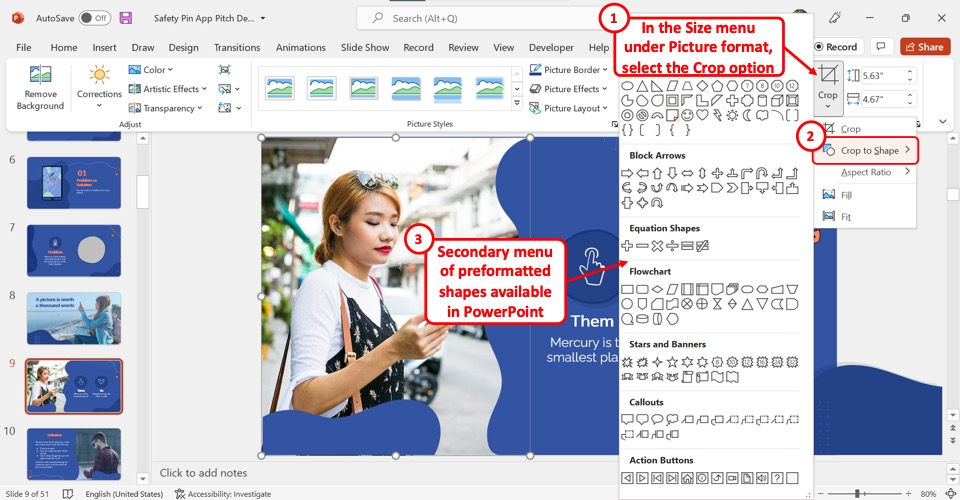
In the “Size” group of the “Picture Format” tab, you have to now click on the “Crop” option. Then click on the “Crop to Shape” option from the dropdown menu under the “Crop” option. This will open a secondary menu containing a list of all the preformatted shapes available in PowerPoint.
Step-3: Select a shape
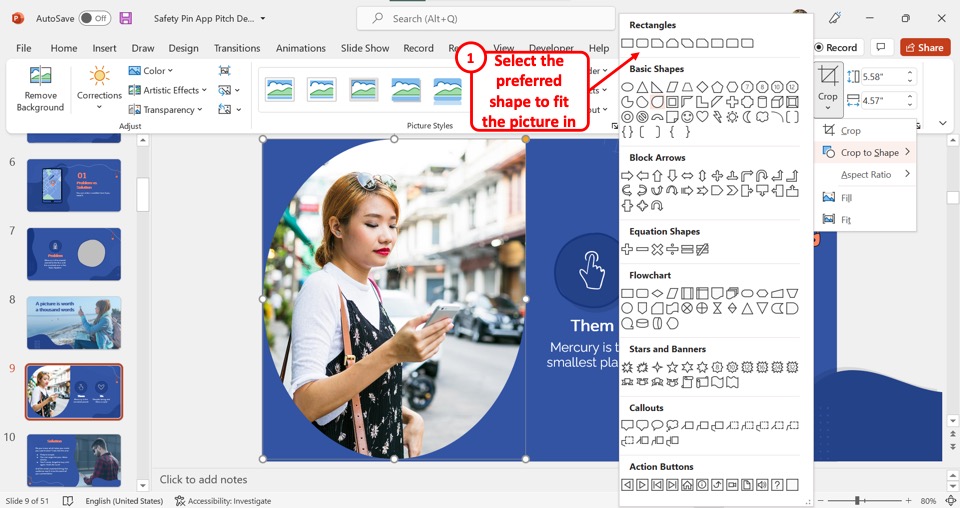
Finally, all you have to do is click on your preferred shape from the dropdown list to insert the picture into the shape.
Method 3 – Using Merge Shape Options (Advanced)
In Microsoft PowerPoint, you can also add a picture and a shape separately and then merge them together. To add a picture into a shape using the “Merge Shapes” option, follow the 5 simple steps.
Step-1: Click on the “Shapes” option
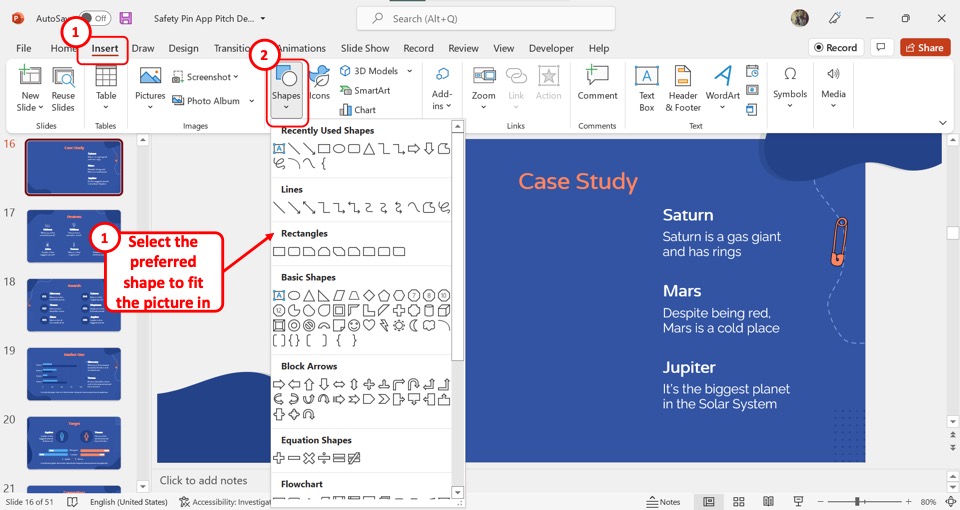
The first step is to add a shape to the slide. To do so, click on the “Shapes” option in the “Insert” tab. Then click on your preferred shape from the dropdown menu under the “Shapes” option.
Step-2: Click on the “Pictures” option
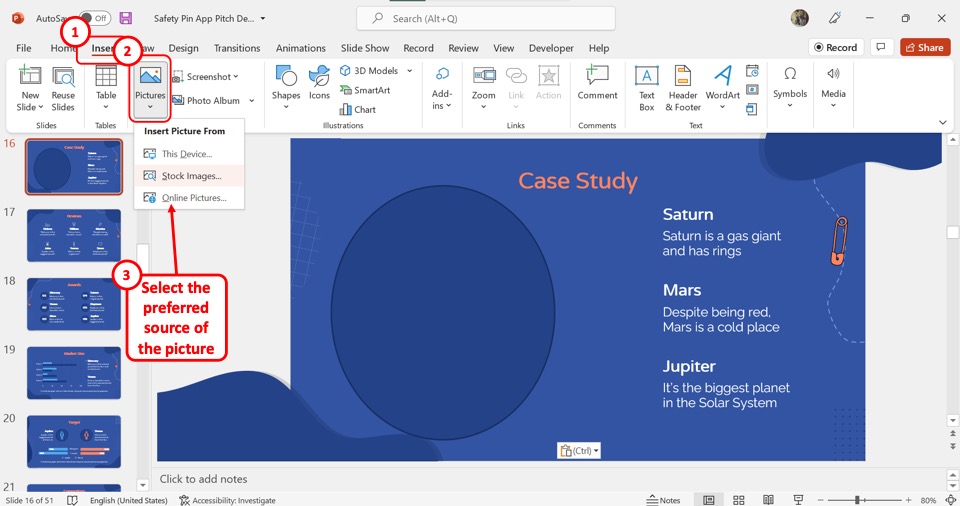
The next step is to add a picture. To do so, click on the “Pictures” option in the “Insert” menu. In the dropdown menu under the “Pictures” option select where you want to add the picture from. Then insert the picture from the selected source.
Step-3: Select both the picture and the shape together
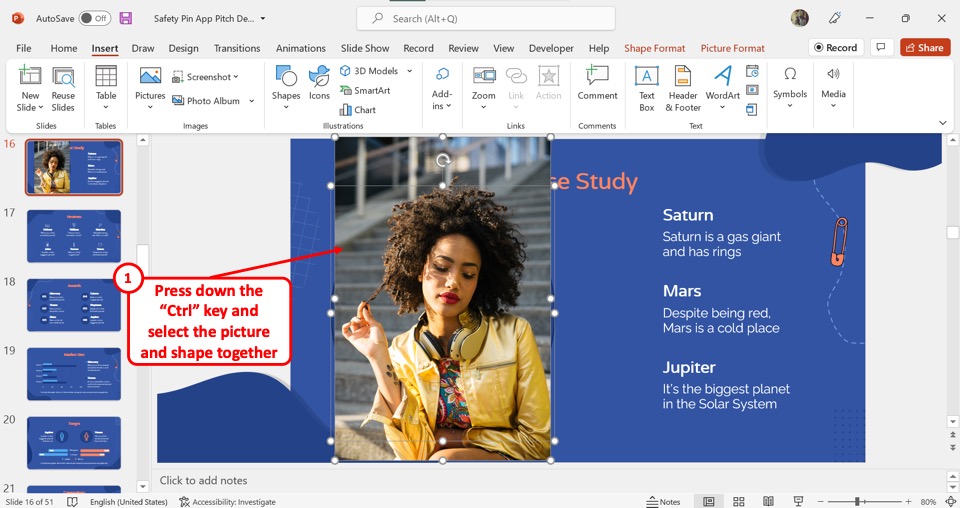
Now you have to select the inserted shape and the picture together. Press and hold the “Ctrl” key on your keyboard and click on the shape and then on the picture to select them both.
Step-4: Click on the “Shape Format” tab
In the menu ribbon located at the top of the screen, click on the “Shape Format” tab (as shown in the next image)
Step-5: Click on the “Intersect” option
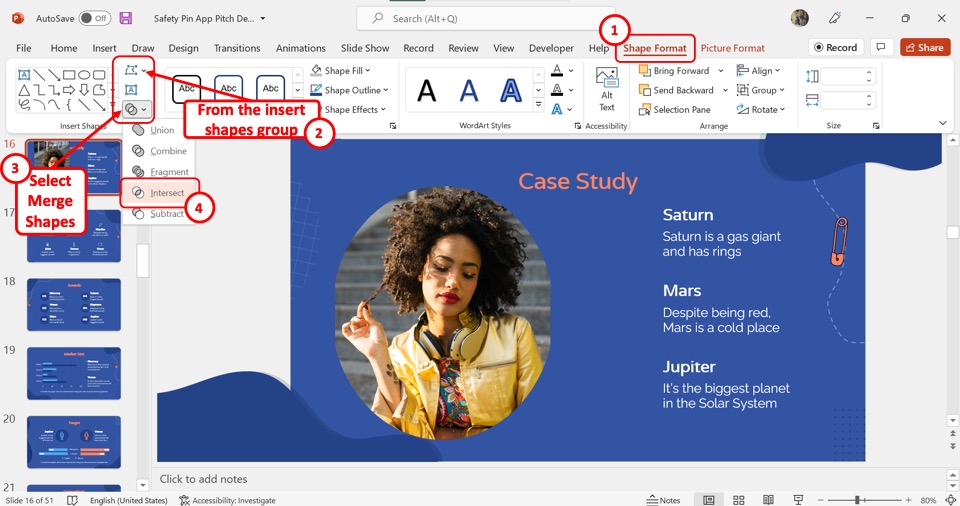
In the “Insert Shapes” group of the “Shape Format” tab, click on the “Merge Shapes” option. In the dropdown menu under the “Merge Shapes” option, all you have to do is click on the “Intersect” option to merge the picture into the shape.
2. Adjusting the Picture Inside a Shape
Once you have inserted a picture into a shape in your presentation slide, you can now adjust the size and position of the picture. You can use the “Crop” feature in Microsoft PowerPoint to adjust a picture inside a shape. To access the “Crop” option, follow the 2 easy steps.
Step-1: Click on the “Picture Format” tab

The first step is to access the contextual tabs. To do so, you have to click on the picture. Then click on the contextual tab “Picture Format” in the menu ribbon.
Step-2: Click on the “Crop” option
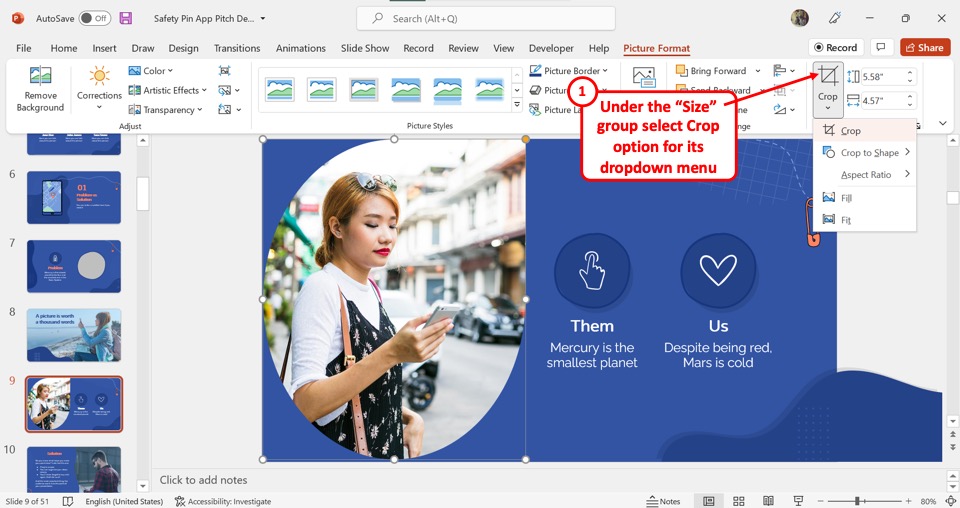
In the “Size” group of the “Picture Format” tab, you have to now click on the “Crop” option. The features for adjusting the picture inside the shape will now be available in the dropdown menu under the “Crop” option.
2.1 Zoom the Image In and Out Inside the Shape
To zoom an image inside a shape in PowerPoint, you can use the “Crop” option in the dropdown menu under the “Crop” button in the “Size” group of the “Picture Format” tab. You will see that the picture in the slide is highlighted with the part outside of the shape grayed out. Now all you have to do is click on the corner of the image and drag it in or out to zoom out or zoom in the picture inside the shape.
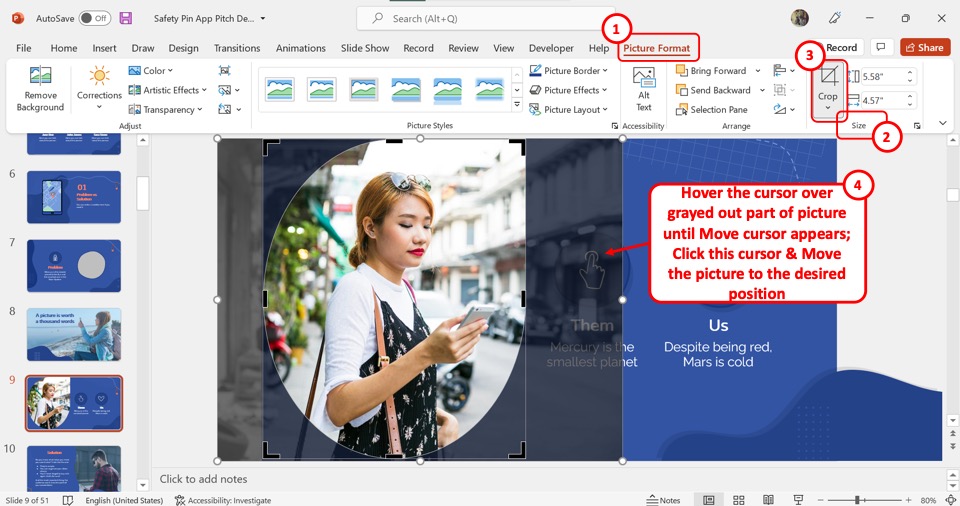
2.2 Move and Adjust the Image Inside the Shape
The “Crop” feature also allows you to move the picture inside the shape. All you have to do is click on the “Crop” option under the “Crop” button. Then hover the pointer over the grayed-out picture inside the slide to find the move cursor that looks like a plus sign with arrows directed towards four ways. Click on the move cursor and drag it in any direction to move the image inside the shape.
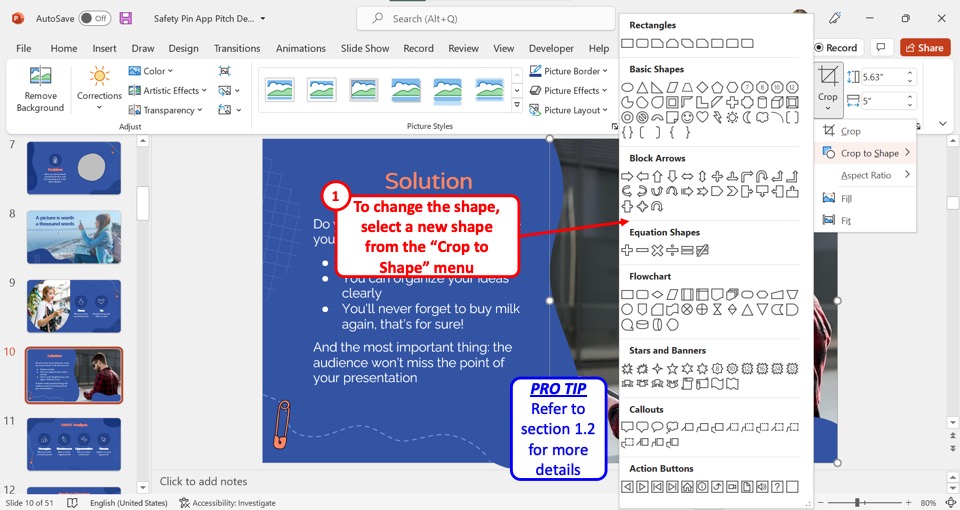
3. How to Change Shape of Picture in PowerPoint

To change the shape of a picture in PowerPoint, you have to select a new shape from the “Crop to Shape” dropdown list in the “Picture Format” tab. Refer to section 1.2 for the detailed steps on using the “Crop to Shape” feature.
4. How to Add Picture to Custom Shape in PowerPoint
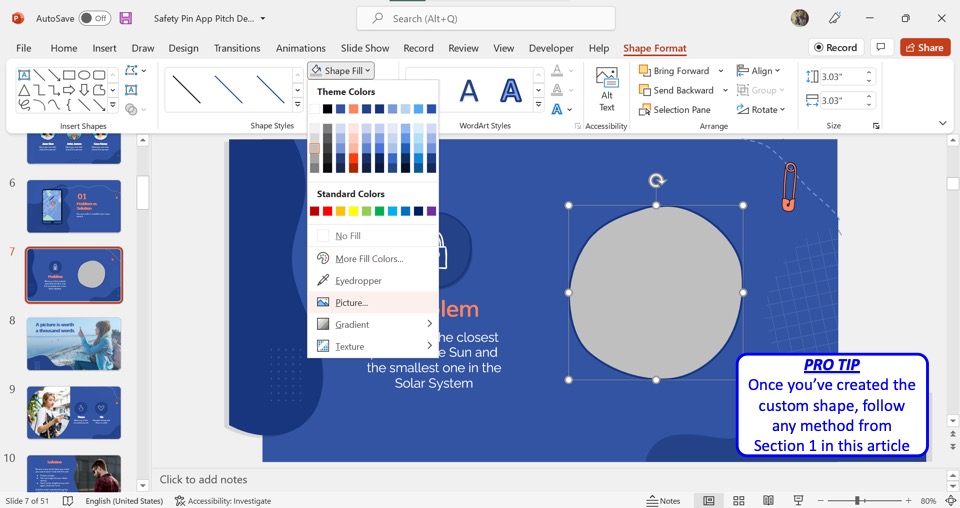
In Microsoft PowerPoint, you can easily add a picture to a custom shape. Once you have created a custom shape in the PowerPoint slide, all you have to do is follow any of the methods detailed in section 1 to add a picture to the custom shape.
Credit to wayhomestudio (on Freepik) for the featured image of this article (further edited).