![How to Insert Images in Google Slides? [Complete Guide!]](https://artofpresentations.com/wp-content/uploads/2022/10/Featured-Image-2.jpg)
Presentations are visually attractive and engaging when you have images on your slides. However, since Google Slides is hosted on the cloud, adding images to your presentation requires a slightly different process than traditional methods.
Here’s how you can add an image to your Google Slides presentation –
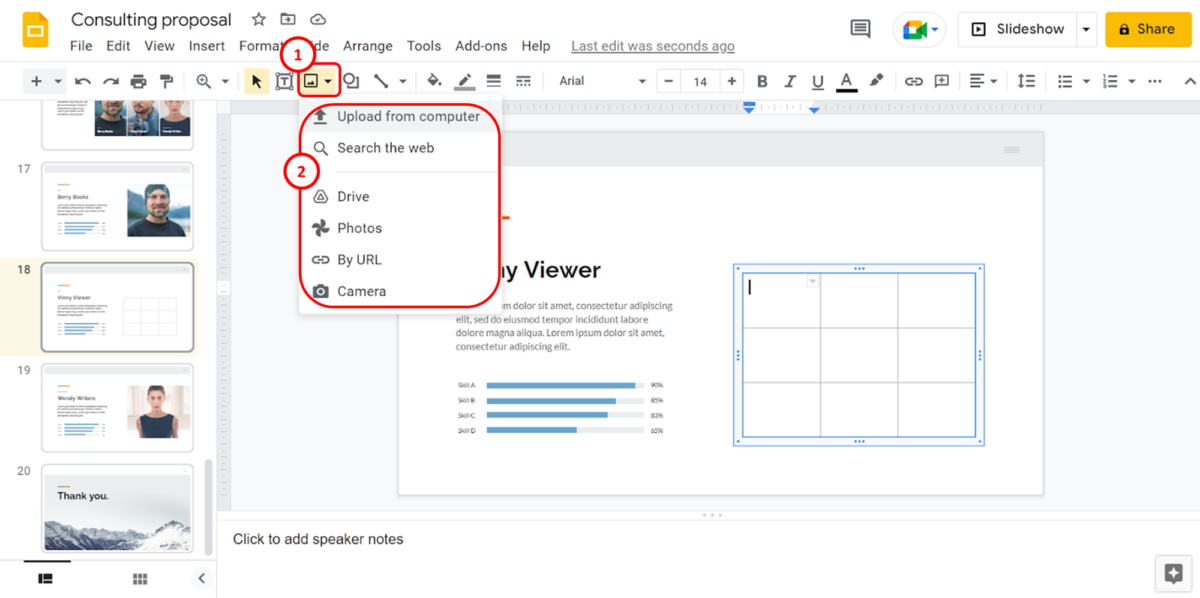
To insert images in Google Slides, click on the “Insert” menu and select the “Image” option from the dropdown. Next, choose any one source to add the image to Google Slides. You can add an image from your computer, search the web, or use Google Drive, Google Photos, image URL, or your PC’s camera.
You can also add images to your Google Slides presentations when using your phone, Mac, or iPad! In this article, I’ll show you the complete step-by-step process to insert images in Google Slides.
1. What Image Formats are Supported by Google Slides?
Google Slides supports all the major and common image formats. You can insert almost any image into the Google Slides presentation. The supported image formats are “Joint Photographic Experts Group (.jpeg and .jpg)”, “Portable Network Graphics (.png)”, “Graphics Interchange Format (.gif)”, “Bitmap (.bmp)”, “Tag Image File Format (.tiff and .tif)”, and “Scalable Vector Graphics (.svg)”.
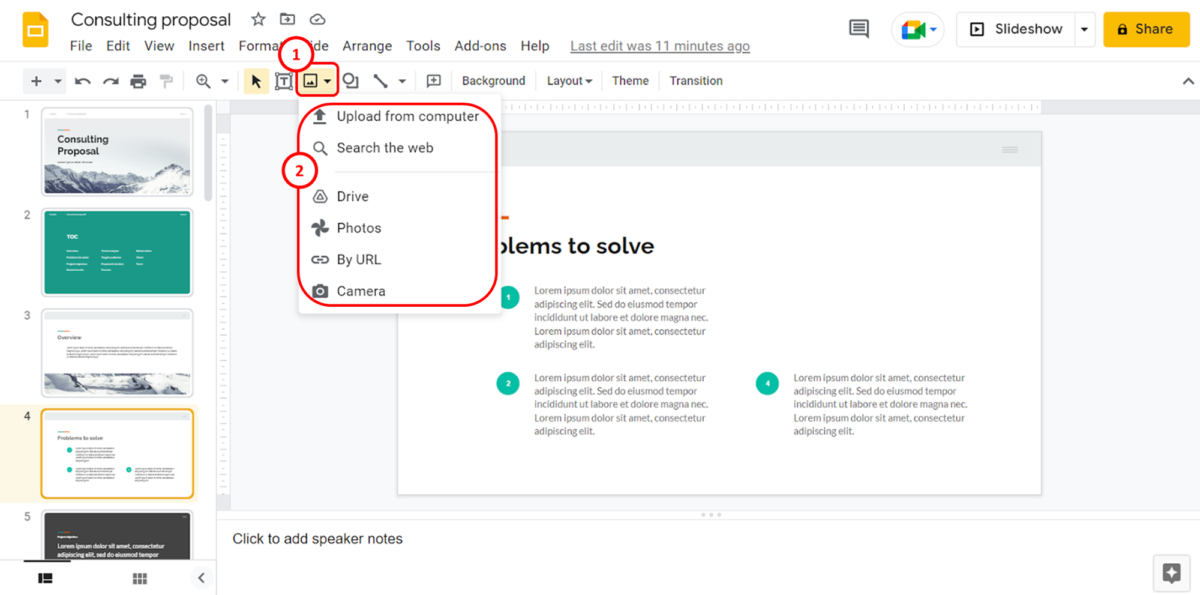
2. Adding Images in Google Slides?
Using the “Insert” menu in Google Slides, you can easily insert an image into a slide. All you have to do is follow the 2 quick steps.
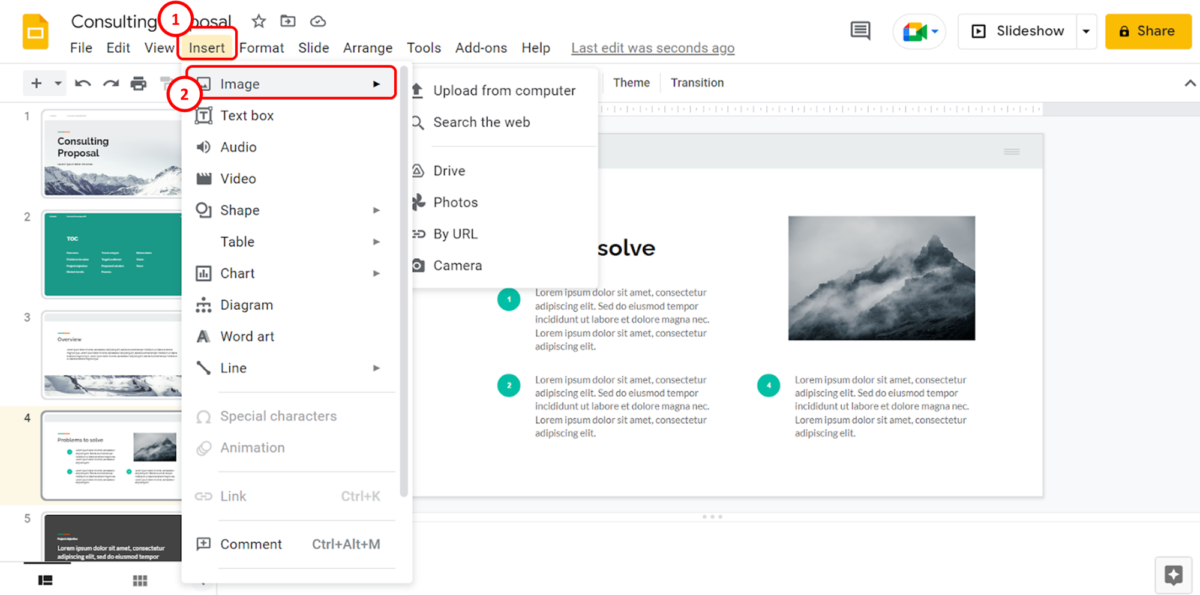
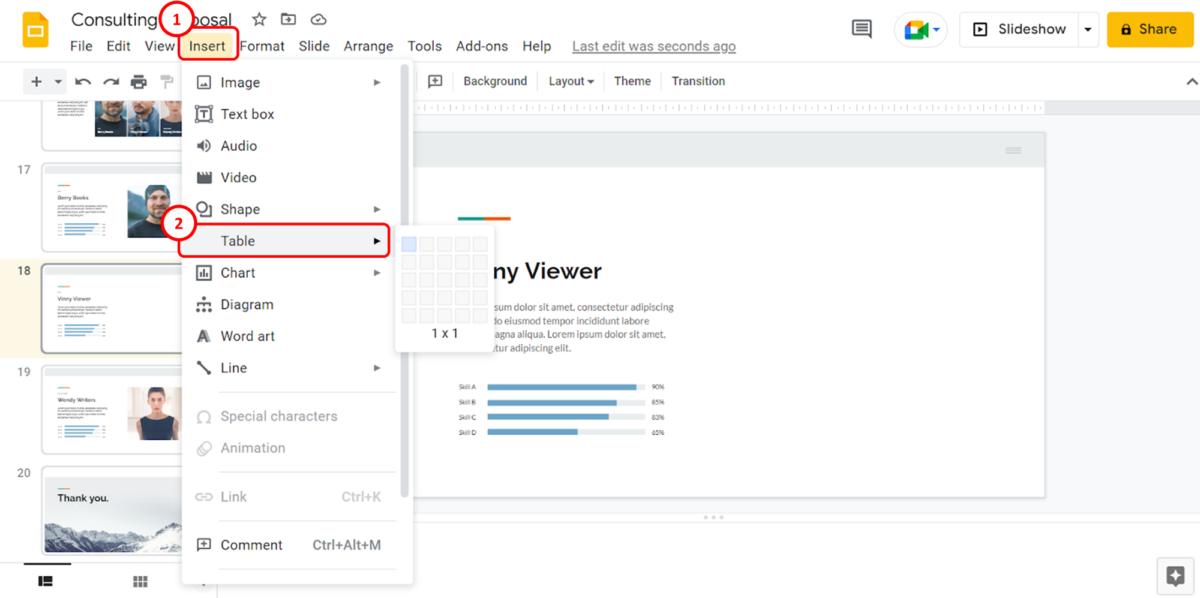
Step-1: Click on the “Insert” menu
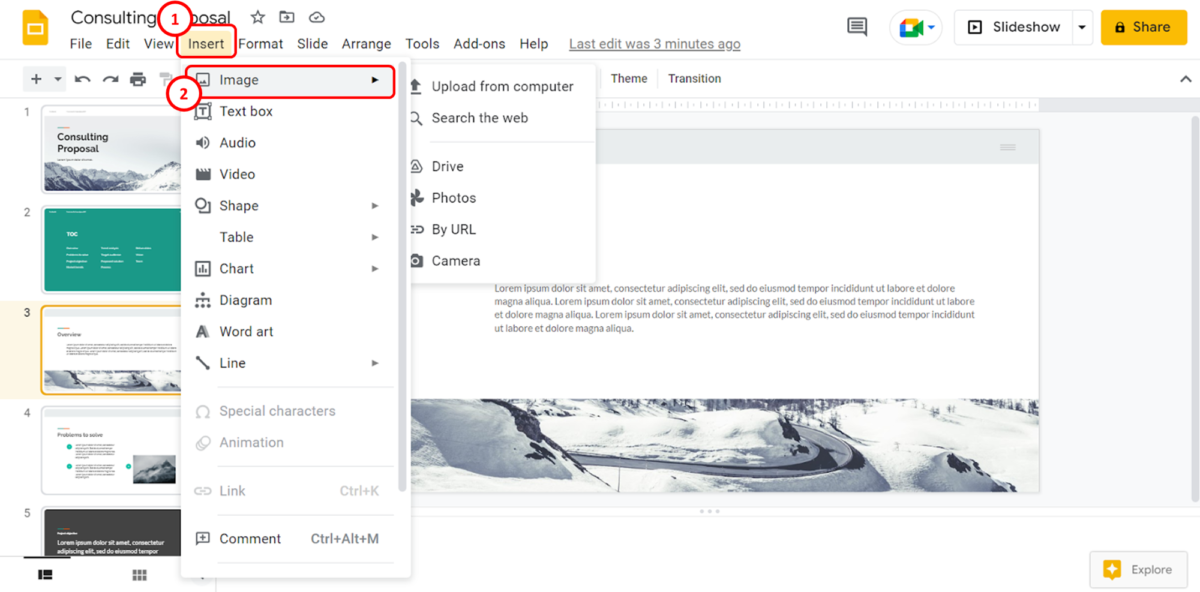
In the menu bar at the top of the screen, click on the “Insert” menu. This will open the “Insert” dropdown menu.
Step-2: Click on the “Image” option
In the “Insert” menu, click on the “Image” option (as shown in the image in step 1). Then select the image source from the pop-up menu by the “Image” option
2.1 Method 1 – Upload from Computer
To upload an image into Google Slides from your computer, you have to first open the “Insert” menu. Then follow the 2 easy steps.
Step-1: Click on the “Upload from computer” option

In the pop-up menu by the “Image” option in the “Insert” menu, you have to click on the “Upload from computer” option. This will open a file explorer dialog box.
Step-2: Click on the “Open” button
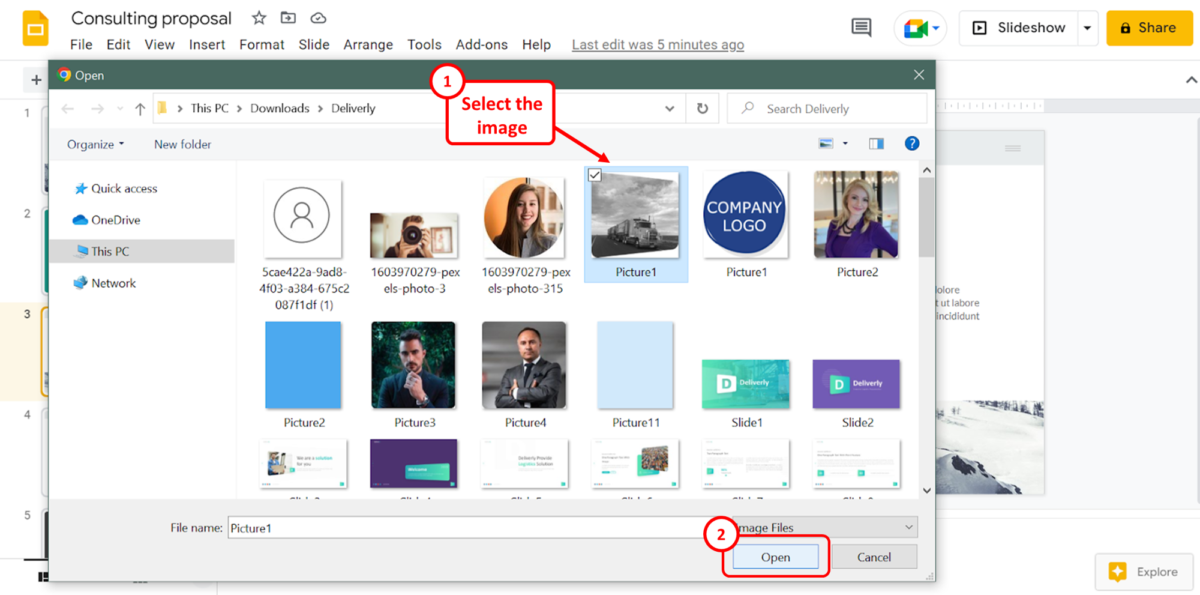
In the “Open” dialog box, select the image that you want to upload to the presentation slide. Then click on the “Open” button at the bottom of the dialog box to insert the image into the slide.
2.2 Method 2 – Search the Web
The “Search the web” option allows you to insert an image into Google Slides directly from the internet. To insert an image from the web, follow the 3 quick steps.
Step-1: Click on the “Search the web” option
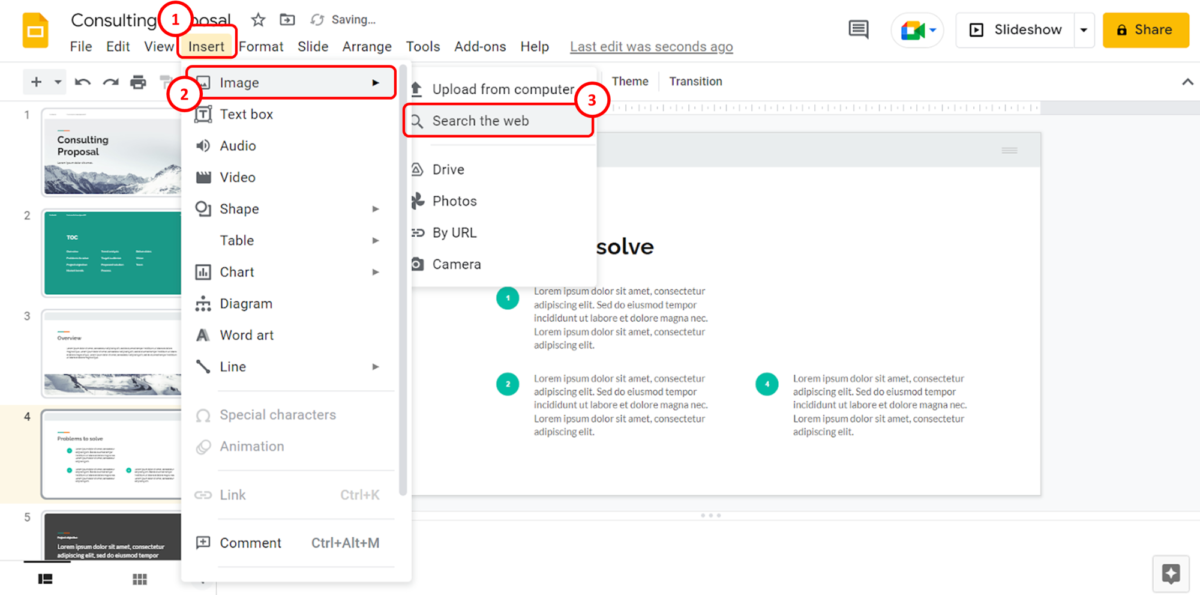
The first step is to open the “Insert” menu. In the pop-up menu by the “Image” option in the “Insert” menu, click on the “Search the web” option.
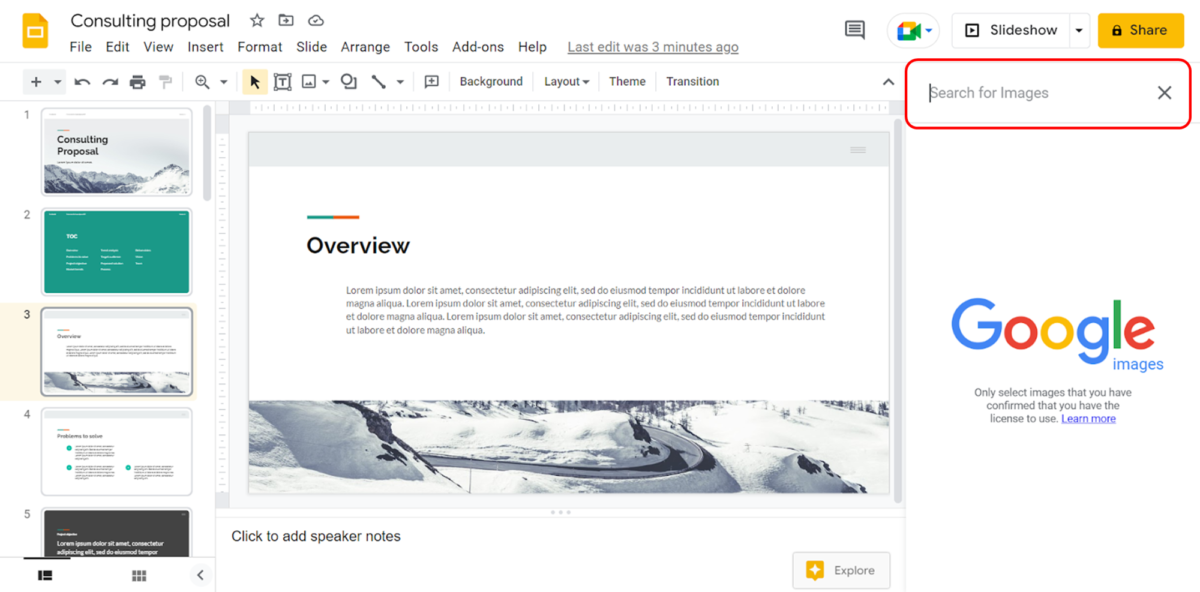
Step-2: Click on the “Search for images” box
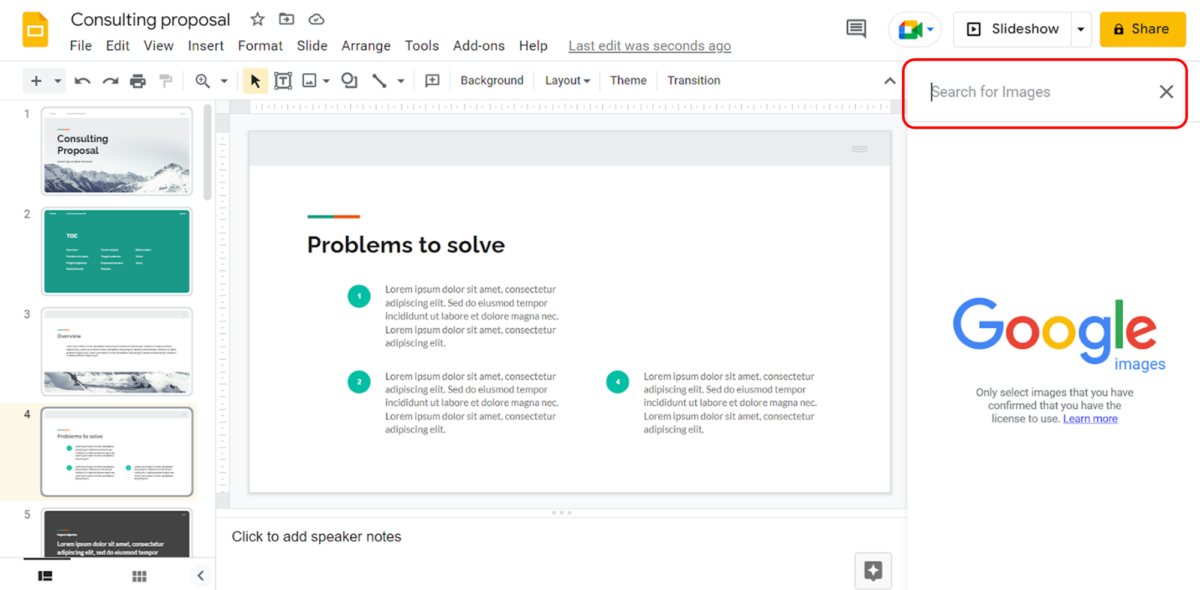
In the sidebar on the right side of the screen, click on the “Search for images” box. Then type in the keywords for the image that you want to insert into the slide. The search result will appear in the sidebar.
Step-3: Click on the “Insert” option
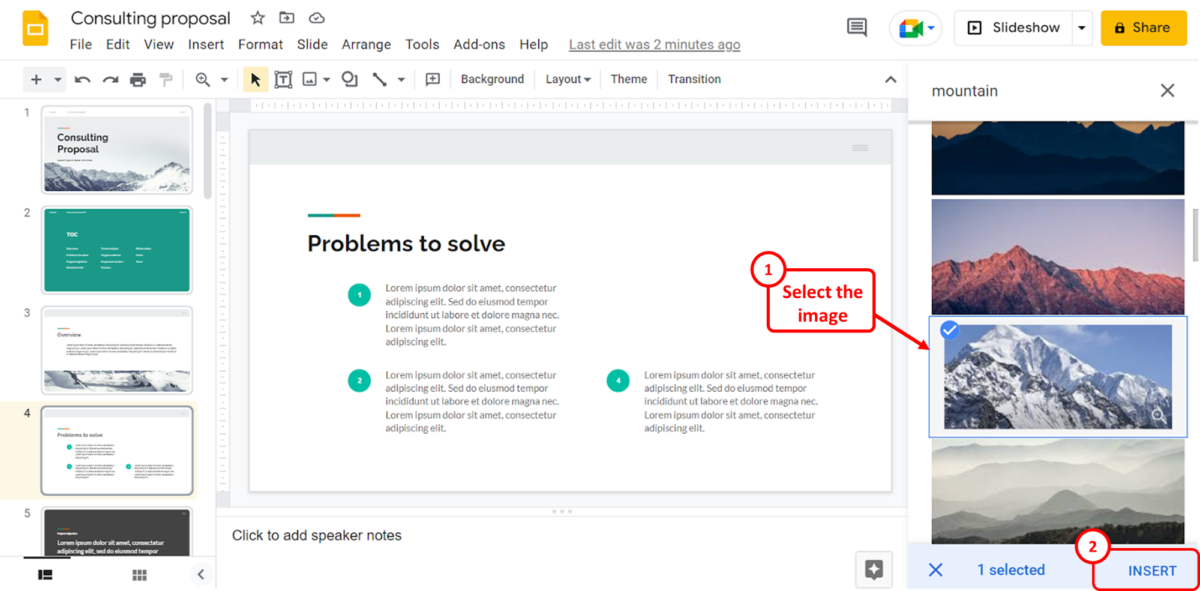
The final step is to click on the image that you want to insert from the sidebar. Then all you have to do is click on the “Insert” button at the bottom of the dialog box.
2.3 Method 3 – Using Google Drive
The “Drive” option allows you to insert an image into Google Slides from your Google Drive folders. To insert an image from Google Drive, follow the 2 simple steps.
Step-1: Click on the “Drive” option
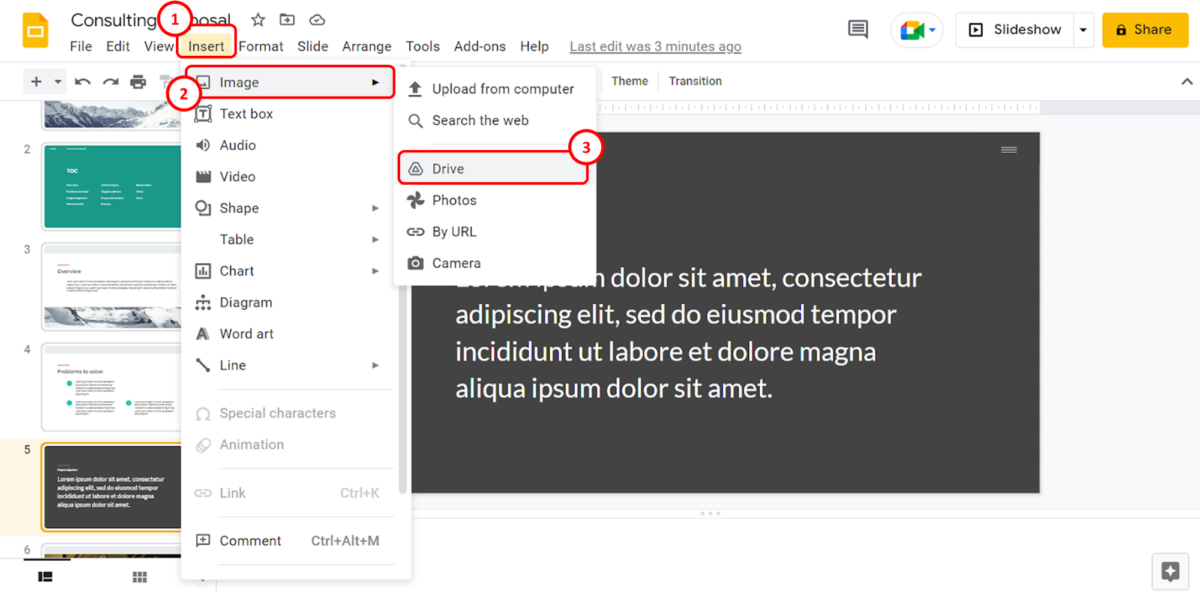
In the pop-up menu by the “Image” option in the “Insert” menu, click on the “Drive” option. This will open a sidebar on the right side of the screen.
Step-2: Click on the “Insert” option
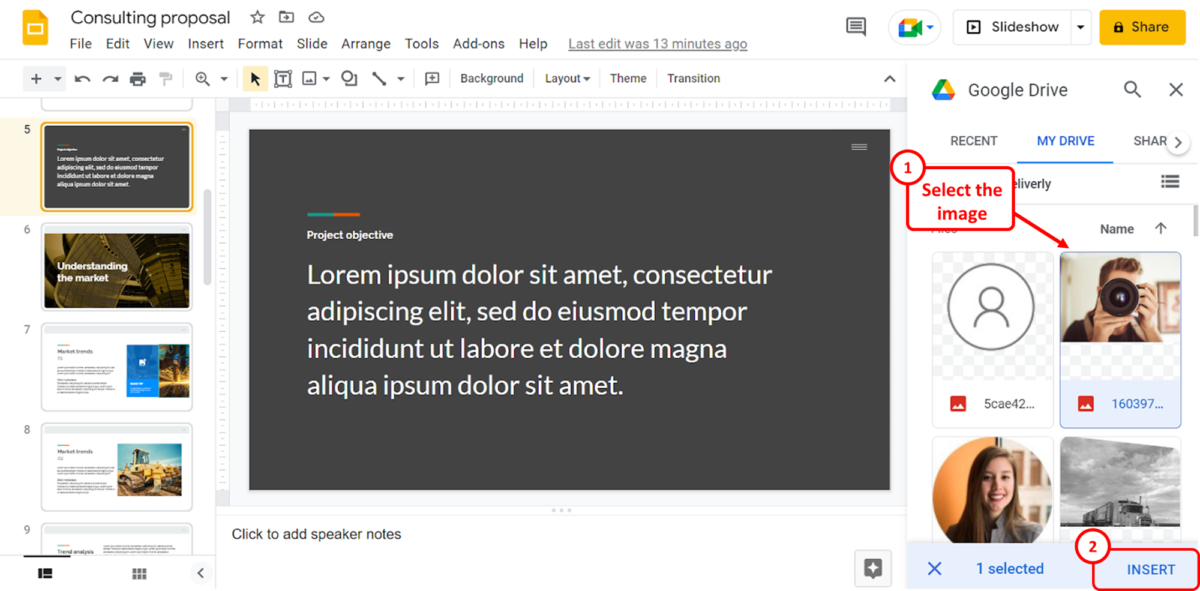
In the “Google Drive” sidebar, select the image that you want to insert into the open slide. Then all you have to do is click on the “Insert” option at the bottom of the sidebar.
2.4 Method 4 – Using Google Photos
You can insert an image into Google Slides directly from your Google Photos. To do so, follow the 2 easy steps.
Step-1: Click on the “Photos” option
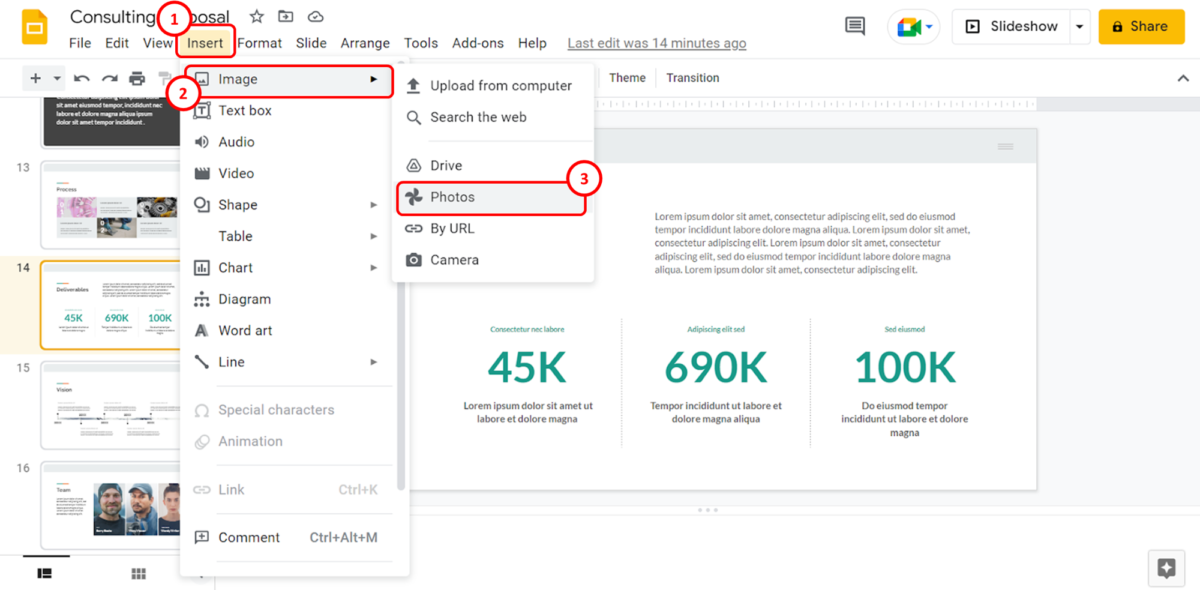
The first step is to click on the “Photos” option in the pop-up menu by the “Image” option in the “Insert” menu.
Step-2: Click on the “Insert” option
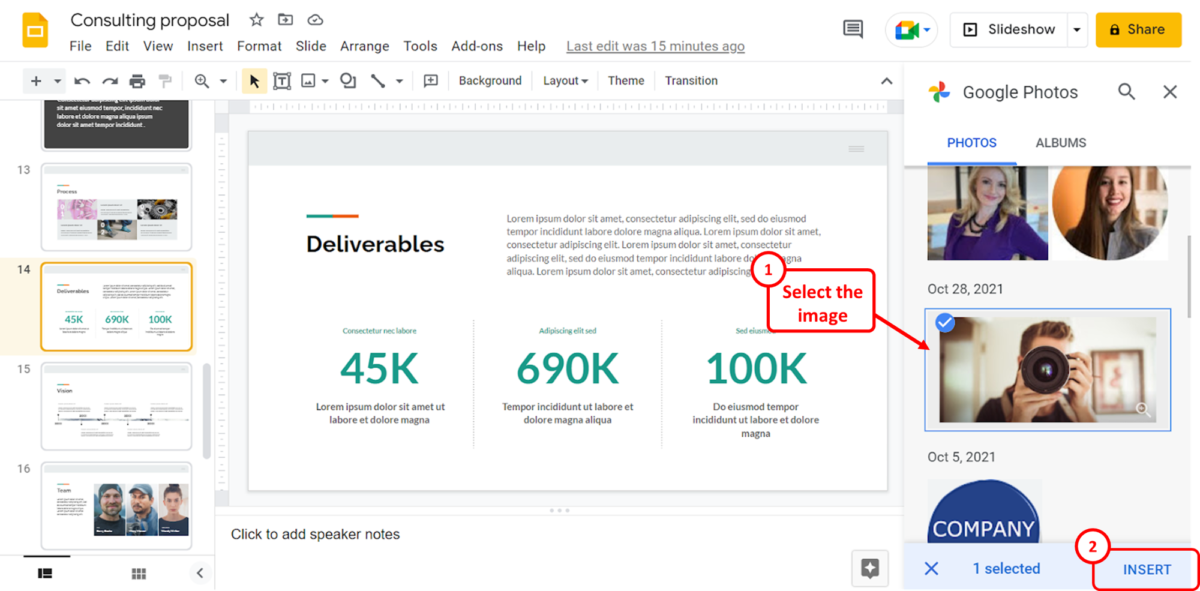
In the “Google Photos” sidebar, click on the image that you want to insert. Then click on the “Insert” button at the bottom of the sidebar to insert the image from your Google Photos
2.5 Method 5 – Using a URL
The “By URL” option in Google Slides allows you to add an image from the internet using its link. To insert an image using the URL, follow the 3 simple steps.
Step-1: Click on the “By URL” option
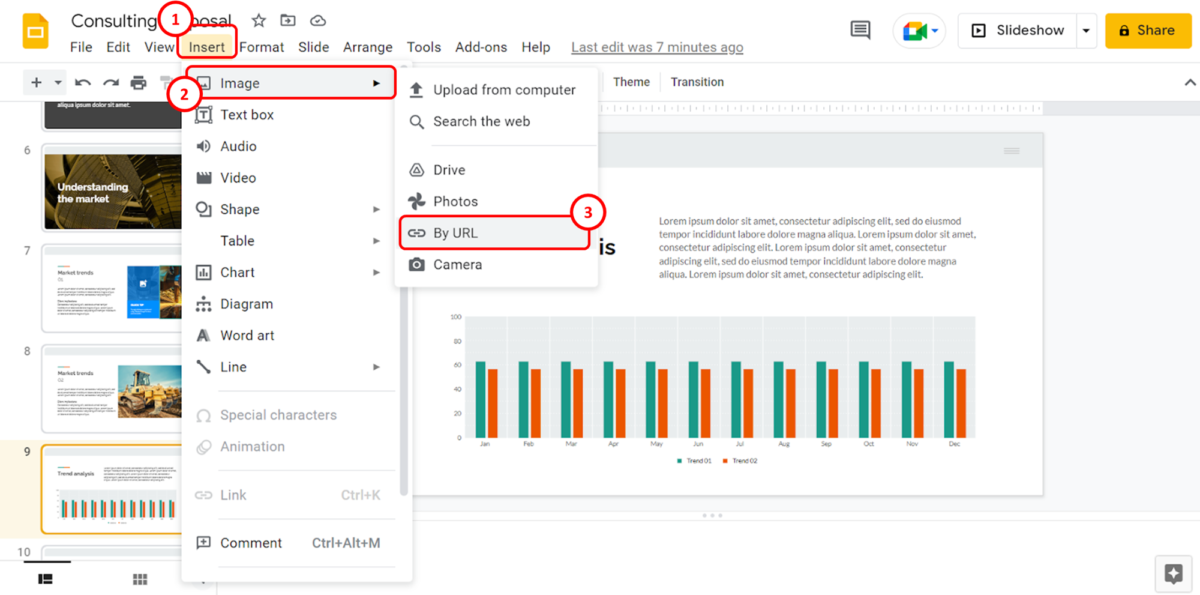
The first step is to click on the “Insert” menu in the menu bar. In the “Insert” menu, click on the “Image” option and select the “By URL” option as the image source.
Step-2: Paste the image URL
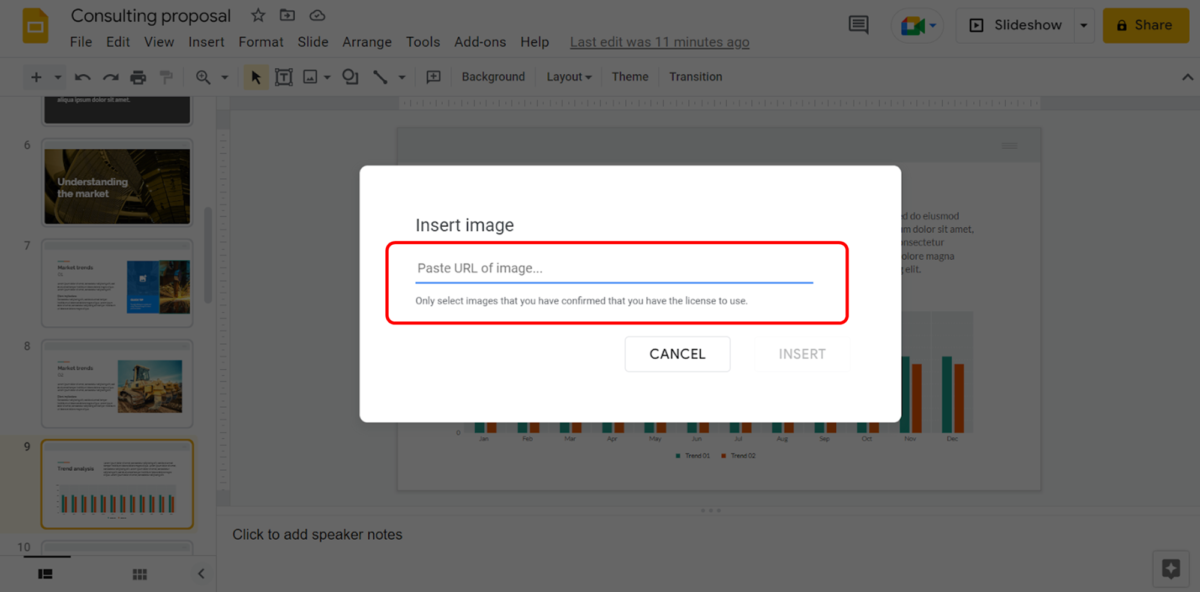
In the “Insert image” dialog box, you have to now paste the link of the image that you want to insert into the slide. The image preview will appear in the dialog box.
Step-3: Click on the “Insert” button
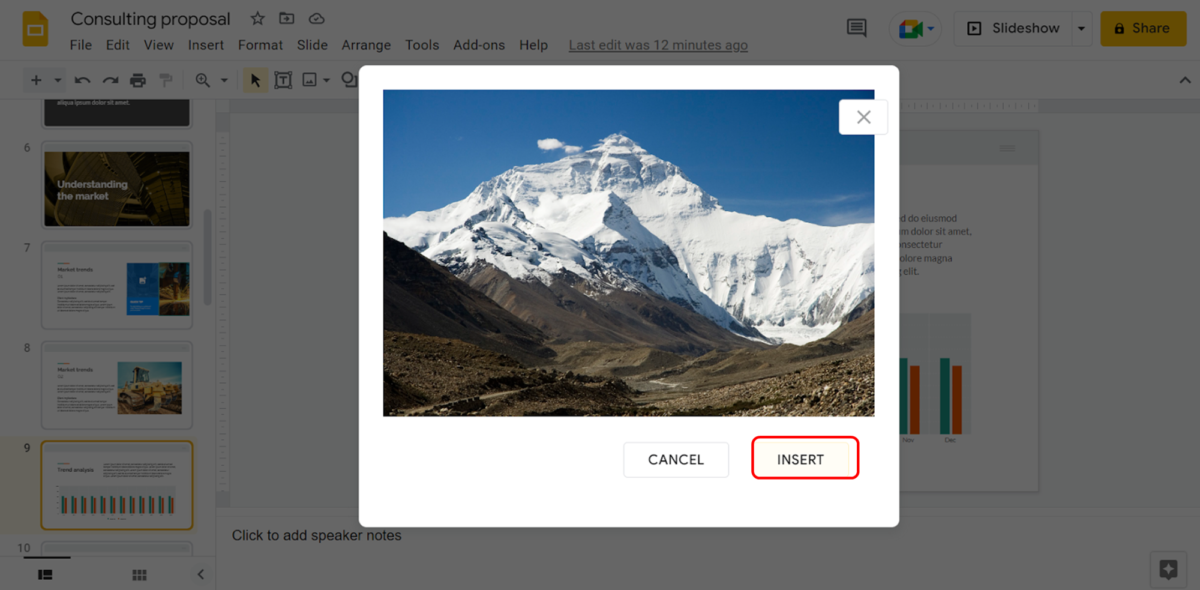
The final step is to click on the “Insert” button at the bottom of the “Insert image” dialog box to insert the picture into the slide.
2.6 Method 6 – Using a Camera
Google Slides also allows you to add a picture directly using the camera on your device. To insert an image using the camera, follow the 3 quick steps.
Step-1: Click on the “Camera” option
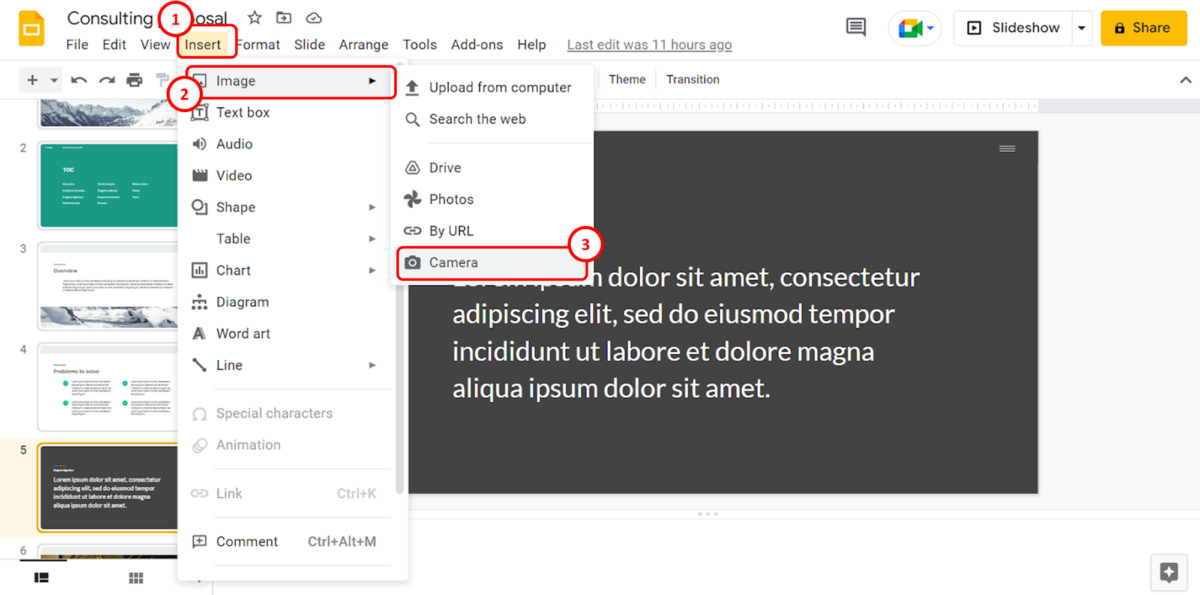
In the pop-up menu by the “Image” option in the “Insert” menu, you have to first click on the “Camera” option. This will open a dialog box.
Step-2: Click on the camera icon

In the dialog box, you can now take pictures with your camera. Click on the yellow camera icon to take a picture. You can also take multiple pictures to insert all of them together.
Step-3: Click on the “Insert” option
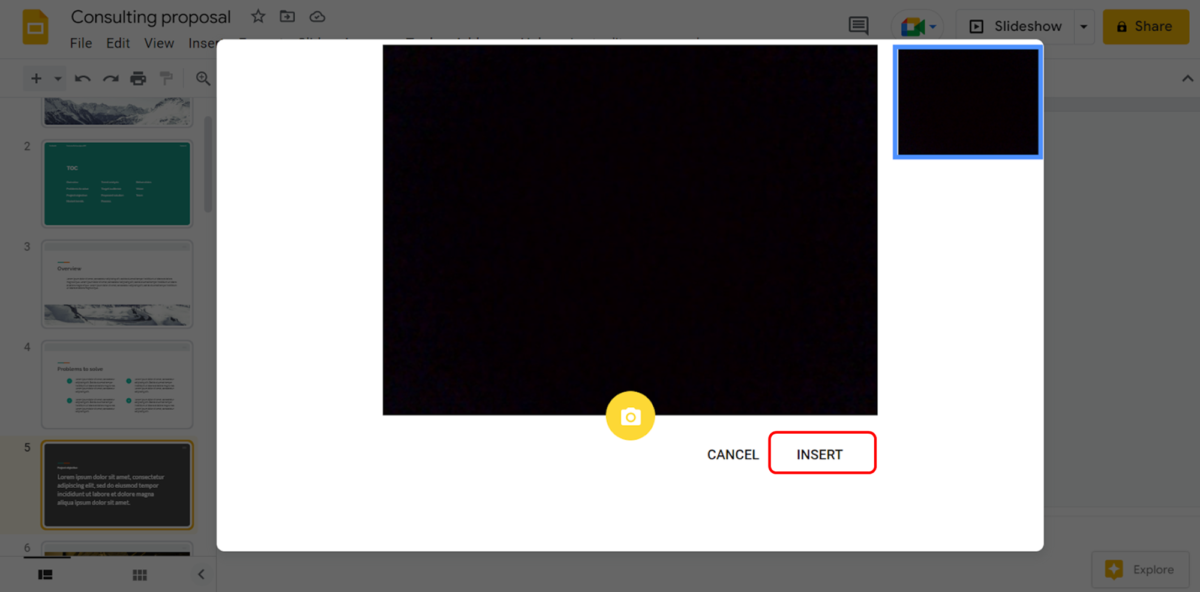
The final step is to click on the “Insert” option at the bottom of the dialog box to insert the photos taken with your device camera.
3. How to Add Pictures to Google Slides on Mac?
Since Google Slides is an online application, it is similar to all computer operating systems. To add a picture in Google Slides on a Mac device, follow the steps detailed in section 2 of this article.
4. How to Put Pictures on Google Slides from Your Phone?
On your phone, you can easily insert an image in Google Slides using the “Insert” menu. All you have to do is follow the 3 simple steps.
Step-1: Tap on the “Insert” option
In the toolbar at the top of the screen, tap on the “Insert” option which is the “+” icon.
Step-2: Tap on the “Image” option
In the “Insert” menu, you have to now tap on the “Image” option. Then select the source of the image that you want to insert into the presentation slide.
Step-3: Tap on a photo
Finally, all you have to do is tap on your preferred photo to insert it into the Google Slides presentation.
5. How to Insert Images in Google Slides on iPad?
Since the Google Slides application is the same for both Android and Apple devices, you can insert an image on an iPad in a similar way as on your phone. To insert an image into Google Slides on an iPad, follow the steps detailed in section 4.
6. How to Insert Image Behind Text in Google Slides?
In Google Slides, you can easily insert an image behind text on a slide. All you have to do is follow the 4 easy steps.
Step-1: Click on the “Insert” menu
The first step is to click on the “Insert” menu. In the “Insert” menu, click on the “Image” option. Refer to section 2 for the detailed steps on inserting an image into a slide.
Step-2: Move and resize the image
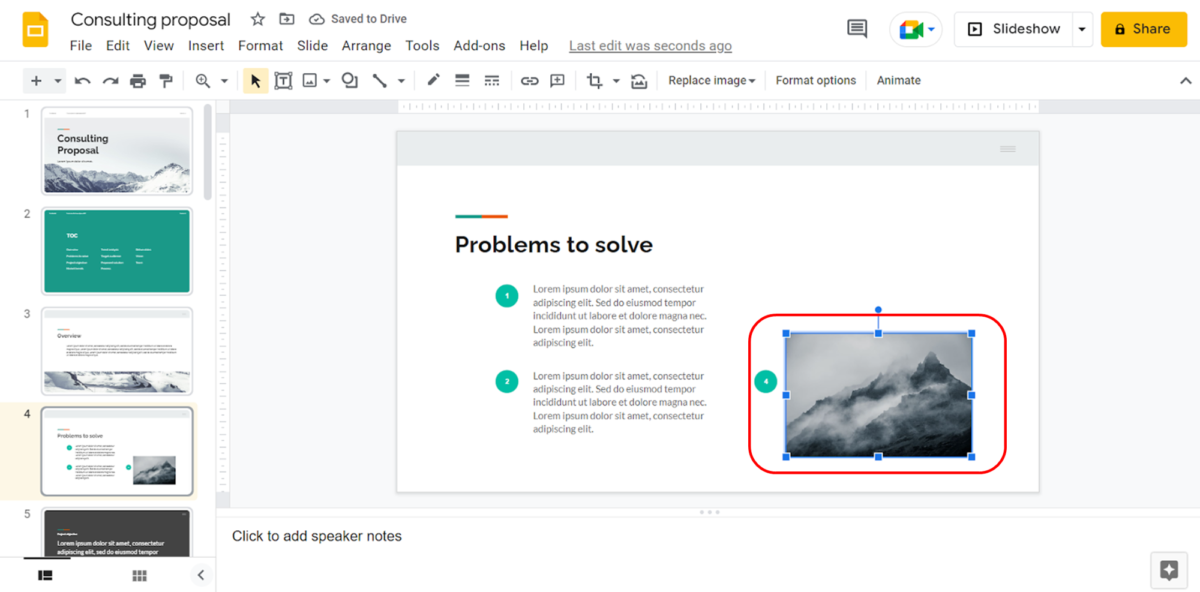
The next step is to move the image on top of the text on the slide. Click and drag the image to move it.
Step-3: Click on the “Arrange” menu
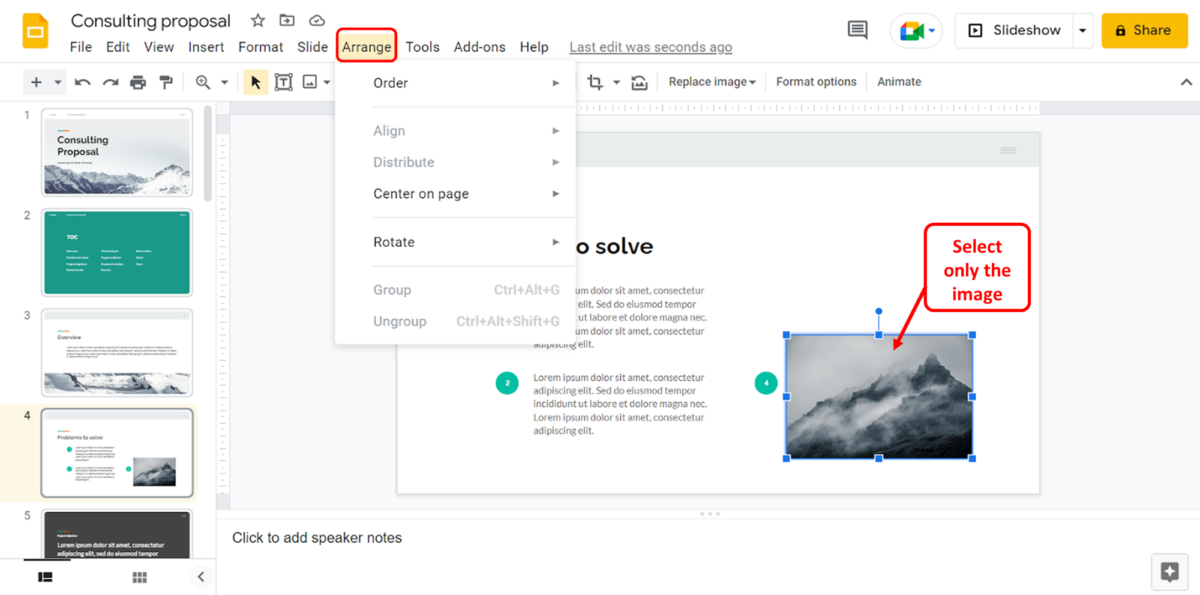
In the menu bar at the top of the screen, click on the “Arrange” menu. Make sure that only the image is selected on the slide.
Step-4: Click on the “Send backward” option
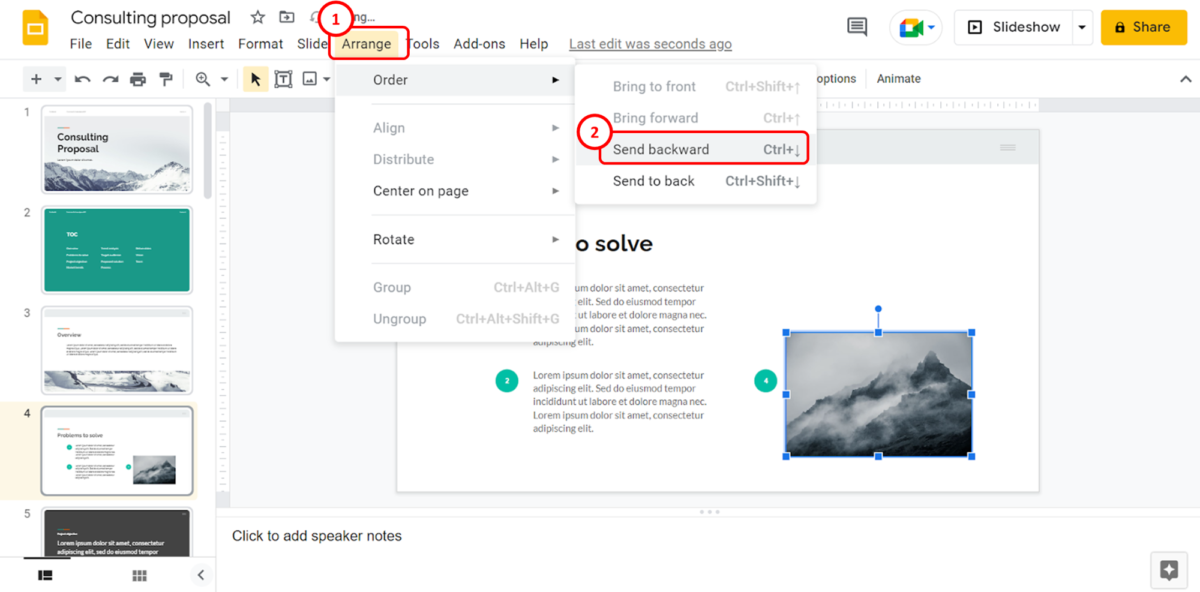
In the “Arrange” menu, click on the “Order” option. Then all you have to do is click on the “Send backward” option in the pop-up menu by the “Order” option to send the image behind the text.
7. How to Insert Image as Slide Background in Google Slides?
Google Slides allows you to add a picture as the slide background. To insert an image as a slide background, follow the 4 quick steps.
Step-1: Click on the “Background” option
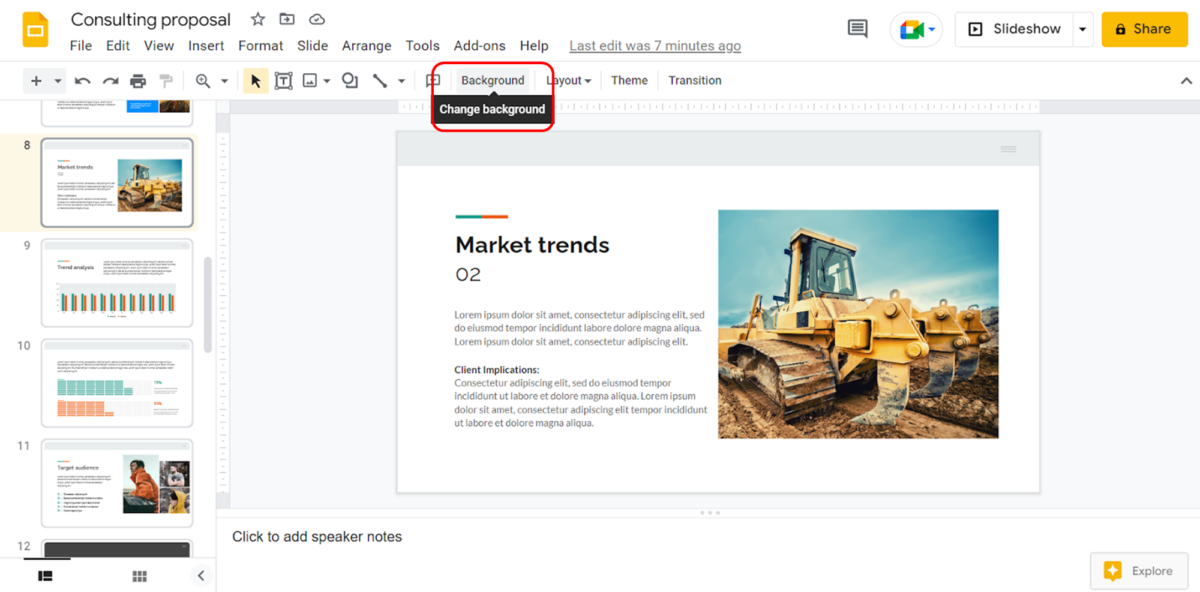
The first step is to open the slide where you want to insert the image. Then click on the “Background” option from the toolbar at the top of the screen.
Step-2: Click on the “Choose image” option
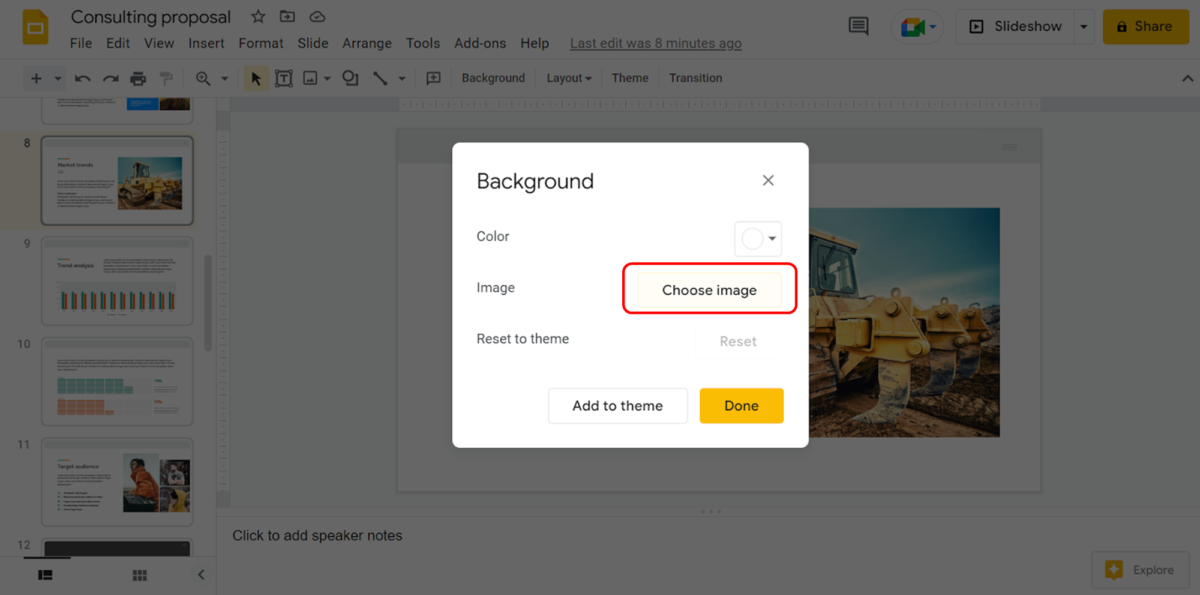
In the “Background” dialog box, click on the “Choose image” box. This will open another dialog box.
Step-3: Select the image source

In the “Insert background image” dialog box, click on the image source. The selected source will open in a new window where you can select the image to insert it into the slide.
Step-4: Click on the “Done” button
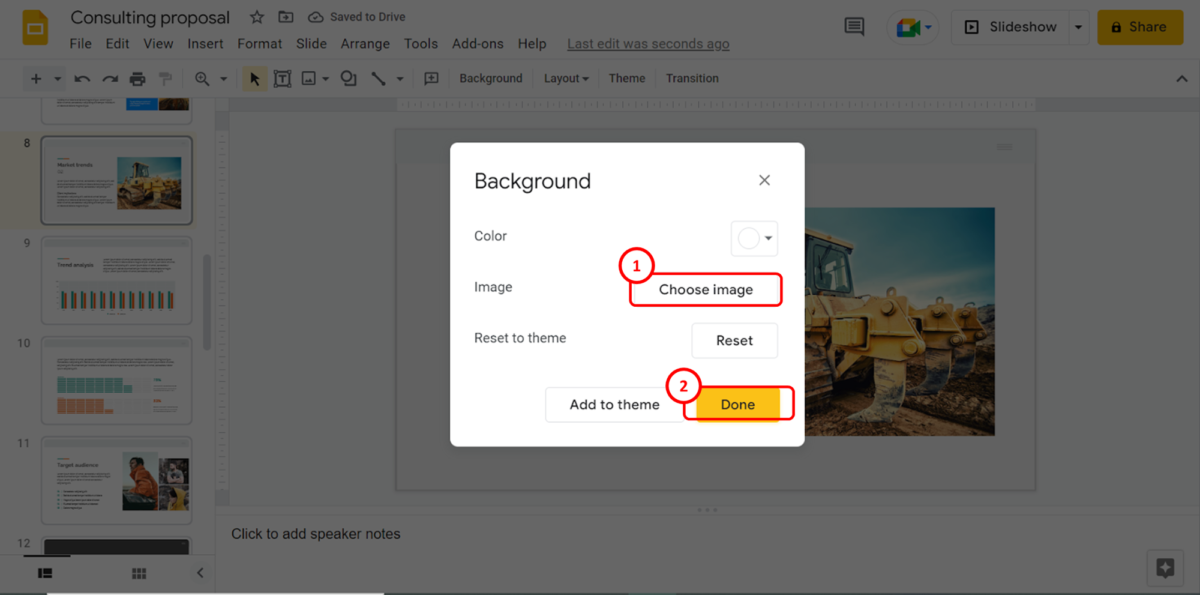
Finally, all you have to do is click on the “Done” button to insert the image fitted to the open slide.
8. How to Insert Image Placeholder in Google Slides?
In Google Slides, you can add image placeholders in the slide layout. All you have to do is follow the 5 easy steps.
Step-1: Click on the “Theme builder” option
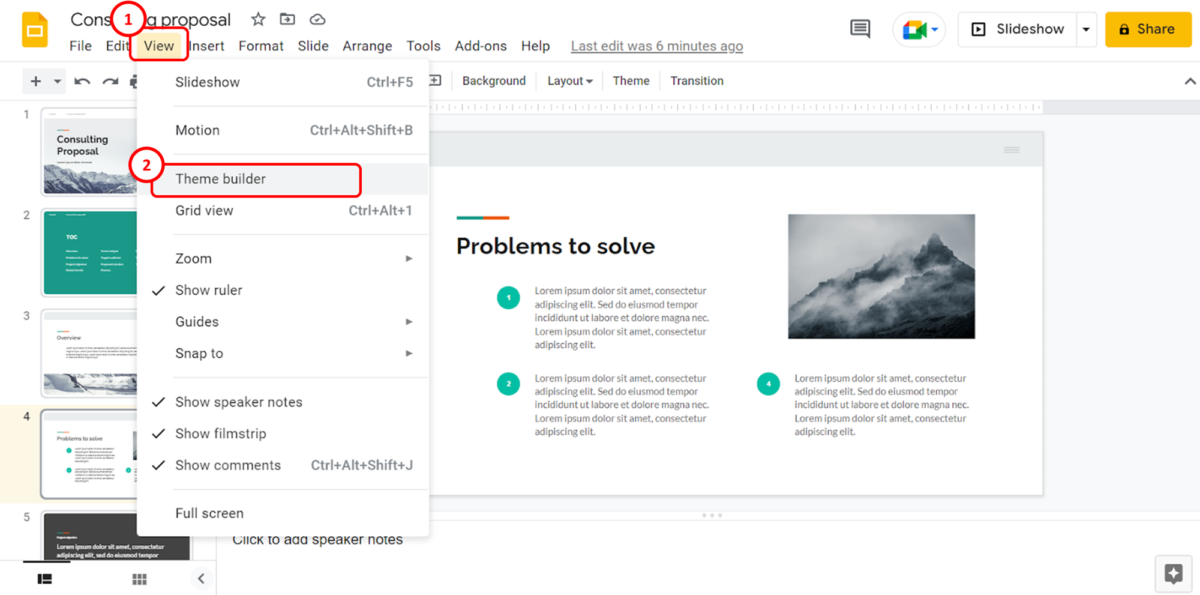
The first step is to click on the “View” menu in the menu bar at the top of the screen. In the “View” menu, click on the “Theme builder” option.
Step-2: Click on a slide layout

In the left column of the “Theme builder” view, click on the slide layout thumbnail where you want to insert the image placeholder. Then slide layouts are the thumbnails under the “Layout” section.
Step-3: Click on the “Image placeholder” option
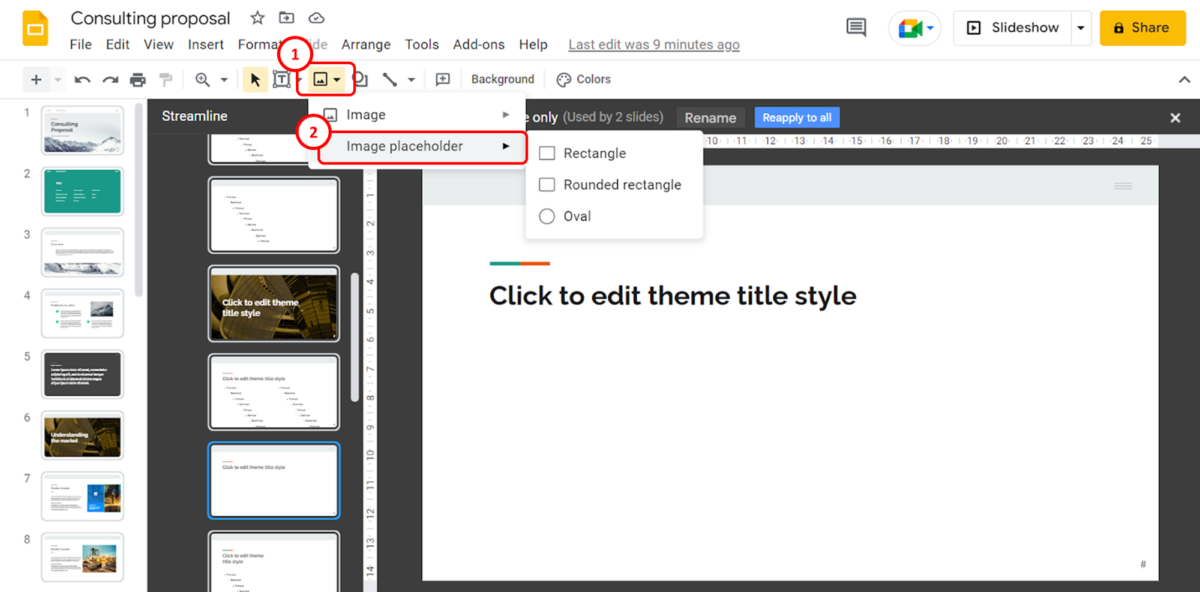
The next step is to click on the “Insert image placeholder” option in the toolbar. In the dropdown menu, click on the “Image placeholder” option. You can then select the placeholder shape from the pop-up menu by the “Image placeholder” option.
Step-4: Draw the image placeholder
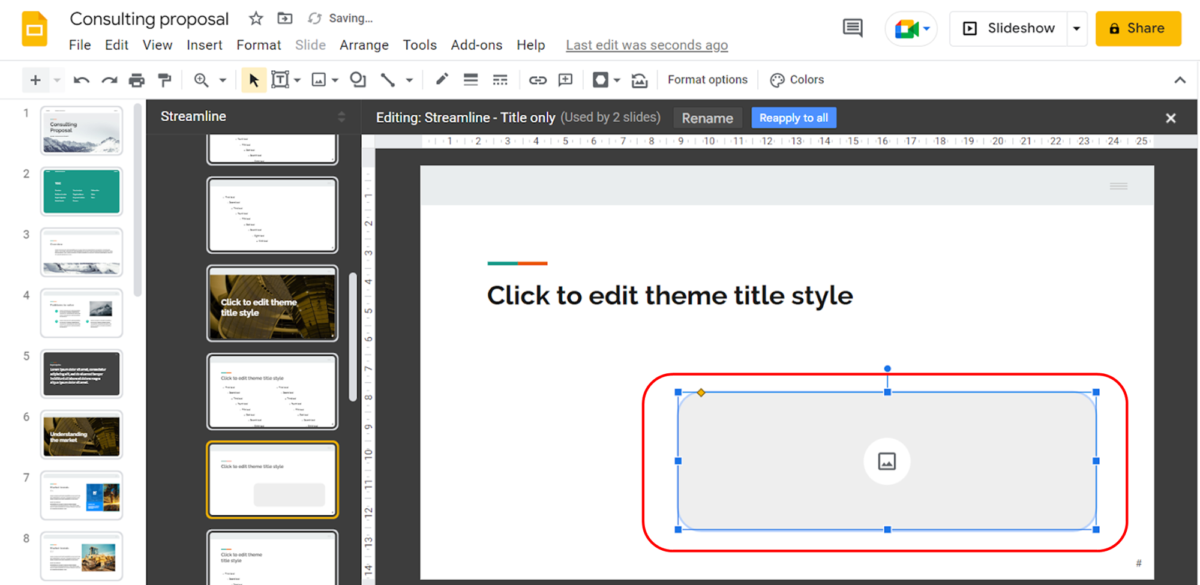
You can now draw the image placeholder in the slide layout. You can also move and resize it.
Step-5: Click on the “X” icon
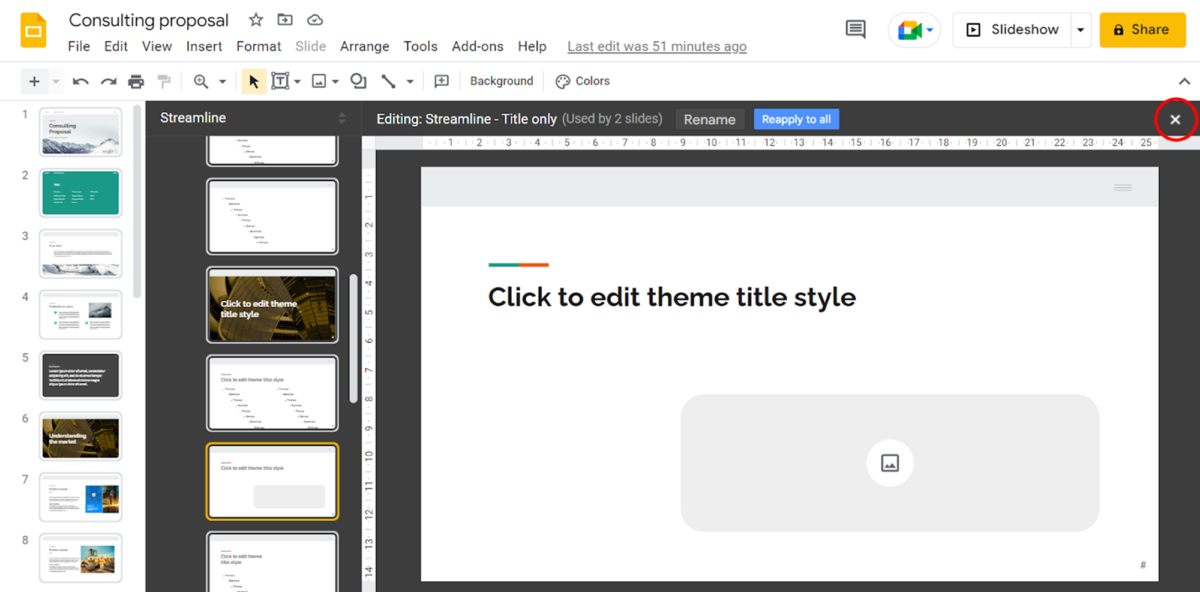
Finally, all you have to do is click on the “X” icon at the top right corner of the “Theme builder” screen to return to normal view.
9. How to Insert Image into a Shape in Google Slides?
The “Mask image” option in Google Slides allows you to insert an image into any of the preformatted shapes available. To insert an image into a shape, follow the 3 simple steps.
Step-1: Click on the “Insert image” option
In the toolbar located under the menu bar at the top of the screen, click on the “Insert image” option. Then select the image source to insert the picture into the open slide.
Step-2: Click on the “Mask image” option
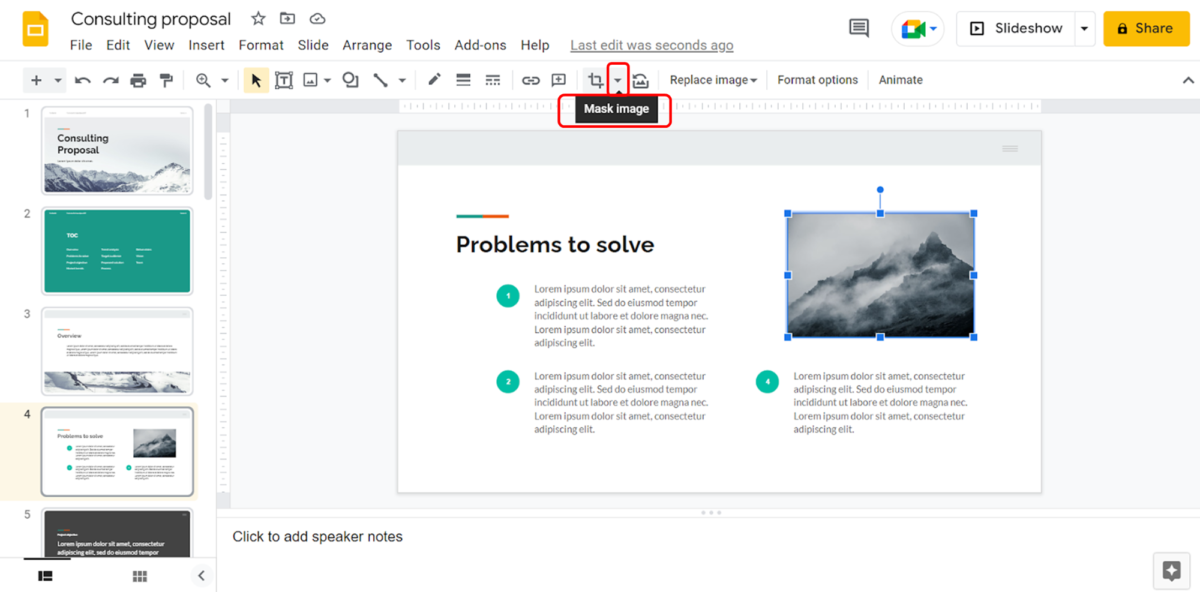
The next step is to add a shape to the inserted picture. Click on the “Mask image” option in the toolbar. It is the down arrow beside the “Crop” option.
Step-3: Select a shape
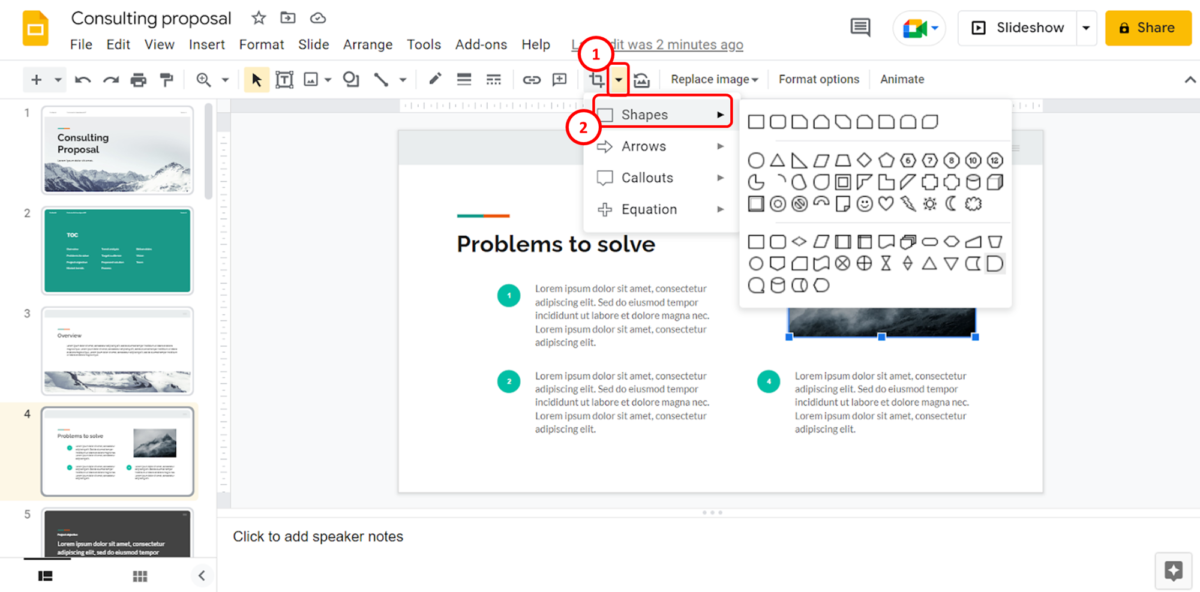
In the dropdown menu under the “Mask image” option, click on the type of shape that you want to add to the image. Then select the shape from the pop-up list to insert the picture into it.
10. How to Insert Image into a Table in Google Slides?
In Google Slides, you cannot insert an image into a table. However, you can insert an image to the slide and move it to the table. To do so, follow the 4 quick steps.
Step-1: Click on the “Table” option
The first step is to insert the table. Click on the “Insert” menu at the top of the screen. Then click on the “Table” option in the “Insert” menu. You can select the table dimensions.
Step-2: Click on the “Insert image” option
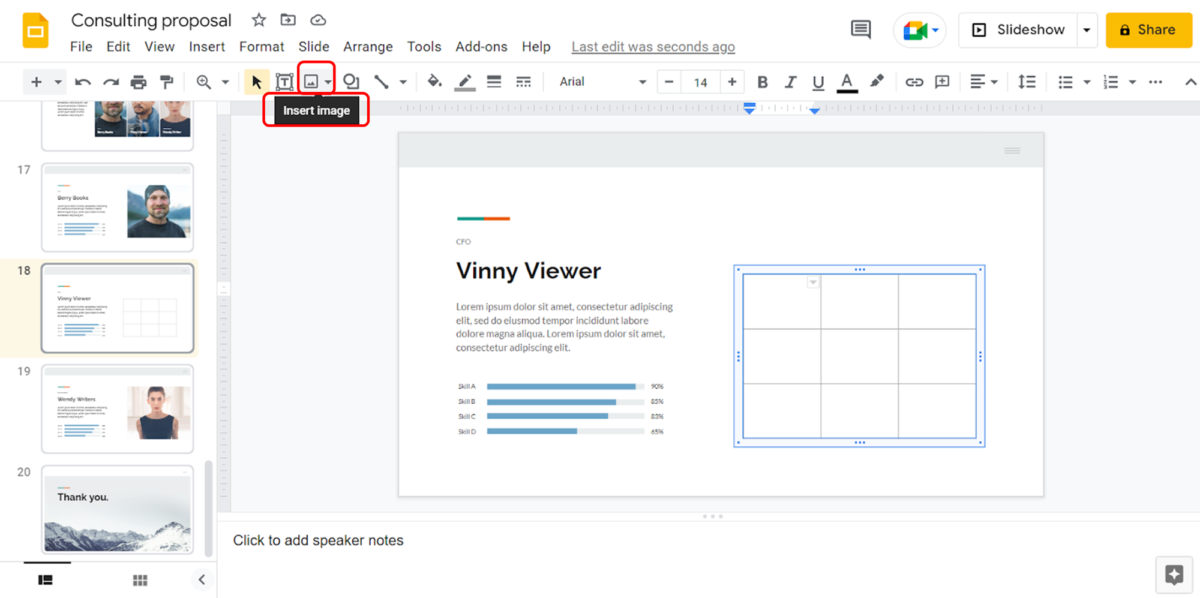
The next step is to insert an image into the slide. Click on the “Insert image” option in the toolbar.
Step-3: Select the image source
Now you have to select the image source. Refer to section 2 for detailed steps on inserting images from each source.
Step-4: Move and resize the image

The image will be inserted outside of the table. Click and drag the image to move it inside the table. You can click on the corners of the image to resize it to fit inside a cell.
11. How to Get Free Images for Google Slides?
In Google Slides, there is no separate source for free stock images. To get free images, you have to check the license for the images that you want to use. All you have to do is follow the 6 simple steps.
Step-1: Click on the “Insert” menu

The first step is to click on the “Insert” menu in the menu bar. In the “Insert” menu, click on the “Images” option.
Step-2: Click on the “Search the web” option
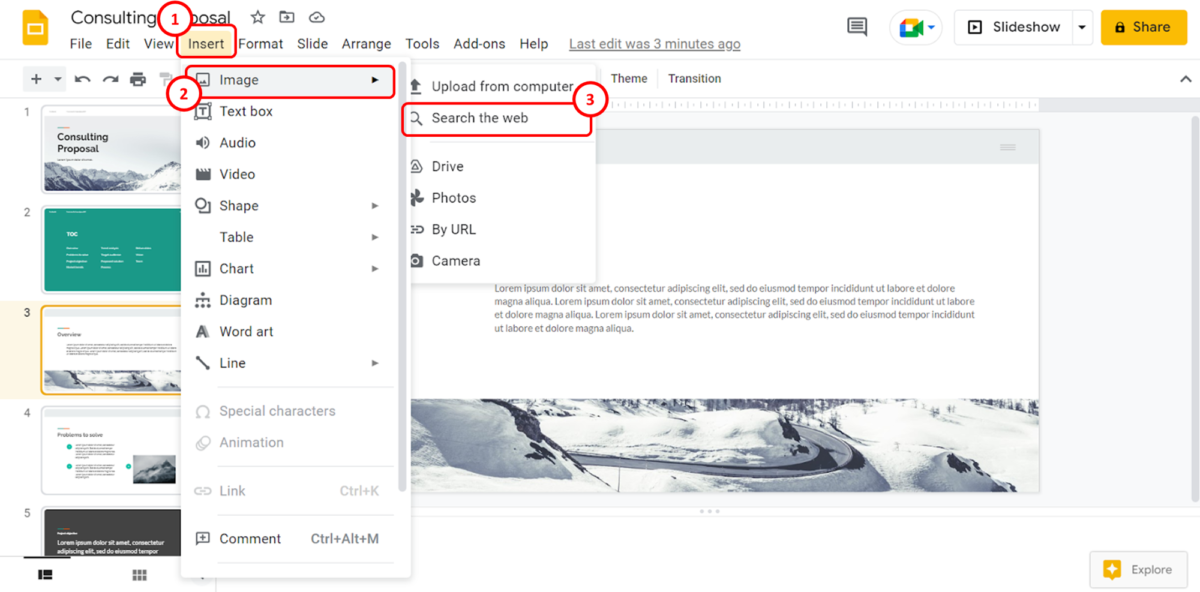
In the dropdown menu beside the “Images” option, click on the “Search the web” option. This will open a sidebar on the right side of the screen.
Step-3: Click on the “Search for images” option
Now you have to click on the “Search for images” box at the top of the sidebar. In the box, type in the keywords for the image that you want to insert.
Step-4: Click on the “+” icon
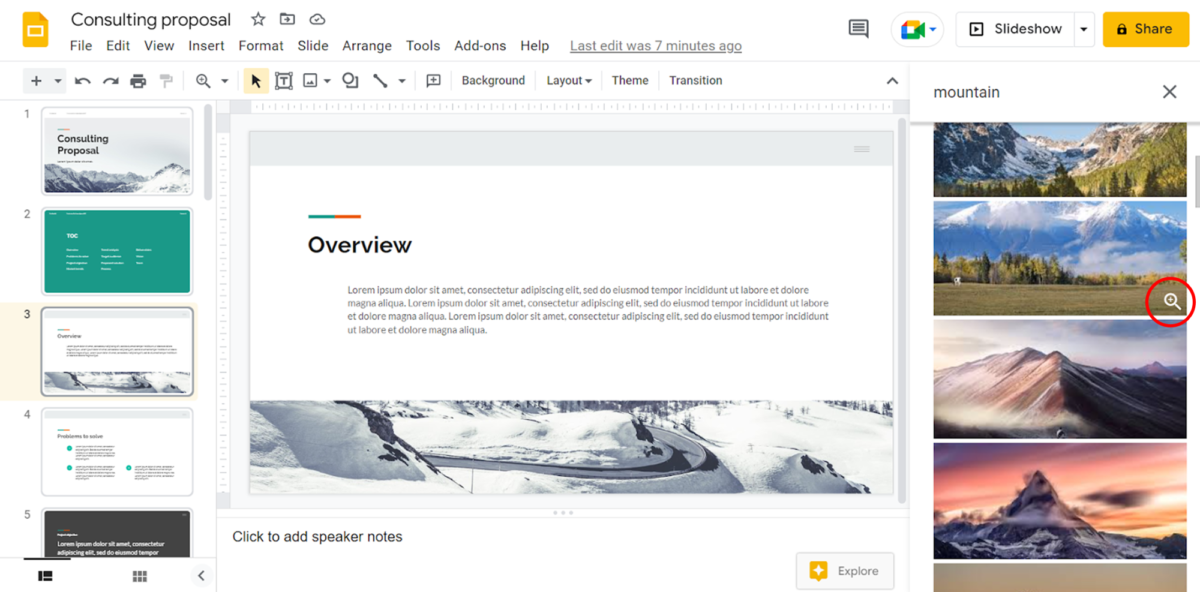
The search results will appear as thumbnails in the sidebar. Click on the “+” icon on the right corner at the bottom of the preferred picture to view it.
Step-5: Click on the image link
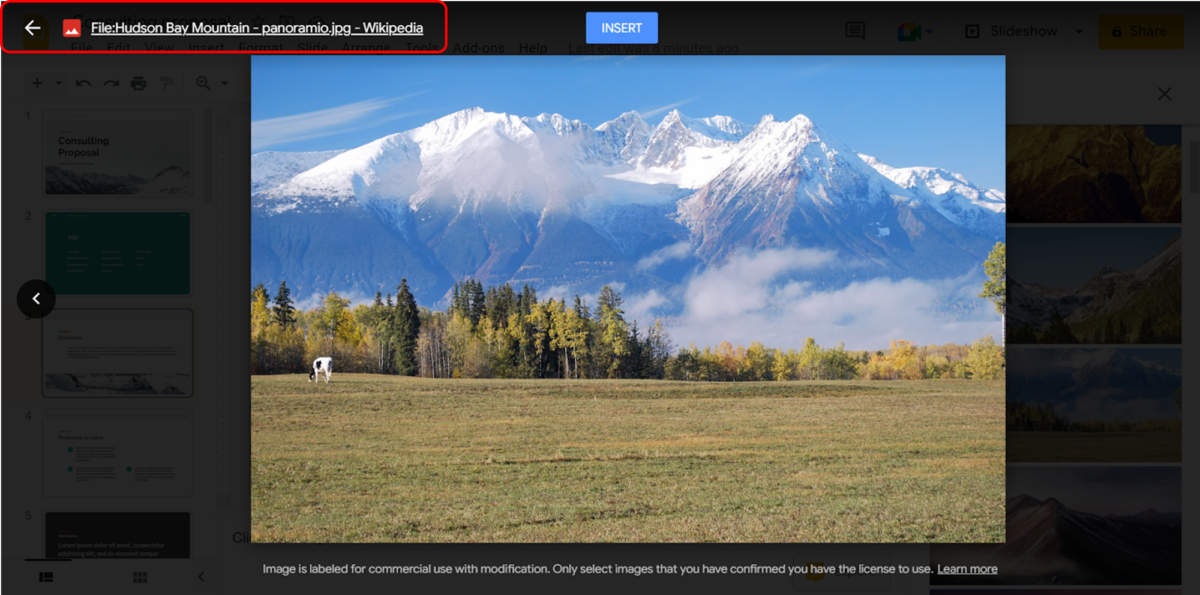
At the top of the screen, click on the image description. This will open the image source. If the picture is licensed as “Creative Commons” or “Public Domain”, you can use the picture for free.
Step-6: Click on the “Insert” button
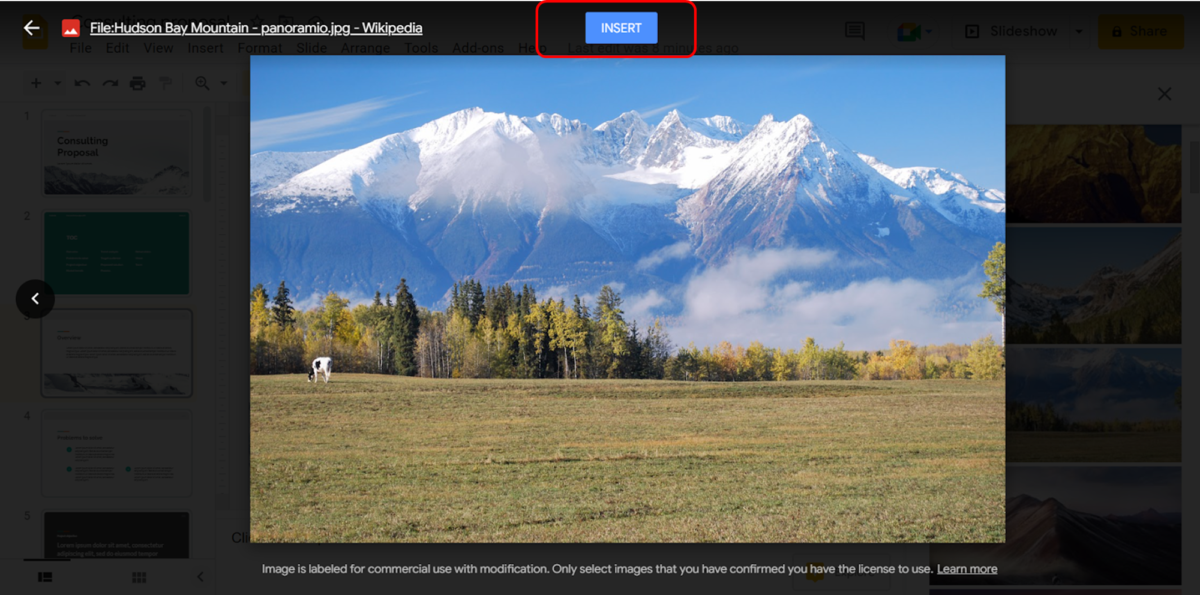
Now all you have to do is click on the “Insert” button at the top of the screen to insert the free image into the presentation slide.
12. Getting Unsupported Image Type Error in Google Slides? Here’s How to Fix It! [Link to Another Article]
The “Unsupported Image Type” error in Google Slides shows that the application is unable to upload an image to insert into the slide. The error occurs when you try to insert an image file that is not supported by Google Slides.
To fix the issue, you have to change the file type of the image. You can do so using image converters available online. You can also manually change the file extension of the image. For more detailed steps on these fixes, you can read my previous article here.