
Arranging the order of images in a Google Slides presentation can help you create a more organized and visually appealing layout. And so, you can easily adjust the stacking order of images in Google Slides.
To move image to the back or front in Google Slides, go to the “Arrange” tab and click on “Order” in the dropdown menu. Then choose ” send to back” or “bring to front” from the pop-up menu of the “order” option according to your preference.
You can alternatively press the “Ctrl+↓” or “Ctrl+↑” keys to move image to the back or front in the Google Slides.
This article will also help you to learn how to move image placeholder, image behind the text as well as change layer order in Google Slides. Let’s work together with this complete guide and find the preferred image order that works best for your content!
1. How to Move the Image to Back in Google Slides?
While making presentation slides in Google Slides, you might need to rearrange the image position. In Google Slides, you can move an image on a slide to the back very quickly using the “Arrange” option.
1.1 How to Send Image to Back in Google Slides?
To send an image to the back in Google Slides, you have to follow 2 quick steps.
Step-1: Click on the “Arrange” tab
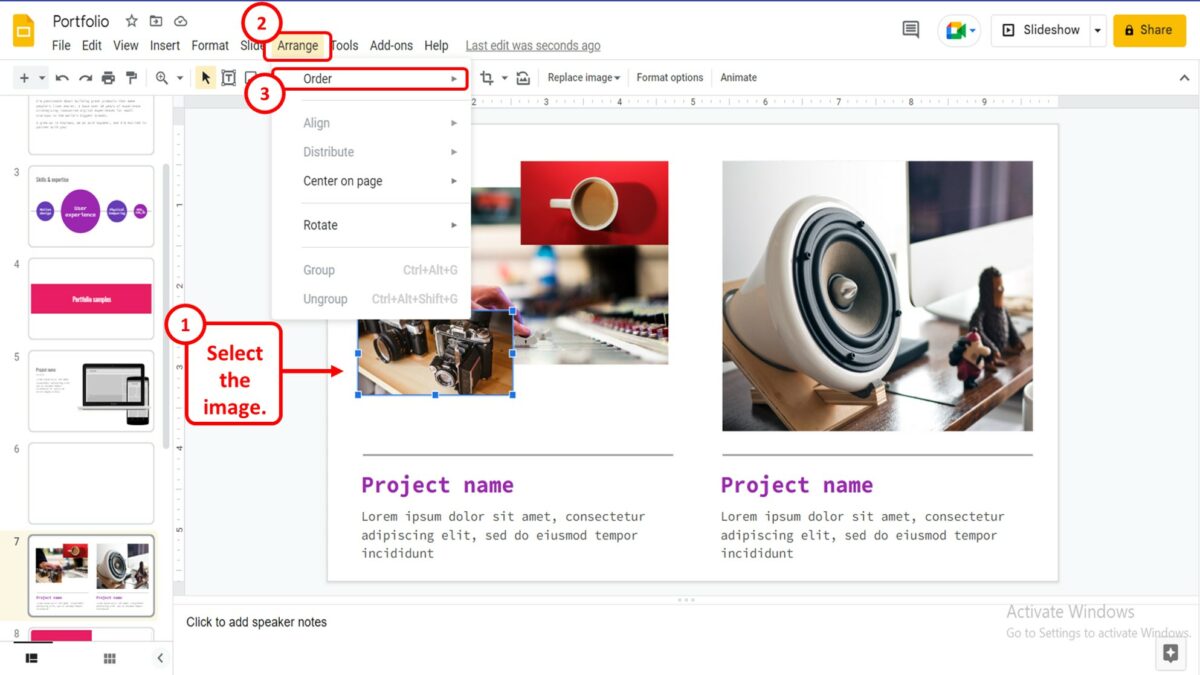
In Google Slides, to move an image, you will have to first select the image. Then click on the “Arrange” format in the menu bar at the top of the screen. In the dropdown menu under the “Arrange” tab, click on the “Order” option.
Step-2: Click on the “Send to back” option
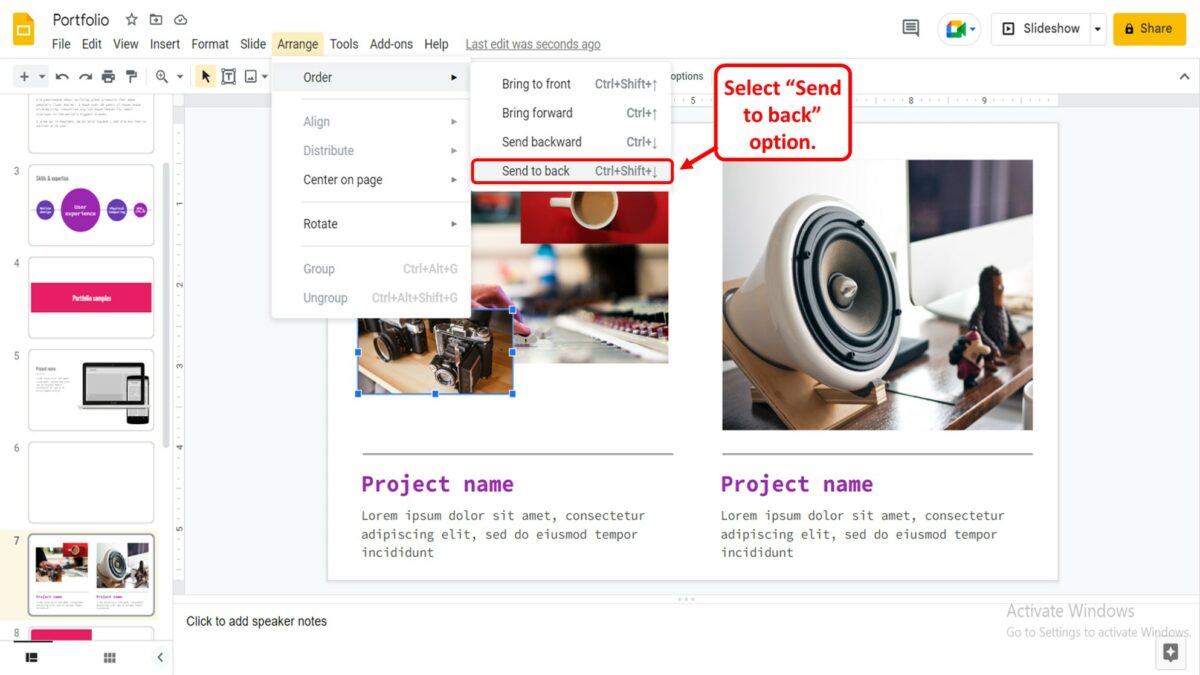
A pop-up menu will appear by the “Order” option in the “Arrange” menu. Then you have to select the “Send to back” option. Alternatively, you can press the “Ctrl+Shift+↓” keys on your keyboard to send the image to the back.
1.2 How to Send Image Backward in Google Slides?
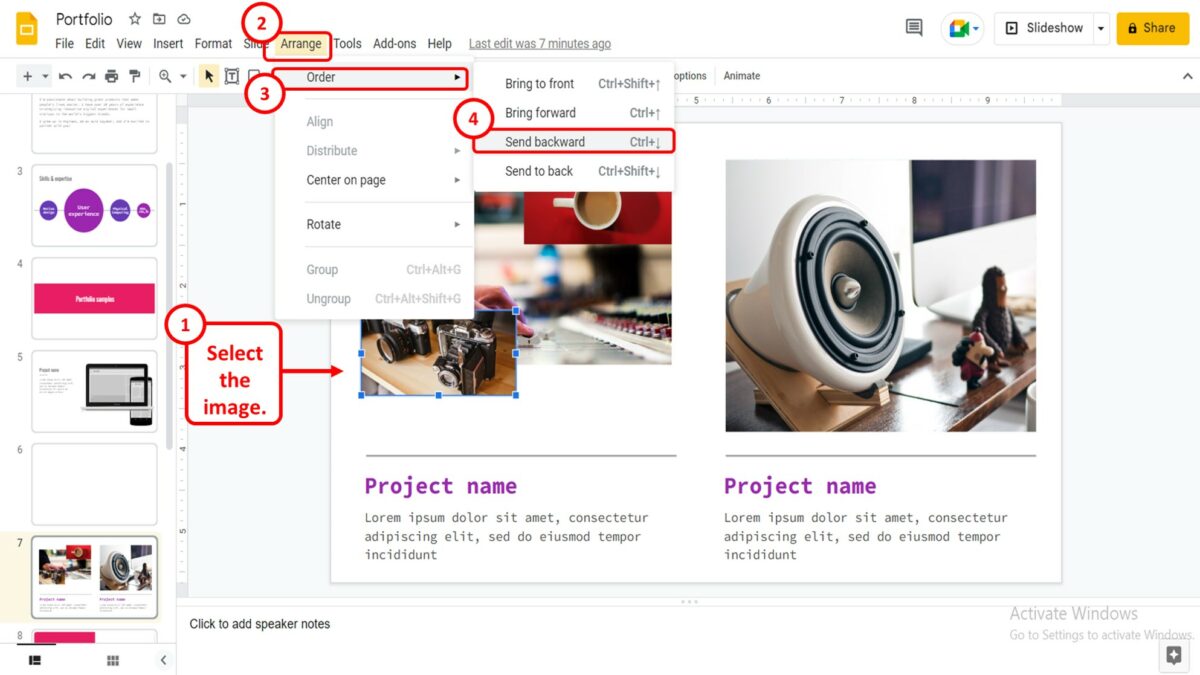
To send images backwards in Google Slides, you have to first select the image. Then click on the “Arrange” tab in the menu. In the pop-up menu by the “Order” option in the “Arrange” tab, click on the “Send backward” option. You can alternatively press the “Ctrl+↓” keys on your keyboard to send the image backward.
2. How to Move Image to the Front in Google Slides?
In Google Slides, you can move an image to the front of all the objects on a slide using the “Arrange” menu. You can also move the image in front of a single object.
2.1 How to Bring Image to Front in Google Slides?
You can easily bring an image to the front in Google Slides. To do so, you have to follow the 2 easy steps.
Step-1: Click on the “Arrange” menu
The first step is to select the image that you want to bring to the front. Then click on the “Arrange” tab in the menu bar located at the top of the screen. A dropdown menu will appear. Click on the “Order” option from that dropdown menu.
Step-2: Click on the “Bring to front” option
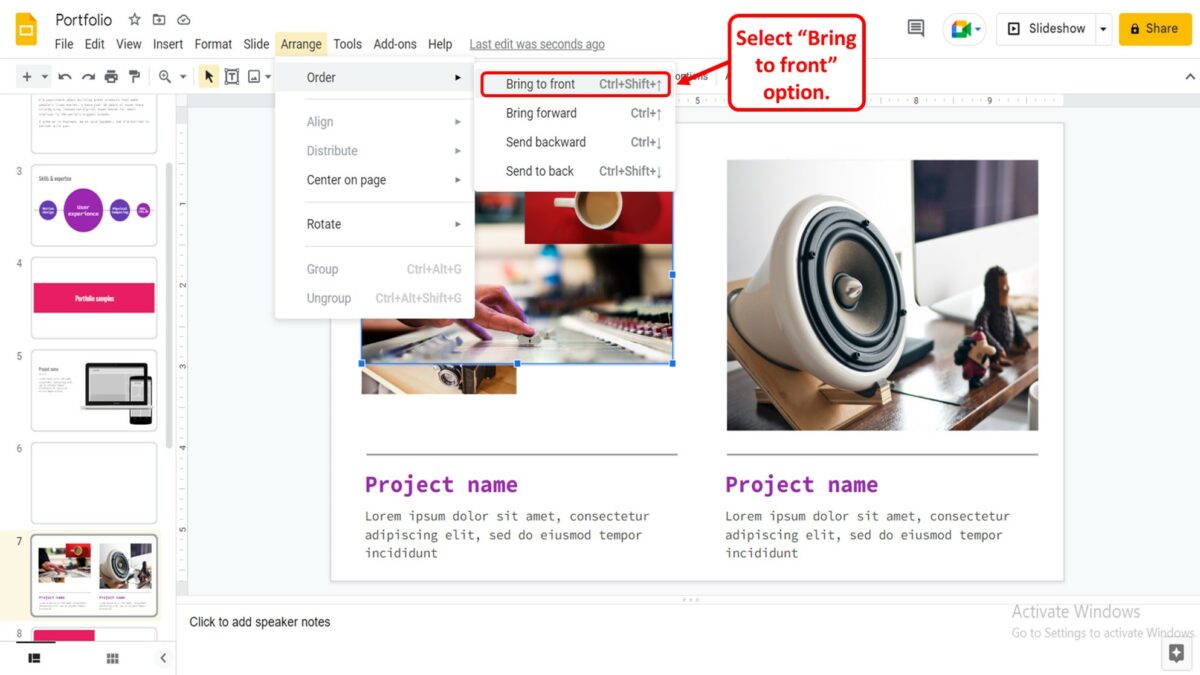
When you click on the “Order” option in the “Arrange” menu, another menu will pop up on the screen. Now you have to click on the “Bring to front” option in the pop-up menu. You can alternatively press the “Ctrl+Shift+↑” keys on your keyboard to bring an image to the front.
2.2 How to Bring Image Forward in Google Slides?
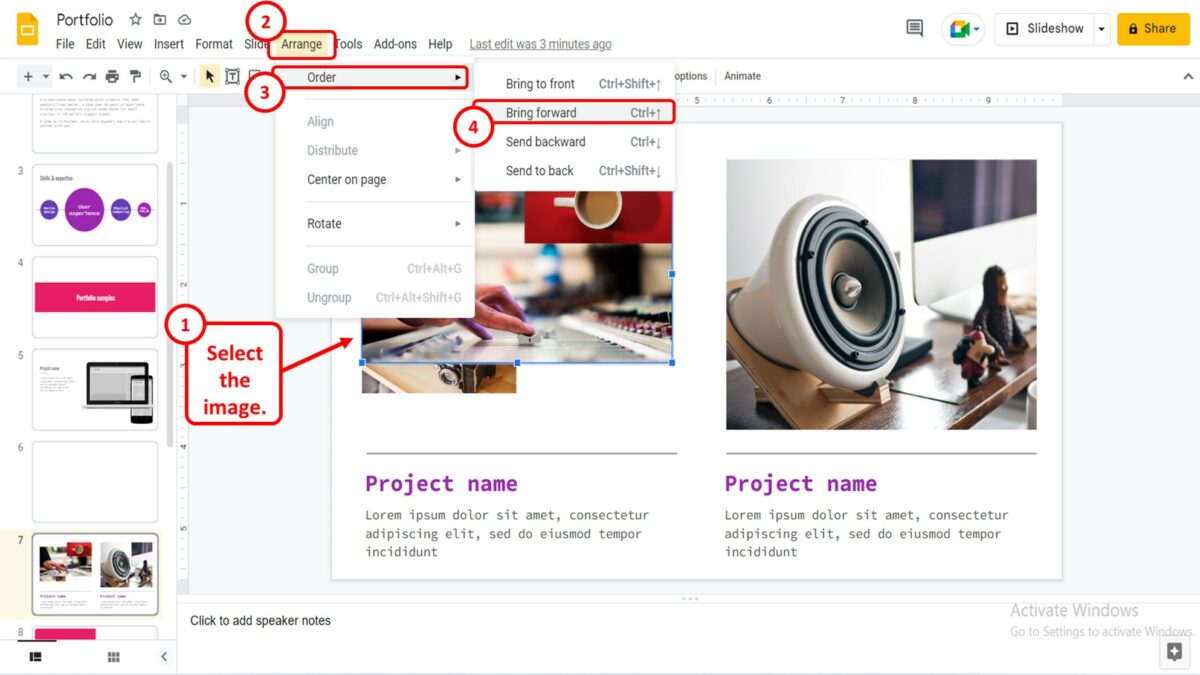
To bring an image forward in Google Slides, you can use the “Arrange” menu. In the “Arrange” menu, click on the “Order” option. Then click on the “Bring forward” option in the pop-up menu by the “Order” option. You can alternatively press the “Ctrl+↑” keys on your keyboard to bring an image forward.
3. How to Move Image Placeholder in Google Slides?
To move an image placeholder in Google Slides, you have to insert an image placeholder first. You can easily insert an image placeholder by using the “Theme builder” option. All you have to do is follow the 5 quick steps.
Step-1: Click on the “View” option
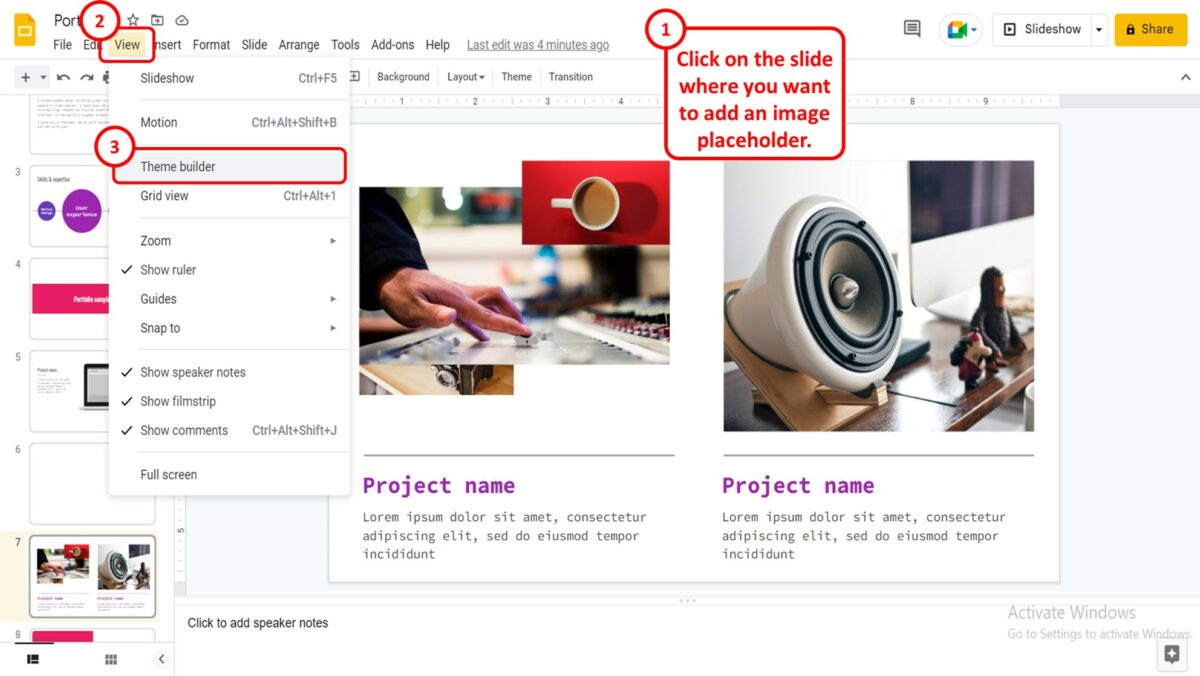
First, click on the slide where you want to add an image placeholder. In the menu bar at the top of the screen, click on the “View” menu. Then click on the “Theme builder” option in the “View” dropdown menu.
Step-2: Click on the “Insert” option
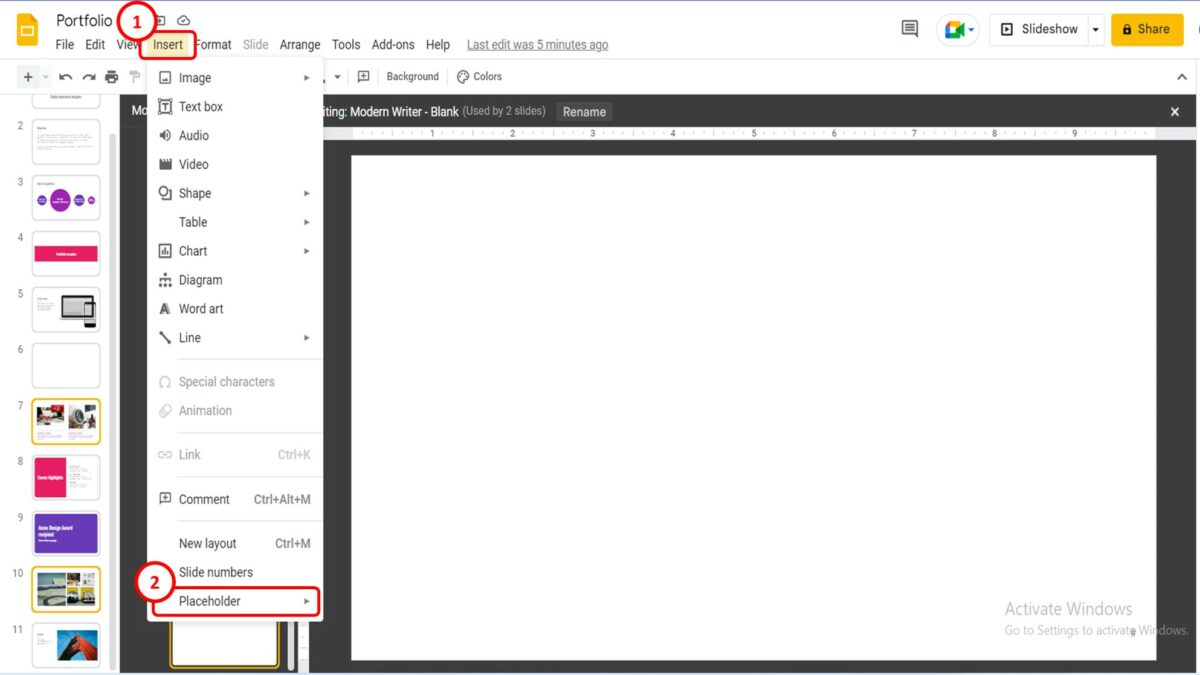
In the menu bar at the top of the screen, click on the “Insert” menu. Then you have to click on the “Placeholder” option from the “Insert” dropdown menu.
Step-3: Click on the “Image placeholder” option
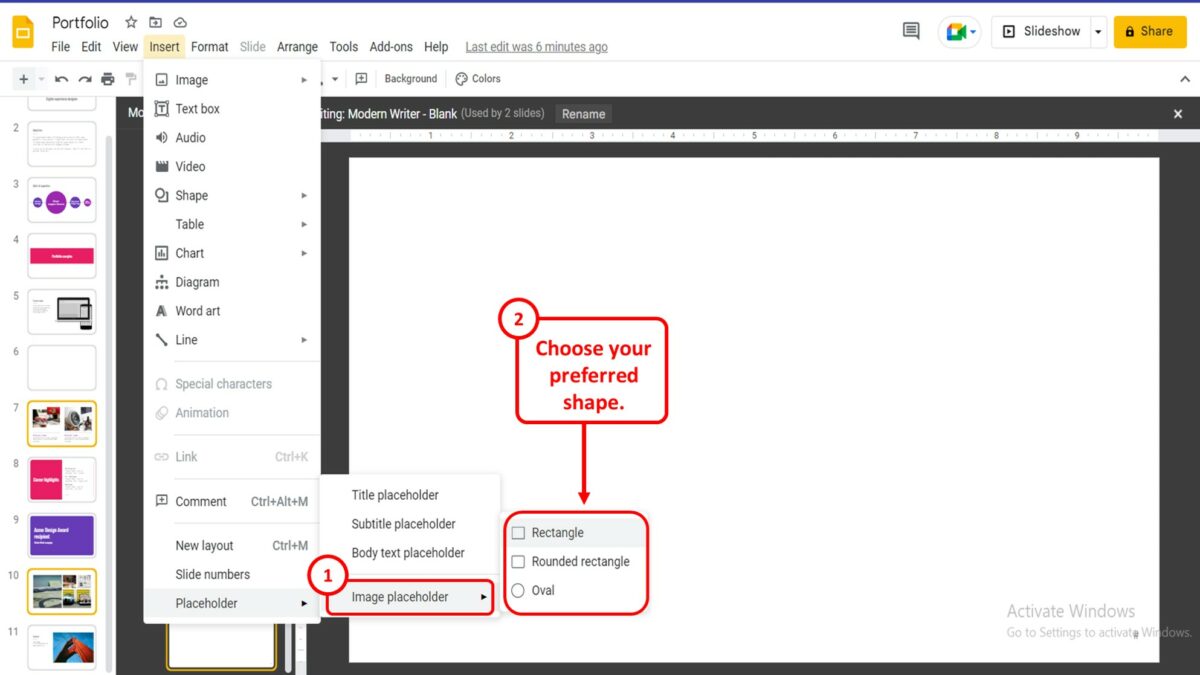
In the pop-up menu by the “Placeholder” option, click on the “Image placeholder” option. Then all you have to do is to click on your preferred shape from the “Rectangle”, “Rounded Rectangle”, and “Oval” options.
Step-4: Click on the “Arrange” menu
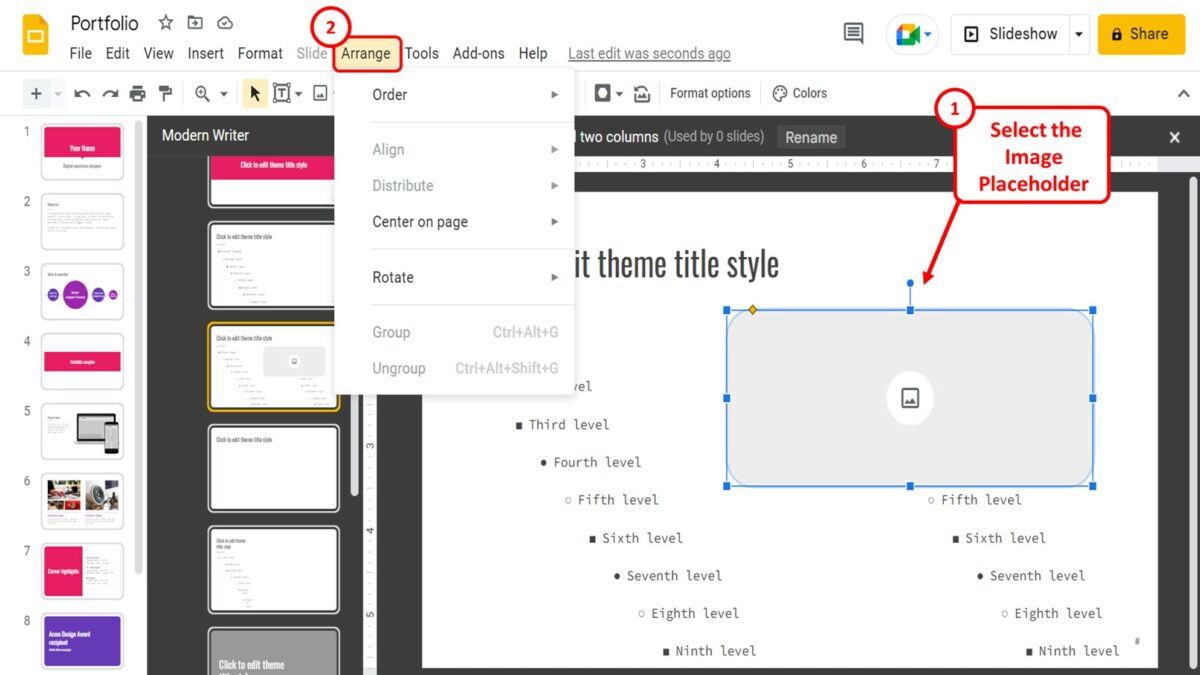
The next step is to click on the image placeholder to select it. Then click on the “Arrange” menu in the menu bar at the top of the screen.
Step-5: Click on the “Order” option
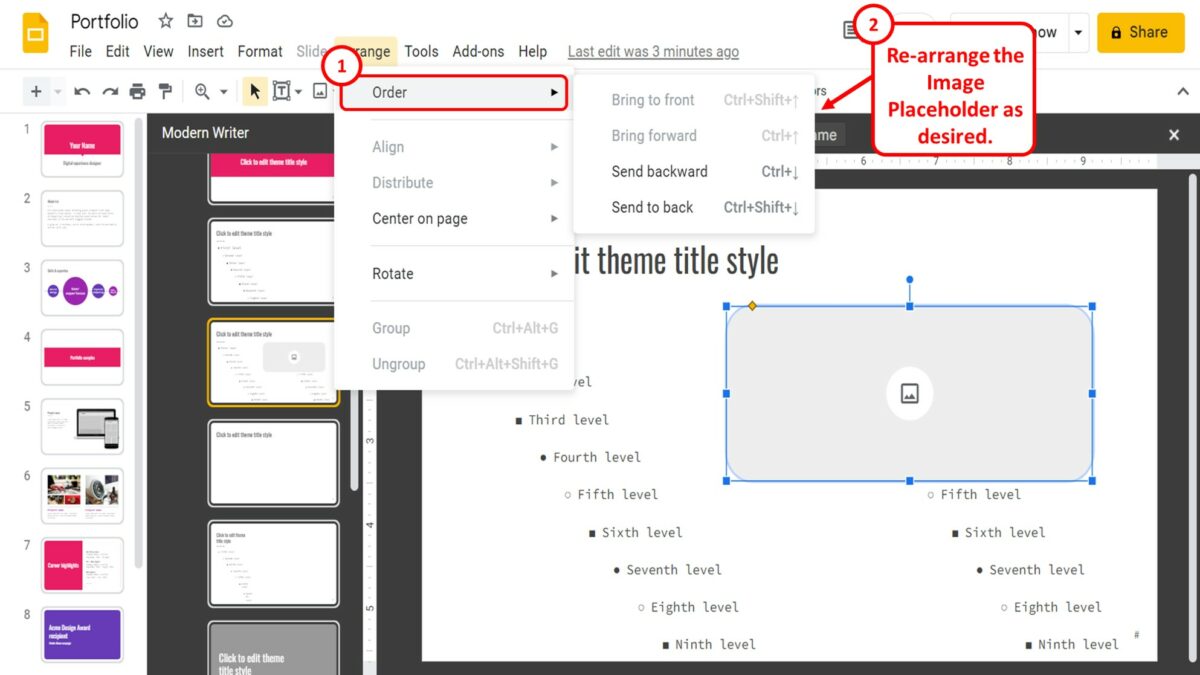
Finally, all you have to do is click on the “Order” option in the “Arrange” dropdown menu. In the pop-up menu by the “Order” option, you can now select how you want to rearrange the image placeholder.
4. How to Move Image Behind Text in Google Slides?
In Google Slides, you can easily position your image behind a text box using the “Arrange” menu. All you have to do is to follow the 3 quick steps.
Step-1: Move the image over the text
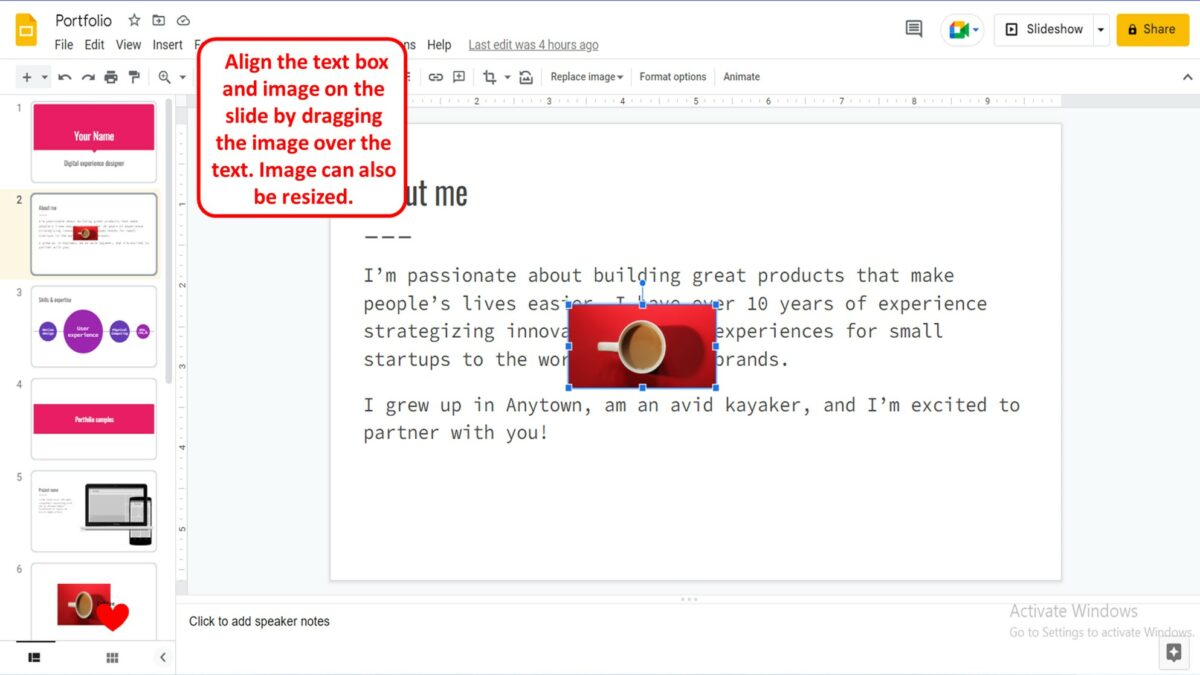
The first step is to align the text box and the image on the slide. To do so, all you have to do is click and drag the image over the text. You can also resize the image to cover the entire text box.
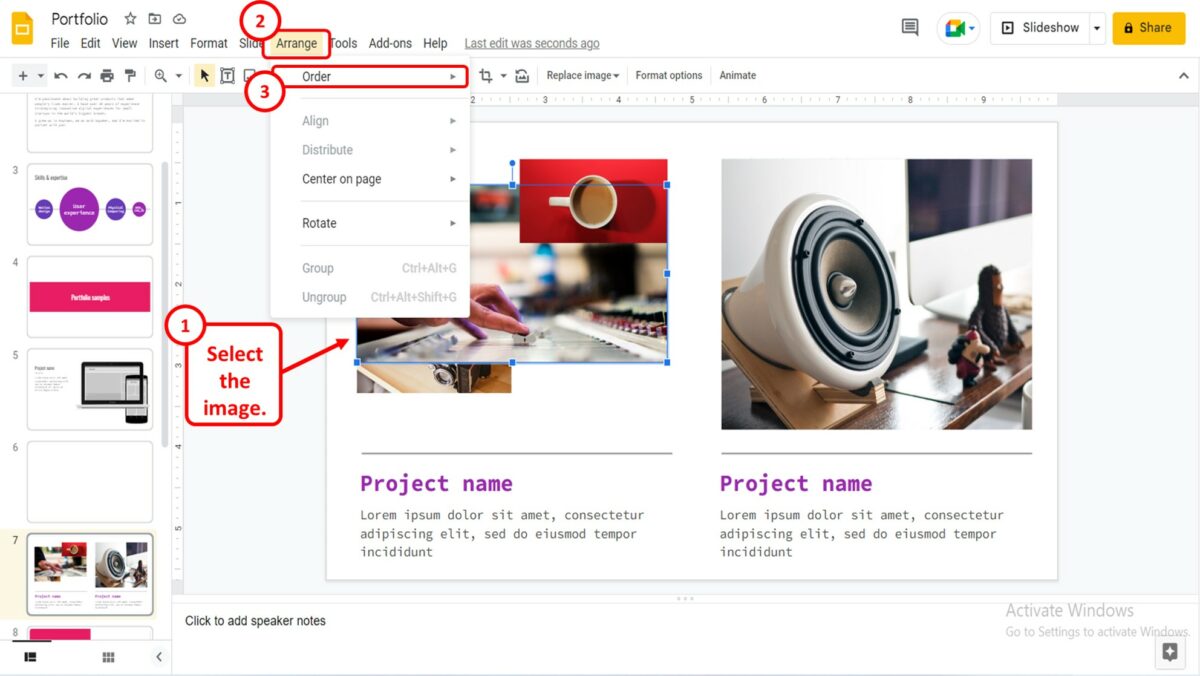
Step-2: Click on the “Arrange” menu

The next step is to click on the “Arrange” menu in the menu bar located at the top of the screen. A dropdown menu will appear. In the “Arrange” dropdown menu, you have to select the “Order” option.
Step-3: Click on the “Send to back” option
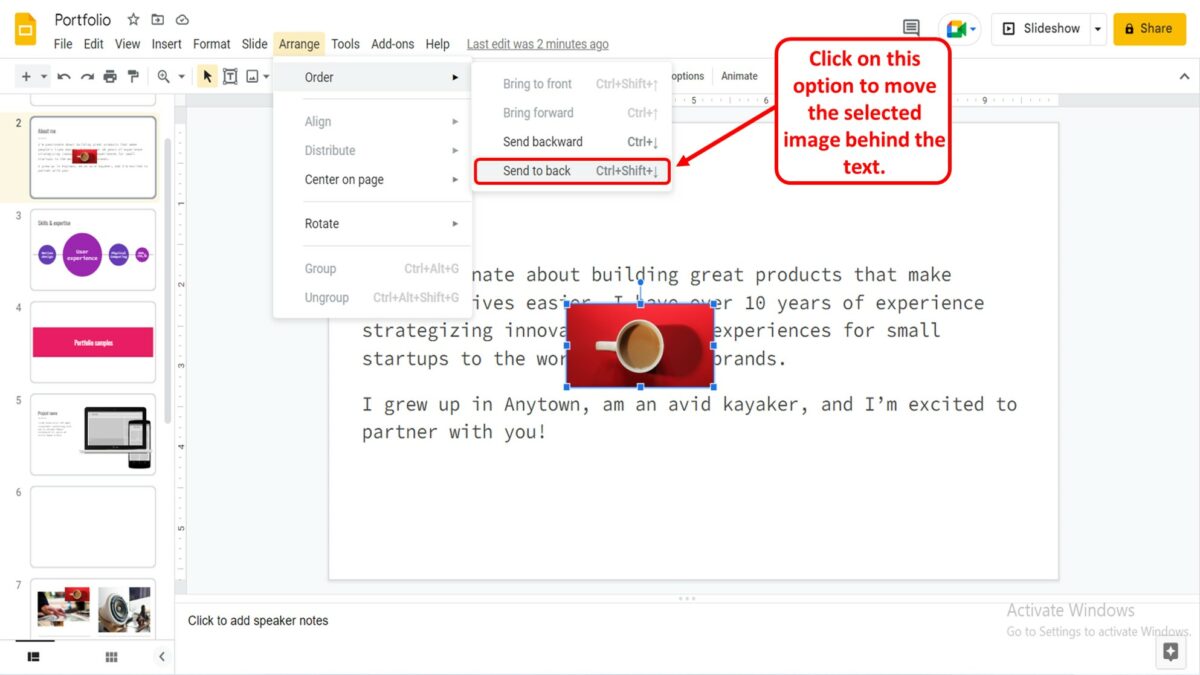
A pop-up menu will appear when you click on the “Order” option. All you have to do is click on the “Send to back” option in the pop-up menu to move the selected image behind the text.
5. How to Change Layer Order in Google Slides?
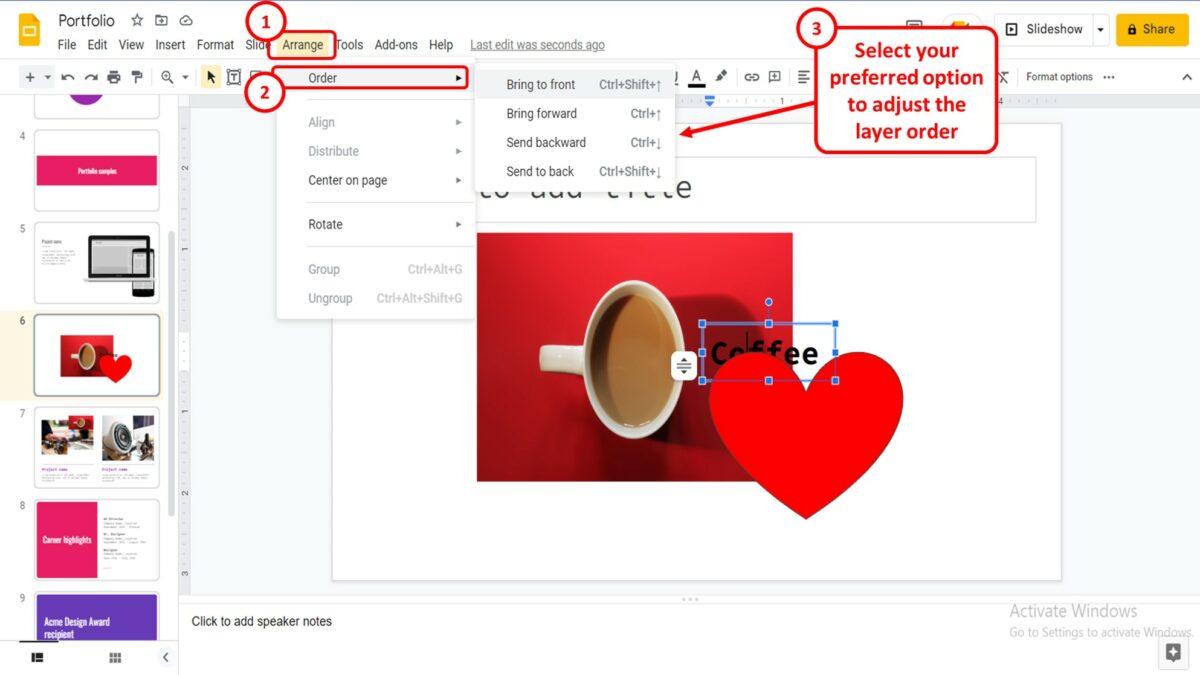
The “Order” option in Google Slides allows you to change the layer order of objects on a slide. To change the layer order, all you have to do is click on the “Arrange” menu in the menu bar at the top of the screen. Then click on the “Order” option in the dropdown menu under the “Arrange” tab. A pop-up menu will appear by the “Order” option where you can select your preferred option to adjust the layer order.