Grouping and ungrouping objects in Google Slides can help you streamline your design process and create more efficient presentations. This can also save you time and effort, especially if you have a complex slide with many objects.
To group objects in Google Slides, select the objects, go to the “Arrange” menu in the menu bar and then click on the “Group” option. Similarly, to ungroup objects, select the group, go to the “Arrange” menu in the menu bar and then click on the “ungroup” option.
You can also use the keyboard shortcut Ctrl + Shift + G to group or Ctrl + Shift + Alt + G to ungroup the objects.
Let’s try Grouping and Ungrouping objects in Google Slides with our Step-by-Step guide!
1. How to Select Multiple Objects in Google Slides?
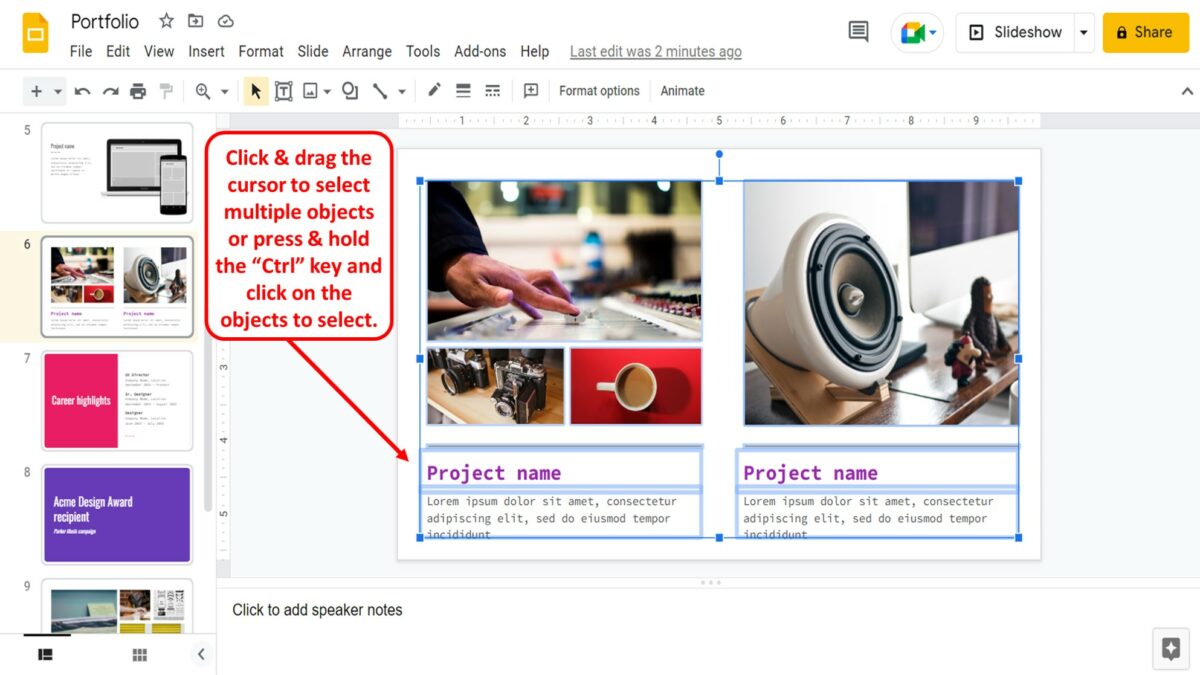
To select multiple objects on a slide in Google Slides, you can just click and drag the cursor to select multiple adjacent objects. Alternatively, you can press and hold the “Ctrl” key on your keyboard and click on the objects that you want to select.
2. How to Group Elements in Google Slides?
The “Group” feature in Google Slides allows you to group multiple objects on a slide together. Once grouped, you can move, resize and edit all the objects in a group together as a single object. You can group elements in various methods.
2.1 Method 1 – Using Right-Click
To group objects on a slide in Google Slides using the “Right Click”, follow the 2 quick steps.
Step-1: Select multiple objects
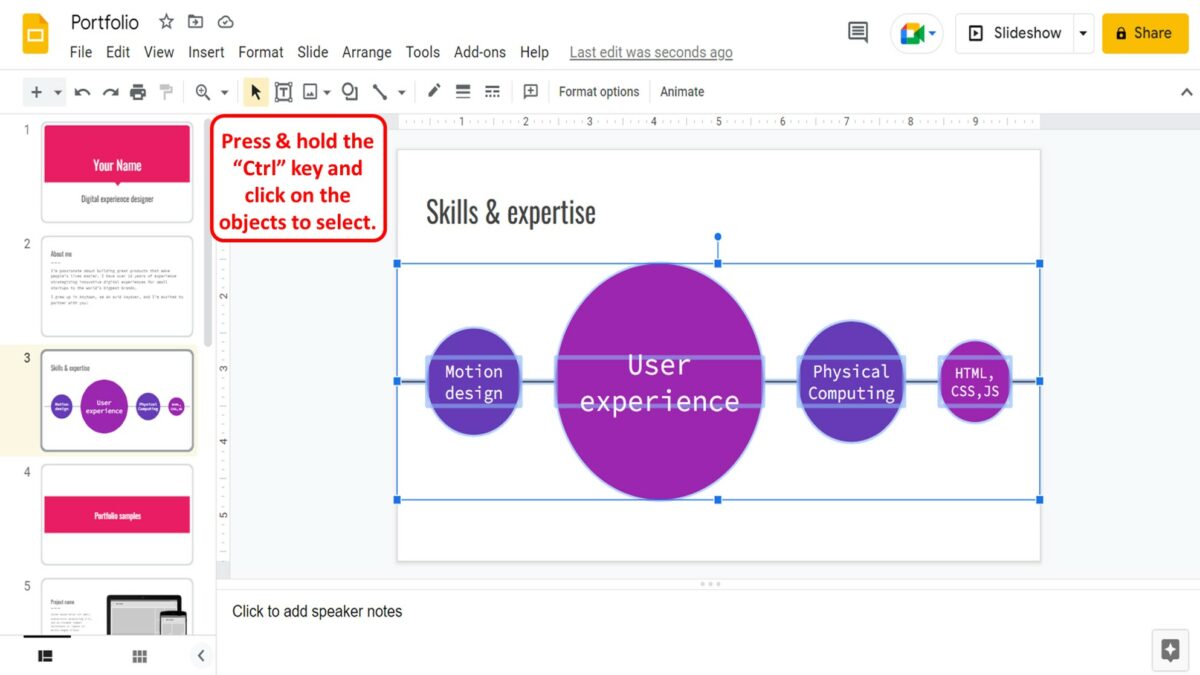
The first step is to select all the objects on a slide that you want to group together. To do so, press and hold the “Ctrl” key on your keyboard and click on the objects that you want to select.
Step-2: Click on the “Group” option
The next step is to “Right Click” on the selected objects. In the right-click menu, click on the “Group” option to group the selected objects on the slide.
2.2 Method 2 – Using the “Arrange” Menu
In Google Slides, you can also use the “Arrange” menu at the top of the screen to group several objects on a slide. All you have to do is follow the 3 simple steps.
Step-1: Select multiple objects
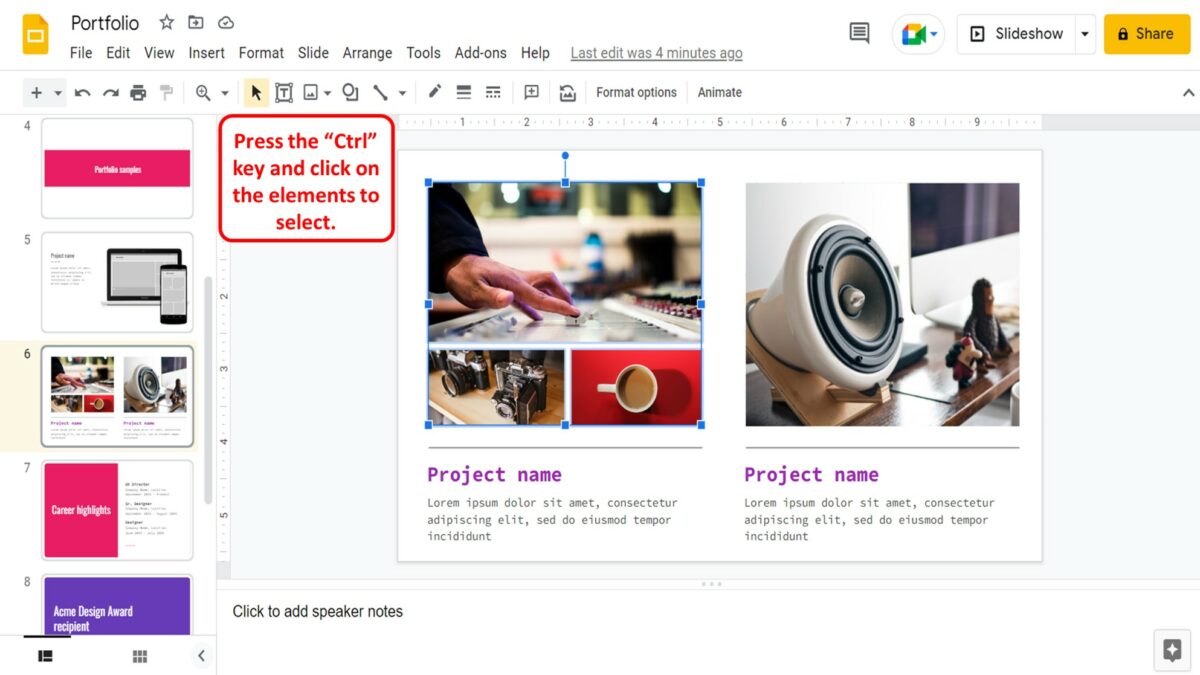
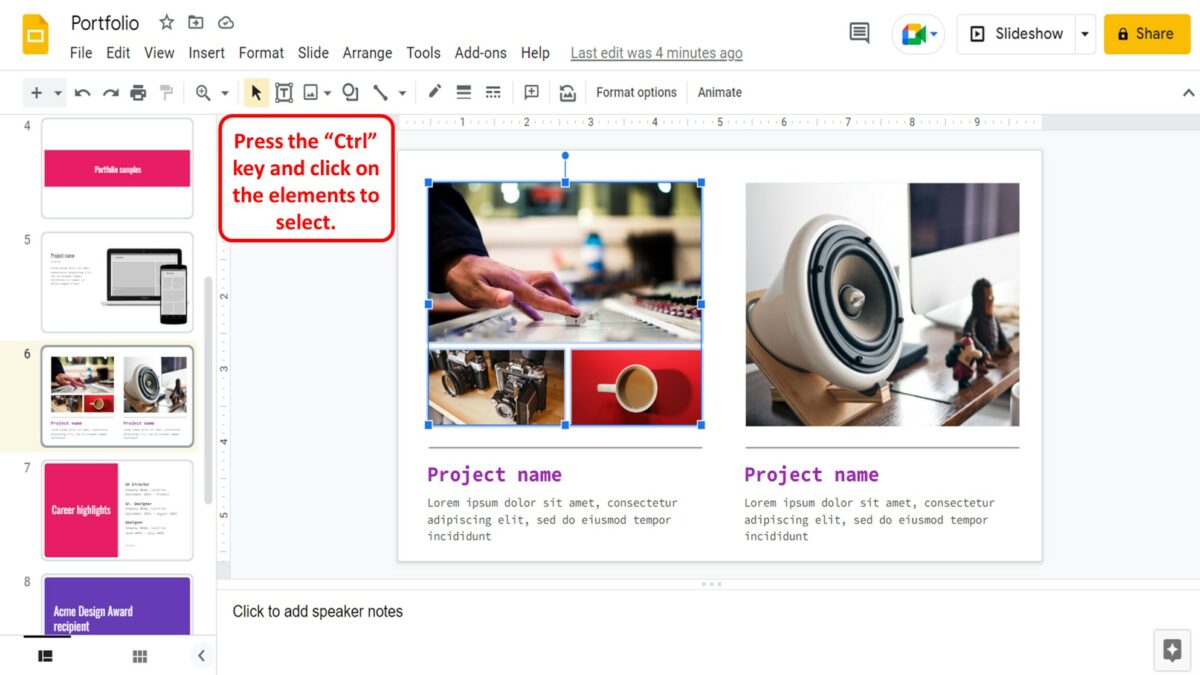
The first step is to select the objects on a slide. To do so, press the “Ctrl” key on your keyboard and click on the elements that you want to select.
Step-2: Click on the “Arrange” menu
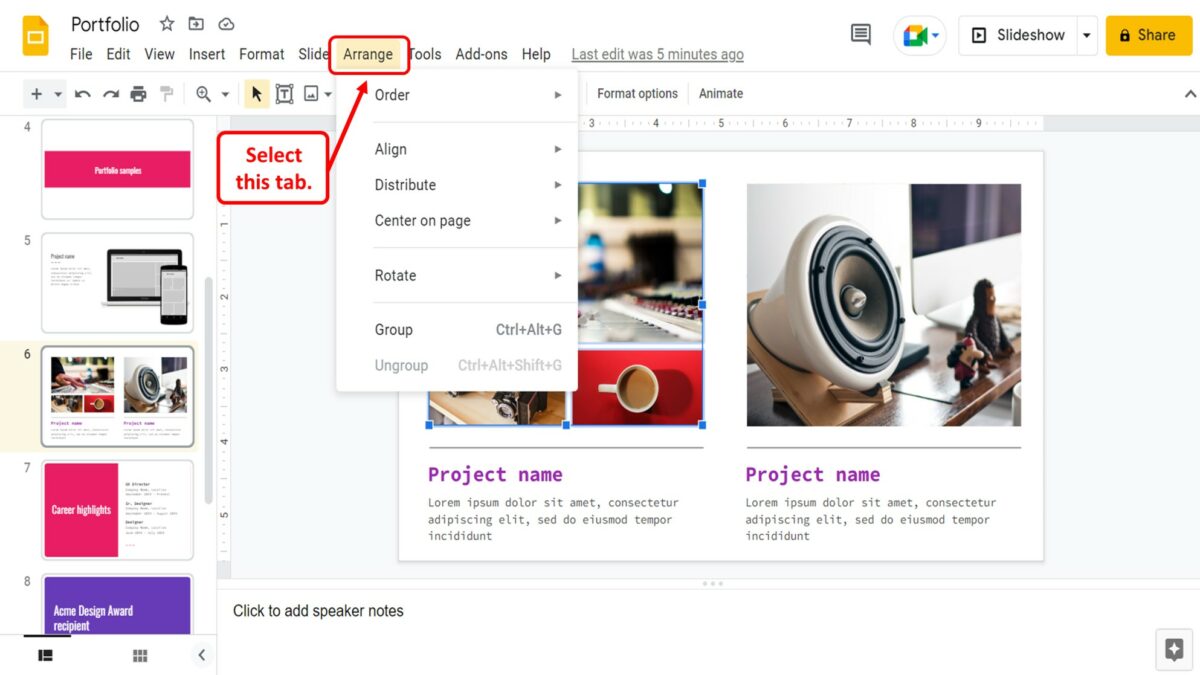
In the menu bar located at the top of the screen, click on the “Arrange” menu.
Step-3: Click on the “Group” option
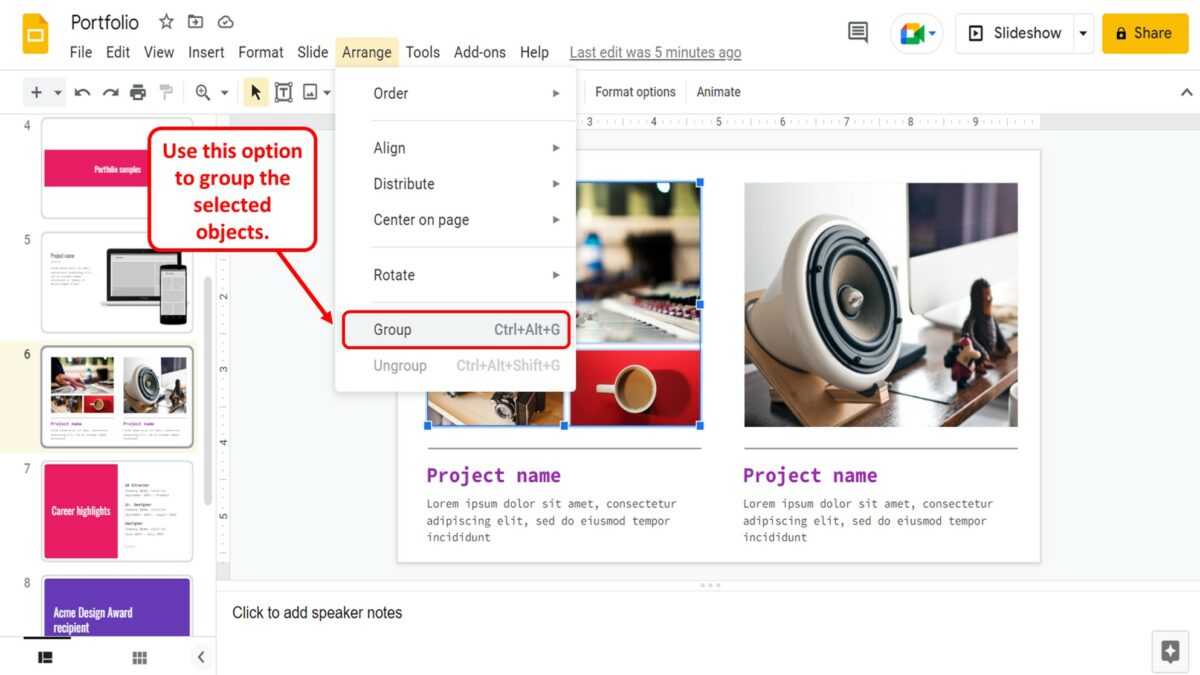
In the “Arrange” drop-down menu, click on the “Group” option to group the selected objects together.
2.3 Method 3 – Keyboard Shortcut
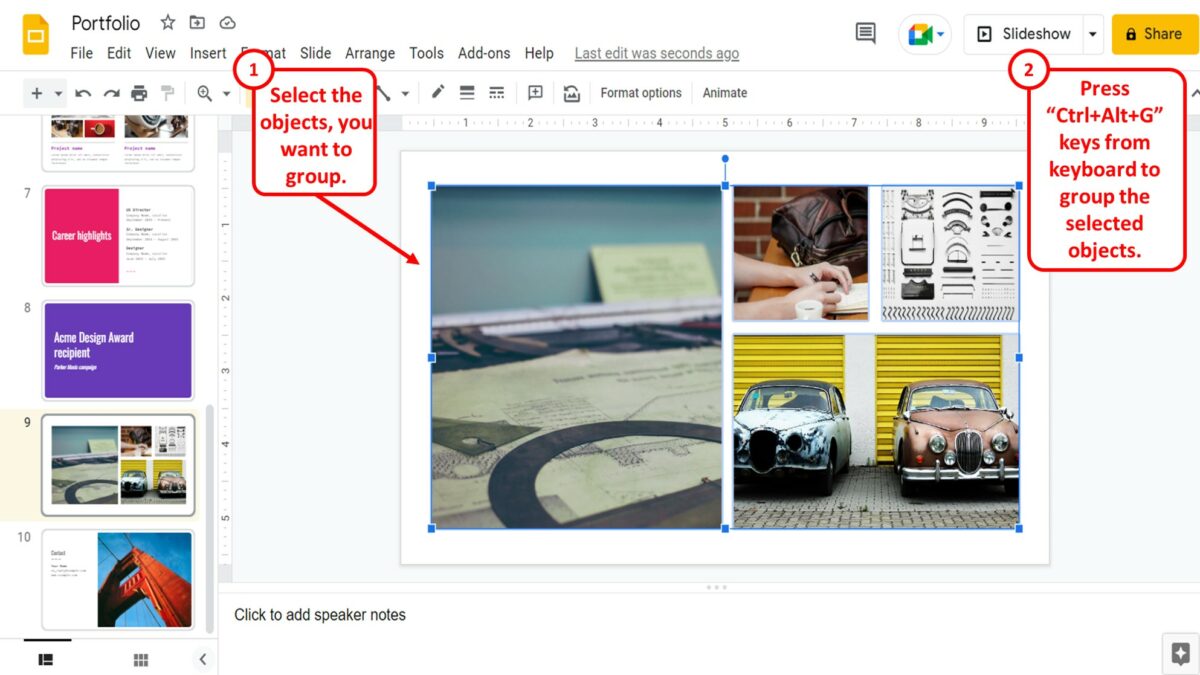
To quickly group objects together in Google Slides, you can use the keyboard shortcut. You have to first select the objects that you want to group. Then press the “Ctrl+Alt+G” keys on your keyboard to group the selected objects. On a Mac device, you have to press the “command+option+G” keys on your keyboard.
3. How to Group Images on Google Slides?
In Google Slides, you can group images on the same slide like any other object. To group images on a slide, all you have to do is follow the 3 quick steps.
Step-1: Select the images together
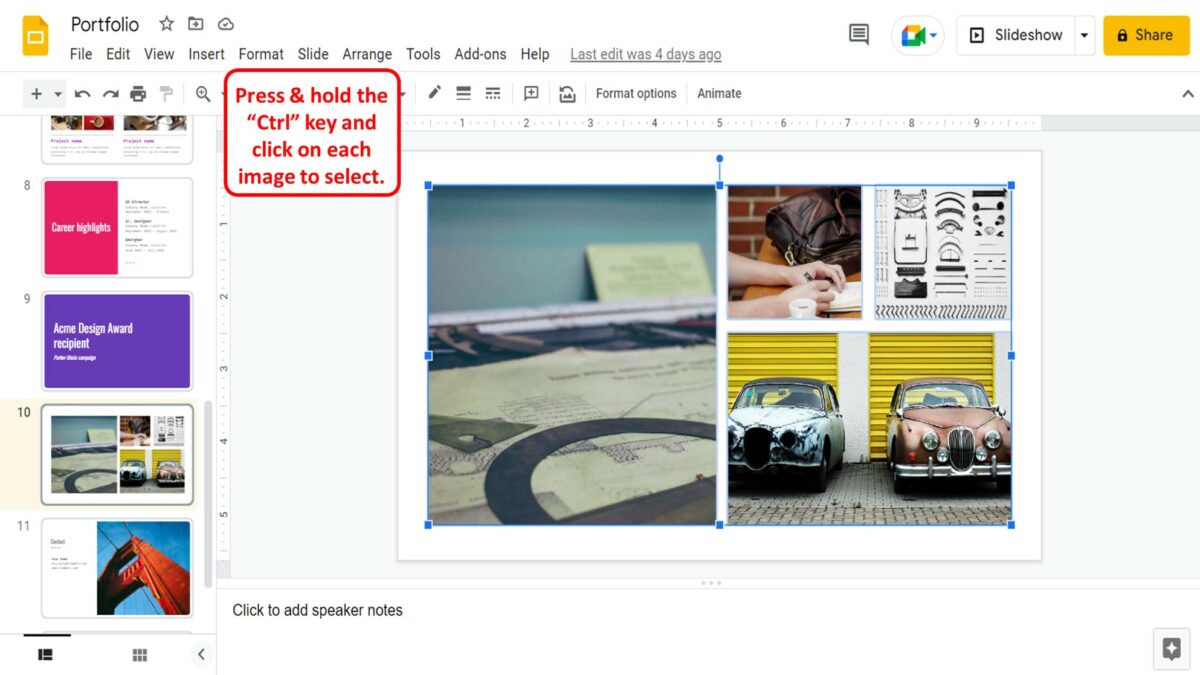
In the open slide, you have to first select all the images that you want to group. To do so, press and hold the “Ctrl” key on your keyboard and click on each image to select them.
Step-2: Click on the “Arrange” menu
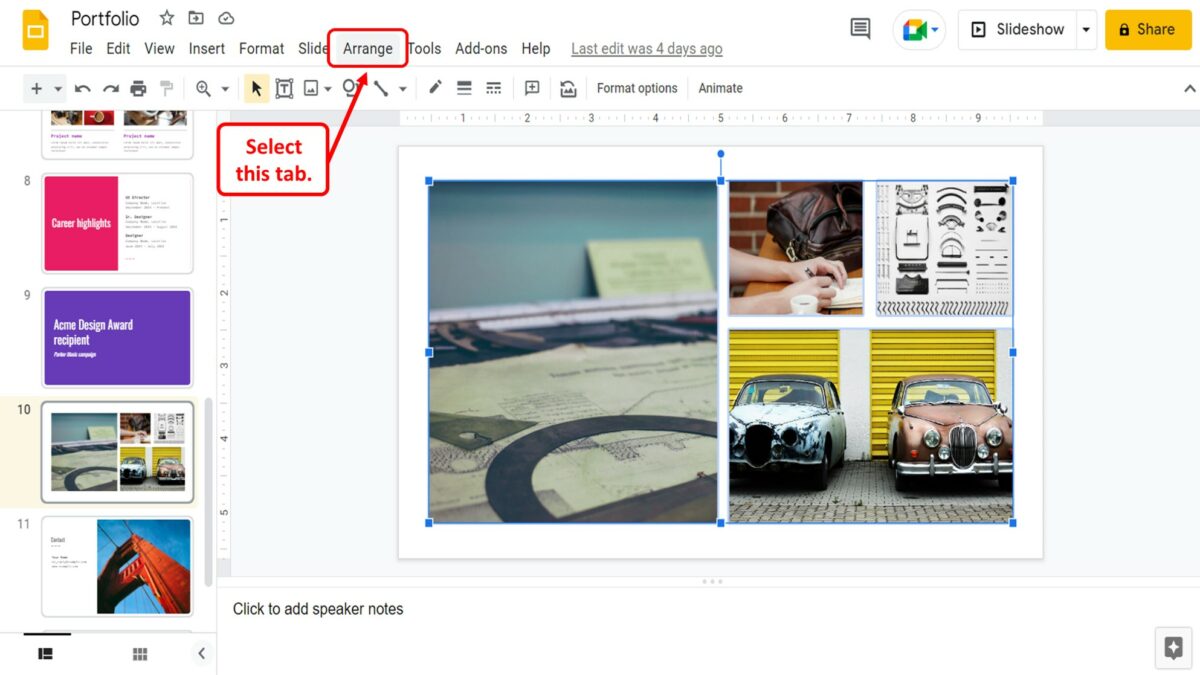
In the menu bar located at the top of the screen, click on the “Arrange” option. It will open the dropdown “Arrange” menu.
Step-3: Click on the “Group” option
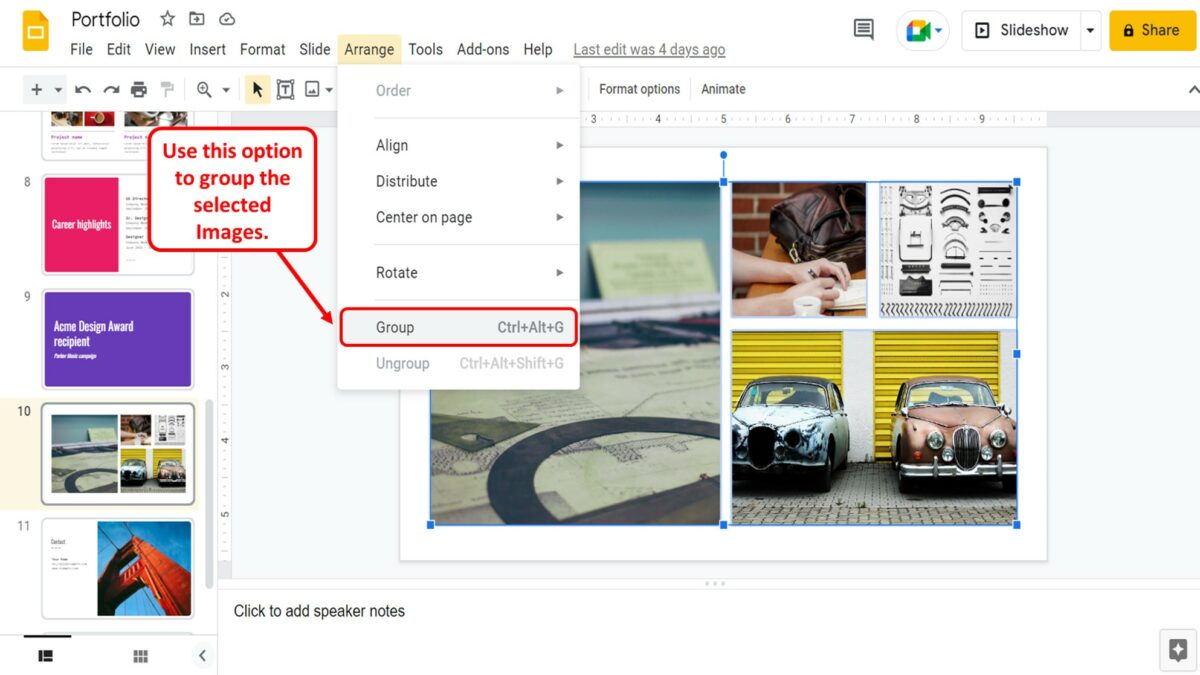
In the “Arrange” menu, all you have to do is click on the “Group” option. Alternatively, you can press the “Ctrl+Alt+G” keys on your keyboard to group the selected images.
4. How to Move Objects Within a Group in Google Slides?
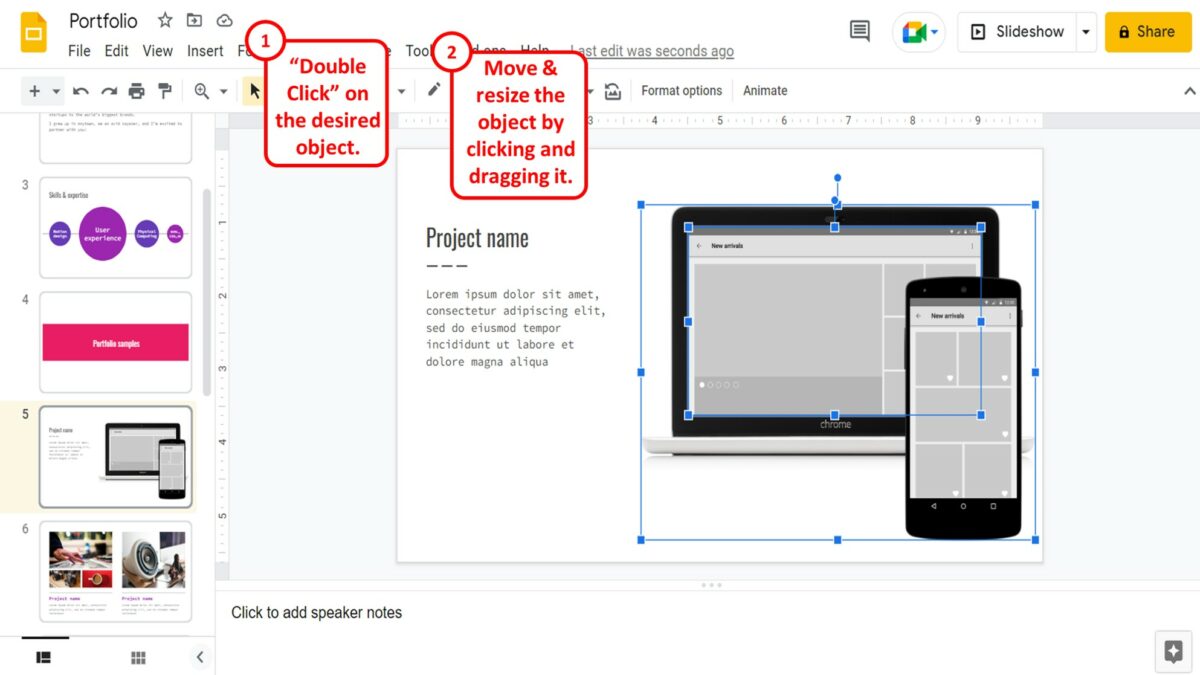
When you group multiple objects in Google Slides, they are treated as a single object when editing. However, you can move and resize a single object in the group without using the “Ungroup” feature. To move objects within a group, you have “Double Click” on the object. You can then move and resize the object by clicking and dragging it.
5. How to Ungroup Objects on Google Slides?
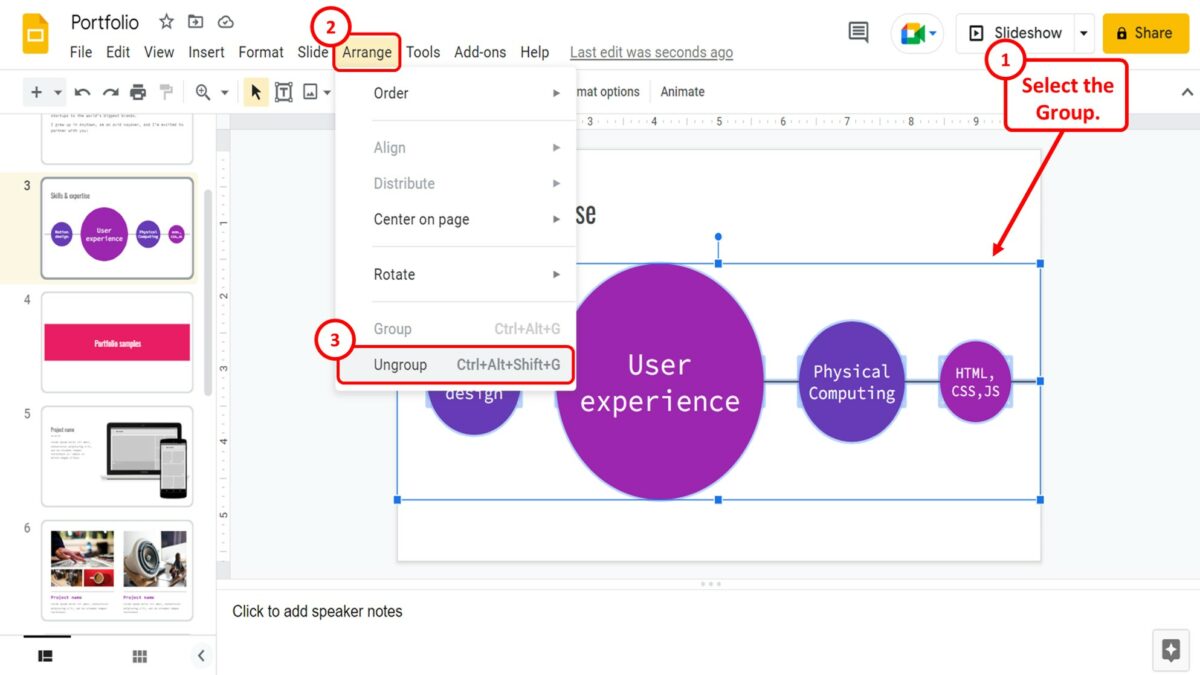
To ungroup objects on a slide in Google Slides, you have to first select the group. Then click on the “Arrange” menu in the menu bar at the top of the screen. In the “Arrange” menu, click on the “Ungroup” option. You can alternatively press the “Ctrl+Alt+Shift+G” keys on your keyboard to ungroup the objects.
6. Group Option Greyed Out in Google Slides? Here’s How to Fix!
In Google Slides, you may find that the “Group” option in the “Arrange” menu is greyed out. This may occur when you are trying to group text placeholders. Google Slides allows you to group images, shapes, and text boxes only. You cannot group placeholders containing text. To fix the issue, follow the 5 simple steps.
Step-1: Click on the “Cut” option
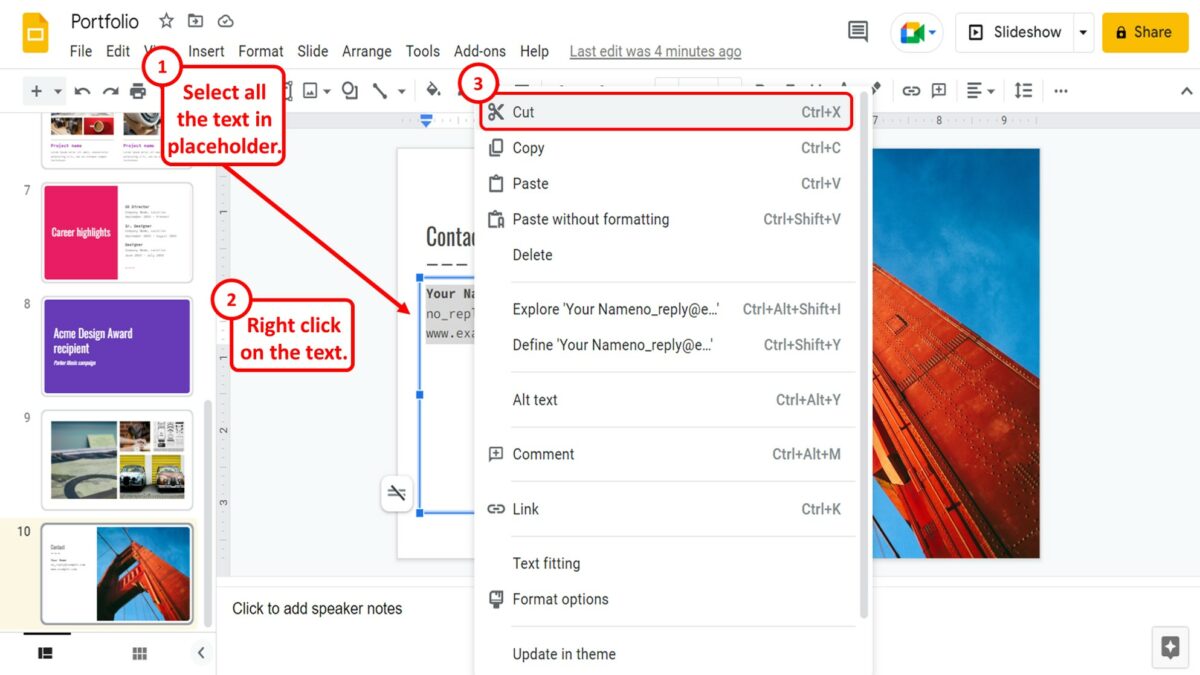
The first step is to remove the text from the placeholder. To do so, select all the text in the placeholder. Then “Right Click” on the text and click on the “Cut” option in the right-click menu. Alternatively, you can press the “Ctrl+X” keys on your keyboard to cut the text from the placeholder.
Step-2: Click on the “Delete” option
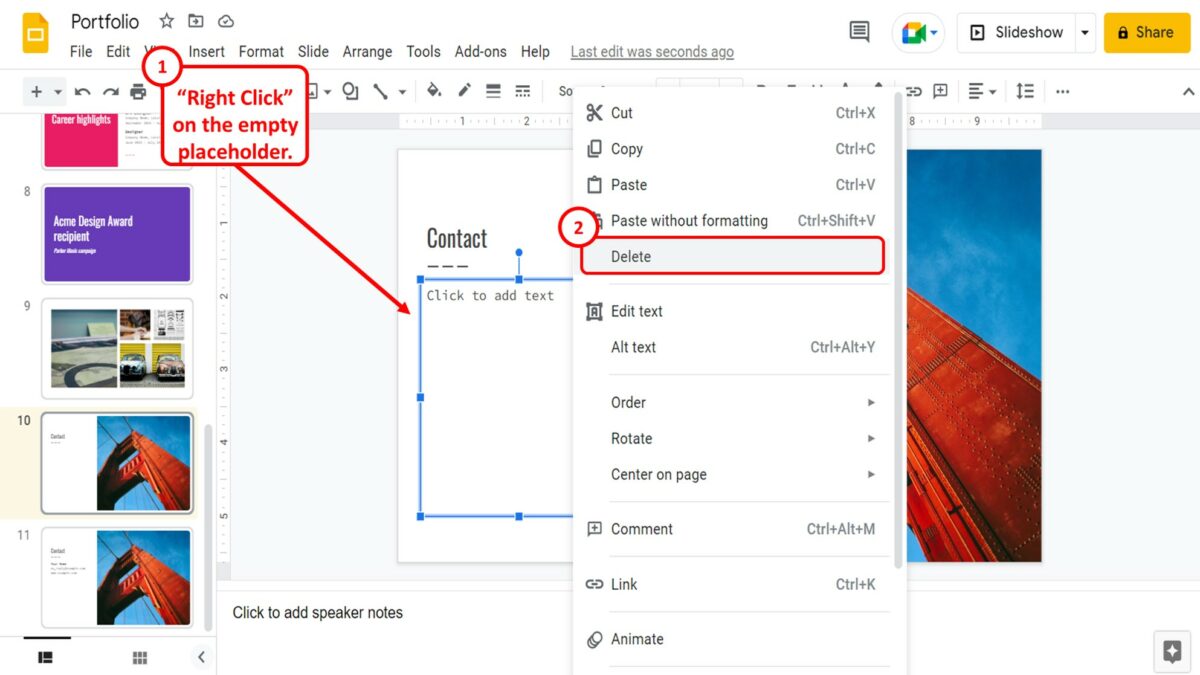
The next step is to “Right Click” on the empty placeholder. In the right-click menu, click on the “Delete” option. You can alternatively press the “delete” key on your keyboard to delete the text placeholder.
Step-3: Click on the “Text box” icon
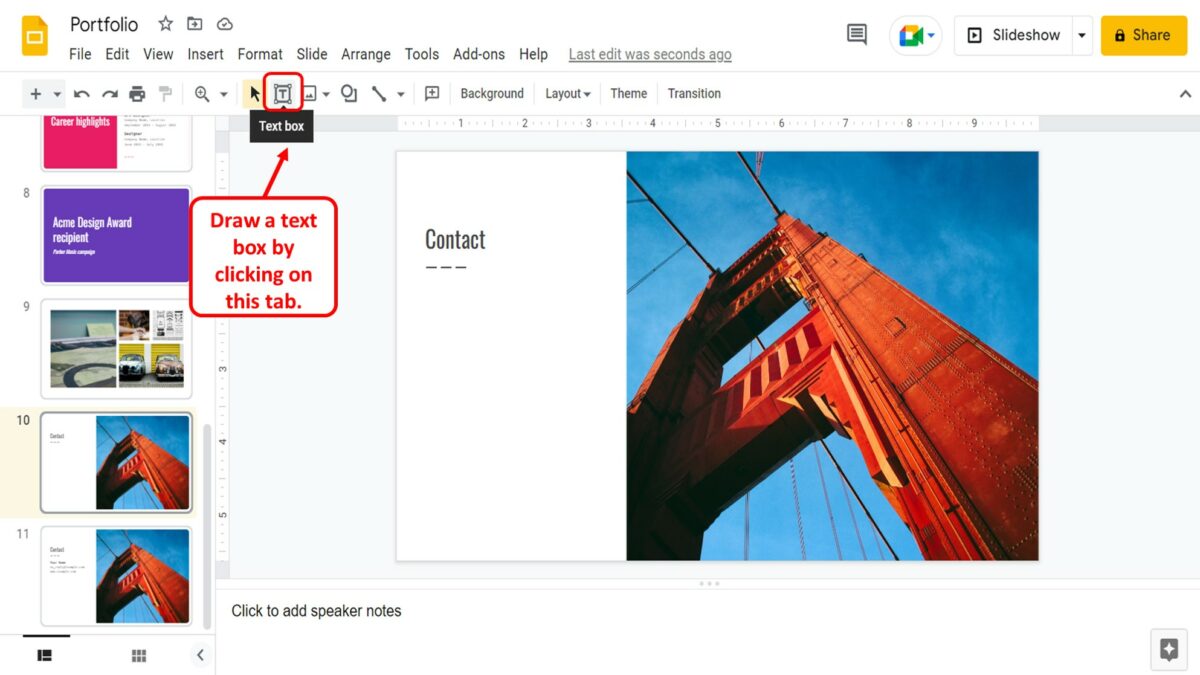
In the toolbar located under the menu bar at the top of the screen, click on the “Text box” option. Then you can draw the text box on the slide in place of the text placeholder.
Step-4: Click on the “Paste” option
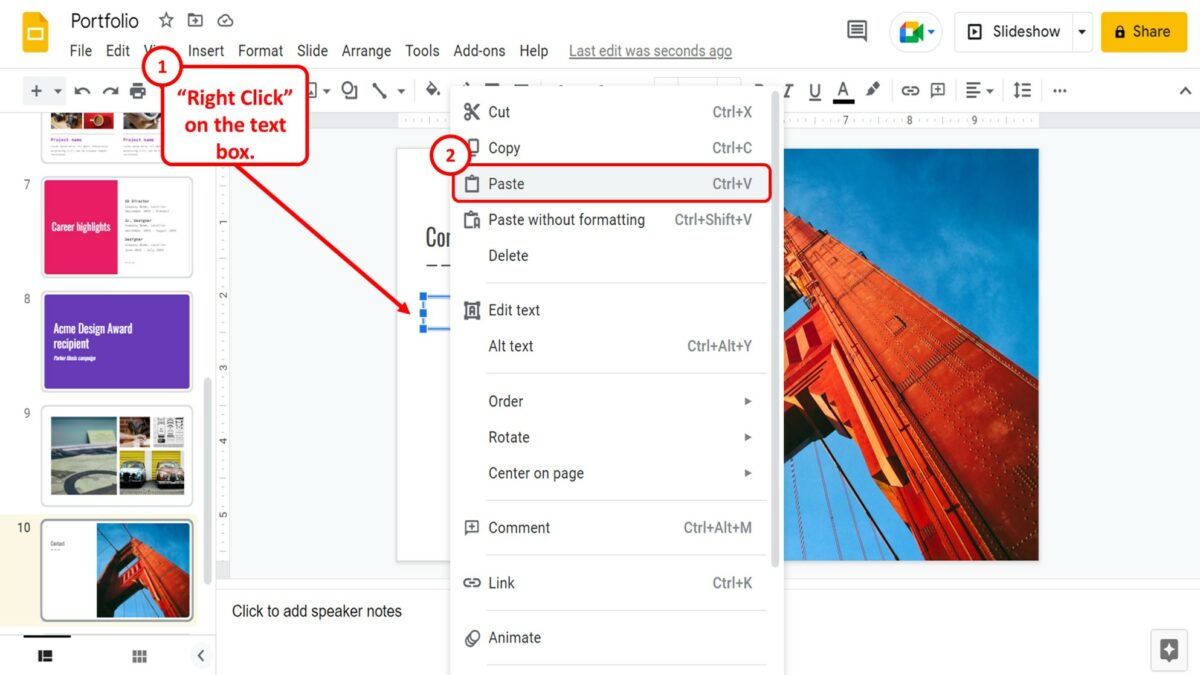
Now you have to paste the text from the placeholder into the text box. “Right Click” on the text box and click on the “Paste” option in the right-click menu. Alternatively, you can press the “Ctrl+V” keys on your keyboard to paste the text into the text box.
Step-5: Click on the “Group” option
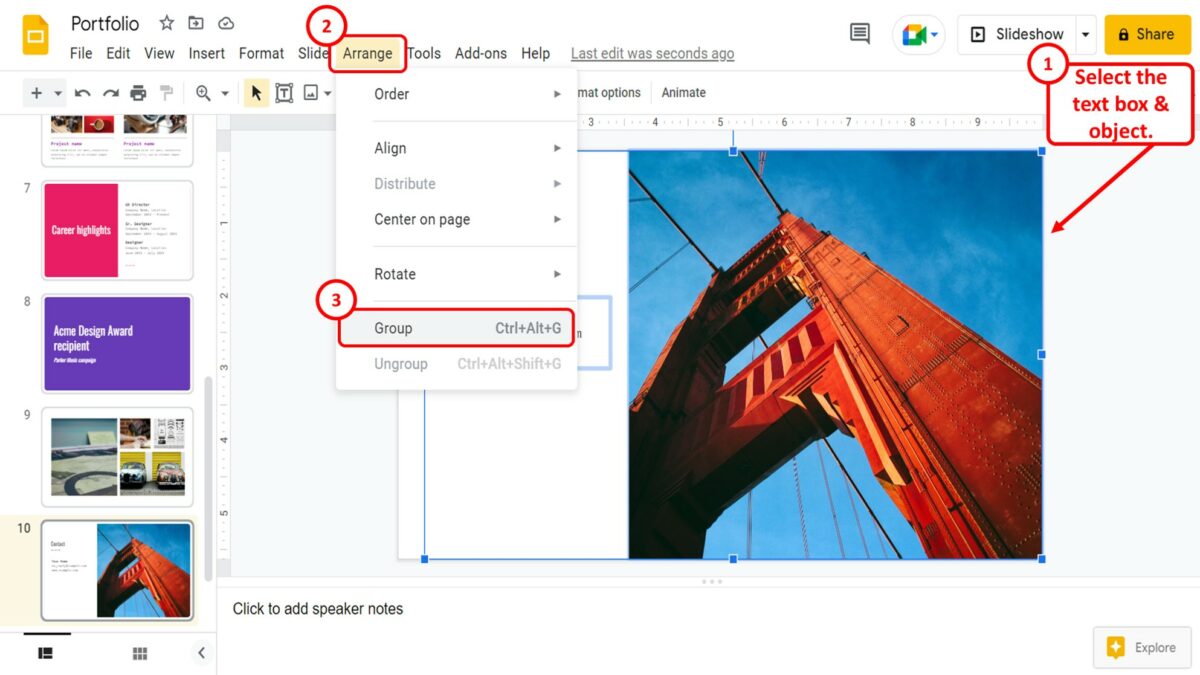
Finally, you can group the text with the other objects on the slide. You have to first select the objects and the text box that you want to group. Then all you have to do is click on the “Arrange” menu. In the “Arrange” menu, you will see the “Group” option is no longer greyed out.

![How to Group & Ungroup Objects in Google Slides? [Step-by-Step]](https://artofpresentations.com/wp-content/uploads/2023/02/Featured-Image-1-2.jpg)