![How to Insert Clip Art in PowerPoint [For Any Version]](https://artofpresentations.com/wp-content/uploads/2022/11/Featured-Image-How-to-Insert-Clip-Art-in-PowerPoint-For-Any-Version.webp)
What’s the best part about PowerPoint presentations? YES, it is the graphics and visual representations. And how best can we insert these into our presentations? No, Google Images is not the answer (although it is one of the ways). It is through the in-built feature of Clip Art.
To insert a clipart into your presentation simply Go to the Insert tab, select Pictures, choose Online Pictures and then in the Filters select Clip Art. From here you can choose your preferred Clip Art and add it into the Slide.
See how simple it is? Now let us show you some other cool features for using Clip Art in your presentations and wowing your audience.
1. Inserting Clip Art in PowerPoint
The clipart in PowerPoint is a collection of free images that you can use in your presentation slides. You can access the available cliparts under the “Online Pictures” option in PowerPoint.
1.1 Method 1 – Using the Online Pictures Option
To insert a clipart in PowerPoint using the “Online Pictures” option, follow the 5 simple steps.
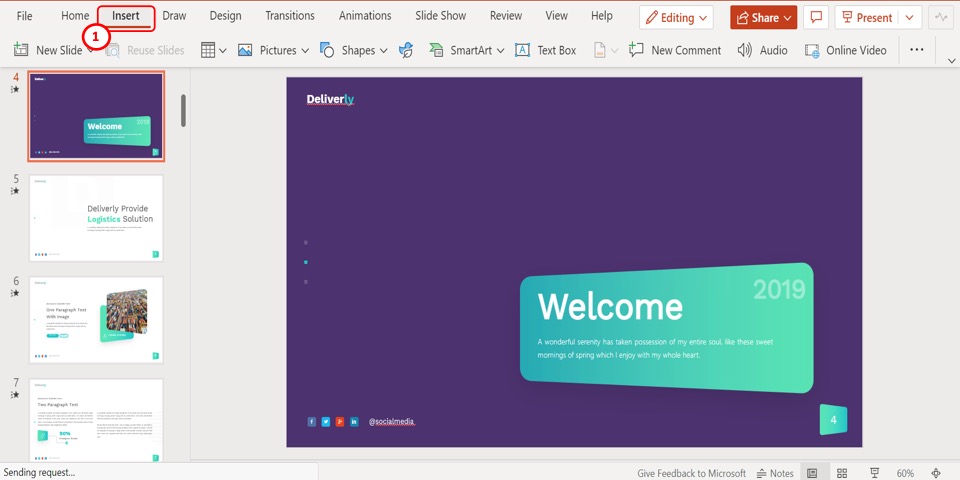
Step-1: Click on the “Insert” tab
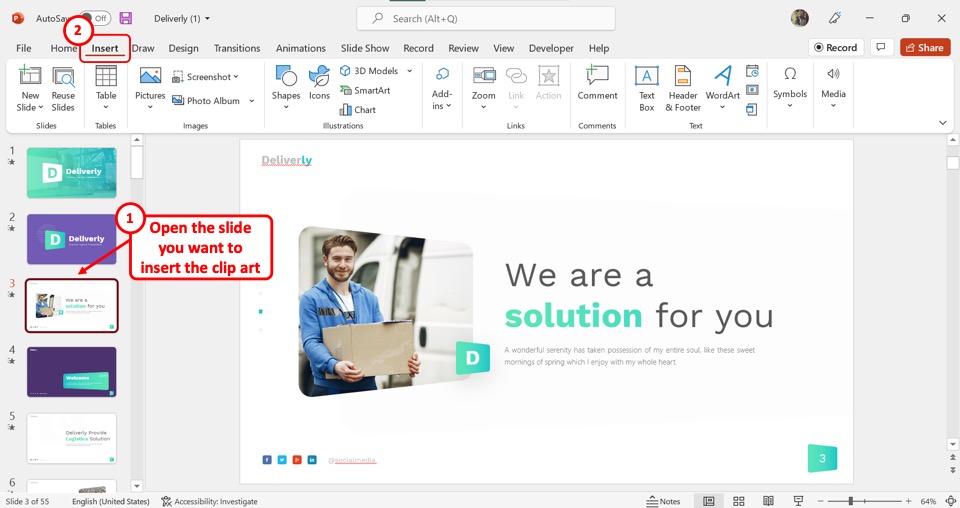
The first step is to open the slide where you want to insert the clipart. Then click on the “Insert” tab in the menu ribbon located at the top of the screen.
Step-2: Click on the “Online Pictures” option
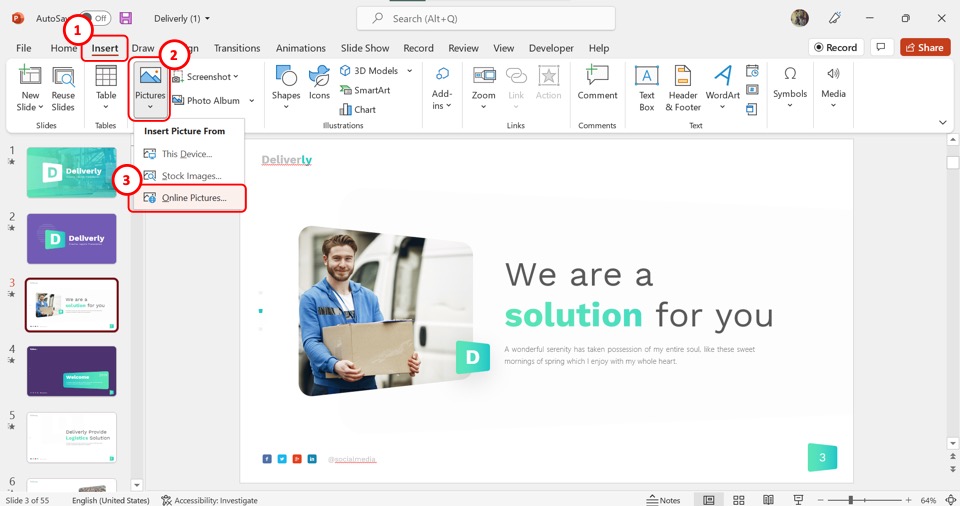
The next step is to click on the “Pictures” option from the “Images” group of the “Insert” tab. In the dropdown menu under the “Pictures” option, click on the “Online Pictures” option.
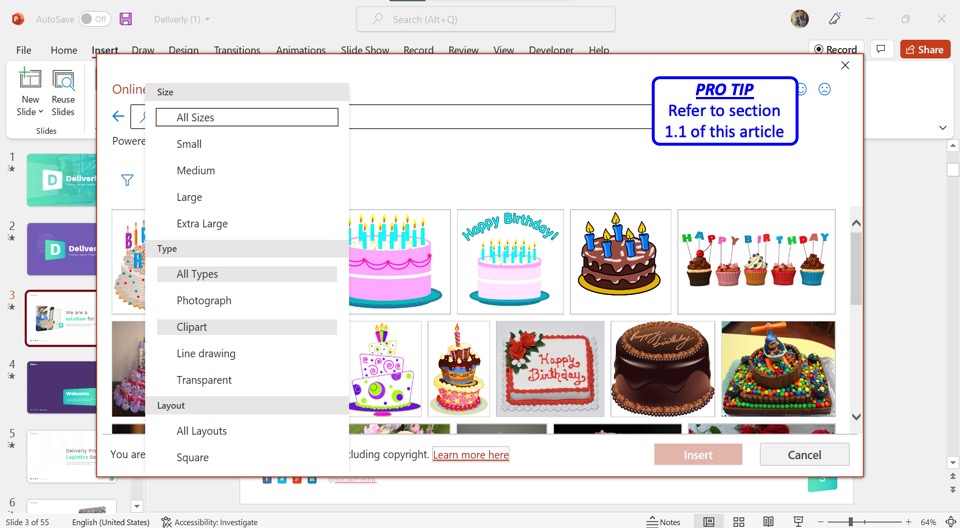
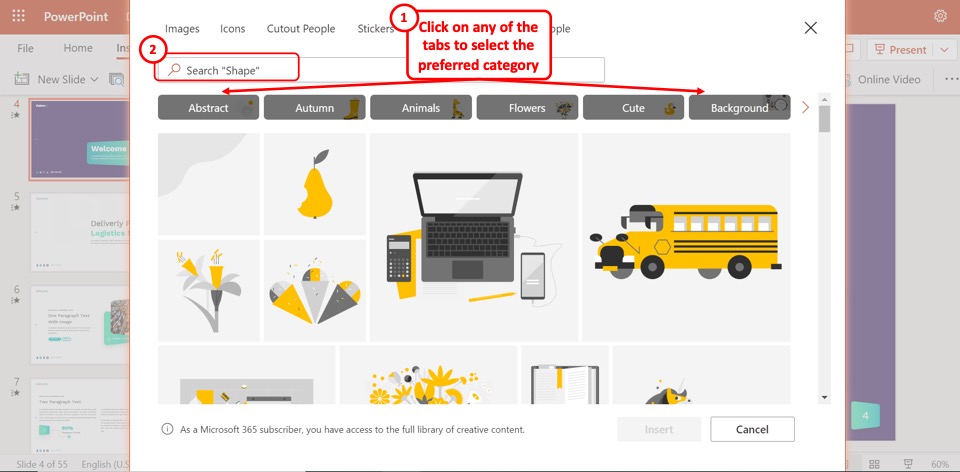
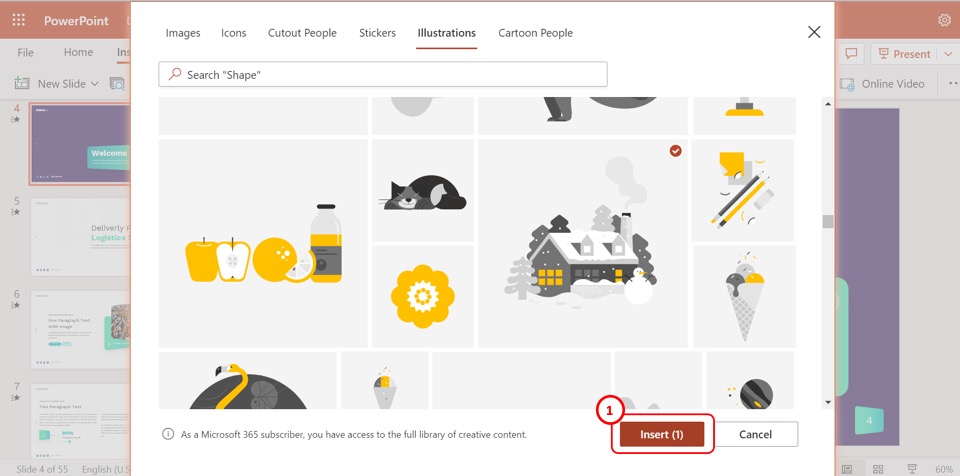
Step-3: Select your preferred category
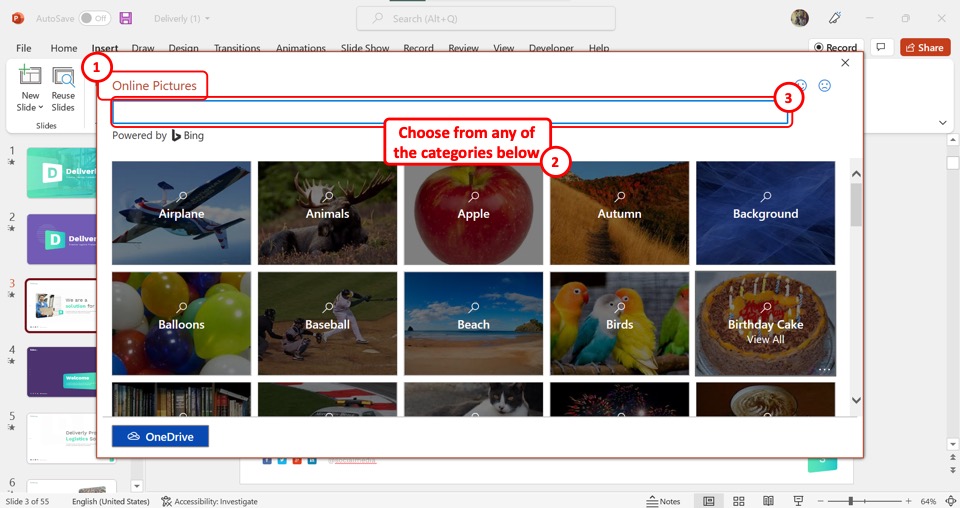
In the “Online Pictures” dialog box, you can now click on any of the available categories of the pictures. You can also click on the search bar at the top of the dialog box to search for a specific category.
Step-4: Click on the “Clipart” option
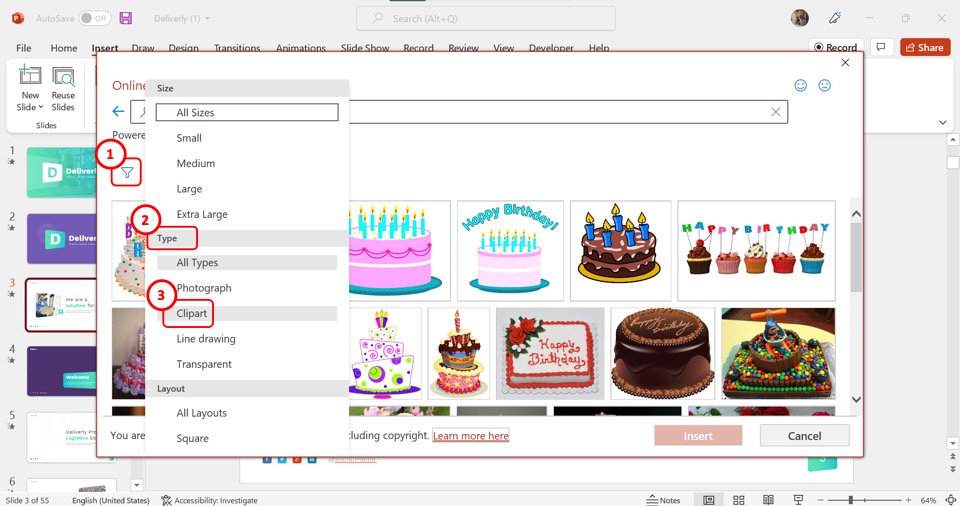
Now you have to click on the “Filter” option which is the funnel icon under the search bar. In the “Filter” pop-up menu, click on the “Clipart” option under the “Types” section.
Step-5: Click on the “Insert” button
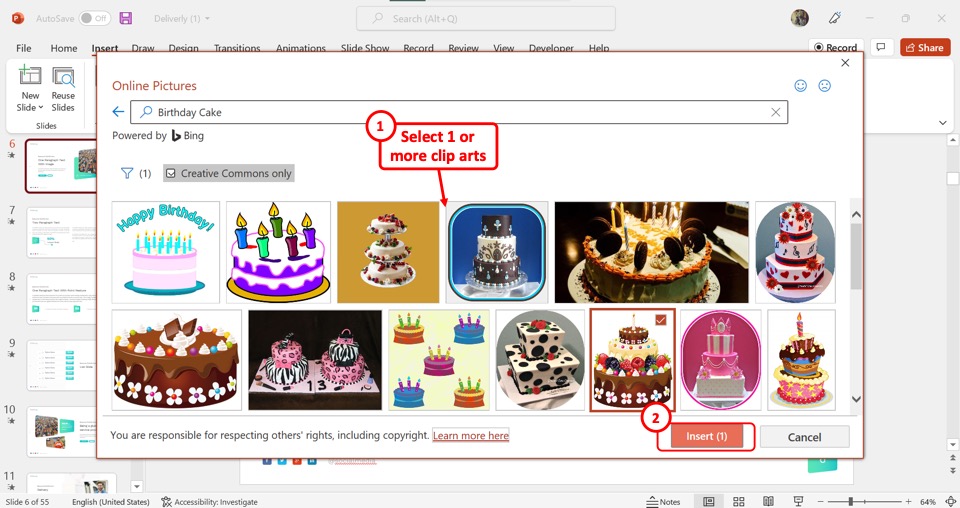
The final step is to select one or more cliparts from the “Online Pictures” dialog box to insert into the slide. Then all you have to do is click on the “Insert” button at the bottom of the dialog box.
1.2 Method 2 – Using the Pickit Add-in
Using Add-ins in PowerPoint is a great way to get features that are not available in PowerPoint by default. The “Pickit” add-in includes thousands of graphics for your PowerPoint presentation that you can access with a monthly subscription.
Check out my other article on how to install add-ins in PowerPoint to go through the installation process.
To insert a clipart using the “Pickit” add-in, you have to first get it from the “Add-ins” option. Then follow the 4 quick steps.
Step-1: Click on the “Pickit Images” option
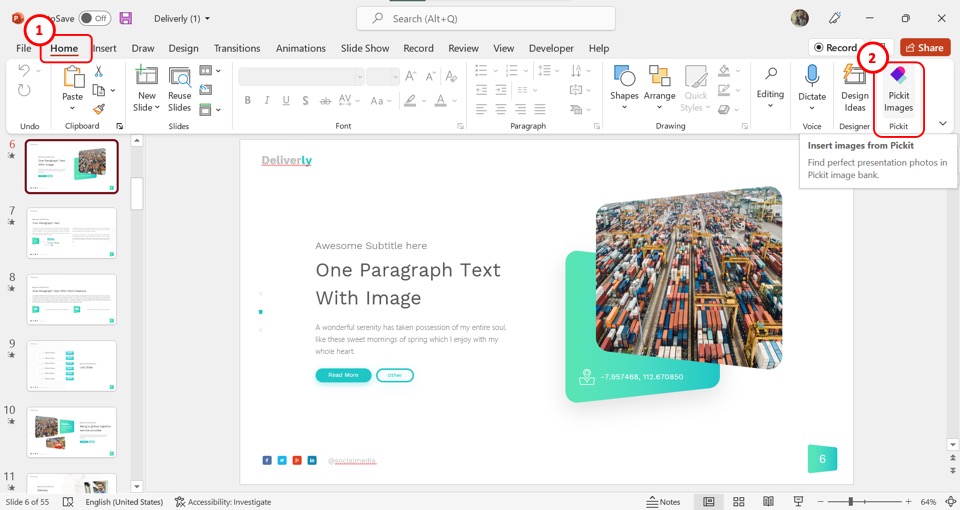
At the right corner of the “Home” tab, click on the “Pickit Images” option to open the “Pickit” sidebar on the right side of the screen.
Step-2: Select your preferred category
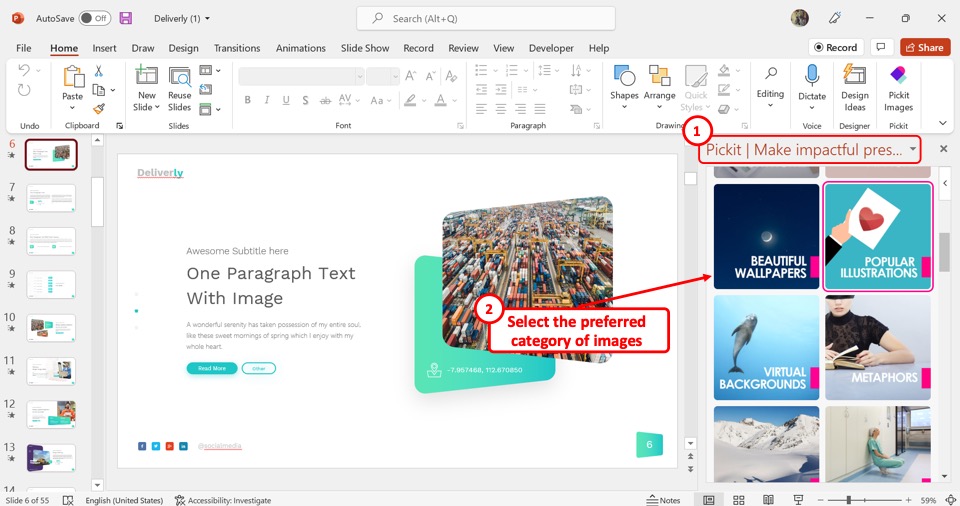
The next step is to select your preferred category of images from the “Pickit” sidebar.
Step-3: Click on the “Search” icon
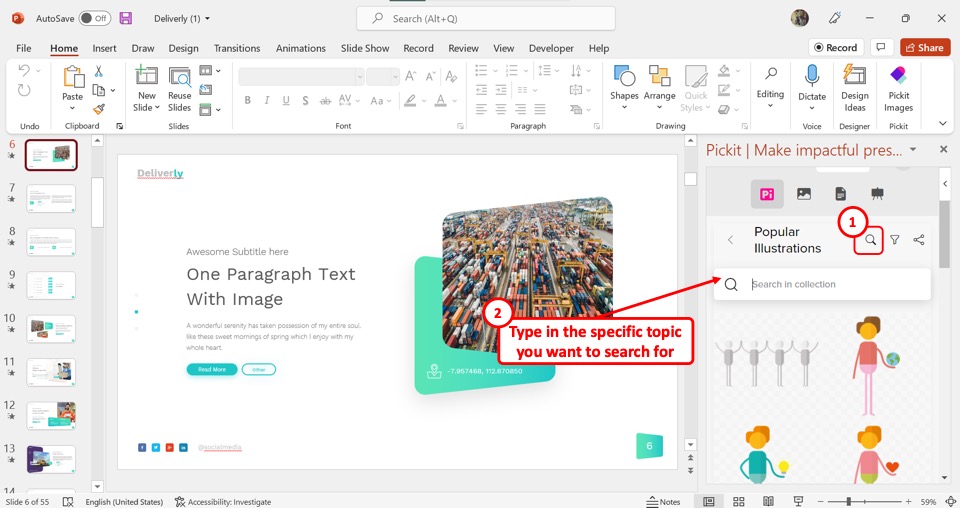
Now you can click on the search icon at the top of the sidebar to open the search bar. Type in the keywords to search for a specific topic.
Step-4: Click on the “Insert Medium” option

Finally, click on the clipart that you want to insert into the presentation. Then click on the “Insert Medium” button under the clipart to insert it.
2. Types of PowerPoint Clip Art
Clip Arts are premade illustrations that can be used in various formats. In Microsoft PowerPoint, there are unlimited clip arts available for free. There are mainly five types of clipart available in PowerPoint.
2.1 Icons
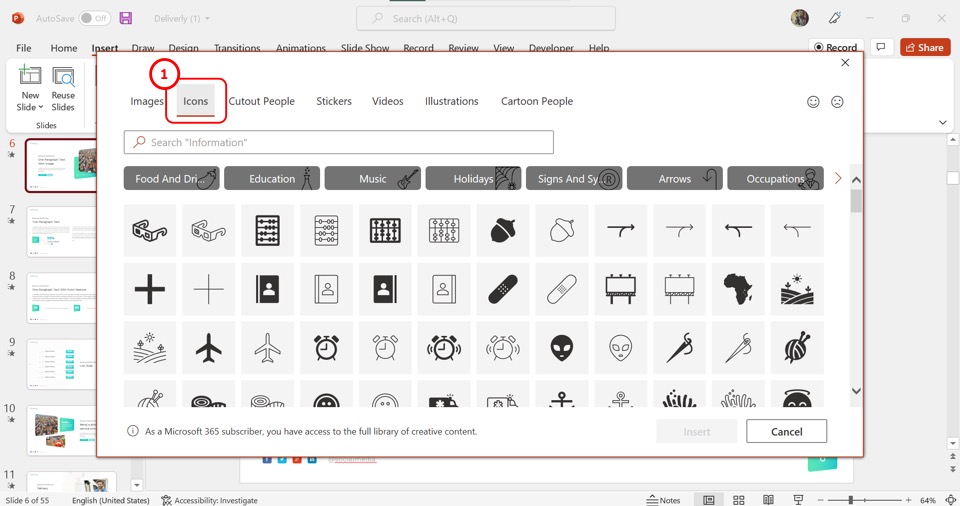
The “Icons” available in Microsoft PowerPoint are free to use. You can access the icon cliparts from the “Stock Images” option. The icons are black and white illustrations representing various objects and activities.
2.2 Stickers
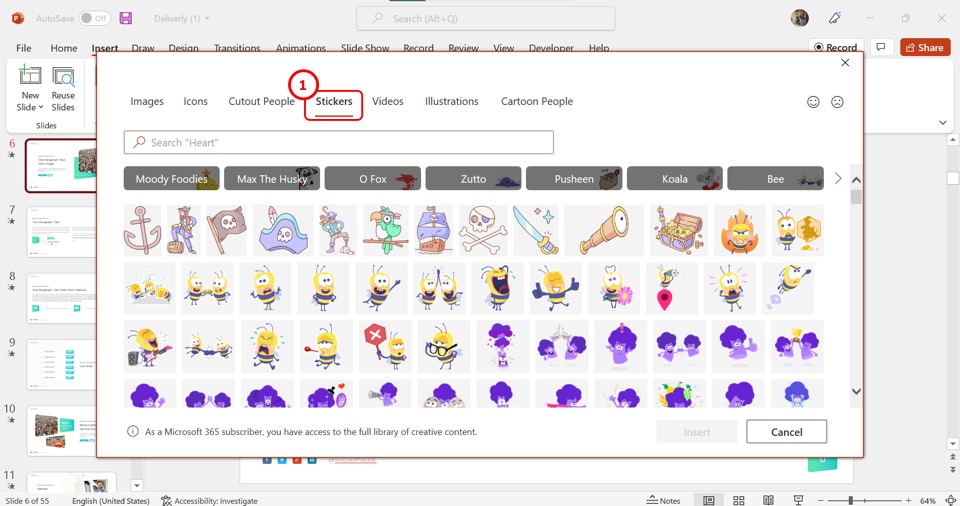
The “Stickers” are colorful clipart illustrations that usually include cartoonish drawings and silly characters.
2.3 Illustrations
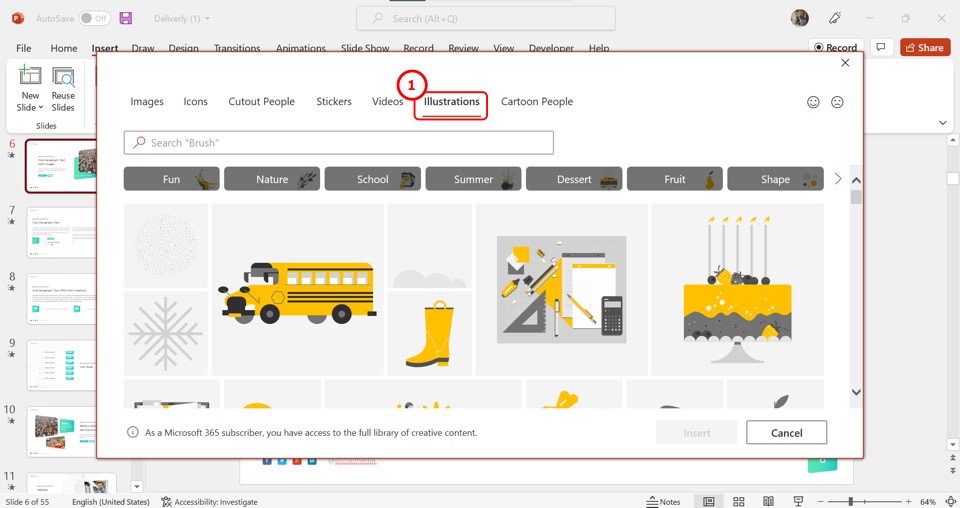
The “Illustrations” are simple line arts that are available in both colors and monochrome. They usually represent various objects.
2.4 People Cutouts
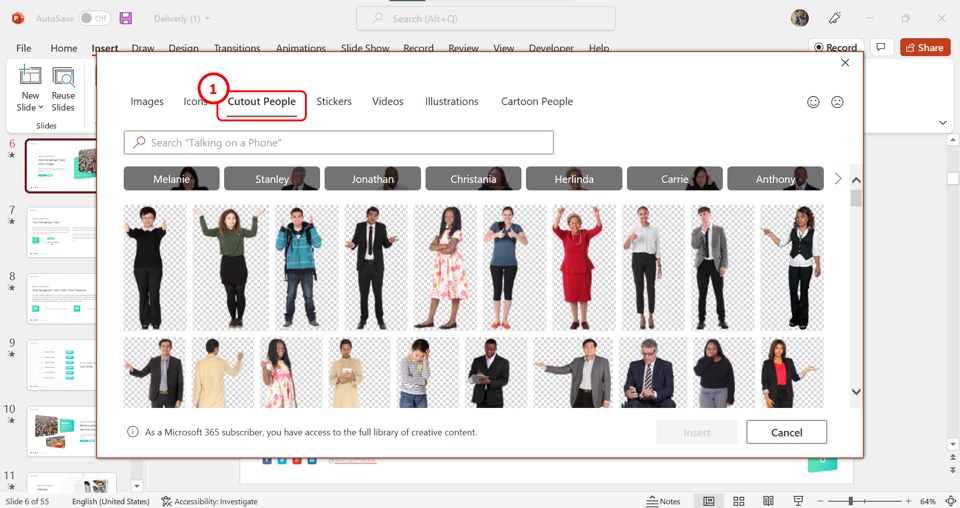
The “Cutout People” option in PowerPoint includes cliparts of photographed people with a transparent background.
2.5 Videos
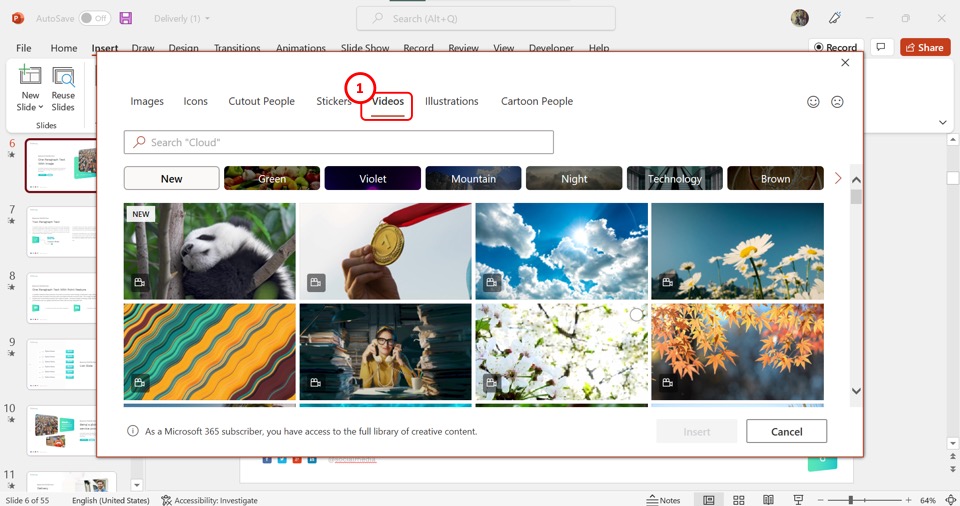
The “Videos” category includes videos that are a few seconds long. The video cliparts give an illusion of moving images.
3. Insert Clip Art in PowerPoint 2007
In PowerPoint 2007, you can insert a clipart using the “Clip Art” task panel. To do so, follow the 4 easy steps.
Step-1: Click on the “Clip Art” option
In the menu ribbon located at the top of the screen, click on the “Insert” tab. Then click on the “Clip Art” option in the “Illustrations” section of the “Insert” menu.
Step-2: Click on the “Search for” box
In the “Clip Art” task panel at the right side of the screen, click on the “Search for” box and type in the keywords. You can click on the “Search in” box to specify the sources of the clipart, and on the “Results should be” box to select the clipart format.
Step-3: Click on the “Go” button
Now you have to click on the “Go” button beside the “Search for” box to start the search.
Step-4: Paste the clipart
The final step is to “Right Click” on the clipart that you want to insert and select the “Copy” option. Then all you have to do is “Right Click” on the slide and select the “Paste” option to insert the clipart.
4. Insert Clip Art in PowerPoint 2010
In the PowerPoint software for Office 2010, you can insert a clipart using the “Clip Art” task panel. All you have to do is follow the 5 easy steps.
Step-1: Click on the “Insert” tab
The first step is to open the slide where you want to insert the clipart. Then click on the “Insert” tab from the menu ribbon at the top of the screen.
Step-2: Click on the “Clip Art” option
The next step is to click on the “Clip Art” option in the “Images” section of the “Insert” menu. This will open the “Clip Art” task panel on the right side of the screen.
Step-3: Search for a clipart
In the “Clip Art” task panel, click on the “Search for” box and type in what you are looking for. In the “Results should be” box, select the preferred format of the cliparts. Then all you have to do is click on the “Go” button to start the search.
Step-4: Select the preferred clipart
The cliparts will now appear in the “Clip Art” task panel. You can scroll vertically in the task panel to find your preferred clipart.
Step-5: Click on the “Insert” option
Finally, all you have to do is “Right Click” on the image that you want to add to the slide. In the right-click menu, click on the “Insert” option.
5. Insert Clip Art in PowerPoint 2013 or 2016
In the PowerPoint for Office 2013 and 2016, you can insert a clipart using the same process. To add a clipart to a slide, follow the 3 quick steps.
Step-1: Click on the “Online Pictures” option
The first step is to click on the “Insert” tab in the menu ribbon. Then click on the “Pictures” option in the “Insert”menu. In the dropdown menu under the “Pictures” option, click on the “Online Pictures” option.
Step-2: Click on the “Clipart” option
In the “Online Pictures” dialog box, click on the search bar to look for a picture category. Then click on the “Type”option and select the “Clipart” option from the dropdown list.
Step-3: Click on the “Insert” button
Finally, select your preferred clipart image and click on the “Insert” button at the bottom of the “Online Pictures” dialog box.
6. Insert Clip Art in PowerPoint 2019 or Office 365
In the PowerPoint 2019 or the Office 365 subscription, you can insert a clipart into your presentation slide using the “Online Pictures” option. Refer to section 1.1 for the detailed steps.
7. Insert Clip Art in PowerPoint on Mac
On a Mac device, you can easily insert a clipart into your PowerPoint slide. The process depends on the version of PowerPoint that you are using on your device. If you are using the Office 2016 subscription, follow the steps detailed in section 5. If you are using PowerPoint 2019 or Office 365, refer to section 1.1 for the detailed steps.
8. Insert Clip Art in PowerPoint Web
In PowerPoint for web, you can insert cliparts using the “Stock Images” feature. To do so, follow the 4 simple steps.
Step-1: Click on the “Insert” tab
In the menu ribbon located at the top of the screen, you have to first click on the “Insert” tab to open the “Insert” menu.
Step-2: Click on the “Stock Images” option

In the “Insert” menu, click on the “Pictures” option. Then click on the “Stock Images” option from the dropdown list under the “Pictures” option.
Step-3: Select the preferred clipart type
In the “Stock Images” dialog box, click on one of the six tabs available to choose the type of clipart that you want to insert. Then type in the keywords in the search bar.
Step-4: Click on the “Insert” button
The final step is to select a clipart. Then click on the “Insert” button at the bottom of the dialog box to insert the selected clipart into the slide.
Credit to cookie_studio (on Freepik) for the featured image of this article (further edited).