
There are so many reasons why you would want to save a picture from a Google Slides presentation or even extract the entire slide as an image. Sadly, you can’t just copy and paste the image from a Google Slides presentation to a local folder on your computer. So, how do you then save an image from Google Slides?
To save an image from Google Slides, view the presentation in “Present” mode and take a screenshot. Then, save this screenshot as an image on your computer. You can also download the presentation as a PPTX file and extract the image using the “Save as picture” option in PowerPoint.
In this article, I’m going to be sharing with you a few different methods which you can use to extract the image from Google Slides. We will be going through a step-by-step process that will help you extract images in the most efficient way possible.
Plus, we will also take a look at grabbing an object and how to save entire slides as images. So, for everything you need to know about saving images on Google Slides, keep reading.
How to Save an Image from Google Slides?
Extracting images from Google slides is not straightforward as it should be. In fact, it can be quite a complicated process if you don’t exactly know the methods. That is why we are going to give you a step-by-step guide on how to do this. There are multiple ways of copying Google Slides images.
In this section, we are going to talk about the best and the easiest methods of saving images directly from Google Slides. All of these methods are the same on Mac as they are on Windows. Thus, whichever one stands out to you as being easiest is the one that you should try and do first.
With all of that said, let’s get into it!
Method 1 – Saving an Image Using a Screenshot
This method will not give you the best quality picture however it is the most straightforward way of saving images from Google slides. I shall also add that this method is also one of the quickest of all the remaining methods described below –
Here’s how you can save the image from Google Slides using this method –
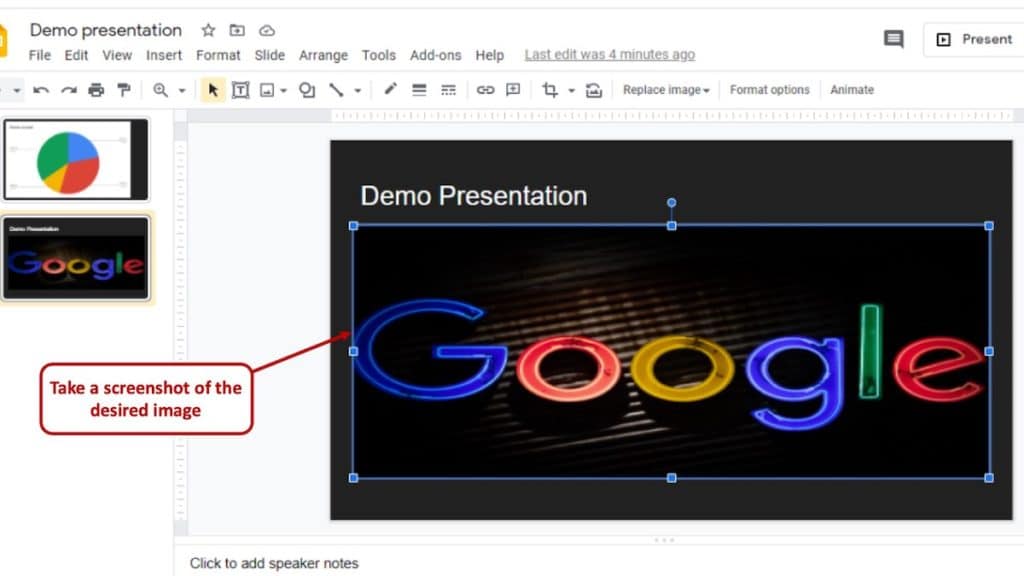
1. With your Google Slides window open, take a screenshot. It is recommended to put the presentation in the “Present” or slide show mode before taking the screenshot. But, that is not necessarily required.
2. Open the folder where the screenshot is saved. You should know where your saved images go. It is usually on the desktop of your computer.
3. Open the Image as we will need to crop the image to the specific part of the image that we want to retain.
4. Now, to crop the image, simply click on the crop button if you are using Windows 10. If you are using an older version of Windows, you can open the image in MS Paint and crop it or use any third-party software.
5. All you have to do at this point is to crop the image as shown in the image below.
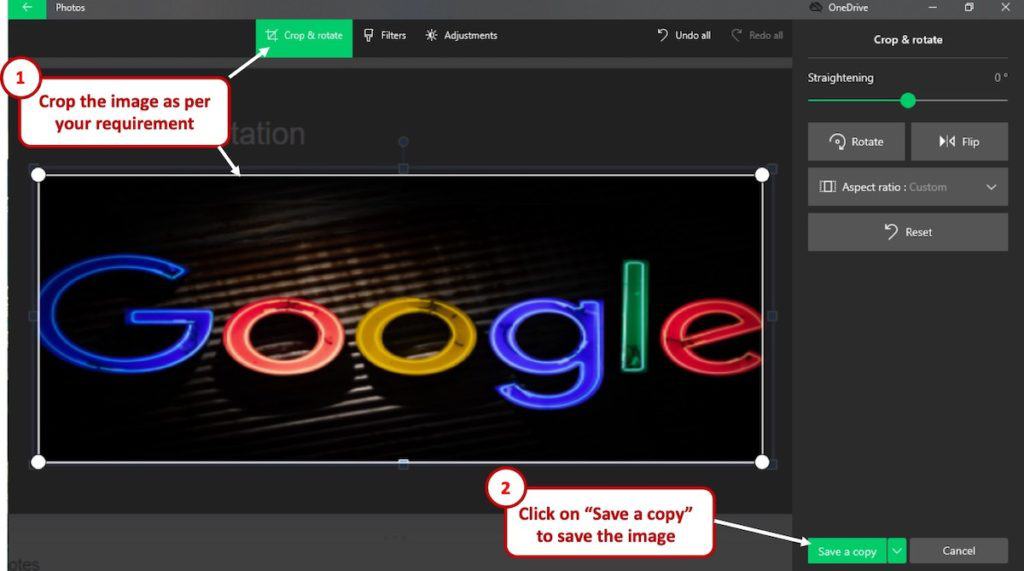
6. Select “Save Copy” or click the little arrow to overwrite the image.
Method 2 – Copy and Paste the Image
In the step-by-step guide I gave you above this one, I spoke about the easiest way to grab an image from Google slides. However, in this section, we are going to talk about the method that gives you the best quality image.
There are actually multiple ways you can extract a picture from Google Slides using the copy and paste method. One of the ways is using PowerPoint –
Copy and Paste Method using PowerPoint –
1. Open the Google Slides presentation that has the image that you want to extract to your local folder on your computer.

2. Select the image and right-click on the image.
3. A drop-down menu will appear. Select “Copy” from the menu. You can also press Ctrl+C to copy the image (or Cmd+C on Mac)
4. Then, open a blank PowerPoint presentation on your computer and paste the image.
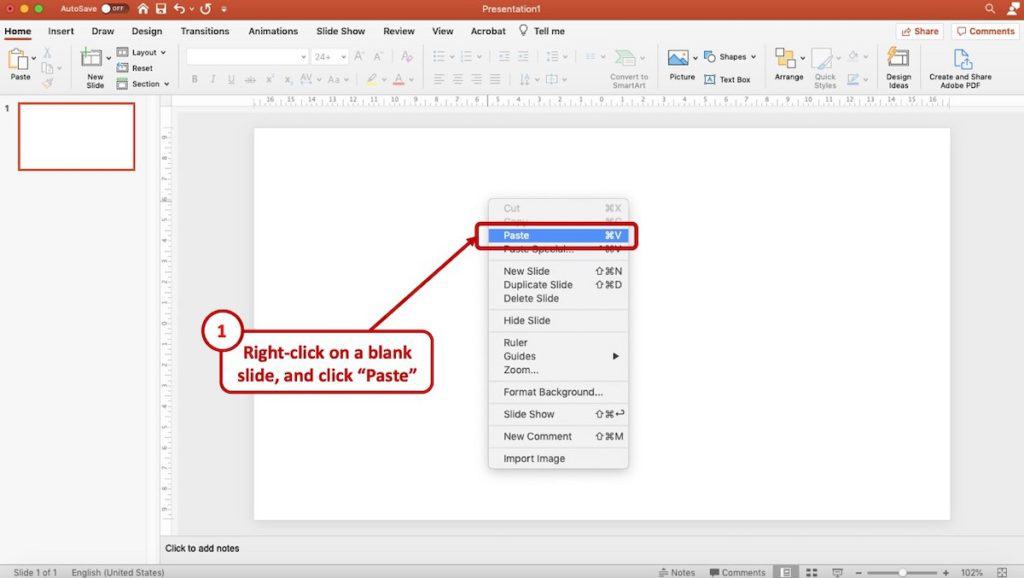
5. To paste the image, press right-click on any blank slide of PowerPoint. You will see a dropdown menu appear. Simply click on “Paste”. You can also press Ctrl+V (or Cmd+V on Mac) to paste the image on the blank slide.
6. You will now have the image on PowerPoint. Now we will save it from PowerPoint to a local folder on our computer.
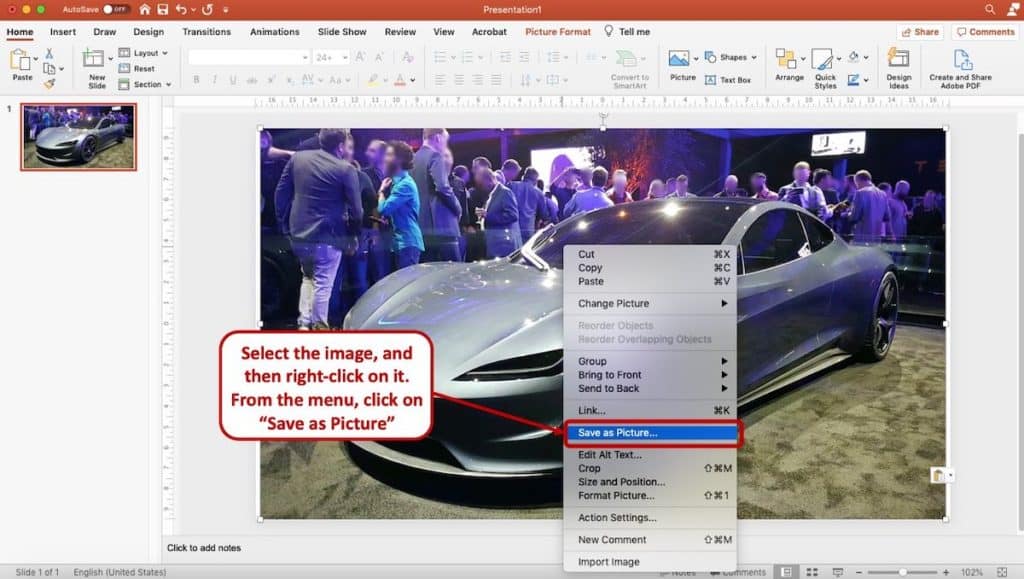
7. Select the image and right-click on it. A dropdown menu will appear.
8. Click on “Save as a Picture” Option.
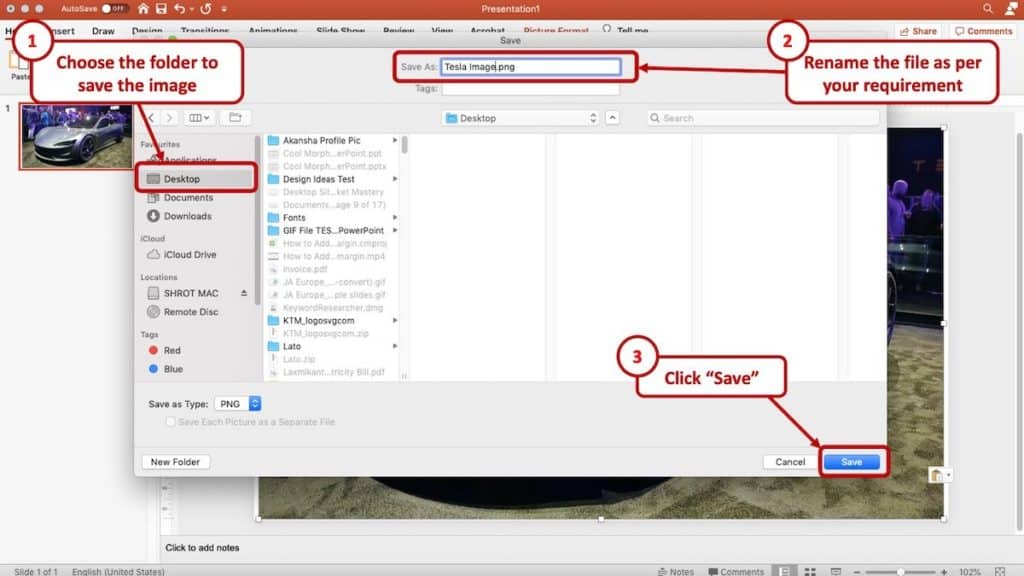
9. A new window will pop-up. Choose the folder on your computer in which you want to save the file. Finally, click “Save”
That’s it! You will now have the file on your computer!
You can also download your Google Slides presentation as a PPTX file. Then, open the presentation using PowerPoint. Next, browse to the exact slide that contains the image and extract the image using “Save as Picture” option from step 7 above.
You can also use Microsoft Word to extract the image from Google Slides. The steps for that process are almost exactly the same.
Copy and Paste Method without PowerPoint
If you don’t have PowerPoint or perhaps don’t even have Microsoft Office on your computer, you can still use the copy and paste method. However, you will then have to rely on Google’s Office Suite (now known as Google Workspace).
However, this process involves more steps and may take a little extra time. Nevertheless, it will definitely work.
You can use a Blank Google Docs Document. Let’s go through the steps to understand this process in further detail.
1. Open Google Slides and open your presentation.
2. Select the image that you wish to extract. Make sure it is the highlighted object.
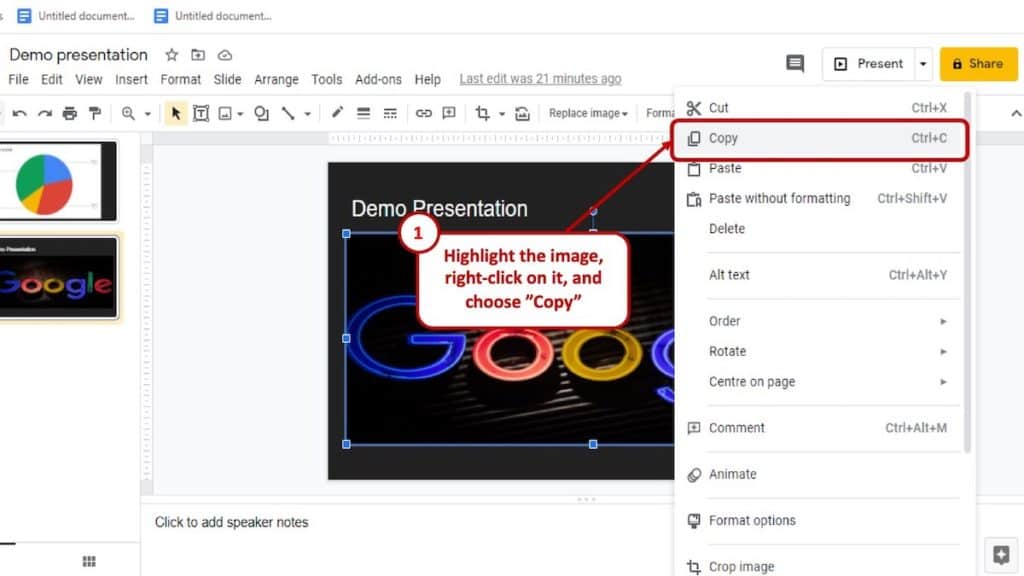
3. On the image, right-click.
4. Select “Copy” from the drop-down menu.
5. Now, you want to open a blank Google Docs document.
6. Right-click anywhere on the blank document and select paste. The image will take a second or two to load.
7. Now that your image is on the page, you need to download the document.
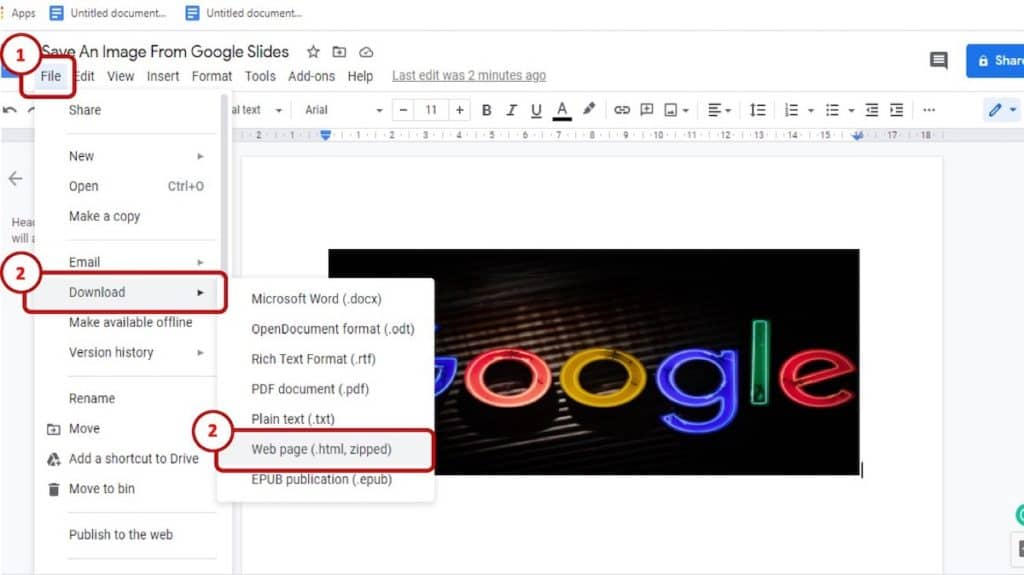
8. Go to “File” and then “Download”.
9. Select “Web Page (.html.zipped)”
10. Now you need to find where that file is saved to. It should be with all your other downloaded files.
11. Double click on the zip file to open it.
12. Go to “Images”.
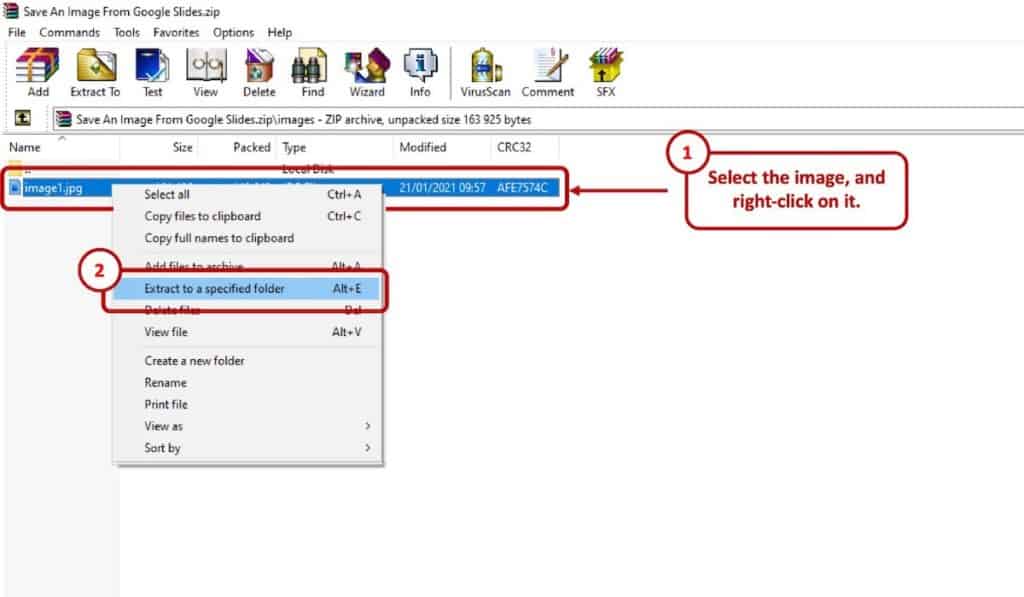
13. Right-click on the image and say “Extract To Specified Folder”
14. You are done. The image will be saved to whichever folder you choose.
Remember that you can save multiple images to one blank Google document. So, if your slide has multiple images and you want to extract all of them, simply just copy and paste each of the images into one Google document and the process is exactly the same.
Save Objects in Google Slides as Pictures
Unfortunately, there is no direct method of saving objects such as charts and graphs from Google slides. With that being said, there is a workaround that you can use that seems to be what all the professionals are doing. Hopefully, Google takes notes that this is something that the community wants and will make it possible in the future.
You are basically going to save an entire slide as an image and then crop that image. In most cases, you won’t have to crop the image unless you want to get rid of any background objects or text. If the chart is the only thing you have on the slide you will be able to save it as a JPEG.
Here is a step-by-step guide on how to do this.
- Open your presentation and select the slide with the object that you wish to save.
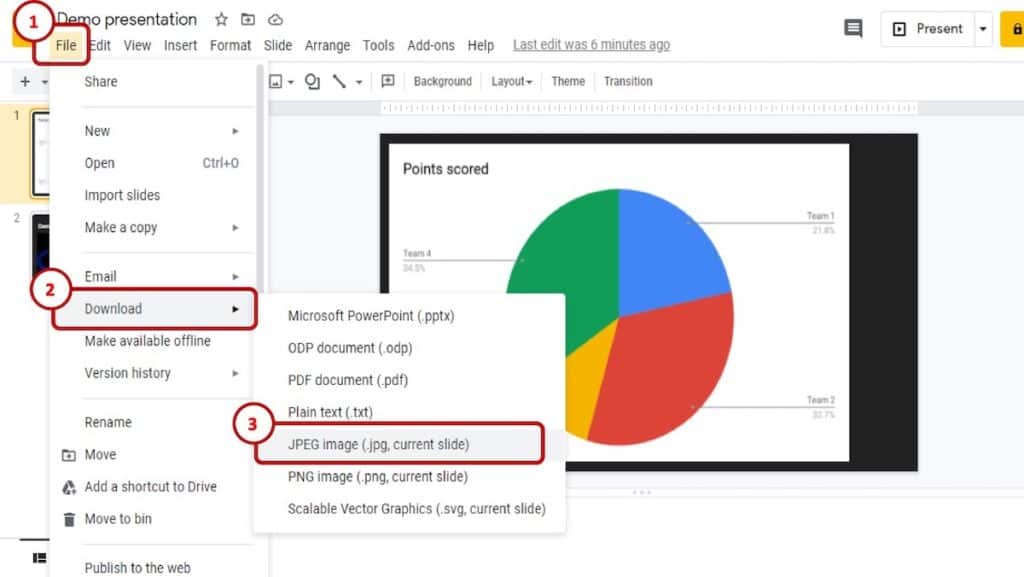
- Go to the “File” tab and select it.
- In the drop-down menu, select “Download”.
- You should get another set of options. Select either “PNG Image” or “JPEG Image”. I prefer JPEG.
- Your download should be in your “Downloads” folder. You can either leave the image as it is or crop it using the method we spoke about early in this article.
How to Save a Slide from Google Slides as a Picture?
Ok, so what happens when you want to save an entire slide as an image? Well, luckily this is quite simple to do and the process can be used to do so much more. For example, instead of taking a screenshot when wanting to crop an image, you can just download the entire slide. Then, crop that image.
Here is a step-by-step guide on how to extract a slide and save it as a picture.
- Open your presentation and select the slide with the object that you wish to save.
- Go to the “File” tab and select it.
- In the drop-down menu, select “Download”.
- You should get another set of options. Select either “PNG Image” or “JPEG Image”. I prefer JPEG.
How to Save all Slides from Google Slides as Images?
Google Slides does not have a function that allows you to save all the slides at the same time. So, if you want, you can do each slide individually, or if you have a really large presentation, you might want to use the workaround that I am about to show you.
In order to do this, you would need to be able to use PowerPoint, unfortunately. Here is a step-by-step guide on how to do this
- Open your Google Slides presentation.
- Go to “File” and select it.
- Select the “Download” option.
- Download the presentation as a Powerpoint file. Make sure you know which folder your downloads go to.
- Open PowerPoint.
- In the PowerPoint start page, select “Open other presentations.
- Select the folder that your Slide presentation downloaded to and select the file.
- In PowerPoint, select “Save As”.
- Select the file format. Because you want to save all slides as images, it is best to select “JPEG.
- Click “Save”.
- Select the folder that you want the saved images to go to.
- In the new prompt, select “Save All Slides”.
I know at first, just reading that step-by-step guide might seem intimidating but trust me if you follow the guide, it is relatively easy. The only hiccup that you might encounter is if you don’t know where your downloaded files are going.
Final Thoughts
That brings us to the end of this article. My goal was to help you save, extract and/or grab images and slides and save them. We gave you a few methods of doing this because I understand that one method is not a fix for everyone.