
We are all used to making notes when creating a presentation. Sometimes, these notes are only for our reference and might actually look sloppy when seen by others. So, the most obvious thing to do is share the presentation without notes! But, when it comes to sharing Google Slides without notes, it is not quite that straightforward!
There is no direct way to share Google Slides without notes. The easiest way to remove notes from Google Slides before sharing with others is to simply create another copy of your presentation and then remove the notes manually from each slide before sharing it with your audience.
Nevertheless, there are many different situations that call for the removal of notes whether you are a teacher giving a lesson, a student presenting his assignment, or perhaps a business presentation that’s taking place.
Removing notes from the presentation can be done in various ways, therefore, in this article, we’ll be covering various aspects of doing it correctly.
How to Share Google Slides Without Speaker Notes?
If you’re planning to share your Google slides on the web or perhaps to another person or maybe even in a group, then you would perhaps like to exclude your speaker notes from the slides you are willing to share.
Speaker notes are at times mostly arranged in a way convenient to be understood by presenters. So, the need to have it removed is completely valid.
Hence, I’m going to show you how you can share your Google Slides with other people or on the web without having to include speaker notes.
Here’s the step-by-step process –
Step 1 – Go to the “File Tab” on the top left side of your screen on the Menu Bar.
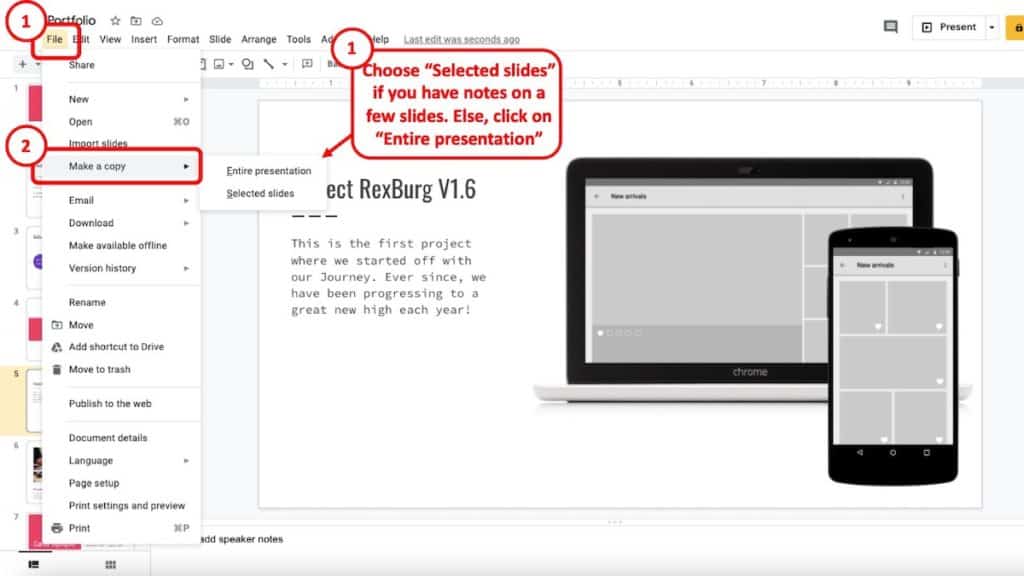
Step 2 – Upon clicking on the “File” tab, a dropdown menu will appear. Click on “Make a copy“.
Step 3 – Here, you can choose to select the entire presentation or just the specific slides. For this example, I’m going to choose the entire presentation. But, the process works just the same way for removing notes for selected slides as well.
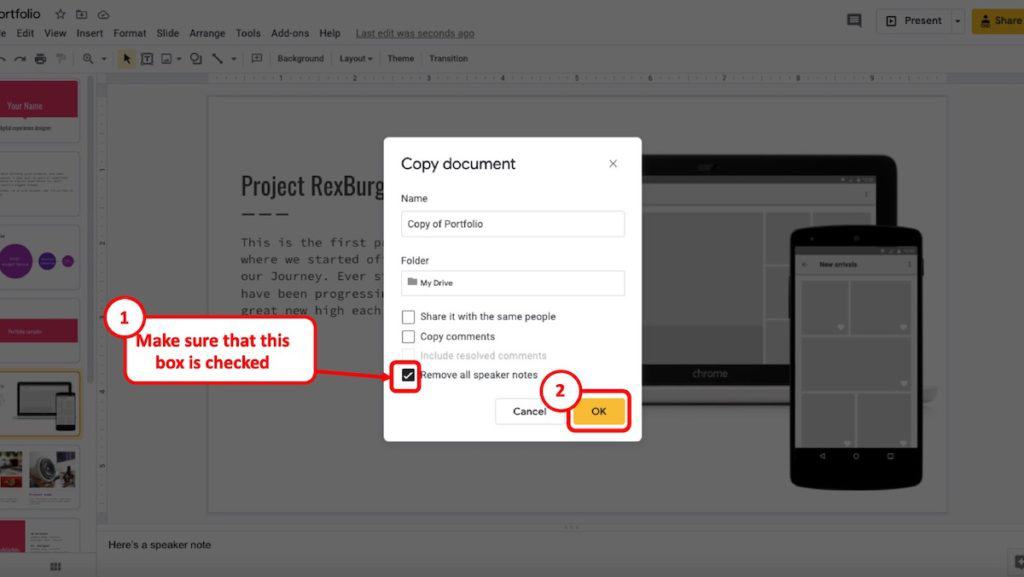
Step 4 – In the next step, a new window will pop-up. Make sure you select the option to “Remove all speaker notes“. Then, click “OK“.
Step 5 – You will notice that the exact copy of the presentation will open in another tab. The only difference would be that this copy of your Google Slides presentation will not have the speaker notes in it.
Step 6 – Share the new copy without the speaker notes with your audience members.
Note: If you just want to remove notes from selected slides, just simply choose the slides from where you are trying to remove notes from. Then proceed to Files>Make a Copy and then choose ‘Selected Slides’ instead of the ‘Entire Presentation’ option from the side-bar menu to finish up.
How to Share Google Slides in Presentation Mode?
One of the coolest features of Google Slides is that it allows you to share your Google Slides presentation directly in a “Present” mode with your audience. This means, they only get to see the presentation directly in full screen mode, and they don’t see the individual slides in edit mode! Super cool, right!
It is important to note that this is another way of sharing the presentation with your audience members without showing them the notes!
So, let’s learn how to do that!
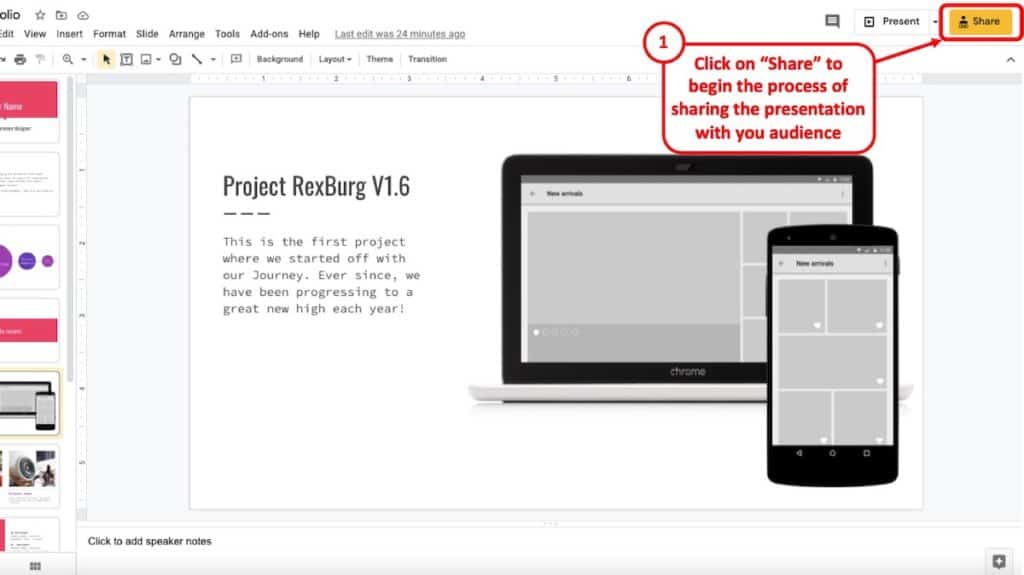
Step 1 – Click on the “Share” button on the top right corner of your screen as indicated on the image below –
Step 2 – You’ll see a new pop-up for sharing your presentation.
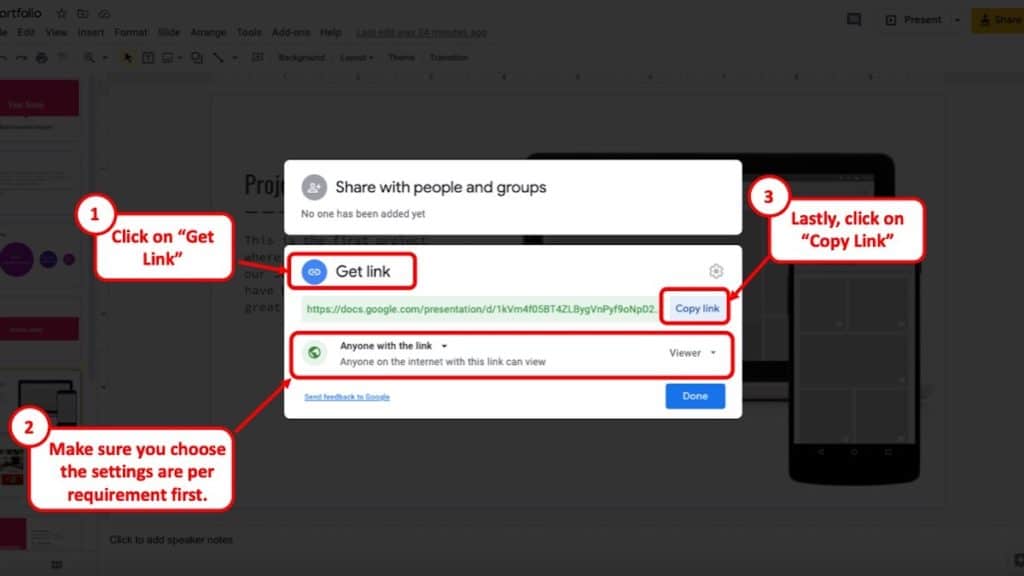
Click on “Get Link“. Before copying the link, ensure that you choose the correct settings for sharing the link. Then, click on “Copy Link“
Step 3 – Before sending or sharing the link, change the URL address.
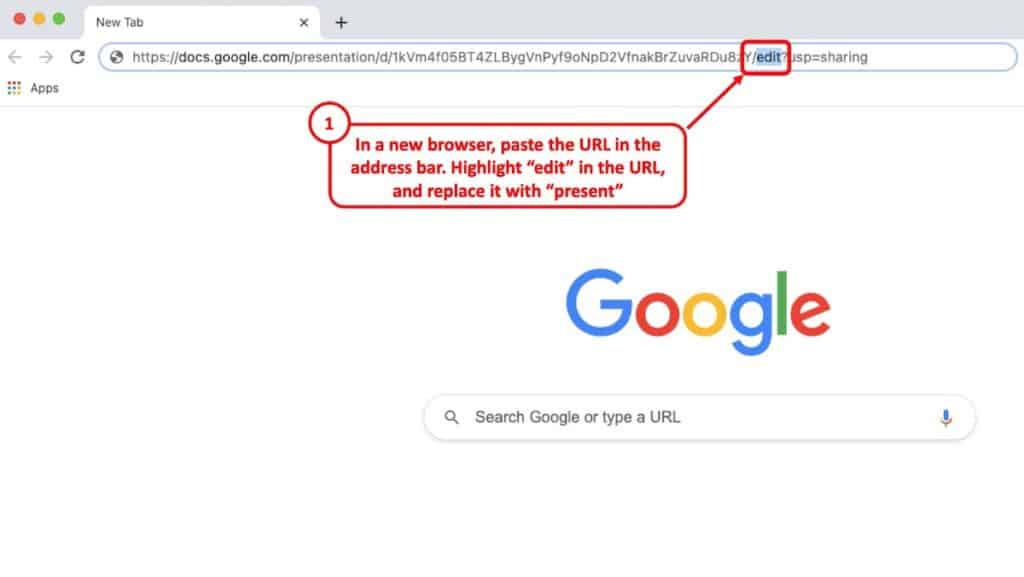
To do that, open a new browser tab or a window. Paste the link in the address bar. Once you paste the URL in the address bar, change the “edit” part to “Present” in the URL (as indicated in the image above).
Step 4 – Share the link with the “Present” included in the URL.
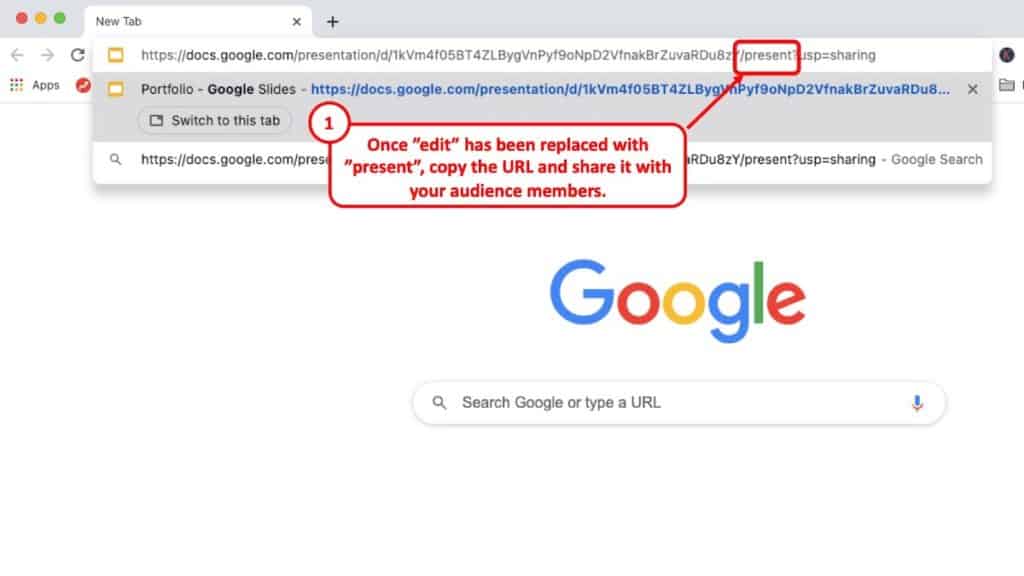
As you can see in the image above, once you have replaced the “edit” part of the URL with “present”, copy the complete URL and share it ahead.
You may want to first try whether the link actually works.
Sharing the link with the “present” option in the URL will always open the slides in presentation mode when someone clicks on the link.
Hide Speaker Notes in Google Slide while Presenting
This is a very important step whenever a user is trying to present their presentation and is trying to hide the speaker notes from the audience while presenting.
Here’s what you need to do in order to hide the notes on Google Slides –
- Open the presentation file.
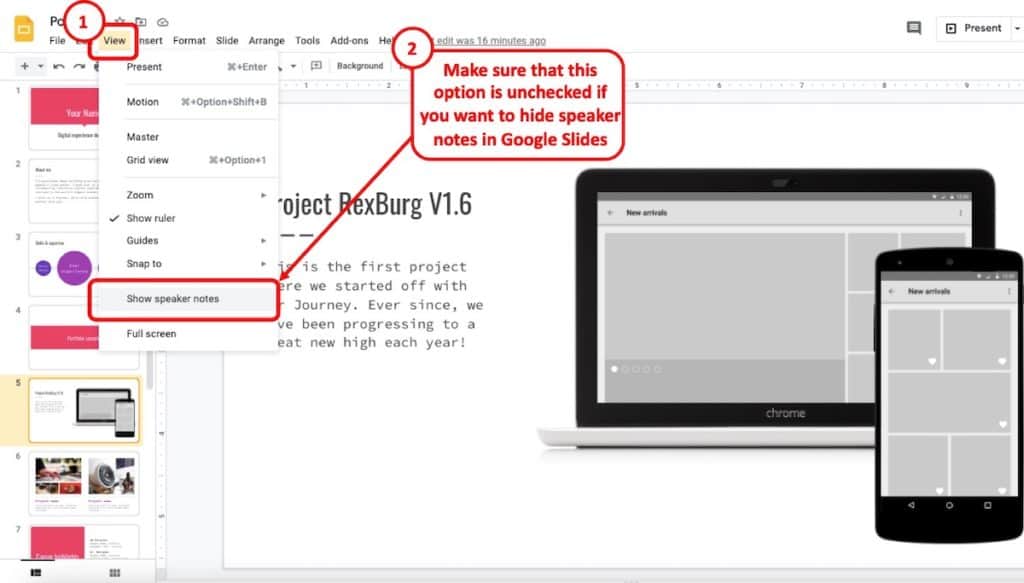
- On the top horizontal lists of tabs, open the ‘View’ Tab.
- Click on the ‘Speaker Notes’ to uncheck the option, this will remove any notes from your slides.
View Speaker Notes in Google Slides while Presenting
Hiding the speaker notes from the presentation screen might help tidy things up for the audience but I just can’t ignore the fact that speaker notes do indeed help a lot to maintain your vocal flow and keep the presentation running smooth.
Thus, I understand the need for people who want to view speaker notes separately while presenting while making sure the notes aren’t visible to their audience.
To do this simply, make sure you have a 2-monitor setup working usually with a laptop and an external monitor alongside you while presenting.
- After you’ve opened your slides without the speaker notes in Presenter view, scroll down towards the bottommost part of your operating screen and then click the gear symbol settings box.
- Click the ‘Open speaker notes option’ this will open the speaker notes in another window. You can arrange your note windows to your laptop screen so that it’s only visible to you.
- Your audience will keep seeing just the window with your slides in presenter modes while you’ll be able to freely navigate through your notes at ease in synchronization with your presentation.
Note: Sometimes few people seem to have a problem in sharing Google Slides over a projector where the notes are also visible for the audience even when they are in presenter mode. To avoid this from happening, you can always just open a new copy of your presentation by removing all speaker notes and then using the new file in Presenter mode.
How to Share Google Slides in Google Classroom without Notes?
Whether it be for an online class or during an online presentation. If you’re a teacher or student who is willing to hide their notes from their peers/students. The best way to do so is to open a secondary copy of your original slides without the notes (refer to 1. How to Share Google slides without Speaker Notes)
After opening a new copy of your slides without any notes, make sure you choose the correct files of the new copy before you do the following:
- While in Google Classroom, click the ‘Classwork’ tab on the top
- Select the Create option and then choose Assignment
- Name your Assignment and then click on Add option to choose the Slides file from Google drive
- Make sure you choose the new copy of your slides without the notes and set the settings to view only before you proceed.
- Make any additional changes with information and then click on assign to automatically share your slides in Google Classroom.
Share Google Slides in Zoom without Notes
Whether it be for a classroom or a business meeting, to share Google slides in Zoom without notes is the same as doing it in a projector except it can be easily done with a single monitor.
For this section, refer back to “Hide Speaker Notes on Google Slides” and “View Speaker Notes on Googles Slides” sections above where I discussed how you can open two separate windows of your slides, one that hides all the notes in the presenter view and one window with just the notes visible to you only.
After opening two separate windows, do the following:
- Click on ‘screen share’ on the bottom mid-part of your zoom screen.
- A sharing dialog box will open that will contain each of the sides of your window by side. Choose the Presenter view window for screen share. This will only show that particular window to everyone.
- Now while everyone will only see the slides in the presenter window, you can freely navigate your way through the notes window side by side while presenting and keeping them hidden.
More Helpful Resources –
- How to Use Google Slides Speaker Notes on a Zoom Call – The Correct Way!
- 17 Pros and Cons of Google Slides [I Bet You DID NOT Know These!]
- Useful TRICK to Zoom in and Zoom Out on Google Slides!
- How to Use Eyedropper or Color Picker Tool in Google Slides!
Image Credit for Featured Image