Scalable Vector Graphics or SVG files are used in anything from print in a magazine to your daily website content. They almost always look better and can easily be scaled to different sizes without any loss in quality! But, PowerPoint has a love-hate relationship with the SVG file type. How then should you easily import an SVG file in PowerPoint?
To import an SVG file into PowerPoint all you need to do is click on the Insert Tab, navigate to Picture, go to the folder that contains your SVG file, and double click on it. PowerPoint will now import your SVG file as a graphic and you can place it anywhere on your presentation.
Creating a PowerPoint presentation in itself can be a stressful experience. Using an SVG file should not increase your confusion and burden!
Thus, in this article, I’ll guide you through exactly how you should work with an SVG file like a Pro!
A Quick Note Before We Begin – if you want to make jaw-dropping presentations, I would recommend using one of these Presentation Designs. The best part is – it is only $16.5 a month, but you get to download and use as many presentation designs as you like! I personally use it from time-to-time, and it makes my task of making beautiful presentations really quick and easy!
How to Import an SVG File in PowerPoint? (Step-by-Step)
Microsoft adopted a system in the mid-2010s wherein they decided to update their Microsoft Office Suite regularly. They moved away from a one-time purchase setup and introduced the monthly subscription-based package.
This meant that using SVG files on any MS Office system became a lot easier and a more intuitive process.
As a result of this, importing an SVG file in the latest version of PowerPoint is a breeze! Let’s learn the steps.
Method 1 – Using the Insert Tab
So, there are multiple methods in which you can import an SVG file in PowerPoint. The first method is using the Insert Tab option. Let’s look at the steps in detail below –
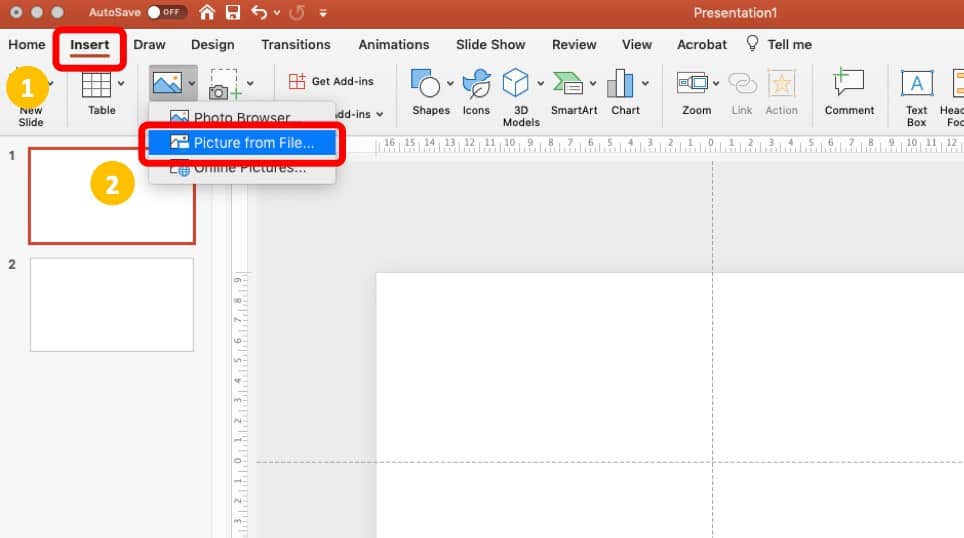
Step 1 – Go to “Insert” Tab
The steps to adding an SVG to a PowerPoint presentation are almost exactly like adding a normal image.
Simply go to the insert tab at the top of the navigation bar, there you will find the option the “Picture” option. When you click on it, you will get a dropdown with multiple options, choose the “Picture from File” option.
Step 2 – Locate the SVG File
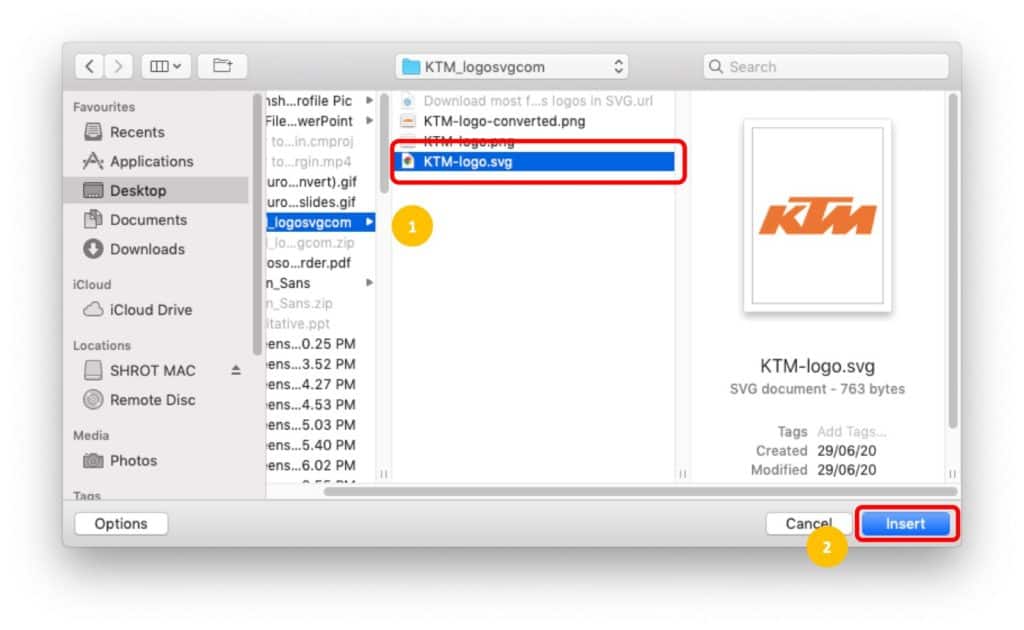
In the next step, locate the SVG file. A quick way to make sure that you choose only an SVG file is to check the extension “.svg” at the end of the file name.
Once the file is selected, you can then click “Insert” or double-click on the file name, and PowerPoint will open it in your presentation.
Once the image has been loaded into PowerPoint it will be recognized as a graphic image, this lets you easily move the image or even edit some of the colors in it.
It really is that easy, but there are more ways of doing it.
Method 2 – Drag and Drop
For those that are looking for a bit of a faster workaround, there is a simple method that you can use to place your SVG file anywhere on your PowerPoint presentation.
Here are the steps involved –
Step 1 – Navigate to the SVG Folder
The first step is to simply locate the folder in which your desired SVG file is saved on your computer.
Once you’ve navigated to that folder, make sure that the PowerPoint file is open underneath, and the folder containing the SVG file is on top.
Step 2 – Drag and Drop the SVG File
The next step is to drag and drop the SVG file on the PowerPoint presentation. It can really be that easy, simply dragging and dropping the SVG into your presentation.
IMPORTANT: It is important to note that the aforementioned steps will only work for Office 365 users. If you are using an older version of PowerPoint, it will simply not recognize an SVG file and you will not be able to import it in this manner!
If you don’t have an Office 365 subscription yet, I highly recommend that you get one. The greatest benefit is that it also provides you with options to add free icons and images directly from within PowerPoint! Plus, it comes packed with several other advanced features that literally transform your presentation’s overall design and aesthetics!
Click on this link to get a 30-day FREE trial! (Hint – Make sure you scroll all the way down to the section just above FAQs, and you’ll find a link to “Try FREE for 1 month”. Alternatively, do a Ctrl+F and search for “Try FREE for 1 month” on the page).
That said, if you don’t have the latest Office version, although the process of importing an SVG file is a bit cumbersome, it can still be done.
How to Import SVG Files in PowerPoint 2010 or Older?
Because SVG files were only standardized around 2011 the older versions of Microsoft Office are not compatible with using them, which means that you will need to do workarounds to have the SVG placed onto your PowerPoint presentation.
Luckily, there are two easy ways of getting around this and adding good looking SVG files to your presentation.
Method 1 – Converting the SVG to a PNG File
This is the easiest way of making your SVG files work on any older program that can’t natively support the file format.
The best conversion of SVG files is transforming it into a PNG file, this keeps a lot of the quality without becoming too large.
There are several ways to convert your SVG into a high-quality PNG, however, you should be careful because there are ways of losing some of the most important parts of the SVG.
Using a website that converts your SVG to a PNG is the safest way of accomplishing your goal, simply go to www.svgtopng.com and load your SVG file.
The website will quickly convert your SVG into a PNG, creating an easy to download image that you can now download and place with ease on your presentation.
One of the biggest downsides of converting an SVG to a PNG file is that you won’t be able to edit the color and other properties of the file anymore. PowerPoint will only consider this as an image henceforth.
That said, you will at least be able to use the file especially if you don’t have any other option.
Method 2 – Using OpenOffice
The best part about this method is that using OpenOffice is not only simple, but it is also FREE! Here are the steps involved for this method –
Step 1 – Download OpenOffice
You first need to download the program from their website, then you select the option to start a presentation once everything has installed and you have it open. Simply drag and drop the SVG files into the slide, OpenOffice will place the SVG file perfectly on the slide.
Step 2 – Ungroup Objects
If the SVG file is made up of multiple layers, you can also ungroup all the elements of an SVG file.
Simply select the SVG file that has been imported, right-click on it, and select the “Break” option. This separates the SVG into separate objects.
Step 3 – Save the File as PPT file type
After this, simply click “Save As“, navigate to the location where you are currently working, and select the “save the file as a PPT” option.
Step 4 – Open it in PowerPoint
The last step would be to open the file that we just saved in PowerPoint.
This simple process makes the files into objects that PowerPoint allows you to individually edit and change the colors of the objects.
How to Edit an SVG on PowerPoint?
While you can’t edit or make changes to either PNG or JPG file types, you can definitely edit the SVG files in PowerPoint.
There are two ways in which you can edit the SVG files in PowerPoint. Let’s look at both of these individually.
Remember, you can edit SVG files only in the newer versions of PowerPoint.
Method 1 – Edit SVG File by Converting it to Shape
You can convert SVGs to shapes in PowerPoint. Each aspect can then be moved, changed, colored, or removed, making it easy to make a custom image that adapts to what you need.
Let’s quickly learn how to do so –
Step 1 – Convert SVG file to Shape
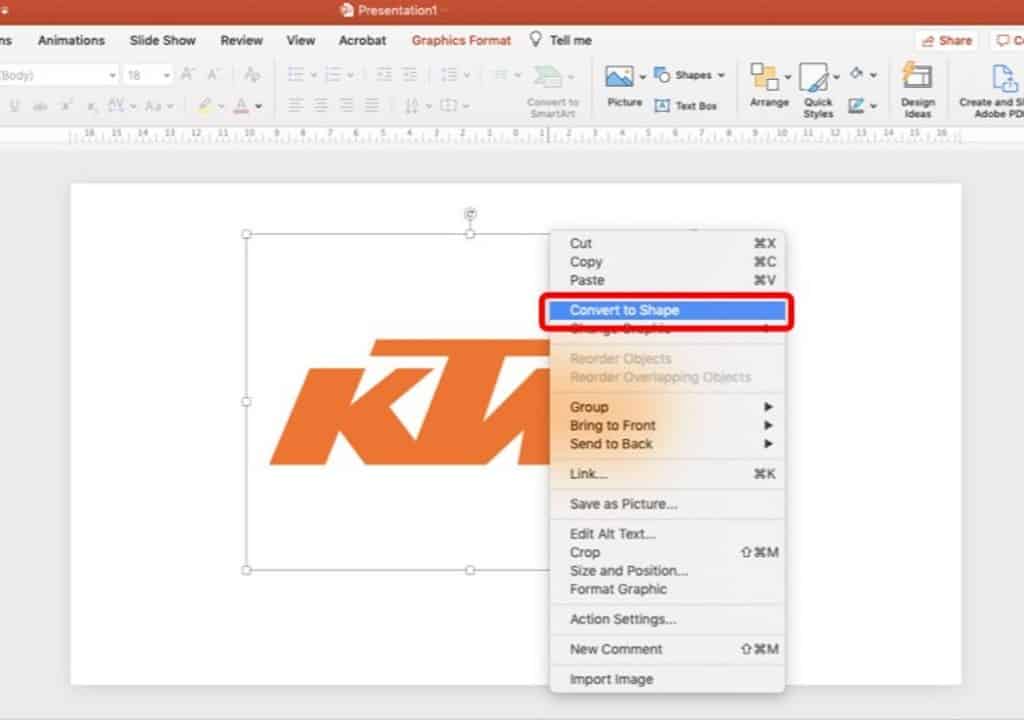
First step is to convert the SVG file into a shape. To do so, simply select the SVG file and right-click on it.
A window with several options will pop-up. Simply select “Convert to Shape” option.
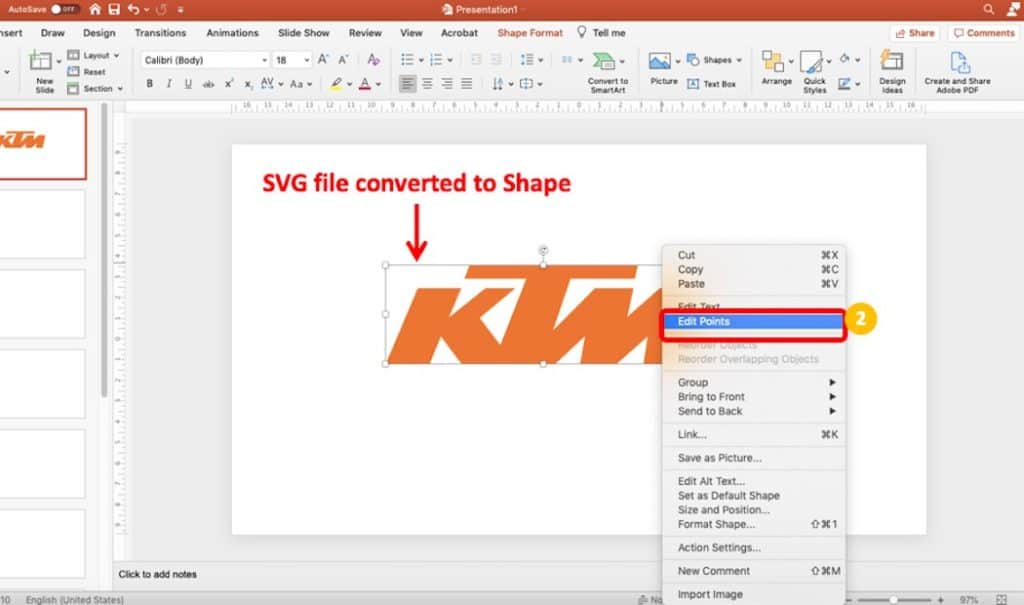
Step 2 – Enable Edit Points
Notice how the logo has been converted to a smaller rectangular shape!
Now you can edit this SVG file like you would edit any other shape. To do so, simply select the object and right-click. From the menu, select “Edit Points“.
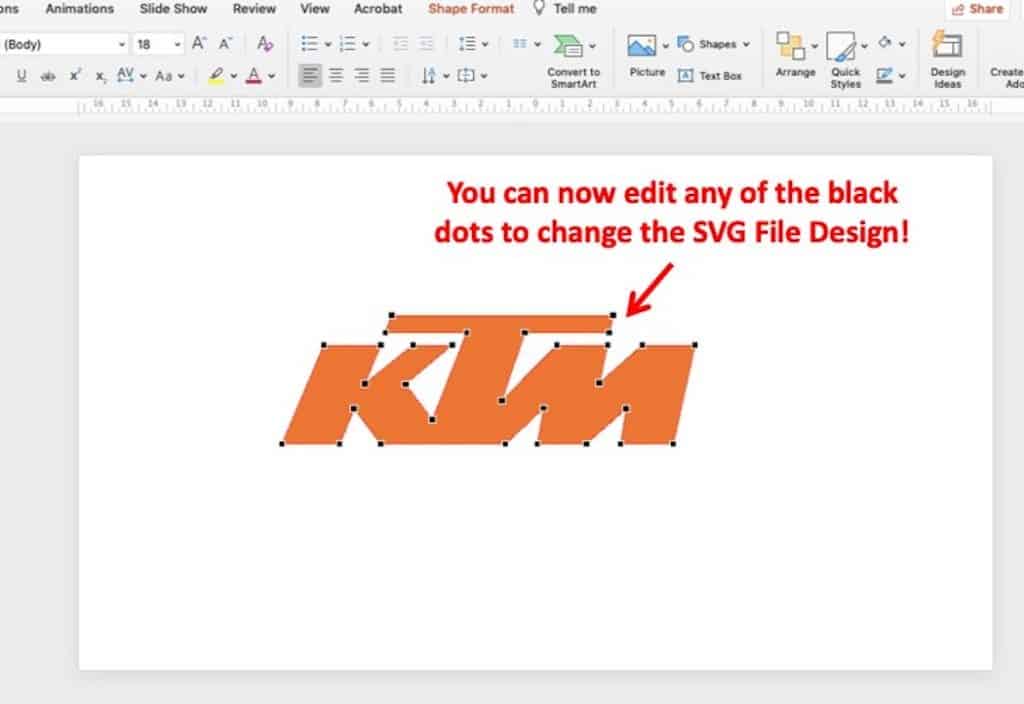
You’ll notice that the object now has several black dots which can be easily manipulated to change the structure of the shape or the image.
In the above example, I’ve used an SVG logo file of the KTM brand, and I will change this logo using only PowerPoint.
Step 3 – Edit Points to Change the Design

To make changes to the design, simply drag any of the points in a particular direction. Be tasteful, and you can easily achieve the desired result by manipulating multiple points in PowerPoint.
Step 4 – Press Esc to Escape Editing
The last step is to press Esc to escape editing the SVG file.
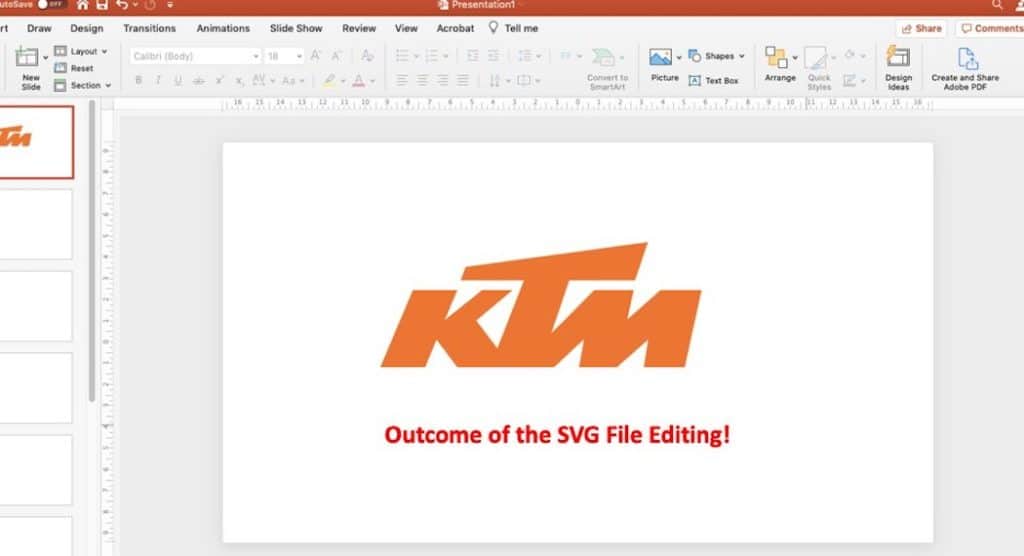
The above example showcases the edited version of the logo file. All these changes were made using just PowerPoint as showcased above!
Method 2 – Edit SVG File as Graphics
Since the new PowerPoint has the graphics option for SVG files you can simply navigate to that bar on your top ribbon. This lets you edit everything from the size of individual parts of the SVG or even change the colors of certain parts.
To edit the SVG file as Graphics, simply select the SVG file. Then, right-click on it and select “Format Graphic“.
Using the right setting will allow you to create SVGs that will make your presentation look better than almost every other presentation.

In the above example, I changed the color of the KTM logo to a version of yellow. I also added some font border, and some cool drop-shadow effect all using just PowerPoint!
Advantages of using SVG files
There are several advantages of using SVG files that few if no other files formats give, which will mean your PowerPoint presentation will look fantastic.
The advantages are simply:
- No Loss of Quality: SVGs do not lose quality if changed, because they save values instead of just pixels.
- Easy to Resize: They can be resized to any size without becoming pixelated.
- Complete Editing and Customization: You can change individual parts of the images.
- Interactivity: Because you can change the color and size of the SVGs they are considered to be more interactive, sometimes even being able to become moving when used properly. Meaning, you can use SVG files to create moving animations.
More about SVG Files
Lastly, I also wanted to share with you the fascinating history of SVG files.
History of SVG Files
The SVG format was a combination of different standards that were being used on the early days of the internet.
Before digital screens were everywhere some would be surprised to know that low quality images were not only everywhere, but they worked perfectly well.
As computer screens became more every day and people all around the world started using them a new way of storing and showing images was needed.
Before 1999 there were several competing standards, all trying to become the chosen format in which images were saved. However, they all had their downsides, even SVGs have a downside that is rarely mentioned.
But, the SVG format won out, in the end, thanks to a few predominantly amazing features such as its ability to scale and hold animation frames.
This meant that no matter how big or small your screen is the SVG will look clean and crisp, allowing several megabytes of information to be saved.
Some other formats of the time required different sized images to be stored for each resolution. But SVG only required the one image that had information that would change and adapt as needed.
Combined with SVGs ability to store animated frames meant that soon it was recognized as the perfect companion to the then still growing internet market
Conclusion
Whether you are making a simple office presentation, or an online presentation for you readers to use, SVGs can take your PowerPoint skills to the next level. Adding them is easy and mastering them is even easier, simply follow the steps and you can be sure your next presentation will be the talk of the office.