

Strikethrough is a great way to highlight the deletion or removal of information and errors. So, if you are in need of using this feature in PowerPoint but don’t know how, this article is just what you need!
To strikethrough text in PowerPoint, simply highlight the text, click on the Home Ribbon, then click on strikethrough option. Alternatively, you can also create strikethrough text effect from Font Format Dialog box by pressing Ctrl+T, and then pressing Alt+K or selecting the strikethrough option.
To learn how to Strikethrough text in PowerPoint in my recommended way, I suggest you read through the whole article. I will talk about every possible way to Strikethrough texts on PowerPoint and also on other platforms like Google Docs, Google Slides, MS Word, and Microsoft Excel.
How to Strikethrough Text In PowerPoint? (Step-by-Step)
On PowerPoint, creating strikethrough on text is very simple and straightforward. Here’s a step-by-step explanation.
Method 1 – Using the “Home” Tab
The first method is using the “Home” tab in PowerPoint. Here are the steps
Step 1 – Highlight the Text for Strikethrough
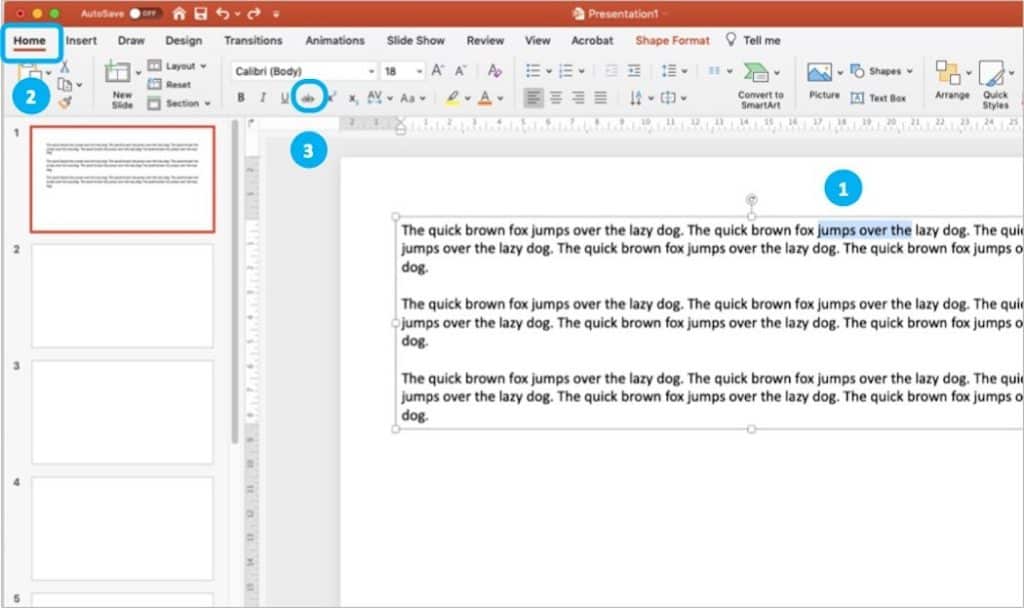
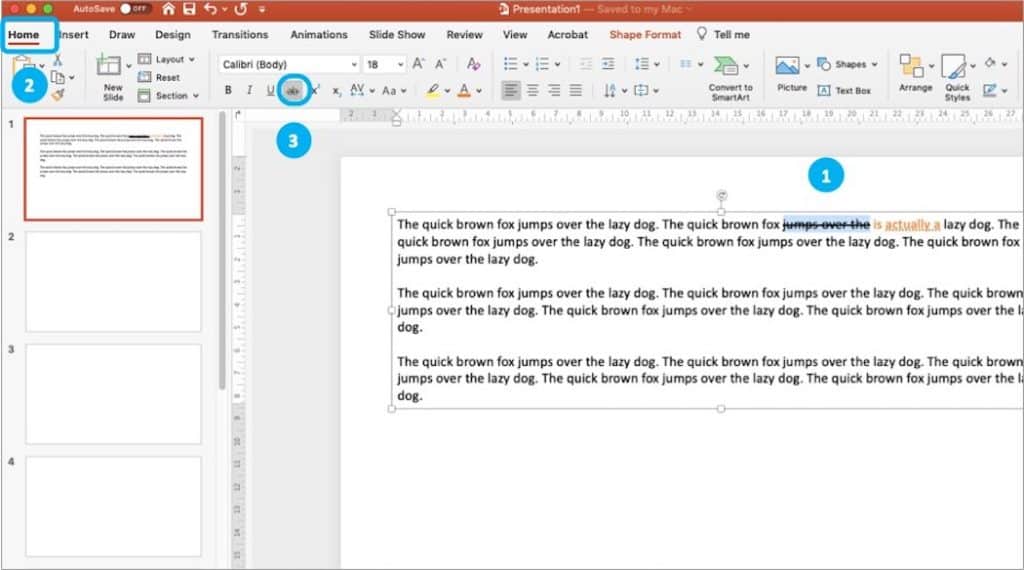
After opening PowerPoint, select the text that you want to strikethrough. To do so, click and hold the left mouse button at one end of the text. Then drag and release the button at the other end.
Step 2 – Select the “Home” tab
Next, click on the home tab which you will find on the top left corner of your screen as indicated in the image above.
Step 3 – Click the Strikethrough Text Option
After selecting the text, you will find an icon that looks like this “abc” (as indicated in the image above) right under the font option on the top menu bar. Just click on that and your work is done!
Method 2 – Using the Format Option
Another method for using strikethrough text is through the Format Option.
The exact steps are as follows –
Step 1 – Highlight the Text for Strikethrough
After opening the specific slide where you want to strikethrough text, first highlight the text for the effect by selecting it using mouse or shift+arrow key.
Step 2 – Open the Format Menu
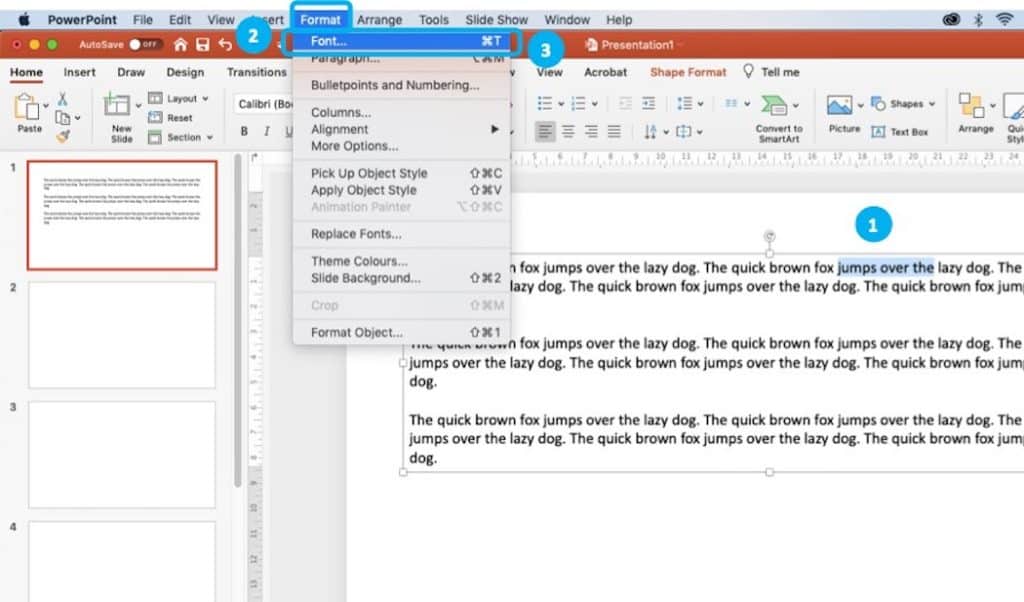
Once you’ve highlighted the text, click on the “Format” menu from the Menu Bar of your PowerPoint.
Step 3 – Select Font Option
Once you click on the Format menu, a dropdown will appear with multiple options. Make sure that you choose “Font” from the Menu.
Step 4 – Select Strikethrough under Effects Option
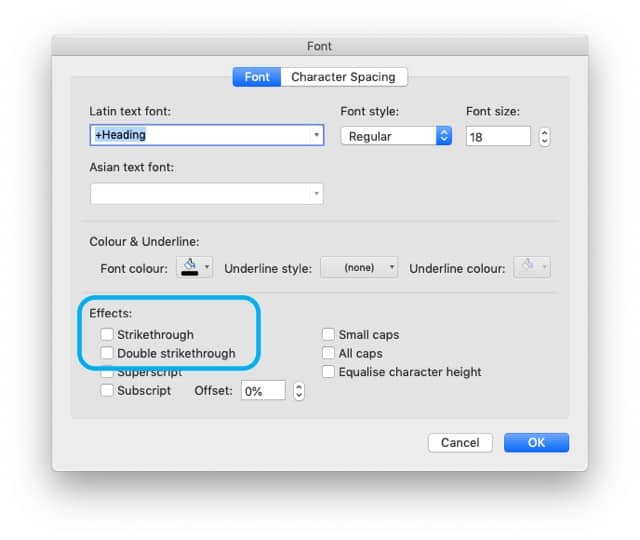
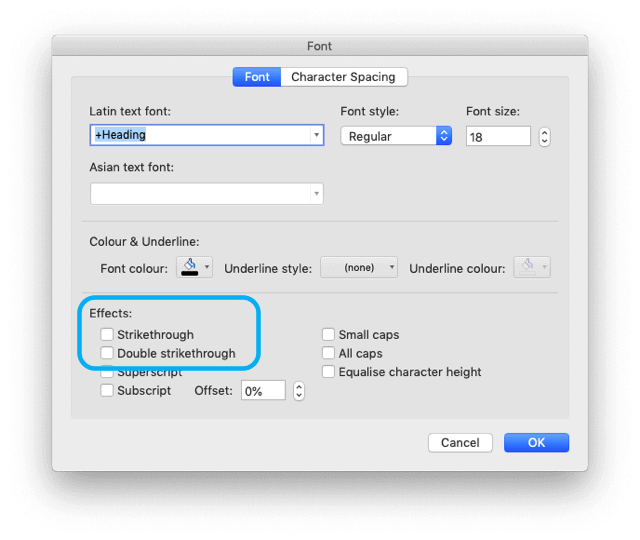
Under the “Effects” option, you can either choose the “Strikethrough” or “Double strikethrough” option. Both these options will create a strikethrough effect.
Make sure that there is a check mark in the checkbox on whichever option that you have selected.
Method 3 – Using Keyboard Shortcuts
There are some shortcut keys on the Microsoft PowerPoint which makes the process of making the presentations very fast. Knowing these shortcut keys is essential if you want to speed up your workflow.
The only drawback is that you need to remember them! An easy way to fix that is to bookmark this page so that you have the shortcut handy every time you need to strikethrough the text!
Depending on your operating system, these shortcut keys may slightly vary.
Strikethrough Text Shortcut for Windows
Step 1 – Highlight the Text
First of all, to strikethrough your text, select the text by holding and dragging the left mouse button over the text as we did before.
Step 2 – Use the Shortcut
Then, to bring up the Font Dialog box, press Ctrl + T or Ctrl + Shift + F. The dialog box should appear beside the text.
Step 3 – Select the Strikethrough Option
Then, to select the strikethrough option, press Alt + k. After that, simply press Enter and you should see a line like this (This is a line).
Ribbon Guide Shortcut (only for Windows)
The Ribbon Guide shortcut is my favorite method! Its easy, and its quick. I highly recommend using this option!
There is another shortcut that will strikethrough a text even more quickly. We call it “Ribbon Guide Shortcut”. Keep in mind that this shortcut is only available on the Windows version of PowerPoint.
Basically, this shortcut allows us to implement Method 1 (described above) without using the mouse. So, this is shortcut directly and quickly creates the strikethrough text effect without using the Format Font option.
Step 1 – Highlight the Text
Using the left mouse button, select the text that you want to strikethrough.
Step 2 – Use the Hot Keys
Once the text is highlighted, just press Alt, H and then 4. And that’s it! You might have noticed that I used commas instead of a plus sign. That means in this case, you won’t have to press and hold those buttons to apply strikethrough. Just press them one after another and your work is done.
Strikethrough Text Shortcut for Mac
For Apple users, shortcut keys to strikethrough a text are different. I will explain the whole process step by step below.
Step 1 – Highlight the Text
On your PowerPoint slide, select the text that you want to strikethrough using the left mouse button.
Step 2 – Use the Shortcut Keys
Now you have to open the Font Dialog box. To do that, simply press Command + T on your keyboard.
Step 3 – Select Strikethrough Effect
In the font dialog box, you have to find the “strikethrough effect”. Just click on it and the strikethrough effect will be applied to the text.
How to Delete or Remove Strikethrough Text Formatting?
Removing the strikethrough effect is also pretty easy. Removing the strikethrough formatting basically follows the same steps as creating the strikethrough effect, but the only difference is that you need to highlight the text that is already having a strikethrough effect!
If you need help, here are the step by step instructions –
Step 1 – Highlight the Text WITH Strikethrough Effect
After opening the PowerPoint, select the text that has a strikethrough effect. Click and hold the left mouse button at one end of the text then drag and leave the button at the other end of the text.
Step 2 – Select the Home Tab
Then, click on the home tab which you will find on the top left corner of the screen as indicated in the image above.
Step 3 – Click the Strikethrough Text Option
After selecting the text, click on the “abc” icon located under the font option on the top menu. Just click on that and the strikethrough effect will be removed.
How to Strikethrough Text In Google Slides and Google Docs?
Putting a strikethrough effect on Google Slides or even Google Docs is a bit different than PowerPoint. The shortcut keys are a bit different as well.
So, in case you end up using the Google Slides, and you need to strikethrough text effect on your slides, you can follow the steps given below.
Method 1 – Using the Format Menu Option
Step 1 – Highlight the Text
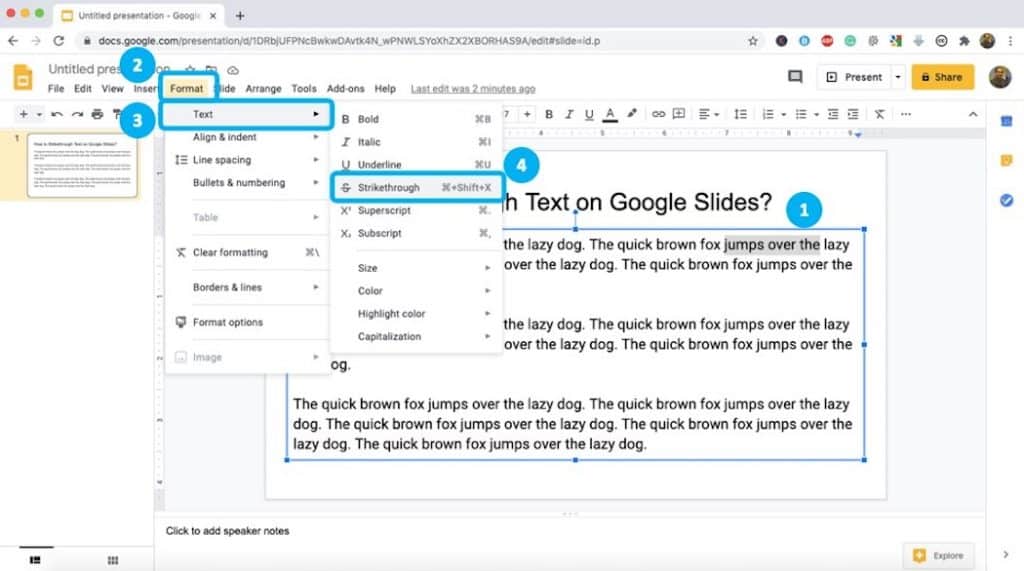
After opening Google slides, Select the text that you want to strikethrough.
Step 2 – Click on the Format Menu
The next thing you need to do is click on the “Format” menu which you will find on the top left corner of the screen.
Step 3 – Select Text Option
When you click on the “Format” Menu, a dropdown will appear. Simply click on the “Text” option.
Step 4 – Select Strikethrough Text Option
On the text menu, you will find an option called strikethrough. Just click on it and the strikethrough effect will be applied.
Keyboard Shortcut for Strikethrough Text on Google Slides and Google Docs
You can also use shortcut keys for applying strikethrough effects on Google slides. The steps for using those shortcuts are given below
Make sure that you highlight the text before applying the shortcut otherwise you would not be able to see the effect.
Once you’ve highlighted the text, simply press “Alt + Shift + 5” on Windows PC.
If you are using Mac OS, you can recreate the same strikethrough text effect by pressing “Command + Shift + X“.
How To Strikethrough Text In Word?
On MS Word, putting a strikethrough effect on a text is even more simple. A few simple steps are all you need to make your presentation perfect.
Step 1:
Open MS Word. Click on the home tab which you will find on the top left corner of the screen.
Step 2:
After that, select the text that you want to strikethrough. The length of the text does not matter. In fact, you can put a strikethrough effect on the whole article.
Step 3:
After selecting the text, you will find some like “abc” right under the font. Click on that and the strikethrough effect will be applied.
Shortcut Keys for Strikethrough Text on Word
Like on other platforms, you can use strikethrough effects on MS Word using shortcut keys. The steps are given below.
Step 1:
First of all, to strikethrough your text, select the desired text.
Step 2:
Then, to bring up the Font Dialog box, press Ctrl + D.
Step 3:
Then, to select the strikethrough option, press Alt + K. After that, simply press Enter and you should see the strikethrough effect.
How To Strikethrough Text In Excel?
Using strikethrough effects on Excel is a bit tricky. Here’s how to do it –
Step 1:
After opening Excel, click on the “Edit in Excel” tab which is at the top right corner of the screen.
Step 2:
After that, select the cells that you want to strikethrough.
Step 3:
Find the “Format Cells” and click on it.
Step 4:
There is a tab called “Effects” on the Format cells box. Under that tab, you will find strikethrough. Click on it.
Keyboard Shortcuts for Strikethrough Text Effects in Excel
Using the shortcut keys is the easiest way to apply the strikethrough effect on Excel. There are only two steps.
Step 1:
First of all, select the context using the left mouse button of your mouse. The length of the text doesn’t matter.
Step 2:
Then, just press Ctrl + 5. You will see that the strikethrough effect has been applied to the text.
Final Thoughts
We all use the discussed programs almost regularly in our work life and study life. So, knowing some shortcuts of different effects is very important to speed up our workflow.
In this article, I briefly discussed how to strikethrough text in PowerPoint in an easy way. Hopefully, you’ve found what you came here for. Thanks for stopping by. Be sure to check out our other articles. We provide some great tips & tricks to create awesome presentations!