
When you go for a presentation, it is always a good feeling to have a Handout of it with you, that way it makes it easy to follow through with the presenter, even if you can’t see the screen properly.
To create handouts in PowerPoint, first, click on the “View” tab in the “Menu” ribbon. Then, click on the “Handouts Master”. Customize the handouts using the “Preview” option, and then click “Close Master View”. This will return to the normal view and the changes to your handouts will be saved.
However, this is just a quick summary on how to make handounts in PowerPoint. There are quite a few things you should know while creating handouts in PowerPoint. In this article, we shall cover all the nuances involved in creating PowerPoint handouts. So, let’s get started!
1. What are Handouts in PowerPoint and Why are They Used?
Microsoft PowerPoint slides can be printed or converted into a copy of “Handouts.” Handouts are either PDF, Word, or paper copies of a PowerPoint presentation that you can hand to the audience.
They provide something substantial for your audience to take hand notes and to keep with themselves. Handouts can also be used for adding notes alongside each slide by the presenter.
2. How to Create Handouts in PowerPoint?
Creating handouts of a PowerPoint presentation can be helpful for both the presenter and the audience to keep track of all the slides. Besides, it allows the audience to review it even after the presentation is over. You can easily create handouts in Microsoft PowerPoint using the “Handout Master” feature.
2a. Using Handout Master on PC
On a Windows PC, you can create a PowerPoint handout. All you have to do is follow the 3 easy steps.
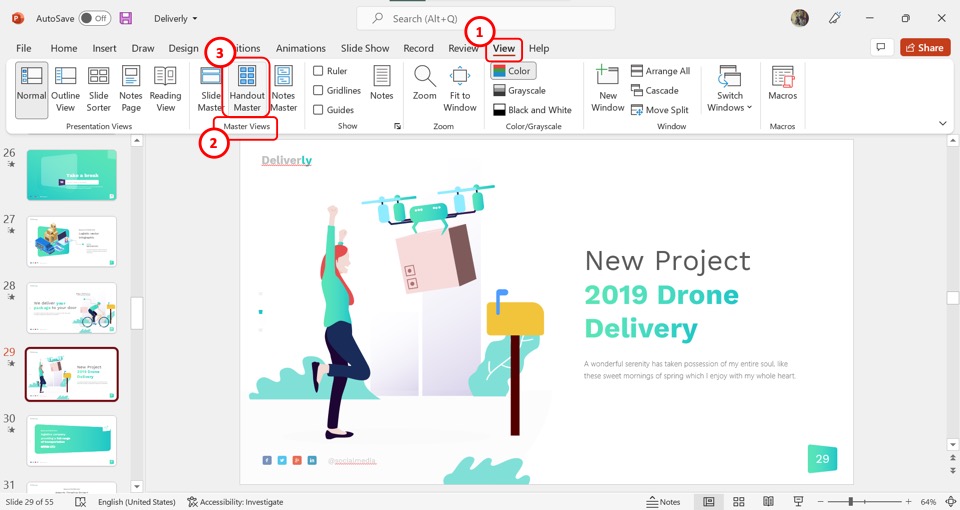
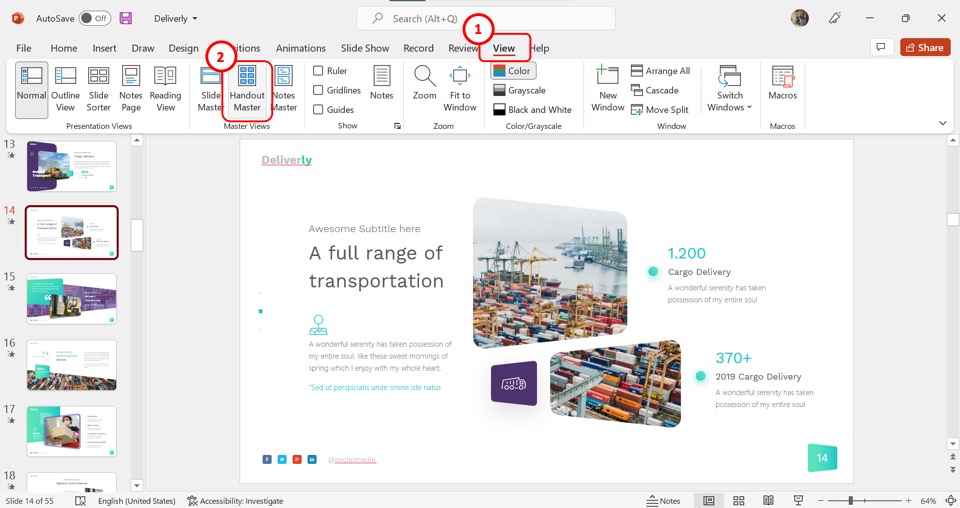
Step-1: Click on “Handout Master”
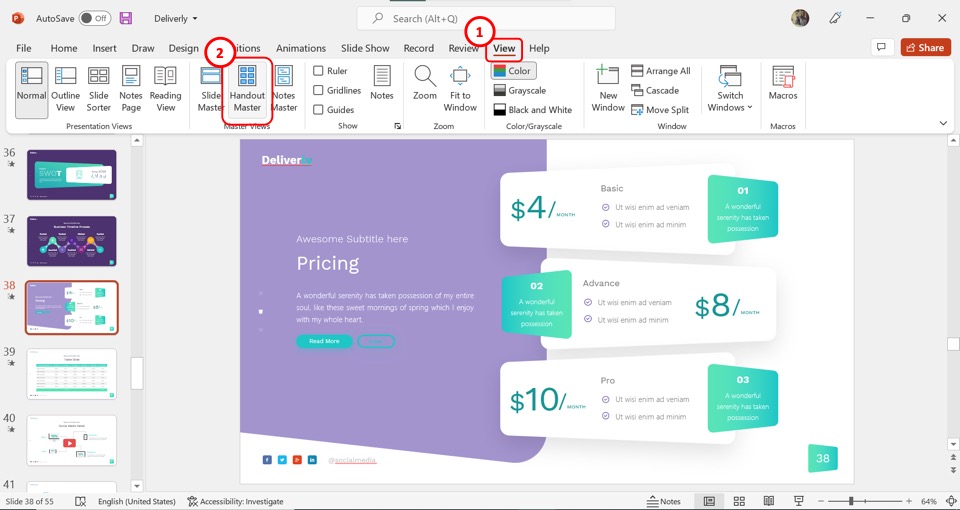
In the menu ribbon located at the top of the screen, click on the “View” tab. Then you have to click on the “Handout Master” option.
Step-2: Customize the handout
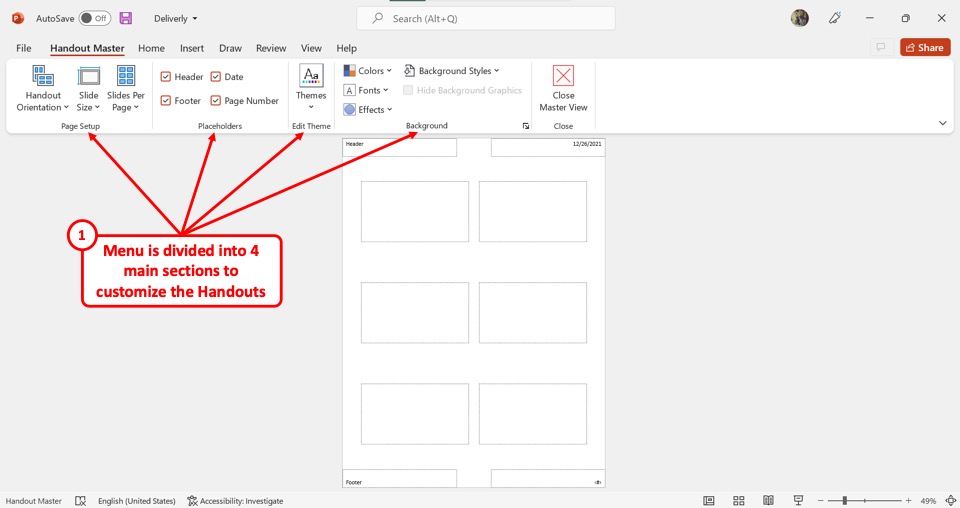
In the “Handout Master” view, you can preview the PowerPoint handout. The menu is divided into four main sections: “Page Setup”, “Placeholders”, “Edit Theme” and “Background”. You can use the options under each section to customize the handout according to your preference.
Step-3: Click on “Close Master View”
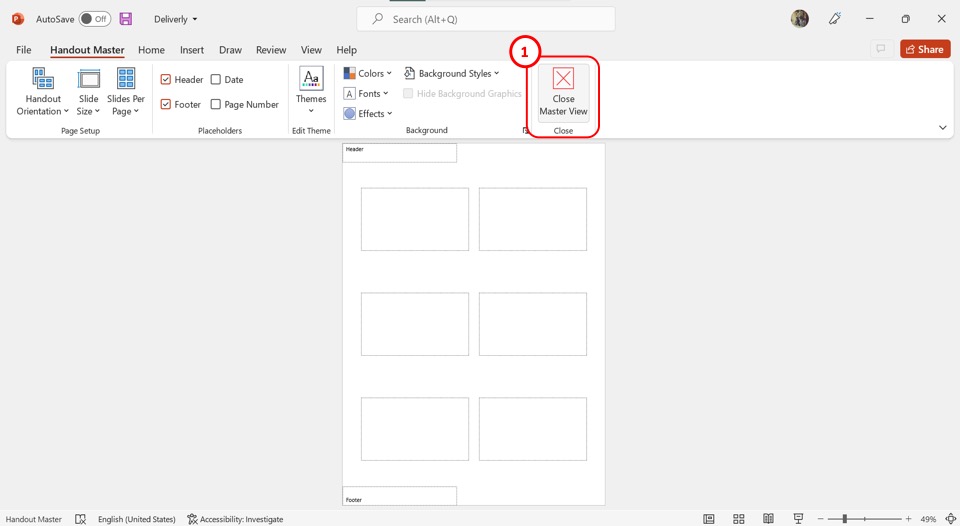
The final step is to click on the “Close Master View” button after customizing the handout. This will automatically save the handout and return it to “Normal View” where you can go back to editing the presentation slides.
2b. Using Handout Master in PowerPoint on Mac
To use the “Handout Master” in PowerPoint for creating handouts on Mac, follow the 3 quick steps.
Step-1: Click on “View”
In the menu bar at the top of the screen, click on the “View” tab. This will open the “View” menu right under the menu bar. Click on the “Handout Master” option in the “View” menu.
Step-2: Arrange the handout with the preferred settings
In the “Handout Master” view, you will find various options to customize the handout. Click on “Handout Orientation” to change the orientation of the handout.
You can also click on the “Slide Size” button to access the “Page Setup” dialog. You can also add or remove the “Header”, “Footer”, “Date and Time” and “Page Number”.
Step-3: Click on “Close Master”
The final step is to click on the “Close Master” option to save the preferred settings for the PowerPoint handout.
3. How to Create Multi-slide Handouts in PowerPoint?
Microsoft PowerPoint allows you to create handouts with one to nine slides per page. To create multi-slide handouts in PowerPoint, follow the 3 simple steps.
Step-1: Click on the “View” tab
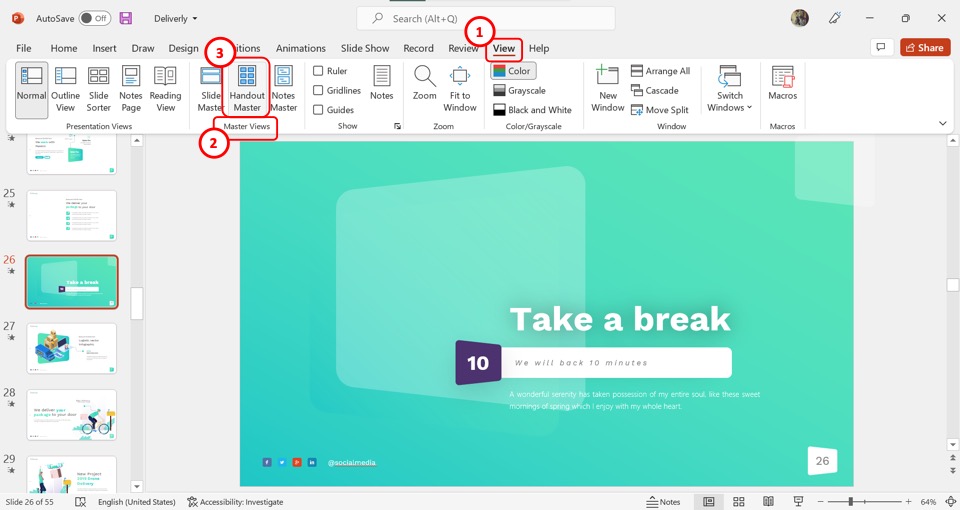
The first step is to click on the “View” tab from the menu bar. In the “View” menu, click on the “Handout Master” option in the “Master Views” section.
Step-2: Click on the “Slides Per Page” option
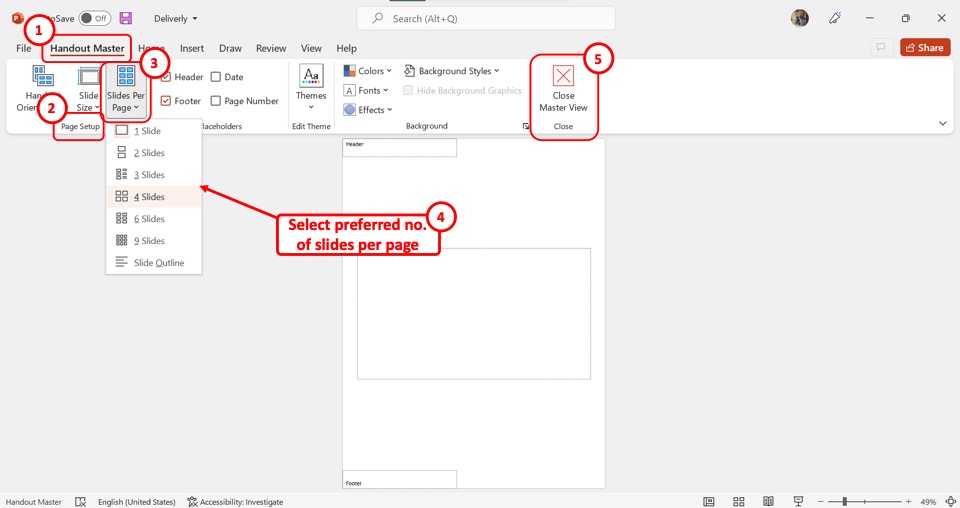
In the “Handout Master” view, click on the “Slides Per Page” option which is in the “Page Setup” section. From the dropdown menu, click on your preferred number of slides for a single page.
Step-3: Click on the “Close Master View” option
Now all you have to do is click on the “Close Master View” option to save the multi-slide template for the handout. (shown in the image above)
4. How to Change Handout Orientation?
The handout orientation controls whether the PowerPoint handout will be in landscape or portrait mode. To change the handout orientation, follow the 3 simple steps.
Step-1: Click on the “Handout Master” option
The first step is to click on the “View” tab in the menu ribbon. Then click on the “Handout Master” option in the “Master Views” section.
Step-2: Click on “Handout Orientation”
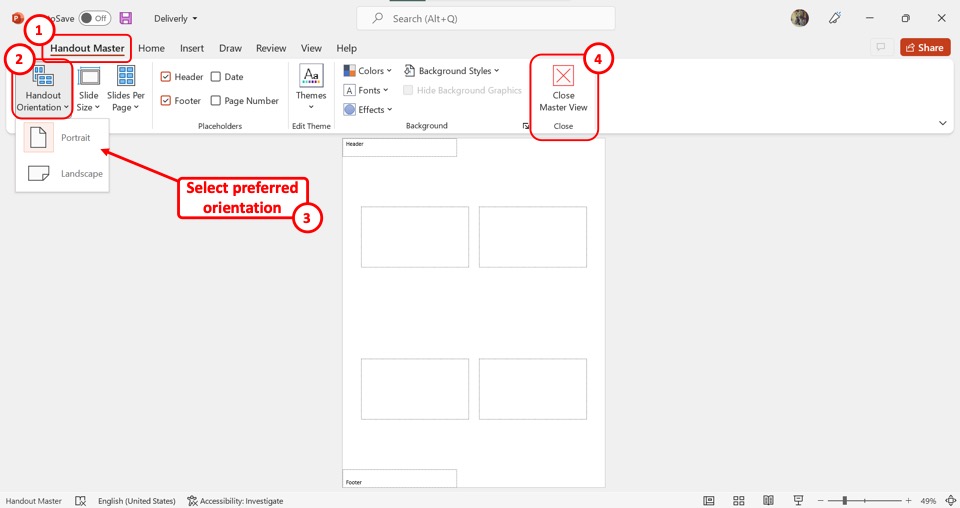
The next step is to click on the “Handout Orientation” option which is the first option in the “Page Setup” section in the “Handout Master” view. This will open a dropdown menu. Click on “Portrait” for portrait orientation or click on the “Landscape” option for landscape orientation.
Step-3: Click on the “Close Master View” button
Now all you have to do is click on the “Close Master View” button to save the new orientation. The screen will return to “Normal View” (as shown in the image above)
5. How to Change Header and Footer of Handouts in PowerPoint?
Using the “Handout Master” in the PowerPoint presentation, you can change the header and the footer of the handouts. Follow the 5 easy steps.
Step-1: Click on the “Handout Master” option
The first step is to open the “Handout Master” view. You have to first click on the “View” tab in the menu ribbon. Then click on the “Handout Master” option in the “View” menu.
Step-2: Click on the “Header” and the “Footer” options/
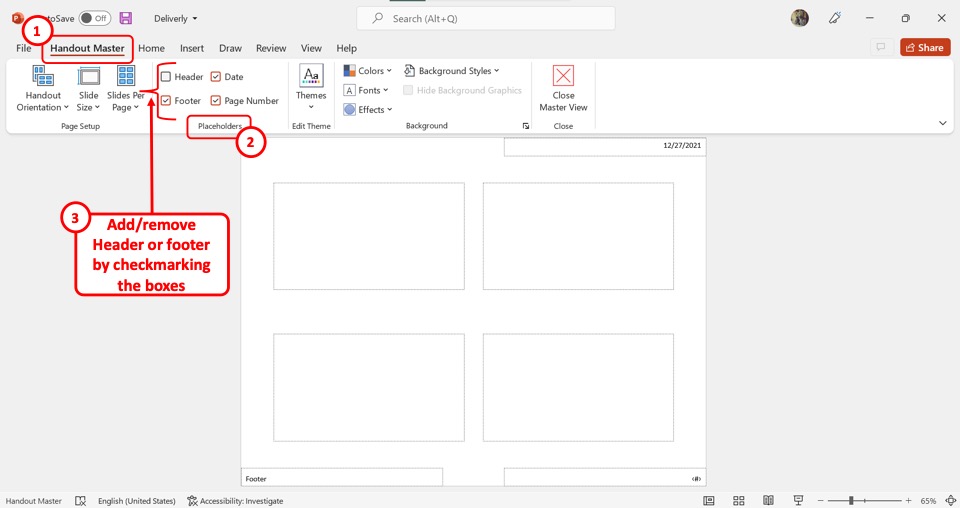
In the “Handout Master” view, you can make both or either of the header and the footer disappear. To remove the header, click on the checked box beside the “Header” option in the “Placeholders” section of the toolbar.
Similarly, you can click on the checked box at the left side of the “Footer” option to make it disappear. To make them reappear, click on the unchecked box again and the checkmark will reappear.
Step-3: Click on the “Header” placeholder
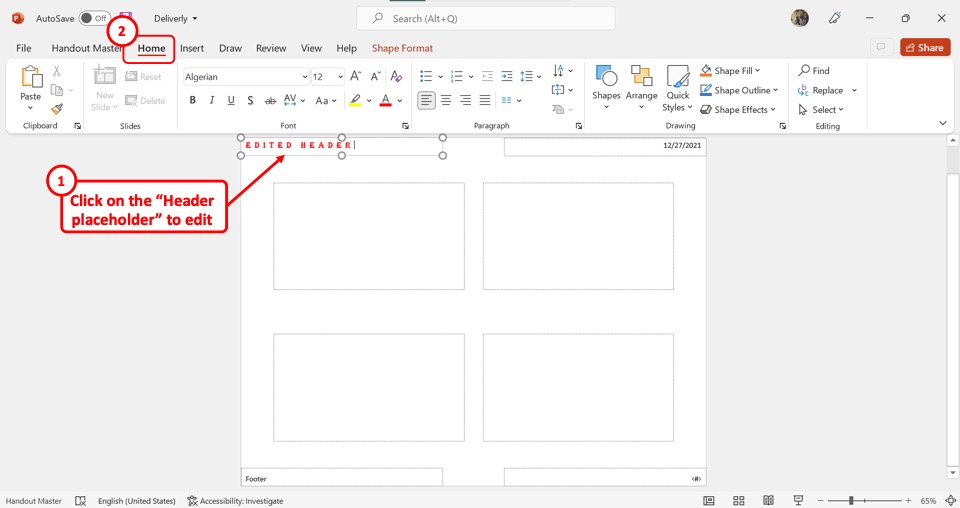
To edit the header, click on the “Header” placeholder. It is located at the top left corner of the “Handout Master”. Then click on the “Home” tab in the menu ribbon. You can use the toolbar in the “Home” menu to edit the header of the handout.
Step-4: Click on the “Footer” placeholder
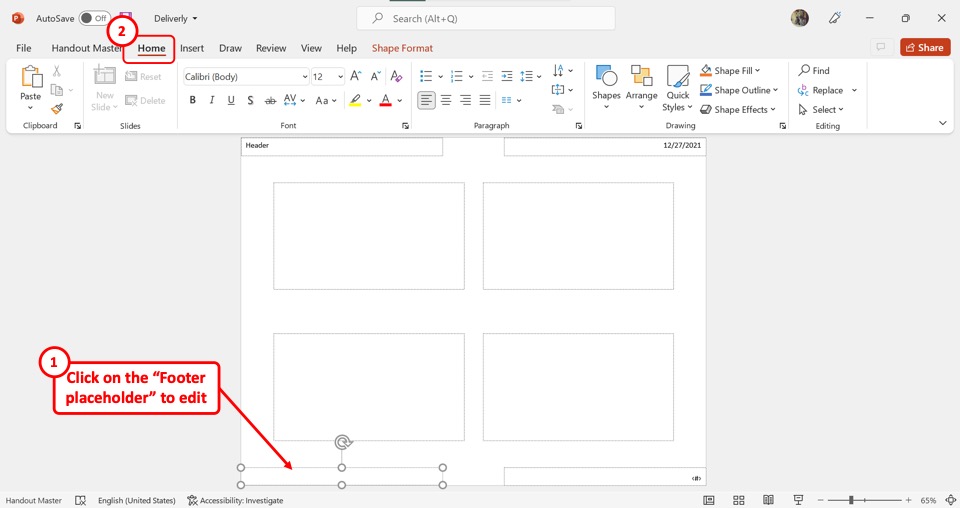
You can also edit the footer in a similar way. Click on the “Footer” placeholder located on the left side at the bottom of the “Handout Master”. Then click on the “Home” tab to access the editing toolbar. You can also drag the placeholder to resize or reposition it.
Step-5: Click on “Close Master View”
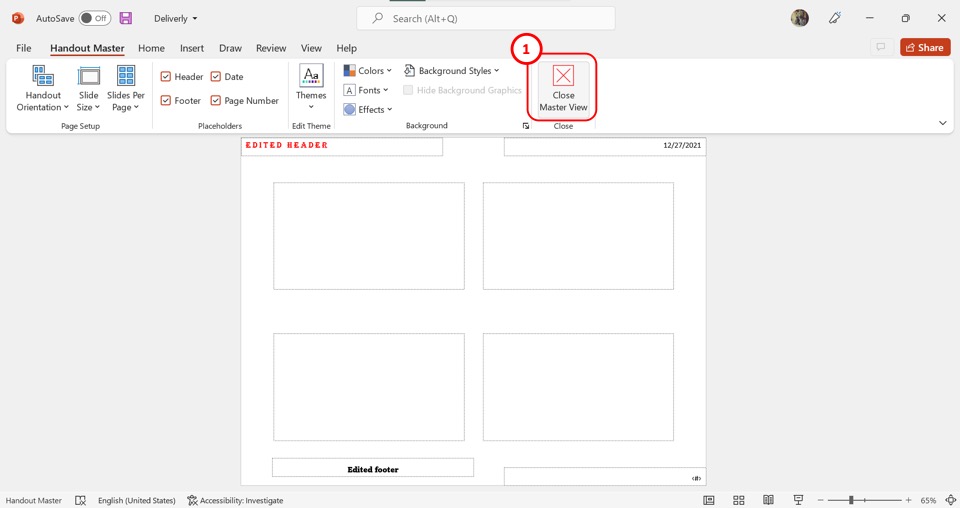
Now all you have to do is click on the “Close Master View” option in the “Handout Master” tab. This will save the edited changes of the header and the footer.
6. How to Change the Background of Handouts in PowerPoint?
Microsoft PowerPoint allows you to change the background of the handouts. This does not affect the background of the presentation slides. To change the background of the handouts, follow the 3 quick steps.
Step-1: Click on the “View” tab
Click on the “View” tab in the menu ribbon at the top of the screen. Then click on the “Handout Master” in the “View” menu.
Step-2: Click on the tools in the “Background” section
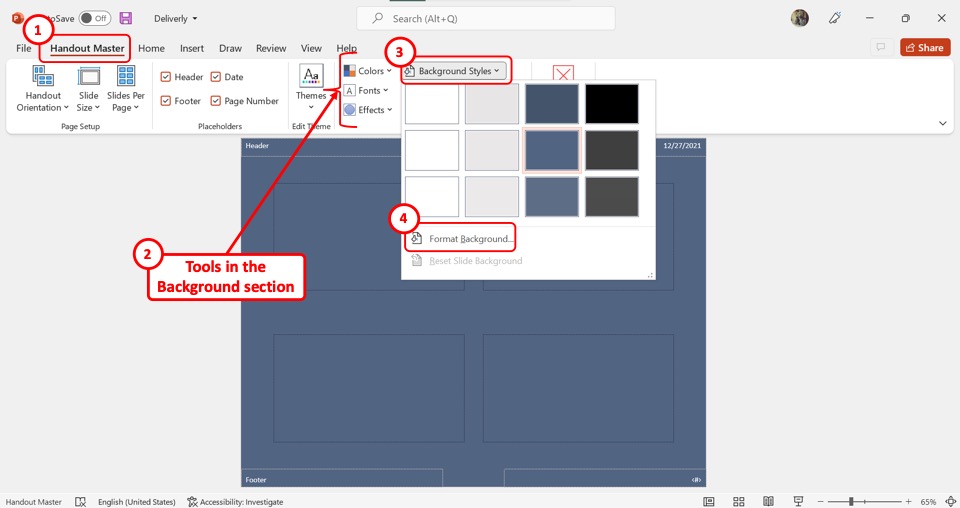
In the “Handout Master” view, you can use the tools in the “Background” section to change the background of the handout. There are “Colors”, “Fonts”, and “Effects” options.
Click on “Background Styles” and then click on the “Format Background” option from the dropdown menu to customize the background.
Step-3: Click on “Close Master View”
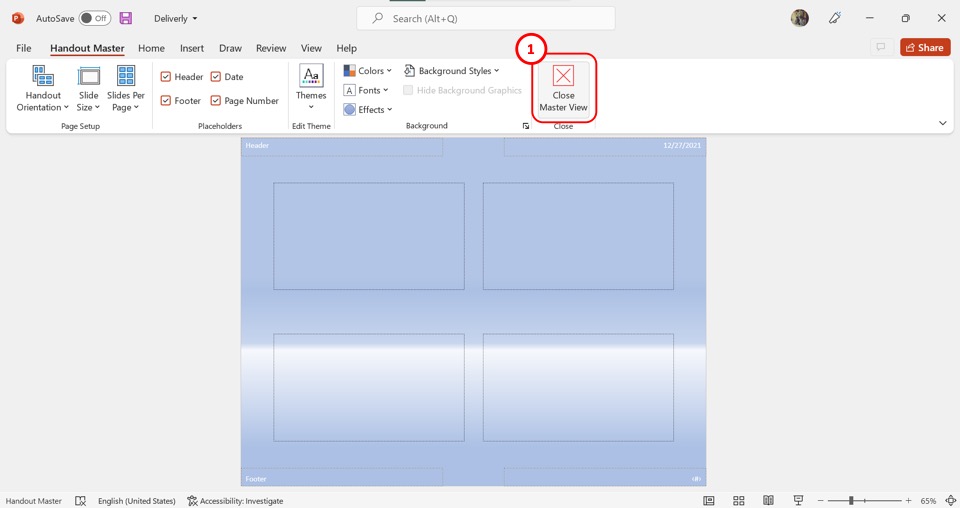
To save the changes to the handout background, all you have to do is click on the “Close Master View” button at the top of the screen.
7. How to Preview Handouts in PowerPoint?
Using the “Print” option in Microsoft PowerPoint, you can preview the handouts. All you have to do is follow the 3 simple steps.
Step-1: Click on “File”
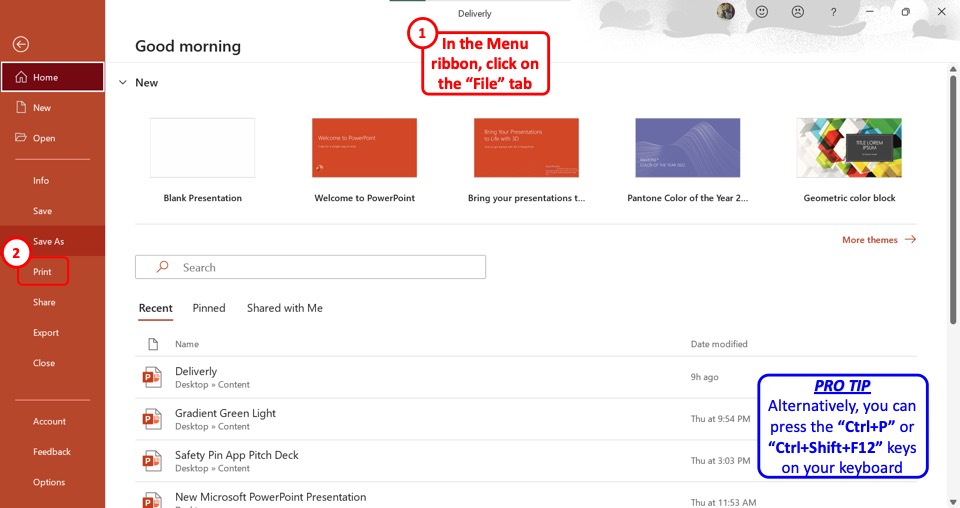
In the menu ribbon located at the top of the screen, click on the “File” tab. In the “File” menu, you have to click on the “Print” option. Alternatively, you can press the “Ctrl+P” keys or the “Ctrl+Shift+F12” keys on your keyboard. This will open the “Print Preview” screen.
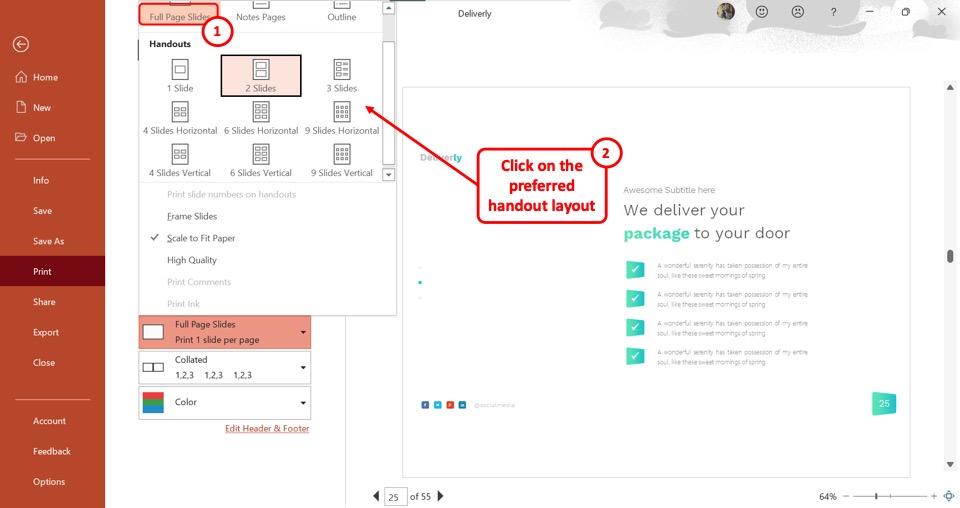
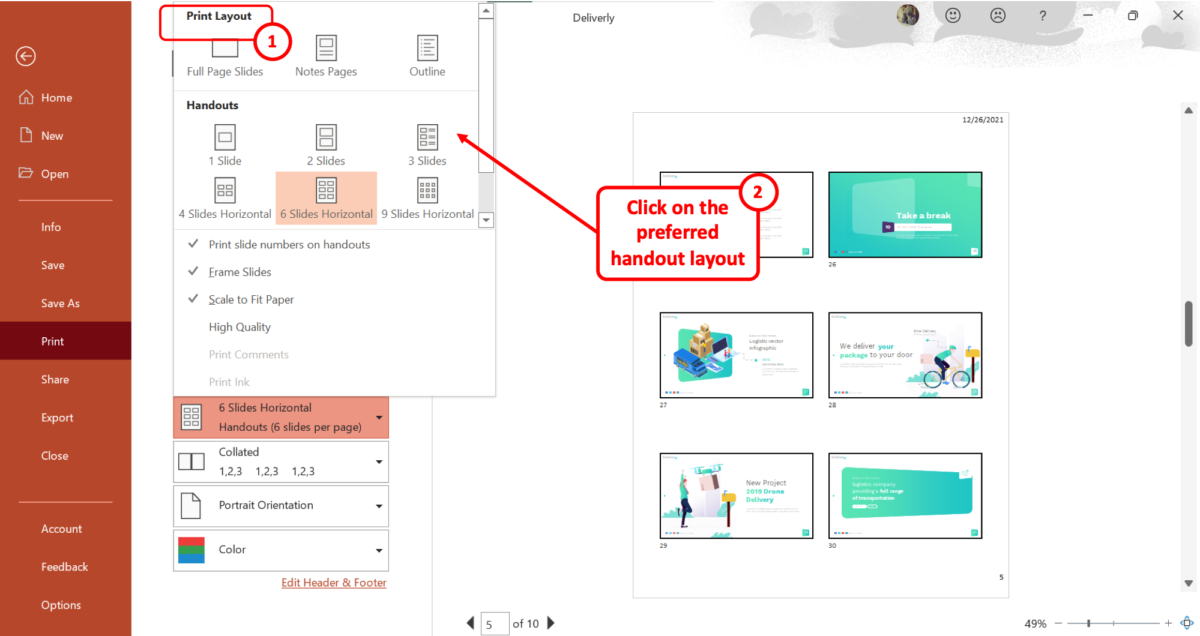
Step-2: Click on the “Print Layout” option
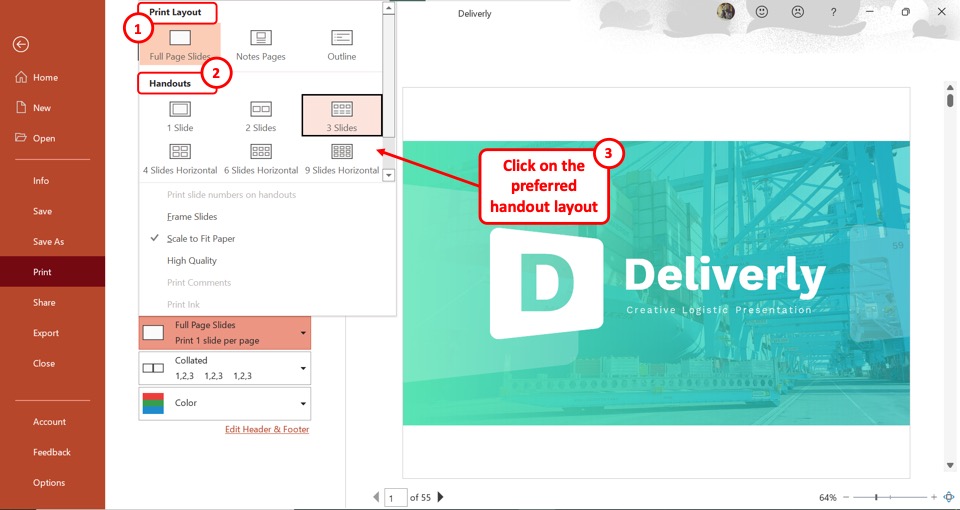
The next step is to click on the “Print Layout” option which is the second box under “Settings”. In the “Print Layout” menu, the default option is “Full Page Slides”. You have to instead click on the preferred handout layout from the “Handouts” section.
Step-3: Click on the “Next Page” arrow
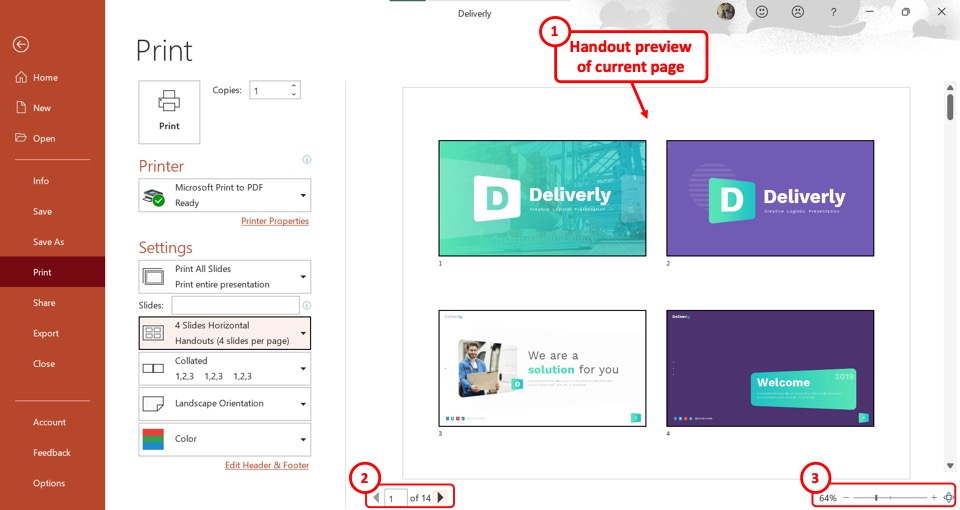
Now you can see the handout preview of the current page. At the bottom of the screen under the preview, you can click on the “Previous Page” option which is the leftward-facing arrow to preview the previous pages.
Click on the “Next Page” option which is the rightward-facing arrow to preview the next pages of the handout. You can also use the “Zoom” option to zoom in or zoom out on the preview page.
8. How to Print Handouts in PowerPoint?
Microsoft PowerPoint allows you to print out handouts or save them as a PDF file. There are also multiple layouts available for printing handouts.
8a. How to Print Handouts in PowerPoint?
To print handouts in PowerPoint, follow the 4 easy steps.
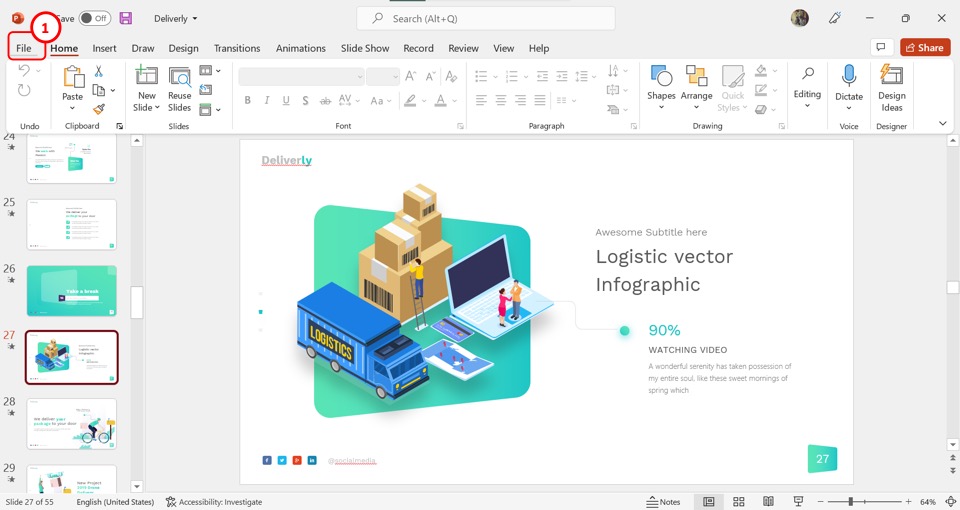
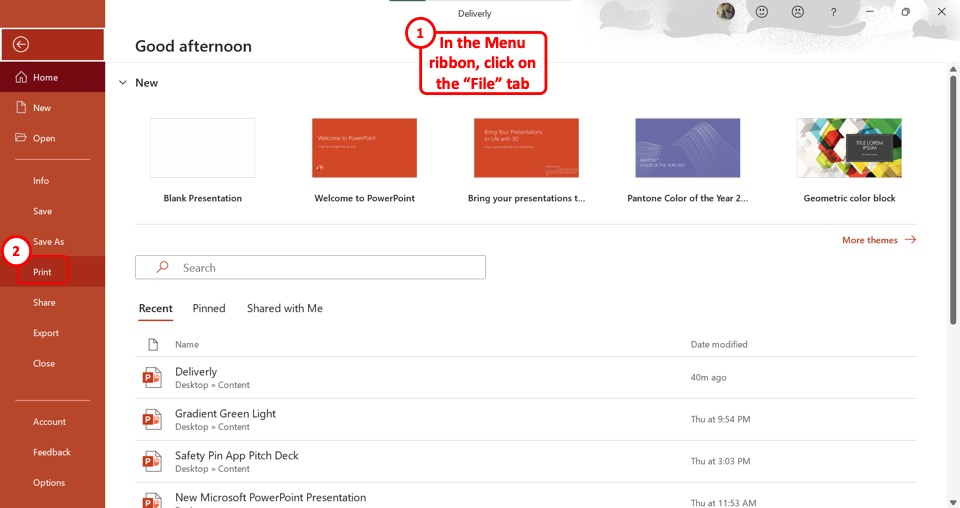
Step-1: Click on the “File” tab
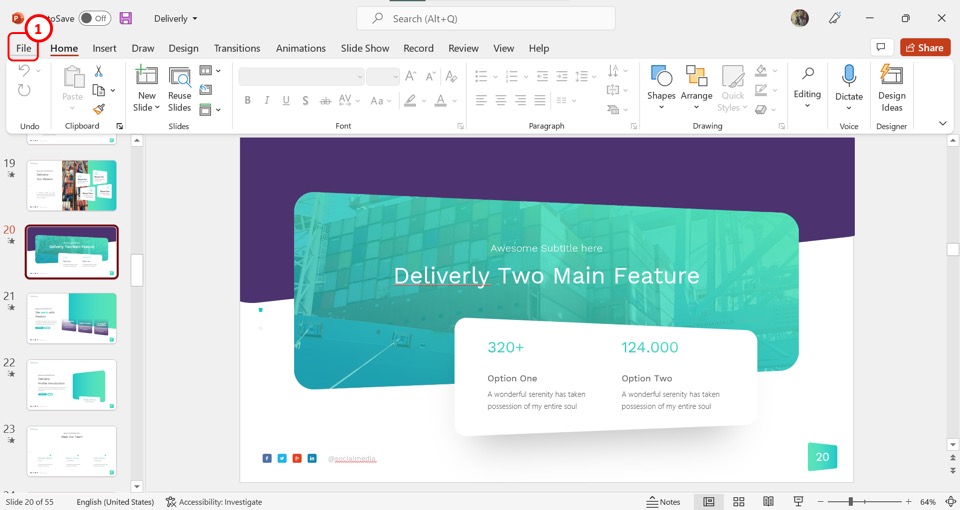
The first step is to click on the “File” tab on the left side of the menu bar. In the “File” menu, click on the “Print” option from the sidebar at the left side of the screen (shown in image below).
Step-2: Click on the “Full Page Slides” box
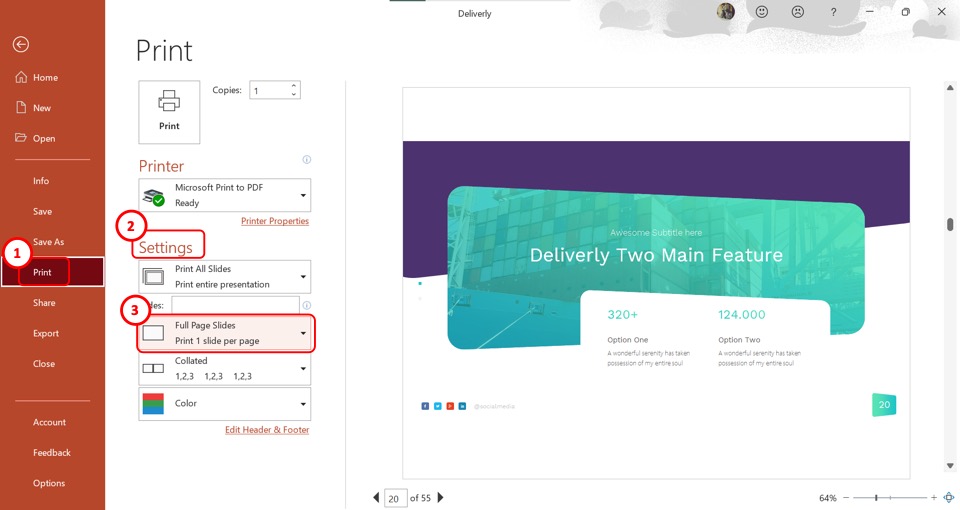
In the “Print Preview” screen, click on the “Full Page Slides” box under the “Settings”. It will open the “Print Layout” dropdown menu.
Step-3: Select the preferred handout layout
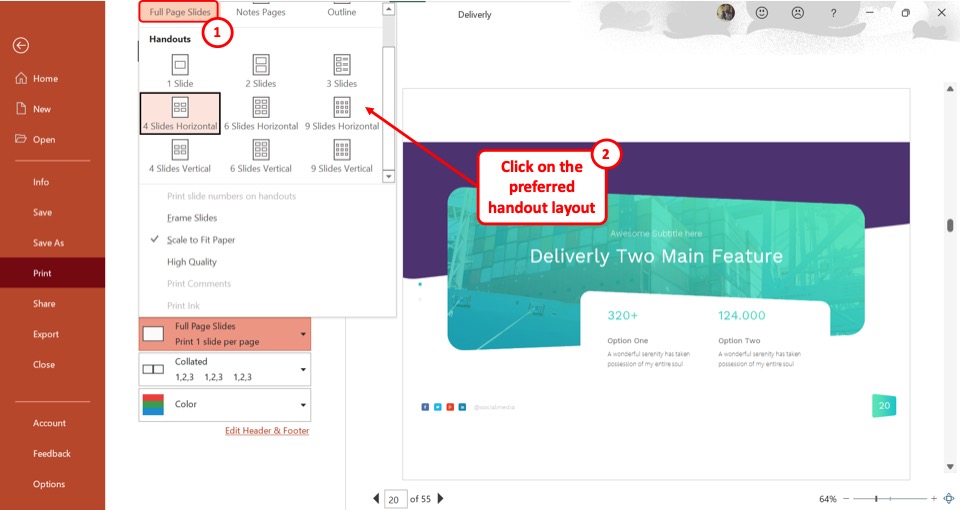
In the “Print Layout” menu, you will find 9 different options under the “Handouts” section. Click on your preferred handout layout. You can see a preview on the screen.
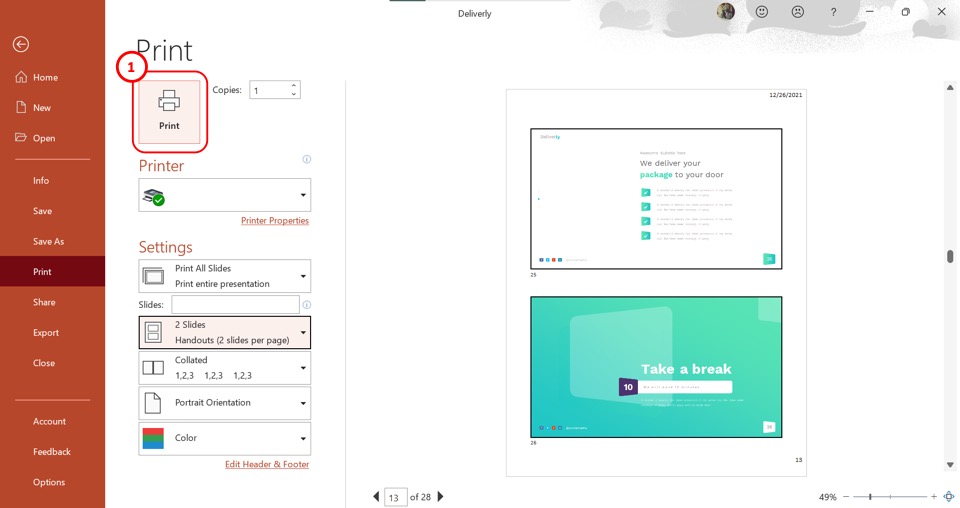
Step-4: Click on the “Print” button
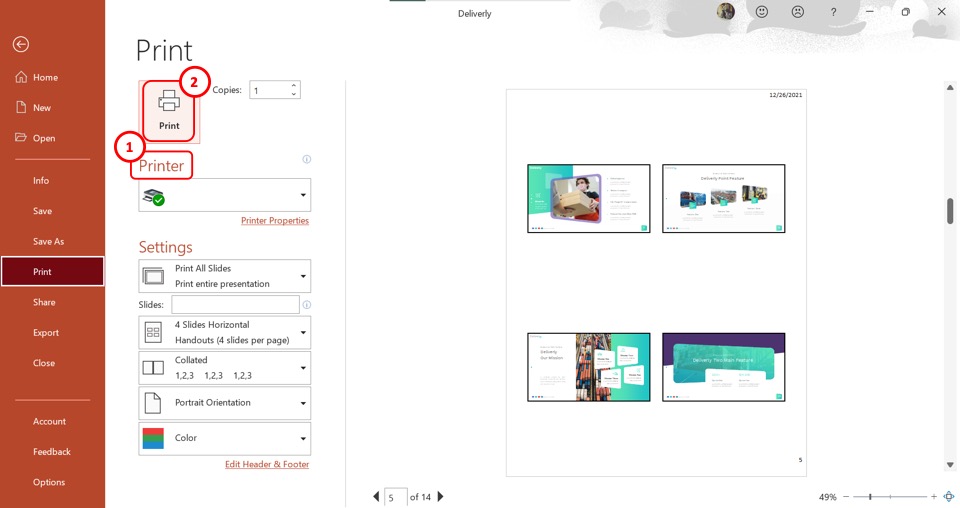
In the “Printer” section, make sure that the correct printer device is connected to your computer. Now all you have to do is click on the “Print” button at the top of the screen.
8b. How to Print Handouts with Slide Number in PowerPoint?
You can easily print handouts with slide numbers in PowerPoint. All you have to do is follow the 4 simple steps.
Step-1: Click on “File”
In the menu ribbon located at the top of the screen, click on the “File” tab. In the “File” menu, click on the “Print” option.
Step-2: Click on the “Print Layout” option
In the “Print Preview” screen, click on the “Print Layout” option which is the second box under the “Settings” section. In the “Print Layout” menu, select your preferred handout layout under the “Handouts” section.
Step-3: Click on “Print slide numbers on handouts”
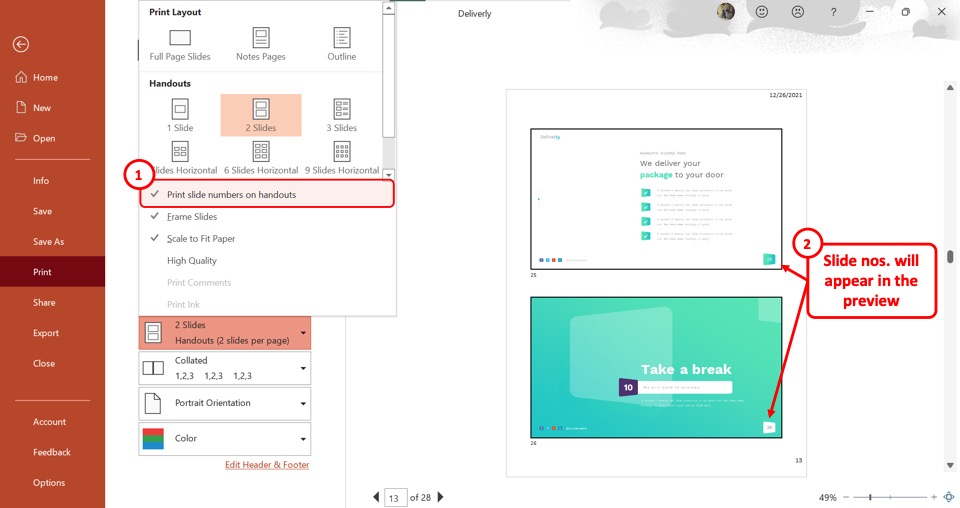
The next step is to click on the “Print slide numbers on handouts” option in the “Print Layout” menu. You will see a checkmark appear on the left side of the option. In the preview screen, slide numbers will appear under each slide.
Step-4: Click on “Print”
Now all you have to do is click on the “Print” button located at the top of the screen to print the handouts with slide numbers in PowerPoint
8c. How to Print Handouts as PDF?
To save the handouts as a PDF file, follow the 4 quick steps.
Step-1: Click on the “Print” option
The first step is to click on the “File” tab in the menu ribbon. Then click on the “Print” option from the sidebar at the left side of the screen in the “File” menu.
Step-2: Click on “Print Layout”
The next step is to click on the “Print Layout” option. It is the second box under the “Settings” section. In the “Print Layout” menu, select your preferred handout layout. There are nine different layouts available to choose from in the “Handouts” section.
Step-3: Click on the “Printer” box
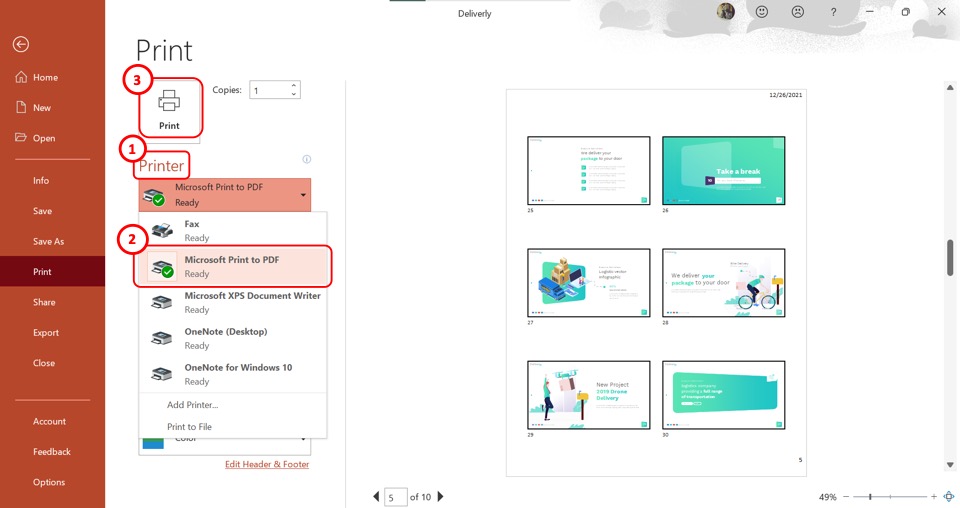
Click on the “Printer” box to open a dropdown menu. Then click on the “Microsoft Print to PDF” option.
Step-4: Click on “Print”
The last step is to click on the “Print” option. This will save the Microsoft PowerPoint handouts as a PDF document (as shown above).
9. How to Export Handouts to Word From PowerPoint?
In Microsoft PowerPoint, there is a feature that allows users to export handouts to Microsoft Word. Using this feature, you can edit the notes and rearrange the handout slides. To export handouts to Word from PowerPoint, follow the 3 simple steps.
Step-1: Click on the “File” tab
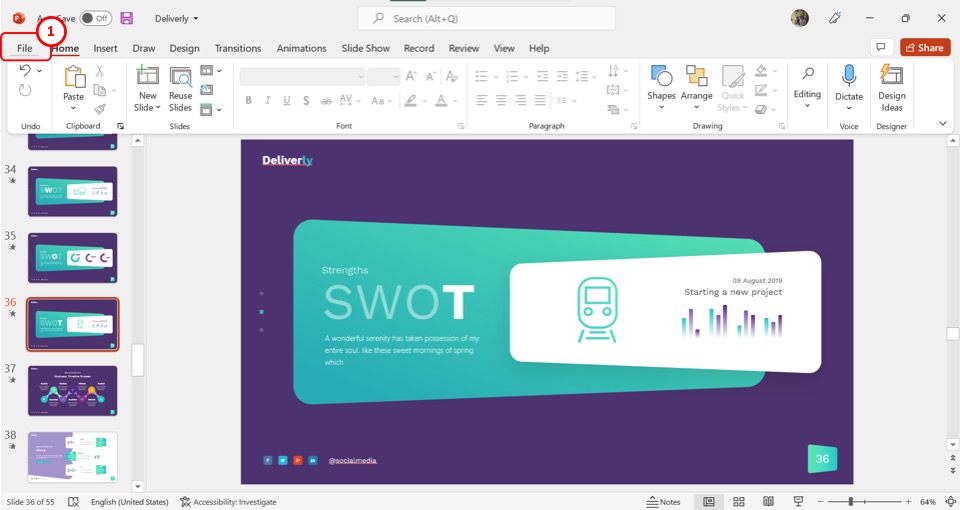
In the open Microsoft PowerPoint presentation, click on the “File” tab from the menu ribbon. Then click on the “Export” option from the left sidebar in the “File” menu.
Step-2: Click on the “Create Handouts” option
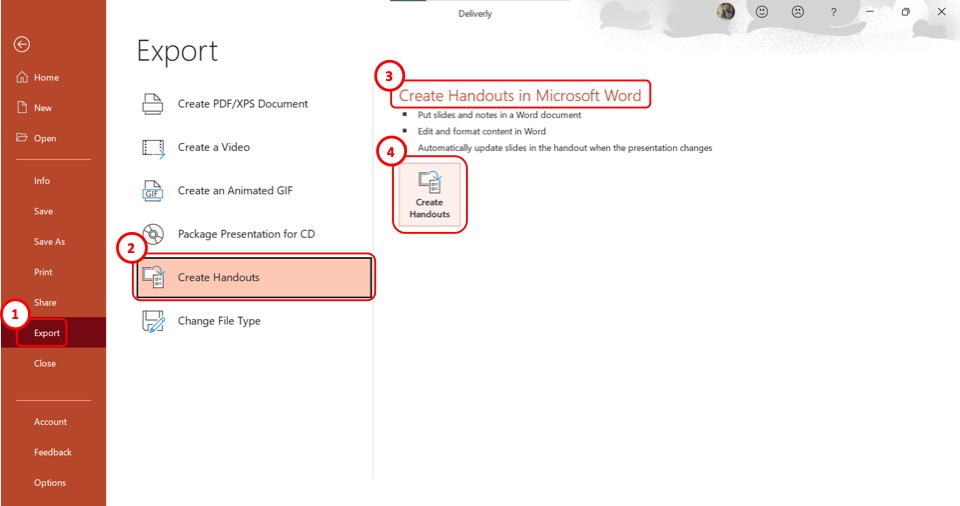
The next step is to click on the “Create Handouts” option from the secondary sidebar in the “Export” screen. Then click on the “Create Handouts” button under the “Create Handouts in Microsoft Word” section. This will open a new dialog box.
Step-3: Select your preferred page layout
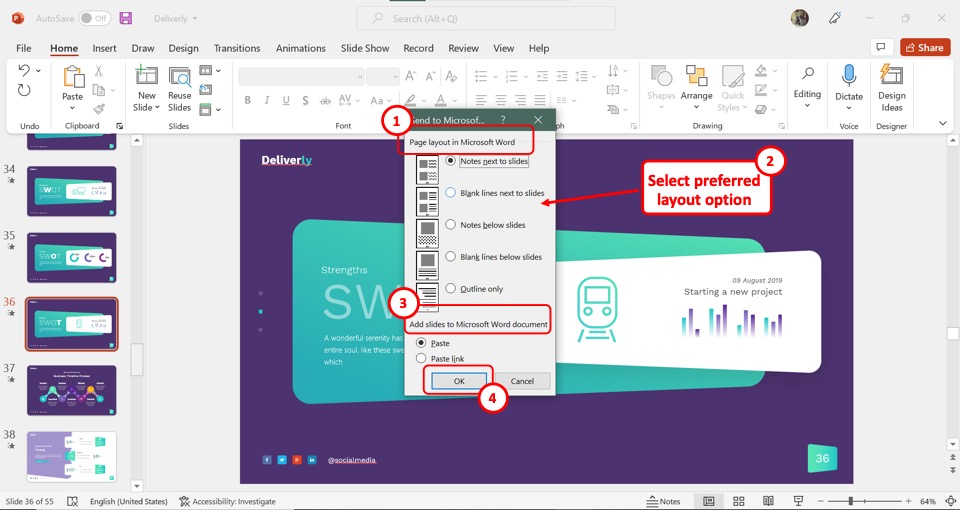
In the “Send to Microsoft Word” dialog box, click on your preferred layout under the “Page layout in Microsoft Word” option. Then click on the “Paste” option under the “Add slides to Microsoft document” section if you want to export the handout in its current state.
You can also click on the “Paste link” option if you want the exported handout to update when you update the PowerPoint. Finally, click on the “OK” button to export the handouts to Microsoft Word.
10. Difference Between Notes and Handouts in PowerPoint
The main difference between “Handouts” and “Notes” is that handouts are mostly designed for your audience while the notes are for you, the presenter. Notes usually contain the speaker notes and key points of a presentation. The handouts contain printed slides where the audience may add their own notes.
Credit to user18526052 on Freepik for the featured image of this article (further edited)