![How to Add Section in PowerPoint? [And Why to Use them!]](https://artofpresentations.com/wp-content/uploads/2021/09/Featured-Image-how-to-add-sections-in-PowerPoint-optimized.jpg)
When creating a big presentation (of more than 30 or 40 slides), there are times when you end up looking for a slide that you just created, and it takes you quite some time to locate it! If this happens frequently to you, then you’re perhaps better off adding sections to your PowerPoint presentation!
To add sections in PowerPoint, right-click between any two slides in the slide navigation panel. From the options presented, click on “Add Section”. This will add a section to your PowerPoint presentation.
Adding sections and grouping slides in PowerPoint allows you to stay organized when creating and delivering a presentation. It can come in handy especially when you have a long presentation.
But, what more can you do and how exactly can you benefit from using sections in PowerPoint? Let’s find out!
1. How to Group Slides in PowerPoint?
Let’s first start with the basics once again.
Here’s how it works – to begin with, you need to add sections in your presentation. Then, you’ll want to move the slides around so that the correct slide is present in the correct section! If needed, you can then rename the sections to be on top of things.
We’ll learn how to do all these things in the following sections of the article.
But, let’s start with grouping slides in PowerPoint as this is where the whole process begins.
To group a slide in your PowerPoint presentation, you have to select the “Add section” option from the dropdown menu of the slide’s navigation bar as mentioned previously.
Here’s a step-by-step process on how to do it –
Step-1: “Right-click” on the slide navigation bar

The first step of the process is to “Right-click” between any two slides to add a section. Ideally, you should right-click just above the first slide from which you want to group of slides to begin.
When you right-click, you will be presented with a dropdown menu.
Step-2: Click on “Add section”
Now, from the dropdown menu, click on the “Add sections” option which is the last option there (as shown in the image in step 1).
Step-3: Give a name to the section
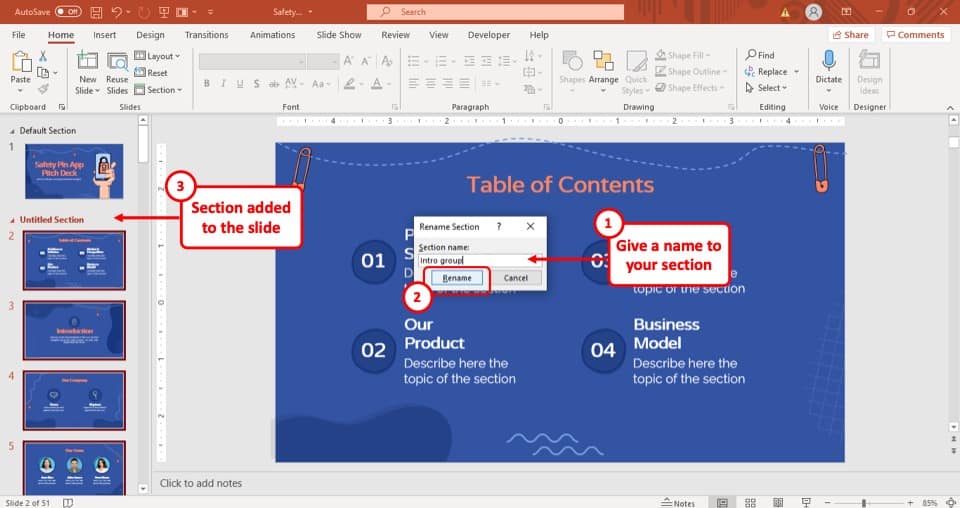
In the pop-up window, give a name to the group and hit the “Rename” button. This will group all the slides below the newly added section.
Step-4: Create another group after the last slide
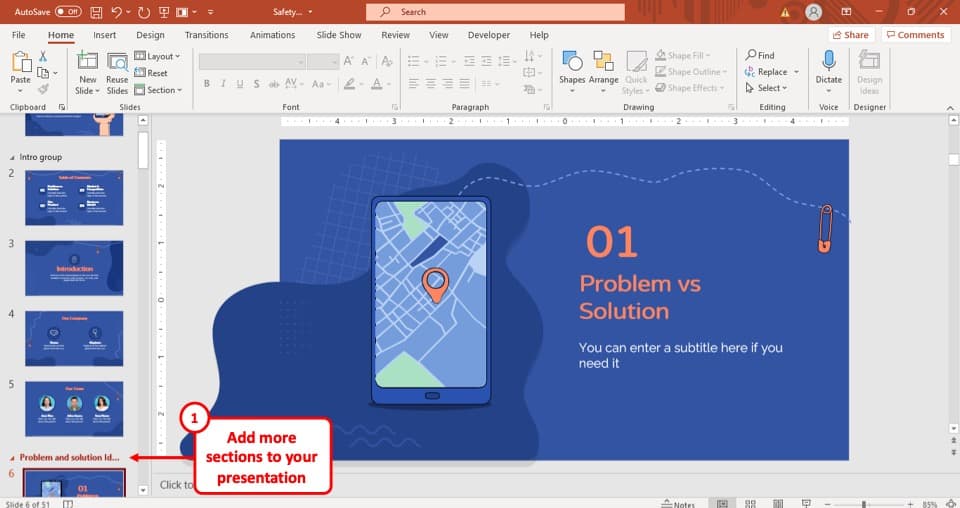
When you add a section above the first slide of the group of slides, it adds all the slides below that section into one group.
To separate one group from another, add another section under the last slide of your group following the same process described above. This will separate the slides in your group from the next group.
2. How to Rename Sections in PowerPoint?
To rename a section in your PowerPoint presentation, you have to select the rename option from the drop-down menu. The easy 3 step process is described below.
Step-1: “Right-click” on the title of the section
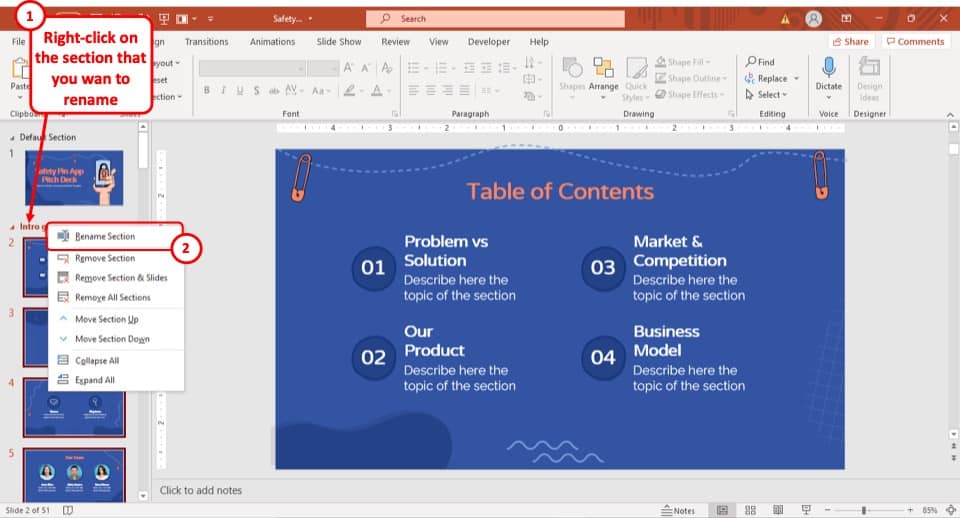
The first step of the process is to “Right-click” on the title of the section that you want to rename. This will open a dropdown menu.
Step-2: Click on “Rename section”
In this step, all you have to do is to select the “Rename section” option from the dropdown menu. It is the first option in the dropdown menu (as shown in the image in step 1).
Step-3: Rename the slide
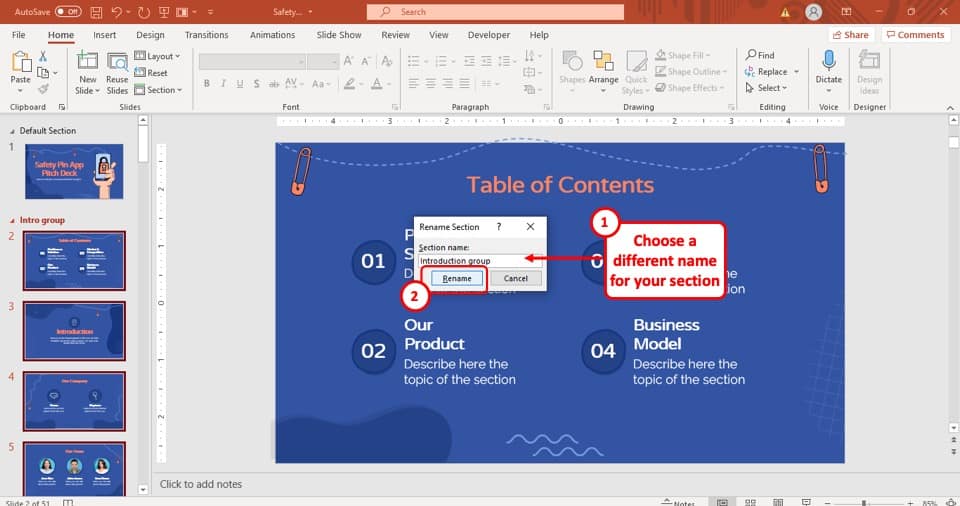
After you click on the “Rename Section” option, a pop-up window will appear on your screen. Now, rename the section and then hit the “Rename” button.
After that, the section will be renamed accordingly.
3. How to Add Slides to a Section in PowerPoint?
There are two ways in which you can add a slide to a group in your PowerPoint presentation. You can either add a new slide in the group or you can move a slide from another group to your preferred group.
Both of these methods are explained in the following section.
3a. Add New Slides to a Section
To add a new slide to a section in your PowerPoint presentation, you have to select the “New slide” option from the drop-down menu. The whole process is described step-by-step below.
Step-1: “Right-click” on the slide navigation bar

The first step of the process is to “Right-click” on the slide navigation bar, in the location of the sequence of slides where you want the new slide to be added.
For example, if you want to add the slide as the fourth slide in the slide navigation bar, “Right-click” just above the existing fourth slide.
Step-2: Select the “New Slide” option
After you right-click on the slide navigation bar, a dropdown menu will appear on your screen. From the dropdown menu, click on the “New Slide” option, which is the first option in the menu.
After that, a new slide will be added to your preferred sequence.
3b. Move Slides from Other Sections
You can also move slides from one group to another
Step-1: Select and hold the slide
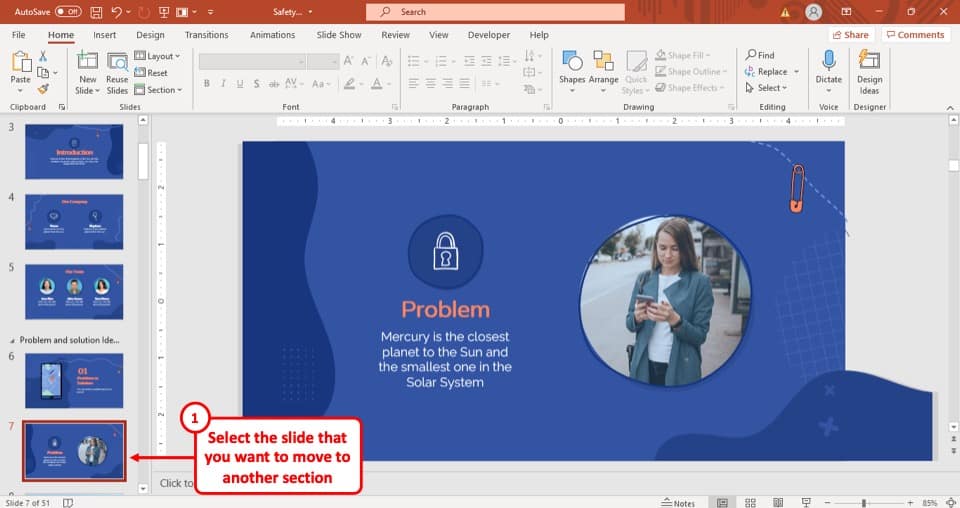
The first step of moving a slide from one group to your preferred group is to select the slide that you want to move and keep holding the “Left mouse button”.
This will allow you to move the slide up and down the slide navigation bar.
Step-2: Place the slide in your preferred location
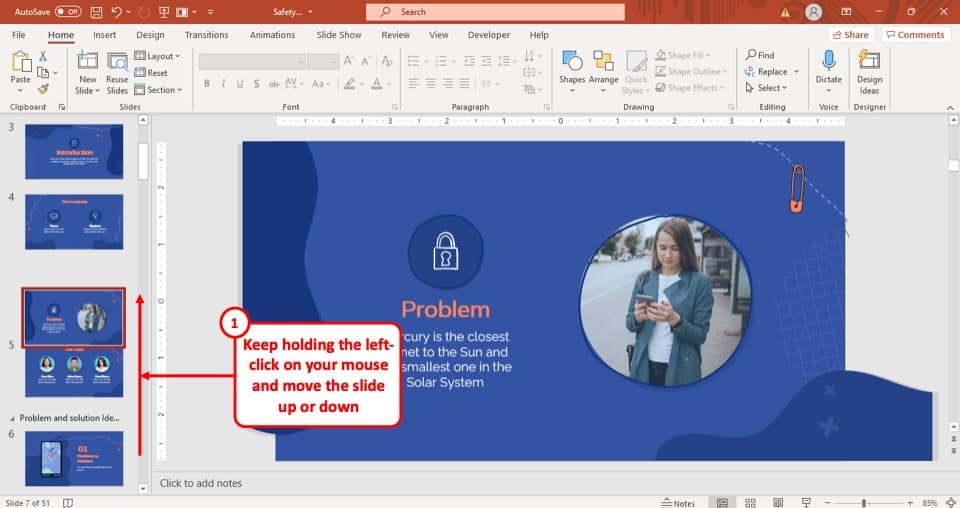
While holding the “Left mouse button”, drag the slide from its original position and place it in your preferred location then let go of the “Left mouse button”.
This way, the slide from one group will be moved to your preferred group.
4. How to Expand and Collapse Sections in PowerPoint?
You can also expand and collapse a section or a group of slides in PowerPoint.
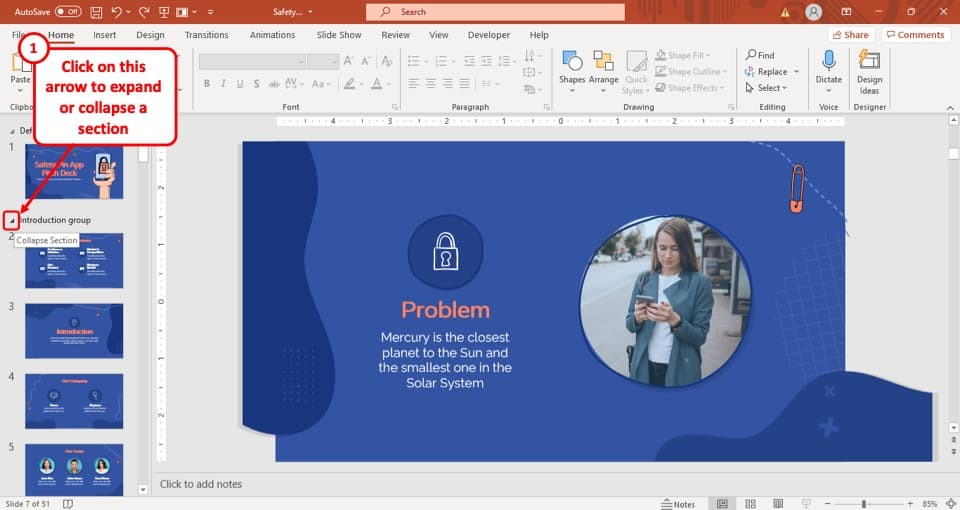
To collapse a section in PowerPoint, simply click on the section name or the arrow before the name of the section. This will collapse the section and hide all the slides within the section from the slide navigation panel.
You have to use the same button to expand a section in PowerPoint. If a group is expanded then you will see a triangular arrow pointing downward, located just to the left of the title of the group.
And, if the group is already collapsed, you will be able to expand it using the same button.
4a. How to Expand and Collapse All Sections in PowerPoint?
You can also expand or collapse all sections in PowerPoint in one quick movement! Here’s how to do it –
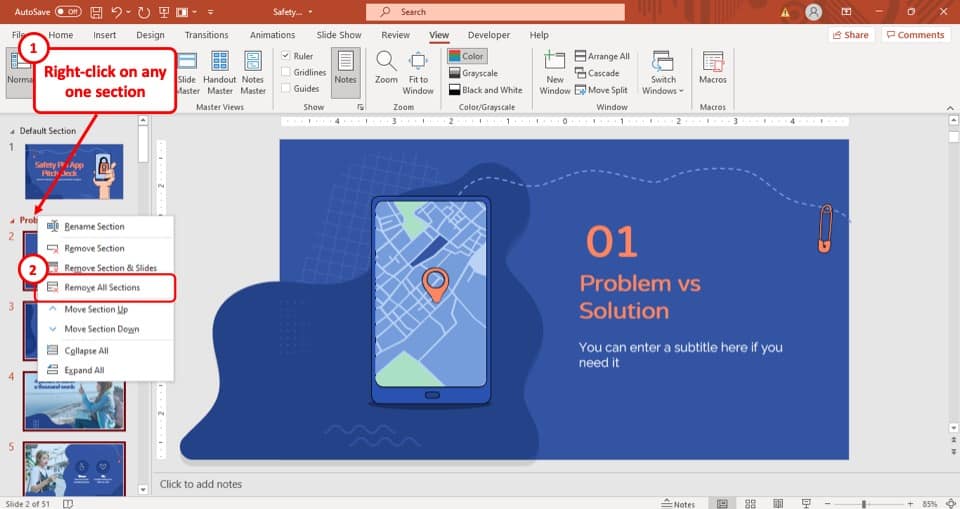
Step-1: Right-click on any section
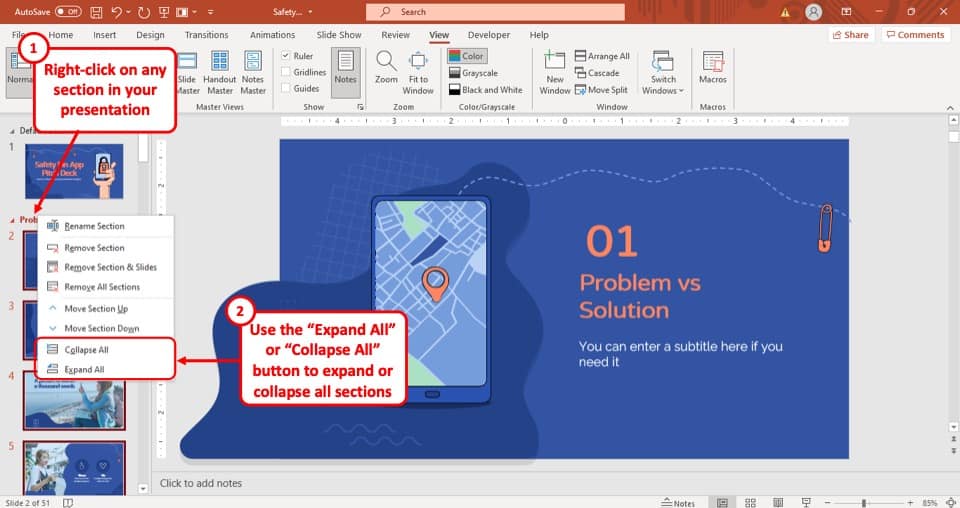
The first step is to right-click on any one of the sections in your PowerPoint presentation. You will be presented with a dropdown menu.
Step-2: Click on the “Expand All” or “Collapse All” options
The next step is to simply click on the “Collapse All” option to collapse all the sections in your presentation (as shown in the image in step 1).
You can also click on the “Expand All” option to expand all the groups of slides or the sections in your PowerPoint presentation.
Do remember, the “Expand All” option can also be used when only a few sections are in a collapsed state. Using this option then will expand only the collapsed sections.
5. How to Move a Section Up or Down in Slide Thumbnail View?
The process of moving an entire section up or down in the slide thumbnail view is very similar to moving a slide from one group to another. The whole process is described in easy steps below.
Method 1 – Dragging the Sections Up or Down
This method is the easiest when you have all the sections collapsed first.
Step-1: Collapse all the sections
The first step is to collapse all the sections in your presentation as described in the previous section. This will allow you to move a section quickly and easily.
Step-2: Click and hold the title of the section
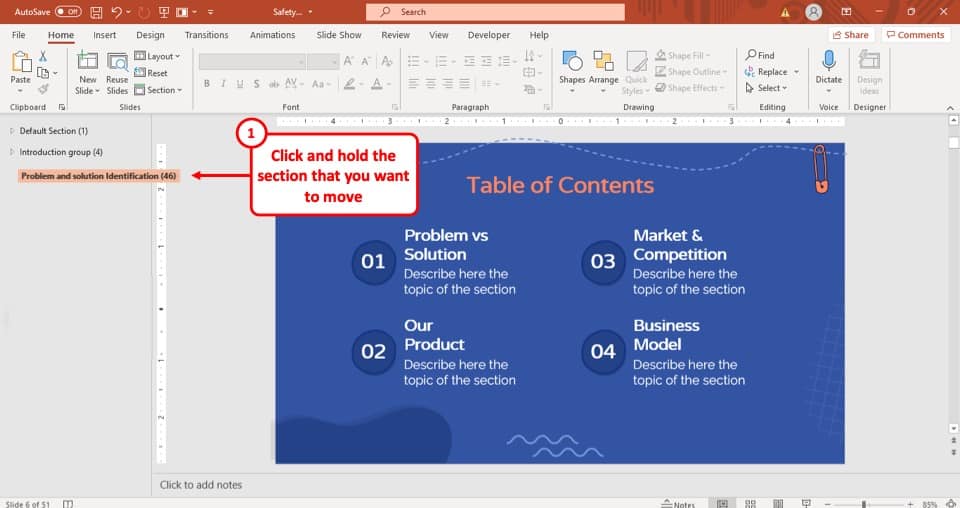
The first step of the process is to select the title of the section and then keep holding the “Left mouse button”.
Step-3: Move the section to your preferred sequence
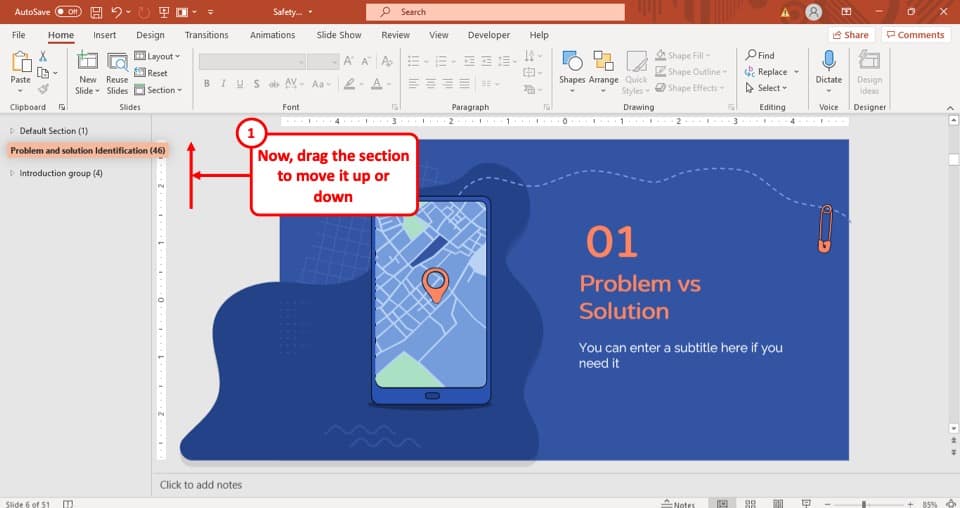
While holding the “Left mouse button”, drag the title of the group up or down to the position where you want to move the section.
After that, let go of the “Left mouse button” and the entire section will change its position accordingly.
Method 2 – Using the “Right-click” Option
You can also move a complete section using the right-click option. However, it can sometimes be confusing when you have all the slides open.
Nevertheless, here’s what you need to do when moving a section in PowerPoint using this method –
Step-1: Right-click on the section
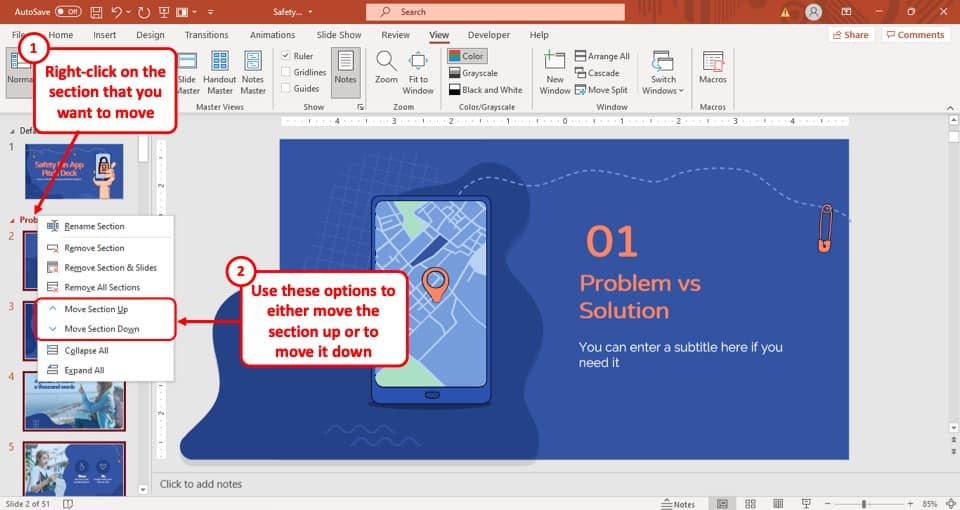
The first step is to “Right-click” on the section that you want to move. A dropdown menu will appear.
Step-2: Move the section
The next step is to simply move the section. You can click on the “Move Section Up” to move the section up (as the name suggests).
Likewise, you can also click on the “Move Section Down” option to move the section below the next section.
Repeat the process if you want to move a section up or down multiple steps.
6. How to Delete a Section in PowerPoint?
To delete a section in your PowerPoint presentation, you have to choose the remove section option in PowerPoint.
Here’s how you can remove a section in PowerPoint –
Step-1: “Right-click” on the title of the section
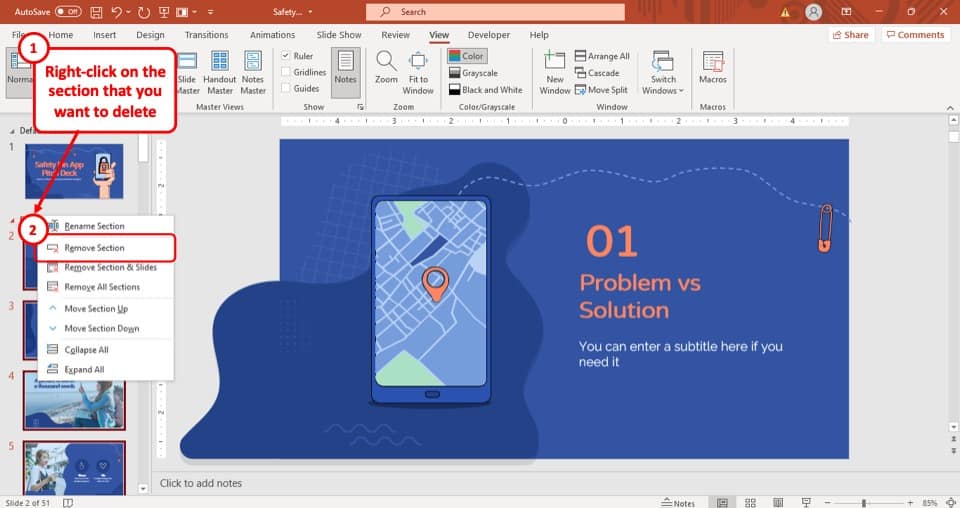
The first step of the process is to “Right-click” on the title of the section. This will open a drop-down menu.
Step-2: Click on “Remove section”
After you have opened the drop-down menu, simply click on the “Remove section” option, which is the second option of the menu.
After that, the section will be deleted immediately, and the slides in that section will merge with the preceding section.
6a. How to Remove All Sections in PowerPoint?
If you want to get rid of all sections in your presentation, PowerPoint provides you with the option to do that as well. Don’t worry, your slides will not be deleted if you choose to remove all the sections from your PowerPoint presentation!
Here’s how to delete all sections in PowerPoint –
Step-1: Right-click on any one section
The first step is to right-click on any one section in your PowerPoint presentation. You will be presented with a dropdown menu.
Step-2: Select the “Remove All Sections” option
From the options in the dropdown, simply click on the “Remove All Sections” option and this will delete all the sections in your presentation.
As mentioned before, this will not remove any of your slides. It will only remove all the sections.
6b. How to Remove a Section with Slides in PowerPoint?
Using sections comes in really handy especially when you want to delete an entire section from your presentation.
Although deleting a section in PowerPoint doesn’t delete the slides, PowerPoint also provides you with an option to delete a section along with the slides within that section.
Here’s what you need to do –
Step-1: Right-click on the section to delete

As usual, the first step is to select the section that you want to delete and right-click on it. This will open a dropdown menu with options.
Step-2: Select the “Remove Section & Slides” option
From the dropdown, simply click on the “Remove Section & Slides” option. This will remove the section along with the slides in that section.
7. Can you Create Sub-Sections in PowerPoint?
Unfortunately, you can’t create a subsection in your PowerPoint presentation.
Although it is quite the obvious upgrade, and many users have been requesting it since the option to add sections was introduced in PowerPoint, you can’t make a subsection in your PowerPoint.
However, to organize your PowerPoint presentation, you can insert a new section and add an underscore (“_”) before the title of the section to identify that it is a subsection.
Credit to cookie_studio (on Freepik) for the featured image of this article (further edited).