![Where Does PowerPoint Save Recordings? [Here’s Where!]](https://artofpresentations.com/wp-content/uploads/2023/01/ezgif.com-gif-maker-6.webp)
It is really annoying when you finish recording a PowerPoint presentation and you don’t get to see the complete presentation that you just finished recording! The truth is that the presentation is embedded on the slides itself. But, how do you access the recordings and how do you share the recorded presentation?
PowerPoint saves the recording specific to each slide on the slide itself. However, to access the complete recording of your presentation, you need to export your presentation as a video file. Click on the “File” tab, then click “Save As” and change the file format to an “.MP4” file.
In this article, I will share with you all the details of not just how to record a presentation correctly, but also how to locate the recorded file and share it with your colleagues or clients.
So, without further ado, let’s get started!
1. How to Record a Presentation in PowerPoint?
To know how the video or audio recordings work in PowerPoint, let us first understand how to record a presentation in PowerPoint. We shall take two examples to understand this further i.e. recording yourself giving the presentation with your video camera, and recording just the audio narration.
1.1 How to Record Yourself Giving a PowerPoint Presentation With Video?
Microsoft PowerPoint allows you to record yourself presenting the slides. You can also use features like laser pointer, pen, highlighter, etc. during the recording. To record yourself presenting a PowerPoint presentation, follow the steps mentioned below:
Step-1: Click on the “Record” tab

In the menu ribbon located at the top of the screen, click on the “Record” tab to open the “Record” menu.
Step-2: Click on the “From Beginning” option
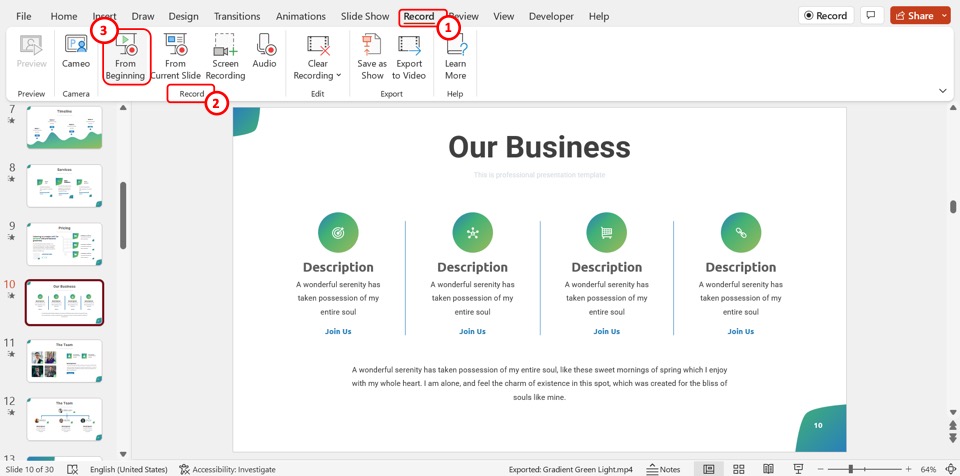
Click on the “From Beginning” option in the “Record” group of the “Record” menu. This will open the recording screen.
Step-3: Click on the “Camera” icon
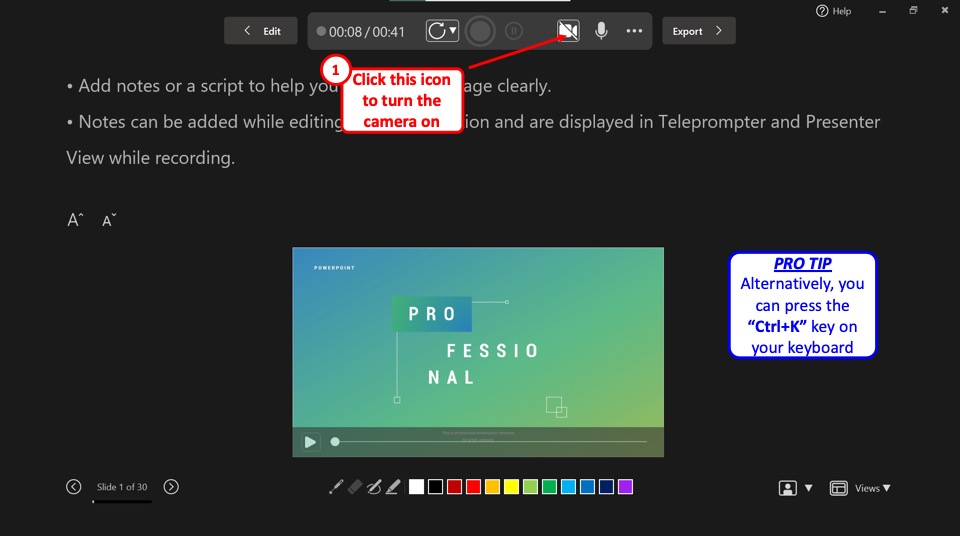
In the toolbar at the top of the screen, click on the “Turn camera on” option which is the camera icon. Alternatively, you can press the “Ctrl+K” keys on your keyboard to turn on the device camera to record yourself.
Step-4: Click on the “Start recording” option
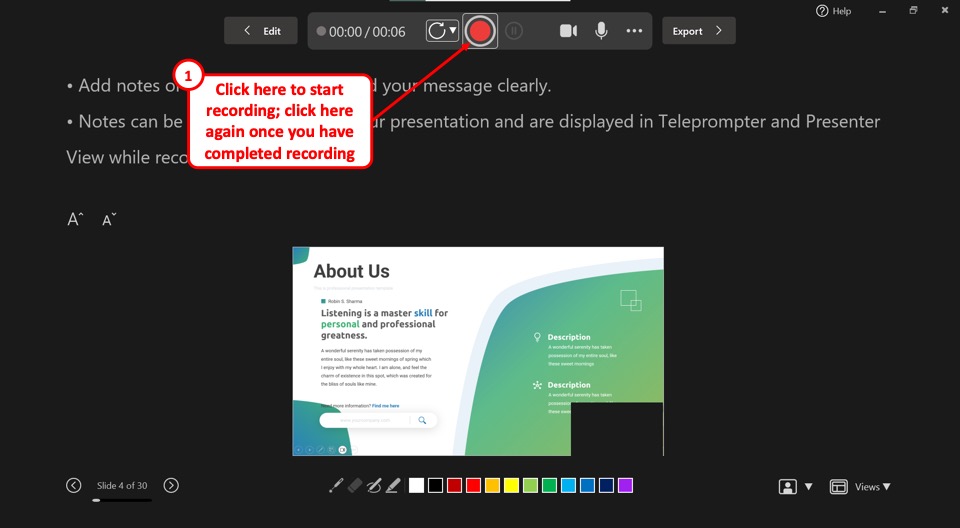
Now you can start recording yourself presenting. Click on the “Start Recording” option which is the circle icon with a large red dot in the middle. When you are done presenting, click on the same icon to stop recording.
Step-5: Click on the “Close” option
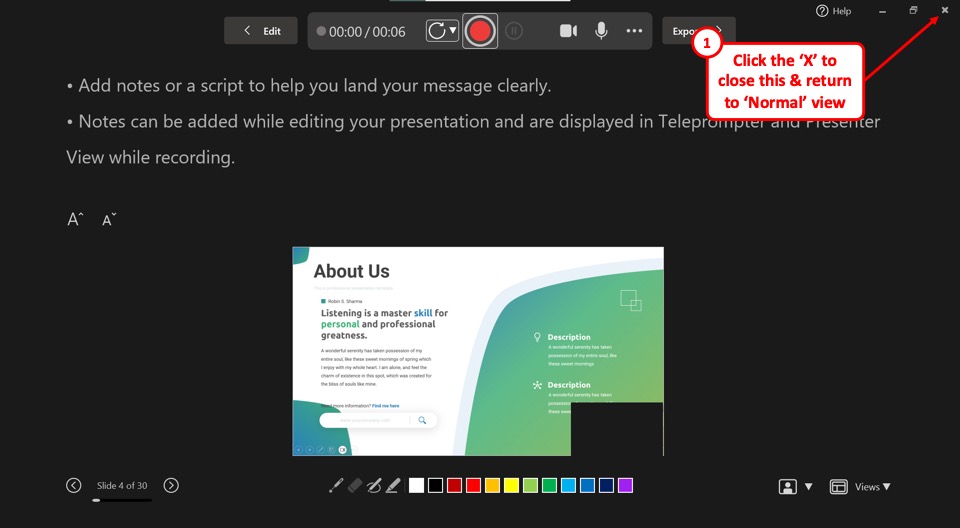
Click on the “Close” option which is the “X” icon at the top right corner of the recording screen to return to the “Normal” view.
Once you have finished the recording, you will notice that the part of the video that talks about slide 1 gets automatically added to the first slide, and part of the video where you talk about slide 2 is added to the 2nd slide.
Likewise, your entire recording gets automatically divided across every single slide wherever you had any comments to add!
You may not notice this at first, however, just look for the camera video that gets embedded to the bottom right corner of your slide.
Now, how do you extract your recordings? I will explain that in the subsequent sections.
1.2 How to Record a PowerPoint Presentation with Audio?
If you wish to record just the audio narration for your presentation without showing your face or using your camera, you can do so by choosing the following methods.
To be honest, there are a couple of different ways to record audio narration for your presentation.
Method 1 – Using the “Record” Feature
The first method is quite similar to the one described above. The only difference is that you need to turn off the camera before you begin recording the presentation.
This will record the presentation with just your voice for each slide. Since we’ve already covered the steps, I won’t show you the steps for this method and I shall focus on the second method for recording audio narration for your presentation.
Once the recording is complete, follow the steps mentioned in section 1.3 below to convert it into a cohesive recorded presentation.
Method 2 – Using the “Audio” Recording Feature
The second method involves recording the audio for a presentation on each slide. This method allows you to record audio for a slide individually and not the whole presentation at once.
Here’s what you need to do to record just the audio for the presentation.
Step-1: Click on the “Record” tab

The first step is to click on the “Record” tab in the menu ribbon at the top of the screen. This will open the “Record” menu.
Step-2: Click on the “Audio” option
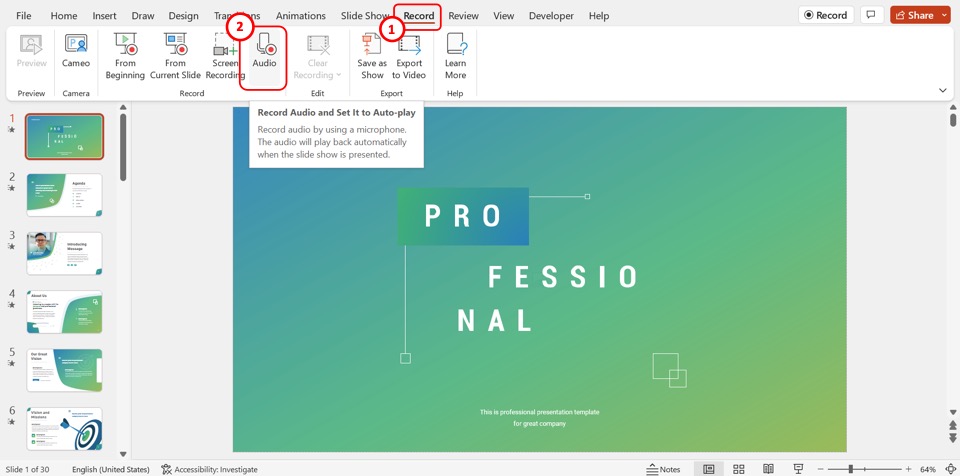
In the “Record” group of the “Record” menu, click on the “Audio” option. This will open the “Record Sound” dialog box.
Step-3: Click on the “Name” box
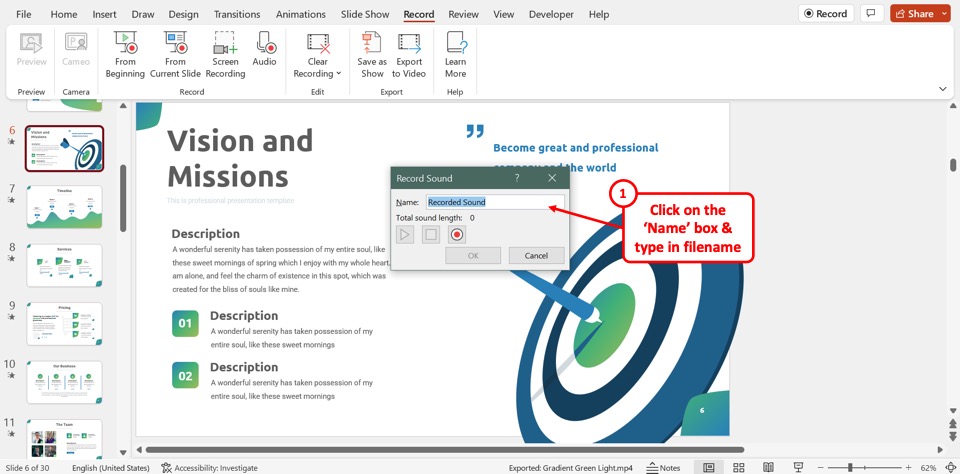
In the “Record Sound” dialog box, click on the “Name” box. Then you can type in a file name for the audio recording.
Step-4: Click on the “Record” icon
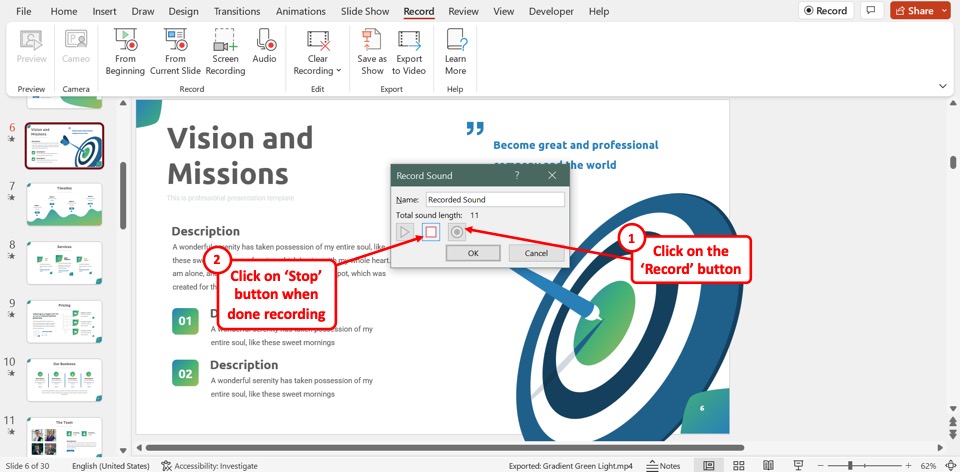
The next step is to click on the “Record” icon in the “Record Sound” dialog box. It is the black circle with a large red dot inside. When you are done recording audio, click on the “Stop” option which is the square icon.
Step-5: Click on the “Ok” button
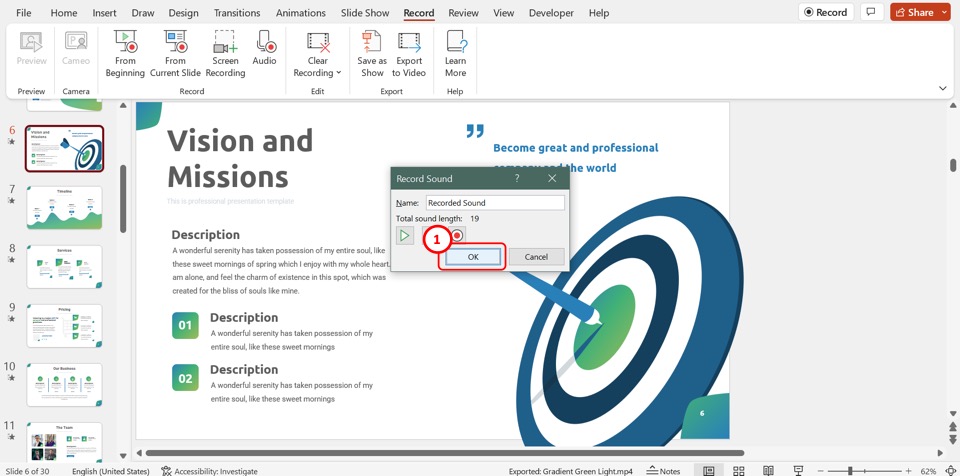
Now all you have to do is click on the “OK” button at the bottom of the “Record Sound” dialog box to save the audio recording.
Repeat the process for each slide where you want to add an audio recording. Once you’re done recording the audio narration for your presentation, save the file and proceed for section 1.3 below to make it into a cohesive presentation.
1.3 How to Save Your PowerPoint Presentation Recording?
Once you have recorded your complete presentation using the aforementioned methods, it is now time to save your presentation recording.
One mistake that people often make is to try and save the camera video embedded on the file. However, this will only save the camera video and not your entire presentation.
The correct way to save your PowerPoint presentation recording is to save the file as a video. However, do this only once you have finished recording your presentation.
Here’s what you need to do to save your recorded presentation into a video:
Step-1: Click on the “Save” option
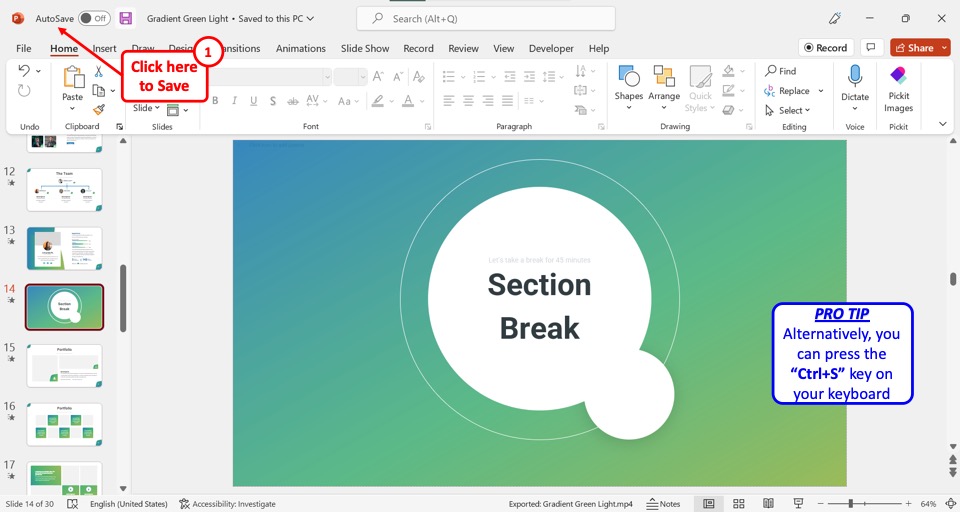
On the left corner at the top of the screen, click on the “Save” option. Alternatively, you can press the “Ctrl+S” keys on your keyboard to save all the changes made to the presentation file.
Step-2: Click on the “Export to Video” option
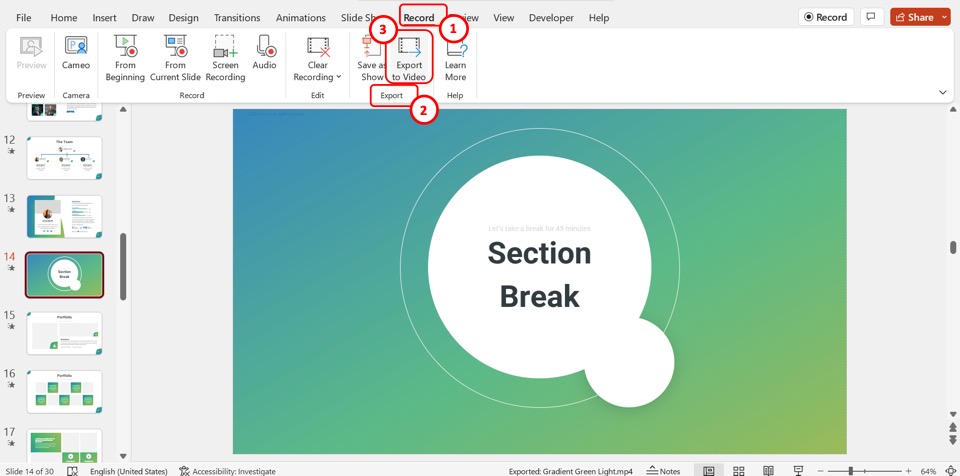
Click on the “Record” tab in the menu ribbon to open the “Record” menu. Then click on the “Export to Video” option in the “Record” menu. This will open the recording screen.
Step-3: Click on the “Export Video” option

In the recording screen, click on the “Export Video” button at the bottom to save the presentation recording as a video file.
1.4 Recording a Presentation into a PowerPoint Show File
You can also convert your presentation into a PowerPoint Show file (.ppsx file). This allows you to directly open the file into a presentation.
This option works great when you don’t have any audio components to your presentation and when you don’t want to record yourself to give a presentation. Instead, all you want to show is the presentation itself in the “Slideshow” mode.
I’ve written a detailed article about how you can loop your presentation using a PowerPoint Show file. Make sure to check out that article to understand a use case for this type of a presentation recording.
Nevertheless, here’s what you need to do to record your presentation as a .ppsx file.
Step-1: Click on the “File” tab
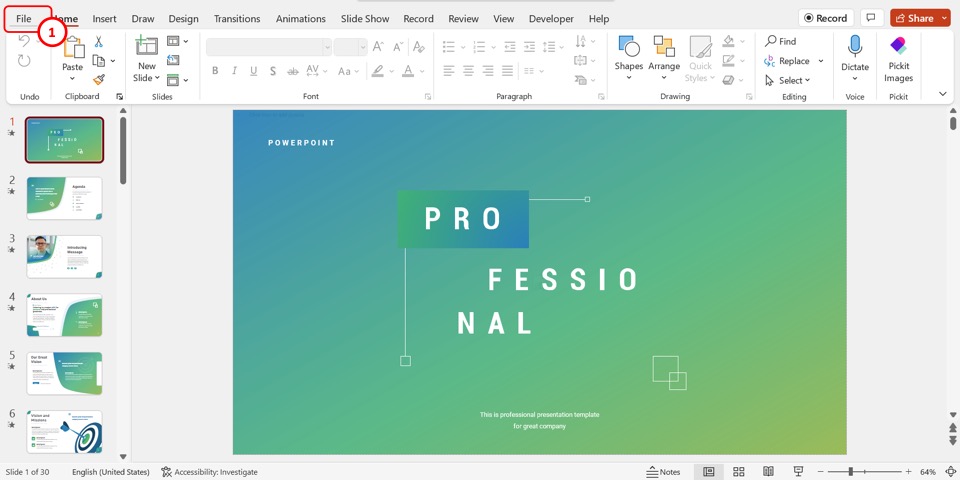
In the menu ribbon located at the top of the screen, click on the “File” tab. This will open the “File” screen.
Step-2: Click on the “Save As” option
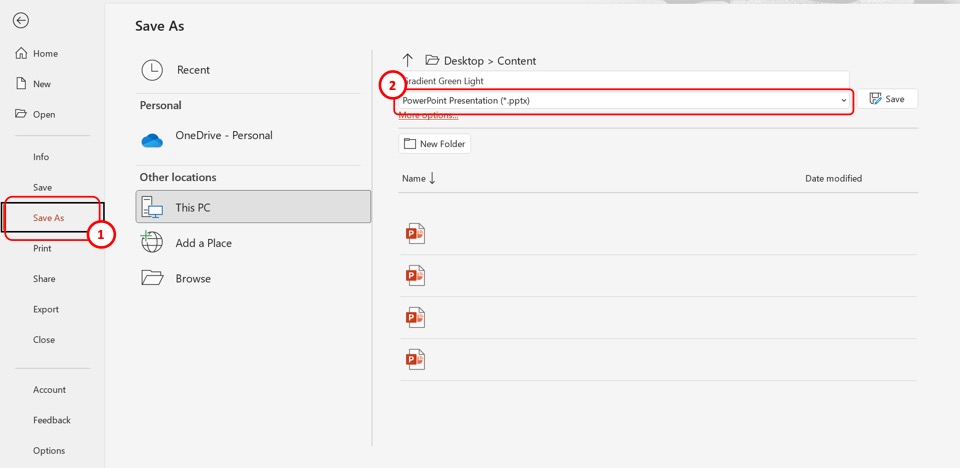
In the menu sidebar on the left side of the “File” screen, click on the “Save As” option. Then click on the second box in the “Desktop” section of the “Save As” screen.
Step-3: Click on the “PowerPoint Show (.ppsx)” option
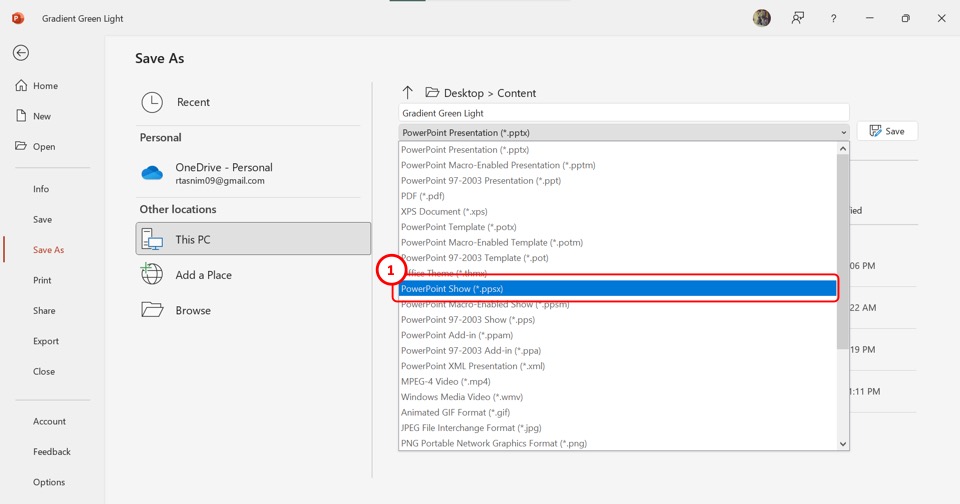
Now all you have to do is click on the “PowerPoint Show (.ppsx)” option from the dropdown list to save the PowerPoint presentation as a recording.
Step-4: Click on the “Save” button
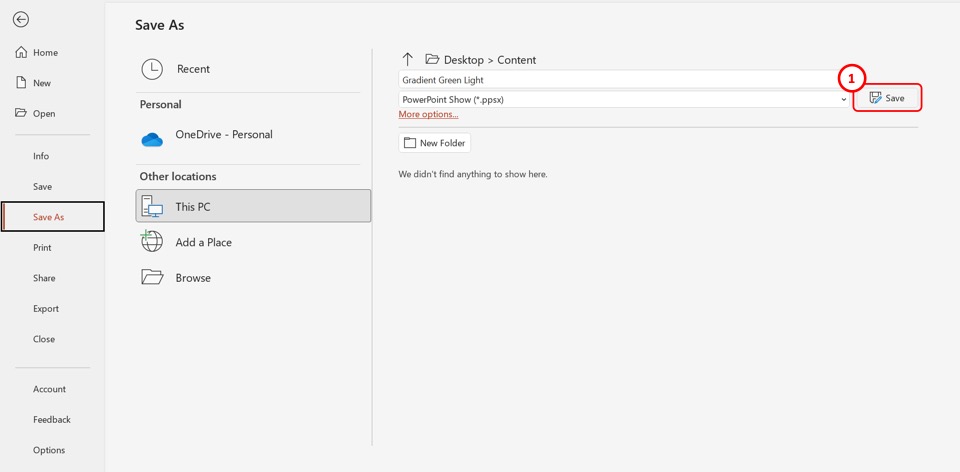
Finally, click on the “Save” button next to the “Save As” box to save the PowerPoint recording. This will save all the transitions, animations, and audio as a slideshow.
2. Where Does PowerPoint Save Recordings?
As I previously mentioned, typically PowerPoint saves the presentation recording as a video embedded into the presentation slide. You can access the complete recording only when you save your entire presentation and convert it into a video file.
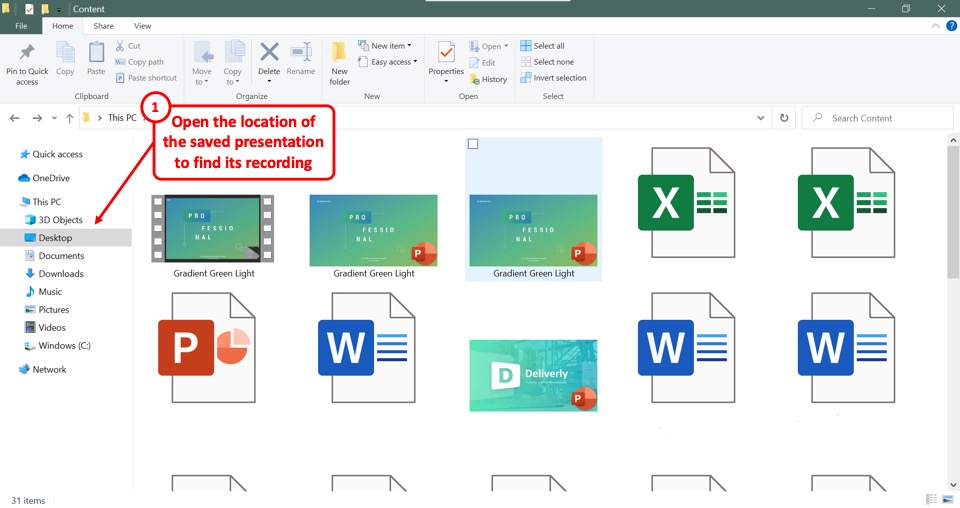
This video file is saved in the same folder as the location of your original PowerPoint file. To find the recording or the slideshow, all you have to do is open the location of the PowerPoint presentation file.
2.1 Where does PowerPoint Save Recordings on Mac?
In Microsoft PowerPoint for Mac, you can save a presentation recording as an “MP4” or a “MOV” file. Just like Windows, you get an option to choose the location of the folder to save the video recording of your PowerPoint presentation.
That said, if you want to access just the video from the camera, it is usually saved in the “Movies” folder available on your Mac device.
3. How to Find Saved PowerPoint Recordings?
In Microsoft PowerPoint, you cannot select the destination for saving the default presentation recording as the files are saved within the presentation itself.
The difficult bit is often recognizing that the presentation has been recorded as it is often difficult to notice any change to the presentation at the end of the recording.
However, there are ways you can know that the presentation has been recorded and access the recordings!
Method-1: Click on the video inserted in the slide

When you record yourself presenting a Microsoft PowerPoint file, the recording is embedded in each slide as a video. To find the recording, all you have to do is open the slide and find the video embedded in there.
Method-2: Click on the “Video Exported Successfully” notification
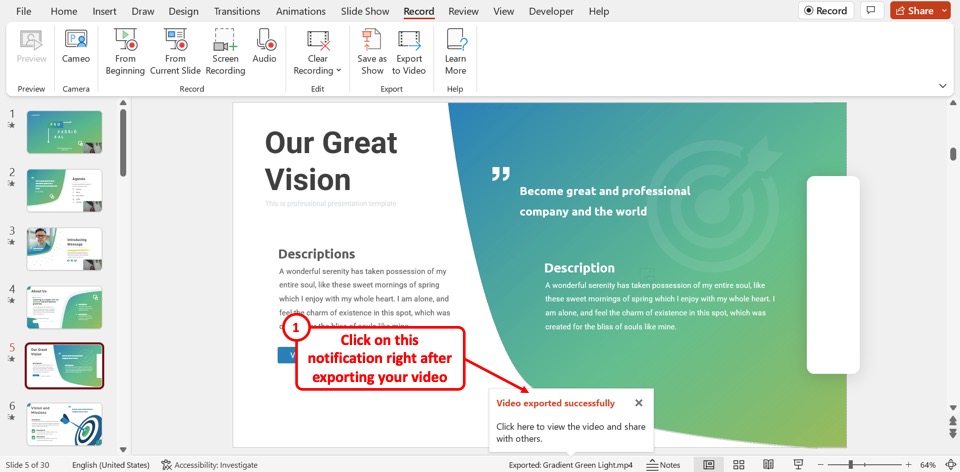
When you save a presentation recording using the “Export to Video” option, the “Video exported successfully” notification will appear at the bottom of the screen. All you have to do is click on the notification to open the recorded video without having to look for it in your desktop files.
Method-3: Open the PowerPoint location
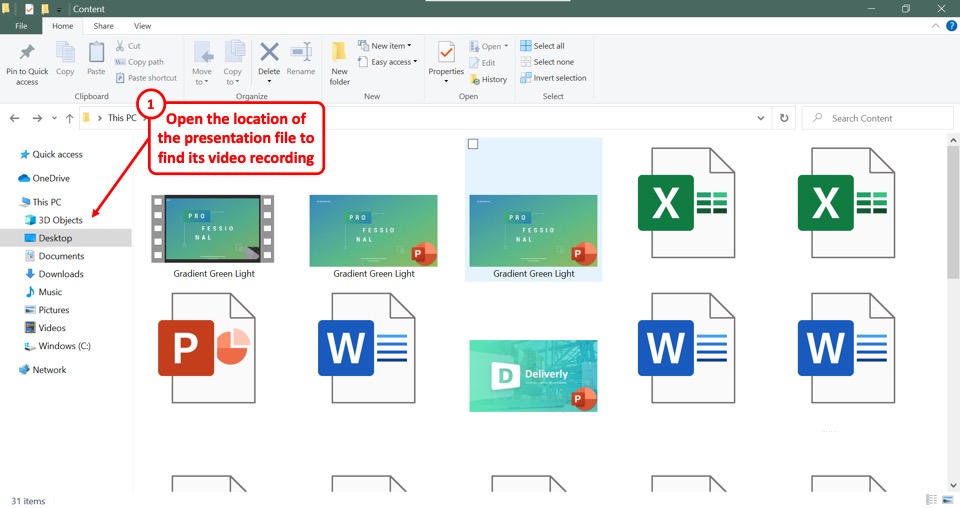
Since recordings are saved in the location of the original PowerPoint presentation file, you can simply open the file location to find the recorded presentation file.
4. Where does PowerPoint Save Audio?
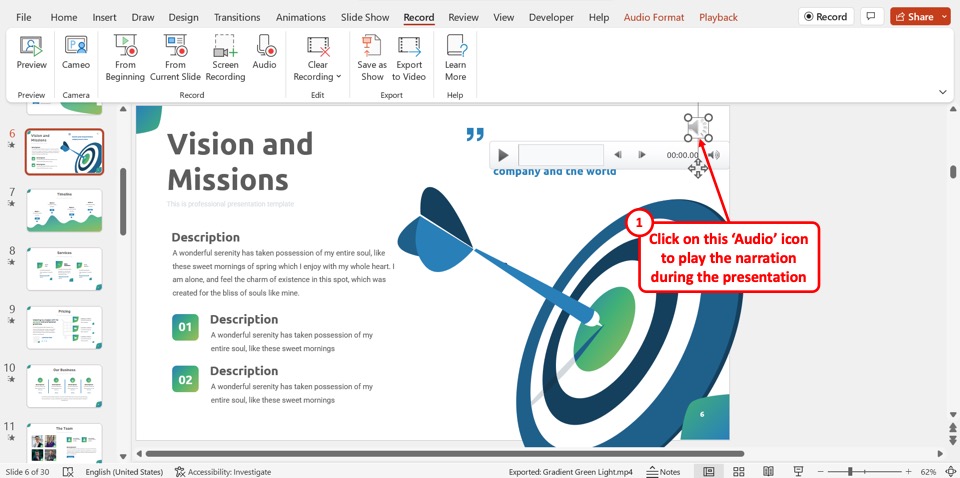
In Microsoft PowerPoint, the recorded audio is embedded into each slide rather than saved as a separate file. You can find the recorded audio as the “Audio” icon which is a megaphone icon in the middle of the slide. To play the narration, all you have to do is click on the “Audio” icon on the slide during the presentation.
Credit to cookie_studio (on Freepik) for the featured image of this article (further edited).