![How to Upload PowerPoint to YouTube? [Complete Guide!]](https://artofpresentations.com/wp-content/uploads/2023/03/Featured-Image-2-1.jpg)
If you’re looking to share your PowerPoint presentation with a wider audience, uploading it to YouTube can be a great option. Not only does it allow you to reach a larger viewership, but it also makes it easy for people to access and share your content.
To upload PowerPoint to YouTube, go to “Your channel” and click on the “Manage Videos” button to open the “YouTube Studio” screen. Click on the “Create” button and select the “Upload videos” option from the dropdown menu. Finally, click on the “Select Files” button in the “Upload Videos” window.
In this guide, we’ll walk you through the steps to how to convert your PowerPoint to a video format and customize your video settings as well as how to record your PowerPoint presentation on YouTube. Let’s get started!
1. How to Convert a PowerPoint into a Video?
In order to upload a Microsoft PowerPoint presentation to your YouTube channel, you must first convert the presentation file into a video. To convert a PowerPoint presentation to a video, follow the 4 simple steps.
Step-1: Click on the “File” tab
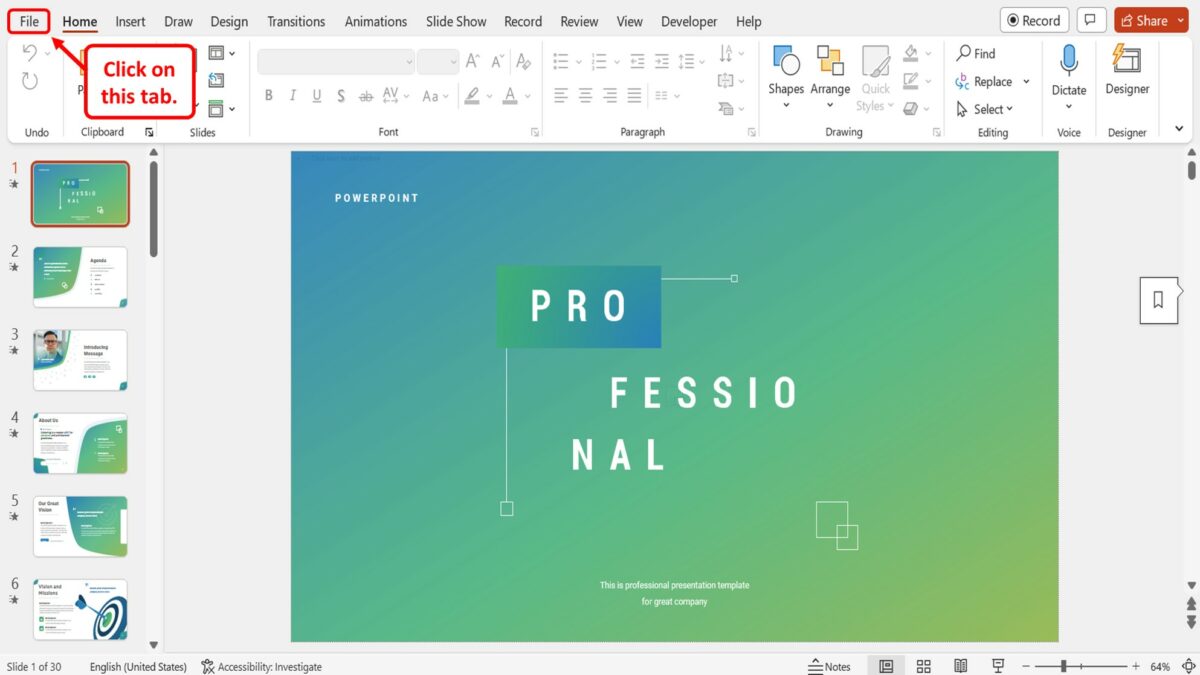
In the PowerPoint presentation file, you have to first open the “File” menu. To do so, click on the “File” tab in the menu ribbon located at the top of the screen.
Step-2: Click on the “Save As” option
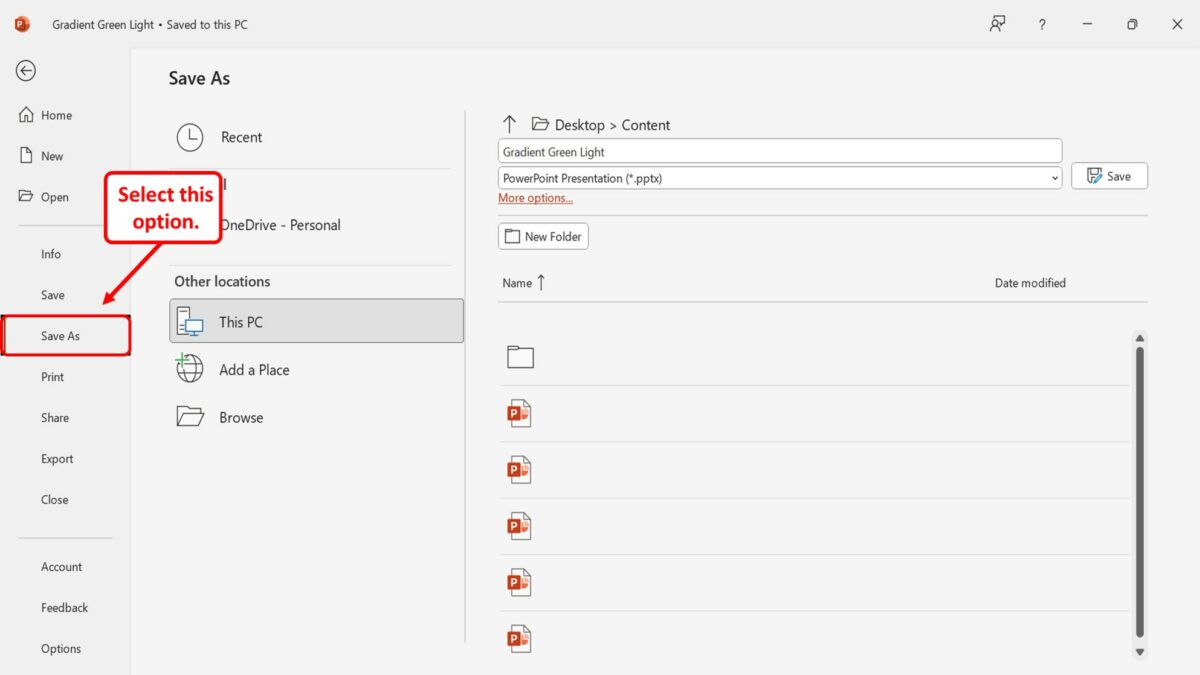
The next step is to click on the “Save As” option. It is located in the sidebar on the left side of the screen in the “File” menu.
Step-3: Click on the “Save As Type” box
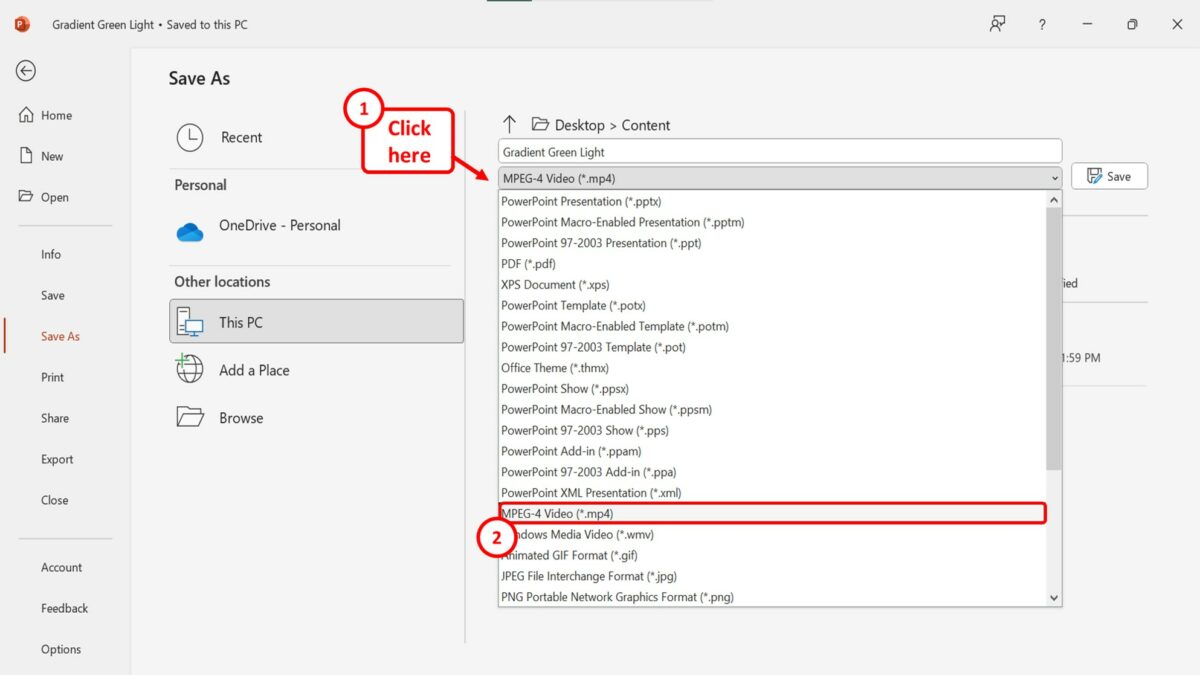
In the “Save As” screen, click on the “Save As Type” box which is the second box in the right column. Then click on the “MPEG-4 Video (*.mp4)” option or the “Windows Media Video (*.wmv)” option in the dropdown menu under the “Save As Type” box.
Step-4: Click on the “Save” button
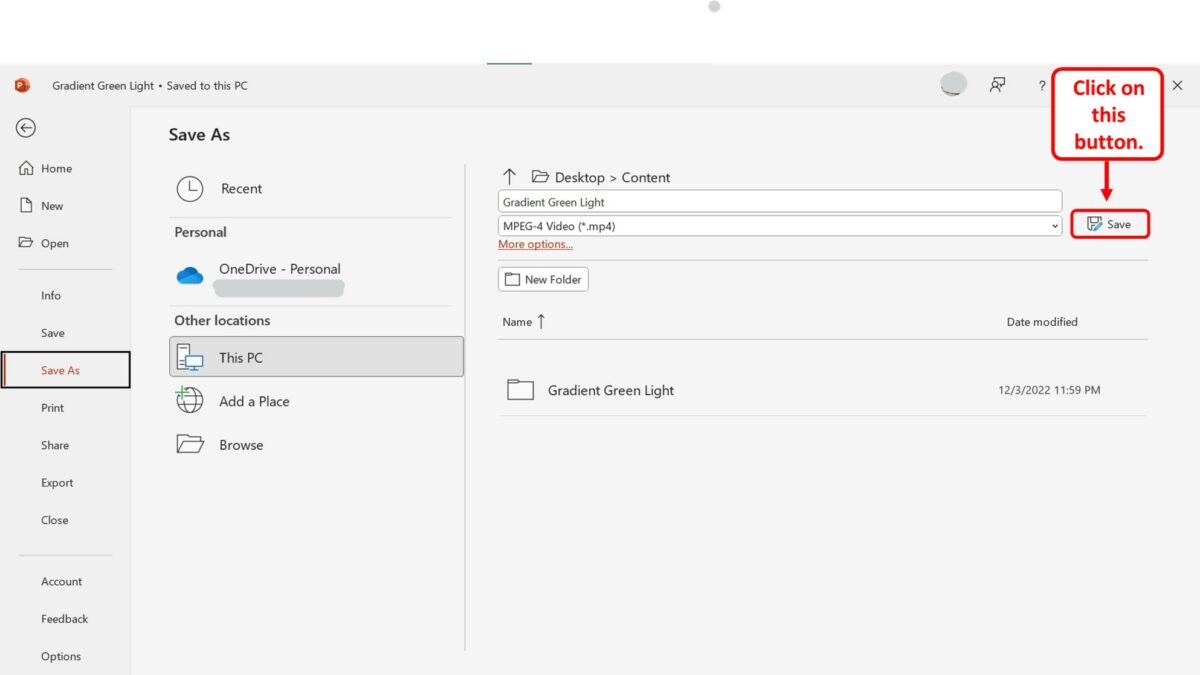
Finally, all you have to do is click on the “Save” button next to the “Save As Type” box in the “Save As” screen to save the PowerPoint presentation as a video.
2. How to Upload PowerPoint to YouTube?
In Microsoft PowerPoint, you can easily convert a PowerPoint presentation into a video. To do so, follow the steps mentioned in section 1. Then you can upload it to your YouTube channel. All you have to do is follow the 4 quick steps.
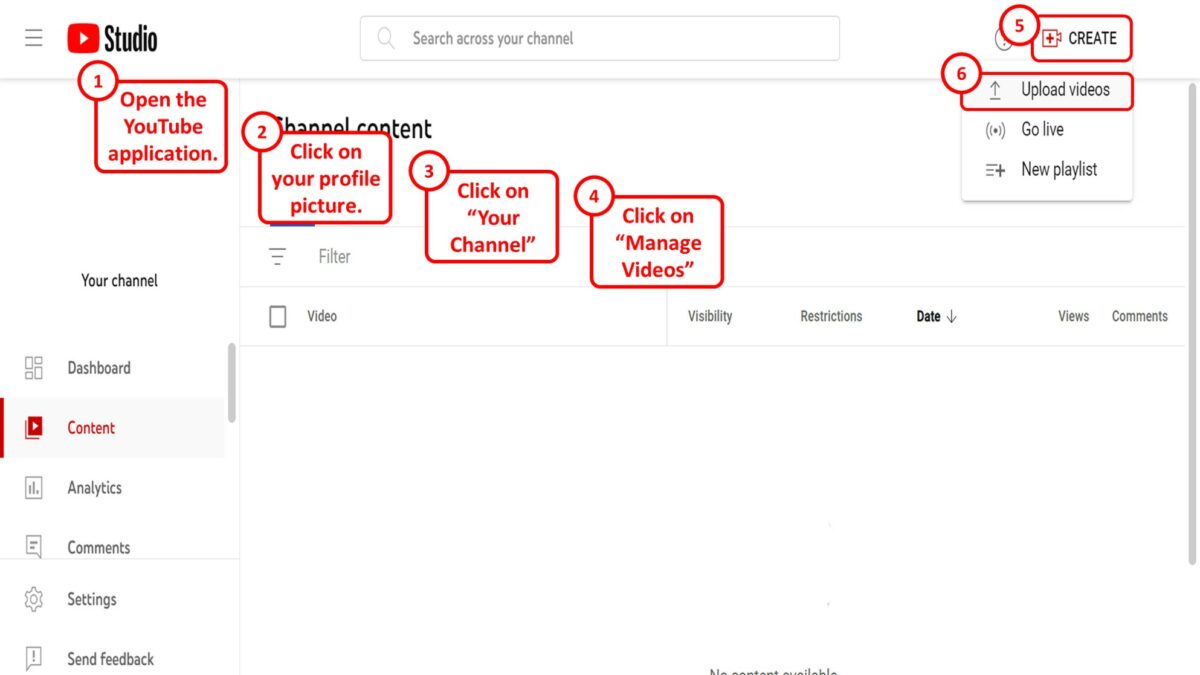
Step-1: Click on the “Your channel” option
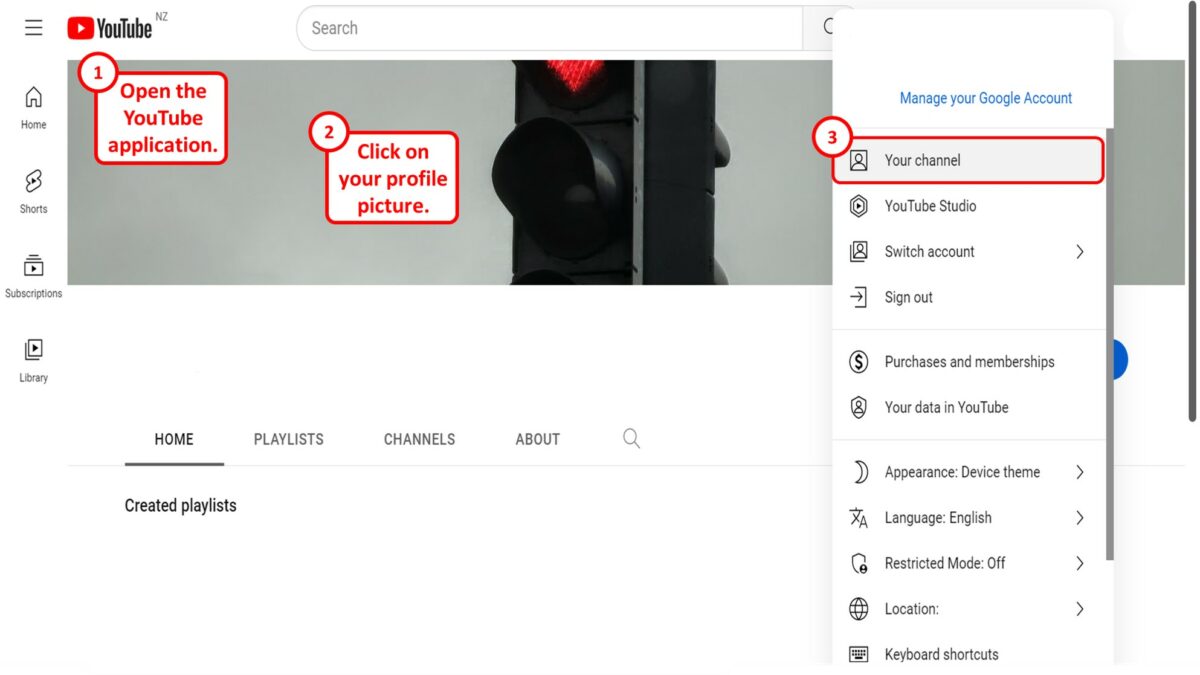
The first step is to open the YouTube application. At the top right corner of the screen, click on your profile picture. Then click on the “Your channel” option in the dropdown menu.
Step-2: Click on the “Manage Videos” option
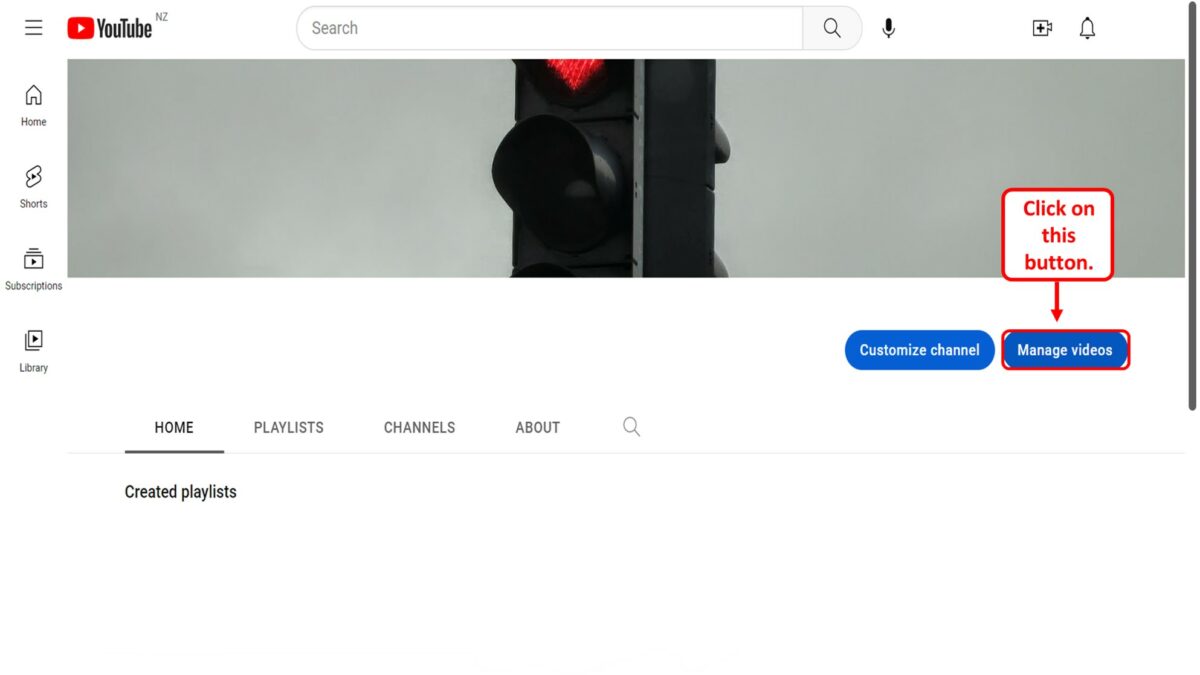
The next step is to open the YouTube Studio screen. To do so, click on the “Manage Videos” button in your YouTube channel.
Step-3: Click on the “Create” button
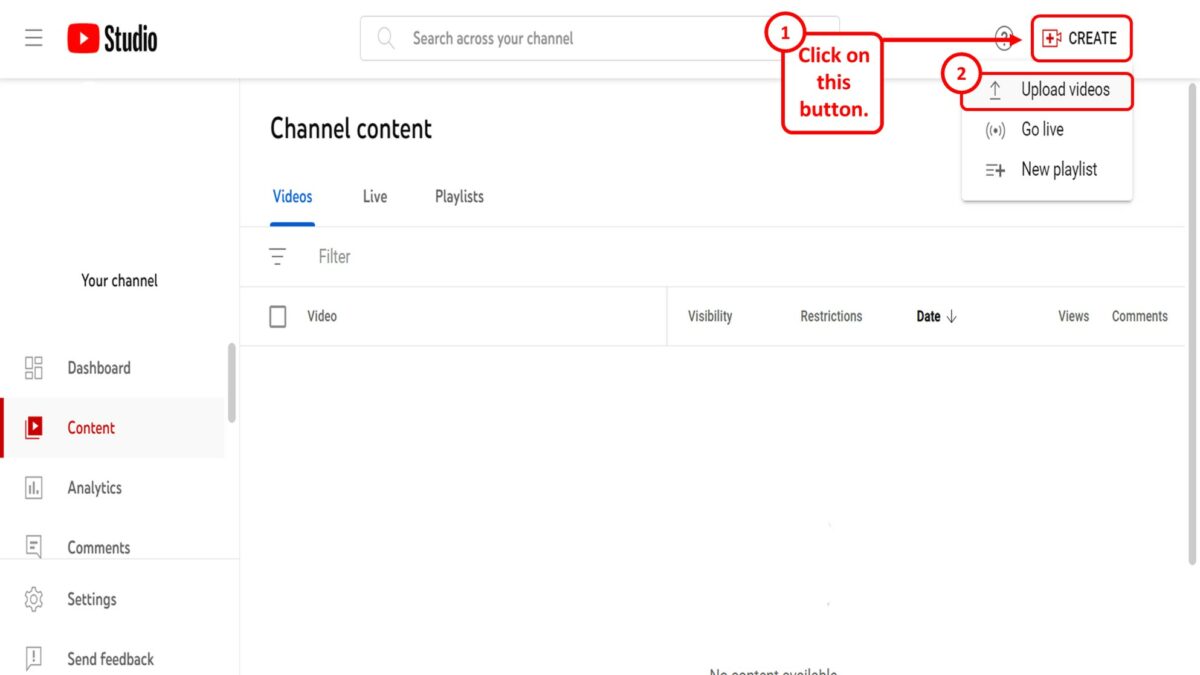
In the “YouTube Studio” screen, click on the “Create” button at the top right corner. Then click on the “Upload videos” option in the dropdown menu under the “Create” button.
Step-4: Click on the “Select Files” option
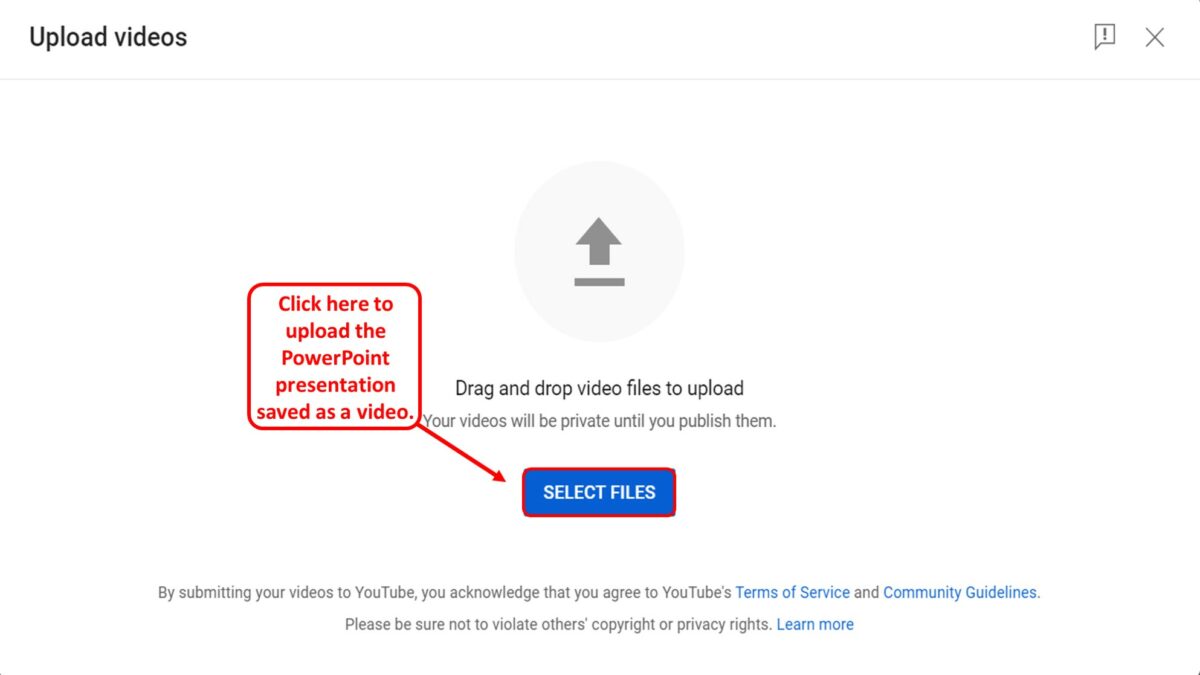
Finally, all you have to do is click on the “Select Files” button in the “Upload Videos” window to upload the PowerPoint presentation saved as a video on your device.
3. How to Record PowerPoint to Upload to YouTube?
In Microsoft PowerPoint, you can record the presentation with audio. By doing so, you can change slides at your own pace and also record your voice to complete the presentation. A recorded presentation is likely to be more engaging than a video presentation when uploaded to YouTube. To record a PowerPoint presentation, follow the 7 simple steps.
Step-1: Click on the “Record” tab
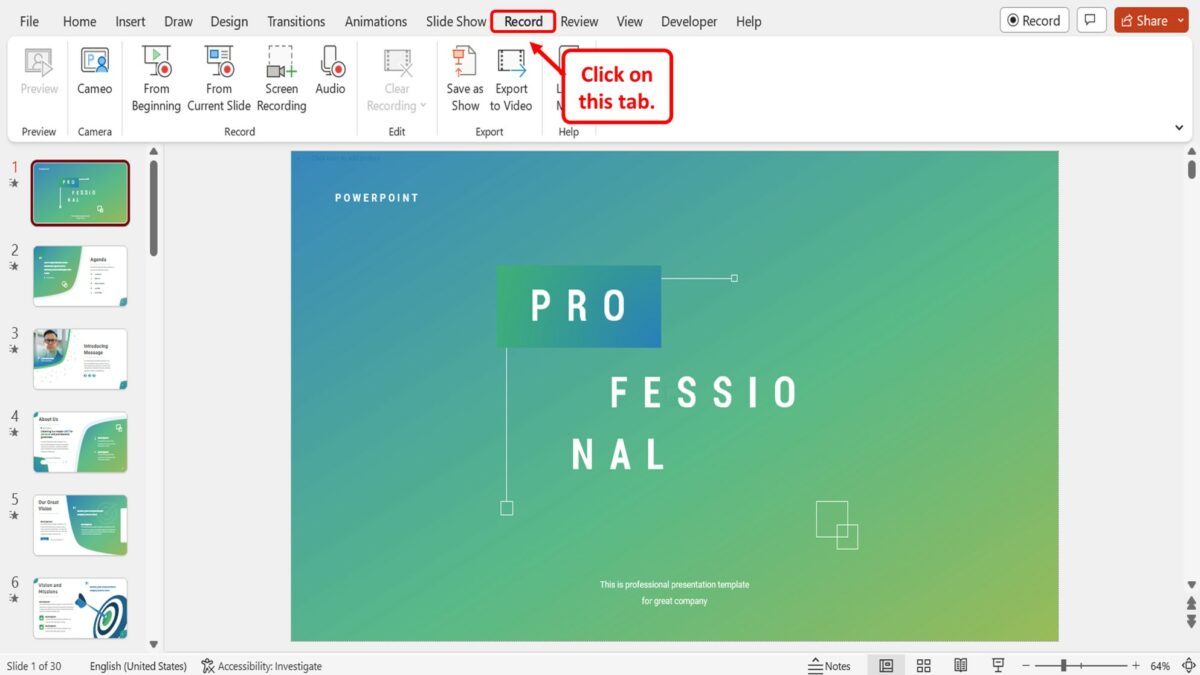
In the menu ribbon located at the top of the screen, click on the “Record” tab. This will open the “Record” menu.
Step-2: Click on the “From Beginning” option
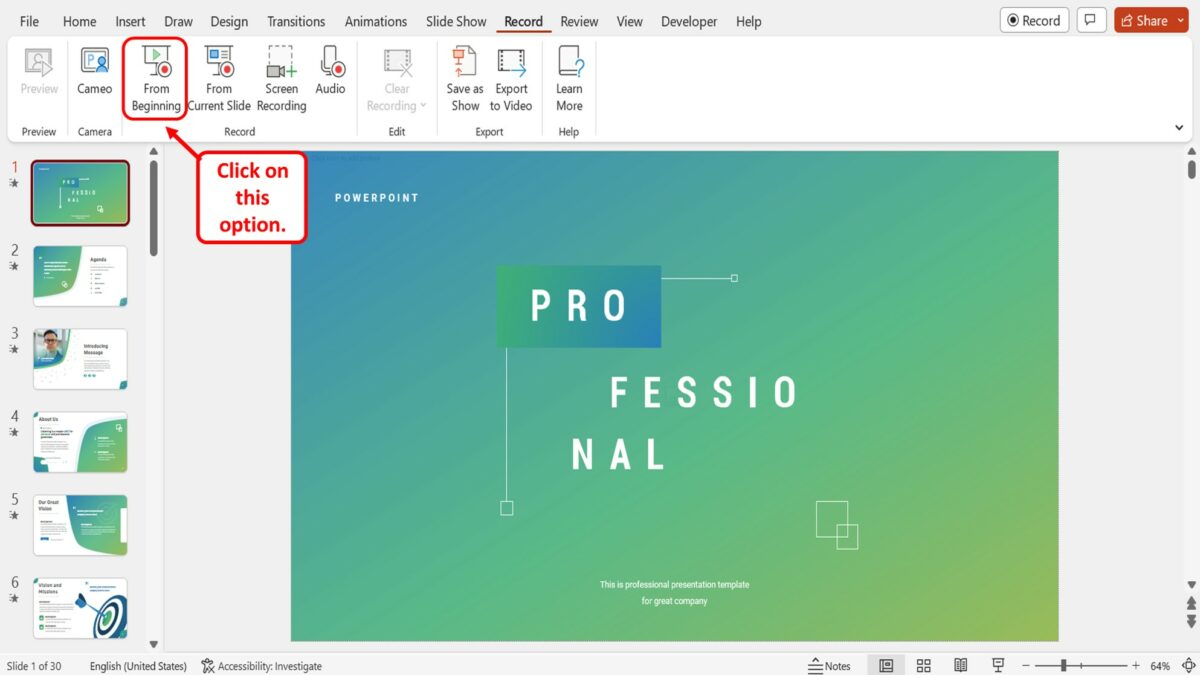
In the “Record” group of the “Record” menu, click on the “From Beginning” option. This will open the recording screen starting from the first slide in the presentation.
Step-3: Click on the “Start recording” option
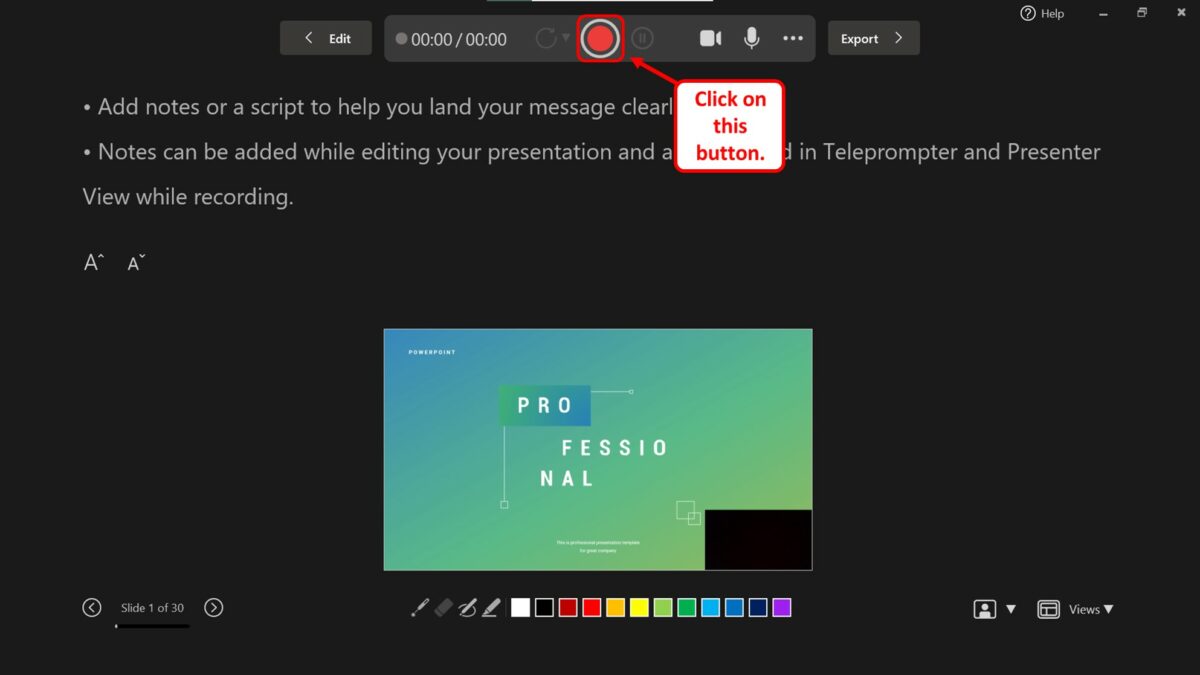
In the recording screen, you have to now click on the “Start recording” option which is the red circle in the middle of the toolbar located at the top of the screen. Alternatively, you can press the “R” key on your keyboard to start recording your presentation.
Step-4: Record the presentation
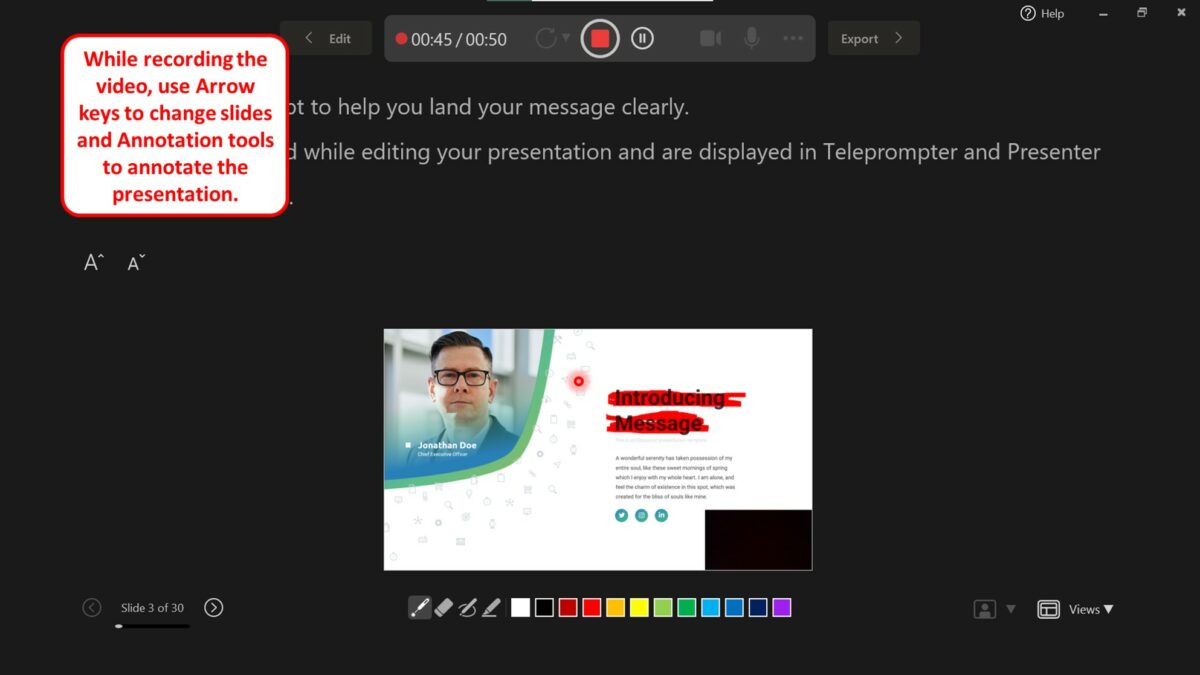
The next step is to simply record the video. All you have to do is present the video as you would to the live audience. You can use the arrow keys to change slides and the annotation tools available at the bottom of the screen to annotate the presentation.
Step-5: Click on the “Stop recording” option
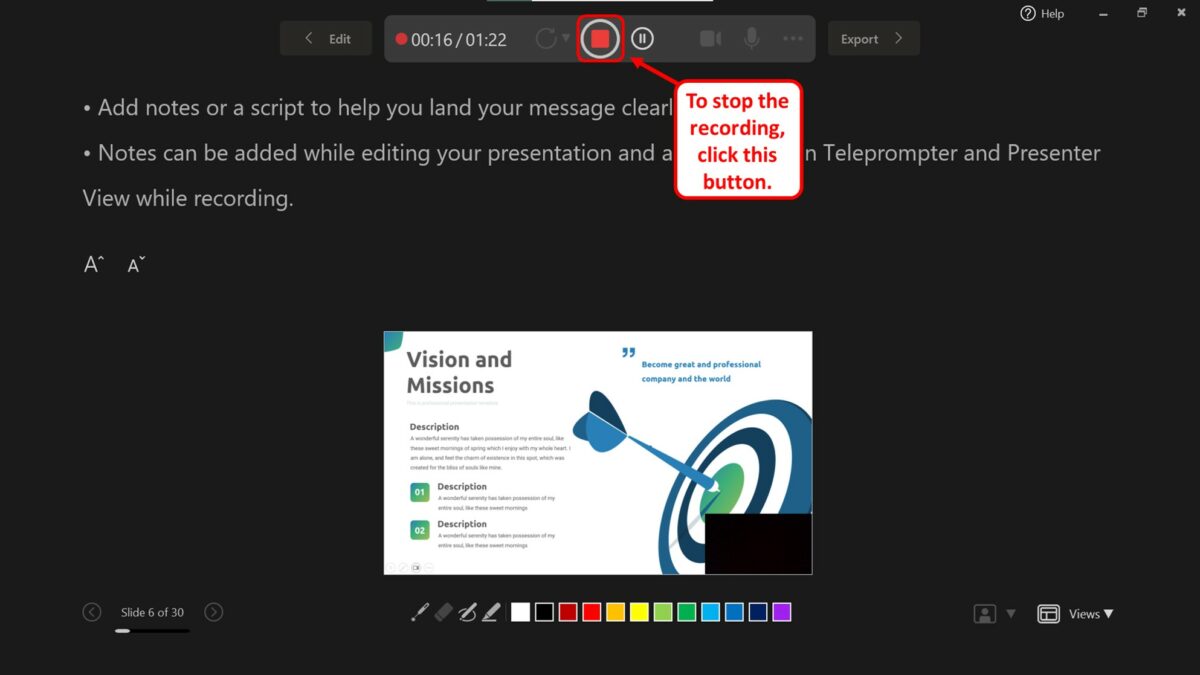
After you finish recording, click on the “Stop recording” option which is the red square icon at the top of the screen. You can alternatively press the “S” key on your keyboard to stop recording the presentation.
Step-6: Click on the “Export” option
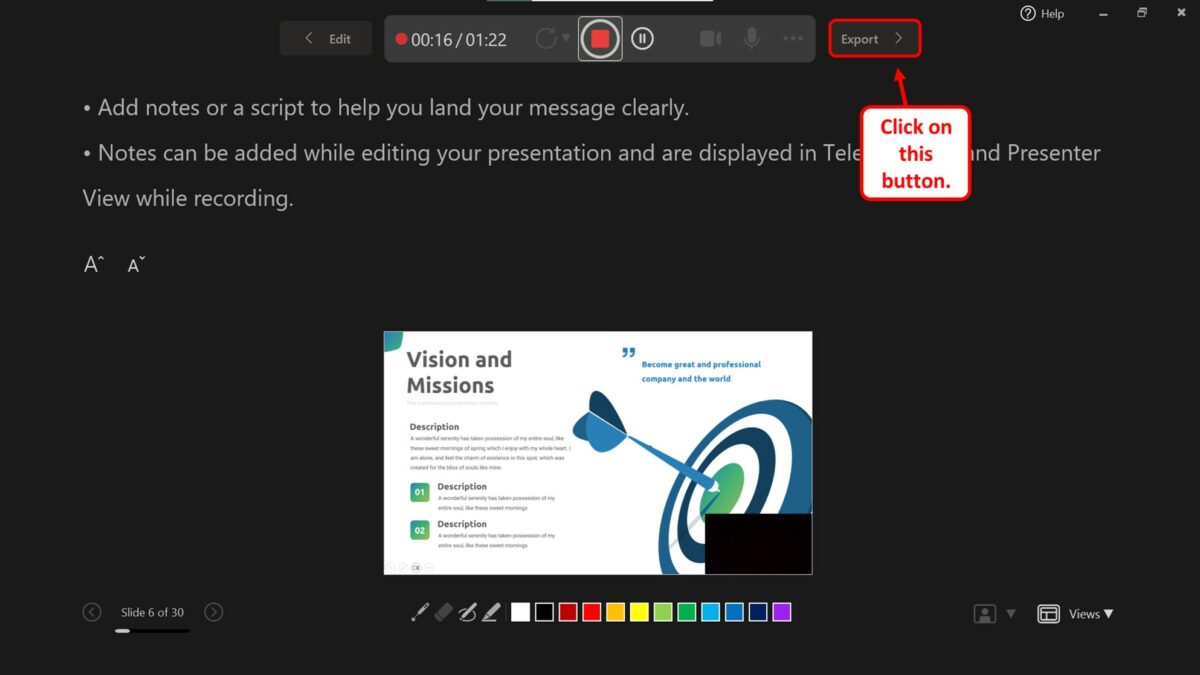
Now all you have to do is save the recorded presentation as a video that you can upload to YouTube. To do so, click on the “Export” button next to the toolbar at the top of the screen.
Step-7: Click on the “Export Video” option
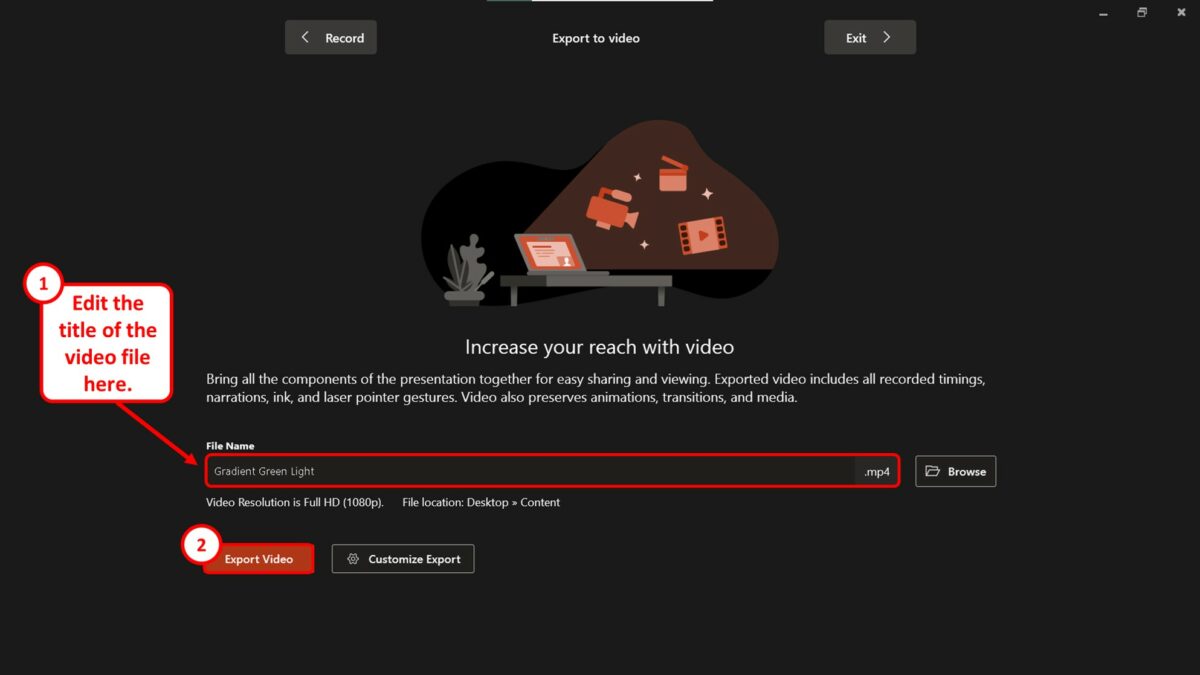
In the “Export to Video” option, you can now edit the title of the video file by clicking on the “File Name” box. Then all you have to do is click on the “Export Video” button at the bottom to save the recorded presentation as a video.
4. How to Upload Powerpoint to Youtube with Audio?
To upload a Microsoft PowerPoint presentation to YouTube with audio, you have to simply add audio to the PowerPoint presentation. Then you have to save the presentation as a video containing audio. All you have to do is follow the 7 easy steps.
Step-1: Click on the “Insert” tab
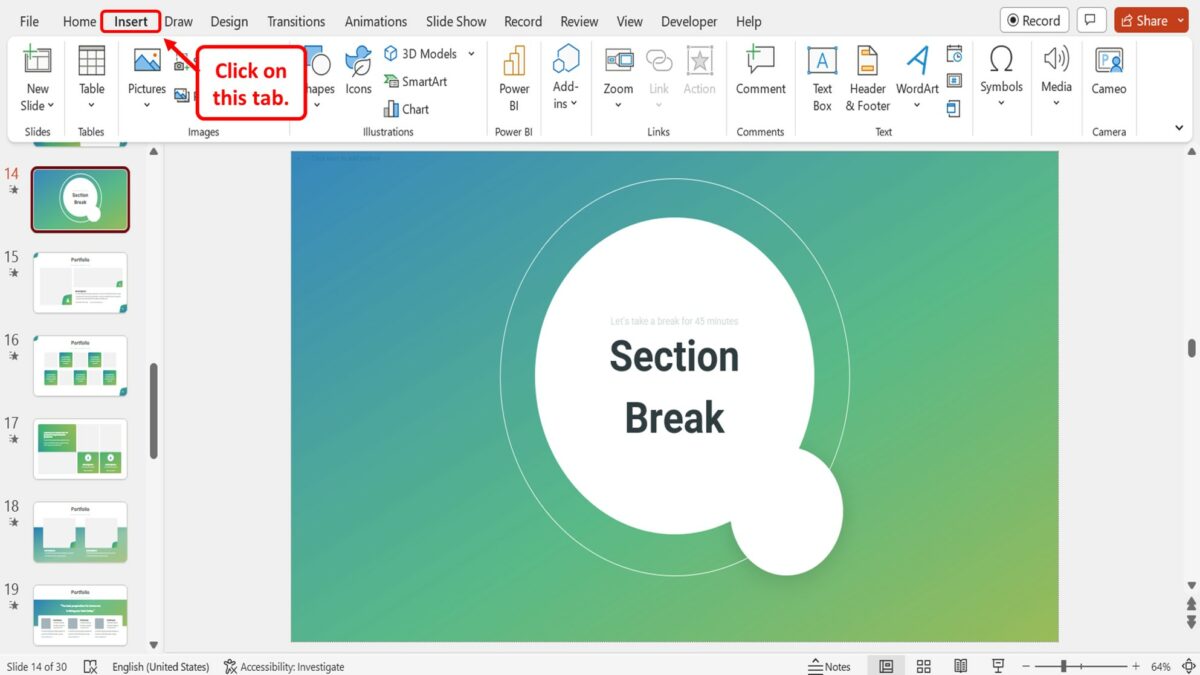
The first step is to insert the audio into the presentation slides. To do so, click on the “Insert” tab in the menu ribbon located at the top of the screen.
Step-2: Click on the “Audio” option
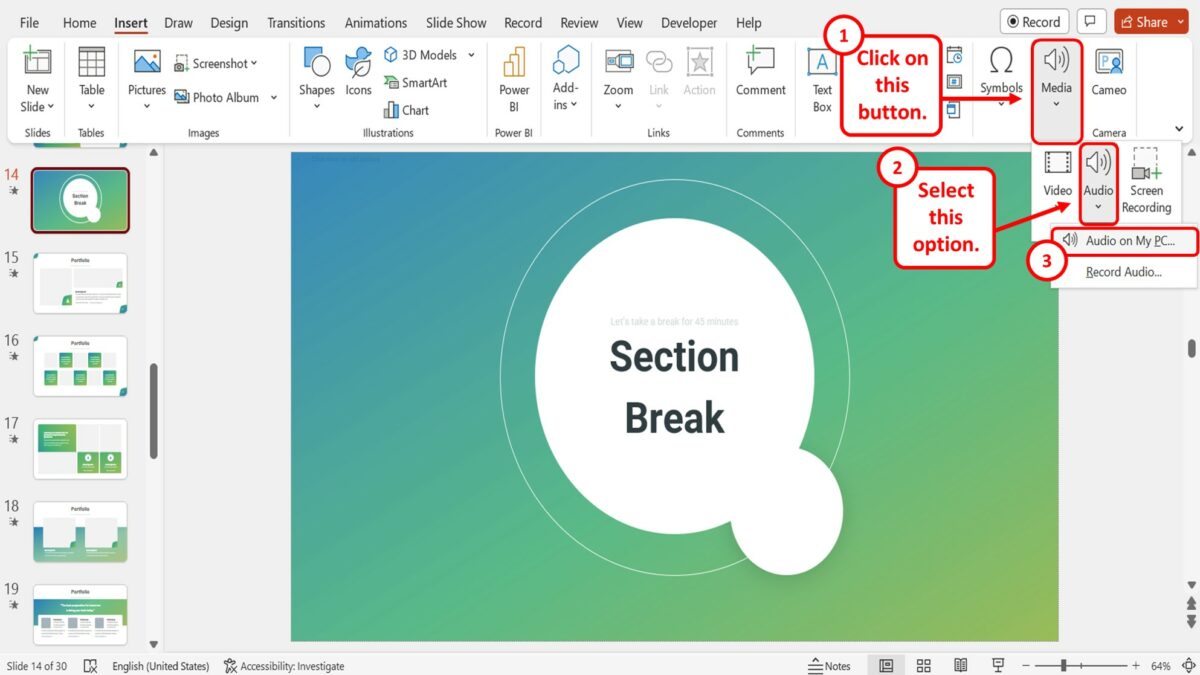
In the “Insert” menu, you have to now click on the “Media” button. Then click on the “Audio” option in the dropdown menu under the “Media” button. In the second dropdown list under the “Audio” option, click on the “Audio on My PC” option.
Step-3: Click on the “Insert” button

In the “Insert Audio” pop-up window, click on the audio that you want to insert into the presentation slide. Then click on the “Insert” button at the bottom of the pop-up window.
Step-4: Click on the “Export” option
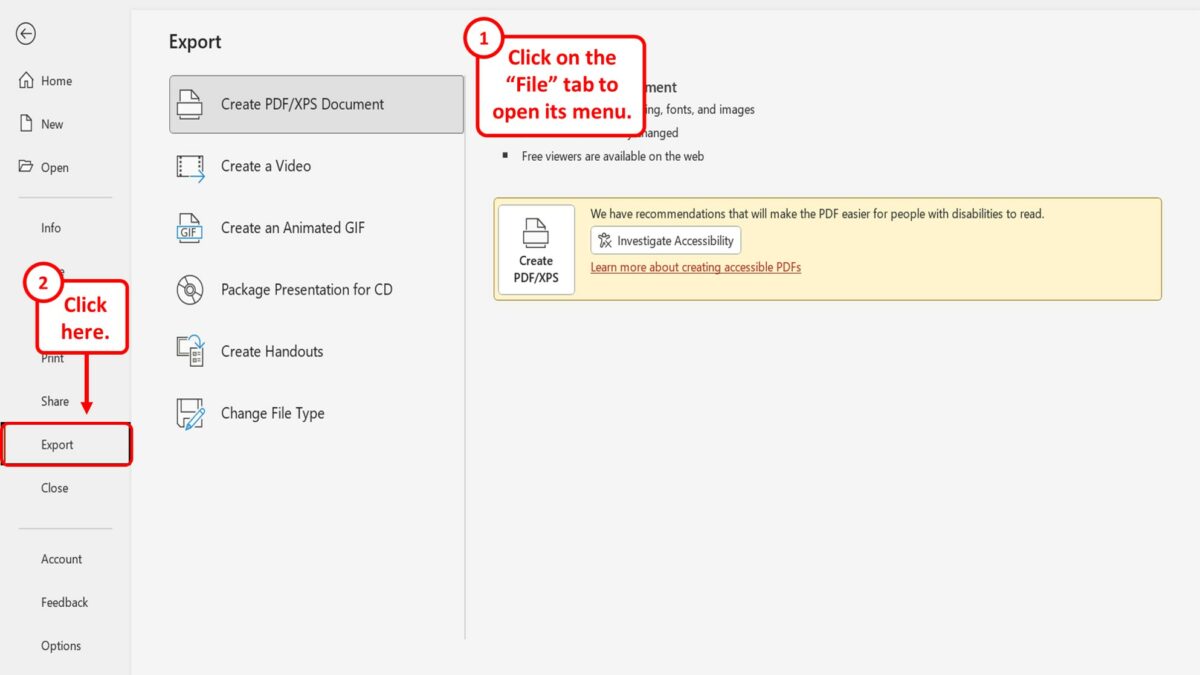
The next step is to click on the “File” tab in the menu ribbon at the top of the screen. In the “File” menu, click on the “Export” option.
Step-5: Click on the “Use Recorded Timings and Narrations” option
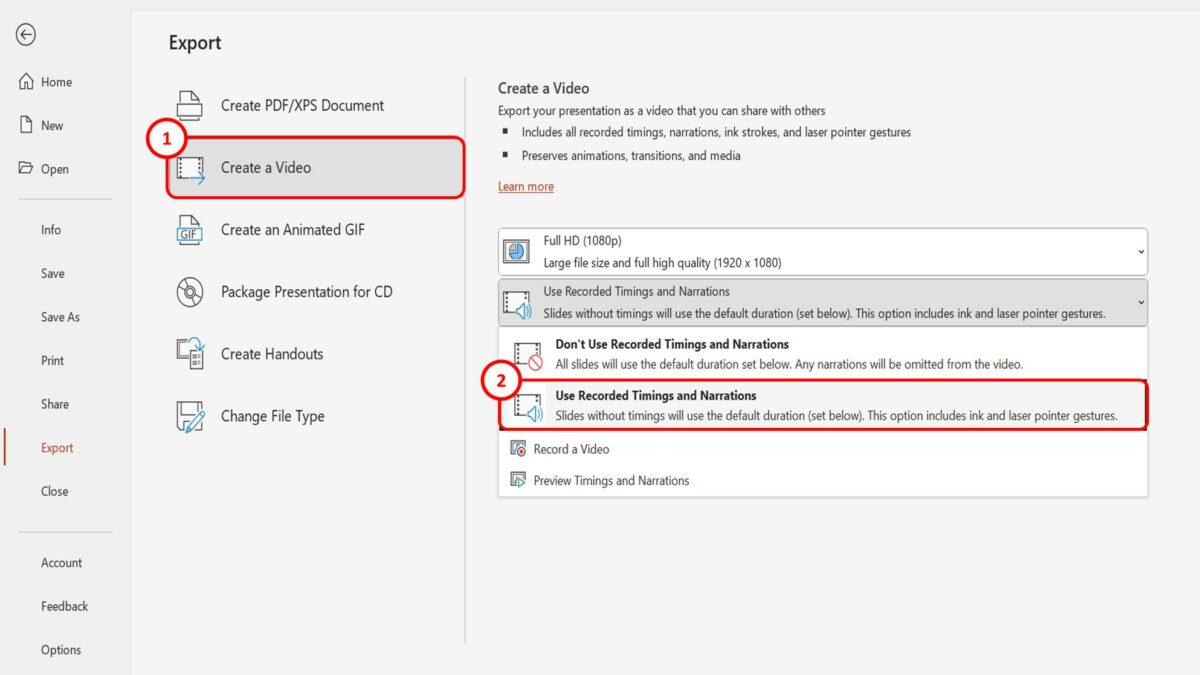
In the “Export” screen, click on the “Create a Video” option. Then click on the “Use Recorded Timings and Narrations” option in the “Create a Video” section in the right column.
Step-6: Click on the “Create Video” button

Now all you have to do is click on the “Create Video” button at the bottom of the “Create a Video” section in the right column of the “Export” screen. The presentation with the audio will be saved as a video on your device.
Step-7: Upload to YouTube
The final step is to upload the presentation video to YouTube. All you have to do is follow the steps detailed in section 2.