![How to Add Table Border in PowerPoint? [Complete Guide!]](https://artofpresentations.com/wp-content/uploads/2022/06/Featured-image-Add-borders-in-table.webp)
When creating tables in PowerPoint, the default style is with no border or color. This makes it difficult for readers to easily distinguish the data that is mentioned in it. It is for this reason that I have made this ready-to-use article to show you how to add table borders.
To add a border to a table, first select the table, then from the contextual Table Design tab, click on borders and choose All borders. This will add a border around the table cells.
For an in-depth understanding of how this is to be done read on further
1. How to Add Border to a Table in PowerPoint?
In Microsoft PowerPoint, you can insert a table in a slide and even edit its appearance. PowerPoint allows you to add borders to tables in slides and customize them according to your preference.
1.1 Method 1 – Using Table Style to Add Border
In the “Table Design” tab, you can use the “Table Style” group to add borders to a selected table in PowerPoint. You can read about the “Table Style” group in PowerPoint in my article here. To add table borders, follow the 2 steps.
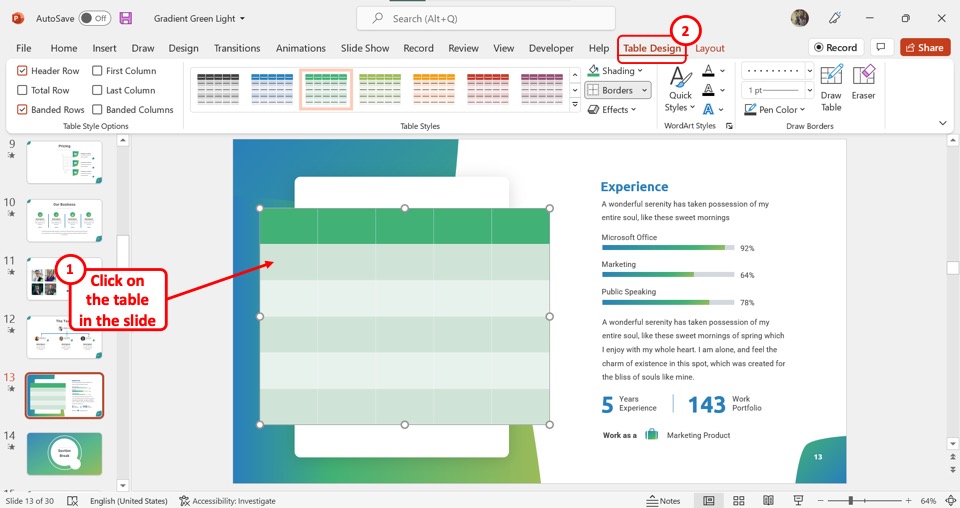
Step-1: Click on the “Table Design” tab
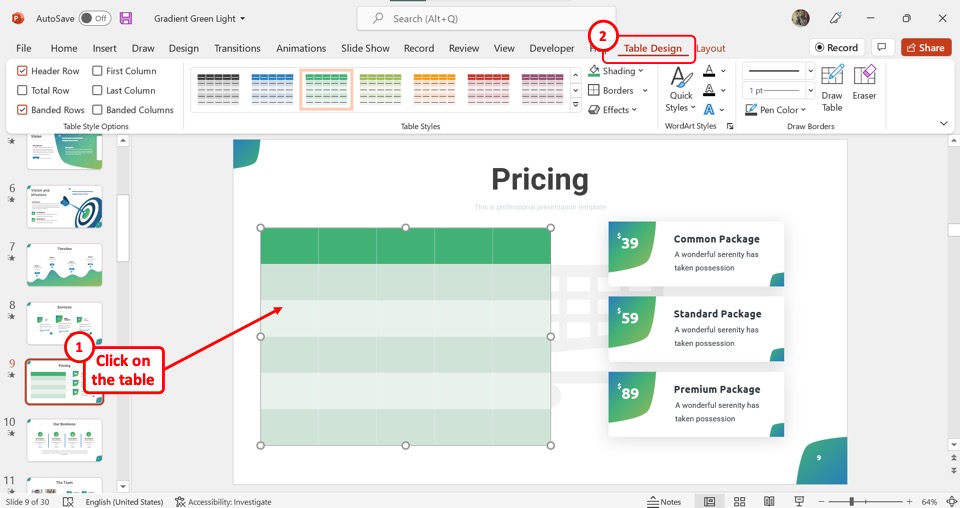
The first step is to click on the table to which you want to add borders. Then click on the “Table Design” tab from the menu ribbon located at the top of the screen.
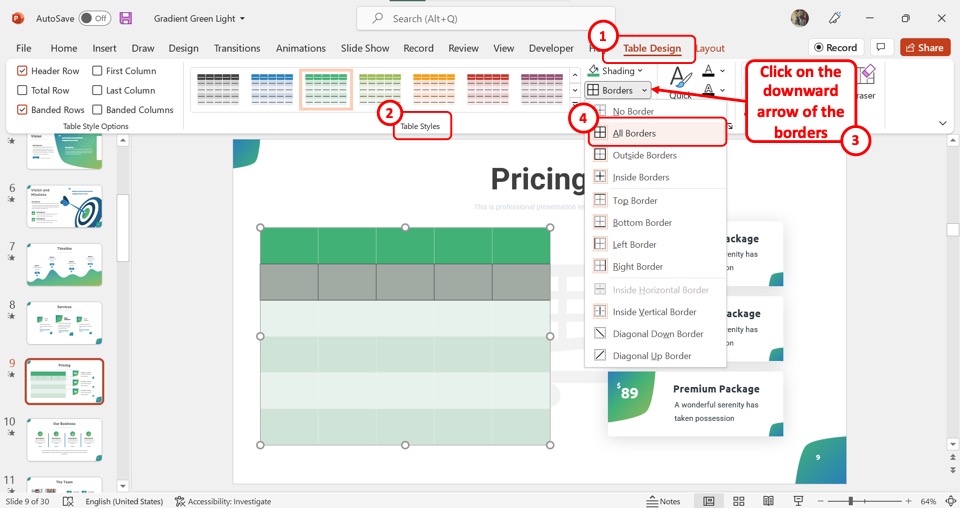
Step-2: Click on the “All Borders” option

In the “Table Styles” group of the “Table Design” tab, click on the downward arrow by the “Borders” option. Then click on the “All Borders” option from the dropdown menu under the “Borders” option to add borders to the selected table.
1.2 Method 2 – Adding a Custom Border to a Table in PowerPoint
Microsoft PowerPoint also allows you to add customized borders to the tables in the presentation slides. You can add borders to cells, rows, and columns.
1.2a. How to Add Border to a Specific Cell in a Table in PowerPoint?
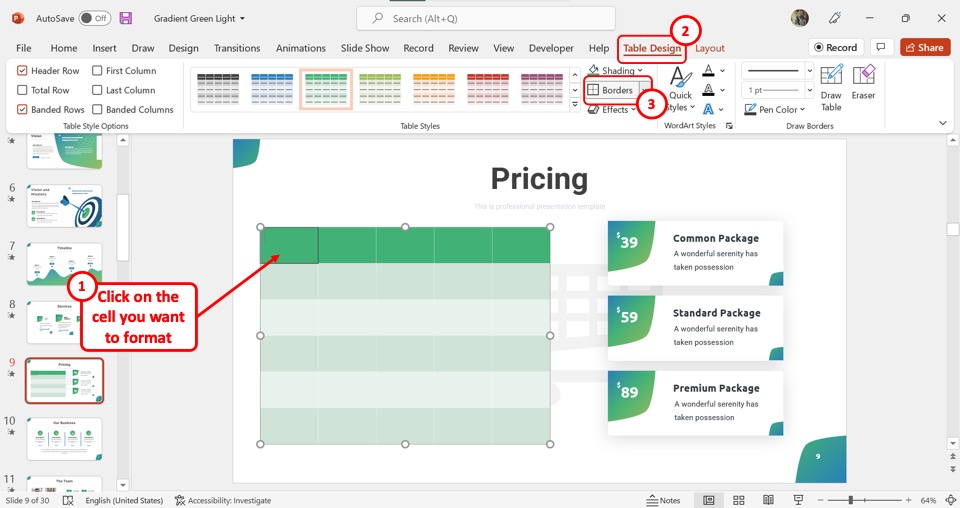
To add borders to a specific cell, you have to first select the cell. Then click on the “Table Design” tab from the menu ribbon located at the top of the screen. Now all you have to do is click on the “Border” option in the “Table Design” menu.
1.2b How to Add Border to a Row in a Table in PowerPoint?
In Microsoft PowerPoint, you can also add borders to a selected row in a table in a slide. All you have to do is follow the 2 quick steps.
Step-1: Select the table row
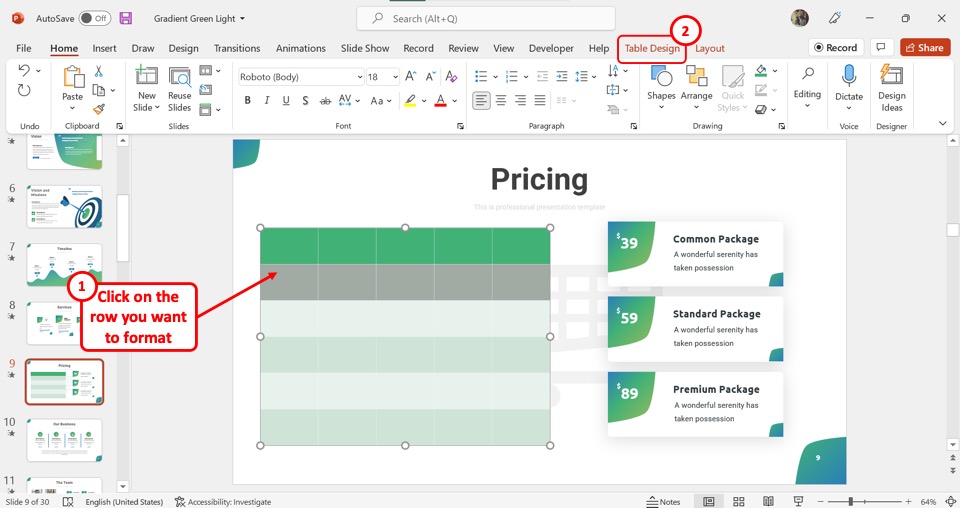
The first step is to select the row in the table. Once the row is highlighted gray, click on the “Table Design” tab from the menu ribbon.
Step-2: Click on the “All Borders” option
In the “Table Styles” group of the “Table Design” menu, click on the downward arrow by the “Borders” option. Then all you have to do is click on the “All Borders” option from the dropdown menu to add borders only to the selected row.
1.2c How to Add Border to a Column in a Table in PowerPoint?
You can also add borders to a table column in a similar way. All you have to do is follow the 3 quick steps.
Step-1: Click on the table column
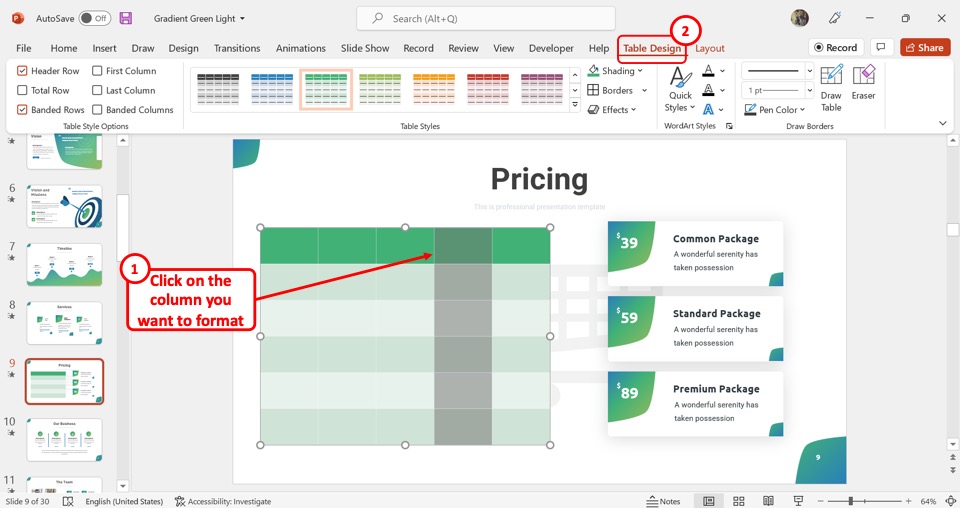
In the open slide, select the table row. Then click on the “Table Design” tab from the menu ribbon located at the top of the screen.
Step-2: Click on the “All Borders” option
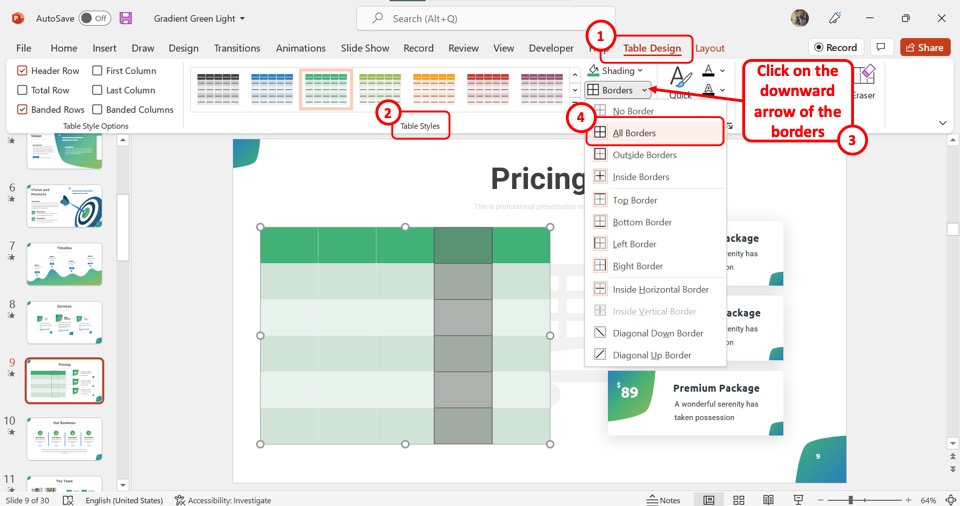
In the “Table Design” tab, click on the downward arrow on the right of the “Border” option from the “Table Styles” group. Then click on the “All Borders” option from the dropdown menu under the “Borders” option.
Step-3: Click on the “Left Border” and the “Right Border” options
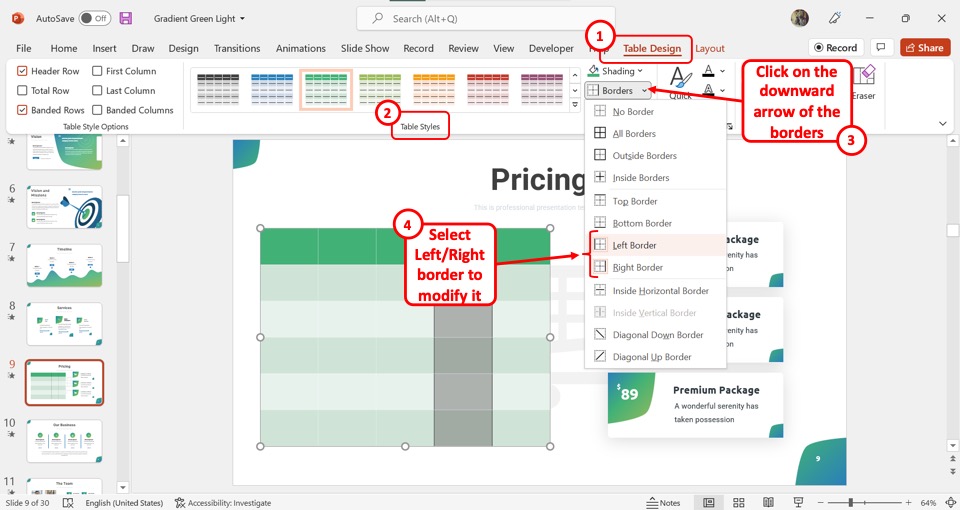
You can also add borders only to the outside of the selected column. To do so, click on the “Left Border” and the “Right Border” options in the dropdown menu under the “Borders” option.
1.2d How to Add Border Around a Table in PowerPoint?
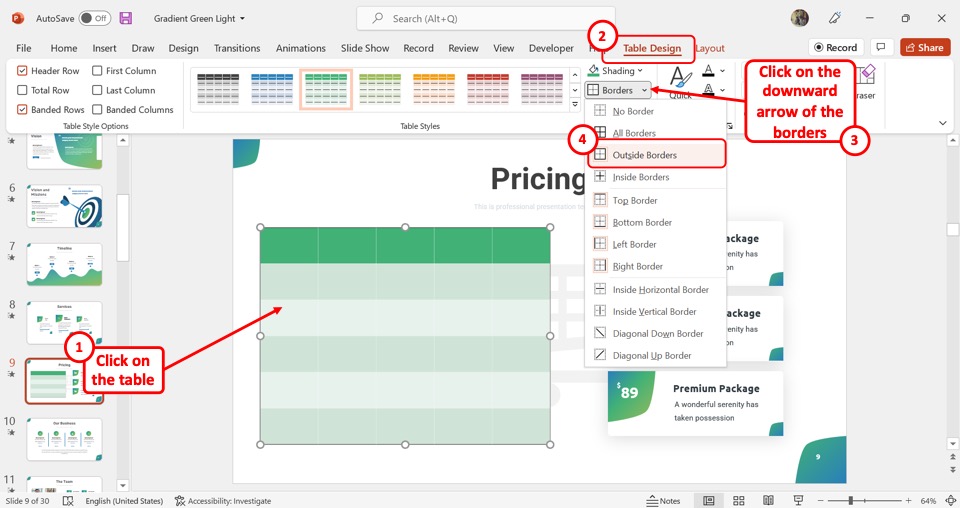
To add a border around the table without adding any borders inside the table in the slide, you can use the “Outside Borders” option. To do so, you have to first select the entire table. Then click on the “Outside Borders” option under the “Border” option in the “Table Design” tab.
This will add a border only on the outside of the selected table in the PowerPoint slide.
2. How to Change the Table Border Line Style in PowerPoint?
Microsoft PowerPoint offers the “Pen Style” feature that allows you to change the style of the table borders in a presentation slide. To change the border style of a table, follow the 3 simple steps.
Step-1: Click on the “Table Design” tab
In the open PowerPoint file, click on the table inside a slide. Then click on the contextual “Table Design” tab from the menu ribbon.
Step-2: Click on the “Pen Style” option
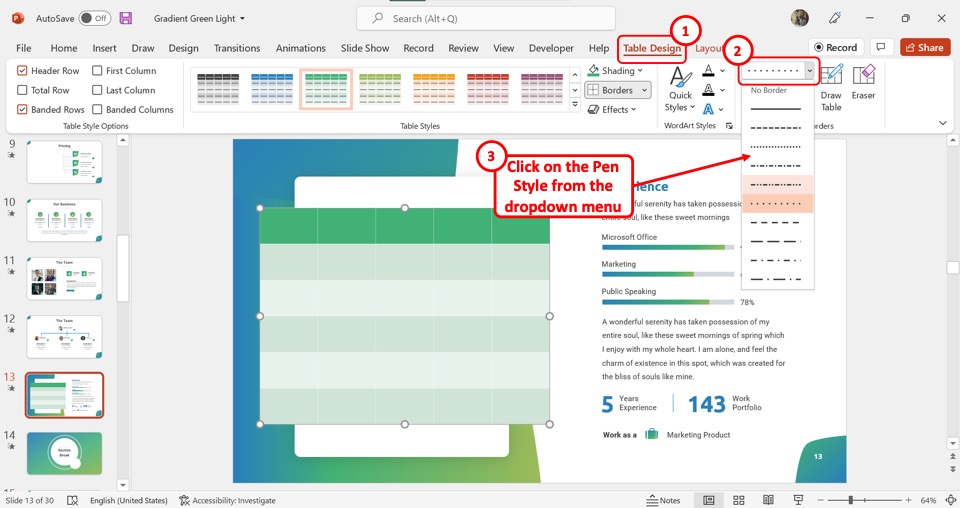
In the “Draw Borders” group of the “Table Design” tab, you have to now click on the “Pen Style” box. Then all you have to do is click on the preferred border design from the dropdown menu under the “Pen Style” option.
Step-3: Click on the “Borders” option

The final step is to click on the “Border” option in the “Table Styles” group. This will change the existing border to the new style.
3. How to Change the Table Border Thickness in PowerPoint?
In Microsoft PowerPoint, you can change the border thickness of a table. All you have to do is follow the 3 simple steps.
Step-1: Click on the “Table Design” tab
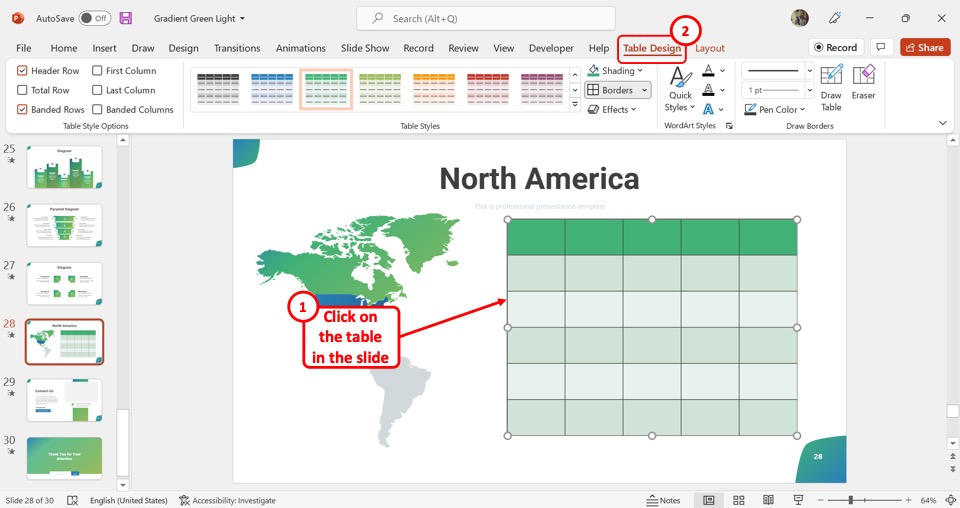
In the slide, you have to first select the table. Then click on the “Table Design” tab in the menu ribbon.
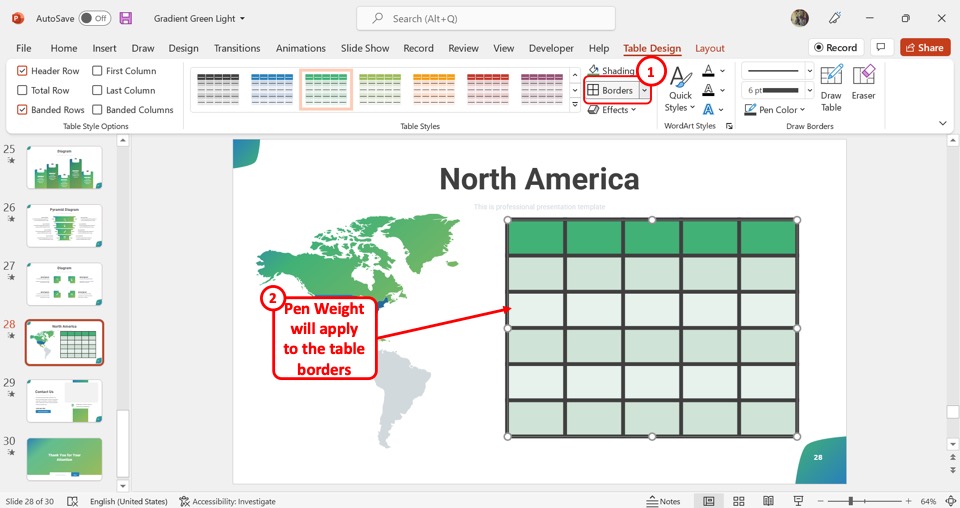
Step-2: Click on “Pen Weight”
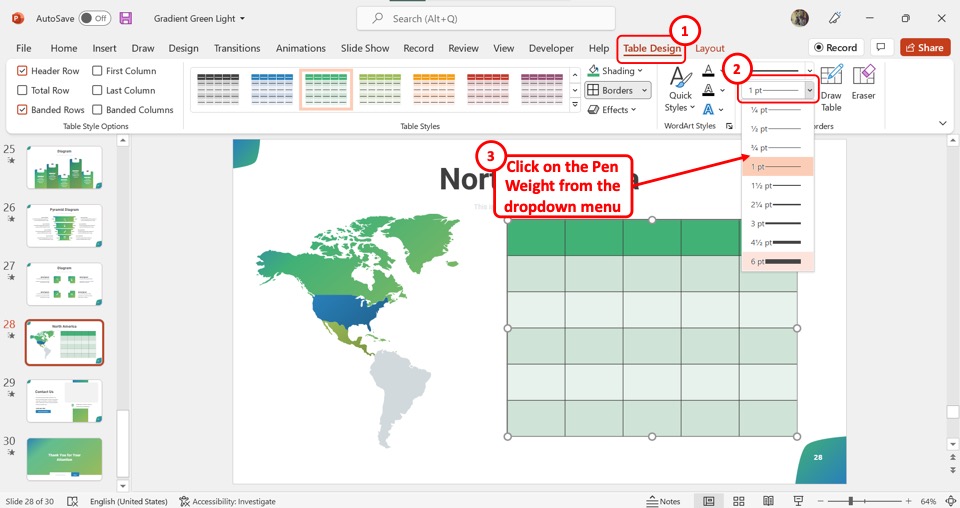
In the “Draw Borders” group of the “Table Design” tab, click on the “Pen Weight” box. In the dropdown menu under the “Pen Weight” option, click on your preferred border weight.
Step-3: Click on the “Borders” option
Now all you have to do is click on the “Borders” option in the “Table Styles” group to apply the changed border width.
4. How to Change Table Border Color in PowerPoint?
Microsoft PowerPoint allows you to customize the border color in the selected table inside a slide. You can learn all about it in my article here. To change the table border color, follow the 2 quick steps.
Step-1: Click on the “Pen Color” option
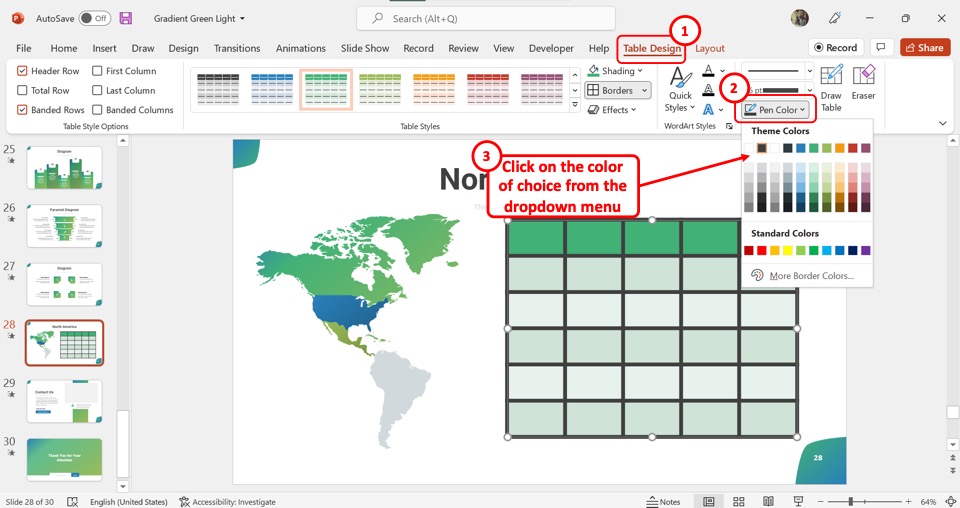
In the “Table Design” tab, you have to first click on the “Pen Color” option from the “Draw Table” group. This will open a dropdown list containing theme color options. Click on your preferred color.
Step-2: Click on “Borders”
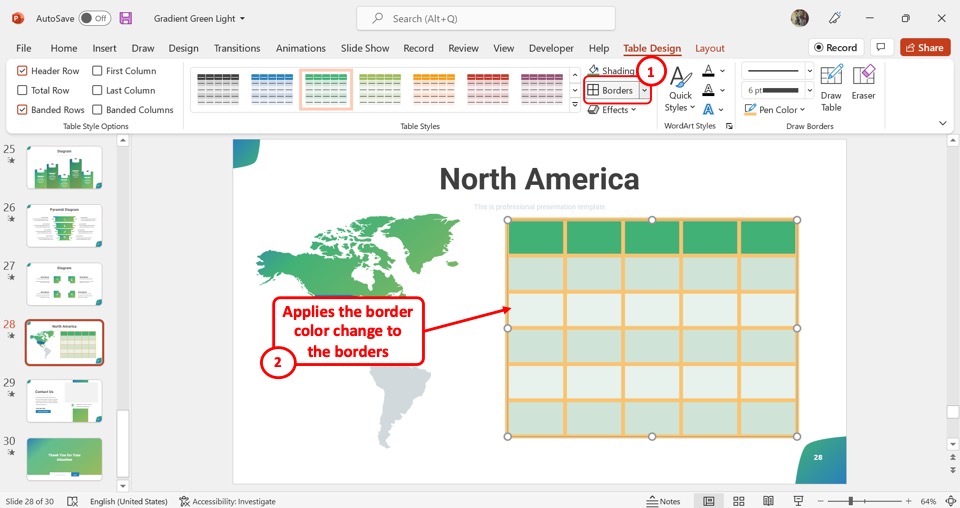
Now all you have to do is click on the “Borders” option in the “Table Design” tab to apply the changed color to the table border.
5. How to Remove Table Border in PowerPoint?
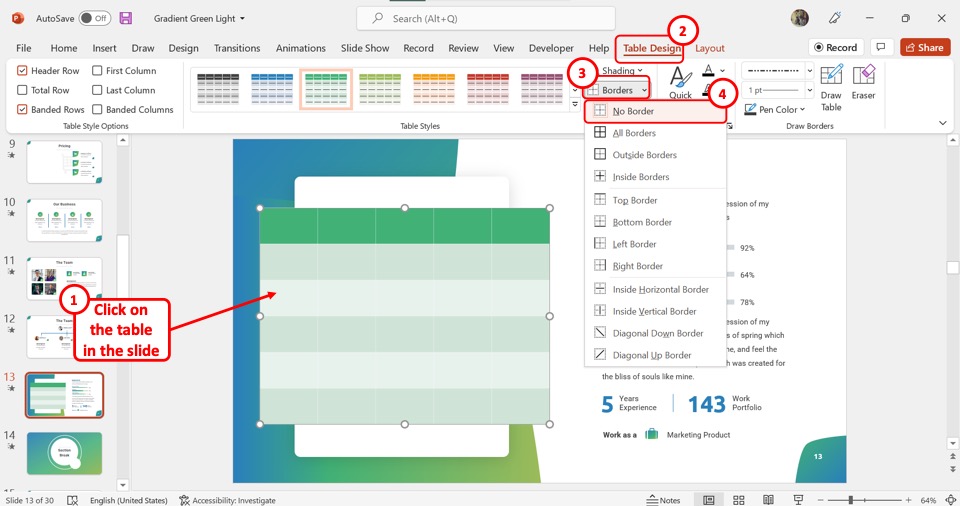
In Microsoft PowerPoint, you can remove the table borders just as easily as adding the borders. All you have to do is select the table and click on the “Table Design” tab. In the “Table Design” tab, click on the down arrow beside the “Borders” option.
Finally, click on the “No Border” option from the dropdown menu.
6. How to Remove Border to Selected Cells of a Table in PowerPoint?
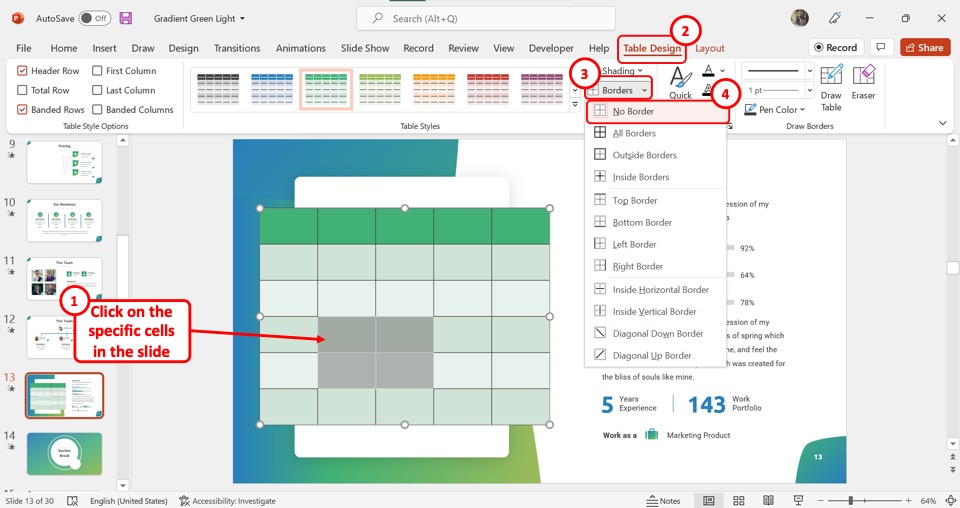
To remove the border of selected cells in PowerPoint, you have to first select the specific cells. In the dropdown menu under the “Borders” option of the “Table Design” menu, click on the “No Border” option to remove the borders of the selected cells in the PowerPoint table.
Credit to cookie_studio (on Freepik) for the featured image of this article (further edited).