![How to Sort a Table in PowerPoint? [An EASY Hack!]](https://artofpresentations.com/wp-content/uploads/2022/06/ezgif.com-gif-maker.webp)
Usually, when you receive data in a table it is in a random sequence and would require a lot of scrolling up and down to make logical sense of it. That is why it is always good to have your table data sorted in a specific order before going through it.
Unfortunately, PowerPoint doesn’t provide a “Sort” feature! So, how do you sort a table in PowerPoint?
To sort a table in PowerPoint, first, copy the table and paste it into Excel. Then, in Excel, click on the “Home” tab and then click on the “Sort & Filter” option. Sort the table as per your need. Once the table is sorted, copy the table from Excel and paste it back into “PowerPoint”.
This might seem cumbersome at first, but don’t worry, even a beginner can carry out the process as long as you follow the step-by-step visual guide that I’ve laid out in this article! So, follow along!
1. Can You Sort Data in a Table in PowerPoint?
In Microsoft PowerPoint, you can add and customize tables. You can insert new tables and add data, or paste a slide from an existing source. You can even insert a table in the Notes section in PowerPoint!
However, you cannot sort the data in a PowerPoint table. The “Sort” feature is available in the tables in Microsoft Excel and Microsoft Word.
2. Work-around to Sort the Data in PowerPoint Table
Although you cannot sort data in tables in Microsoft PowerPoint, you can use the help of other Microsoft software to sort the table data and then export it to PowerPoint.
And don’t worry, if you have PowerPoint on your computer, you will most likely also have Word or Excel installed.
2.1 Method 1 – Sort Data in Excel
To sort the data inside a PowerPoint table, you can use the “Sort and Filter” feature in Microsoft Excel. All you have to do is follow the 6 steps below.
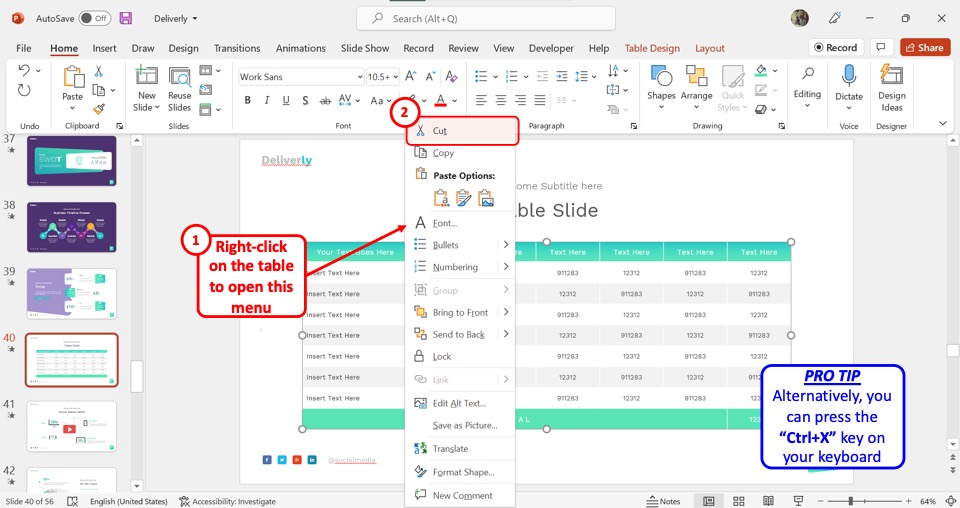
Step-1: Cut the table from the PowerPoint slide
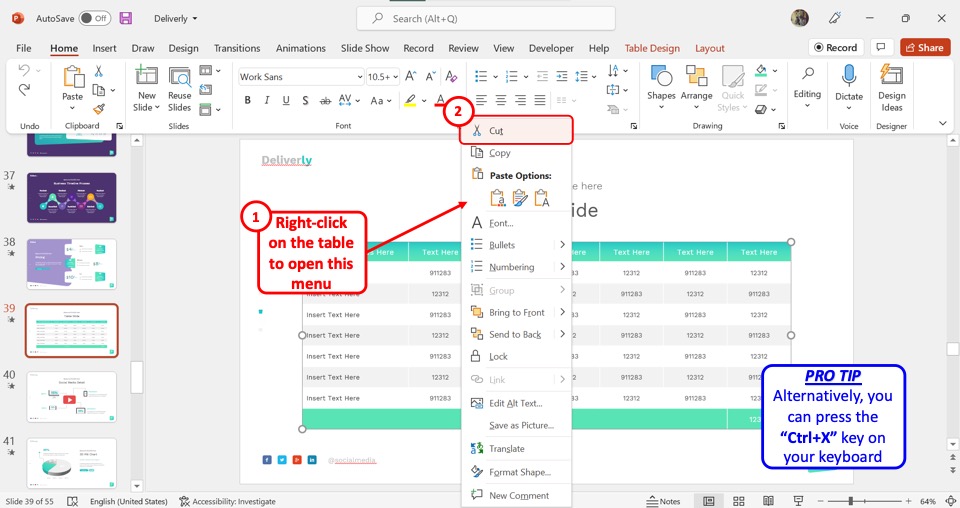
The first step is to export the PowerPoint table to Excel. In the open slide, “Right Click” on the table. Then click on the “Cut” option from the right-click menu. Alternatively, you can press the “Ctrl+X” keys on your keyboard to cut the table.
Step-2: Paste the table into Excel
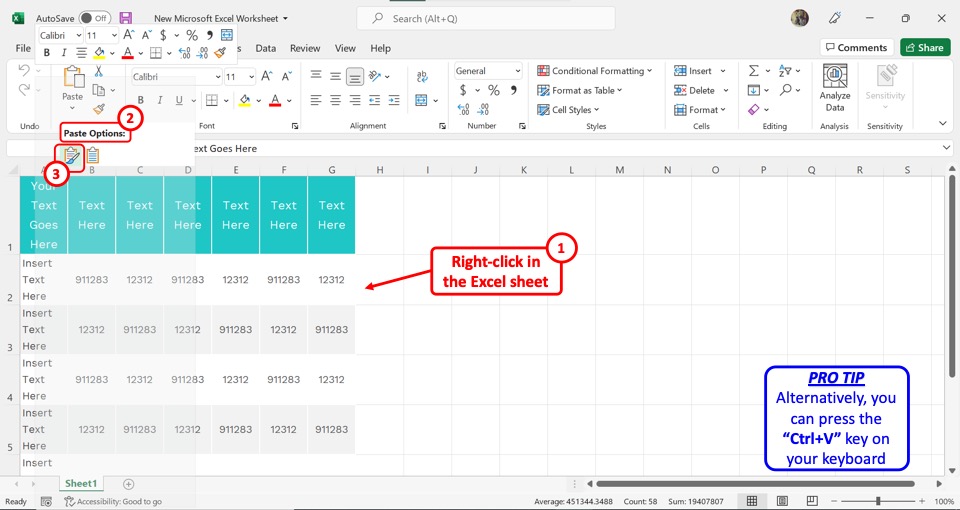
In the Excel worksheet, “Right Click” anywhere and click on the “Use Destination Theme” option under “Paste Options”. Alternatively, you can press the “Ctrl+V” keys on your keyboard to paste the table into the Excel worksheet.
Step-3: Click on the “Sort & Filter” option
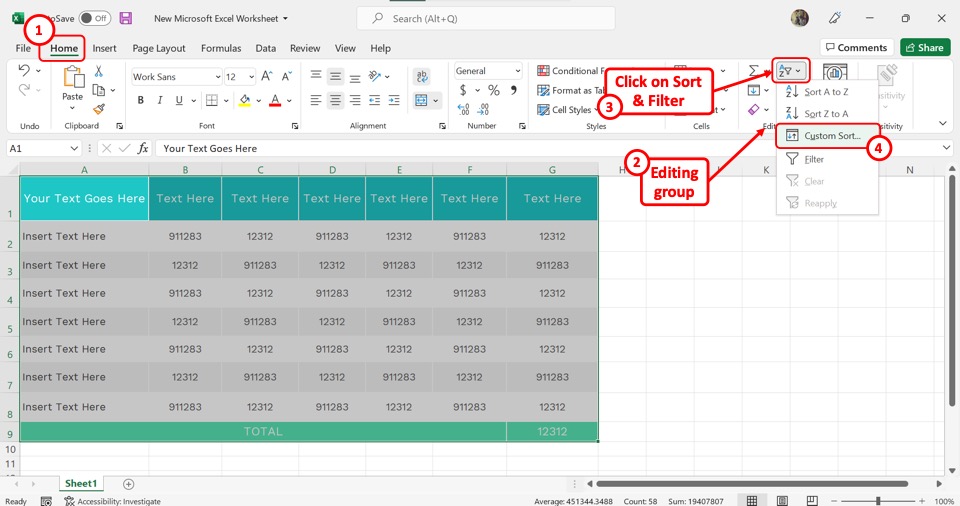
The next step is to select the table in Excel. Then click on the “Sort and Filter” option from the “Editing” group of the “Home” tab. In the dropdown menu, click on the “Custom Sort” option to launch a dialog box.
Step-4: Click on the “OK” button
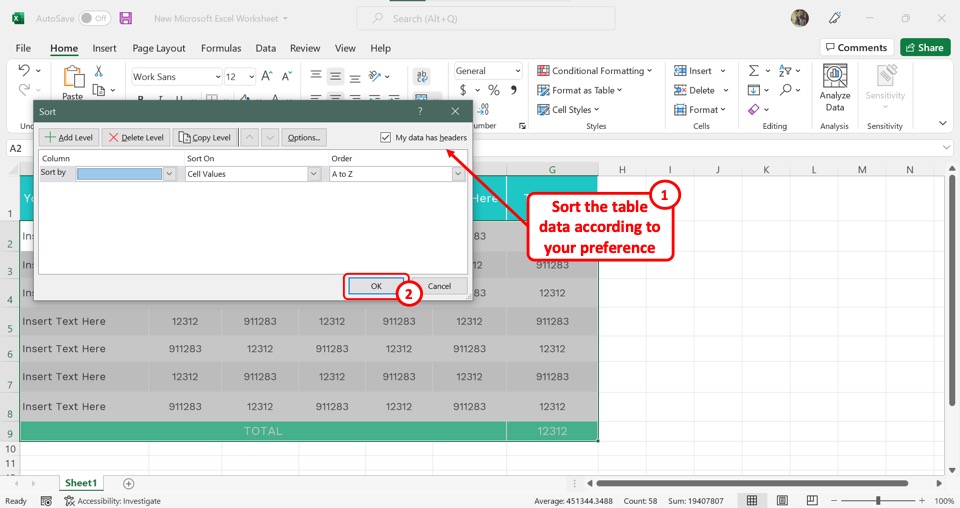
In the “Sort” dialog box, you can now sort the table data according to your preference. Then click on the “OK” button at the bottom of the dialog box.
Step-5: Click on the “Copy” option
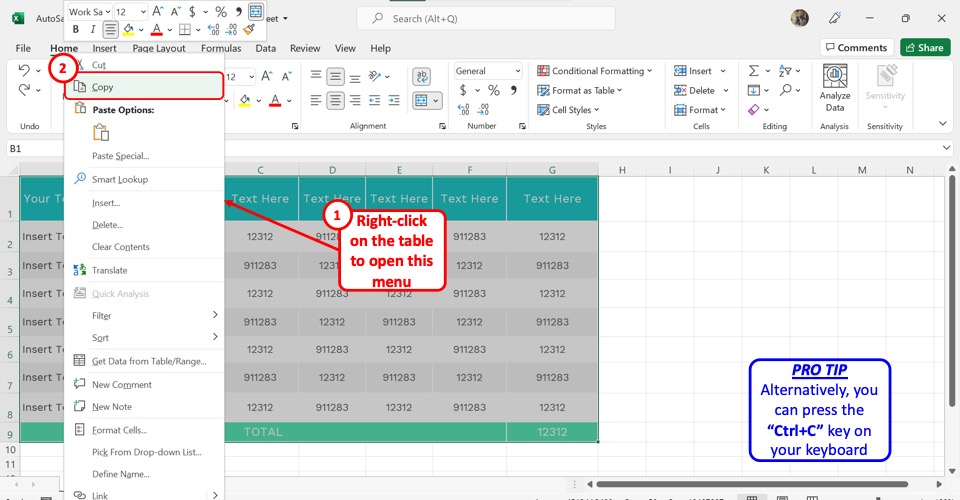
Now you have to copy the table again. To do so, “Right Click” on the table and click on the “Copy” option. You can alternatively press the “Ctrl+C” keys on your keyboard.
Step-6: Click on the “Paste” option
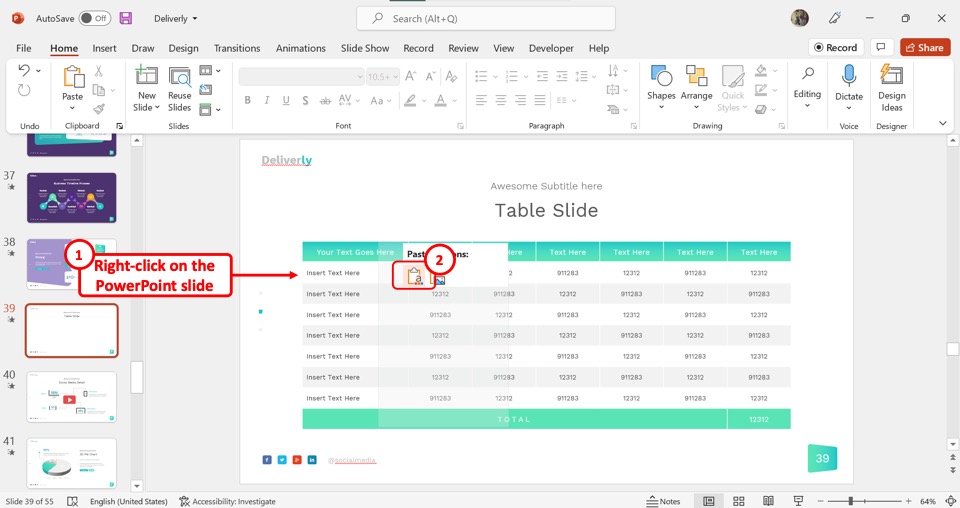
Finally, all you have to do is “Right Click” in the PowerPoint slide and click on the “Paste” option from the right-click menu to paste the table with sorted data.
2.2 Method 2 – Export Table from Excel
In Microsoft PowerPoint, you can also link an Excel worksheet as a table. This allows you to sort the data in the table using the Excel features through PowerPoint.
To export a table from Excel, follow the two steps mentioned below-
Step-1: Click on the “Paste Special” option
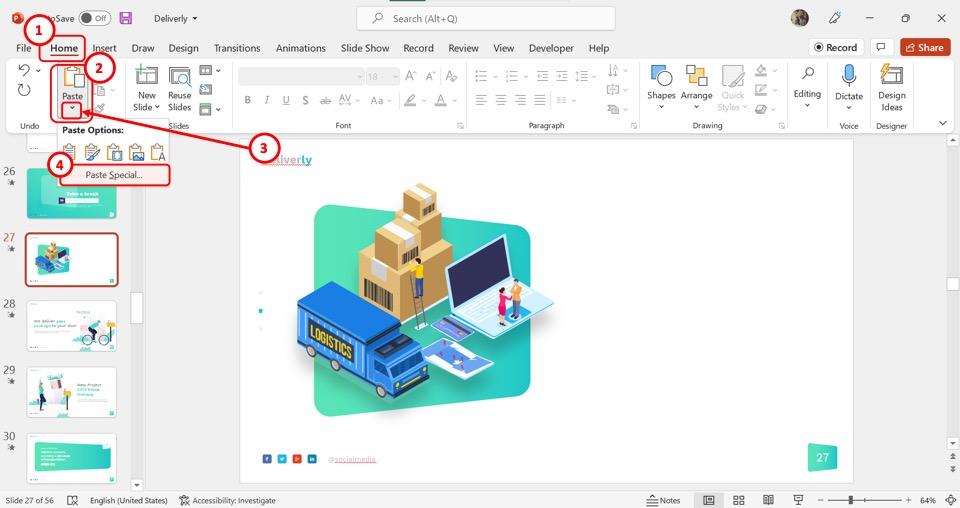
The first step is to copy the Excel table. In PowerPoint, click on the arrow under the “Paste” option in the “Clipboard” group of the “Home” tab. Then click on the “Paste Special” option in the dropdown menu.
Step-2: Click on the “Microsoft Excel Worksheet Object” option
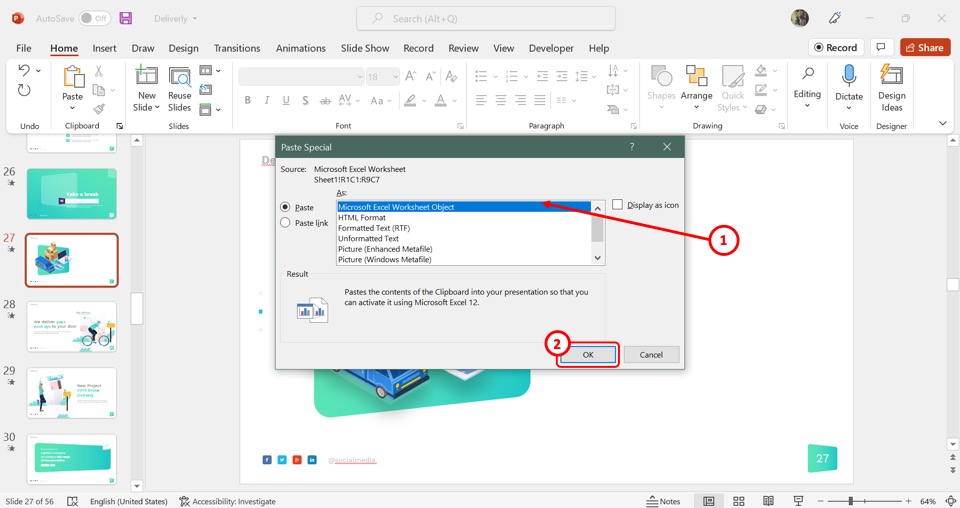
In the “Paste Special” dialog box, click on the “Microsoft Excel Worksheet Object” option. Then all you have to do is click on the “OK” button at the bottom of the dialog box.
2.3 Method 3 – Using Pivot Table with Slicer
You can also add a Pivot Table with slicers in PowerPoint from Excel to sort data. A Pivot Table allows you to sort data inside the table during the presentation according to your audience’s needs. To add the pivot table with slicers, follow these 4 steps.
Step-1: Click on the “Insert” tab
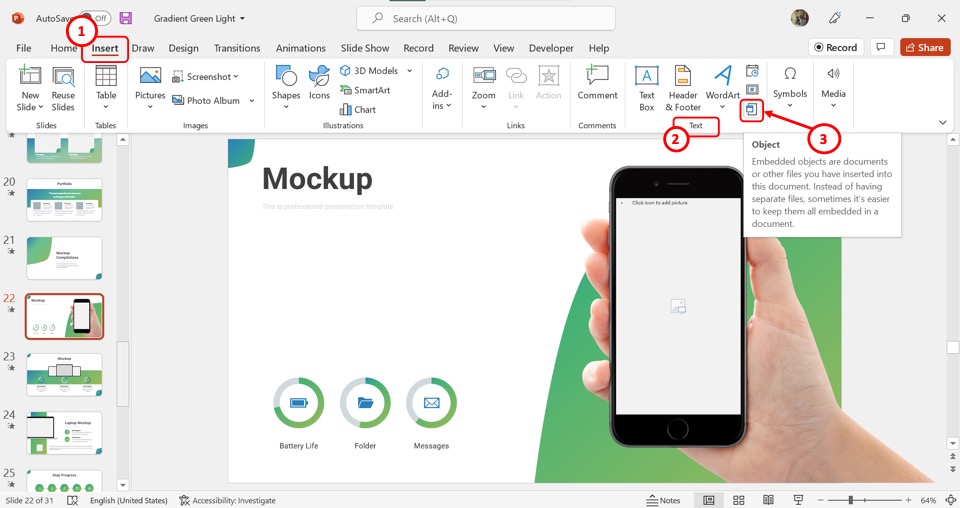
The first step is to click on the “Insert” tab in the menu ribbon located at the top of the screen. Then click on the “Object” icon at the bottom of the “Text” group of the “Insert” menu. This will launch the “Insert Object” dialog box.
Step-2: Click on the “Create from file” option
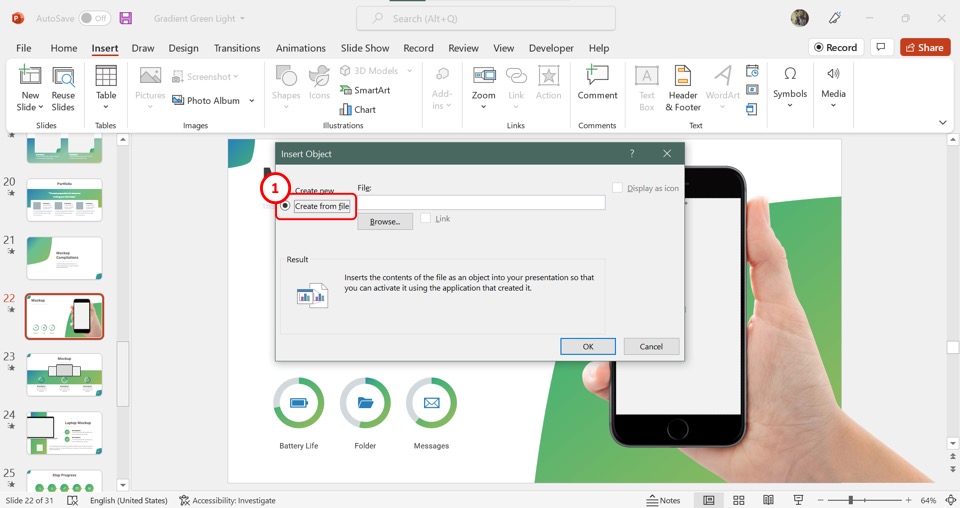
In the left column of the “Insert Object” dialog box, click on the “Create from file” option. This will allow you to insert an existing Excel file containing a Pivot Table with slicers from your device to the PowerPoint slide.
Step-3: Click on the “Browse” option

In the “Insert Object” dialog box, you have to now click on the “Browse” button to open the “Browse” dialog box. In the “Browse” dialog box, select the Excel sheet you want to add to the presentation. Then click on the “Open” button at the bottom of the dialog box.
Step-4: Click on the “OK” button
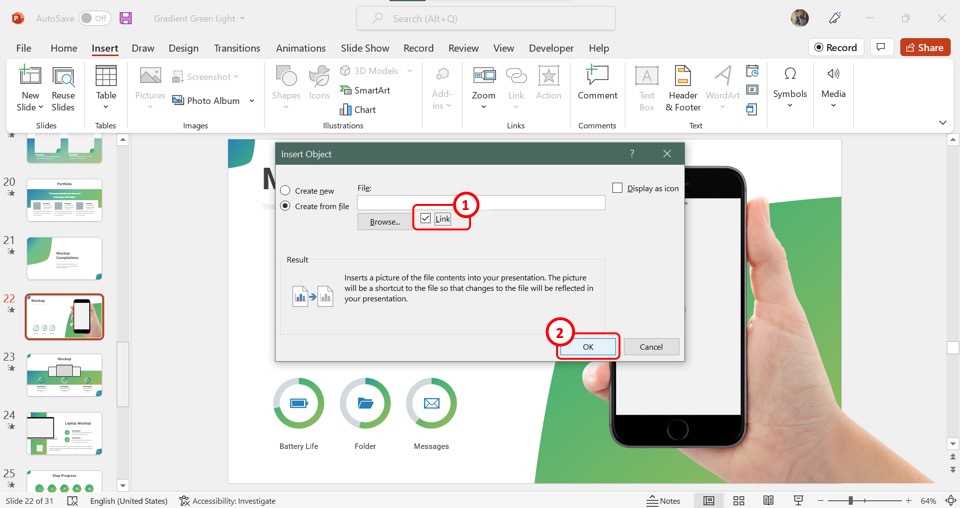
Finally, click on the “Link” option in the “Insert Object” dialog box to add the hyperlink. Then all you have to do is click on the “OK” button at the bottom of the “Insert Object” dialog box to insert the pivot table with slicers. You can now sort the data in the table during the presentation.
3. How to Sort Data in Ascending Order in PowerPoint Table?
Unlike Word, you cannot sort table data in ascending or descending order in PowerPoint. To sort data in ascending order in a table, you can use the “Sort” feature in Word. Follow the 5 steps mentioned below.
Step-1: Cut the table in PowerPoint
The first step is to cut the table from PowerPoint. “Right Click” on the table and select the “Cut” option in the right-click menu. You can alternatively press the “Ctrl+X” keys on your keyboard.
Step-2: Paste the table into Microsoft Word
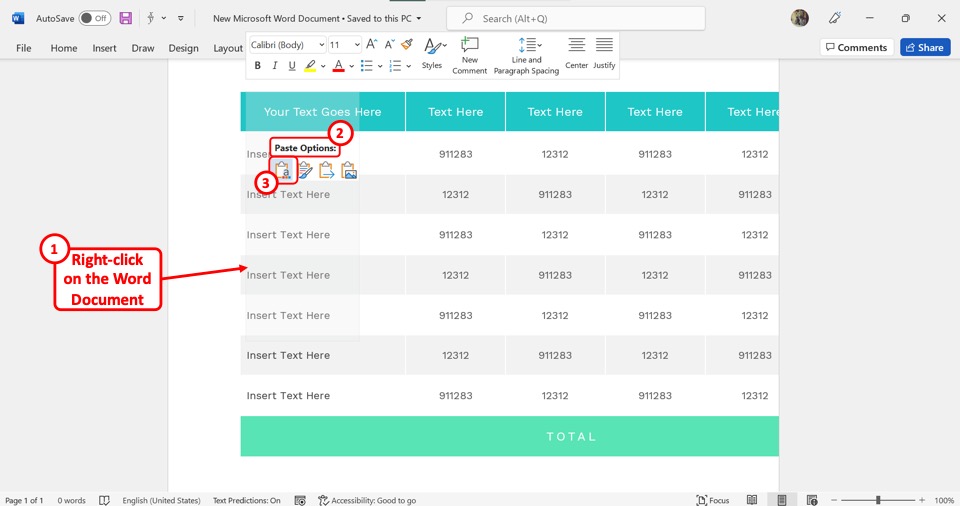
Next, you have to “Right Click” anywhere in the Word document. In the right-click menu, click on the “Use Destination Theme” option under “Paste Options”.
Step-3: Click on the “Layout” tab
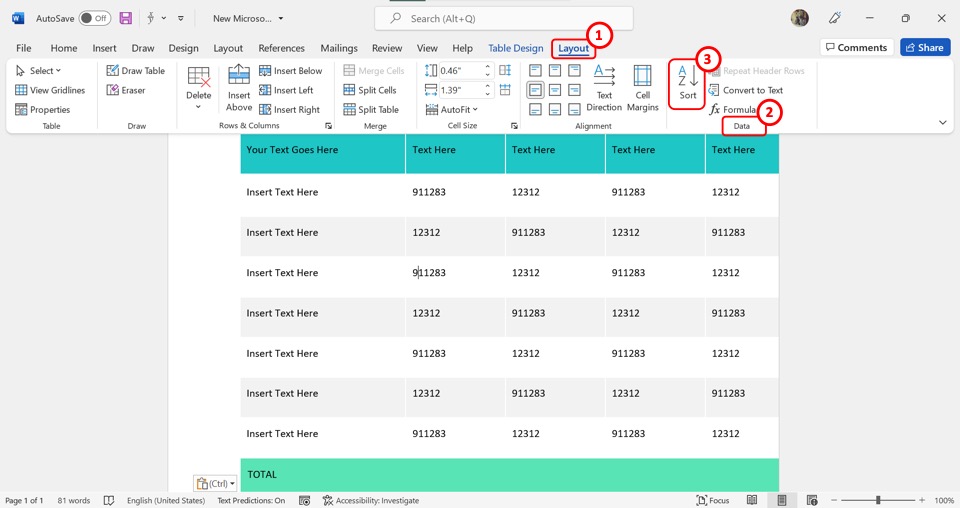
In the menu ribbon located at the top of the screen in Microsoft Word, click on the “Layout” tab. Then click on the “Sort” option in the “Data” group of the “Layout” menu.
Step-4: Click on the “Ascending” option
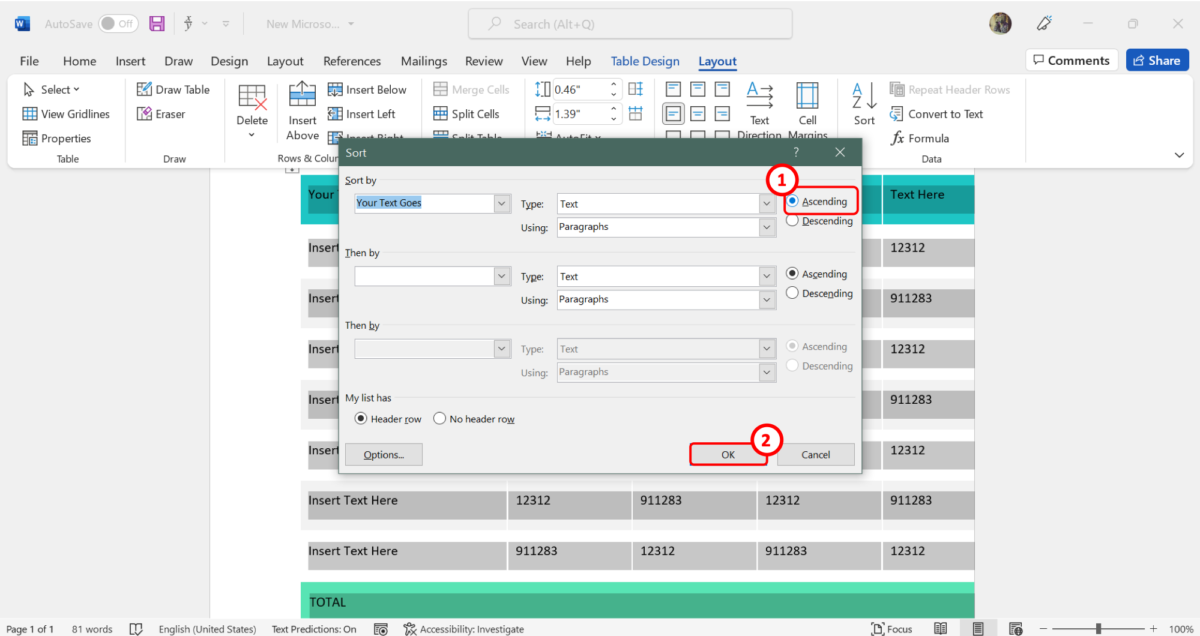
In the “Sort” dialog box, click on the “Ascending” option in the right column. Then click on the “OK” button at the bottom of the dialog box to sort the data in ascending order.
Step-5: Paste the table into PowerPoint
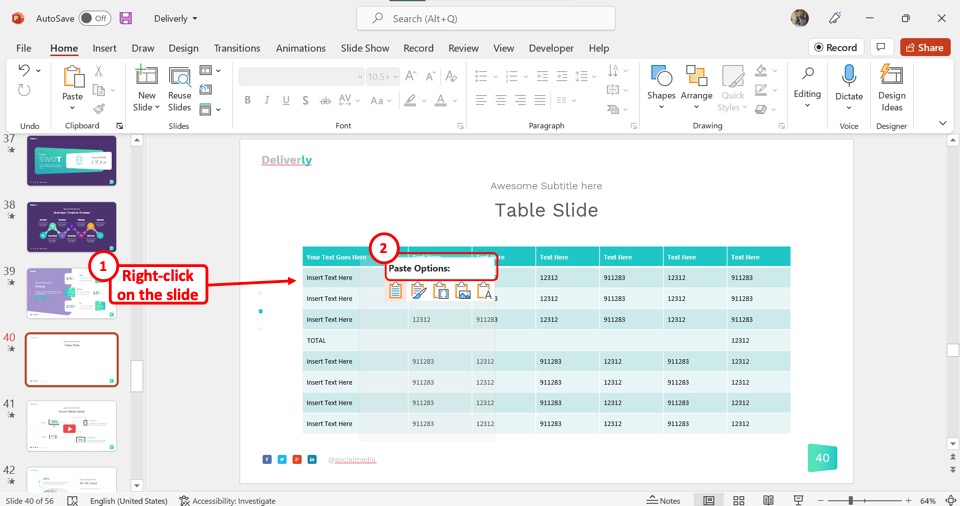
Finally, you have to cut the table from Word and paste it back into the PowerPoint slide. To do so. “Right Click” on the slide and click on the “Paste” option to add the table with data sorted in ascending order.
4. How to Sort Data in Descending Order in PowerPoint Table?
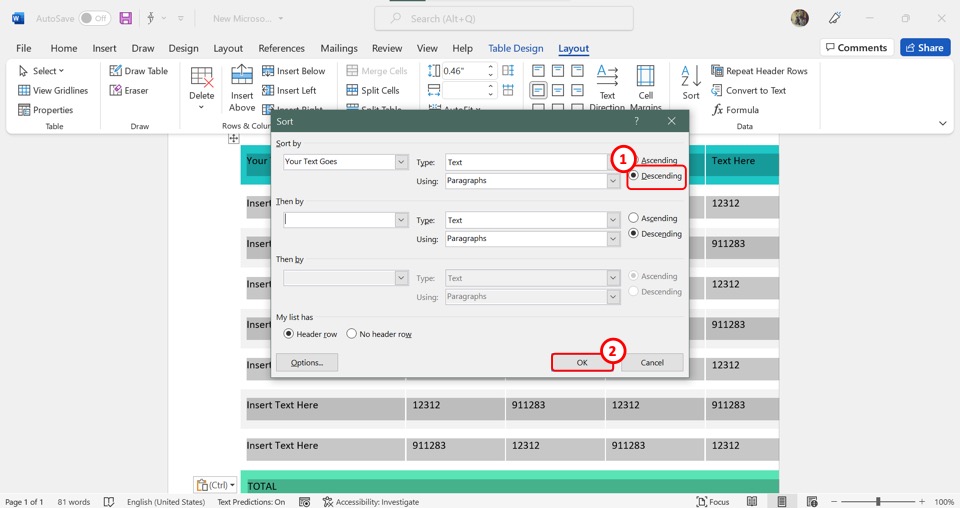
By pasting the PowerPoint table in Word, you can also sort the data in descending order. To do so, follow the steps discussed in the previous section. In the 4th step, click on the “Descending” option in the right column of the “Sort” dialog box to sort the table data in descending order.
More Related Articles
- How to Add Tables in PowerPoint? [Complete Guide!]
- How to Move or Resize a Table in PowerPoint? [An EASY Way!]
- How to Transpose a Table in PowerPoint? [A Simple Solution!]
- Pivot Table in PowerPoint? Here’s How to do It! [With Slicers!]
- How to Format a Table in PowerPoint? [The ULTIMATE Guide!]
Credit to cookie_studio (on Freepik) for the featured image of this article (further edited).