
When you are working on a presentation that has tens and even hundreds of slides, it can soon become very cumbersome to put them together and make sure that they are in the right order! Luckily, the Slide Sorter View (known as the Grid View Google Slides) can help us with exactly this problem.
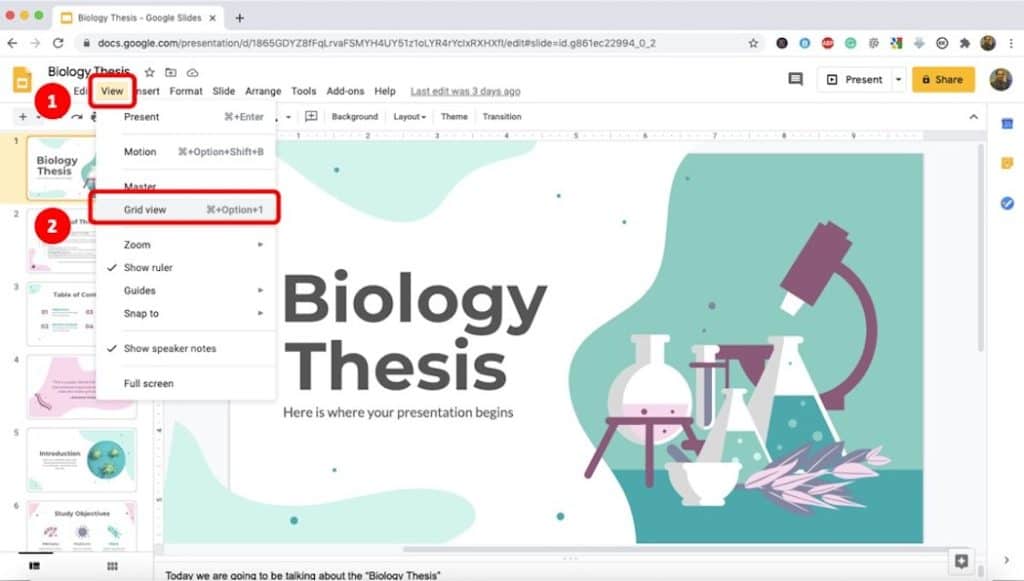
Slide sorter view, known as the Grid View in Google Slides, lets you see, edit, sort, and even remove slides on the fly. To view the slides in Grid View in Google Slides, click on “View”, and then click on “Grid View” from the dropdown. You can also press Ctrl+Alt+1 on Windows and Cmd+Option+1 on Mac.
Getting to a point where you not only know what the slide sorter is, but how to effectively use it will mean you spend a lot less time scratching your head and more time perfecting your presentation.
This means you first need to know what the slide sorter view is, what the difference is between slide view and slide sorter view, how to navigate to it, how to arrange slides, and how many layouts you will be able to find.
Here’s everything you need to know and learn about the slide sorter view or the grid view in Google Sheets.
What does Slide Sorter View Mean?
Google Slides can be very confusing for first-time users even if they have used other presentation design softwares. In such a scenario arranging and restructuring the slides quickly can add to the confusion. However, the Slide Sorter is one of the easiest ways to restructure your slides in Google Slides.
The Slide Sorter View or the Grid View is basically a feature available in Google Slides that allows you to see multiple slides of your presentation in a quick glance.
It allows you to check the flow of your presentation and re-arrange the slides if something doesn’t quite feel right.
This view lets you easily see where everything in your presentation at a high level, including any graphics or text you have placed on them. Using the Slide Sorter will enable you to easily arrange and rearrange your presentation.
Slide sorter view is the best place to sort and view your slides.
What is the Difference between Slide View and Slide Sorter View?
Slide view, also known as the filmstrip view, is the default way in which you will find Google Slides is arranged, letting you see the slides on the left side of your screen. This view requires you to scroll up or down to navigate through your slides.
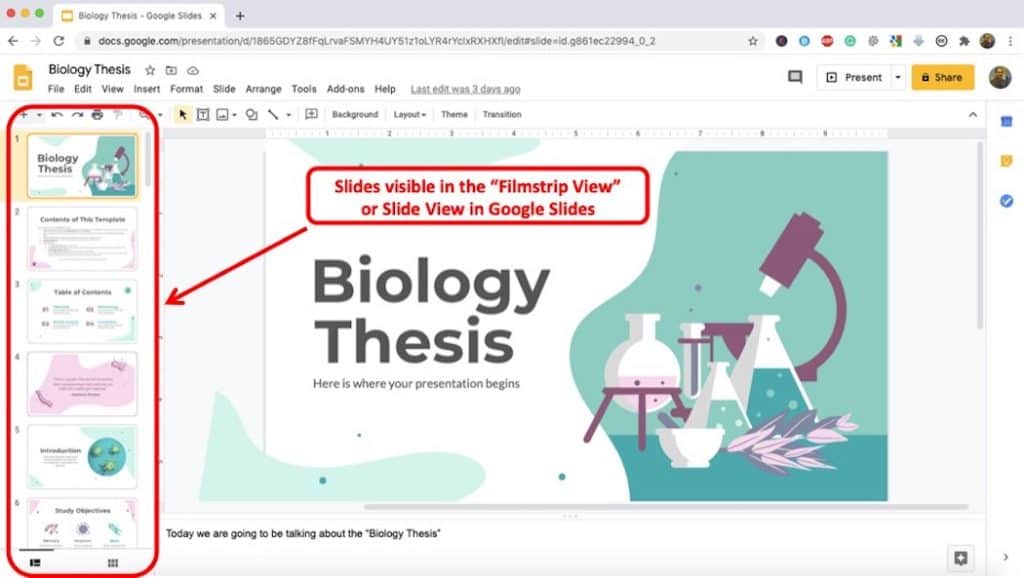
The slides in the slide view or the filmstrip view will be smaller and show less information if you are working on smaller screens.
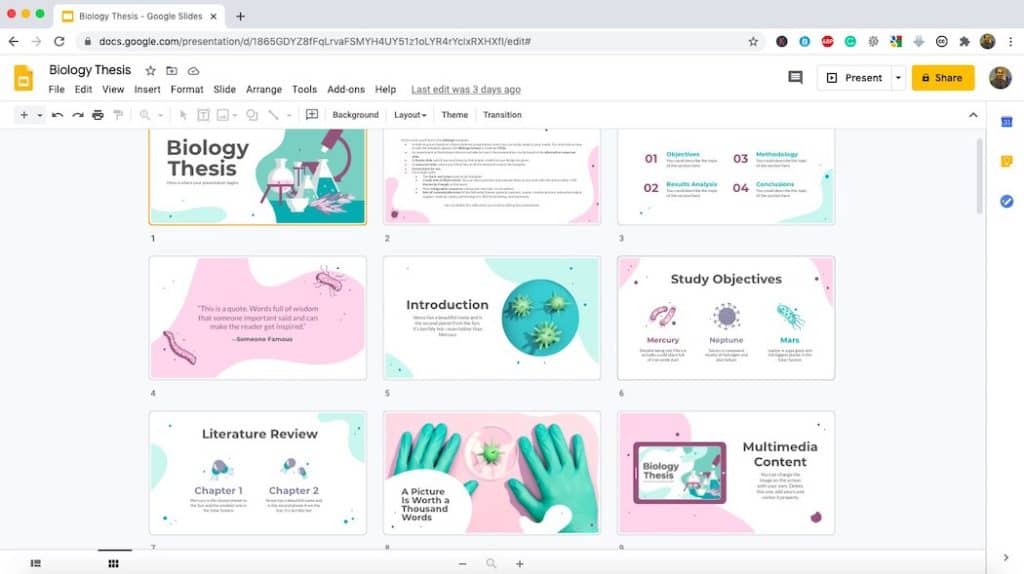
While the Slide Sorter View or the Grid View on Google Slides lets you easily see all slides in your presentation laid out in a grid pattern. This allows you to see more slides in one go that you can in a filmstrip view.
Furthermore, the grid view also shows the slides slightly larger than the filmstrip view. This is the easiest way to see every single slide that you have in your presentation, as well as letting you see in what layout they have been arranged.
Creating a quick and easy way for you to manage your slides, either in a large batch or just one by one on the side. Both views are fantastic for their own purposes, letting you make edits and changes where needed.
Where is the Slider Sorter View Button?
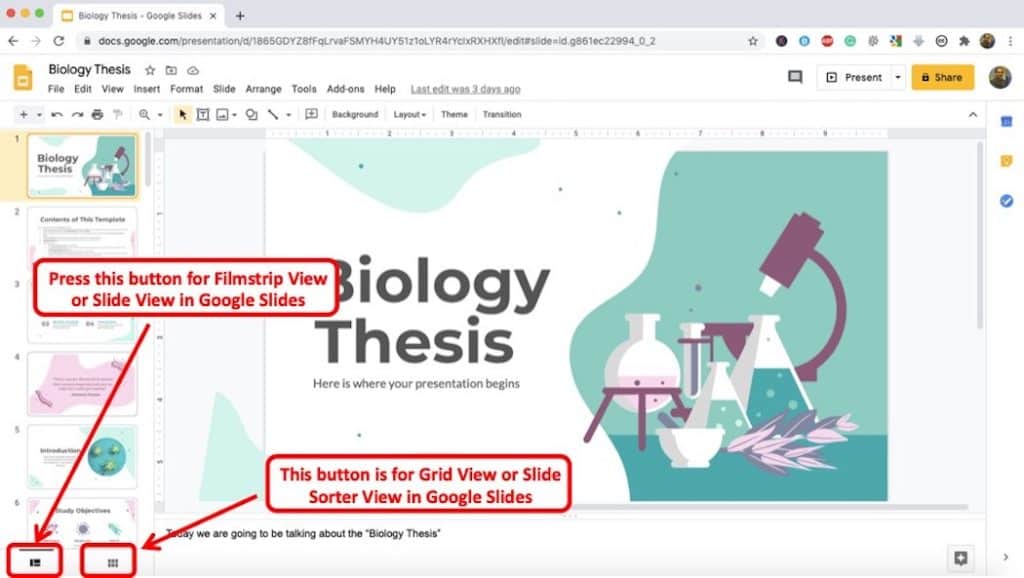
On Google Slides changing your view to something similar to Slide Sorter View is simply clicking on the grid pattern view at the bottom left corner of the screen. It is here where you can choose between filmstrip view or grid view for your Google Slide presentation.
You can also toggle between the grid view and filmstrip view by using the “View” menu.
Simply click on the “View” menu. You’ll see a dropdown that opens up. Click on “Grid View” from the dropdown. You’ll now be able to see the slides in Grid view.
You can now either use the view menu again or click on the button for the filmstrip view to go back to the default view of Google Slides.
Another way to quickly toggle between the grid view and filmstrip view in Google Slides is by using the keyboard shortcut. As mentioned earlier in the article, the keyboard shortcut for entering the Grid View in Google slides is Ctrl+Alt+1 on Windows and Cmd+Option+1 on Mac.
How to Arrange Slides from the Slider Sorter View?
One of the best and most powerful things you can do with the slide sorter view within google slides is the arranging and deleting of slides.
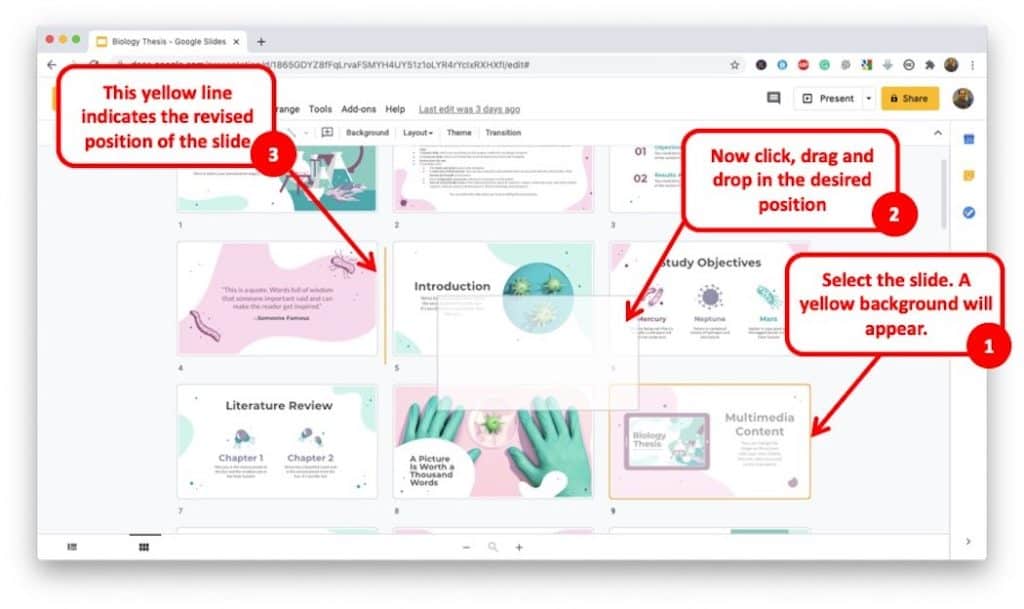
When you have changed the view of your Google Slides to the grid view you can simply click and drag to move a slide around.
Rearranging the slides can also be done by selecting the slide and then pressing right-click on a slide, going to the option to say move forward or backwards.
The slider sorter view also lets you easily remove or delete slides, simply click them and press the delete button on your keyboard.
You can right-click on a slide you want to remove too, selecting the remove slide option from there.
The third option would be to navigate using the “Slide Menu“, and from the dropdown clicking “Move“. Then, you can choose to “Move slide up” or “Move slide down“.
Every single action that you can take using either right-click or desktop shortcuts can be done using the top ribbon you find on Google Slides. This lets you easily understand and execute the function you are looking for.
How to Increase the Slides visible in the Grid View?
Another thing that you can do using the grid view is to increase or decrease the number of slides that are visible in the grid view.
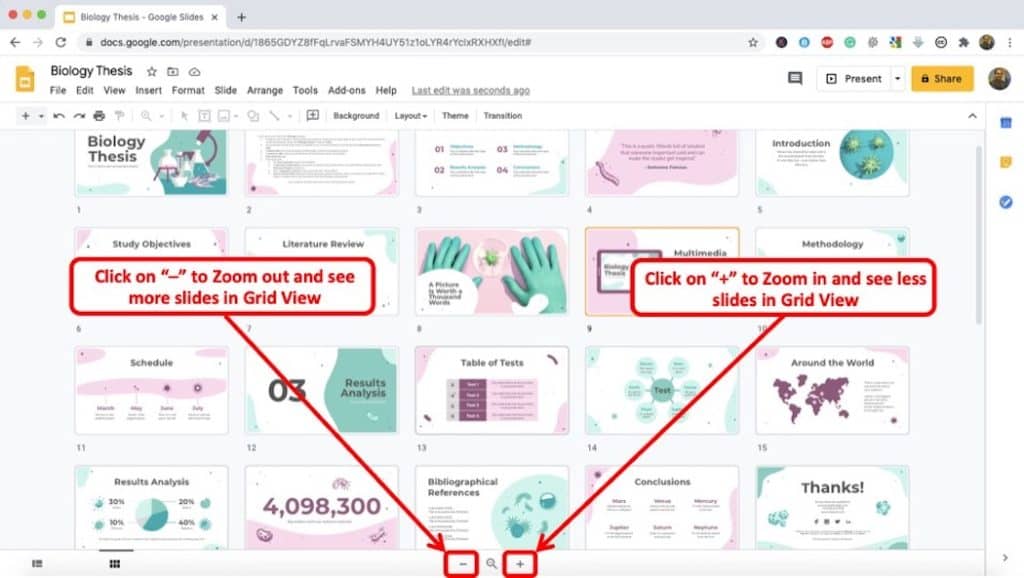
To do so, make sure that you are first present in the Grid View. Then, look for “-” and “+” symbols at the bottom of the Google Slides window. You will see it next to a magnifying glass (as indicated in the image above).
Click on “-” to zoom out and increase the number of slides visible in the grid view. You can also click on “+” if you want to zoom in on the grid view in order to see lesser number of slides.
Zooming in and zooming out provides you with additional flexibility or viewing more slides (or fewer slides) at a glance.
Final Thoughts
Becoming a master presenter and covering all your bases is a simple task of getting to know what you are doing and how to do it all. This can be as simple as rearranging one slide to be before another, or maybe even changing the layout of every single slide to something more friendly and easy to understand.
Be the best presenter in your class or your company using the strongest tools at your disposal, even if it’s the free option!
If you found what you were looking for, make sure that you bookmark this page and add this blog to your favourites. Please do check out some of other more helpful content that is available on the site! Thanks!