![How to Save PowerPoint as an Image? [Complete Tutorial!]](https://artofpresentations.com/wp-content/uploads/2021/09/Featured-Image-How-to-Save-PowerPoint-as-an-Image-optimized.jpg)
Microsoft PowerPoint is a powerful application. It can be used not just to create presentations, but also to create infographics, and to edit images! The ability of PowerPoint to save a presentation as an image is what makes PowerPoint powerful. So, how to save PowerPoint as an image?
To save a PowerPoint as an image, first, click on the “File” ribbon. Next, from the backend view, click on the “Export” option tab. Click on the “Save As” option. From the window that opens up, click on the “Save As Type” setting and choose an image format (PNG, JPEG, etc). Finally, click “Save”.
In this article, I’ll take you through the complete process of saving PowerPoint as an Image. I’ll share the process in a step-by-step manner with images so that you can understand the process better! So, let’s get started!
1. Can You Save a PowerPoint Presentation as Image?
You can save a PowerPoint presentation as an image. PowerPoint allows you to save the presentation in four different types of image format which include JPEG, PNG, TIFF, and GIF format. Additionally, you can also save the presentation in a PDF format.
Let’s understand the different types of image formats below –
1. JPEG format: The Joint Photographic Experts Group format provides you with the option to save images with over 16 million colors. This format is best for saving photographs or graphics with complex color combinations especially when space or file size is a constraint.
2. PNG format: The Portable Network Graphics format provides users the option to save their PowerPoint presentations as images that can be used for presenting images and graphics on webpages. PNG image format usually provides a high-quality image output.
3. TIFF format: The Tag Image File Format provides users to best store their bit-mapped images. Unlike PNG files, Tiff files can be of any resolution and support black and white images and also colored images.
4. Gif format: Like the PNG format, Graphics Interchange Format is great for saving images that can be used on web pages. However, the Gif format supports animations, so the best use for this format is to present line drawings, black and white images and also and very low-resolution texts.
2. How to Save PowerPoint Presentation as an Image?
To save your PowerPoint presentation as an image, you have to go to the “File” tab and export the PowerPoint presentation as an image. The whole process for both window and mac are described in the section below.
2a. On Windows
Follow the simple steps given below to save your PowerPoint presentation as an image on your windows computer.
Step-1: Go to the “File” tab
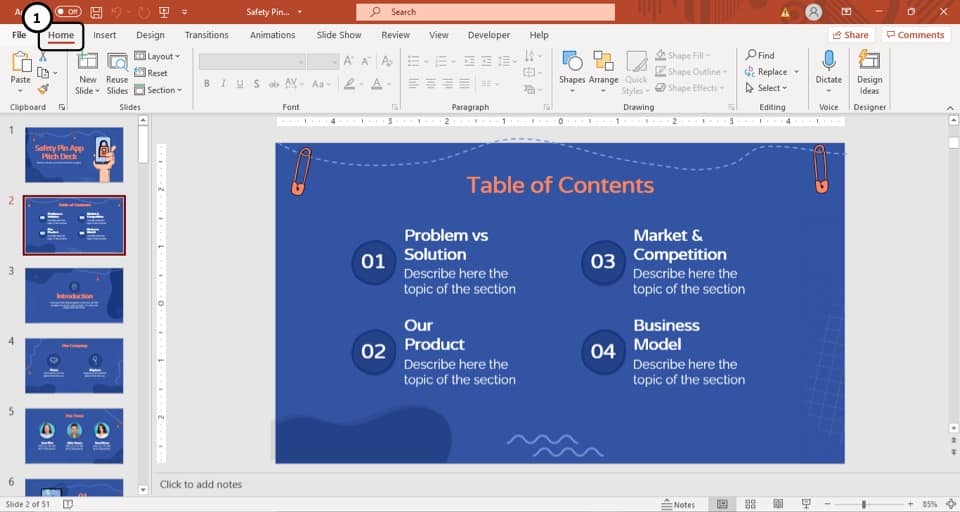
The first step of the process is to click on the “File” tab which is located in the ribbon of your PowerPoint presentation. The “File” tab is the first tab in the ribbon section.
Step-2: Select the “Export” option
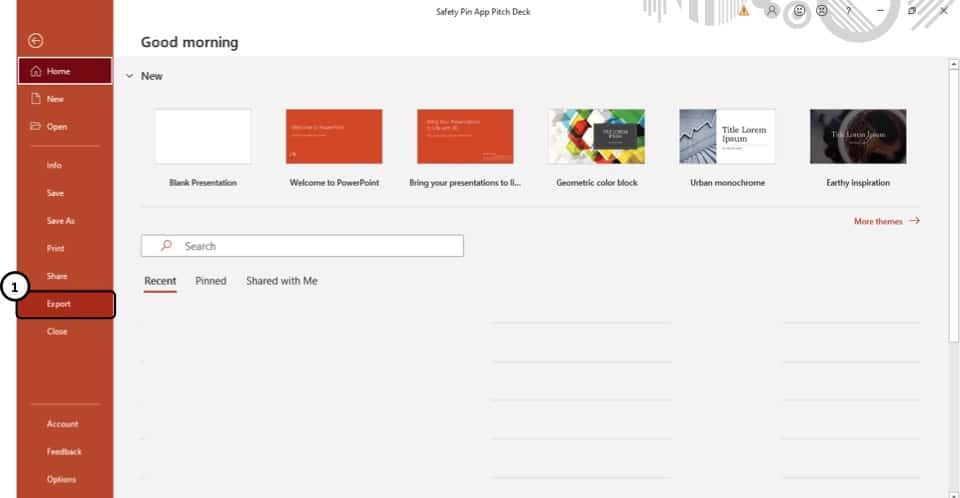
After you have entered the “File” tab, select the “Export” option which is located in the sidebar to the left of your screen. It is the 9th option, right between the “Share” option and the “Close” option.
Step-3: Select the “Save as” option
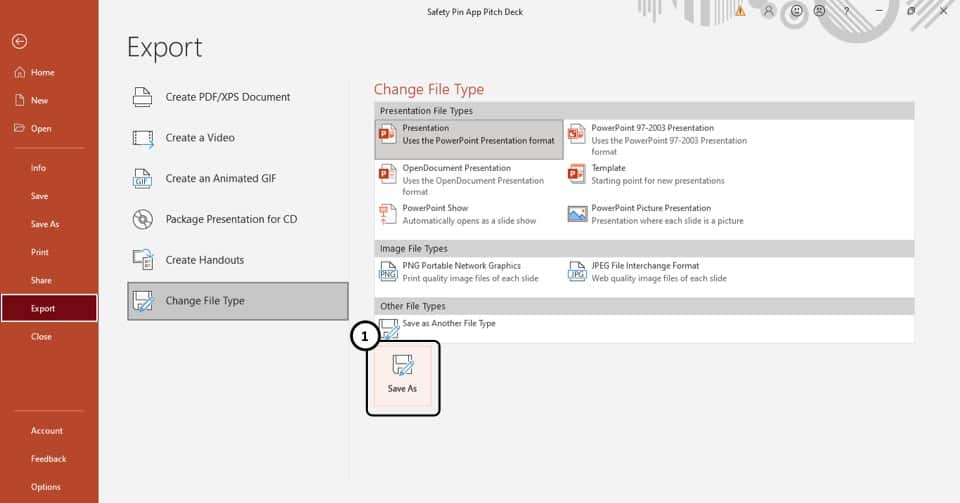
After you have entered the “Export” option, you will be taken to a new window in the “File” tab.
From the new window, select the “Save as” option located in the “Change File Type” option. This will open a pop-up window.
Step-4: Select your preferred image format
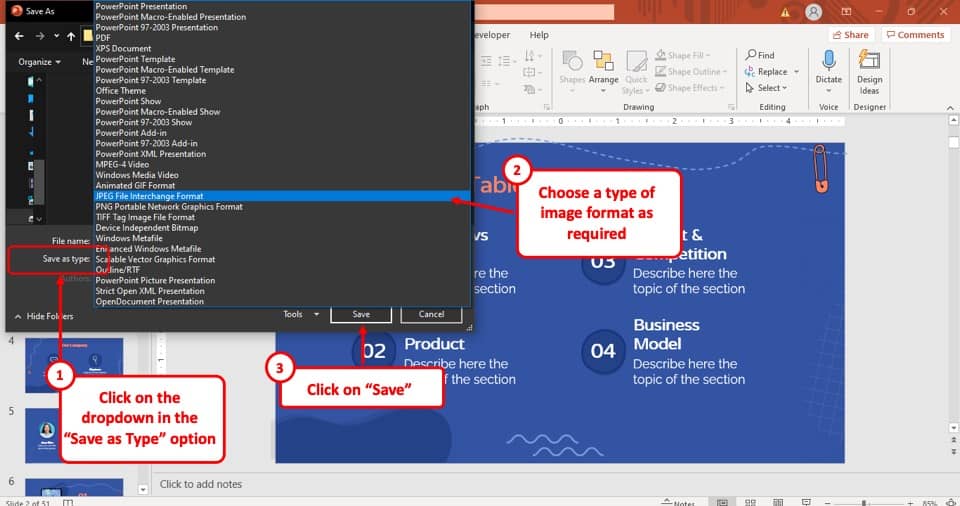
Once you open the pop-up window, go to the preferred location where you want to save the PowerPoint presentation as an image and select your preferred picture format from the drop-down menu of the “Save as type” option.
After that, hit the “Save” button located at the bottom right corner of the pop-up window.
Step-5: Select the “All Slides” option
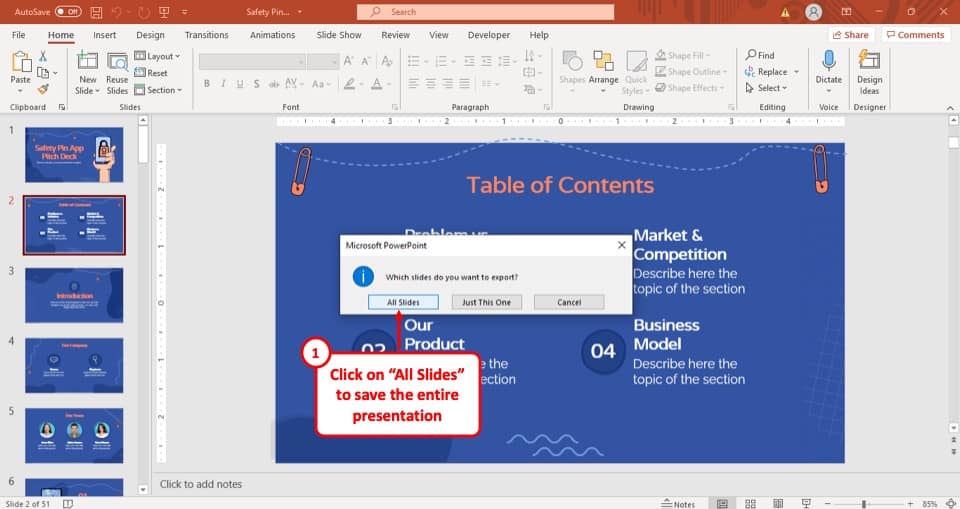
After you click on the “Save” button, a new pop-up window will appear on your screen. Select the “All slides” option and all the slides will be saved in a single folder named after the title of the presentation, on your computer.
After this, you will be asked to select a destination where you want to save the files. Simply choose an appropriate folder to save the presentation as an image.
2b. On Mac
The process of saving your PowerPoint presentation as an image on a Mac computer is the same as saving a PowerPoint presentation as an image on a Windows computer.
The only difference is, instead of selecting the images from the drop-down menu of the “Save as type” option, you have to select the image format from the “File Format” option.
Every other step of the process is identical to that on a Windows computer.
3. How to Save a Single PowerPoint Slide as a Picture?
Here’s how to save a single slide from PowerPoint as a Picture –
- Select the Slide
- Click on the “Home” tab
- Click on “Export” tab from the backend view
- Next, click on the “Save As” option
- Choose the image format such as .jpeg, .png, etc
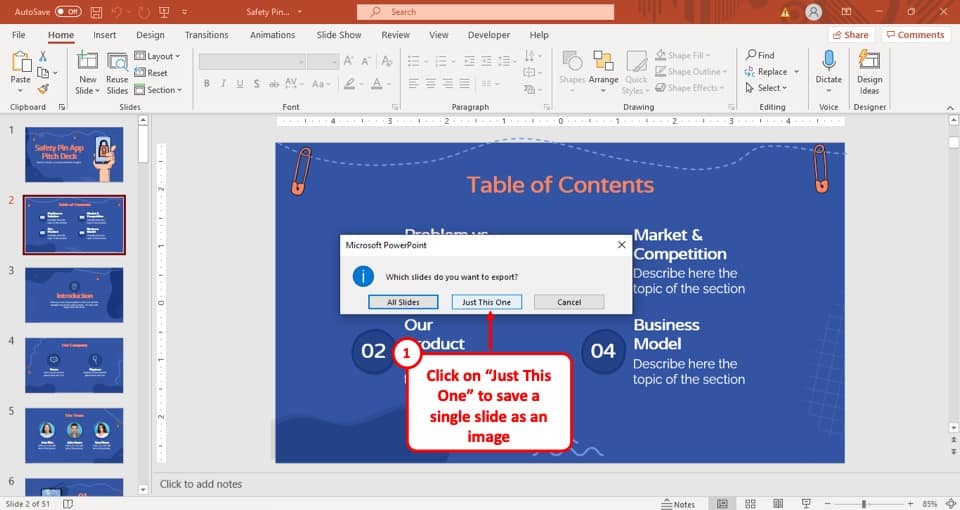
- Finally, on the next prompt, click on “just this slide” to save a single slide as image
The process of saving a single slide in your PowerPoint presentation is very similar to that of saving all the slides in your PowerPoint presentation as an image.
The only difference is in the last step. So, to save a single slide in your PowerPoint presentation as an image, follow the steps described earlier in the article, but in the last step, instead of selecting the “All slides” option, select the “Just this one” option.
This will save that particular PowerPoint slide in your preferred image format.
4. How to Save a High-Quality Image from PowerPoint?
If you plan to use the image for printing or for display using a large screen, it is perhaps better to save a high-quality image of the slides from PowerPoint.
Here’s what you need to do –
Step-1: Open the “Save As” options
To save a high-quality image from your PowerPoint presentation, go to the “File” tab and select the “Save as” option located in the “Export” tool, as described earlier in this article, and then follow the steps described below.
Step-2: Click on the “Tools” option
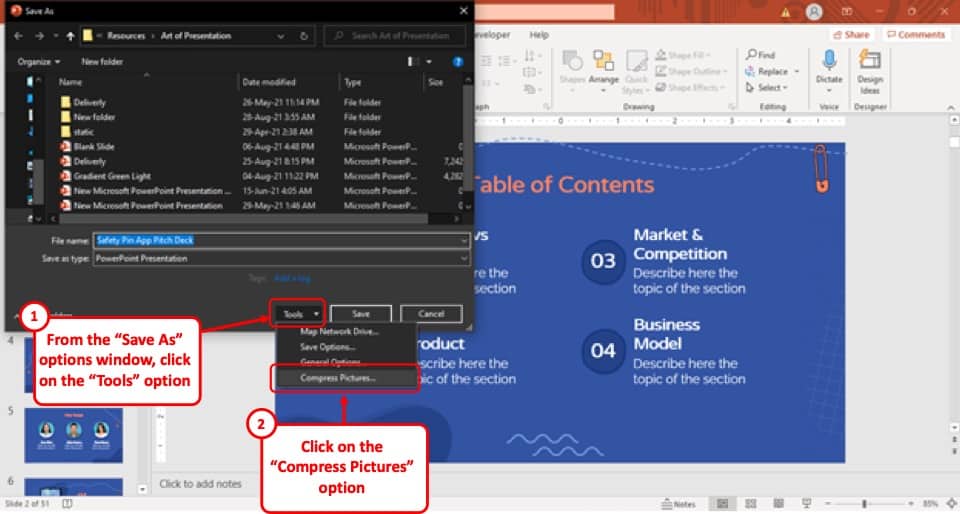
After you select the “Save as” option, select the “Tools” option located at the bottom right corner of the pop-up window on your screen. It is the option immediately to the left of the “Save” button.
Step-3: Select the “Compress Pictures” option
In this step, all you have to do is to click on the “Tools” option and select the “Compress Pictures” option from the drop-down menu. It is the last option in the drop-down menu.
Step-4: Select the “HD (330 ppi)” option
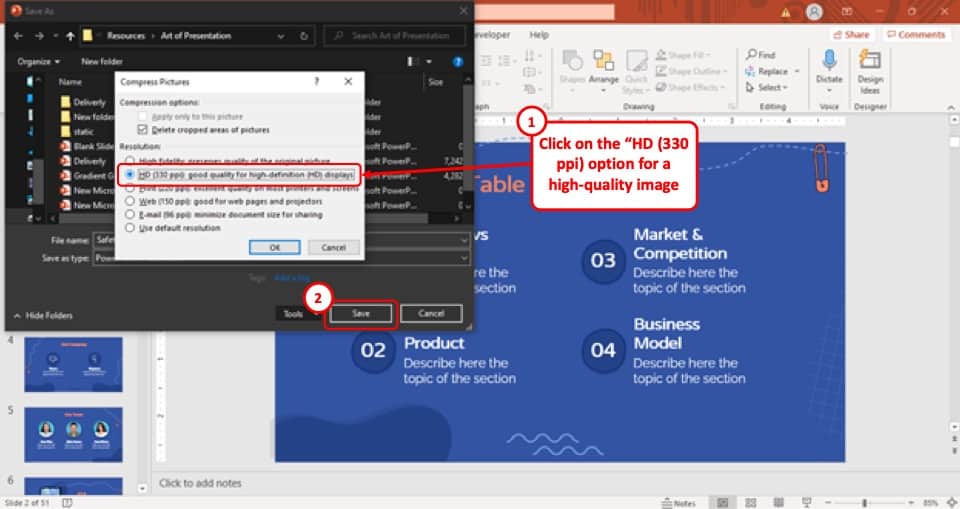
After you select the “Tools” option, a pop-up menu will appear on your screen. Simply select the “HD (330 ppi)” option, which is the second option in the pop-up window, and then hit the “Ok” button.
After you hit the “Ok” button the pop-up window will close and then select the “Save” button at the bottom right of the “Save as” pop-up window.
This way you can save a high-quality image from your PowerPoint presentation.
5. How to Save Objects as Images in PowerPoint?
To save an object as an image in PowerPoint, follow the simple steps described below.
Step-1: Select the “Save as Picture” option
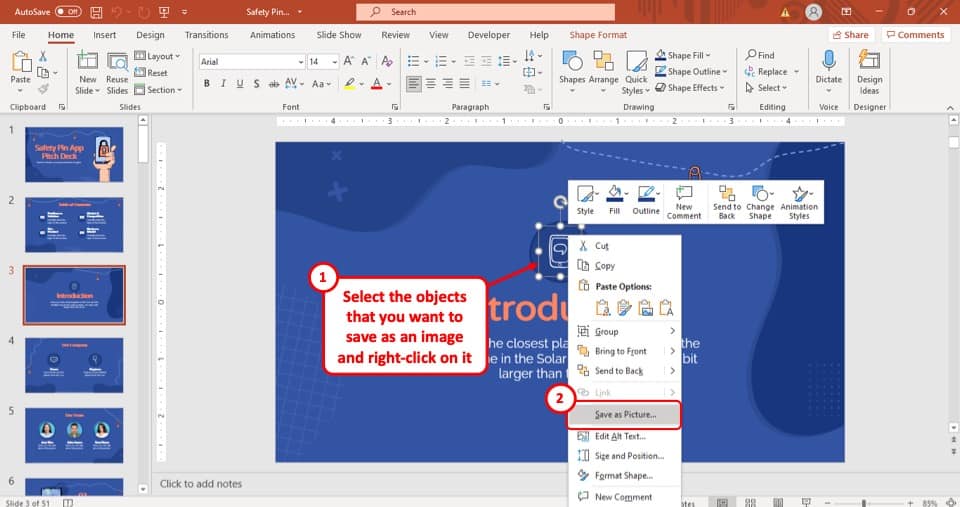
The first step of the process is to “Right-click” on the object and then from the drop-down menu, select the “Save as Picture” option.
Step-2: Save the object as an image
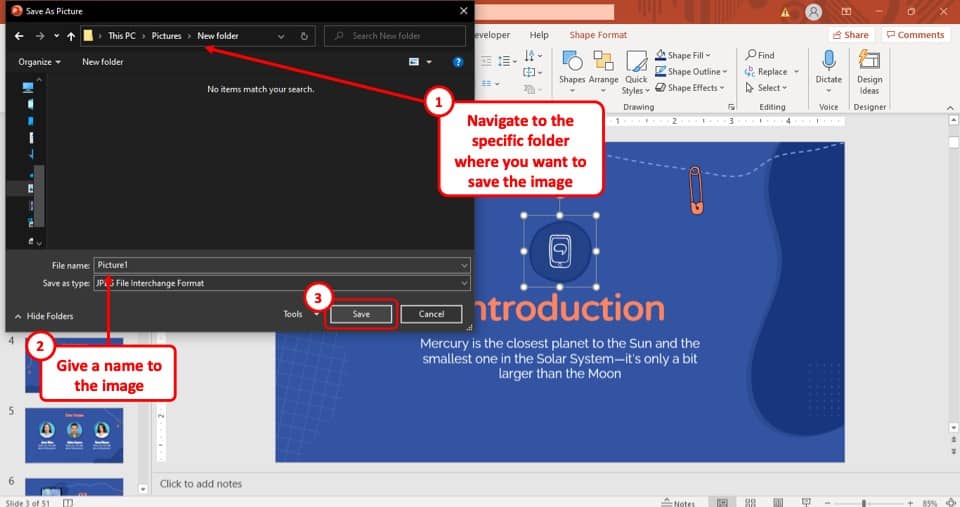
After you select the “Save as picture” option, a pop-up window will appear on your screen. Simply select the location where you want to save the object as an image and then hit the “Save” button located at the bottom right corner of the pop-up window.
Pro Tip: To save a high-quality image of the object, go with the PNG file format!
Likewise, you can also save a single slide as an image. For that, just make sure that you select all the elements on the slide, then right-click on it, and save it as a picture (as described above).
6. PowerPoint Save As Picture Not Working
Sometimes, saving objects as a picture may not work or the option may simply fail to appear in the dropdown menu.
A quick way to solve this problem could be to copy the objects and use the “paste special as image” option on the same slide. You can use the keyboard shortcut Ctrl+Alt+V for paste special option. Then, choose the “Image” option to paste special the object as an image.
Next, select the image on the slide and right-click on it. From the dropdown, click on the “Save as Picture” option as shown in the previous section.
If even this doesn’t work, you can use the export option mentioned earlier in the article.
Credit to drobotdean (on Freepik) for the featured image of this article (further edited).