![Ribbon in PowerPoint [Everything You Need to Know!]](https://artofpresentations.com/wp-content/uploads/2022/02/Featured-Image-Ribbon-in-PowerPoint.webp)
If you use Microsoft PowerPoint even occasionally, one of the most common areas of the application that you will need to access is the Ribbon in PowerPoint! You may have heard the term “Ribbon” in PowerPoint, but what exactly does this mean?
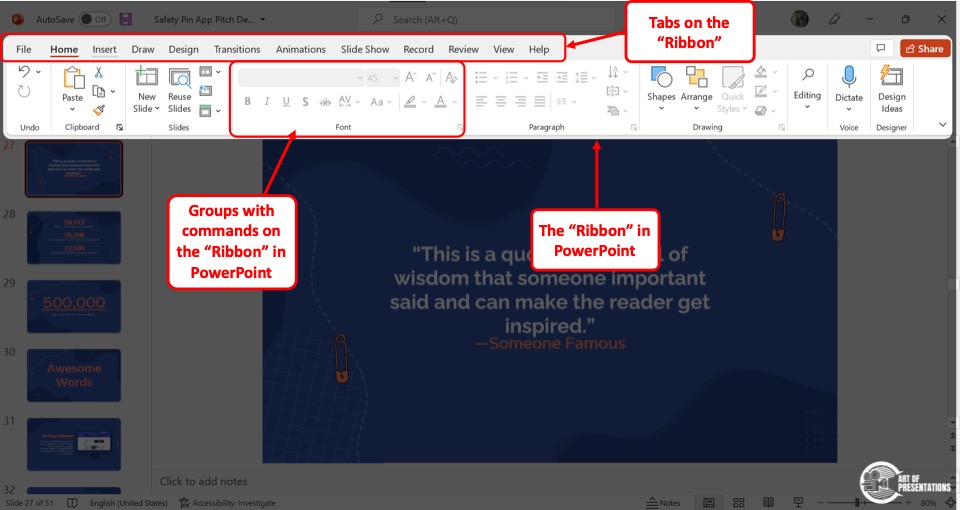
The “Ribbon” in PowerPoint is a long strip at the top of the application screen that provides access to all the features and commands in PowerPoint. A ribbon contains elements such as tabs, groups, commands, more buttons, dropdowns, etc. that make it easy to find a command and complete a task.
It is easy to get confused between these elements on the ribbon. So, in this article, we shall understand the ribbon in PowerPoint in further detail. Plus, we shall also take a look at all the various elements that comprise a ribbon.
So, without further adieu, let’s get started!
1. What is a Ribbon in PowerPoint?
In Microsoft PowerPoint, the ribbon is basically is a set of tools that are arranged within groups in separate tabs.
Each tab contains several commands that are grouped according to their functions. There are various contents in the ribbon that expands when you click on the tab. This makes it quick and easy to remember and locate the command when needed.
The ribbon in PowerPoint also consists of other elements (which we shall discuss in detail in the next section).
For ease of use, PowerPoint also allows you to customize the ribbon.
2. Contents of a Ribbon
The Ribbon in Microsoft PowerPoint comprises various sets of commands. Each of these sets has a separate function and is arranged in a way that helps you to easily find the commands that you need.
Tabs
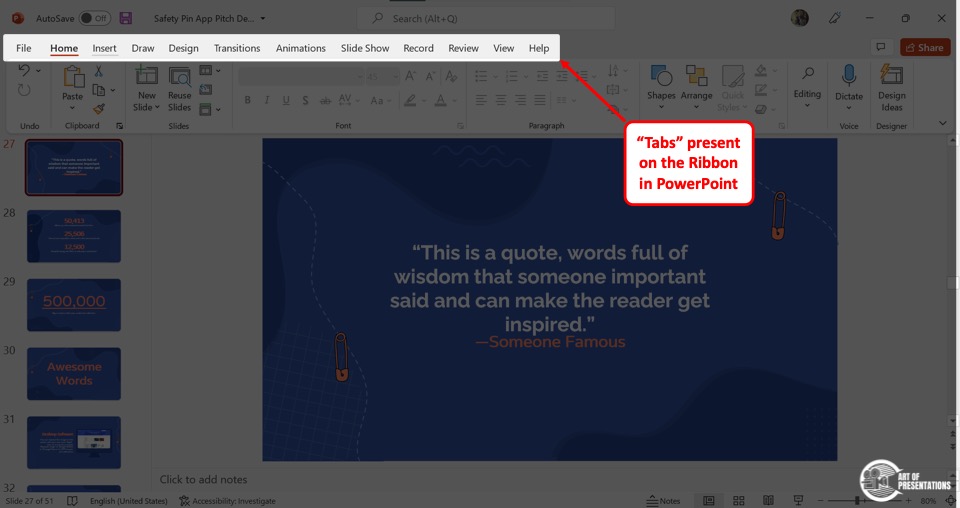
The “Tabs” are a list of labels located at the top of the ribbon. Each label is called a “Tab” in PowerPoint and contains sets of tools to create and edit slides.
The tabs are arranged according to their functionality.
Contextual Tabs
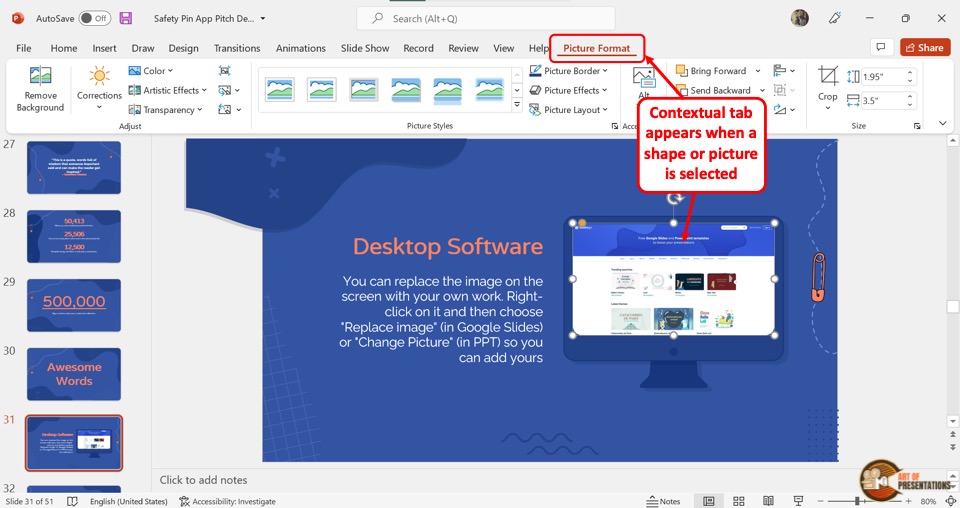
The “Contextual Tab” is a special kind of tab within the ribbon. They only appear when a specific element is selected in a slide and contains commands to edit the selected element.
The “Shape Format” tab and the “Picture Format” tab are examples of contextual tabs.
Gallery

The “Gallery” in a ribbon is a collection of styles or properties for elements like themes, shapes, pictures, etc. The galleries usually contain a dropdown pane of preview thumbnails.
Group
In the ribbon area, each section of commands is considered a “Group”. The groups under each tab vary. Each group contains a set of related commands for ease of use.
Commands

The “Commands” in the ribbon are the clickable options. Each command will carry out a function related to creating and editing the slides.
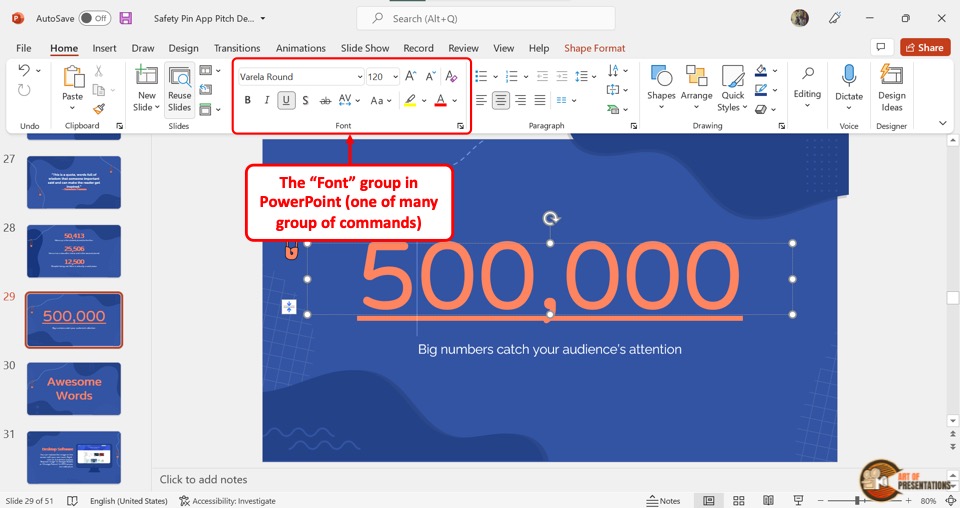
So for instance, the “Font” group contains several individual commands such as bold, italics, choosing font type, color of the font and much more!
More Button
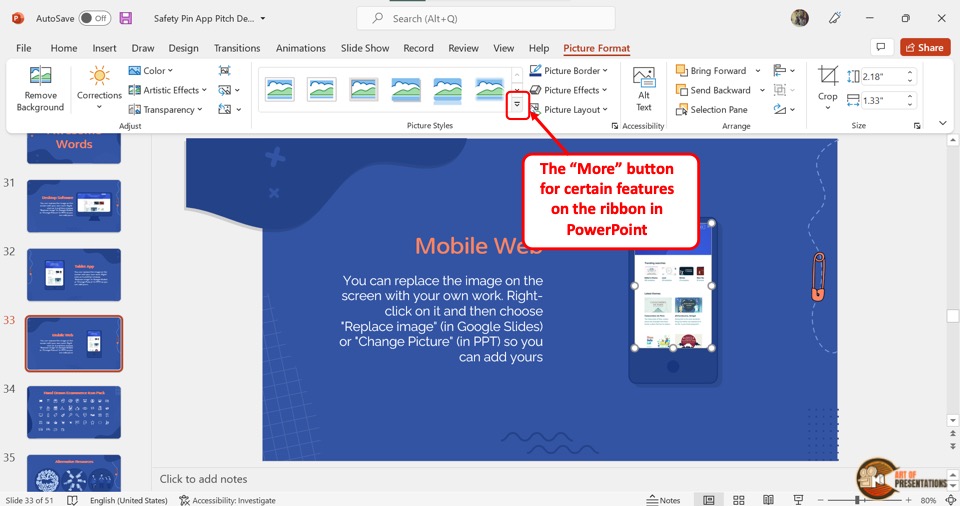
The “More” option in a ribbon is usually available in the galleries. You can click on the downward arrow with a line to access more items in a gallery.
The more button should not be confused with the “down arrow” as the two are slightly different in function.
Down Arrow

The “Down Arrow” is available beside various commands in a ribbon. Clicking on the arrow will open a dropdown menu containing more specific commands.
Dialog Launcher
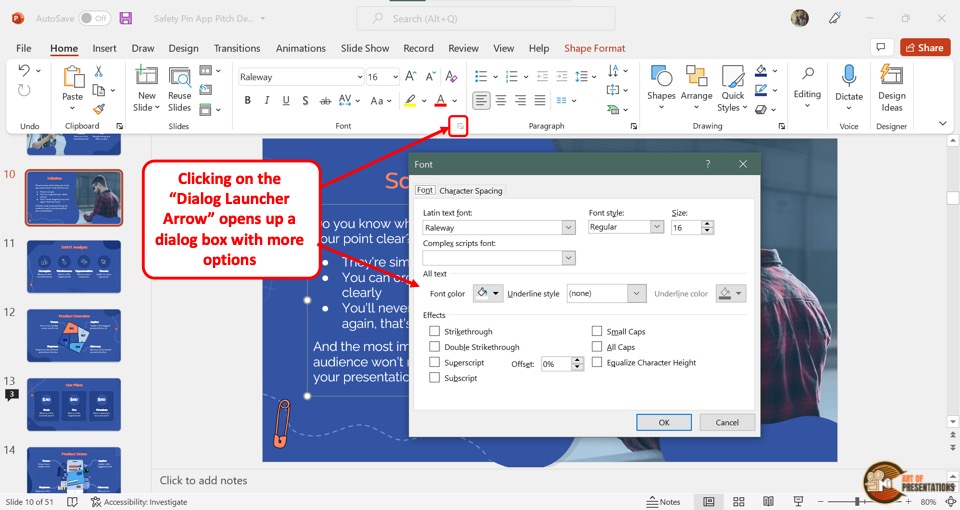
The “Dialog Launcher” in the ribbon is a small square box with an arrow inside it. It is located in the bottom right corner of various groups under each tab.
Click on the “Dialog Launcher” icon to open a dialog box with more advanced options in the group.
3. Tabs on a Ribbon
The tabs on a ribbon in Microsoft PowerPoint are labels that expand into groups of commands when you click on them. There are nine tabs available by default in a ribbon.
Home
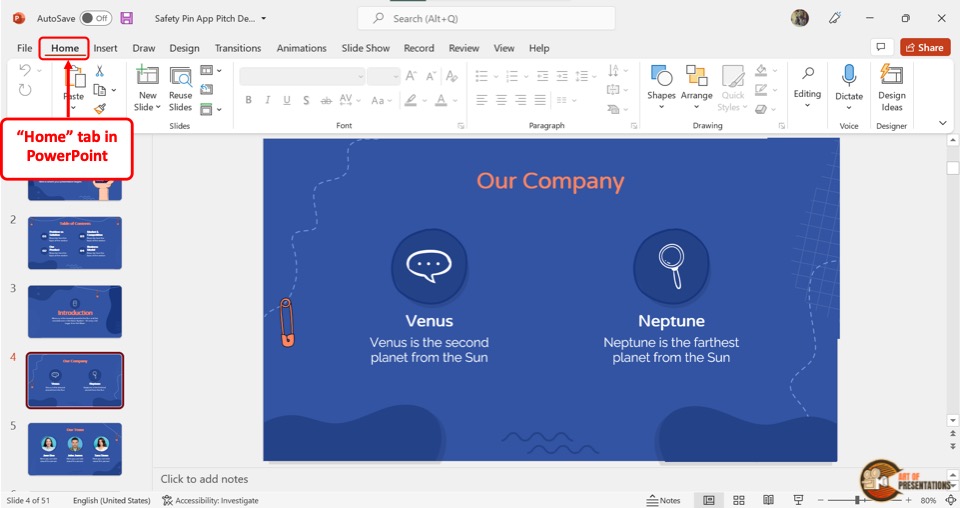
The “Home” tab in PowerPoint contains the most commonly used commands that you need to add, design, and organize slides. The “Slides” group contains the options to insert slides and alter the slide layouts.
The tab also holds the “Clipboard” group with the “Cut” and “Paste” functions, and the “Font” and the “Paragraph” group to edit the texts on a slide.
Insert
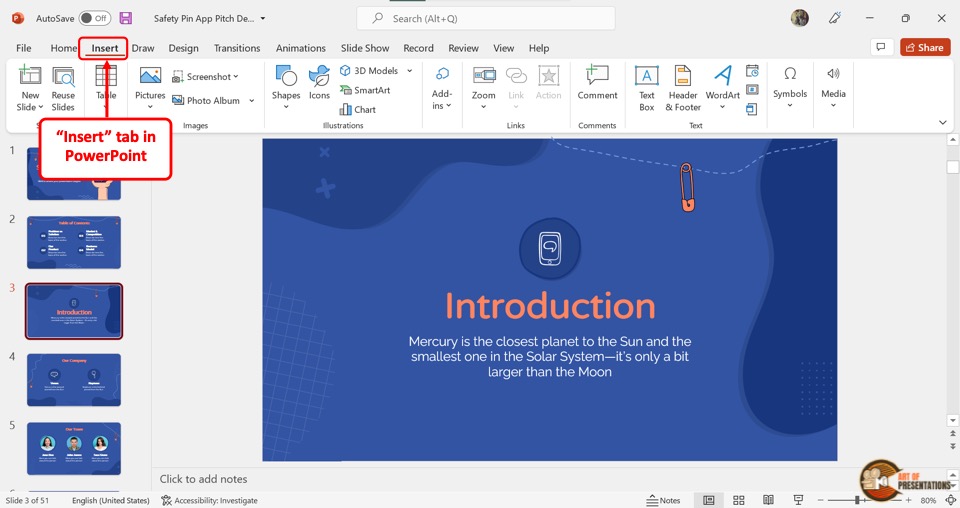
You can click on the “Insert” tab if you want to add something to a slide. In the “Insert” tab, you will find options to insert new slides, text boxes, pictures, tables, charts, shapes, links, and more.
Design
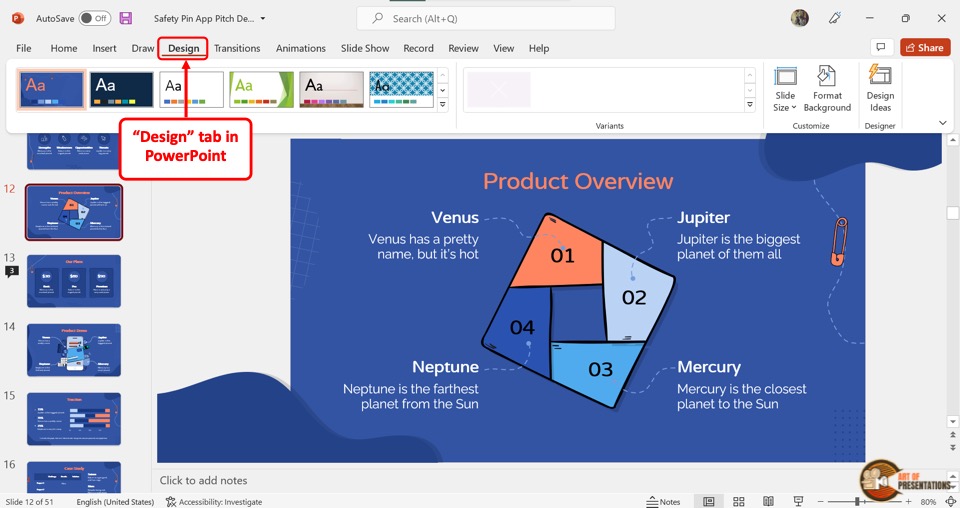
In the “Design” tab, you can change and edit the theme using the “Themes” and “Variants” options respectively. You can also change the slide size and the background.
PowerPoint 2018 and later versions even include the “Design Ideas” button containing auto-generated designs for your slides.
Transition
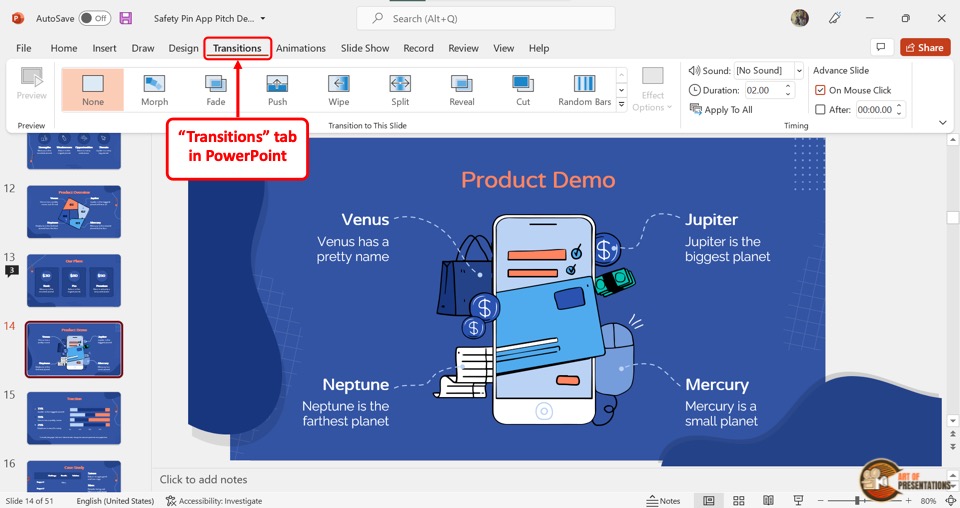
Click on the “Transitions” tab to access different transition styles between each slide. You can also edit other transition settings like the duration, sound, etc.
Features available on this tab can help you to autoplay your PowerPoint presentations in a loop if you need.
Animations
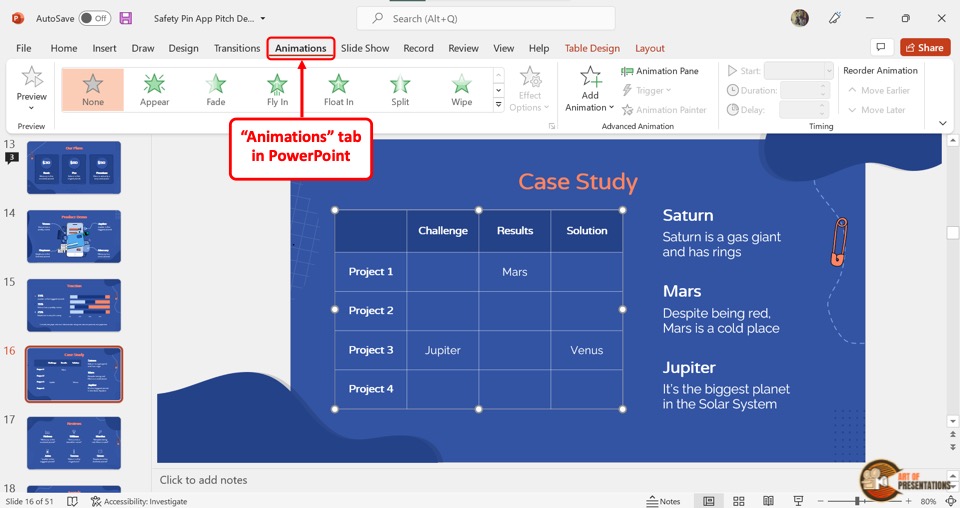
The “Animations” tab includes various styles for the objects inside a slide to enter and leave the presentation screen.
Click on the “Add Animation” button to access all the animations options. You can change the settings in the “Timing” group.
Slide Show
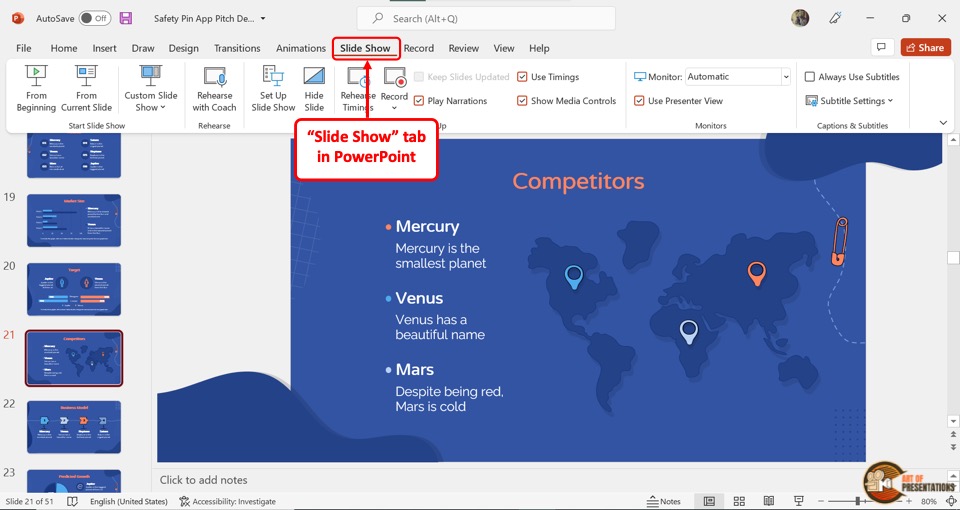
Using the “Slide Show” tab, you can edit and preview the settings for how you want to show the presentation to your audience.
You can rehearse the presentation, set up the slide show, screencast the slides, etc.
Review

The “Review” tab is specially made for feedback on your presentation. You can leave comments, compare versions of the presentation, and proofread and translate the slides.
View
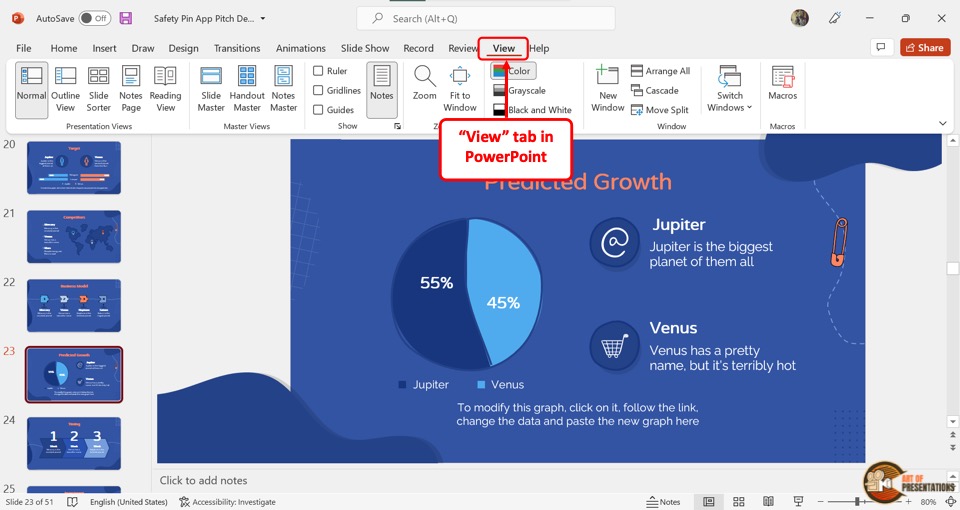
The “View” tab in PowerPoint allows you to access the various view options in your PowerPoint presentation.
In the “Presentation Views” group, you can access the “Outline”, “Slide Sorter”, “Notes”, “Reading” and “Slide Master” view.
Format Tab (Contextual Tab)

The format tab only appears when you select an object on the slide. The “Shape Format” tab appears when you select a shape or a text and allows you to format shapes in PowerPoint, whereas the “Picture Format” tab appears when you select a picture.
The commands in the tools tab vary and are specific to editing the selected object.
4. How to Hide or Collapse Ribbon in PowerPoint?
You can hide or show the PowerPoint ribbon on the screen the way you like it.
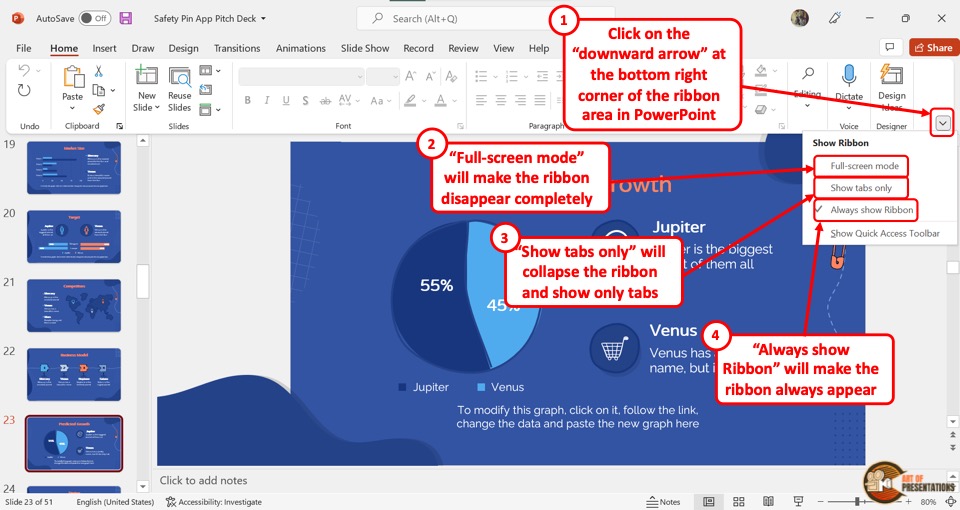
To show or hide the ribbon in PowerPoint, click on the downward-facing arrow from the bottom-right corner of the ribbon menu. This will open a dropdown menu.
- Click on “Full-screen mode” to completely hide the ribbon.
- You can also click on the “Show tabs only” to collapse the ribbon without fully hiding it. This mode will only show the tabs but no groups or commands will appear.
- To unhide the ribbon, click on the “Always show Ribbon” option.
5. How to Customize a Ribbon?
In Microsoft PowerPoint, you can personalize the ribbon menu the way you prefer. Click here to learn about all the specific features of the ribbon that you can customize.
To customize a ribbon, follow the below mentioned steps –
Step-1: Click on the “File” tab
The first step is to open the “File” menu. To do so, you have to first click on the “File” tab which is the first tab in the default ribbon menu in PowerPoint. In the “File” menu, click on “Options”.
Step-2: Click on the “Customize Ribbon” option
Clicking on the “Options” option from the sidebar in the “File” menu will open the “PowerPoint Options” dialog box. In the sidebar on the left of the dialog box, click on the “Customize Ribbon” option.
Step-3: Personalize the ribbon
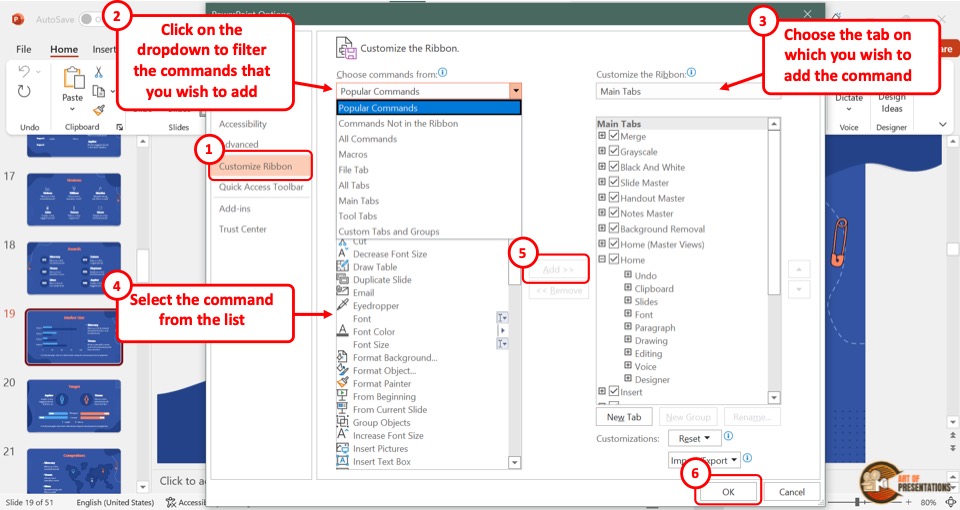
Now you can customize the ribbon. In the left column of the dialog box, you can click on the “Choose commands from” box and select which commands to add or remove from the ribbon.
Here’s what you need to do –
- Choose the set of commands. If you wish to add commands that currently do not exist on the ribbon, click on the “commands not in the ribbon” option from the dropdown.
- Next, select tab on the right on which you wish to add the command.
- Now, select the specific command from the left part of the list.
- Now, click on the “Add” option. This will become clickable once you select a specific command from the left part of the screen.
- Once you are done, click on “OK” to close the dialog box. You can also choose to remove a command from the existing tabs.
Furthermore, in the right column of the dialog box, you can click on the “Customize the Ribbon” box to add, remove and rearrange the tabs in the menu ribbon.
Finally, you can also create a new “Custom” tab that contains custom commands.
6. Ribbon Disappeared or Not Showing? Here’s What to Do!
If the ribbon has completely disappeared from your Microsoft PowerPoint window, it is because the ribbon is set to “Full-screen mode”.
To fix the problem, all you have to do is follow the 2 simple steps.
Step-1: Click on the “More” icon
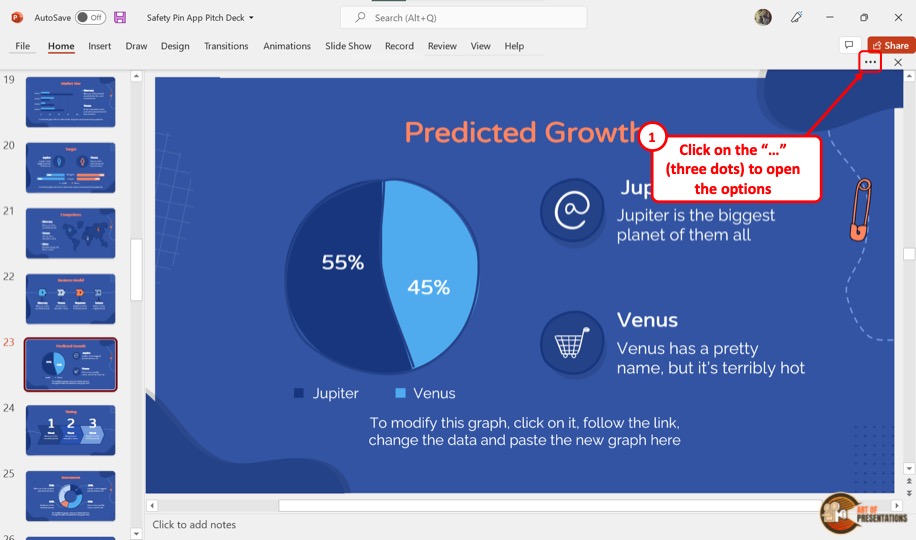
To make the ribbon temporarily visible, you have to click on the “More” icon. It looks like three horizontal dots and is located on the right corner at the very top of the screen.
Step-2: Click on the “Always show Ribbon” option
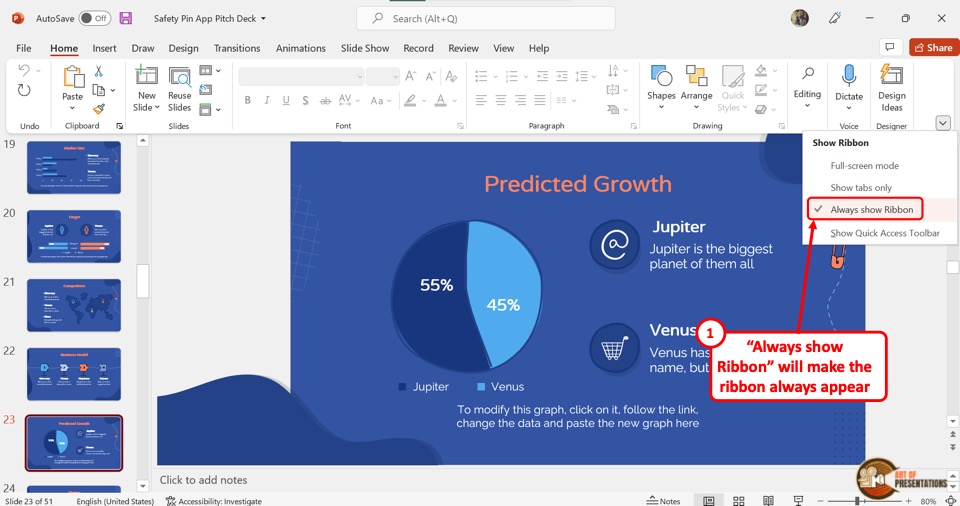
Now all you have to do is make the ribbon permanently visible. To do so, click on the downward pointing arrow that is located in the right corner at the bottom of the menu ribbon.
This will open a dropdown menu. Click on the “Always show Ribbon” option.
Credit to drobotdean (on Freepik) for the featured image of this article (further edited).