![How to Remove PowerPoint Template [Complete Guide]](https://artofpresentations.com/wp-content/uploads/2023/01/Screen-Shot-2023-01-17-at-1.02.18-PM.png)
Every presentation has a certain format, template that is seen throughout. It could be a company’s template, an organization or government template, or even just the standard templates given by Microsoft PowerPoint itself.
But sometimes you may want to change the default template in order to match your own style or brand. This cannot be done directly in PowerPoint, but there are ways to circumvent this issue!
To remove or replace a template in PowerPoint, first, click on the “View” tab. Next, open the “Slide Master” view. Now, click on the “Insert Slide Master” option in the “Edit Master” group. Next, select the first slide master, and delete it. Finally, click on the “Close Master View” button.
To learn more as to how you can remove either the whole template or only certain parts of it, continue reading the remaining article as I show you full steps of the process along with other related things that you will certainly find helpful.
1. How to Remove PowerPoint Template?
In Microsoft PowerPoint, you cannot remove the template from a presentation. However, you can replace the template with a blank one using the “Slide Master” view. To remove the PowerPoint template, follow the 5 simple steps.
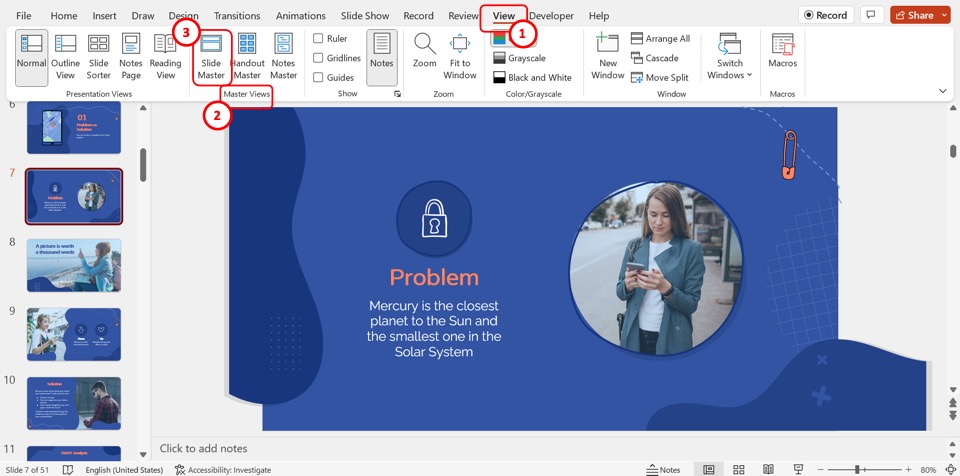
Step-1: Click on the “Slide Master” option
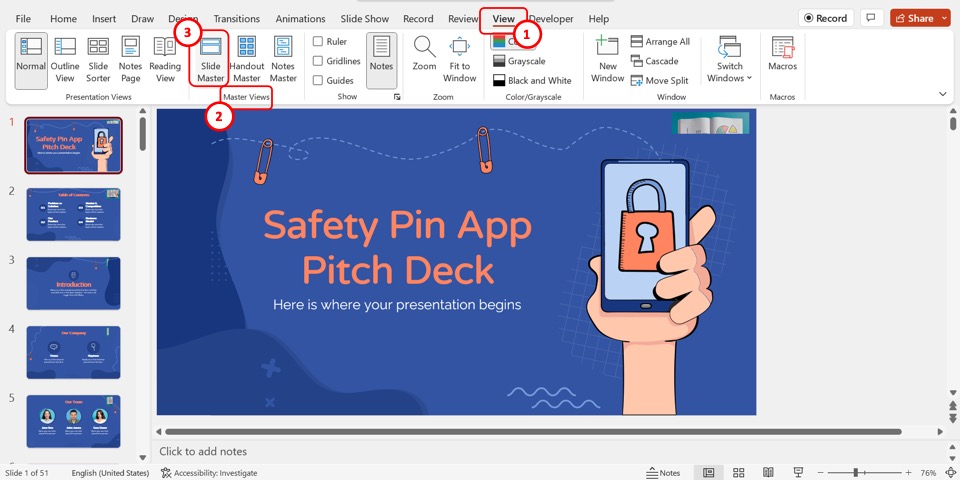
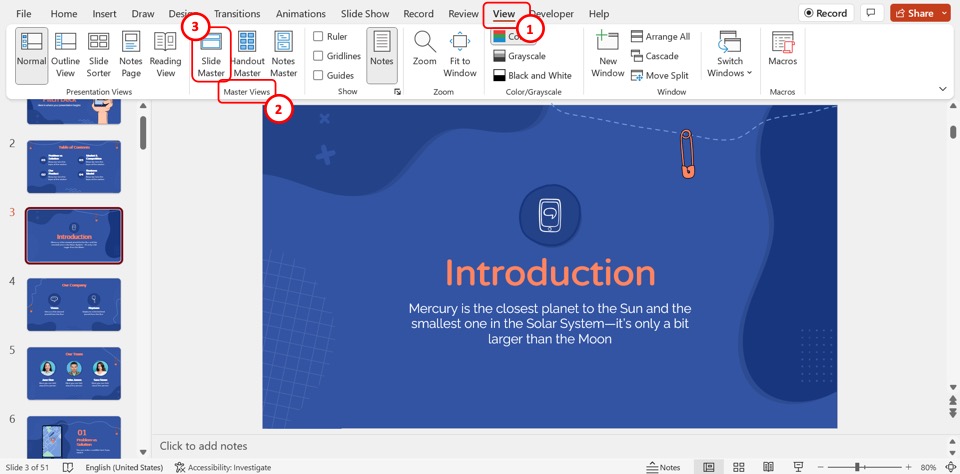
The first step is to access the master slide. To do so, click on the “View” tab in the menu ribbon at the top of the screen. In the “Master Views” section of the “View” menu, click on the “Slide Master” option to open the “Slide Master” view.
Step-2: Click on the “Insert Slide Master” option
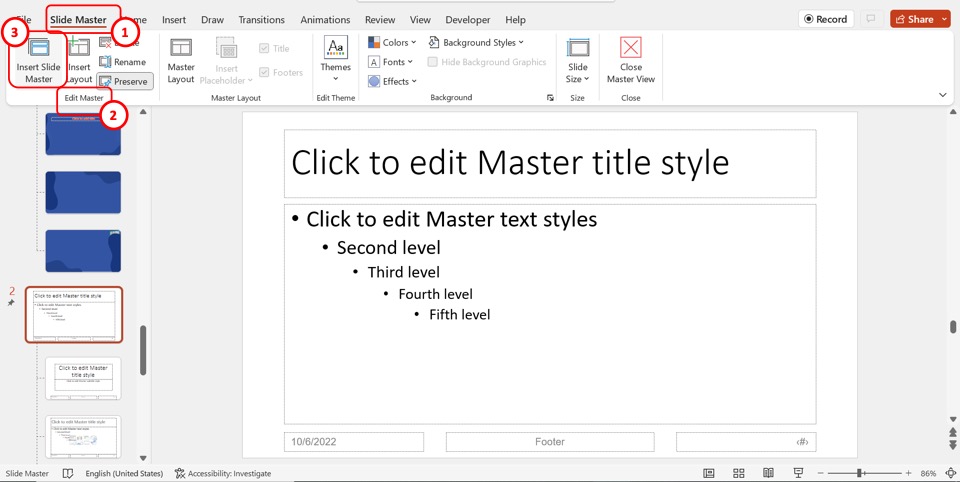
In the “Slide Master” view, click on the “Insert Slide Master” option in the “Edit Master” group. This will open a new blank master slide without any template.
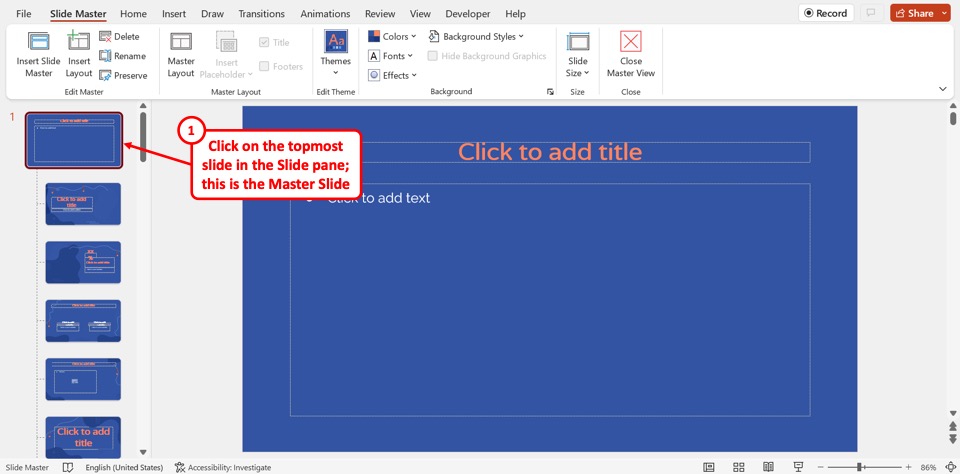
Step-3: Select the first master slide
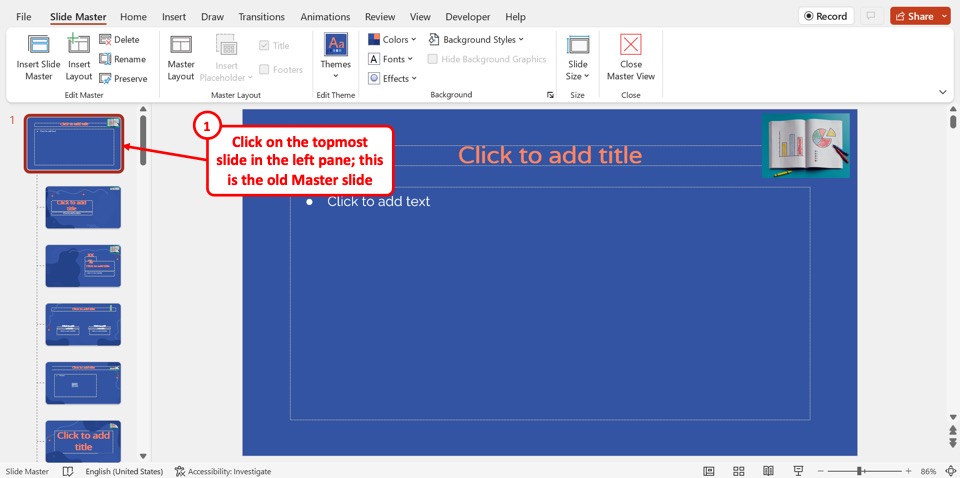
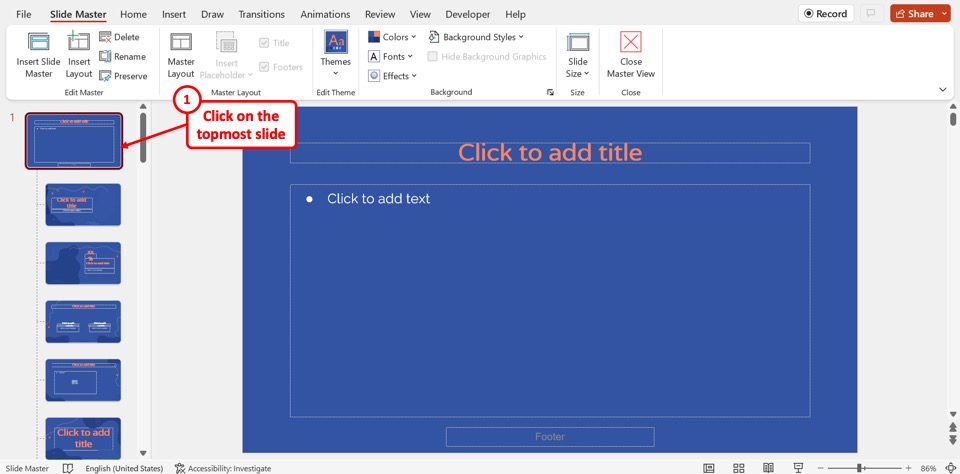
The next step is to remove the existing template. To do so, you have to first select the master slide with the template on it. Click on the slide at the top of the slide layout pane located on the left side of the screen. The topmost slide is the master slide.
Step-4: Click on the “Delete” option
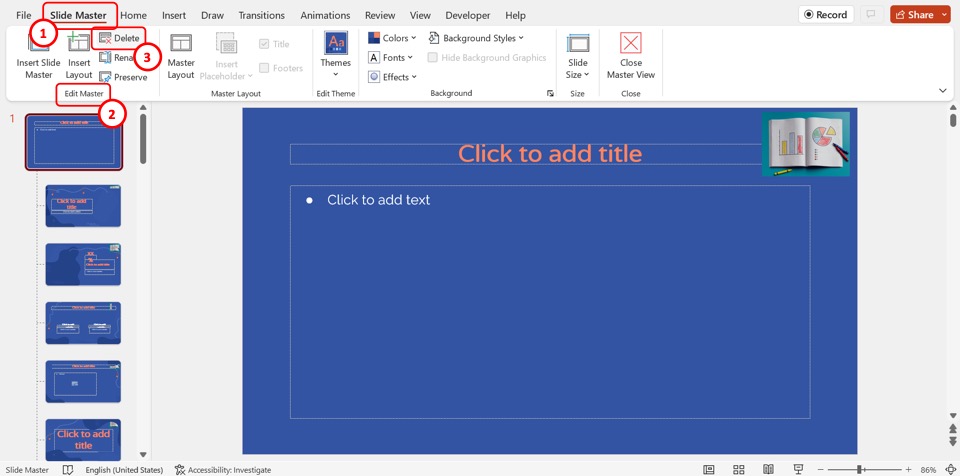
In the “Edit Master” group of the “Slide Master” menu, click on the “Delete” option to delete the master slide with the template that you want to remove.
Step-5: Click on the “Close Master View” option
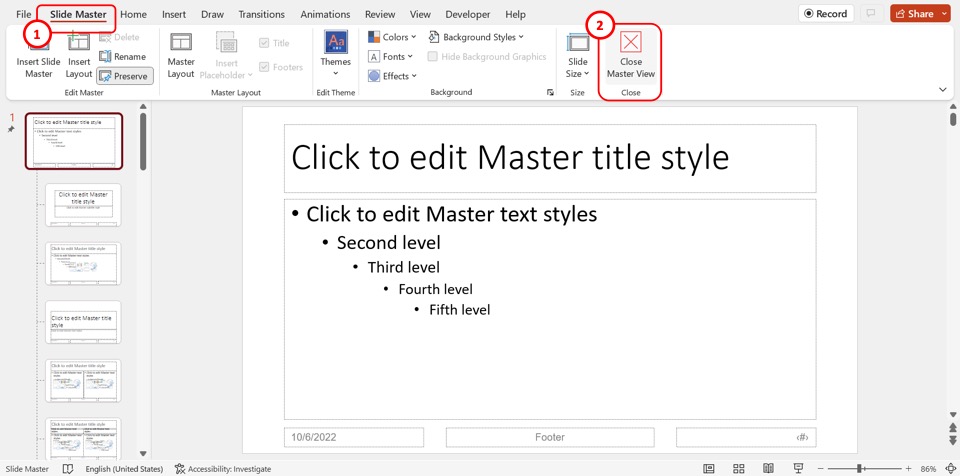
Now all you have to do is click on the “Close Master View” option in the “Slide Master” menu to save the changes and return to the “Normal” view.
2. How to Remove Template Background in PowerPoint?
The template background in Microsoft PowerPoint is set as the background for the master slide. To remove the template background, you have to simply remove the background of the master slide of the PowerPoint presentation. To do so, follow the 6 easy steps.
Step-1: Click on the “Slide Master” option
In the menu ribbon located at the top of the screen, click on the “View” tab. Then click on the “Slide Master” option in the “Master Views” group of the “View” menu to open the “Slide Master” view.
Step-2: Select the master slide
The next step is to open the master slide in the “Slide Master” view. Click on the slide at the top of the slide layout pane located on the left side of the screen to open the master slide.
Step-3: Click on the “Background Styles” option
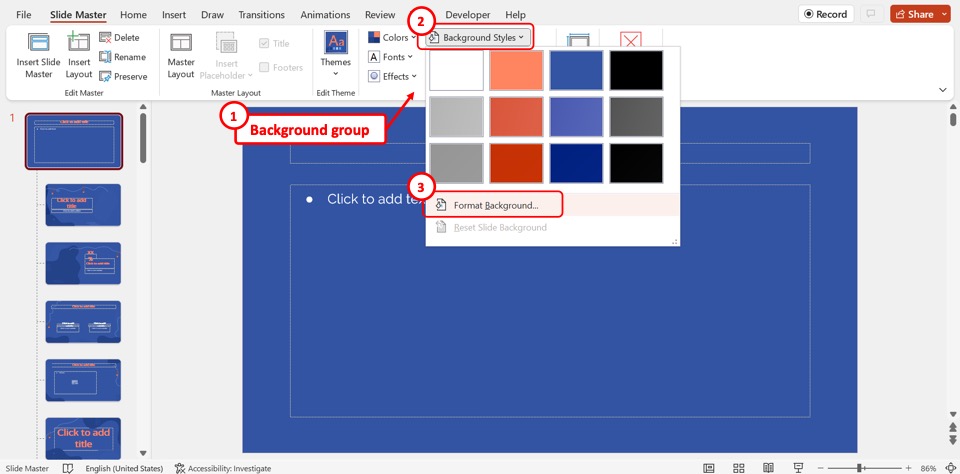
In the “Background” group of the “Slide Master” menu, click on the “Background Styles” option. Then click on the “Format Background” option at the bottom of the dropdown menu under the “Background Styles” option.
Step-4: Click on the “Solid fill” option

In the “Format Background” sidebar on the right side of the screen, click on the “Solid fill” option to remove any background image or pattern in the template.
Step-5: Click on the “Color” option
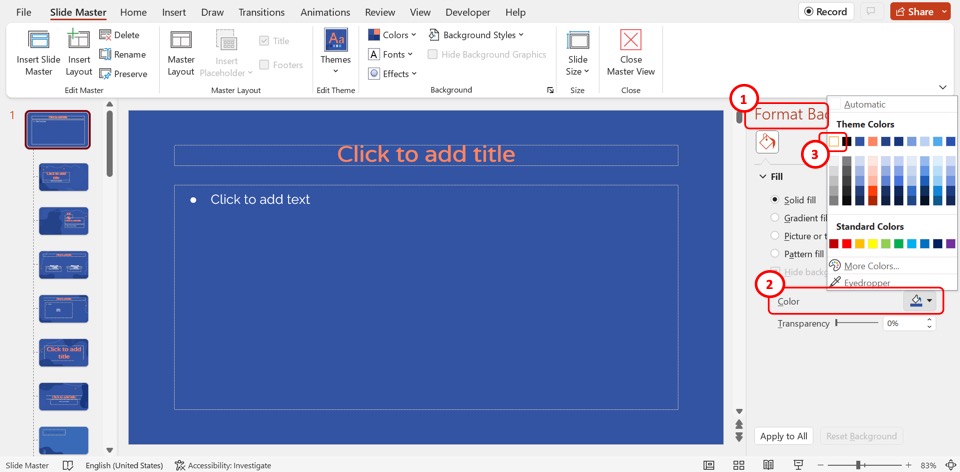
To remove the background color, you can click on the “Color” option in the “Format Background” sidebar. In the pop-up list over the “Color” option, click on the “White” option. This will remove the template background of all the slide layouts under the master slide.
Step-6: Click on the “Close Master View” option
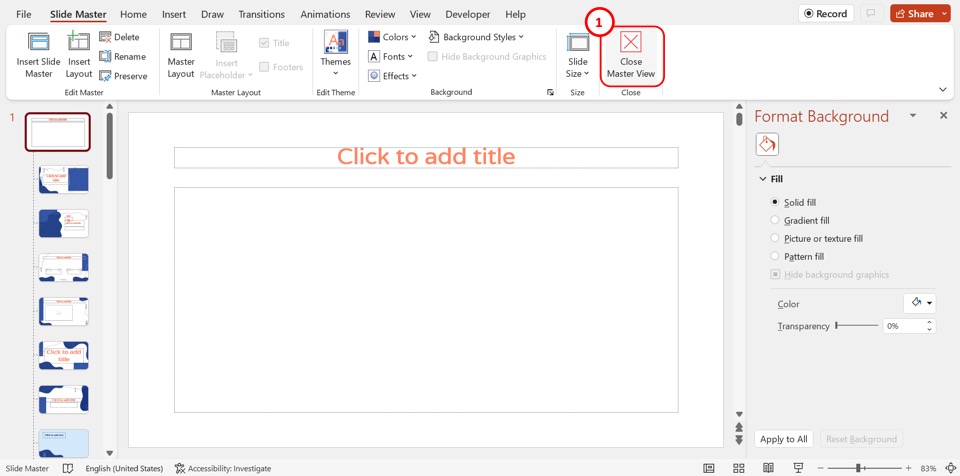
Finally, all you have to do is click on the “Close Master View” option in the “Close” group of the “Slide Master” menu to save the changes and return to the “Normal” view.
3. How to Remove Logo from PowerPoint Template?
A logo in PowerPoint is usually added as an image on the master slide. To remove a logo from a presentation template, follow the 4 steps.
Step-1: Click on the “View” tab
The first step is to open the “View” menu. In the menu ribbon located at the top of the screen, click on the “View” tab to open the “View” menu. In the “Master Views” group of the “View” menu, click on the “Slide Master” option. This will open the “Slide Master” view.
Step-2: Click on the master slide
In the “Slide Master” view, you have to now open the master slide where the logo is inserted. The master slide is the slide at the very top of the slide layout pane on the left side of the screen.
Step-3: Press the “Delete” key on your keyboard
In the master slide, click on the logo to select it. Then all you have to do is press the “Delete” key or the “Backspace”key on your keyboard to delete the logo from the master slide.
Step-4: Click on the “Close Master View” button
Finally, click on the “Close Master View” button in the “Slide Master” menu to permanently delete the logo from the template and return to the “Normal” view.
4. How to Remove Footer from PowerPoint Template?
The template footer in a Microsoft PowerPoint presentation is visible on all the slides in the presentation. You can remove or edit the footer in PowerPoint using the “Slide Master” view. All you have to do is follow the 5 quick steps.
Step-1: Click on the “Slide Master” option
The first step is to click on the “View” tab in the menu ribbon. In the “View” menu, click on the “Slide Master” option to open the “Slide Master” view.
Step-2: Open the master slide
The next step is to open the master slide containing the template footer. Click on the topmost slide in the slide layout pane on the left side of the screen.
Step-3: Click on the “Master Layout” button
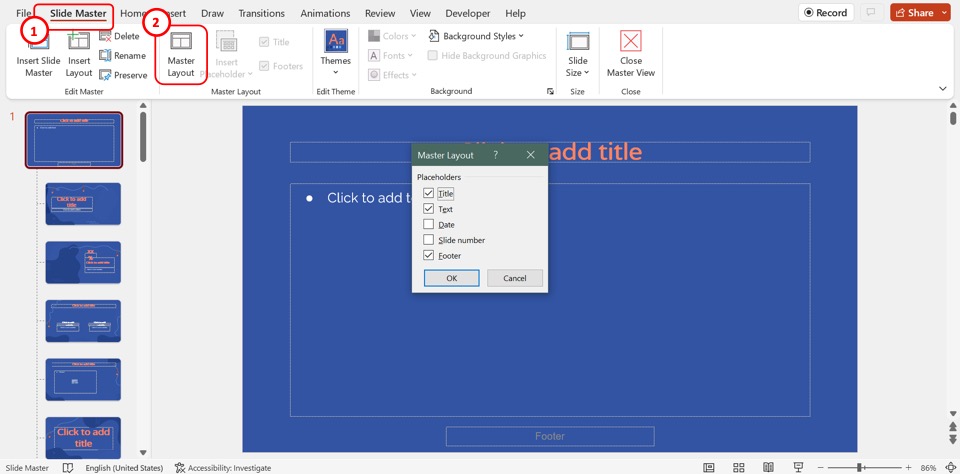
In the “Slide Master” menu, click on the “Master Layout” button. This will open the “Master Layout” dialog box.
Step-4: Click on the “Footer” option
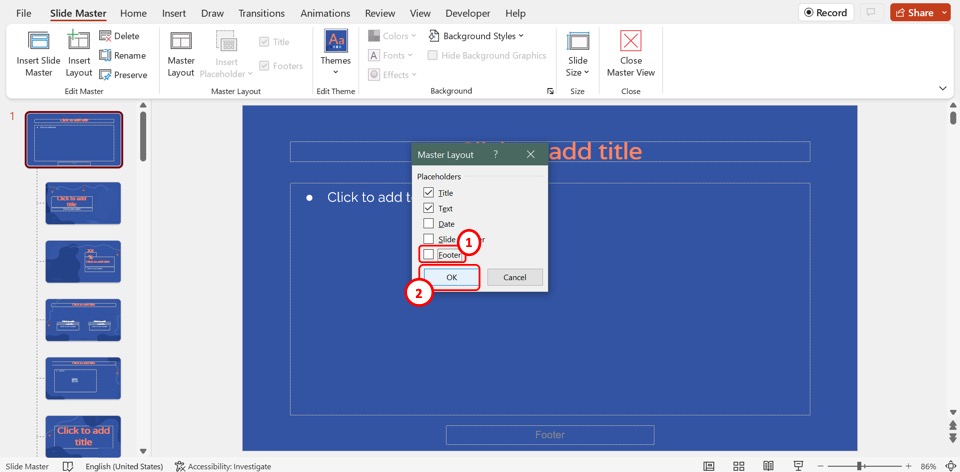
In the “Master Layout” dialog box, click on the “Footer” option to uncheck it. Then click on the “OK” button at the bottom of the dialog box.
Step-5: Click on the “Close Master View” button
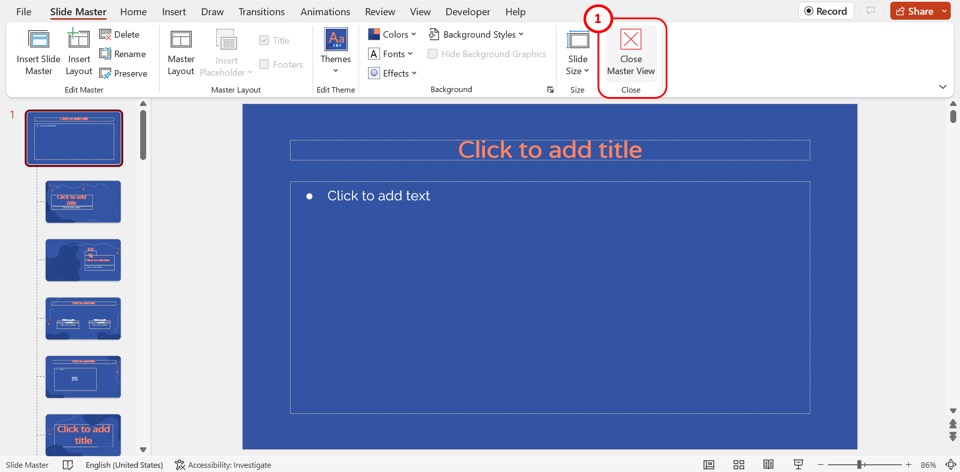
Now you can click on the “Close Master View” option in the “Slide Master” menu to remove the footer and return to the “Normal” view.
5. How to Remove Watermark from Powerpoint Templates?
In Microsoft PowerPoint, the template watermark is inserted as a placeholder or a text box in the master slide. To remove the watermark from a template, follow the 4 simple steps.
Step-1: Click on the “View” tab
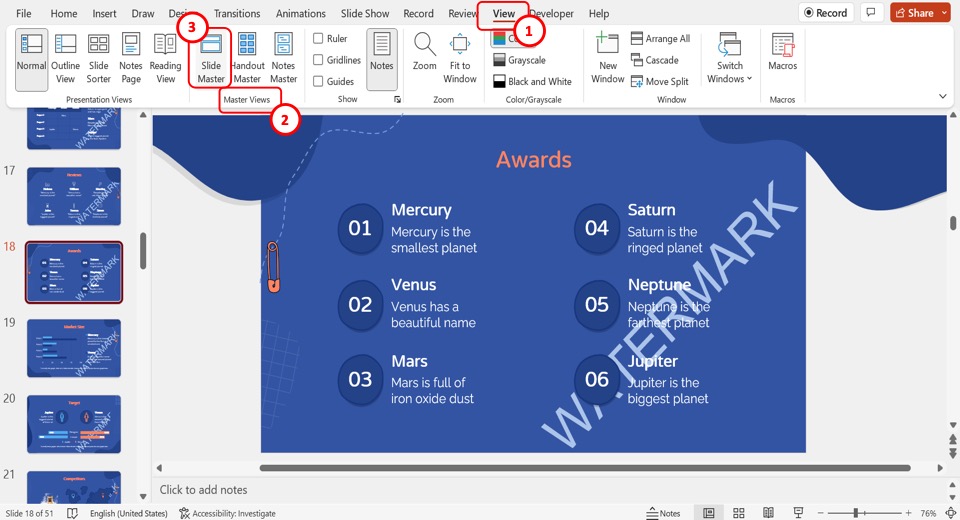
In the menu ribbon, click on the “View” tab to open the “View” menu. Then click on the “Slide Master” option in the “View” menu.
Step-2: Open the master slide
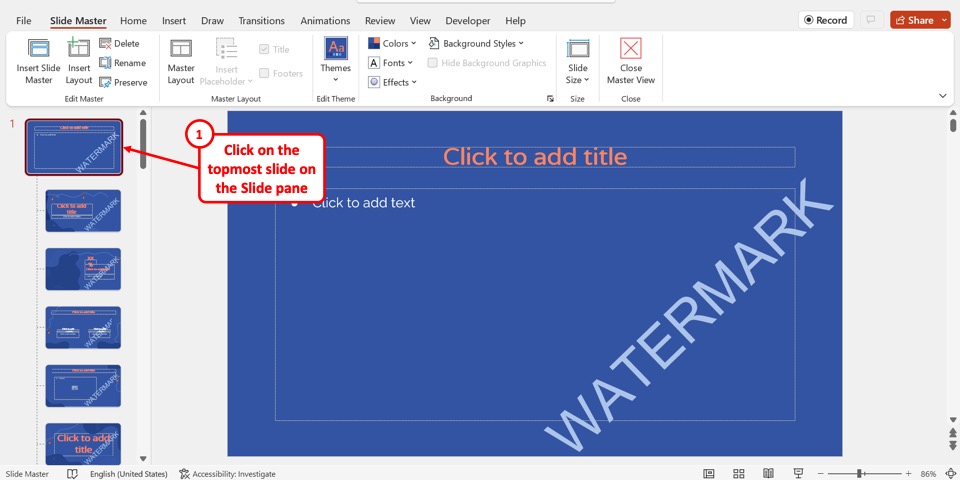
In the “Slide Master” view, click on the slide at the top of the slide layout pane on the left side of the screen. This will open the master slide.
Step-3: Click on the watermark text placeholder
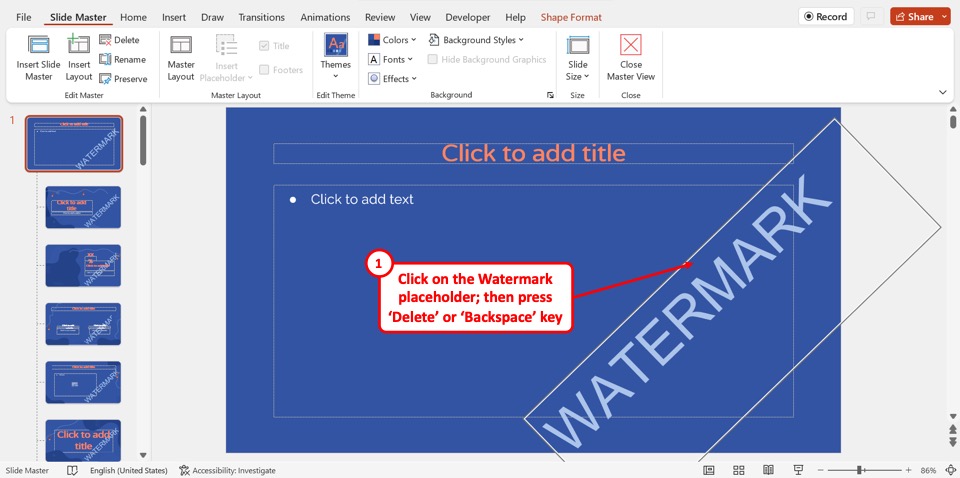
Now all you have to do is click on the watermark to select it. Then press the “Delete” key or the “Backspace” key on your keyboard to remove the watermark.
Step-4: Click on the “Close Master View” option
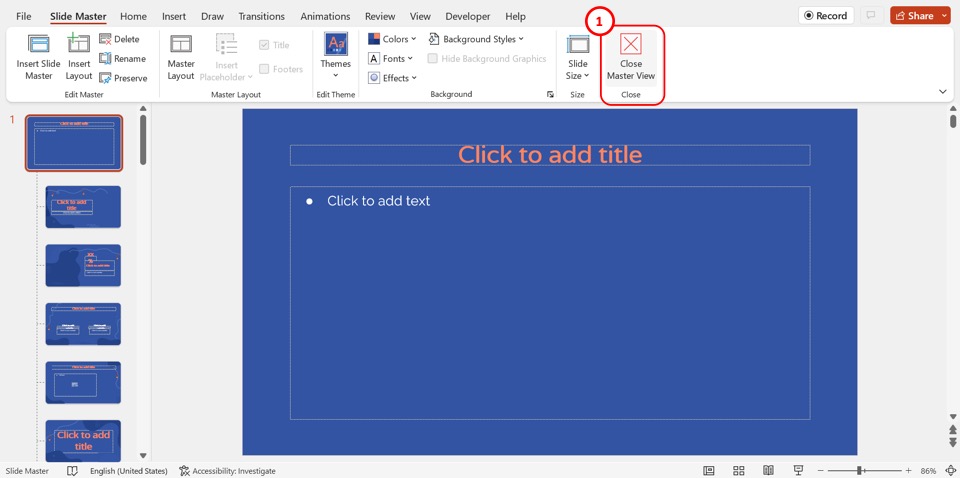
Click on the “Close Master View” option in the “Slide Master” menu to save the changes to the presentation template.
Credit to master1305 (on Freepik) for the featured image of this article (further edited).