![Use PNG in PowerPoint [Everything You Need to Know!]](https://artofpresentations.com/wp-content/uploads/2023/01/ezgif.com-gif-maker-7.webp)
Portable Network Graphics (or popularly called PNG) is a type of picture file format used frequently in images of a very high resolution. It gives the best clarity and image quality to any presentation. It can also be used as a watermark, background image, etc.
To Use a PNG image in a PowerPoint, simply copy the image from its source, then go to the slide where you want to insert the image, right-click on the slide and click on paste.
To understand better how else you can use PNG images in PowerPoint presentations read further in the article.
1. How to Insert PNG in PowerPoint?
In Microsoft PowerPoint, PNG is one of the supported image file types that you can add to the presentation slides. So you can simply use the “Insert” tab on PowerPoint to insert a PNG image into a slide. All you have to do is follow the 3 quick steps.
Step-1: Click on the “Insert” tab

The first step is to open the “Insert” menu. To do so, click on the “Insert” tab in the menu ribbon located at the top of the screen.
Step-2: Click on the “Pictures” option

In the “Images” group of the “Insert” menu, click on the “Pictures” option. Then click on the “This Device” option in the dropdown menu under the “Pictures” option. This will open a pop-up window.
Step-3: Click on the “Insert” button
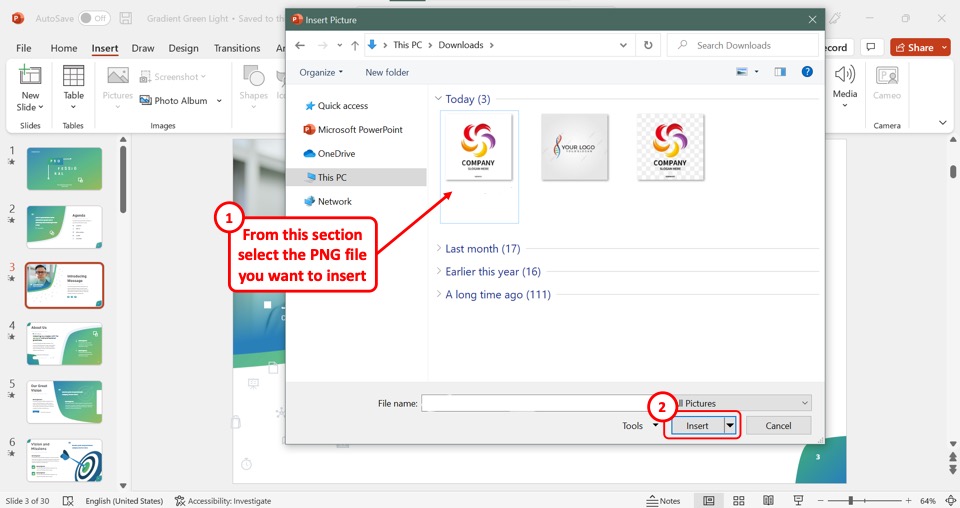
In the “Insert Picture” pop-up window, you can now select the PNG image that you want to insert into the slide. Then all you have to do is click on the “Insert” button at the bottom of the window to insert the PNG image.
1.1 How to Insert PNG in PowerPoint on Mac?
On a Mac device, you can insert a PNG image like any other supported image format in PowerPoint. To insert the PNG image, follow the 3 easy steps.
Step-1: Click on the “Insert” menu
In the Microsoft PowerPoint presentation, you have to first open the slide where you want to insert the PNG image. Then click on the “Insert” menu in the menu bar located at the top of the screen.
Step-2: Click on the “Picture From File” option
In the “Insert” menu, hover the pointer over the “Picture” option to open a dropdown menu. Then click on the “Picture From File” option in the dropdown menu. This will open a dialog box.
Step-3: Click on the “Insert” button
Now all you have to do is browse for the PNG image in the dialog box and select it. Then click on the “Insert” button at the bottom of the dialog box to insert the selected PNG image into the open slide.
1.2 How to Insert PNG in PowerPoint on Android?
In the PowerPoint application on an Android phone, you can insert a PNG image from the device. All you have to do is follow the 3 easy steps.
Step-1: Open the floating ribbon
The first step is to open the slide where you want to insert the PNG image. Then tap on the upward-facing arrow on the right side of the toolbar at the bottom of the screen.
Step-2: Tap on the “Insert” menu
In the floating ribbon, tap on the “Home” option to open the menu bar. Then tap on the “Insert” option from the menu bar to open the “Insert” menu.
Step-3: Tap on the “Pictures” option
In the “Insert” menu, tap on the “Pictures” option. Then tap on the “Photos” option to select and insert the PNG image into the open slide.
2. When to Use PNG in PowerPoint?
Portable Network Graphics (PNG) is an image format that supports lossless compression. So the PNG image format is suitable for high-resolution images. Besides, the PNG format also allows transparent backgrounds which are not supported by other image formats like JPEG.
In a PowerPoint presentation, you can insert a PNG image into a slide in order to retain the original resolution or the transparent background such as when using a logo.
3. How to Insert Transparent PNG in PowerPoint?
To insert a transparent image into a Microsoft PowerPoint slide, all you have to do is insert it as an image. If the PNG image has a transparent background, it will automatically be inserted without a background into the slide. To insert the PNG image into a slide, follow the steps detailed in section 1.
3.1 How to Insert Transparent PNG on All Slides?
The “Slide Master” feature in Microsoft PowerPoint allows you to insert a picture into all the slides at once. This feature can be helpful if you want to insert a logo into your presentation slides. To insert a PNG image with transparent background in all the slides of a presentation, follow the 6 simple steps.
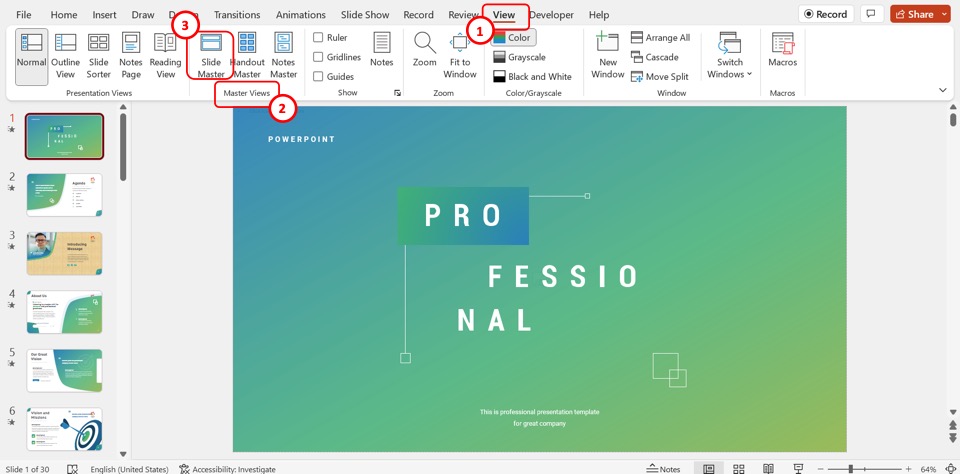
Step-1: Click on the “View” tab
In the menu ribbon located at the top of the screen, click on the “View” tab. This will open the “View” menu.
Step-2: Click on the “Slide Master” option
The next step is to click on the “Slide Master” option in the “Master Views” group of the “View” tab.
Step-3: Click on the “Insert” tab
In the “Slide Master” view, open the master slide. It is the slide at the top in the slide layout pane on the left side of the screen. Then click on the “Insert” tab in the menu ribbon at the top of the screen.
Step-4: Click on the “Pictures” option
Now you have to click on the “Pictures” option in the “Images” group of the “Insert” menu. Then click on the “This Device” option from the dropdown menu under the “Pictures” option.
Step-5: Click on the “Insert” button
In the “Insert Pictures” pop-up window, you can now select the PNG image with a transparent background that you want to insert into the master slide. Then click on the “Insert” button at the bottom of the window to insert the image.
Step-6: Click on the “Close Master View” option
Now all you have to do is click on the “Slide Master” tab in the menu ribbon. In the “Close” group of the “Slide Master” menu, click on the “Close Master View” button to insert the PNG image with a transparent background into all the slides and close the “Slide Master” view.
3.2 How to Paste Transparent PNG in PowerPoint?
In Microsoft PowerPoint, you can insert a PNG image by simply pasting it into the slide from the clipboard. To do so, you have to first copy the PNG image from the source. Then all you have to do is “Right Click” on the presentation slide and click on the “Paste” option from the right-click menu.
Alternatively, you can press the “Ctrl+V” keys on your keyboard to paste the PNG image with a transparent background into the slide.
4. How to Insert Transparent PNG Background?
In PowerPoint, you can insert a PNG image as a slide background. To do so, follow the 4 quick steps.
Step-1: Click on the “Format Background” option
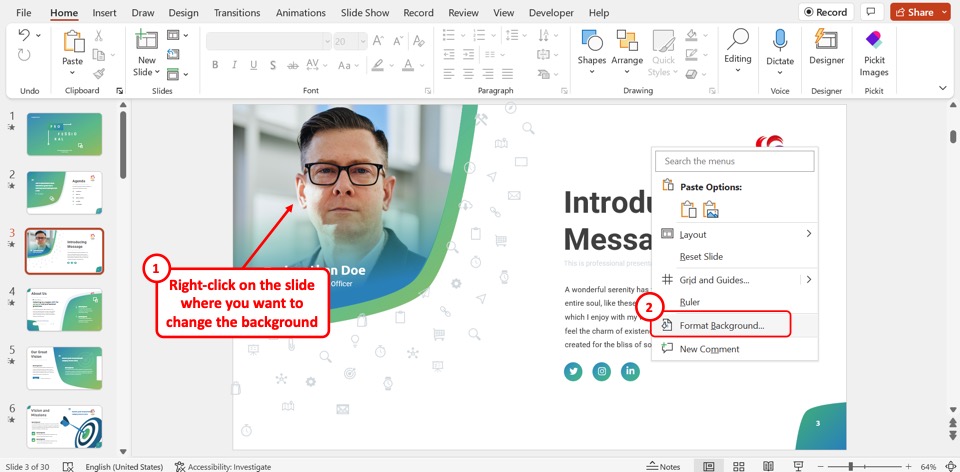
The first step is to open the slide where you want to insert the PNG image with a transparent background as a slide background. “Right Click” on the slide and click on the “Format Background” option in the right-click menu.
Step-2: Click on the “Picture or texture fill” option

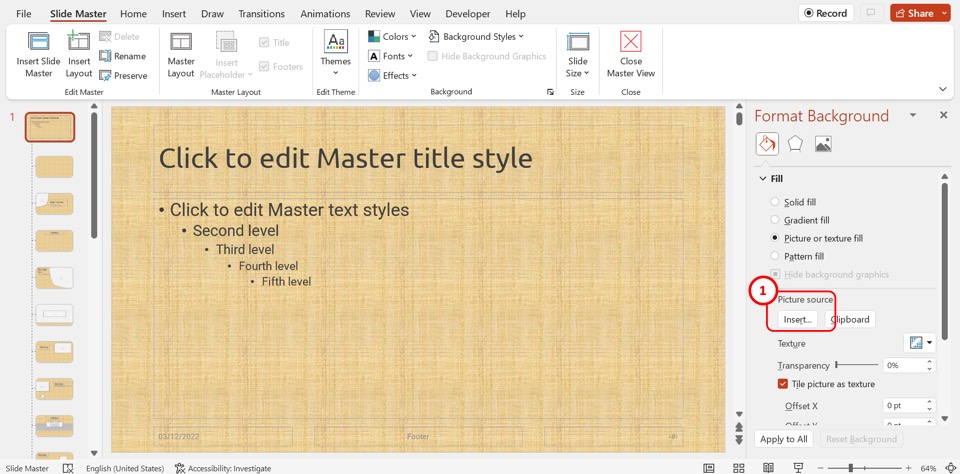
In the “Format Background” sidebar on the right side of the screen, click on the “Picture or texture fill” option under the “Fill” section.
Step-3: Click on the “Insert” option
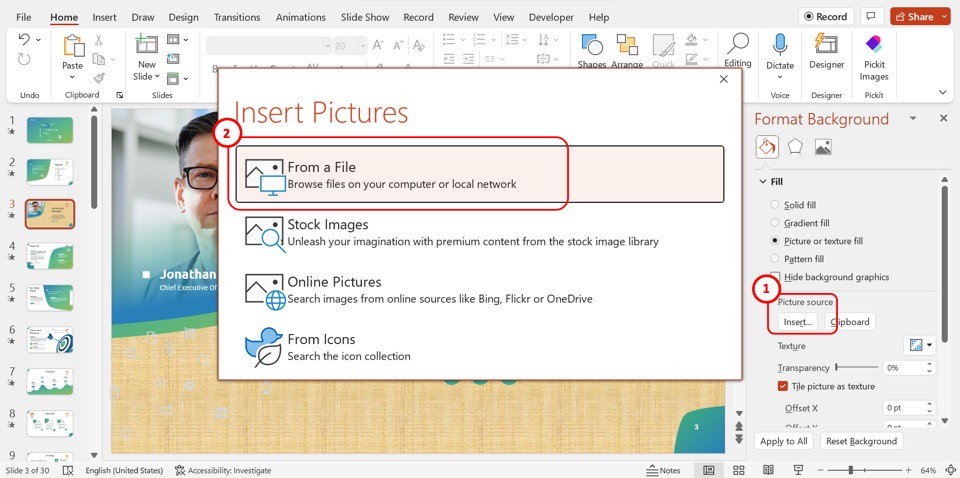
Under the “Picture source” section in the “Format Background” sidebar, click on the “Insert” option. Then click on the “From a File” option in the “Insert Pictures” dialog box. This will open a pop-up window.
Step-4: Click on the “Insert” button
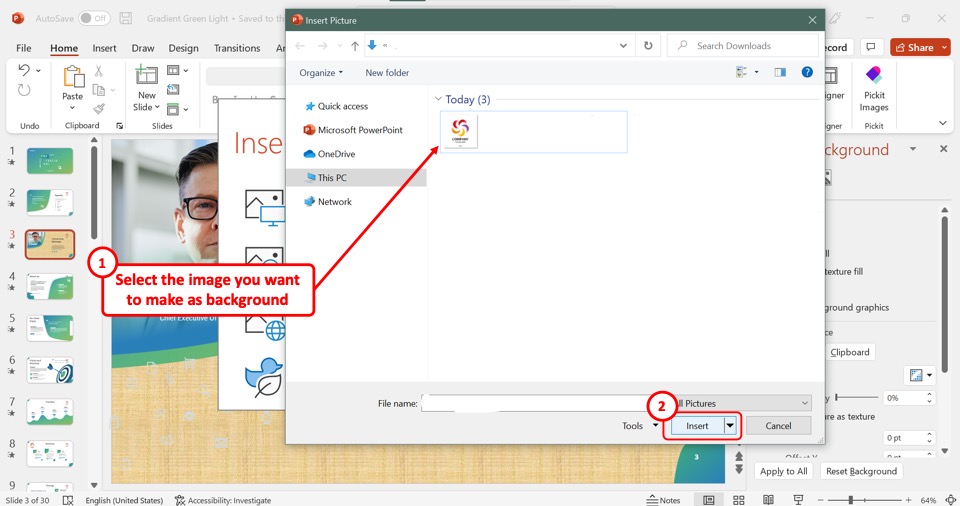
In the “Insert Pictures” pop-up window, browse for the image that you want to insert into the slide as a background. Then all you have to do is click on the “Insert” button at the bottom of the window to insert the PNG image as a slide background.
4.1 How to Insert Transparent PNG Background on All Slides?
Using the “Slide Master” view in Microsoft PowerPoint, you can insert a transparent PNG image as a slide background for all the slides in a PowerPoint presentation. All you have to do is follow the 8 quick steps.
Step-1: Click on the “Slide Master” option
In the menu ribbon located at the top of the screen, click on the “View” tab. In the “View” menu, click on the “Slide Master” option in the “Master Views” group. This will open the “Slide Master” view.
Step-2: Open the master slide
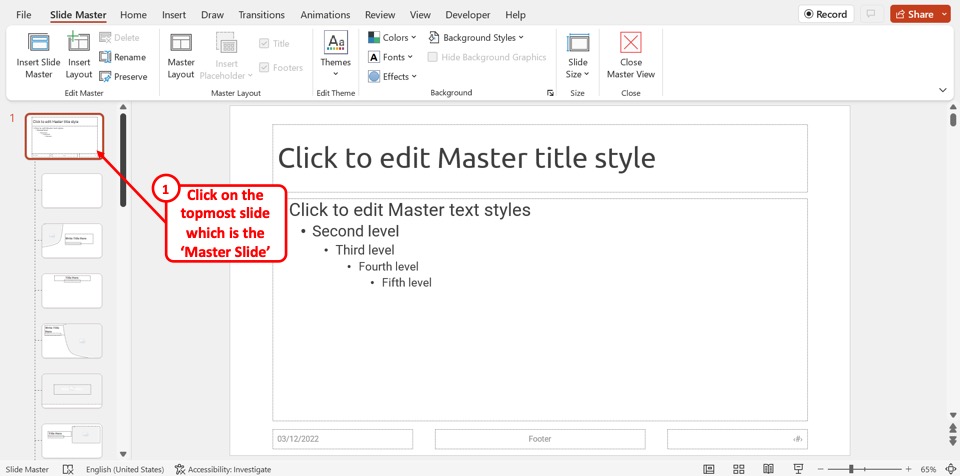
In the “Slide Master” view, you have to now open the master slide. To do so, click on the top slide in the slide layout pane on the left side of the screen.
Step-3: Click on the “Format Background” option
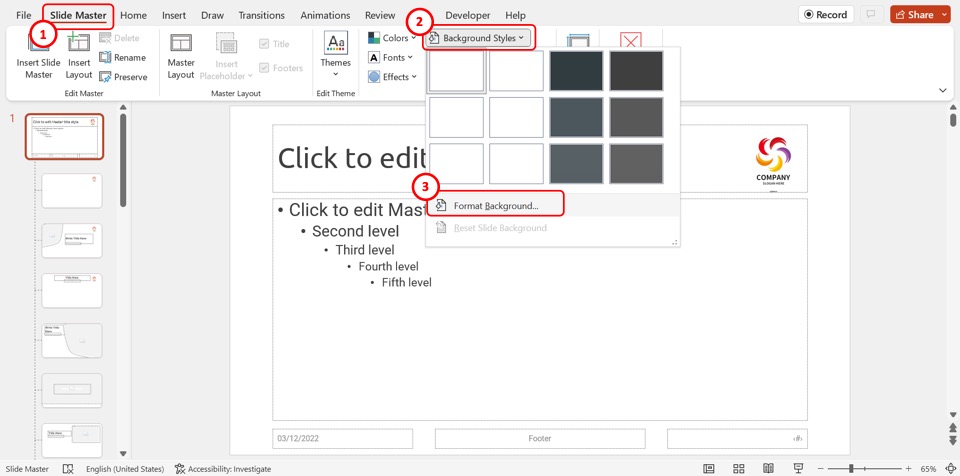
In the “Background” group of the “Slide Master” menu, click on the “Background Styles” option. Then click on the “Format Background” option at the bottom of the dropdown menu under the “Background Styles” option.
Step-4: Click on the “Picture or texture fill” option
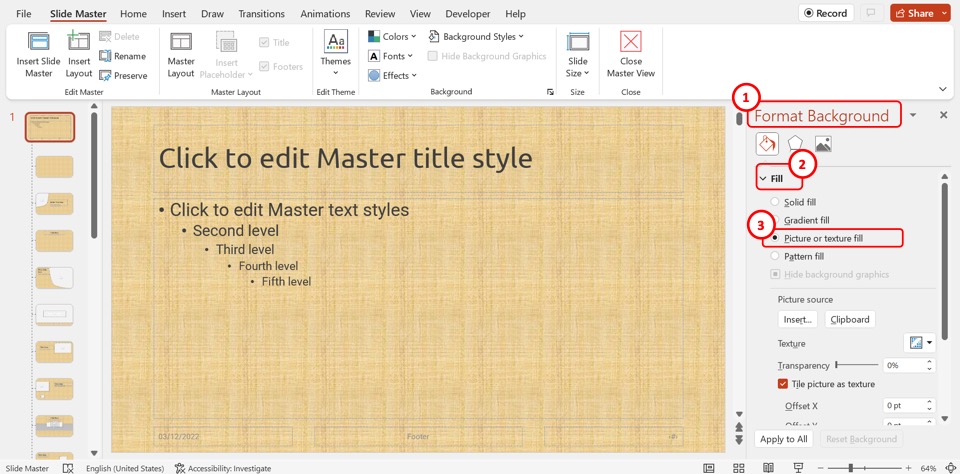
In the “Format Background” sidebar on the right side of the screen, click on the “Picture or texture fill” option. It is located under the “Fill” section in the sidebar.
Step-5: Click on the “Insert” option
Now you have to click on the “Insert” option under the “Picture source” section of the “Format Background” sidebar. This will open a dialog box.
Step-6: Click on the “From a File” option
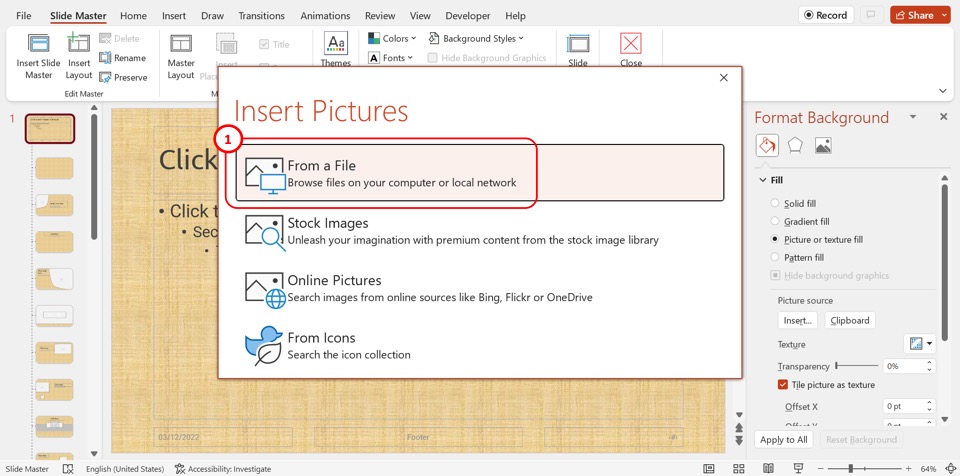
In the “Insert Pictures” dialog box in the middle of the screen, click on the “From a File” option. This will open a pop-up File Explorer window.
Step-7: Click on the “Insert” button
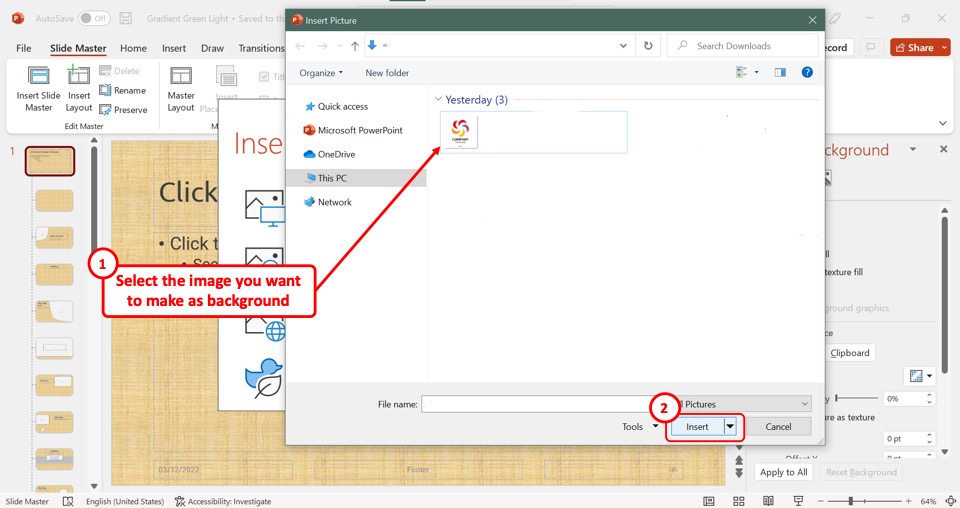
Now all you have to do is select the PNG image with a transparent background in the “Insert Picture” pop-up window. Then click on the “Insert” button at the bottom of the window to insert the image into the master slide.
Step-8: Click on the “Close Master View” option
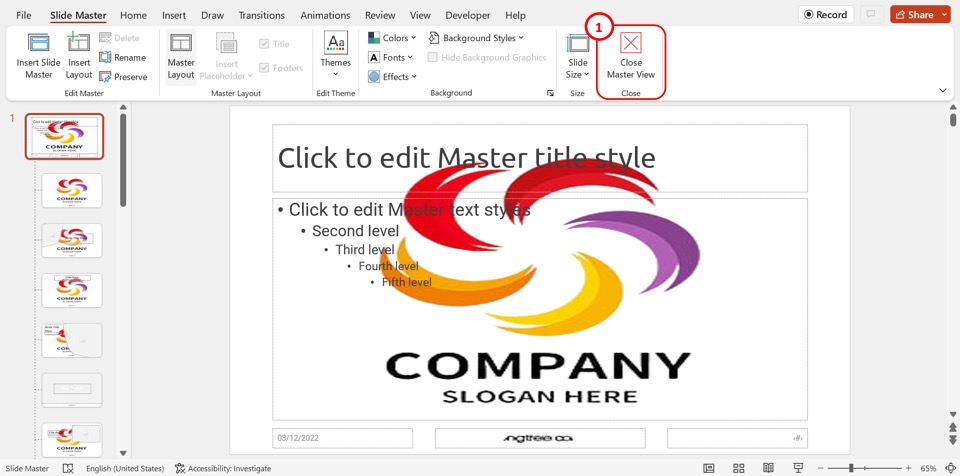
The final step is to close the “Slide Master” view. Click on the “Close Master View” button in the “Slide Master” menu to insert the PNG image as a slide background in all the slides of the presentation.
5. How to Make PNG Transparent in PowerPoint?
Microsoft PowerPoint offers the “Remove Background” feature that you can use to remove the background of an inserted image by making the background transparent. To make the background of a PNG image transparent after inserting it into the slide, follow the 4 simple steps.
Step-1: Click on the “Picture Format” tab
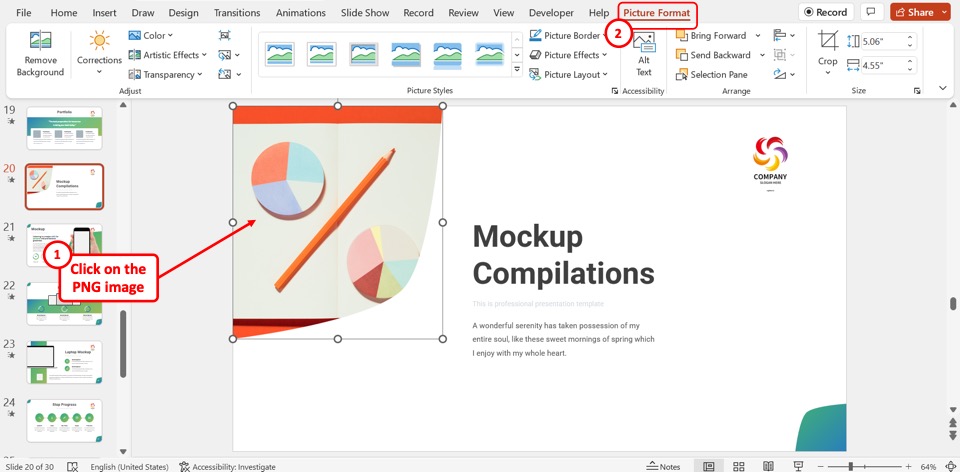
In the slide, you have to first click on the inserted PNG image to select it. Then click on the “Picture Format” tab in the menu ribbon located at the top of the screen.
Step-2: Click on the “Remove Background” option
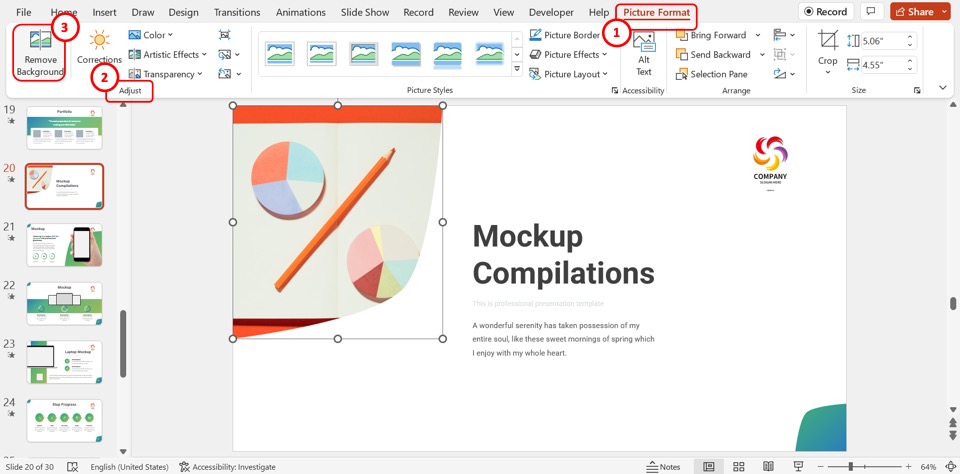
Now all you have to do is click on the “Remove Background” option in the “Adjust” group of the “Picture Format” menu to automatically make the background of the inserted PNG image transparent.
Step-3: Click on the “Mark Areas to Keep” option
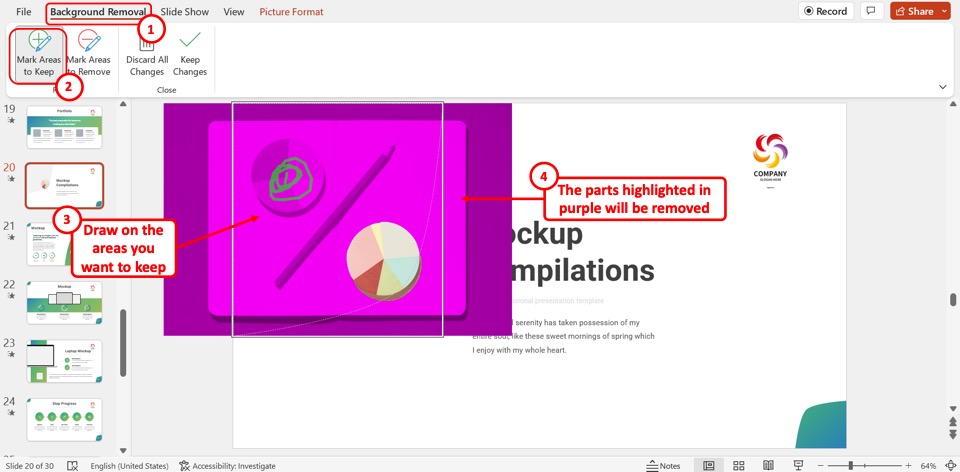
Besides the automatic background removal, you can also select which parts to keep or remove. In the “Background Removal” menu, click on the “Mark Areas to Keep” option. Then draw on the objects in the image that you want to keep. The part of the PNG image highlighted in purple will be removed.
Step-4: Click on the “Keep Changes” option
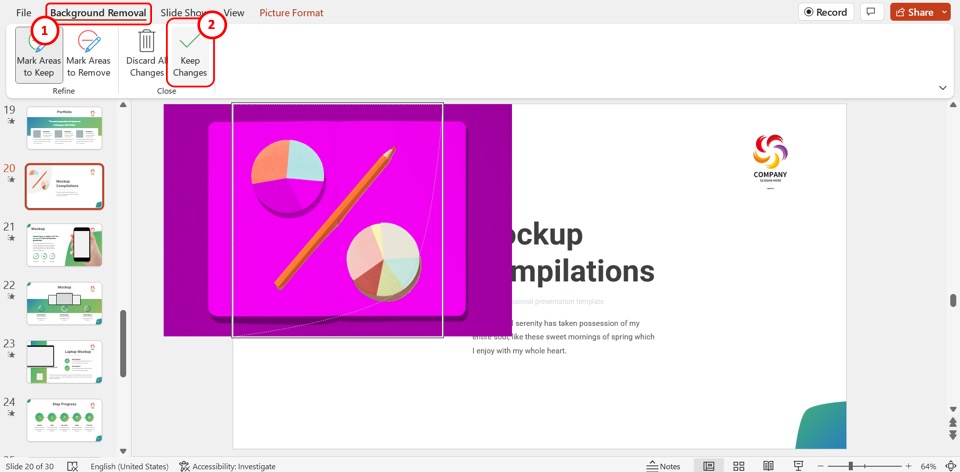
The final step is to click on the “Keep Changes” button in the “Background Removal” menu to make the background of the inserted PNG image transparent.
6. How to Save PowerPoint Slide as PNG?
In Microsoft PowerPoint, you can save a presentation slide as a PNG image. All you have to do is follow the 5 easy steps.
Step-1: Click on the “File” tab

The first step is to open the slide that you want to save as a PNG image. In the menu ribbon located at the top of the screen, click on the “File” tab to open the “File” menu.
Step-2: Click on the “Save As” option
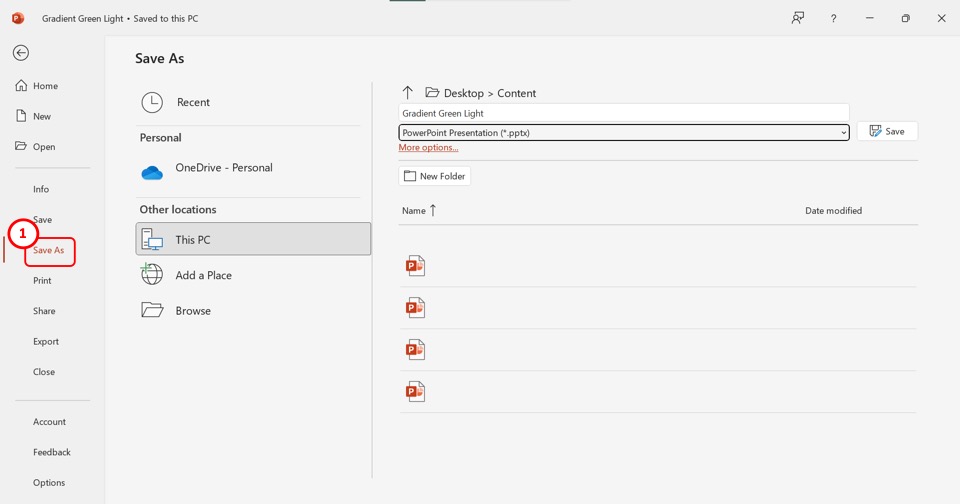
In the “File” menu, click on the “Save As” option in the sidebar located on the left side of the screen.
Step-3: Click on the “PNG Portable Network Graphics Format (*.png)” option
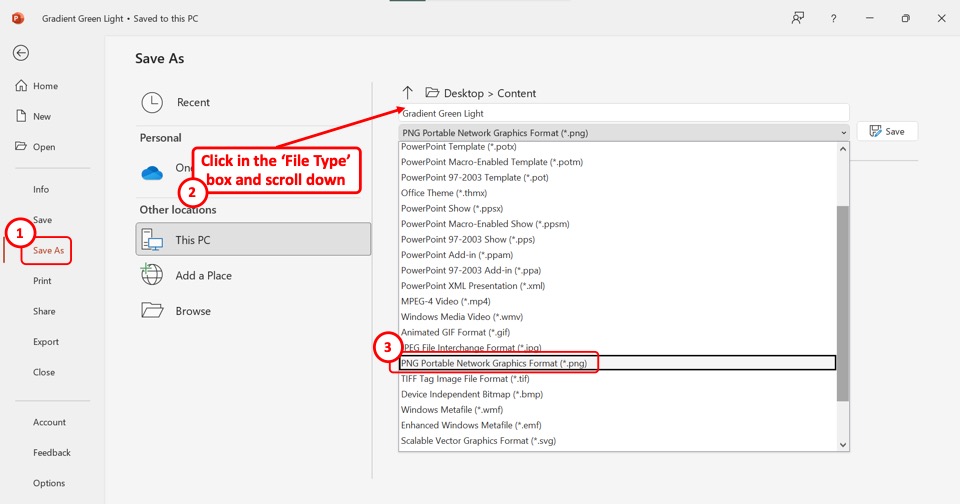
In the “Save As” screen, click on the “File Type” box. Scroll down in the dropdown list and click on the “PNG Portable Network Graphics Format (*.png)” option.
Step-4: Click on the “Save” button
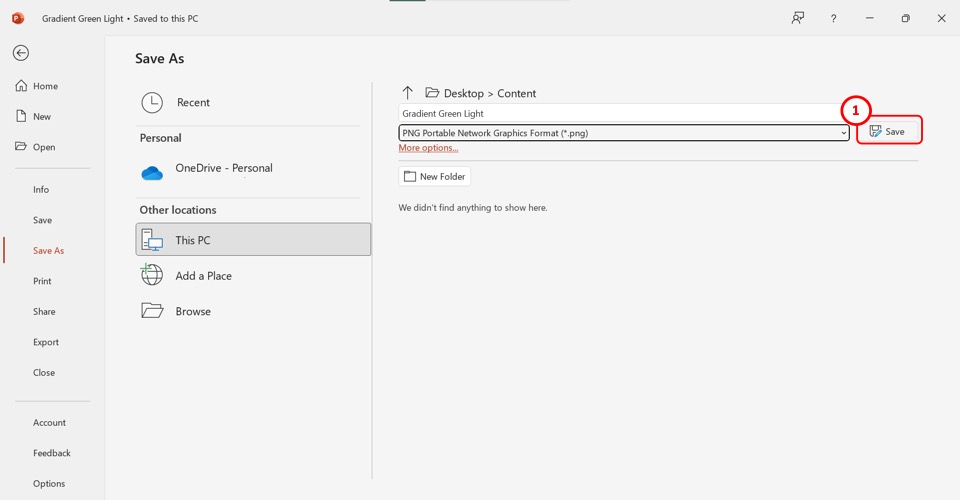
Finally, all you have to do is click on the “Save” button next to the “File Type” box. This will prompt a dialog box.
Step-5: Click on the “Just This One” option
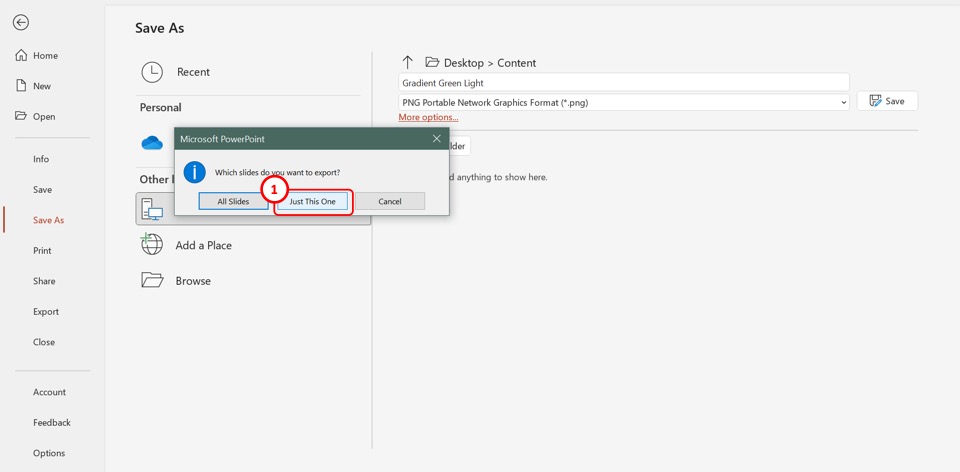
In the dialog box asking “Which slides do you want to export?”, click on the “Just This One” option. This will save the open slide as a PNG image to your device.
6.1 How to Save PowerPoint Presentation as PNG?
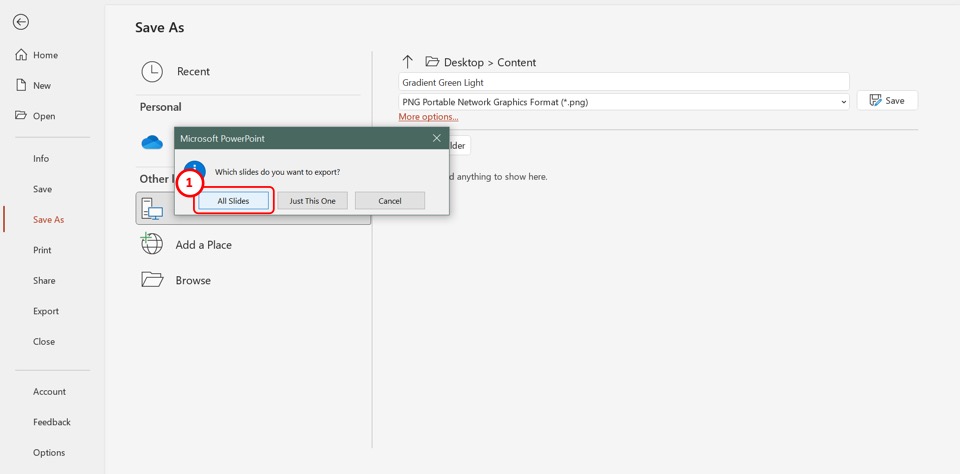
In Microsoft PowerPoint, you can also save an entire presentation file as PNG images. To do so, follow the steps detailed in section 6. Then in the final step (Step 5) all you have to do is click on the “All Slides” option in the dialog box asking “Which slides do you want to export?”.
You can find all the slides saved as PNG images in a folder on your device.
7. Fixed! PNG Not Transparent in PowerPoint
In Microsoft PowerPoint, you can insert a PNG image to be able to add any image with a transparent background. If you are unable to insert a transparent PNG image into a slide, you may try the following troubleshooting.
7.1 Image is Not Transparent
If the transparent PNG image has a checkered background after it is inserted into the slide, then the image does not have a transparent background.
To fix the issue, you can remove the background using photoshop. You can also use the “Remove Background” feature in PowerPoint to remove the checkered background in the PNG image.
7.2 Empty Placeholder in the Slide
If there is any empty image placeholder in the slide where you are inserting the transparent PNG image, the image will be automatically inserted into the placeholder. The transparent PNG image will automatically take on the color of the placeholder.
To fix this issue, make sure there are no image placeholders in the slide where you are inserting the transparent PNG image.
Credit to nakaridore (on Freepik) for the featured image of this article (further edited).