![Picture Correction in PowerPoint [Brighten, Sharpen, Contrast!]](https://artofpresentations.com/wp-content/uploads/2022/10/Featured-Image-1.jpg)
A picture enhances the engagement of your content, so PowerPoint makes sure that the pictures in your presentation are well-integrated with your slides. Once you have added pictures, Powerpoint allows you to brighten, sharpen and adjust the contrast of your pictures, offering both preprogrammed and manual options.
To correct pictures in PowerPoint, right-click on the image and click on “Picture Format”. Then, from the “Format Picture” panel, click on the “Picture Correction” option, and adjust the brightness, sharpness, and contrast values of the image by moving the slider or typing the desired value.
Powerpoint also lets you make your picture fade by adjusting its transparency and increasing saturation to adjust the amount of color in your picture.
Do you want to learn step-by-step about picture correction in Powerpoint? This article will show you how to use Powerpoint picture editor for the purpose of picture brightness, sharpness, and contrast.
Let’s give it a try!
1. How to Sharpen Images in PowerPoint?
The sharpening effect in Microsoft PowerPoint can be applied to any picture inserted into a slide. To sharpen an image using the preset options in PowerPoint, follow the 2 simple steps.
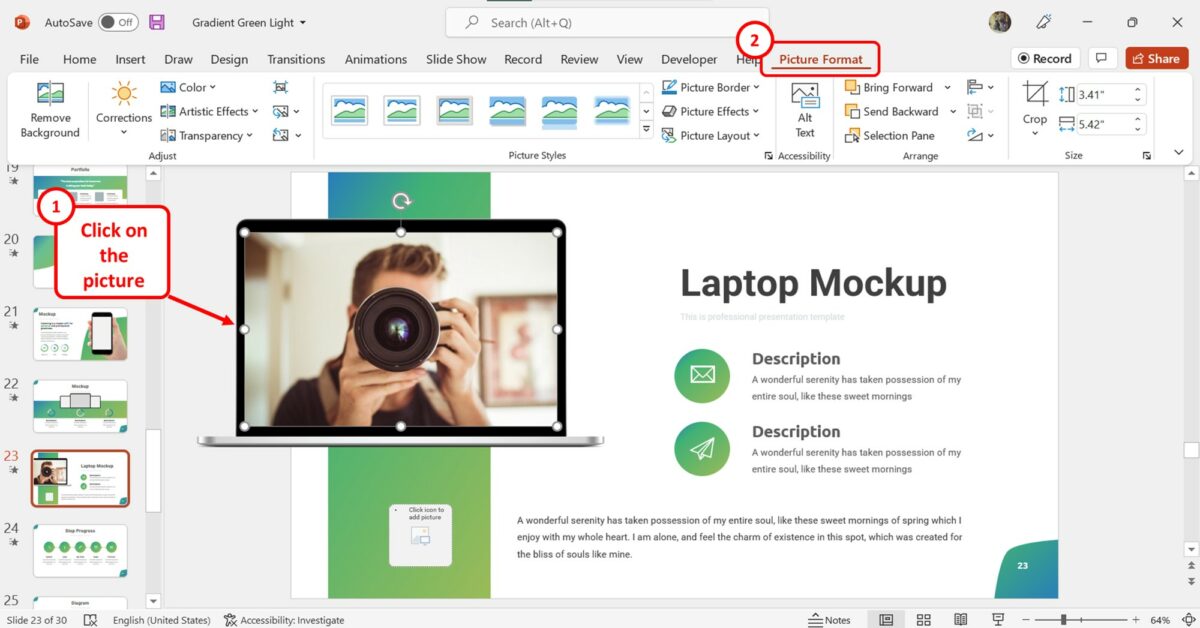
Step-1: Click on the “Picture Format” tab

In the PowerPoint slide, you have to first click on the picture that you want to sharpen. Then click on the “Picture Format” tab in the menu ribbon located at the top of the screen.
Step-2: Click on the “Corrections” option
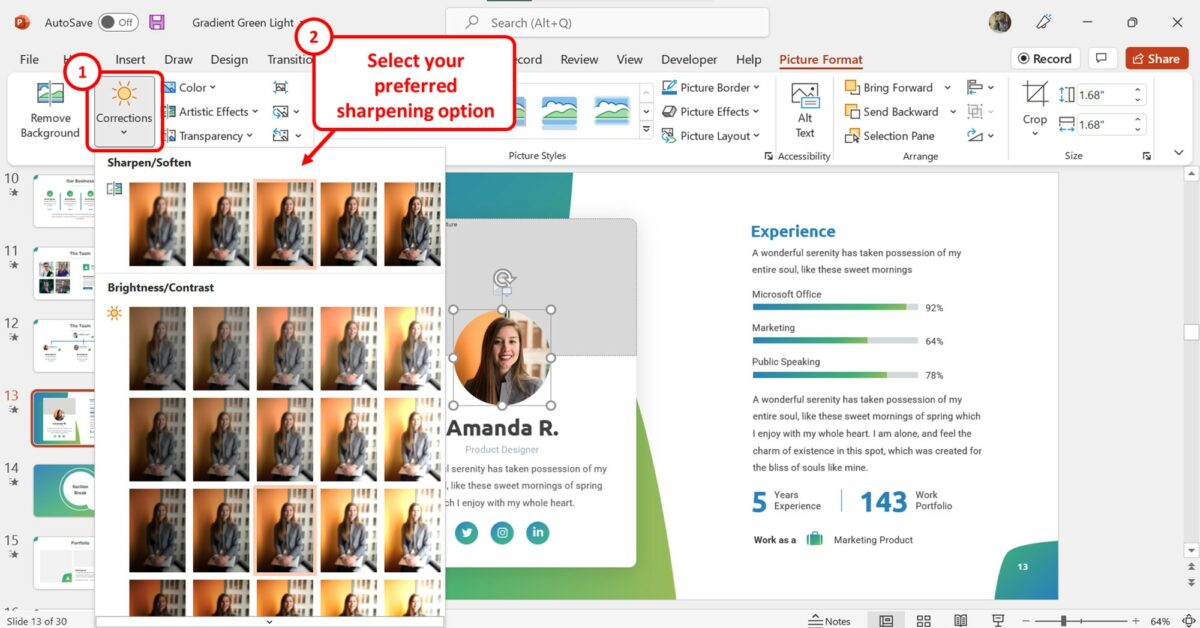
In the “Adjust” group of the “Picture Format” tab, click on the “Corrections” button. Now all you have to do is click on your preferred sharpening option from the “Sharpen/Soften” section of the dropdown menu under the “Corrections” option.
2. How to Increase Brightness or Contrast in PowerPoint
Using the “Picture Format” tab in Microsoft PowerPoint, you can quickly change the brightness or the contrast of a picture inserted into the slide. To increase the brightness or the contrast of a picture using the preset options, follow the 3 quick steps.
Step-1: Click on the “Picture Format” tab
The first step is to click on the picture on the slide. Then click on the “Picture Format” tab in the menu ribbon.
Step-2: Click on the “Corrections” button

The next step is to click on the “Corrections” option in the “Adjust” group of the “Picture Format” tab. This will open a dropdown menu containing the preset brightness and contrast adjustment options.
Step-3: Click on your preferred brightness or contrast preset
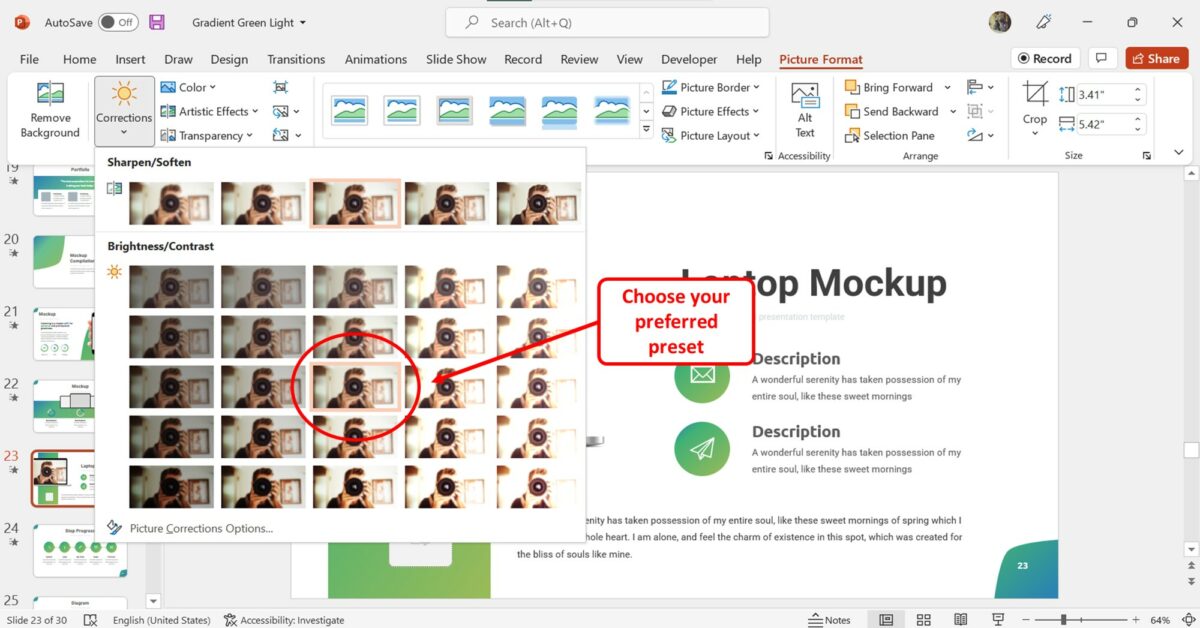
In the “Brightness/Contrast” section of the dropdown menu under the “Corrections” option, you can hover your pointer over the presets to see the brightness and contrast settings for each. Then click on your preferred preset.
3. How to Manually adjust the Sharpness of Picture in PowerPoint?
In Microsoft PowerPoint, you can manually adjust the sharpness of a picture rather than using a preset option. To manually adjust the sharpness of an image in PowerPoint, follow the 3 easy steps.
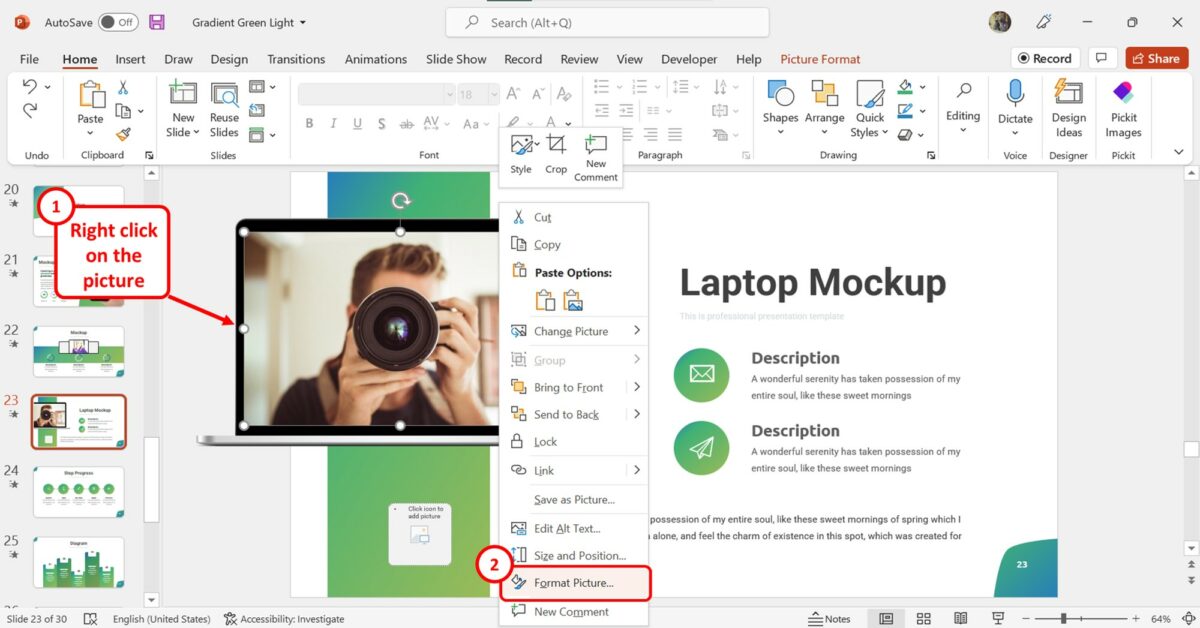
Step-1: Click on the “Format Picture” option

In the open slide, “Right Click” on the picture. Then click on the “Format Picture” option from the right-click menu. This will open the “Format Picture” sidebar.
Step-2: Click on the “Picture” icon
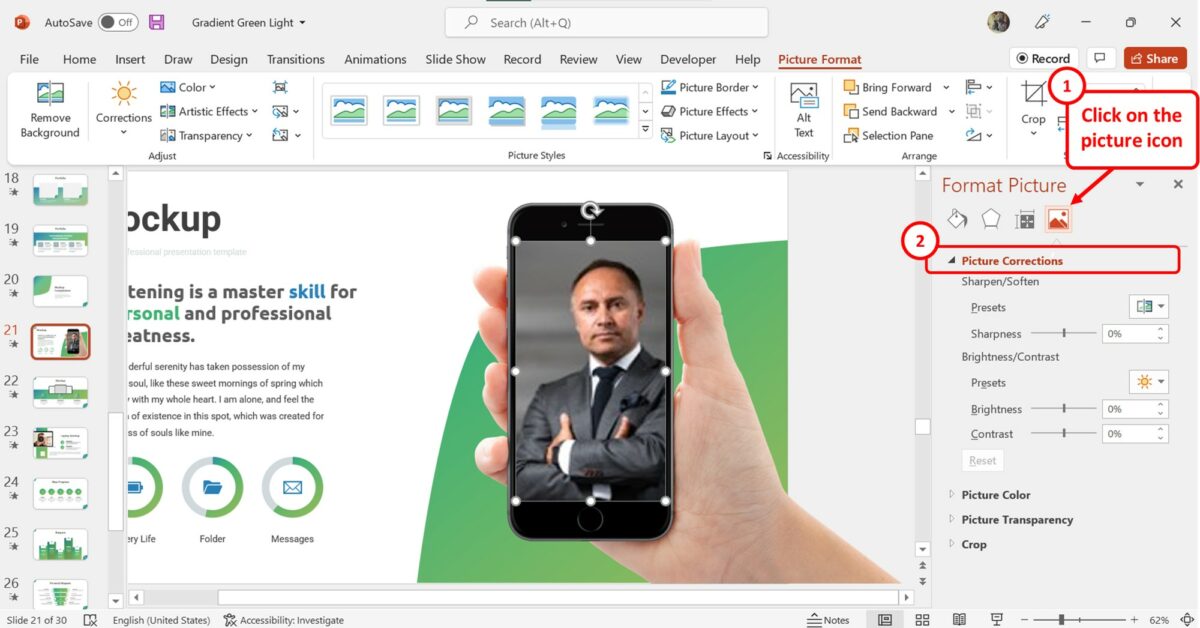
In the “Format Picture” sidebar on the right side of the screen, click on the “Picture” icon at the top. Then click on the “Picture Corrections” option.
Step-3: Click on the “Sharpness” box
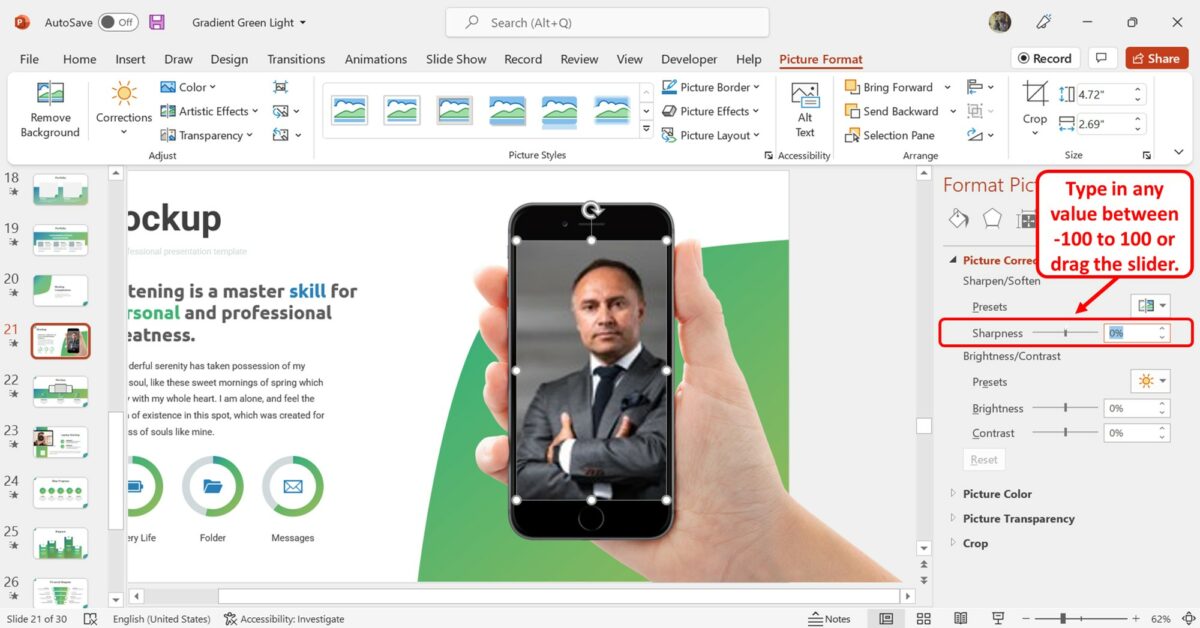
In the “Picture Corrections” section, click on the “Sharpness” box. Now you can enter any number between “-100” to “100”. You can also drag the “Sharpness” slider left and right to decrease or increase the picture sharpness.
4. How to Manually Control Brightness or Contrast of an Image in PowerPoint?
In Microsoft PowerPoint, you can adjust the brightness or contrast of an image using the presets available. However, there are a limited number of presets, and for more options, you have to do it manually. To control image brightness and contrast manually, follow the 4 quick steps.
Step-1: Click on the “Format Picture” option

The first step is to “Right Click” on the image inserted into the slide. Then click on the “Format Picture” option.
Step-2: Click on the “Picture” icon

In the “Format Picture” sidebar at the right side of the screen, click on the “Picture” option which is the last icon at the top. Then click on the “Picture Corrections” option to expand the picture correction options.
Step-3: Click on the “Brightness” box

In the “Picture Corrections” section of the “Format Picture” sidebar, click on the “Brightness” box. Now you can type in any value between “-100” to “100” to set the brightness. You can also drag the “Brightness” slider to adjust the brightness of the picture.
Step-4: Click on the “Contrast” box
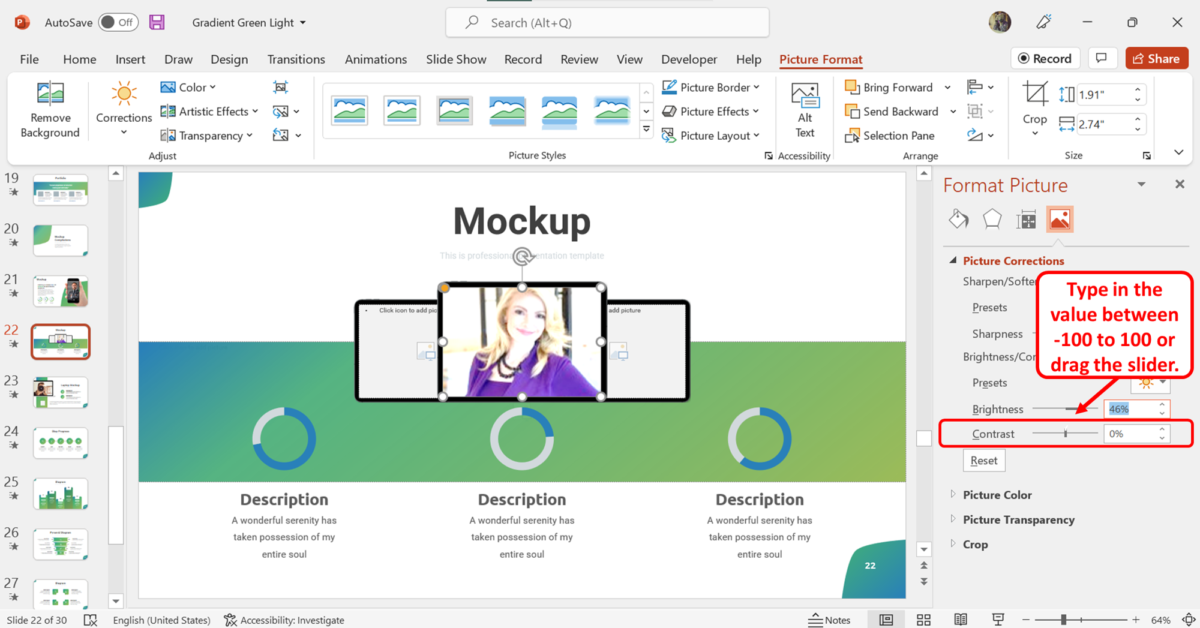
The next step is to adjust the contrast of the picture on the slide. Click on the “Contrast” box in the “Format Picture” sidebar and type in a contrast value between “-100” to “100”. You can also drag the slider to adjust the contrast.
5. How to Fade an Image in PowerPoint?
In Microsoft PowerPoint, you can adjust the transparency of a picture to fade it. To fade a picture in a slide, follow the 3 simple steps.
Step-1: Click on the “Picture Format” tab

The first step is to click on the picture inserted into the slide that you want to fade. Then click on the “Picture Format” tab in the menu ribbon located at the top of the screen.
Step-2: Click on the “Transparency” option

In the “Adjust” group of the “Picture Format” tab, click on the “Transparency” option which is the last option in the group. In the dropdown menu under the “Transparency” option, click on your preferred transparency preset to fade the image. You can also click on the “Picture Transparency Options” option to manually set the transparency.
Step-3: Click on the “Transparency” box

In the “Format Picture” sidebar on the right side of the screen, click on the “Transparency” box and enter your preferred transparency value. You can also drag the “Transparency” slider to the right to increase the transparency to fade the selected image.
6. How to Increase Picture Saturation in PowerPoint?
Picture saturation is what controls the amount of color in a picture. When you insert an image in PowerPoint, you can adjust the saturation to match the presentation theme.
I’ve covered the topic of how to change picture color in PowerPoint in great detail in another article. Make sure you check that out as well!
To increase picture saturation, follow the 3 easy steps.
Step-1: Click on the “Format Picture” option
In the open slide, you have to first “Right Click” on the picture that you want to change the saturation for. Then click on the “Format Picture” option in the right-click menu. This will open the “Format Picture” sidebar.
Step-2: Click on the “Picture Color” option
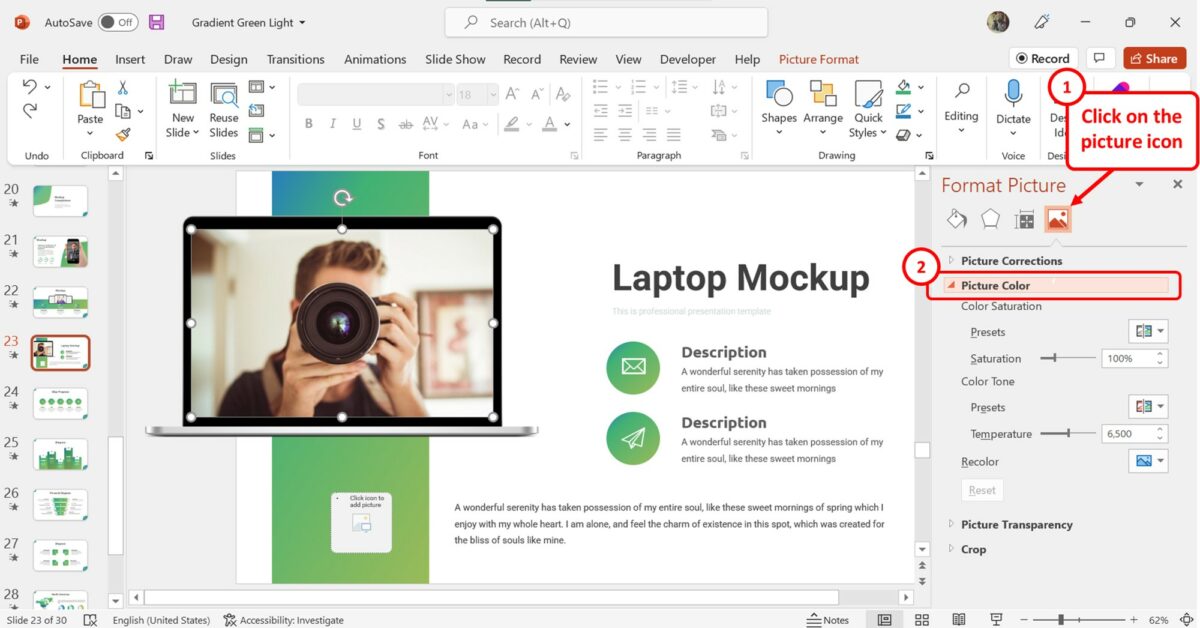
At the top of the “Format Picture” sidebar, click on the “Picture” option which is the last icon. Then click on the “Picture Color” option in the sidebar.
Step-3: Click on the “Saturation” box
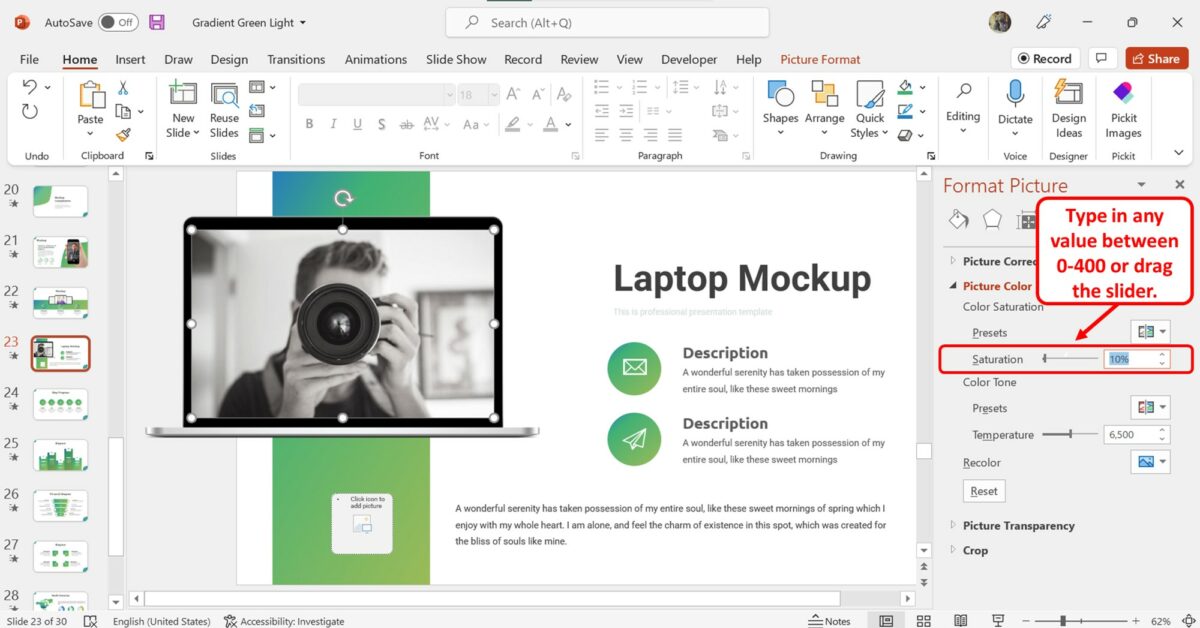
Under the “Picture Color” section in the “Format Picture” sidebar, click on the “Saturation” box. Then type in a value between “0” and “400” in the box. You can also drag the slider to the right to increase the saturation of the selected picture in PowerPoint.