![How to Move or Resize Tables in PowerPoint? [An EASY Way!]](https://artofpresentations.com/wp-content/uploads/2022/05/Featured-Image-Move-or-Resize-tables-in-PowerPoint-1.jpg)
Do you like everything to be tidy and symmetric? If you are like me then the answer to this is most likely yes! But, how does one do this when working with a table in PowerPoint? How to resize and move tables in PowerPoint?
To move a table in PowerPoint, first, select the table by clicking on it. Then, press and hold the “Left Mouse” button, and drag the table to a desired position on the slide. Finally, release the mouse button. To resize the table in PowerPoint, drag any one of the corners of the table in or out.
Is this too easy to be true? Read further for a detailed explanation of the above steps, as well as a few other helpful tips for resizing and moving tables in PowerPoint.
1. How to Select a Table in PowerPoint?
The tables in PowerPoint are very easily editable. There is a ton of stuff that you can do to a table. For instance, you can add rows or columns in a table. However, a lot of editing usually requires you to either select a cell, row, or the table itself!
Let’s take a look at how this can be done.
1.1 Select a Complete Row of a Table in PowerPoint

To select a complete row of a table inside a PowerPoint presentation slide, you have to first click anywhere on the table. Then move the cursor outside the table to the left. You will notice the cursor change to a black arrow pointing horizontally to the row that you want to select.
Now all you have to do is click on it to highlight the entire selected row.
1.2 Select a Complete Column of a Table in PowerPoint
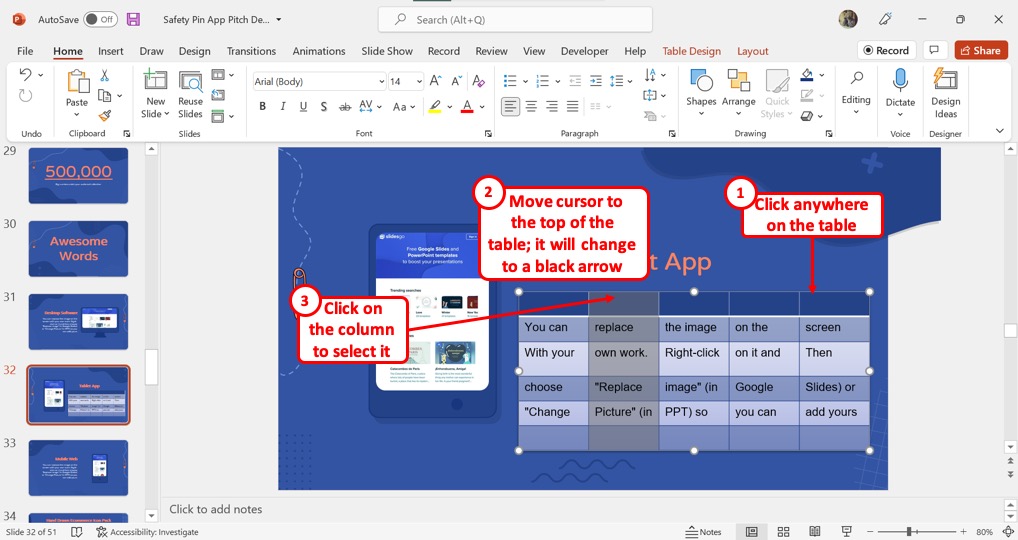
In PowerPoint, you can easily select a complete column of a table. First, click on the table. Then move the cursor outside the table directly at the top of the column that you want to select. When the cursor changes to a black arrow pointing down, click on it to select the entire column.
1.3 Select a Complete Table in PowerPoint
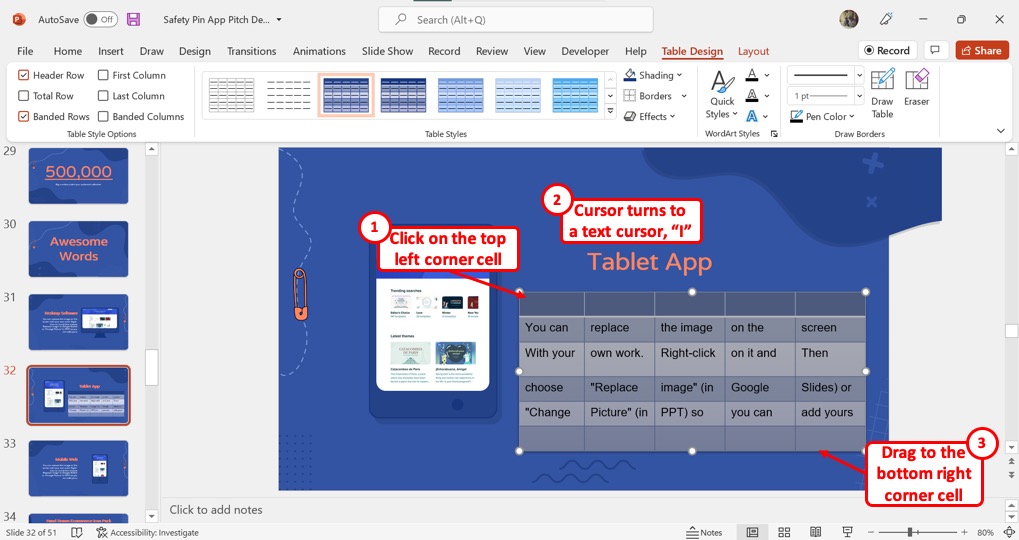
To select an entire table in your PowerPoint presentation, you have to first click on the first cell which is at the left corner on the top of the table. The cursor will change to a “Text Cursor” which looks like the letter “I”.
Now click on it and drag all the way to the last cell which is located at the right and bottom corner of the table. The entire table will be highlighted gray showing that the table is selected.
2. How to Move a Table in PowerPoint?
Now that you’ve understood how to select a table, it is quite easy to move a table in PowerPoint. You can move the inserted table within the slide or even to a different slide.
Let’s understand how to do both these actions in PowerPoint.
2.1 Moving a Table on the Same Slide in PowerPoint
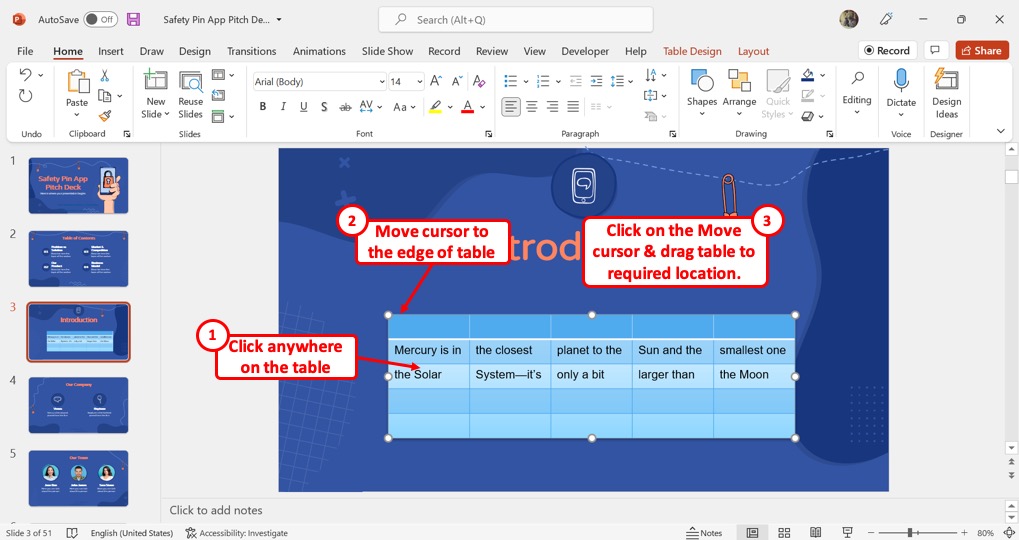
To move a table inside a PowerPoint slide, you have to first click anywhere on the table to select it. Then move the cursor to the edge of the table and click on the move cursor. Now you can drag the table anywhere on the open slide.
2.2 Moving a Table to Another Slide in PowerPoint
To move a table from one slide to another slide in the same PowerPoint presentation file, you have to use the “Cut” and “Paste” features. Follow these 2 steps to do so.
Step-1: Click on the “Cut” option
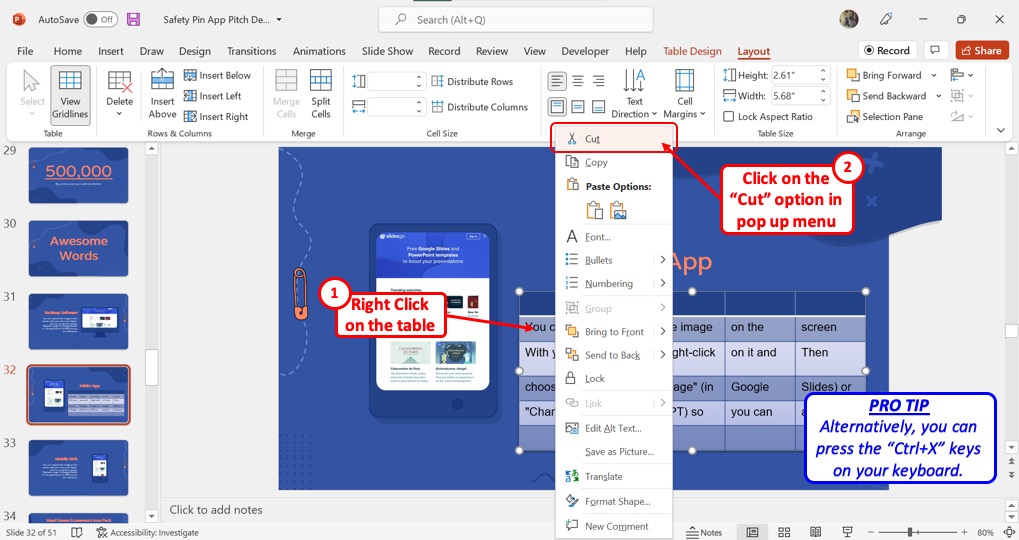
The first step is to “Right Click” on the table that you want to move. Then click on the “Cut” option from the context menu. You can alternatively press the “Ctrl+X” keys on your keyboard.
Step-2: Click on the “Paste” option
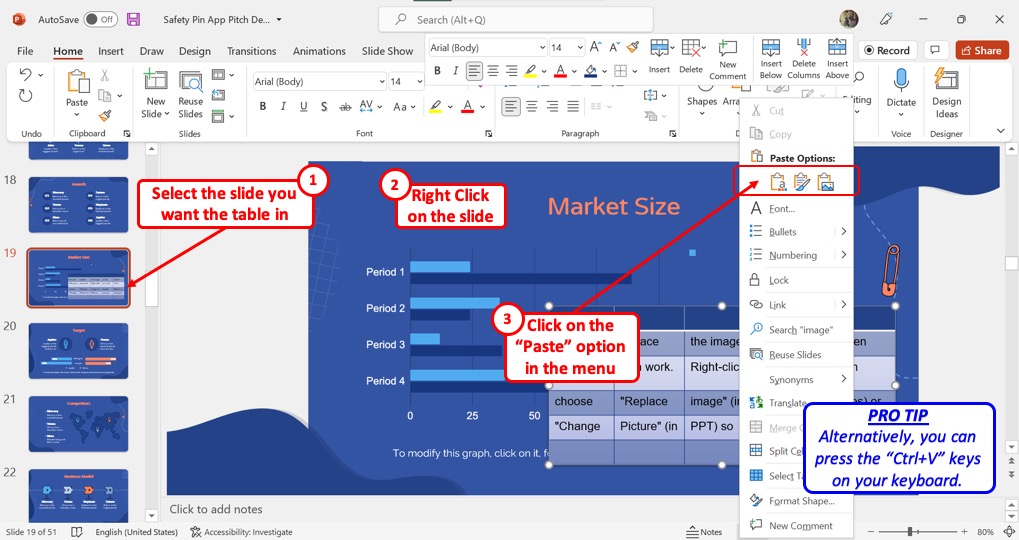
From the slide thumbnail pane on the left side of the screen, open the slide where you want to move the table. Then “Right Click” anywhere on the slide and select the “Paste” option from the right-click menu. Alternatively, you can press the “Ctrl+V” keys on your keyboard to move the table to the new slide.
3. How to Resize a Table in PowerPoint?
In Microsoft PowerPoint, you can resize the tables inserted into the presentation slides in three different ways. You can resize the entire table, select your preferred table dimensions, or even resize rows and columns separately.
Method 1 – Drag the Table Edges
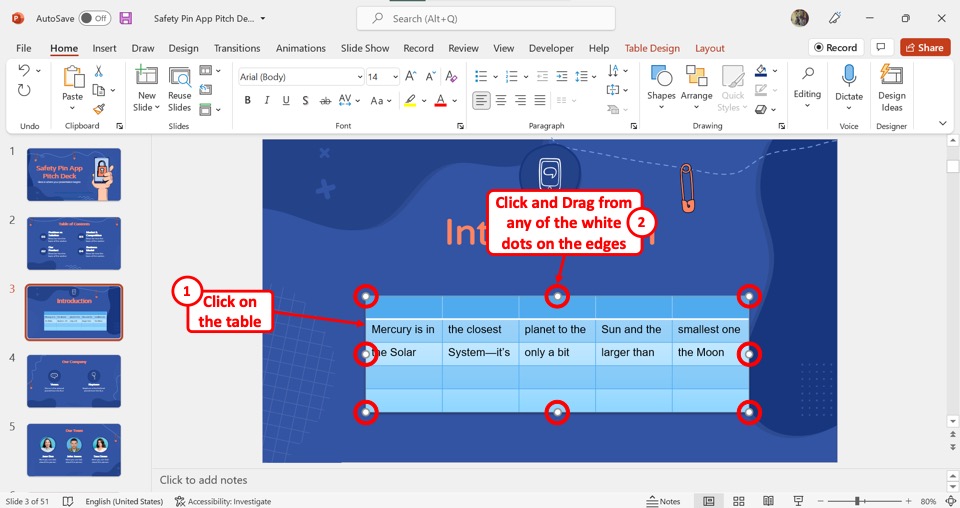
Click on the table that you want to resize. Then click and drag any of the white dots on the edges of the table. The ones on the top and bottom will resize the table vertically, and the ones on either side will resize it horizontally.
You can also use the ones on the corners of the table to resize the entire table proportionally.
Method 2 – Enter a Specific Table Size
You can resize the table by specifying the table dimensions. Follow the 2 steps mentioned below.
Step-1: Click on the “Layout” tab
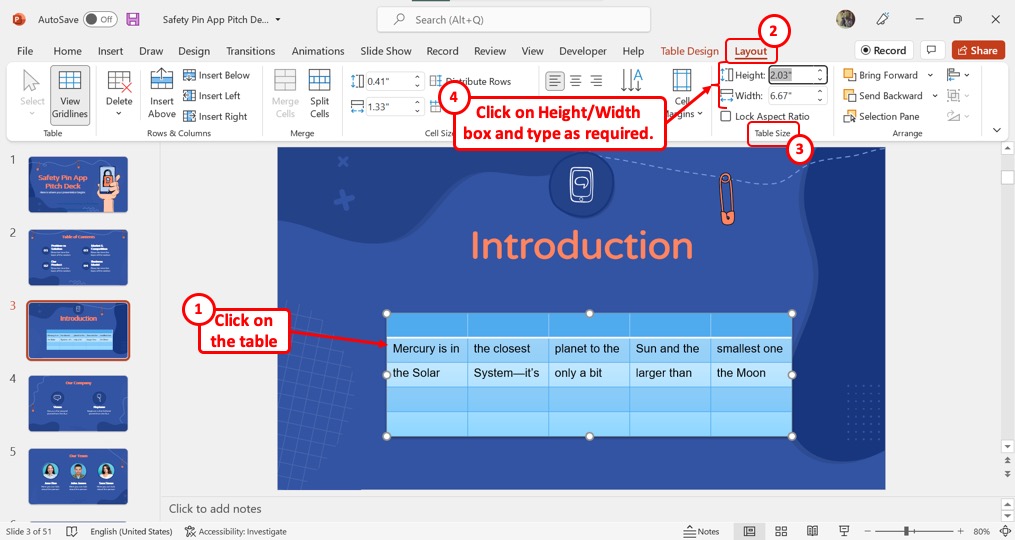
In the open slide, click on the table. Then click on the “Layout” tab in the menu ribbon located at the top of the screen.
Step-2: Click on the “Height” and “Width” box
In the “Table Size” group of the “Layout” tab, click on the “Height” box and type in your preferred table height. Similarly, click on the “Width” box and type in the table width to resize the selected table (shown in the illustration above)
Method 3 – Adjust the Row or Columns
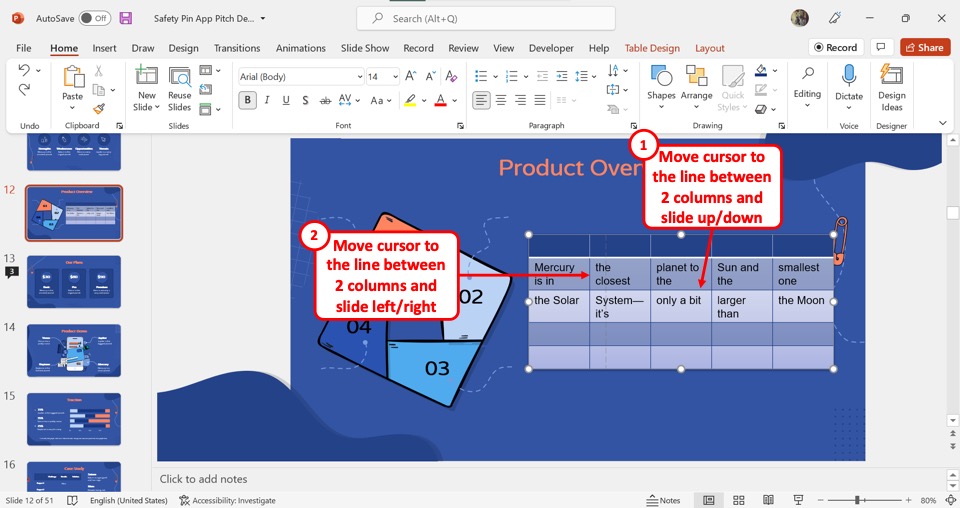
You can also resize a table in a PowerPoint presentation slide by resizing the rows and columns. To resize a row, you need to move your cursor to the line between two rows and slide it up or down. Similarly, you can resize columns by sliding the line between two columns.
4. Can You Move or Rearrange Rows in a Table in PowerPoint?
In Microsoft PowerPoint, you cannot move or rearrange the rows in a table. However, you can use the “Cut” and “Paste” features to take the content from one row to a new row. Follow the 3 easy steps.
Step-1: Click on the “Cut” option
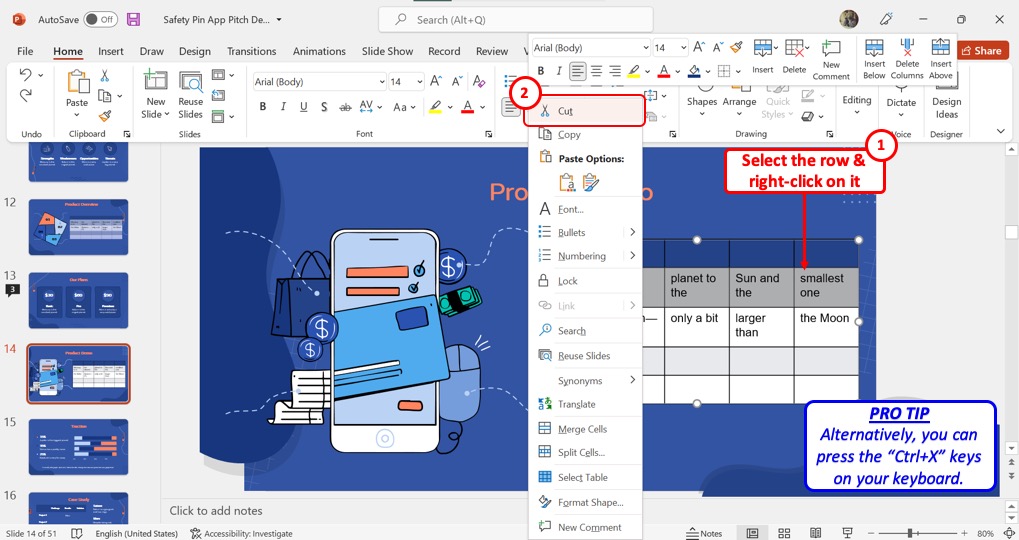
In the table, select the row that you want to rearrange. Then “Right Click” on it and select the “Cut” option from the right-click menu. Alternatively, you can press the “Ctrl+X” keys on your keyboard.
Step-2: Click on “Insert Above”
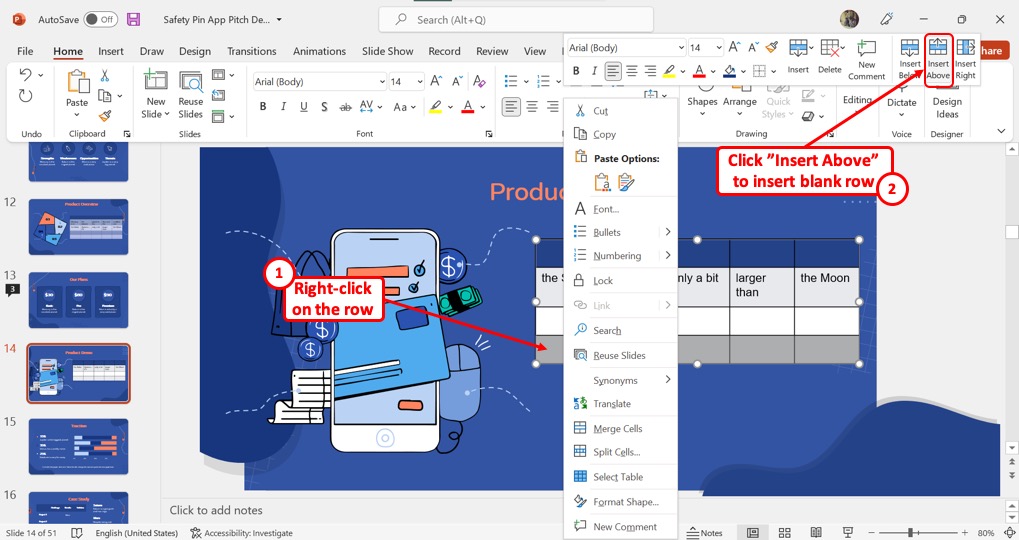
Now “Right Click” on the row above which you want to move the selected row. From the context menu at the top, click on the “Insert Above” option to insert a blank row.
Step-3: Click on the “Paste” option
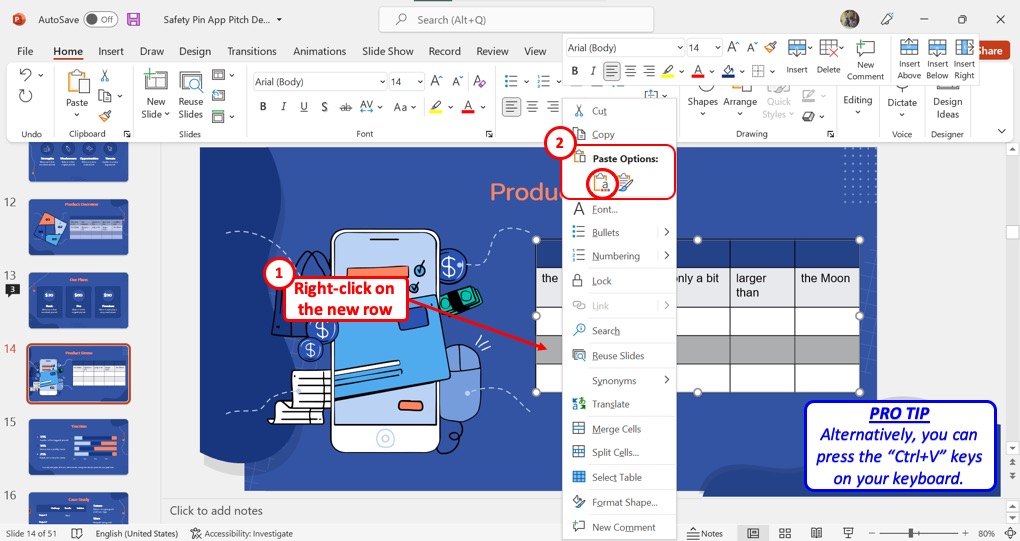
Now all you have to do is “Right Click” on the new blank row and select the “Use Destination Theme” under “Paste Options” to move the selected row to the new row. You can alternatively press the “Ctrl+V” keys on your keyboard.
5. How to Distribute Rows or Columns Evenly in a Table in PowerPoint?
The “Distribute Rows” and “Distribute Columns” feature in PowerPoint allow you to ensure that all the rows and columns are of even sizes on a table in PowerPoint.
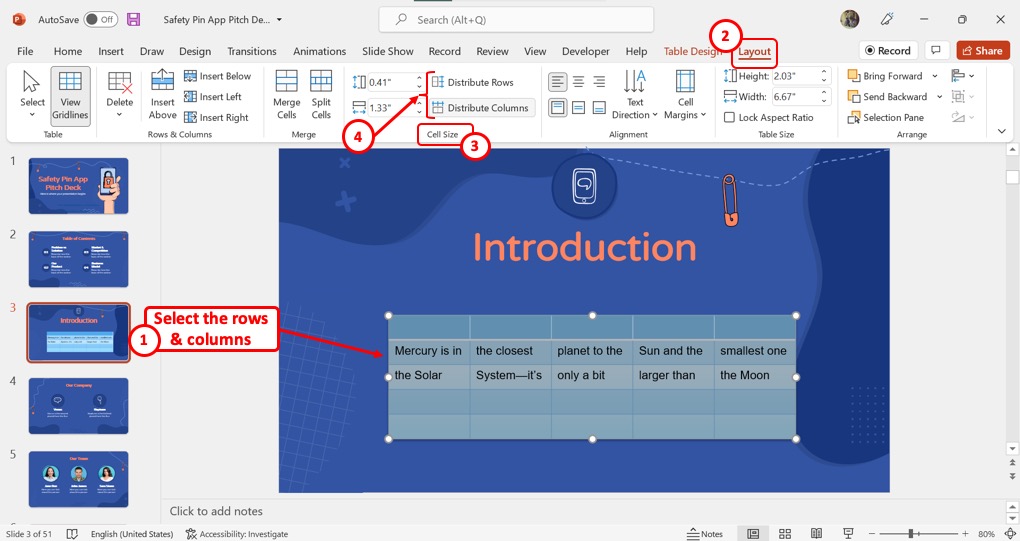
To distribute rows or columns evenly in a table in PowerPoint, you have to first select the rows or columns. Then click on the “Layout” tab in the menu ribbon. In the “Cell Size” group of the “Layout” tab, click on the “Distribute Rows” option to distribute the selected rows evenly.
Similarly, click on the “Distribute Columns” option to distribute the selected columns evenly
6. How to Lock Aspect Ratio of Table in PowerPoint?
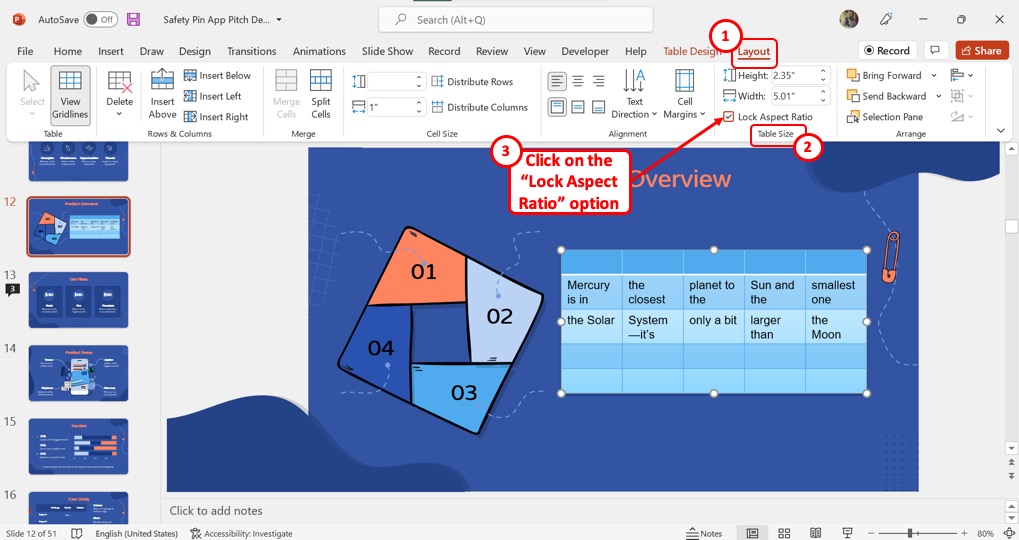
The “Lock Aspect Ratio” feature in PowerPoint locks the height-to-width ratio for resizing the table. To lock the aspect ratio, click on the “Layout” tab in the menu ribbon. In the “Table Size” group of the “Layout” tab, click on the “Lock Aspect Ratio” option.
7. How to AutoFit Table in PowerPoint?
Unlike Word and Outlook, in Microsoft PowerPoint, there is no “Autofit” option available for tables in PowerPoint. To autofit a table in PowerPoint, you can use the “Distribute Rows” and “Distribute Columns” features. Refer to section 5 for the detailed instructions.
8. How to Fix Table Size in PowerPoint?
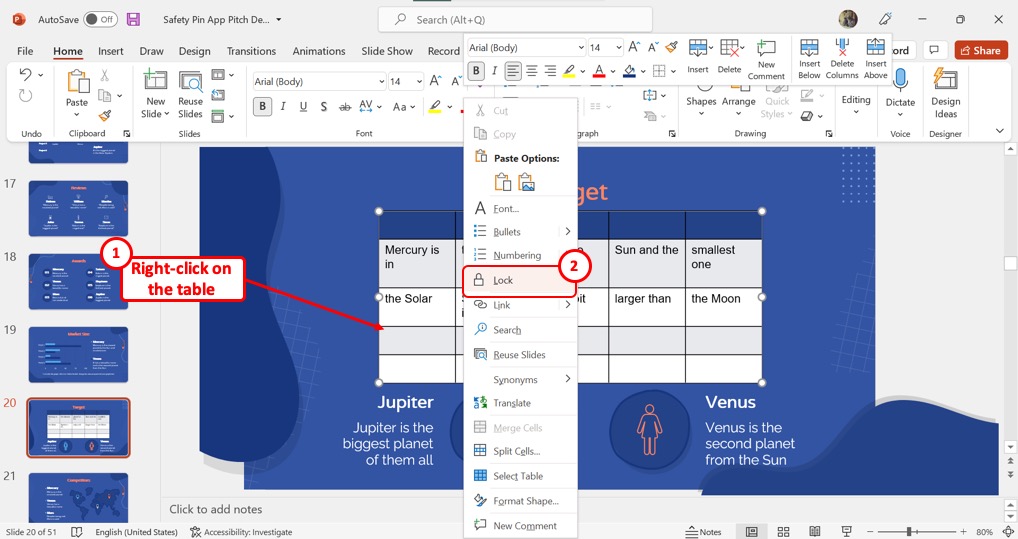
In Microsoft PowerPoint, you can fix a table in its size and position such that it can no longer be moved or resized. To do so, “Right Click” on the table and select the “Lock” option from the right-click menu. The table size and position will now be fixed.
9. Why Does the Row Height Not Change in PowerPoint Table?
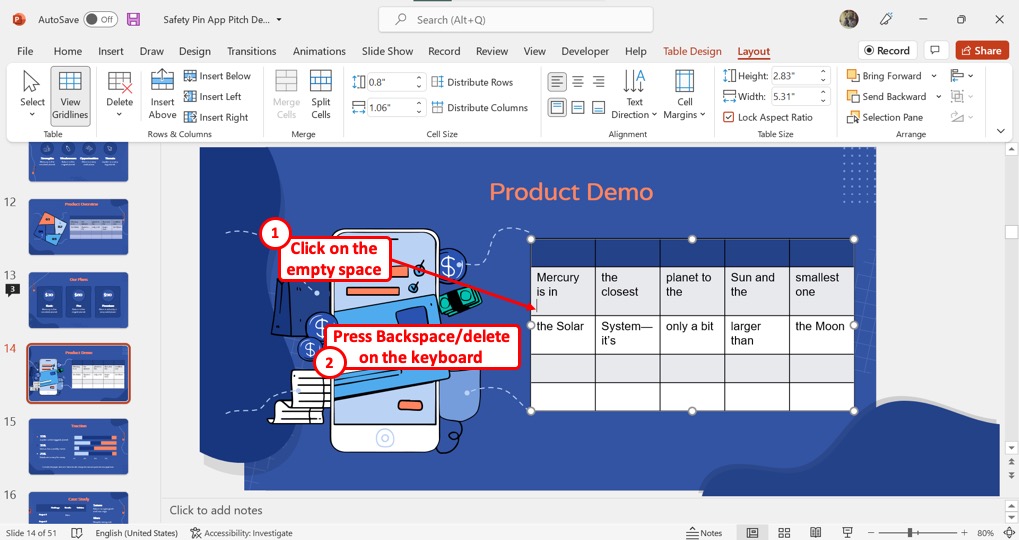
If you cannot change the row height in PowerPoint, the most common reason is that there are blank lines in the row you are trying to resize.
To fix this problem, all you have to do is click on the empty space under the text in the row you want to adjust. When the text cursor appears, press the “backspace” key on your keyboard to delete the blank lines. You should now be able to change the row heights of the tables.