![What is a Mini Toolbar in PowerPoint? [And How to Use It?]](https://artofpresentations.com/wp-content/uploads/2022/02/Featured-Image-Mini-Toolbar-in-PowerPoint.webp)
If you have ever used a toolbar in PowerPoint, you must be wondering what exactly is a mini toolbar and how is it used!
The mini toolbar in PowerPoint is small sized tool bar that appears whenever you select the text or right-click on shapes in PowerPoint. It contains a small set of commands that are considered the most useful for editing of text or shapes in PowerPoint.
In this article, we shall understand the “Mini Toolbar” in PowerPoint in further detail. We will take a look at the commands that are available in the mini toolbar, how to use it, and how to enable and disable the mini toolbar in PowerPoint.
So, let’s get started!
1. What is a Mini Toolbar in PowerPoint? What is Its Purpose?
As mentioned earlier, the “Mini Toolbar” in Microsoft PowerPoint is a set of commands that appear on the screen when you select an object or text on a slide.
The commands in the mini toolbar vary depending on the selected object. Besides, some commands are automatically adjusted based on your recent activities. The sole purpose of the mini toolbar is to make editing quicker and finding the most common commands easier.
One thing to note is that the mini toolbar is not the same as the Quick Access Toolbar in PowerPoint. That said, the goal of both the types of toolbars is to make the process of finding the most useful commands faster and easier.
2. When Does the Mini Toolbar Appear in PowerPoint?
In Microsoft PowerPoint, the mini toolbar appears when you select an object. It is also available when you “Right Click” on something in a slide.
1. When You Select the text
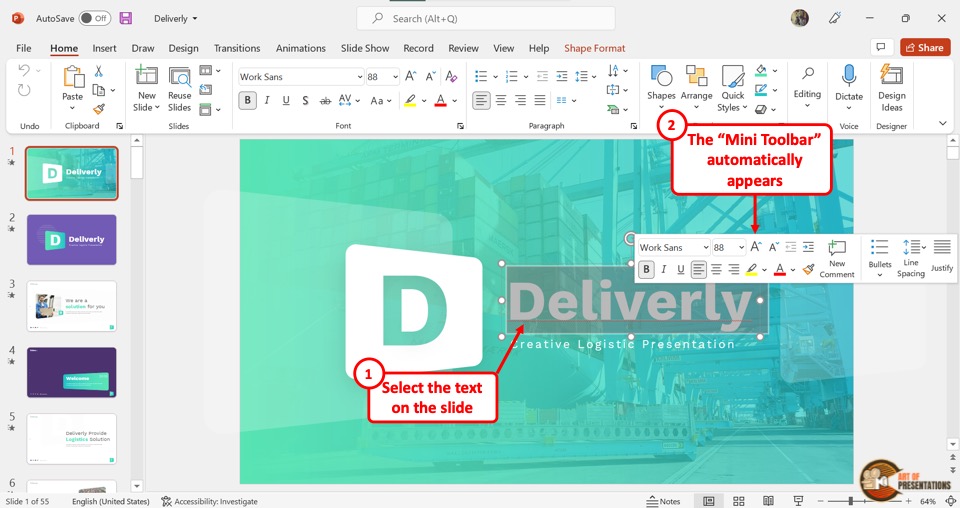
The quickest way to access the mini toolbar is to select the text within a text box in a slide. When you move the pointer away from the text box, the mini toolbar will automatically disappear.
2. When You “Right Click” on the shape
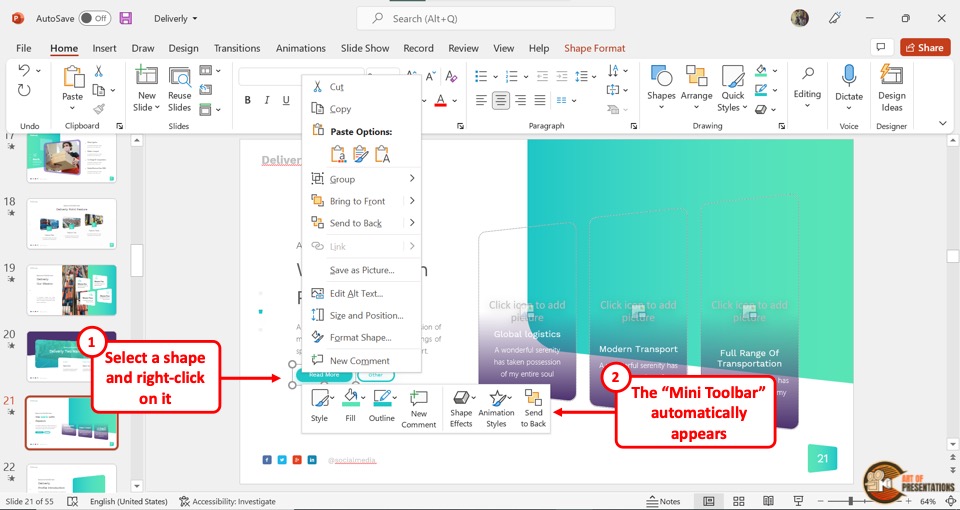
For other objects besides text boxes in a slide, you have to use the “Right Click” method to access the mini toolbar. All you have to do is “Right Click” on the object. The mini toolbar will appear on the top or bottom of the right-click menu depending on the position of the object.
3. How to Use the Mini Toolbar in PowerPoint?
To use the mini toolbar in Microsoft PowerPoint, all you have to do is select a text or “Right Click” on an object. Then all you have to do is click on the options in the mini toolbar to edit the selected text or other objects in the slide.
3.1 Commands Available for Text on the Mini Toolbar in PowerPoint
The commands available in the mini toolbar of Microsoft PowerPoint vary depending on the item selected. Besides, some commands automatically update to your most recently used commands.
Font
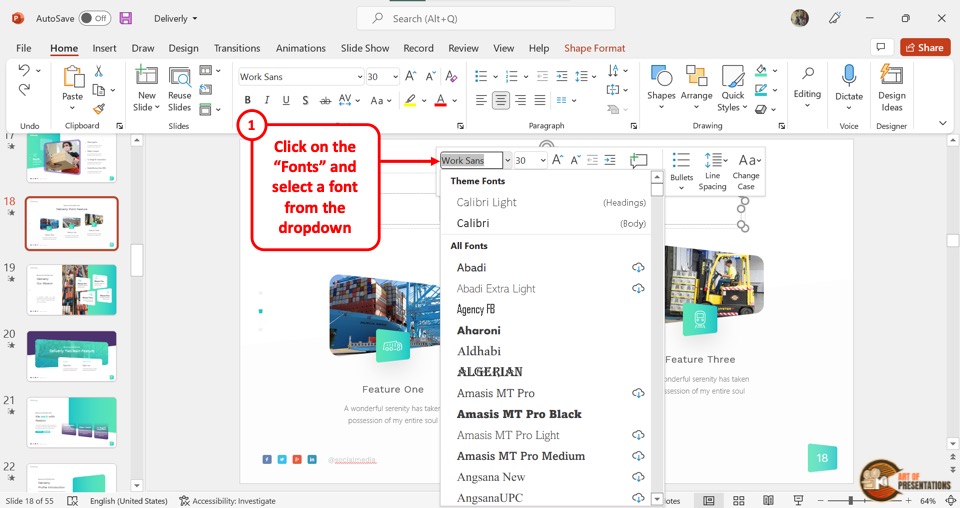
The “Font” option is the first option in the mini toolbar for a text box. Click on the “Font” box to open a dropdown menu containing a list of fonts for your text.
Font Size
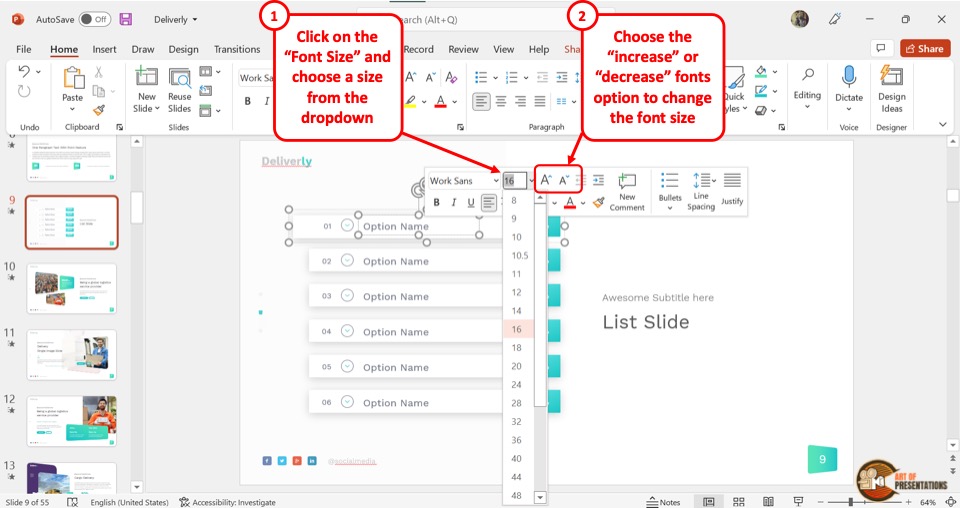
The “Font Size” command is available only for texts. There are three different commands. The “Font Size” box allows you to select any size for the text.
You can also click on the “Increase Font Size” icon or the “Decrease Font Size” icon to increase or decrease your font size by two points.
Font Style
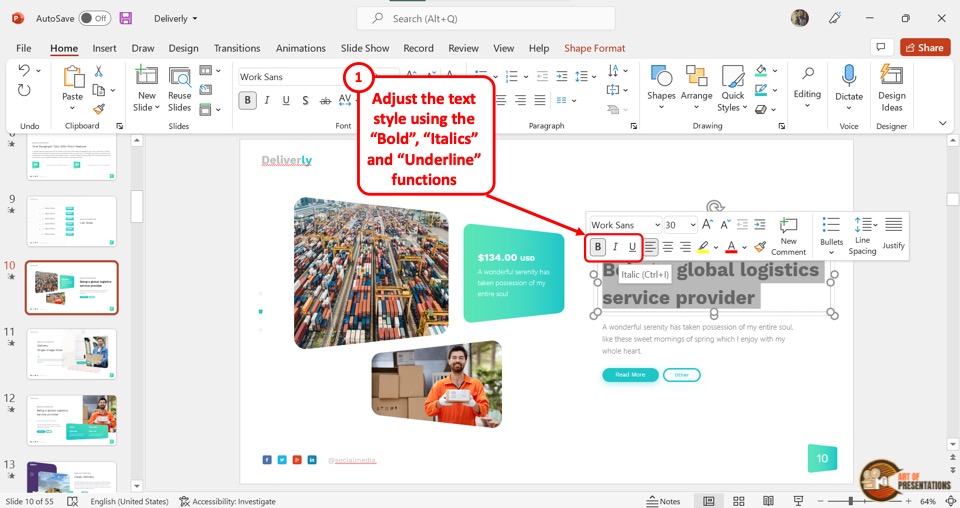
The “Font Style” of the mini toolbar for text boxes includes three different commands. These are “Bold”, “Italics” and “Underline”.
Text Alignment
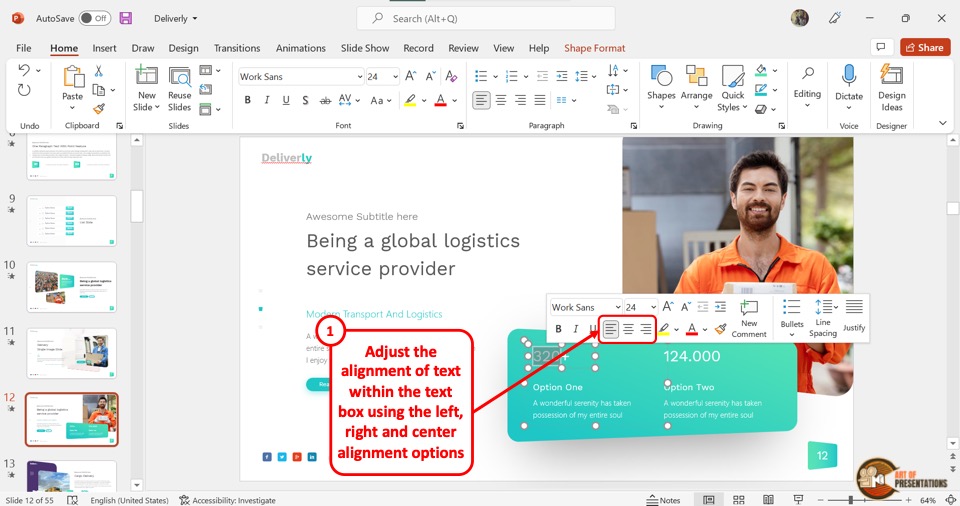
The “Paragraph Alignment” options are available in the second row of the mini toolbar for text boxes. The commands for alignment in the mini toolbar are “Align Left”, “Align Center”, and “Align Right”.
Text Highlight
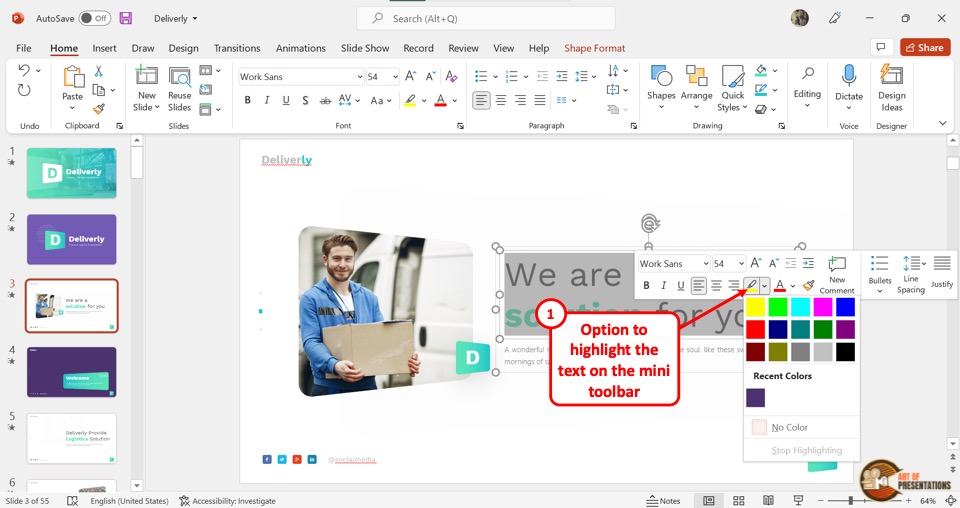
In the mini toolbar for a text box, you will find the “Text Highlight” command in the second row.
You can click on it to open a dropdown menu containing colors available for highlighting the selected text.
Text Color
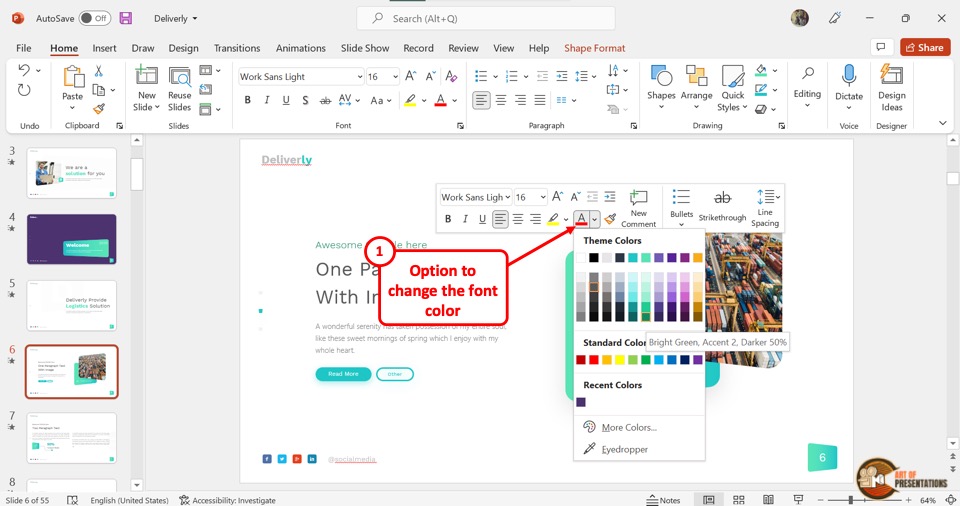
You can click on the “Text Color” option in the mini toolbar to open a dropdown menu. It includes “Theme Colors”, “Standard Colors”, “More Colors” and “Eyedropper” options.
Indentation
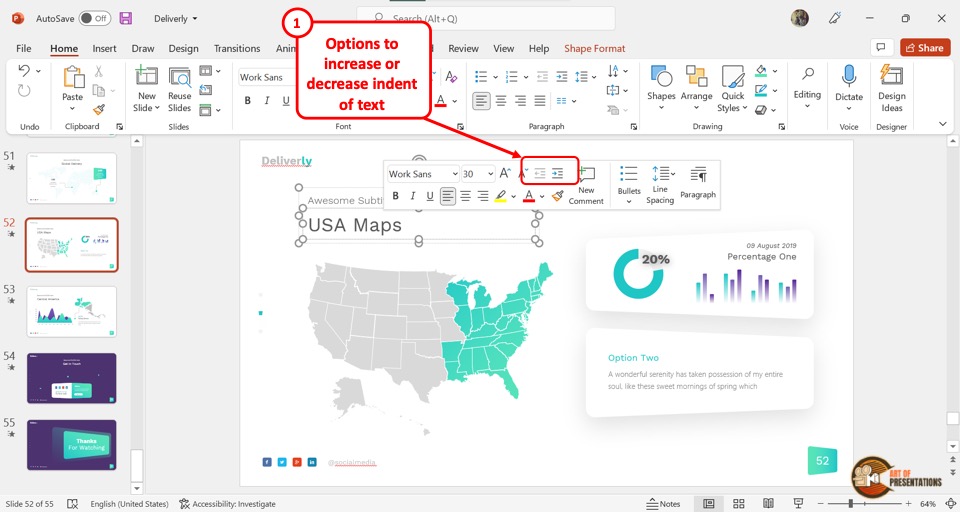
There are two indentation commands in the mini toolbar for a text box. You can click on the “Increase List Level” option to increase indentation, and on the “Decrease List Level” option to decrease indentation.
Format Painter
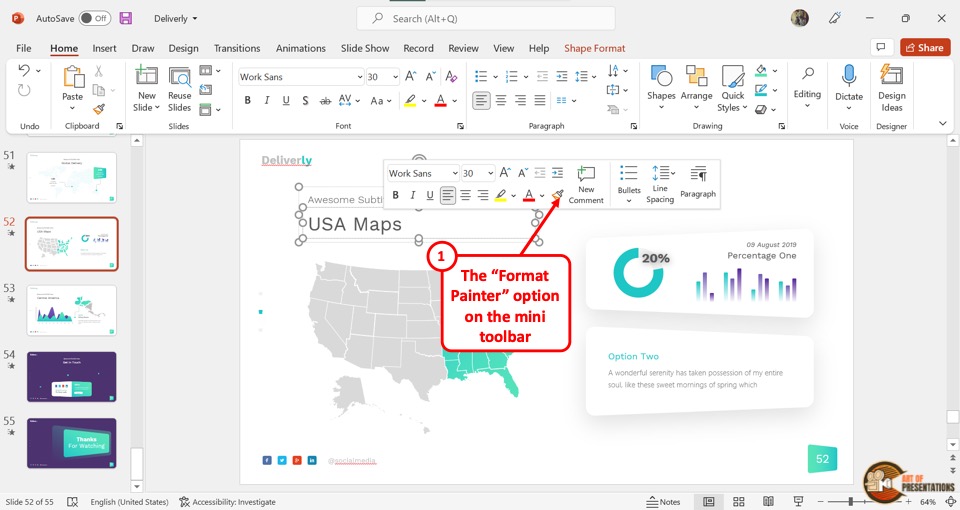
The “Format Painter” in PowerPoint allows you to copy just the formatting of a particular piece of text or object.
Although the most common way to access is it through the “Home Tab” in PowerPoint, it is also available in the mini toolbar for both text boxes and shapes. Click on the option to paste formatting from the clipboard.
New Comment
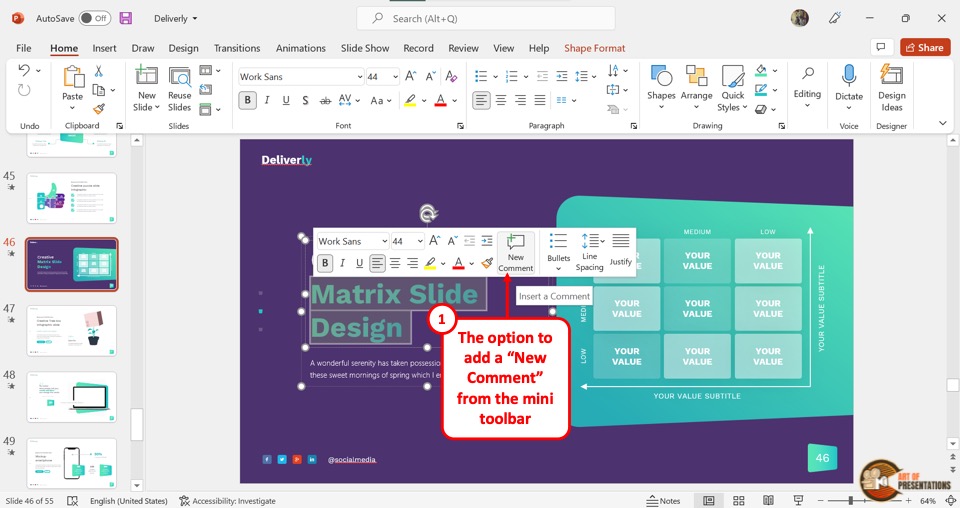
The “New Comment” option is available in the mini toolbar for any selected item in the slide. This command basically allows you to quickly add a comment in PowerPoint to the selected item.
Recent Commands

On the right side of the mini toolbar for any selected item, there are three recent commands separated from the standard commands by a vertical line.
These three commands are automatically updated to the most recent commands you have used for the selected item.
3.2 Commands Available on the Mini Toolbar for Picture and Shape in PowerPoint
When using shapes and images, the mini toolbar appears with a different set of commands. Let’s take a look at some of the commands on the mini toolbar that are specific to shapes and pictures in PowerPoint.
Crop
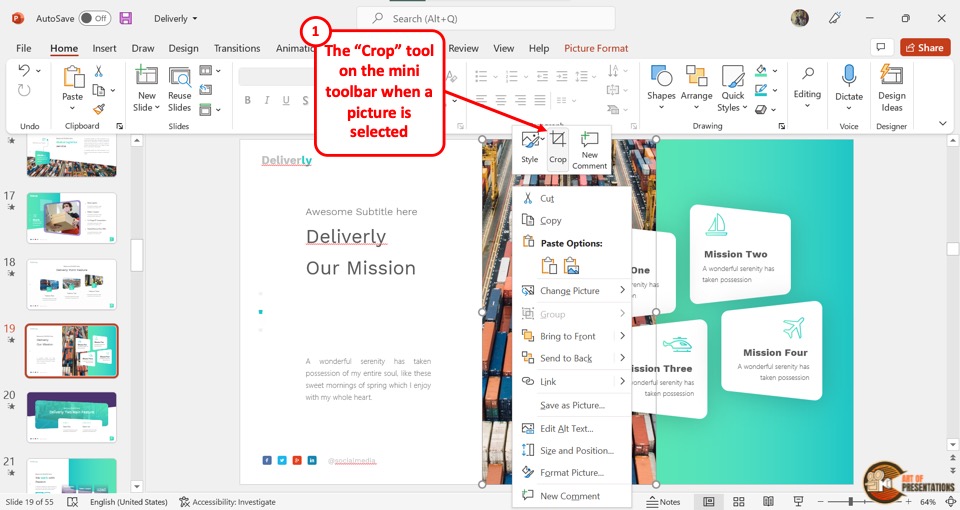
The option to “Crop” a Picture in PowerPoint is also available in the mini toolbar for a picture. You can use this command to quickly open the crop tool and adjust the picture inserted into the slide.
This tool is only visible when an image is selected on the slide in PowerPoint.
Style
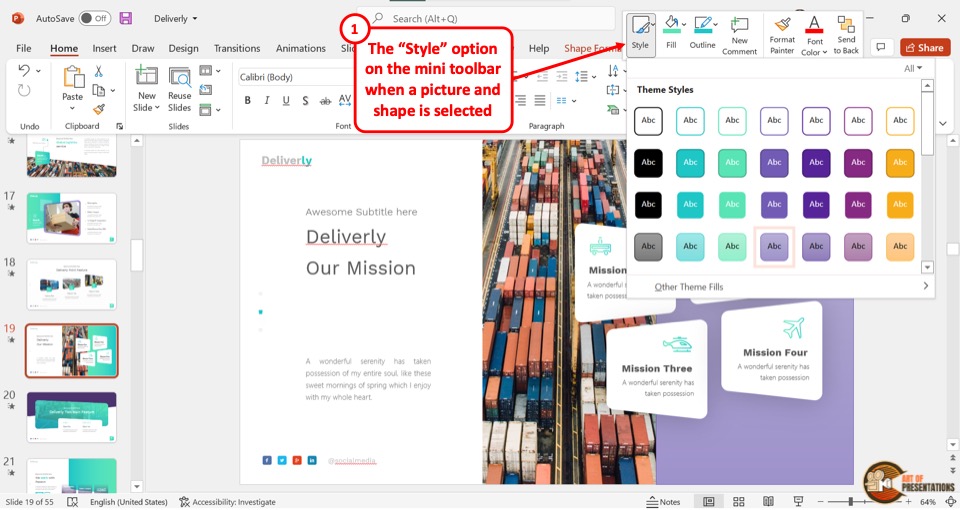
In the mini toolbar for both pictures and shapes, you will find the “Style” option as the first command. Click on the command to open a dropdown menu.
You can access the “Theme Styles” for shapes and the “Picture Styles” for pictures.
Fill Color With Shapes
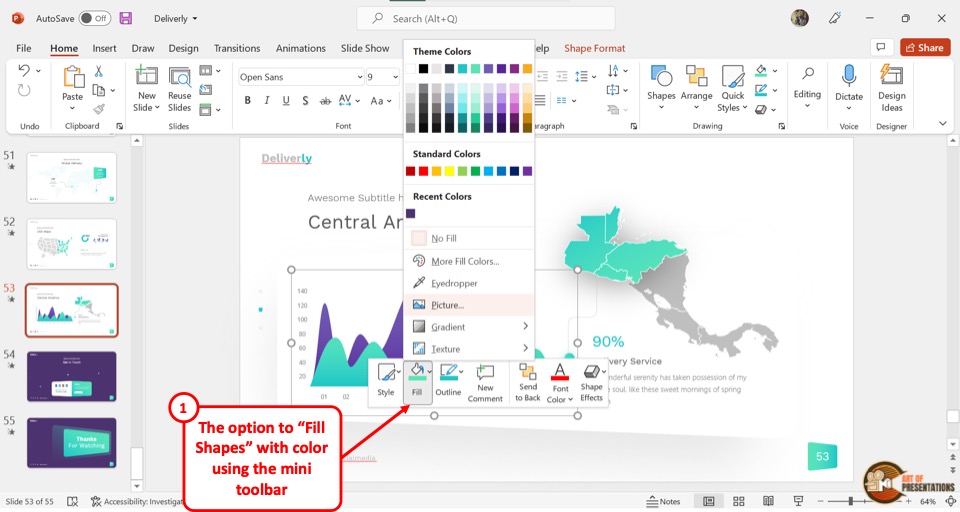
The “Fill” option is only available in the mini toolbar for shapes. You can click on the “Fill” option to select a fill color, texture, or picture.
This function is really helpful when you want to format shapes in PowerPoint.
Outline
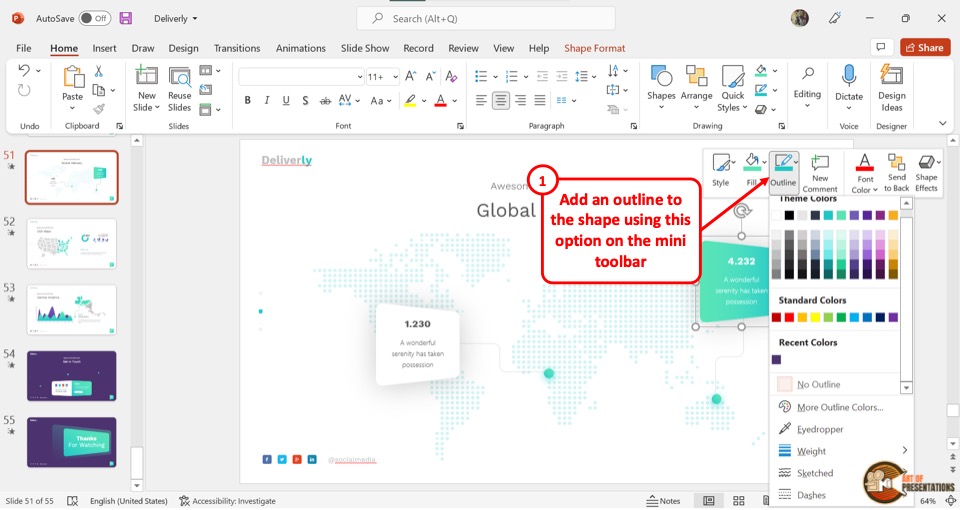
The “Outline” command in the mini toolbar for shapes is used for adding, editing, or removing the shape outline.
In the dropdown menu under the “Outline” option, you can change the color, weight, and style of the outline.
You can also click on the “No Outline” option to remove the outline.
4. Can You Customize the Mini Toolbar in PowerPoint?
Unfortunately, PowerPoint currently does not have the feature to customize the mini toolbar. The set of commands available in the mini toolbar is fixed. You cannot change the available commands nor can you rearrange them.
However, you can disable the mini toolbar feature if you want.
5. How to Enable or Disable the Mini Toolbar in PowerPoint?
Microsoft PowerPoint allows you to enable or disable the mini toolbar to make editing slides easier for you. All you have to do is follow the 3 simple steps.
Step-1: Click on the “File” tab
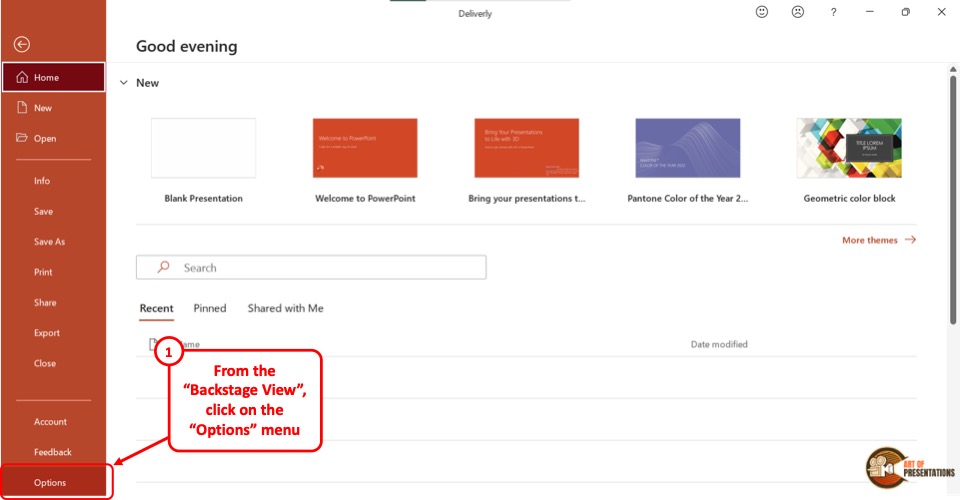
The first step is to click on the “File” tab in the menu ribbon that is located at the top of the screen. This will open the backstage view in PowerPoint.
In the “backstage view”, click on “Options”. This is the last option in the sidebar on the left side of the screen. This will open a dialog box.
Step-2: Click on “Show Mini Toolbar on selection”
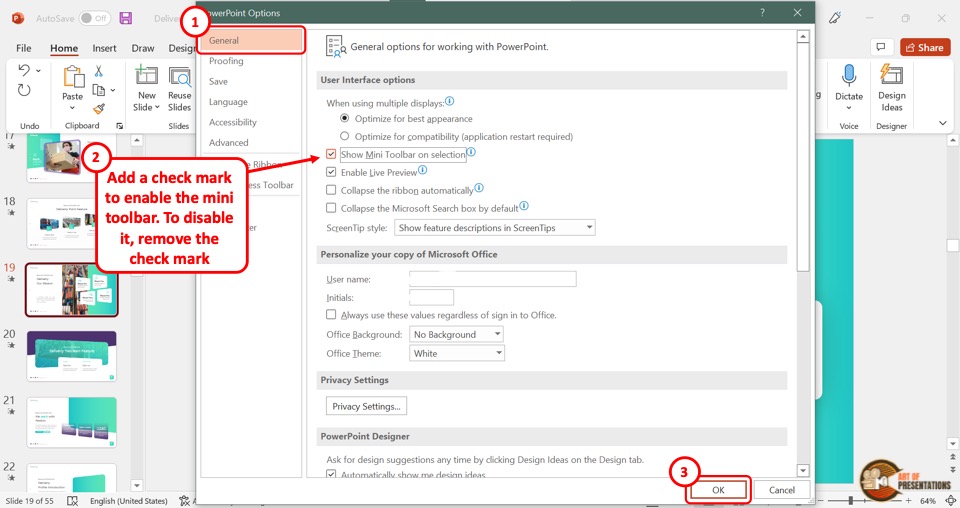
In the “PowerPoint Options” dialog box, click on the “General” option from the sidebar. Then click on the “Show Mini Toolbar on selection” option under the “User Interface Options” section.
Upon clicking, the check mark in the box beside the “Show Mini Toolbar on selection” option will appear to enable it and disappear when disabled.
Step-3: Click on the “OK” button
Now all you have to do is click on the “OK” button at the bottom of the “PowerPoint Options” dialog box to save the changes (as shown in the image in step 2).
Credit to Cookie_studio (on Freepik) for the featured image of this article (further edited).