Adding animation to PowerPoint slides is a great way to enhance your presentation and make it more engaging. One of the most useful animation effects is making an object appear and disappear to bring focus to specific parts of your slide and highlight the important points.
To make an object Appear and Disappear in PowerPoint with animation, go to the “Animation” tab and click on “More” to expand the gallery. Select the “Appear” or “Disappear” animation from the “Entrance” or “Exit” section simultaneously.
In this article, we will discuss in detail how to best use the animations in PowerPoint to make an object or text appear and disappear. Let’s dive in to create a dynamic visual experience for your audience!
1. How to Make an Object Appear in PowerPoint with Animation?
In Microsoft PowerPoint, the “Appear” animation effect can make an object appear on a slide during a presentation. To make an object appear with animation in a PowerPoint presentation, follow the 3 simple steps.
Step-1: Click on the “Animations” tab
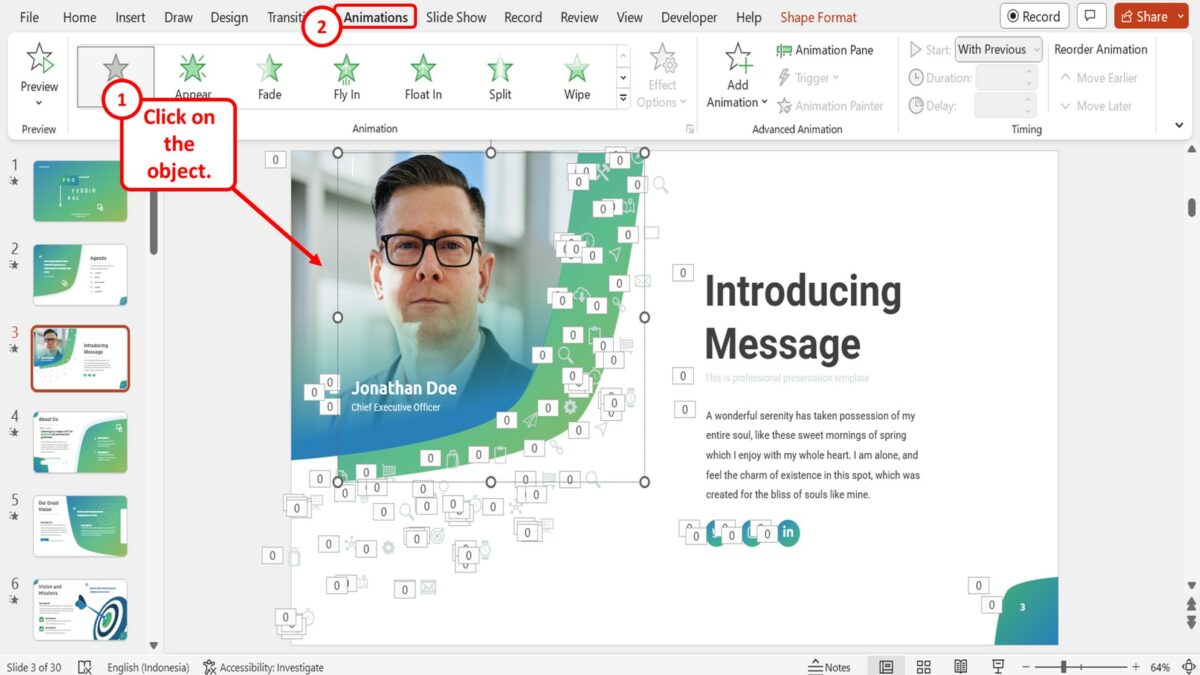
In the open slide, you have to first click on the object that you want to make appear with animation. Then click on the “Animations” tab in the menu ribbon located at the top of the screen.
Step-2: Click on the “More” option
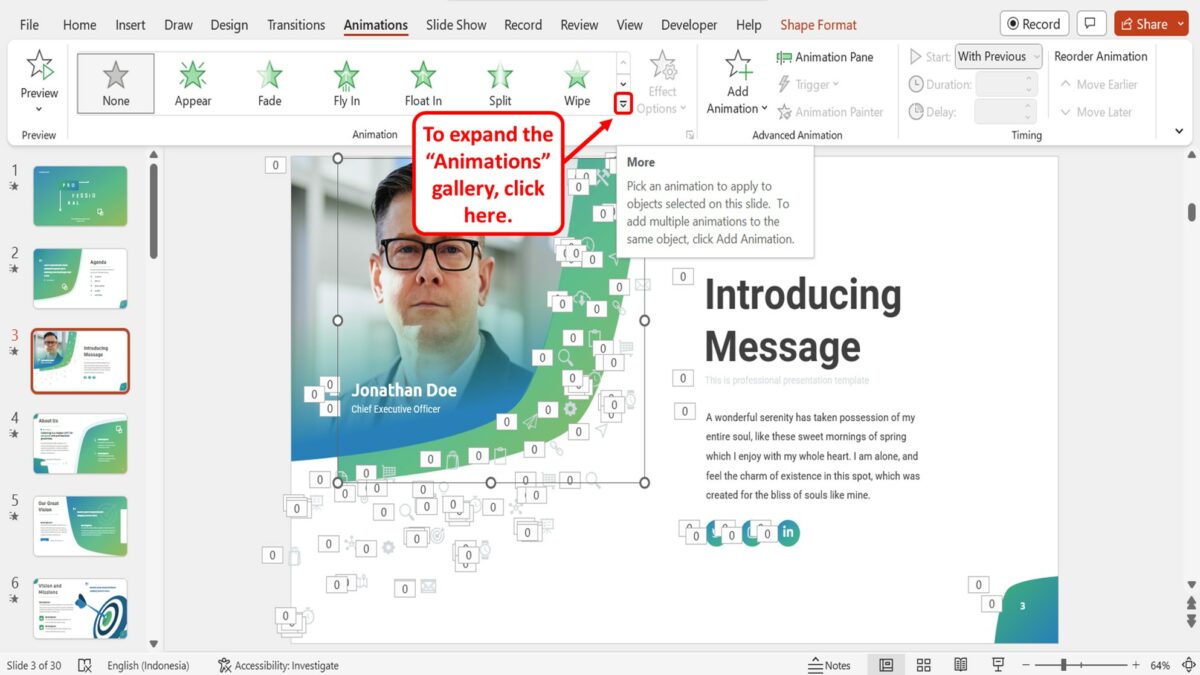
The next step is to expand the “Animation” gallery. To do so, click on the “More” option which is the down arrow at the bottom right corner of the “Animation” group of the “Animations” menu.
Step-3: Click on the “Appear” option
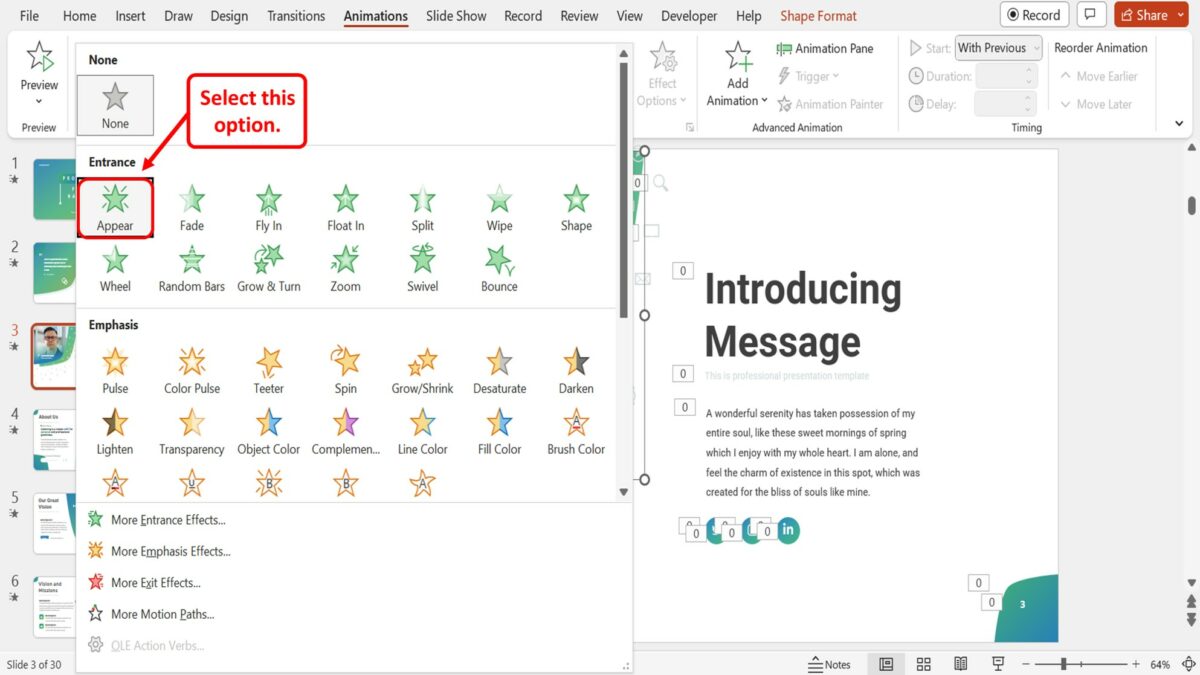
Finally, all you have to do is click on the “Appear” option in the “Entrance” section of the “Animation” gallery to make the selected object appear during a presentation.
2. How to Make an Object Disappear in PowerPoint with Animation?
Using the “Animations” feature in Microsoft PowerPoint, you can make any object automatically appear and disappear during a presentation. To make an object disappear with animation, follow the 3 simple steps.
Step-1: Click on the “Animations” tab

The first step is to click on the object that you want to make disappear with animation. Then click on the “Animations” tab in the menu ribbon located at the top of the screen.
Step-2: Click on the “More” option

The next step is to expand the “Animation” gallery. All you have to do is click on the “More” option. It is the down arrow at the bottom right corner of the “Animation” group of the “Animations” menu.
Step-3: Click on the “Disappear” option
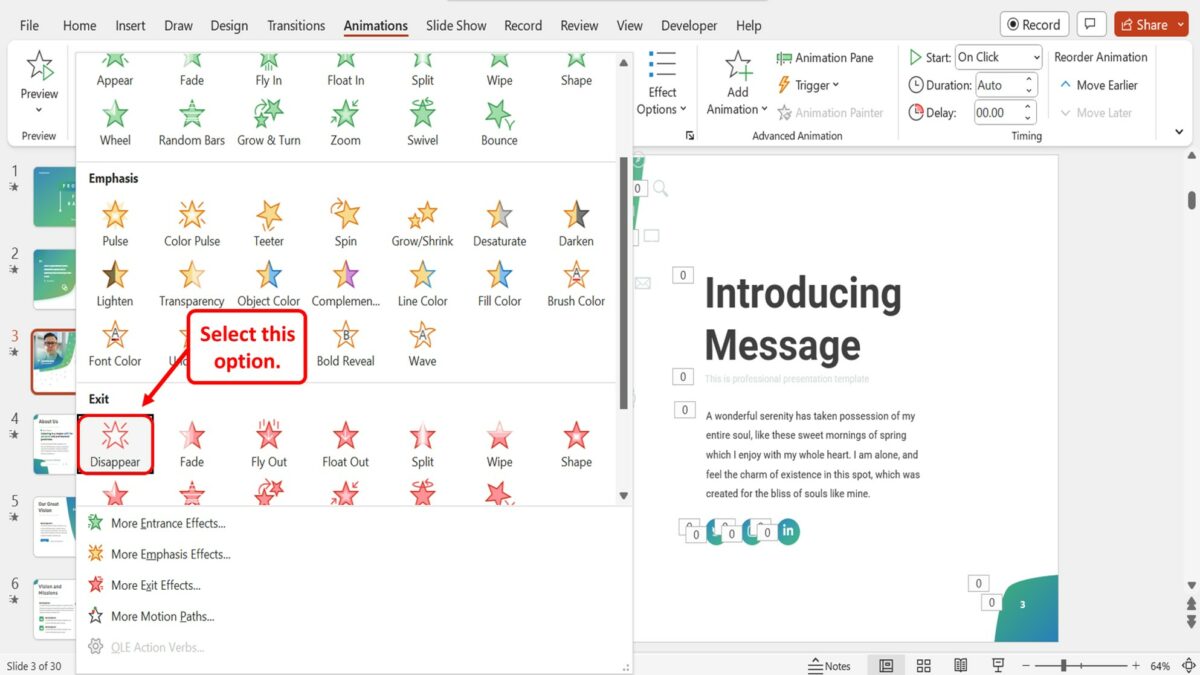
The final is to click on the “Disappear” option in the “Exit” section of the “Animation” gallery to make the selected object disappear during a presentation.
3. How to Make the Same Object Appear and Disappear in PowerPoint?
In Microsoft PowerPoint, you can apply multiple animation effects to the same object. By doing so, you can make the same object appear at the start of the slide and then disappear at the end during a presentation. To make the same object appear and disappear using animations, follow the 4 easy steps.
Step-1: Click on the “Animations” tab
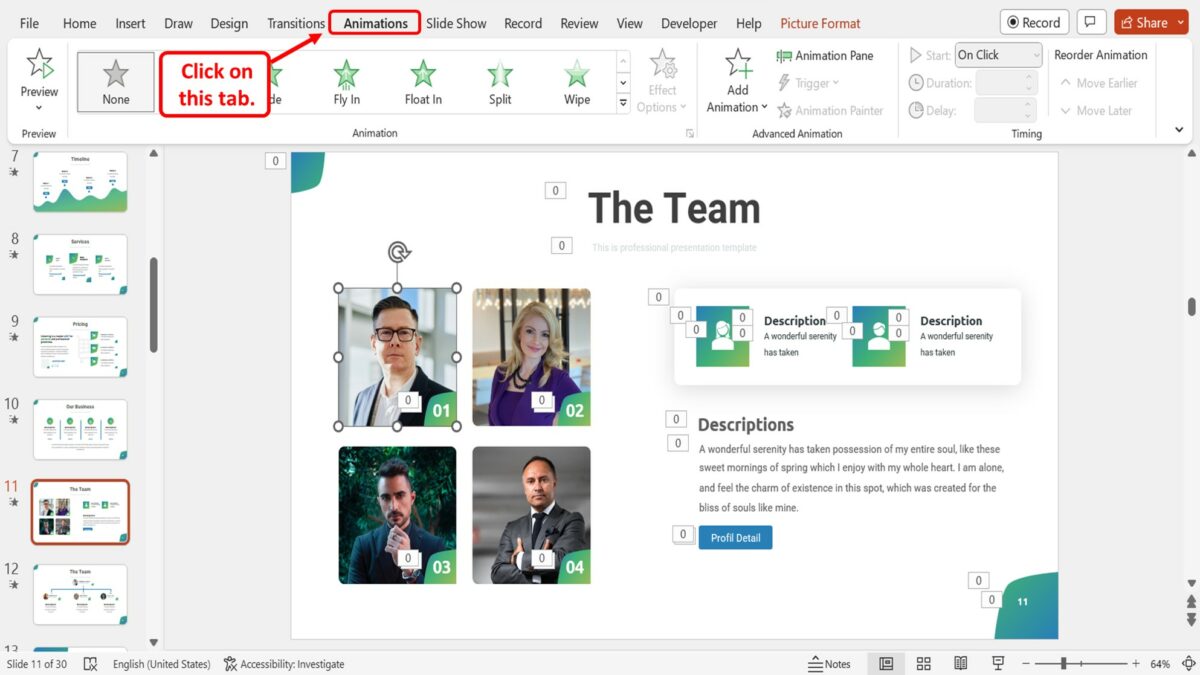
The first step is to open the “Animations” menu. Click on the “Animations” tab in the menu ribbon located at the top of the screen.
Step-2: Click on the “Appear” option

The next step is to click on the object where you want to add the animation effects. In the “Animation” group of the “Animations” menu, click on the “Appear” option. This will make the object appear with animation when opening the slide.
Step-3: Click on the “Add Animation” option
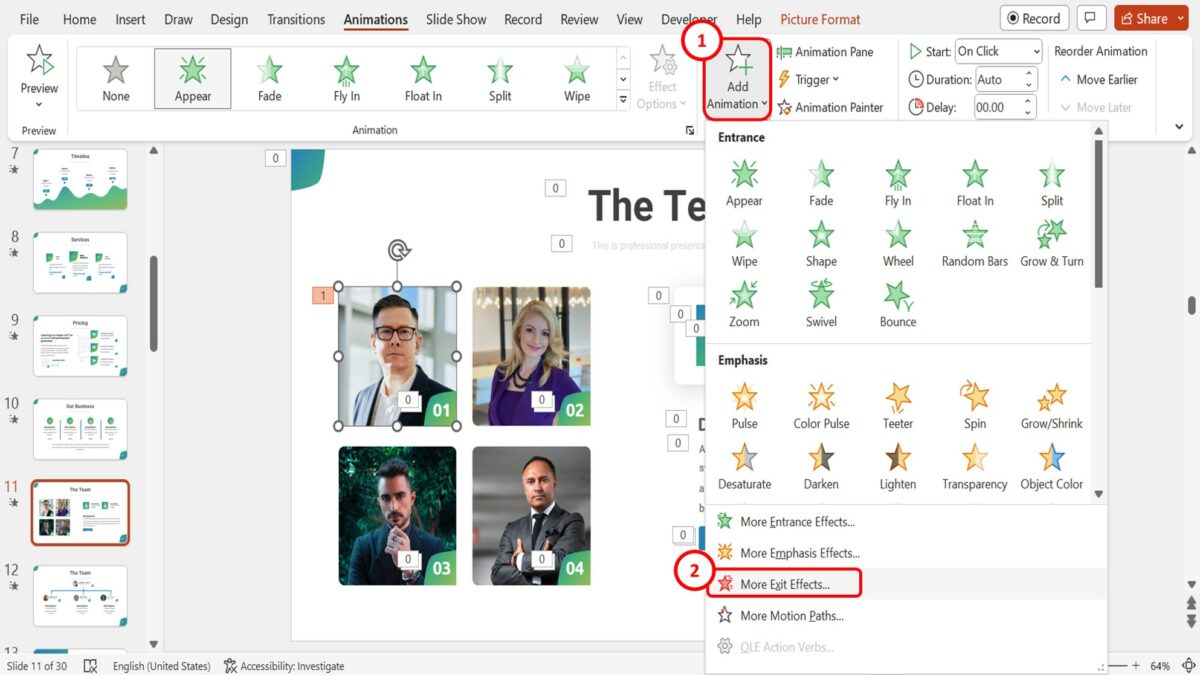
In the “Advanced Animation” group of the “Animations” menu, click on the “Add Animation” button. Then click on the “More Exit Effects” option at the bottom of the dropdown menu under the “Add Animation” button.
Step-4: Click on the “Disappear” option
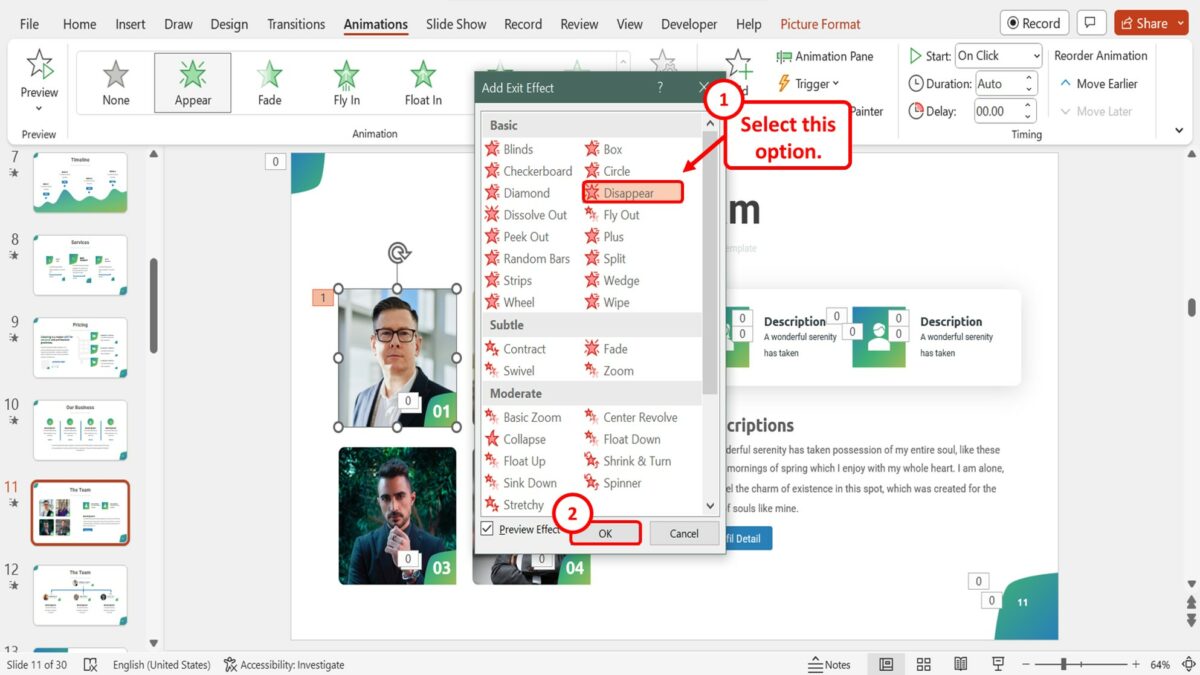
In the “Add Exit Effect” dialog box, click on the “Disappear” option in the right column under the “Basic” section. Then click on the “OK” button at the bottom of the dialog box to add both the “Appear” and “Disappear” animation effects to the selected object on the slide.
4. How to Make an Object Appear on Click in PowerPoint?
The “Trigger” feature in the “Animations” menu in Microsoft PowerPoint allows you to customize the animation trigger for an object on a slide. You can use the feature to make an object appear on click. All you have to do is follow the 4 quick steps.
Step-1: Click on the “Animations” tab

The first step is to add the “Appear” animation effect to the object. Click on the “Animations” tab in the menu ribbon located at the top of the screen.
Step-2: Click on the “Appear” option
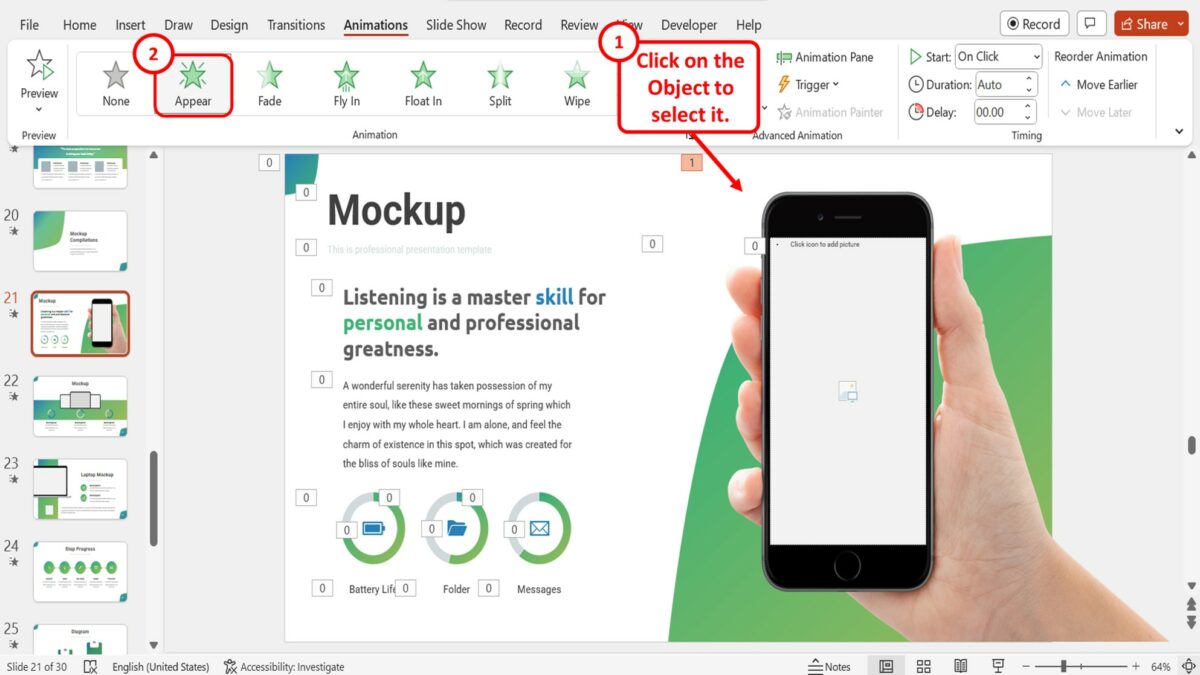
The next step is to click on the object where you want to add the animation effect to select it. Then click on the “Appear” option in the “Animation” gallery in the “Animations” menu to add the animation effect.
Step-3: Click on the “Animation Pane” option
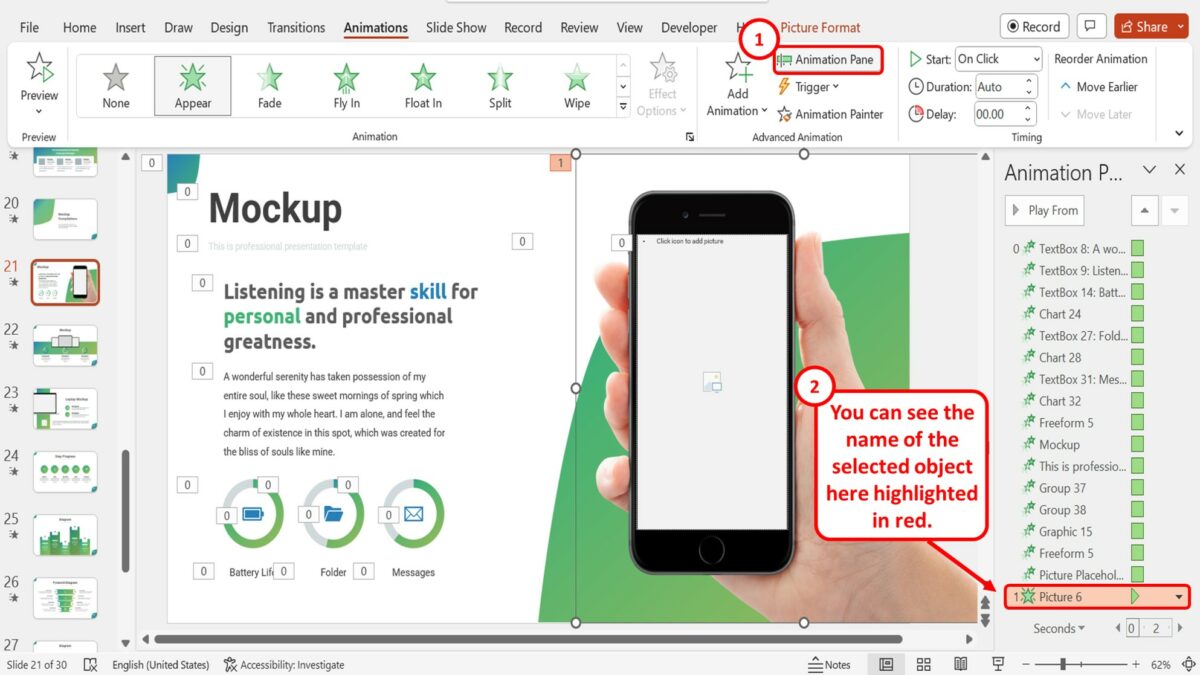
In the “Advanced Animation” group of the “Animations” menu, click on the “Animation Pane” option. In the “Animation Pane” sidebar on the right side of the screen, you can see the name of the selected object highlighted in red.
Step-4: Click on the “On Click Of” option
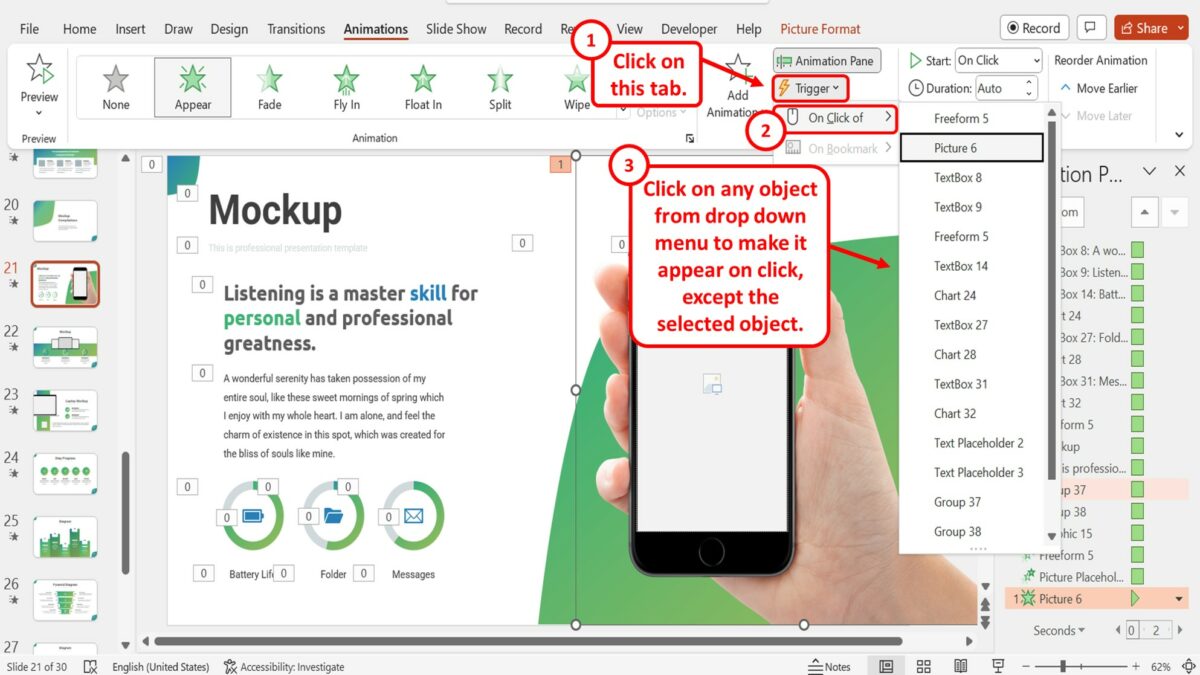
Finally, click on the “Trigger” option in the “Advanced Animation” group. Then click on the “On Click of” option in the dropdown menu under the “Trigger” option. In the pop-up menu by the “On Click of” option, you can select any object except the selected object to make it appear on click.
5. How to Make a Text Box Appear in PowerPoint with Animation?
In Microsoft PowerPoint, you can make a text box appear one paragraph at a time with animation. To do so, all you have to do is follow the 3 easy steps.
Step-1: Click on the “Animations” tab
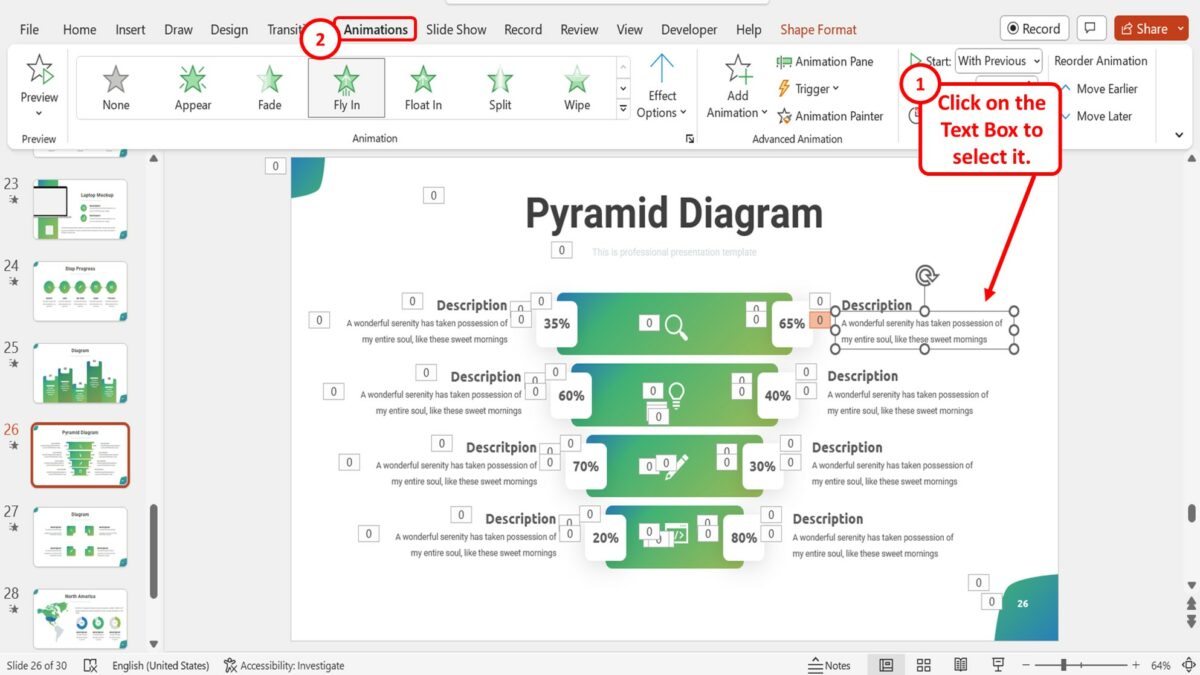
The first step is to select the text box that you want to animate. Then click on the “Animations” tab in the menu ribbon located at the top of the screen.
Step-2: Click on the “Appear” option

The next step is to apply the “Appear” animation effect. In the “Animation” group of the “Animations” menu, click on the “More” option which is the down arrow at the bottom right corner. Then click on the “Appear” option in the “Entrance” section of the dropdown menu under the “Animation” gallery.
Step-3: Click on the “By Paragraph” option
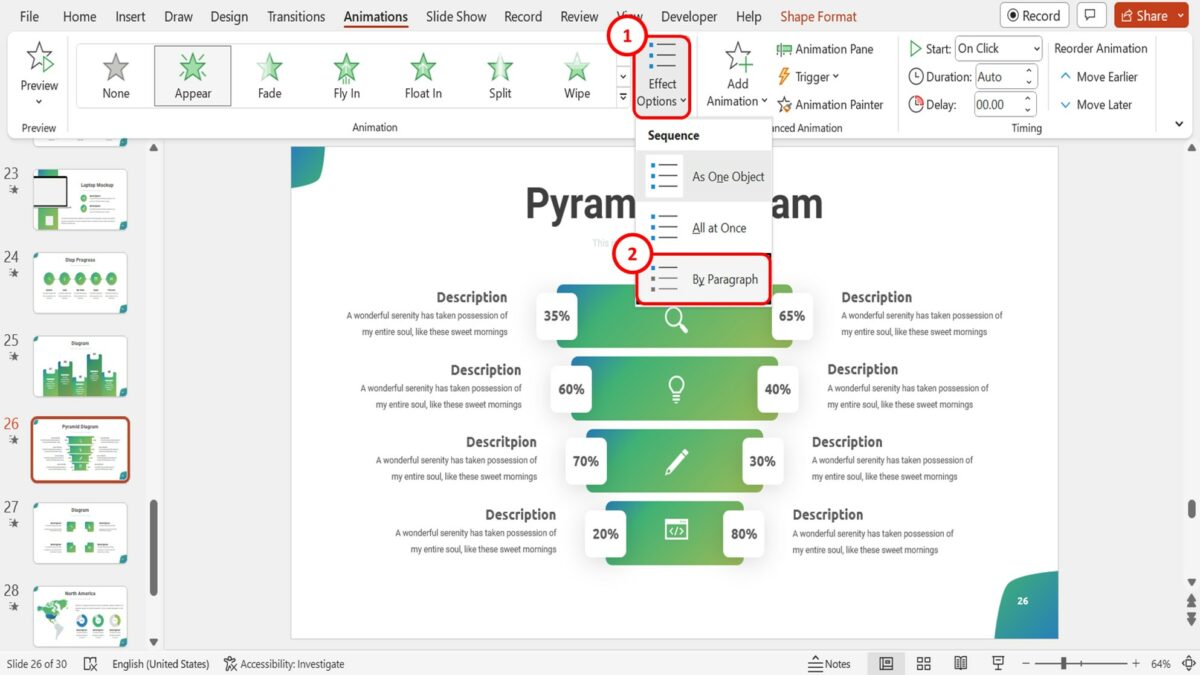
The final step is to click on the “Effect Options” button in the “Animation” group of the “Animations” menu. Then click on the “By Paragraph” option under the “Sequence” section of the dropdown menu under the “Effect Options” button to make the text box appear one paragraph at a time.