
Integrating Images in your presentations always make your slides more attractive and engaging but sometimes it becomes a chore when you want to stick them to one place and end up moving them back and forth to keep up the formatting.
Fortunately, Google Slides provides you with some tricks to lock the images so that you can avoid moving them accidentally.
To lock images in Google Slides, first, go to the specific slide. Then, click on the “Background” button from the toolbar. A pop-up will appear. Click on the “Choose image” option and upload the image from your preferred source. Finally, click “Done” at the bottom of the dialog box to lock the image.
To create an image copy of the slide, you need to download the slide into “PNG image” and insert it into a new slide. If you want to use transparent shape method, you need to draw the shape on the entire visible area of the slide and then make it transparent in the “Fill color” option.
This article will also explain how you can lock the size or aspect ratio of the image in Google Slides. Just follow the below-listed steps to do it right!
1. Can You Lock Images in Google Slides?
In Google Slides, there is no option available to lock an image in place. However, locking an image may be helpful if you do not want to rearrange or resize the image inserted in a slide accidentally. You can use some tricks to lock images in a Google Slides presentation.
2. How to Lock an Image in Google Slides?
While Google Slide does not offer any feature to lock images on a slide, you can add a locked image on a slide using some hacks. There are multiple methods to lock an image.
2.1 Method 1 – Insert Image as Slide Background
To lock an image, you can insert it as a background image. Background images in Google Slides are not editable. To insert an image as a slide background, follow the 4 quick steps.
Step-1: Click on the “Background” option
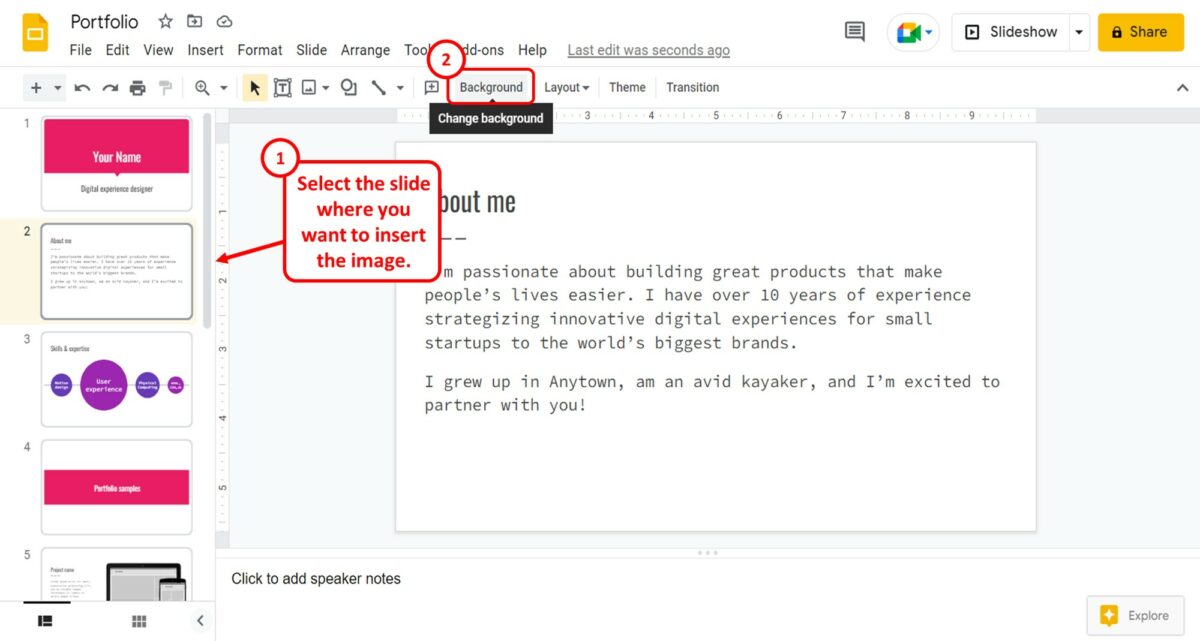
The first step is to open the slide where you want to insert the image. In the toolbar located under the menu bar, click on the “Background” option.
Step-2: Click on the “Choose image” button
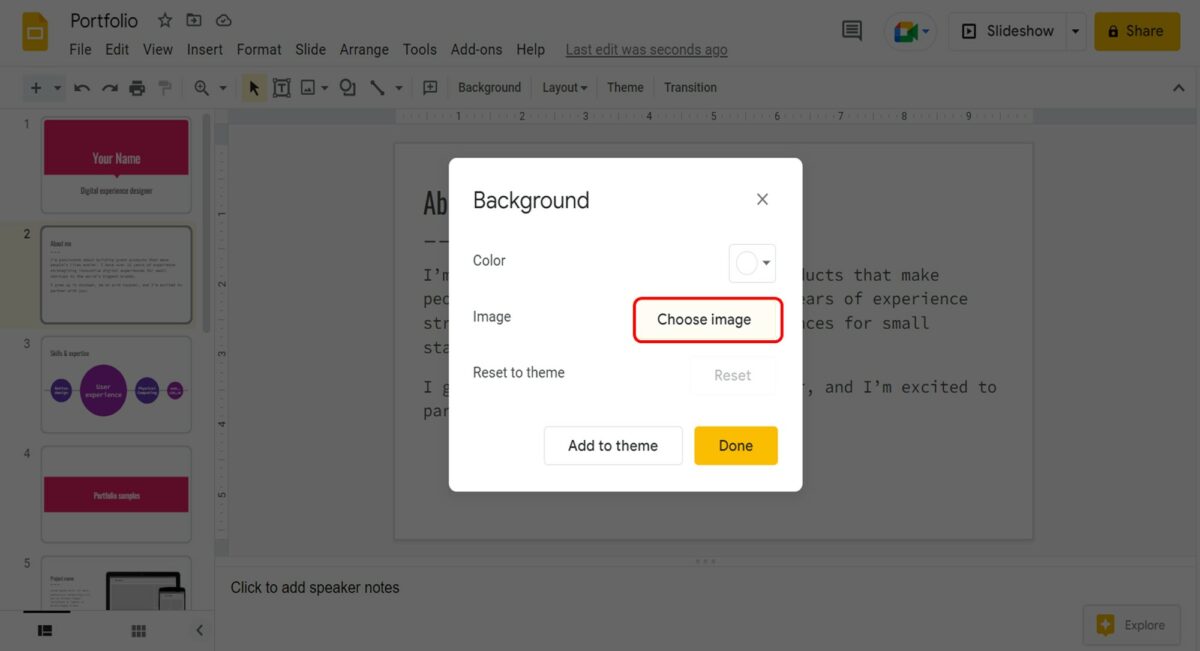
In the “Background” dialog box, click on the “Choose image” button. This will open another dialog box.
Step-3: Insert an image
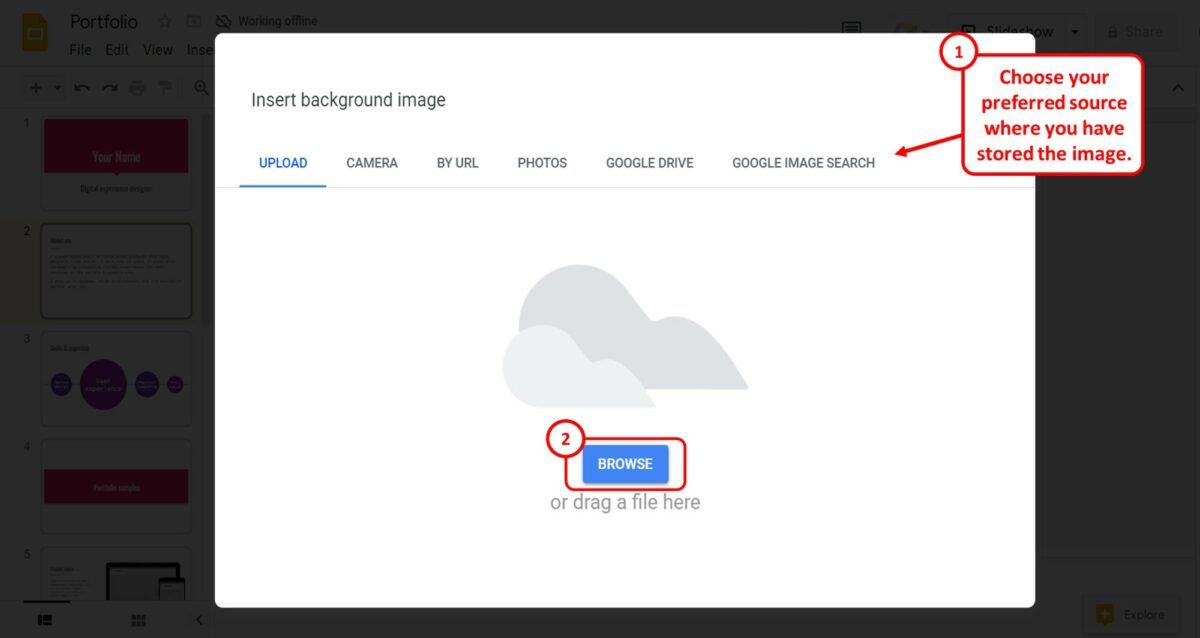
In the top row of the “Insert background image” dialog box, click on the tab where you want to insert the background image from. Then you can select your preferred image from the chosen image source.
Step-4: Click on the “Done” button
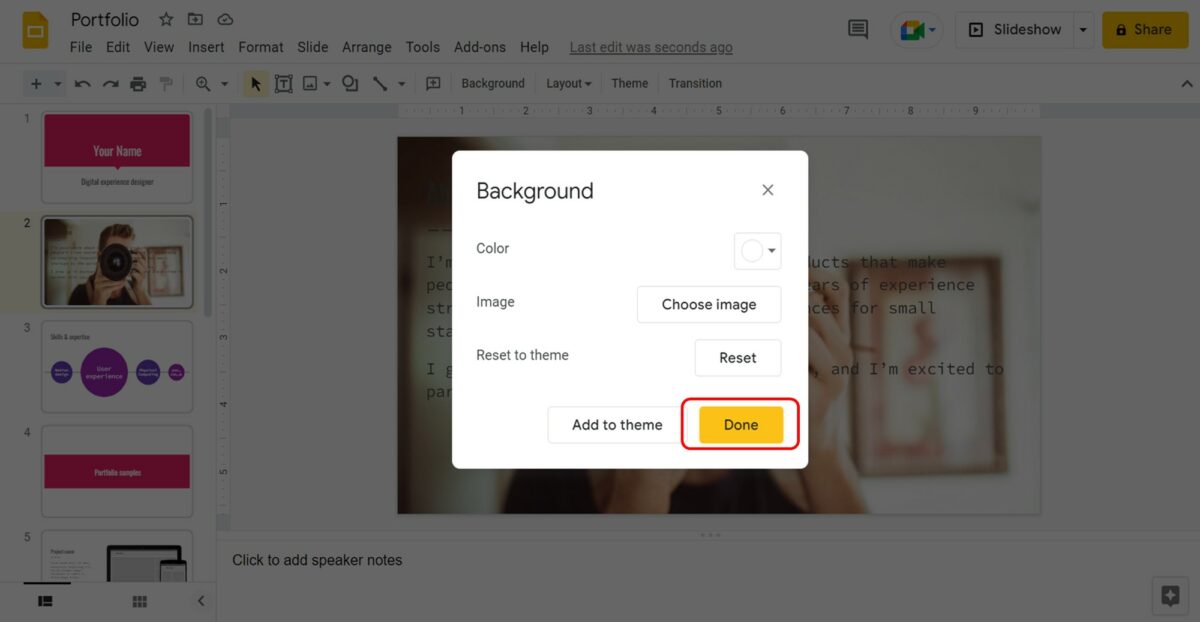
Finally, all you have to do is click on the “Done” button at the bottom of the “Background” dialog box. This will insert the selected image as the slide background which is locked.
2.2 Method 2 – Create an Image Copy of the Slide
Using the image copy of a slide, you can create a locked image on a slide. To lock an image using an image copy, follow the 6 simple steps.
Step-1: Arrange the image
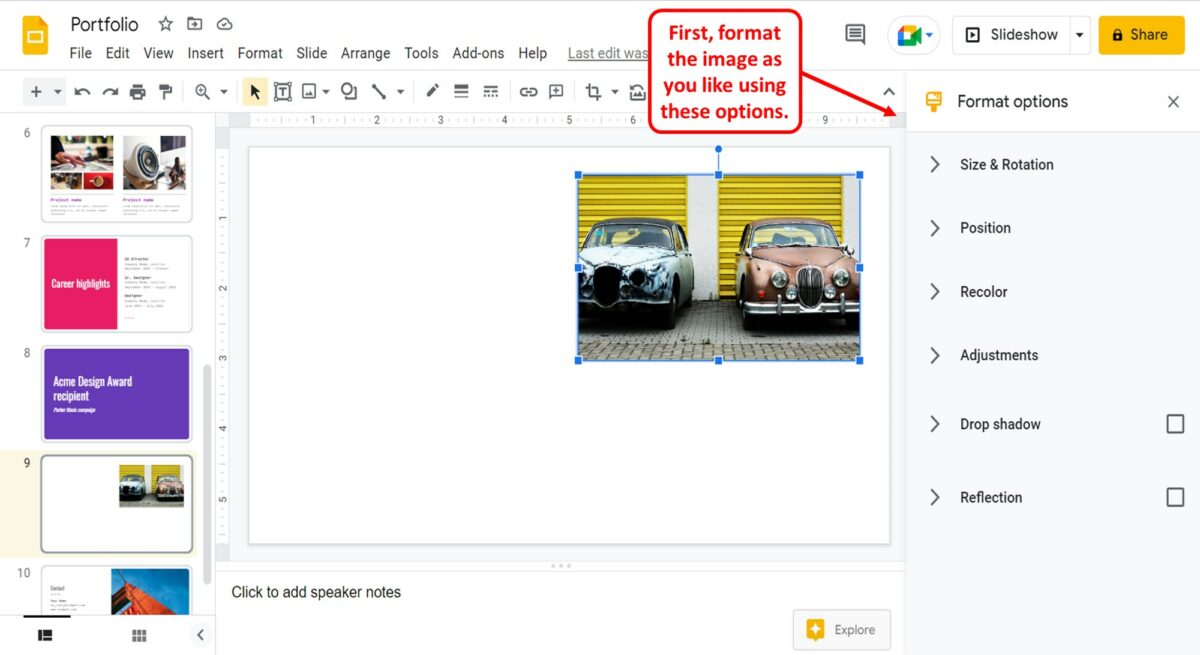
The first step is to arrange and resize the image as you prefer. To do so, you can use the features available in the “Format Options” sidebar. Once you lock the image, you can not edit it anymore.
Step-2: Click on the “File” tab
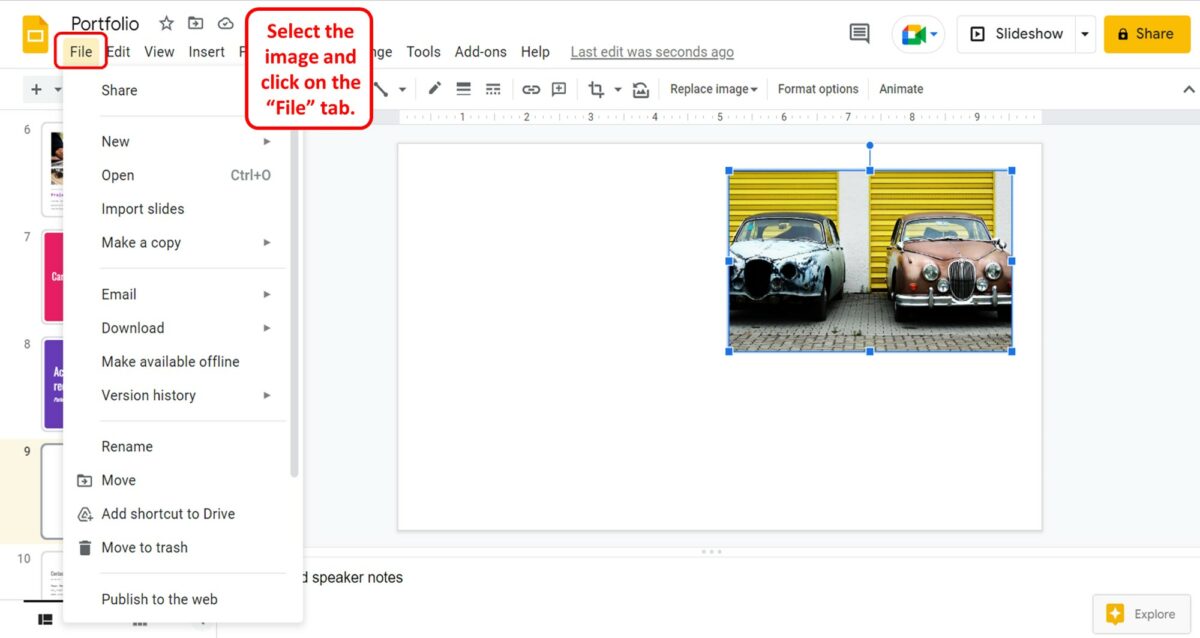
In the menu bar located at the top of the screen, click on the “File” tab which is the first option.
Step-3: Click on the “Download” option
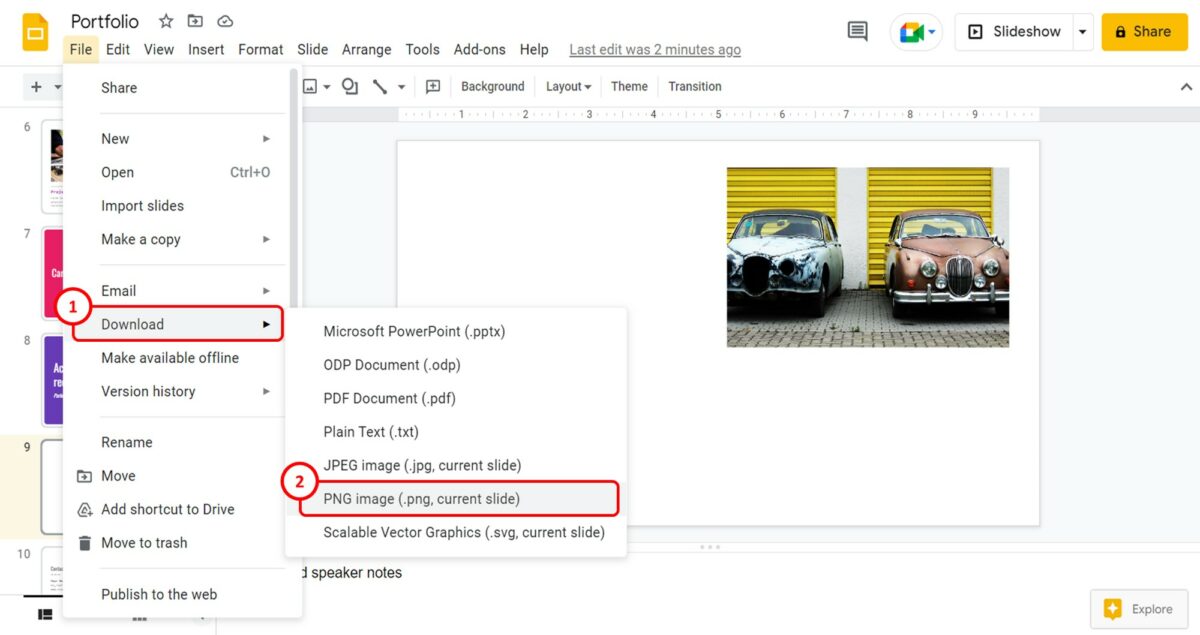
In the “File” menu, click on the “Download” option. This will open another menu. Click on the “PNG image (.png, current slide)” option in the secondary menu. This will save the current slide as an image.
Step-4: Click on the “New Slide” option
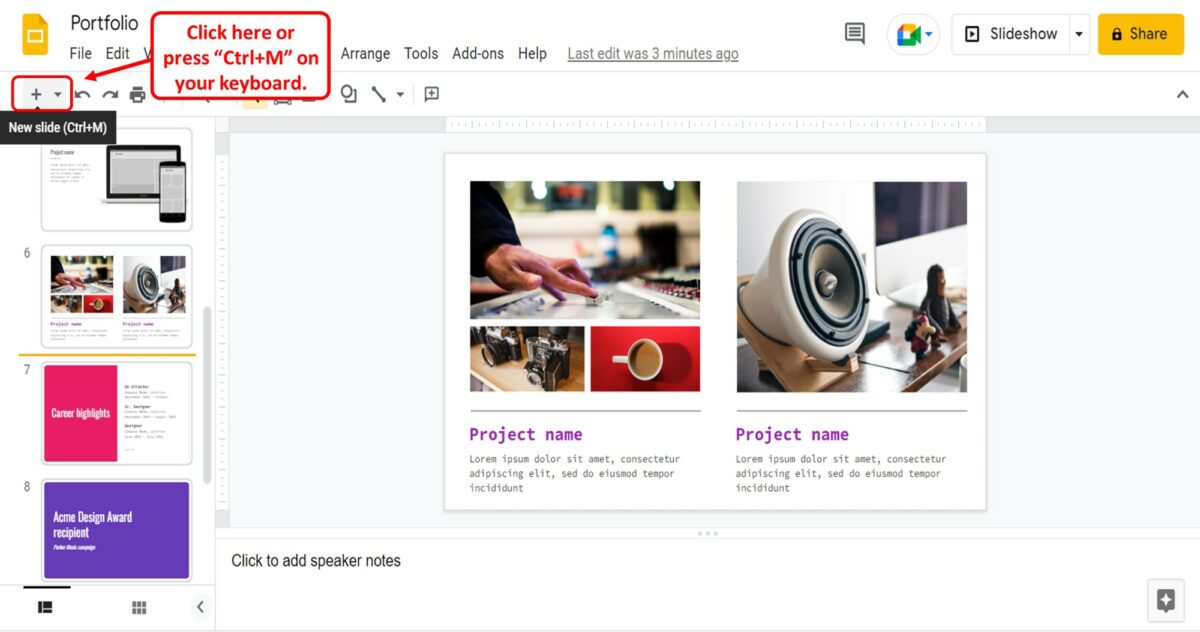
The next step is to click on the “New Slide” option which is the “+” icon in the toolbar. You can also press the “Ctrl+M” keys on your keyboard to open a new slide.
Step-5: Click on the “Insert” menu
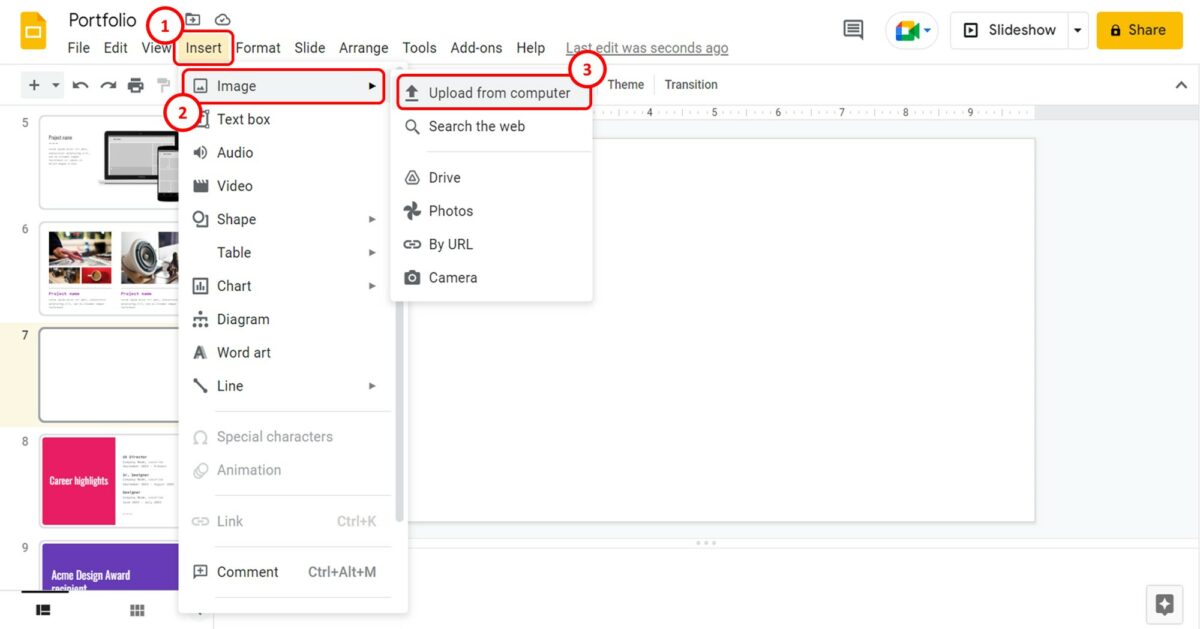
In the menu bar, you have to now click on the “Insert” menu. Then click on the “Image” option in the “Insert” menu. In the secondary menu, click on the “Upload from computer” option.
Step-6: Click on the “Open” button
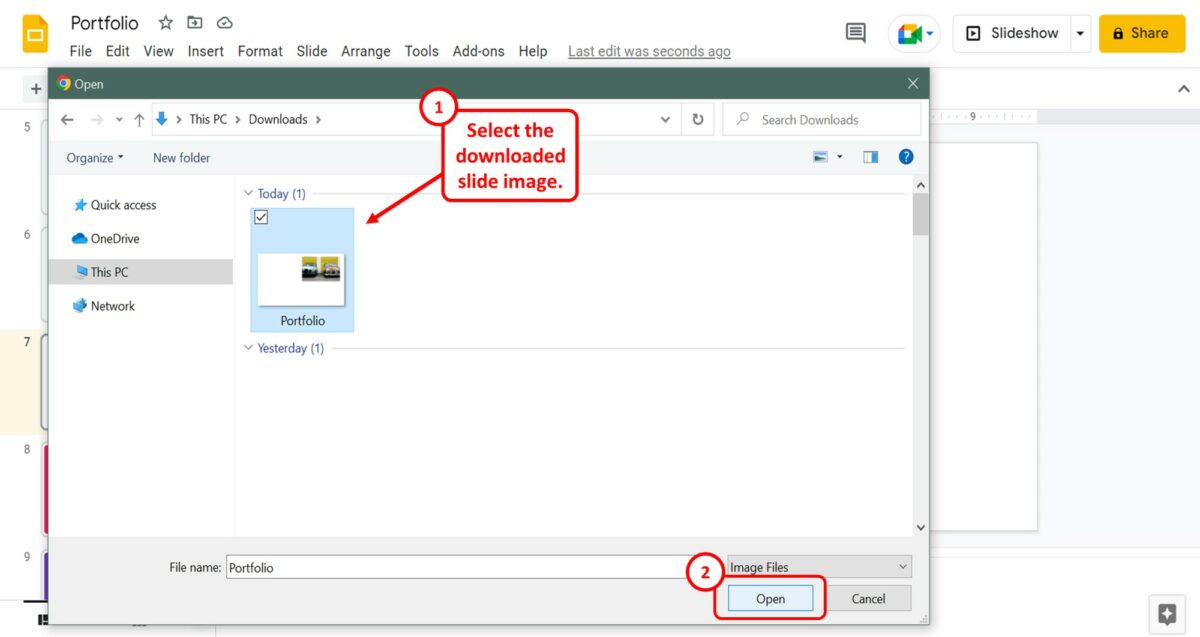
Now all you have to do is select the downloaded slide image in the “Open” window. Then click on the “Open” button to insert the slide image into the new slide. The image on the slide will be locked in place.
2.3 Method 3 – Add a Transparent Shape Over Your Slide
To lock images in Google Slides, you can add a transparent shape over the image so the image can no longer be selected or edited. All you have to do is follow the 6 easy steps.
Step-1: Click on the “Zoom out” option

To lock the image, you have to insert a large shape. So the first step is to zoom out the slide. Click on the down arrow by the “Zoom” option in the toolbar. Then click on the “Zoom out” option from the dropdown menu.
Step-2: Click on the “Shapes” option
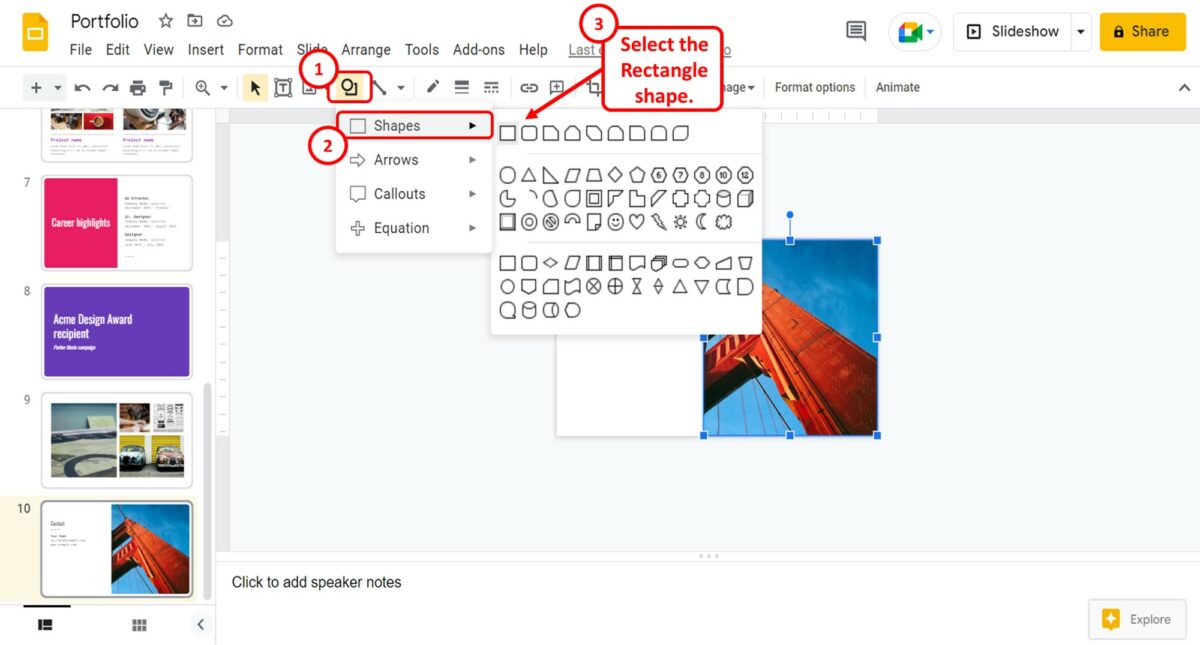
Now you can click on the “Shape” icon in the toolbar. In the dropdown menu, click on the “Shapes” option and select the rectangle shape from the list.
Step-3: Draw the shape
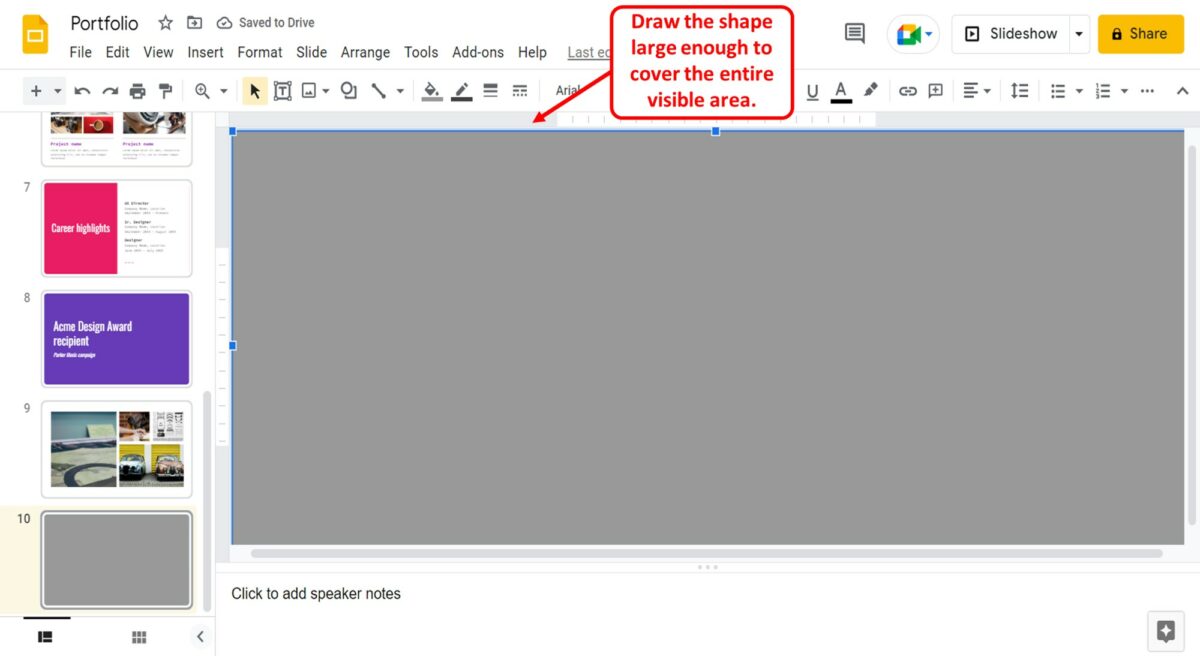
The next step is to draw the shape. You have to draw the shape large enough to cover not only the slide but also the entire visible area.
Step-4: Click on the “Fill color” option
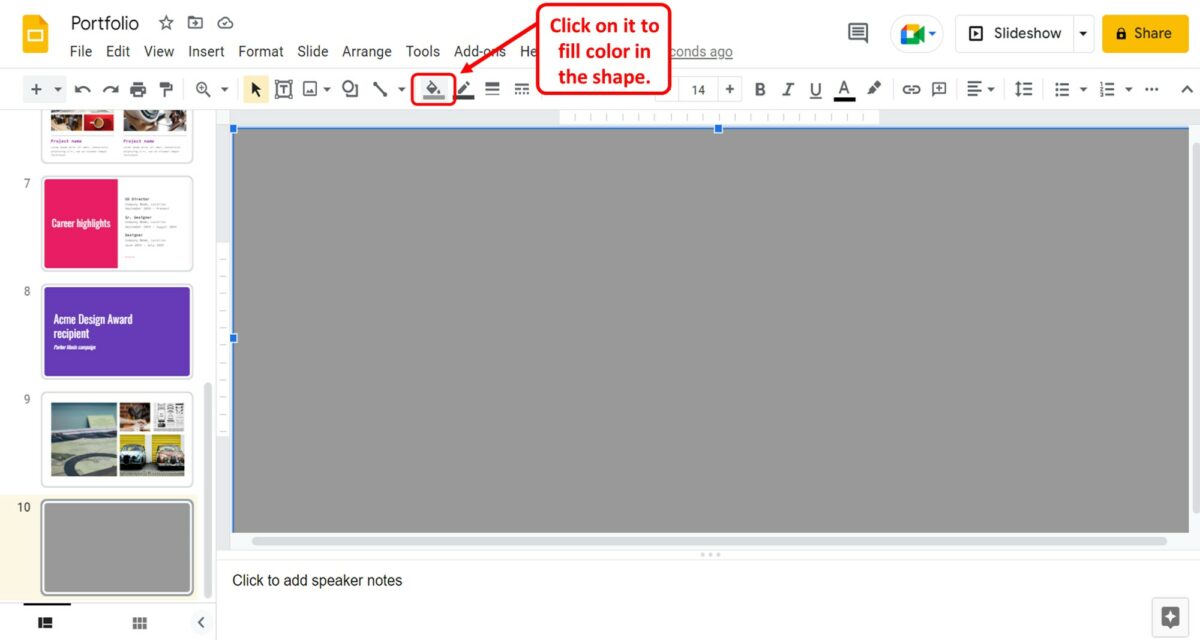
Click on the “Fill color” icon which looks like a paint bucket in the toolbar. This will open the dropdown menu with color options.
Step-5: Click on the “Transparent” option

In the dropdown menu under the “Fill color” option, click on the “Transparent” option at the bottom. This will make the shape transparent and the slide under it visible.
Step-6: Click on the “Zoom in” option
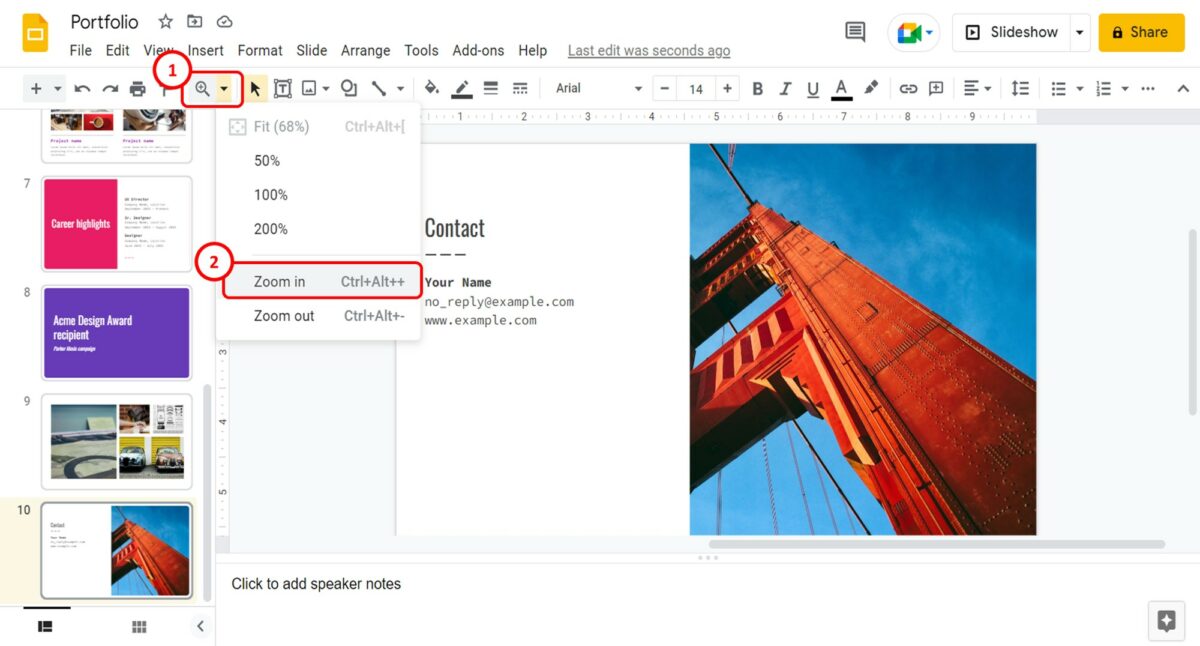
Now you have to click on the “Zoom” option in the toolbar. Then click on the “Zoom in” option from the dropdown menu to return the zoom to normal. The objects in the slide including the images will be locked in place and you will be unable to select them.
3. How to Lock Image Size or Aspect Ratio in Google Slides?
The “Lock aspect ratio” option in Google Slides allows you to lock the size and the aspect ratio of an image. You can use this feature to lock the length-to-width ratio of an image so that it does not change when resizing the image. To lock the aspect ratio, follow the 3 quick steps.
Step-1: Click on the “Format options” option
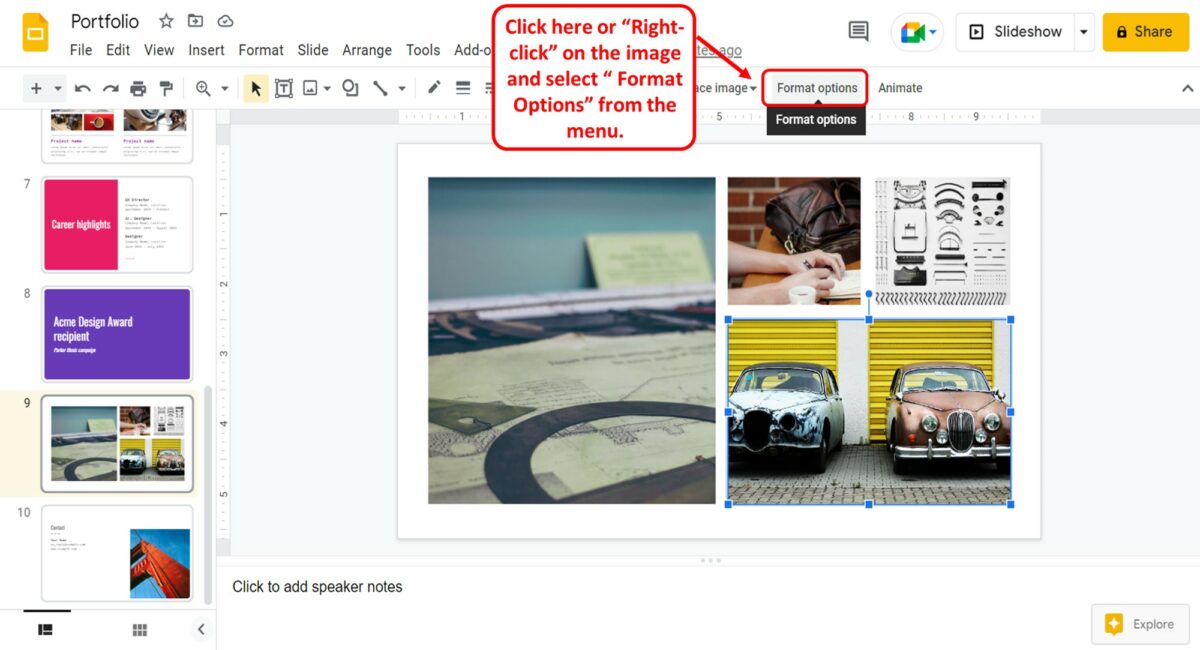
The first step is to “Right Click” on the image on the slide. Then click on the “Format options” option in the right-click menu.
Step-2: Click on the “Size and Rotation” option
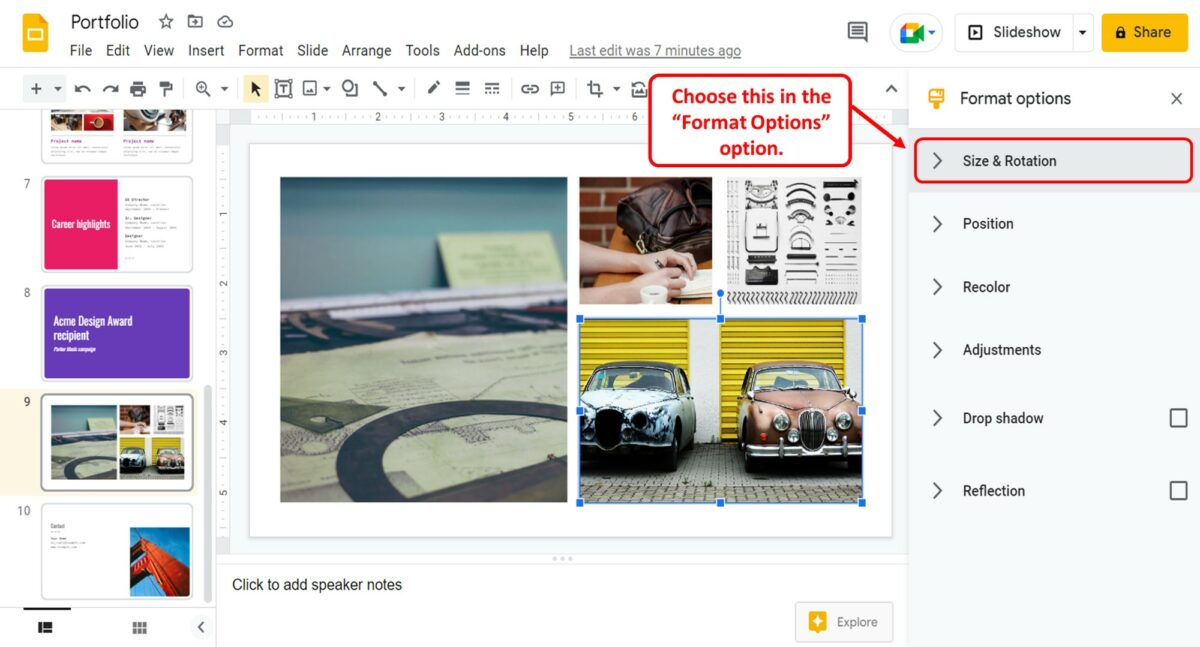
In the “Format options” sidebar on the right side of the screen, click on the “Size and Rotation” option.
Step-3: Click on the “Lock aspect ratio” option
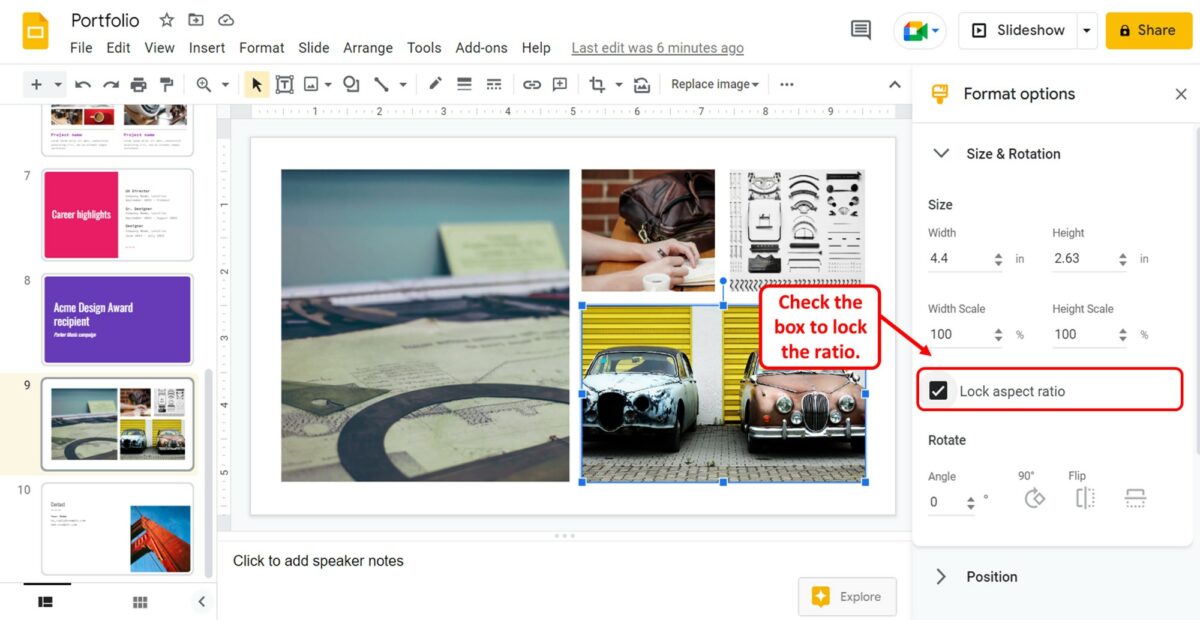
Under the “Size and Rotation” option in the “Format options” sidebar, all you have to do is click on the “Lock aspect ratio” option. A checkmark will appear by the option showing that the aspect ratio is now locked.