![Insert Check Box in Google Slides [Everything to Know!]](https://artofpresentations.com/wp-content/uploads/2023/01/ezgif.com-gif-maker-2.webp)
Many times, you may want to show a certain list of items in the form of check boxes which are ticked. In Google Slides, however, there is no direct way to do this but there are a couple of work around.
To insert a check box in Google Slides, select the text. Then, click on the “Format” tab. Select, “Bullets & Numbering” from the dropdown, and then click on “Bulleted List”. Finally, click on the “check box” bulleted list to add the check box in Google Slides.
In this article, I’ll show you all the different ways you can insert a check box in Google Slides. Plus, I’ll also show you how to tick the check box by duplicating the slide! So, let’s get started!
1. Can You Insert an Interactive Checkbox in Google Slides?
In Google Docs applications, there is a “Checklist” feature that allows you to click on the list item to automatically check it off. However, you can only find this feature in Google Docs and Google Sheets.
The “Checklist” feature is still unavailable in Google Slides. So, you cannot insert an interactive checkbox in Google Slides. To insert an interactive checkbox in a Google Slides presentation, you can try some workarounds or hacks that look as if the check boxes were interactive for the audience.
2. How to Insert a Checkbox in Google Slides?
Although you cannot insert an interactive checkbox in Google Slides, you can work around it to create a checkbox that looks interactive. To add a checkbox, all you have to do is follow the 5 easy steps.
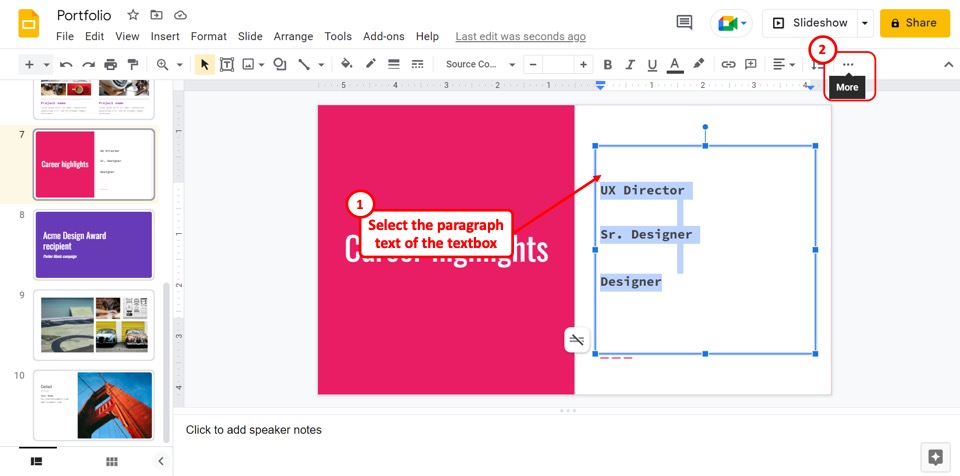
Step-1: Click on the “More” option
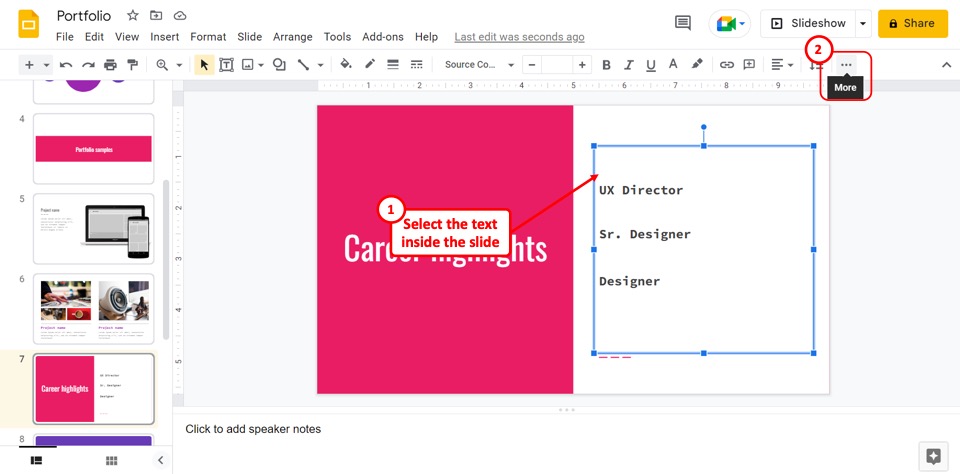
The first step is to convert the text into a bullet list. To do so, select the text inside a textbox. Then click on the “More”option which is the three horizontal dots in the toolbar.
Step-2: Click on the “Bulleted list” option
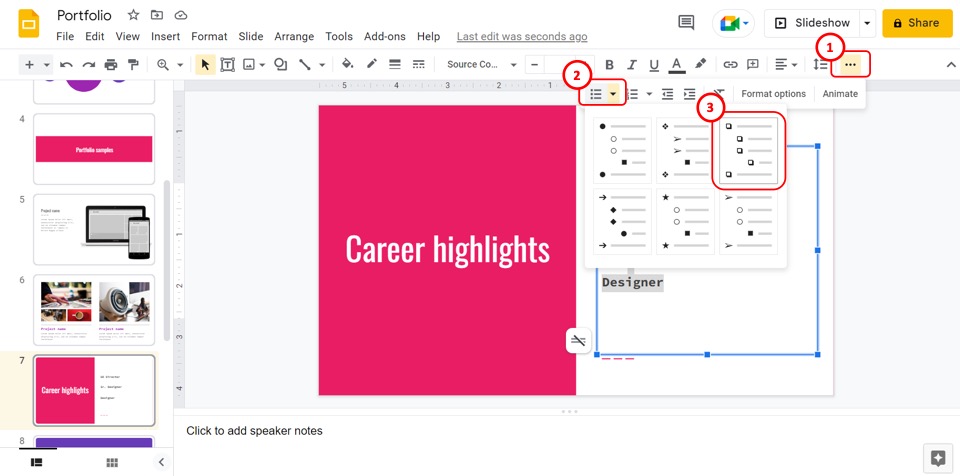
Under the “More” option, click on the “Bulleted list” option. In the dropdown list under the “Bulleted list” option, click on the checkbox list. It is the third option in the first row or the first option in the second column of the dropdown list.
Step-3: Click on the “Duplicate slide” option
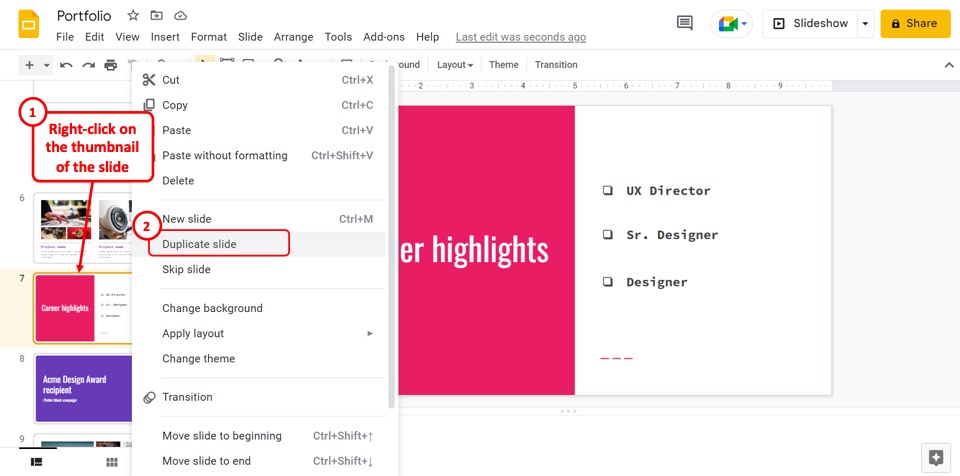
The next step is to duplicate the slide to make the checkbox look interactive. To do so, “Right Click” on the thumbnail of the slide with the checkbox in the slide thumbnail pane located on the left side of the screen. In the right-click menu, click on the “Duplicate slide” option.
Step-4: Click on the “Check mark” icon
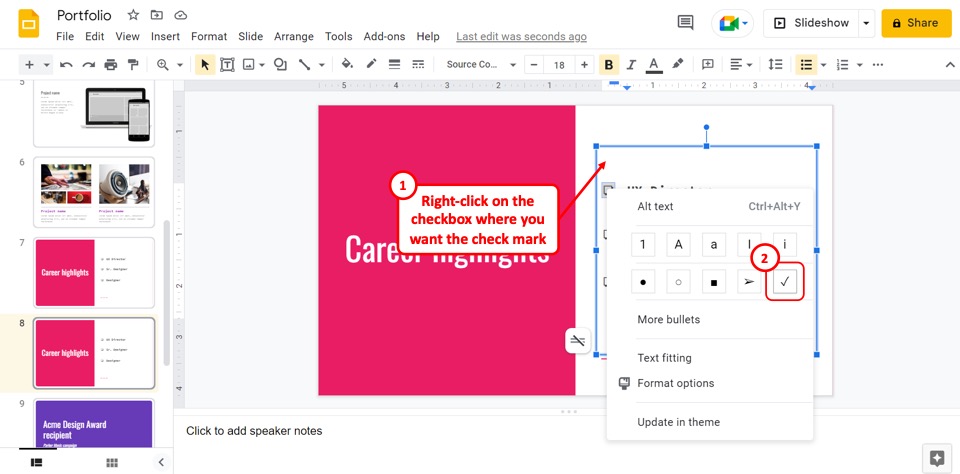
In the duplicate slide, “Right Click” on the checkbox where you want to add the checkmark. Then click on the “Checkmark” icon in the pop-up dialog box.
Step-5: Click on the “Slideshow” option
Finally, you can preview the checkbox in Google Slides. Click on the “Slideshow” button at the top of the screen to start the slideshow. The two similar slides will look like the checkbox is replaced with a checkmark giving the interactive effect.
3. How to Add a Checklist in Google Slides?
In Google Slides, you can convert any bullet list to a checklist. All you have to do is follow the 6 simple steps.
Step-1: Click on the “More” option
The first step is to convert the paragraph into a bullet list. To do so, select the text in the text box. Then click on the “More” option which is the three horizontal dots located on the right side of the toolbar at the top of the screen.
Step-2: Click on the “Bulleted list” option
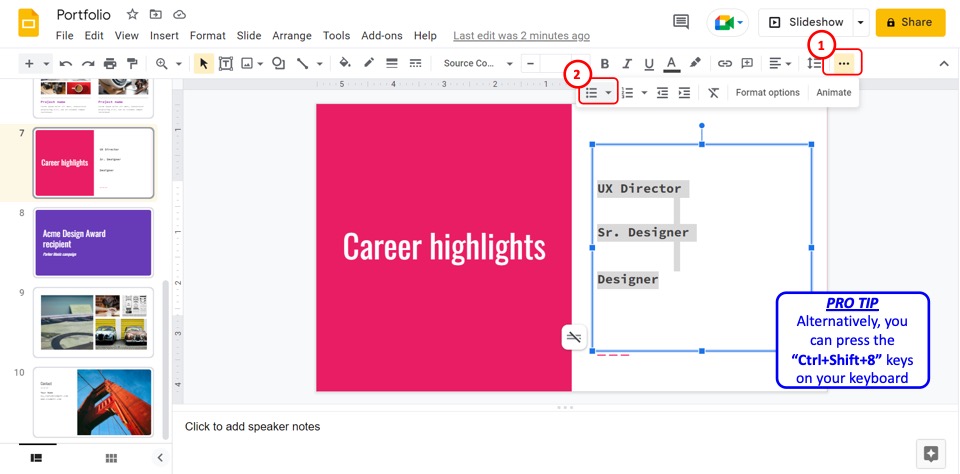
In the “More” menu, click on the “Bulleted list” option which is the first option. Alternatively, you can press the “Ctrl+Shift+8” keys on your keyboard to create the bullet list.
Step-3: Click on the “Format” menu
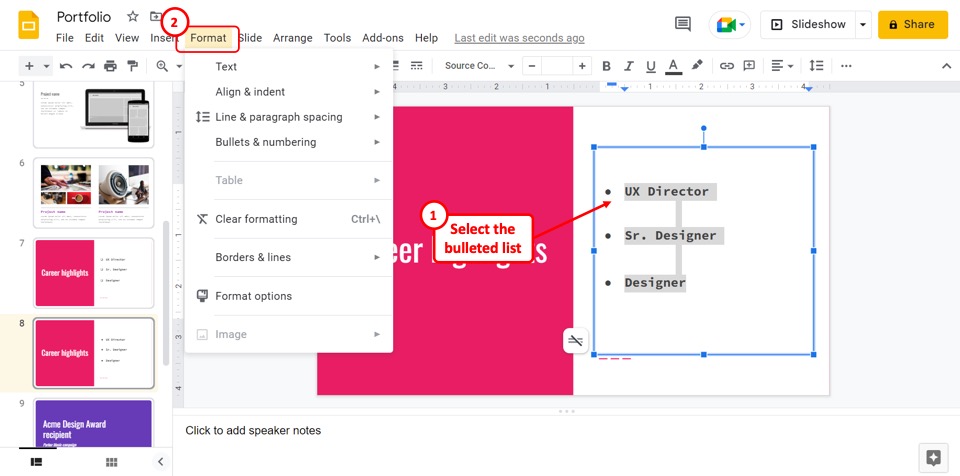
The next step is to convert the bullet list into a checklist. To do so, select the bullet list in the text box. Then click on the “Format” tab in the menu bar located at the top of the screen.
Step-4: Click on the “Bullets & numbering” option
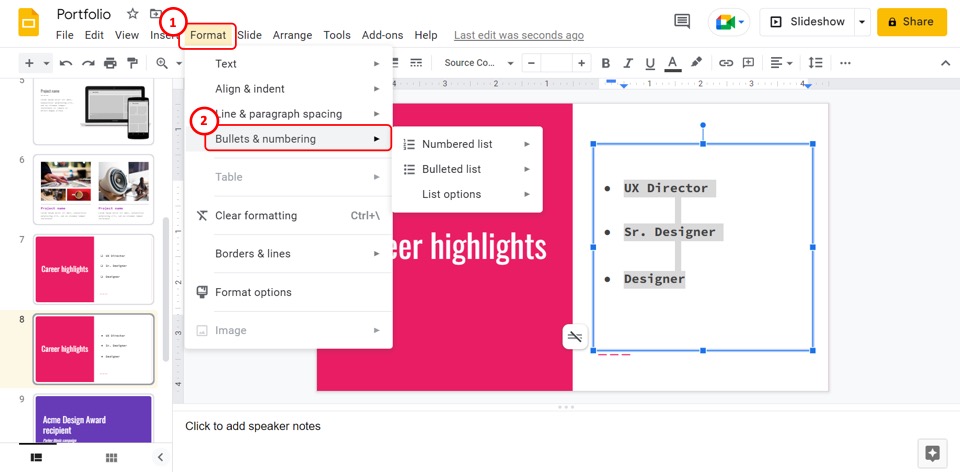
In the “Format” dropdown menu, click on the “Bullets & numbering” option. Another menu will pop up by the “Bullets & numbering” option.
Step-5: Click on “List options”
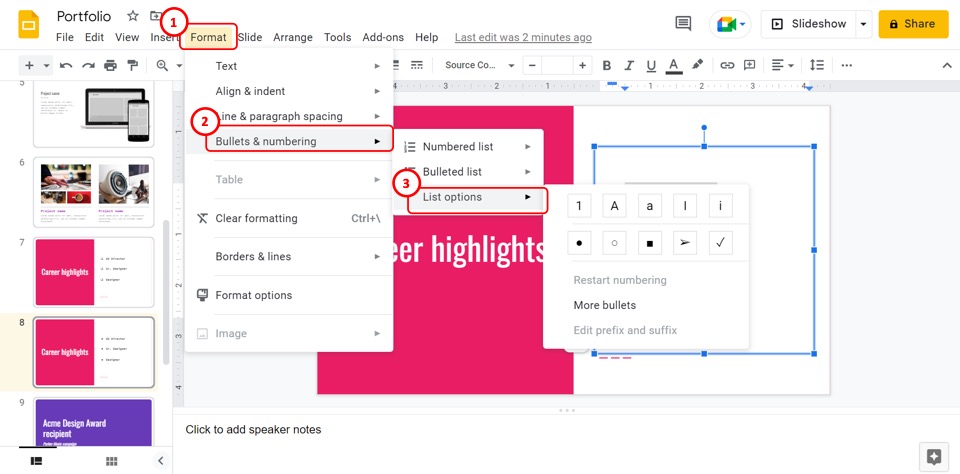
The next step is to click on the “List options” option in the pop-up menu by the “Bullets & numbering” option in the “Format” menu. Another pop-up menu will appear by the “List options” option.
Step-6: Click on the “Check mark” icon

Finally, you have to click on the “Check mark” icon in the pop-up menu by the “List options” option. This will convert the selected bullet list into a checklist.
4. How to Insert a Checkmark in Google Slides?
The “Special characters” feature in Google Slides allows you to add a check mark inside a text box on a slide. You can find various predesigned check marks in the “Insert special characters” dialog box. To insert a check mark on a slide, follow the 5 easy steps.
Step-1: Click on the “Insert” menu
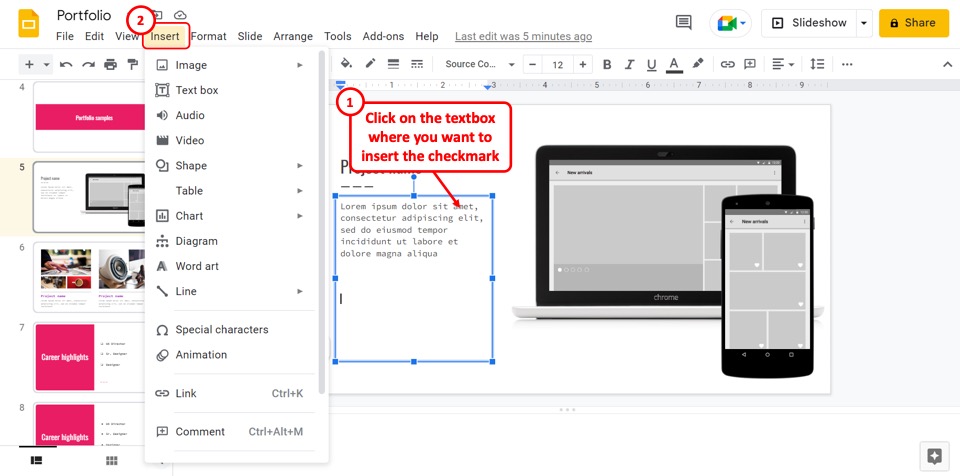
The first step is to click on the text box where you want to insert the check mark. Then click on the “Insert” menu in the menu bar located at the top of the screen.
Step-2: Click on the “Special characters” option
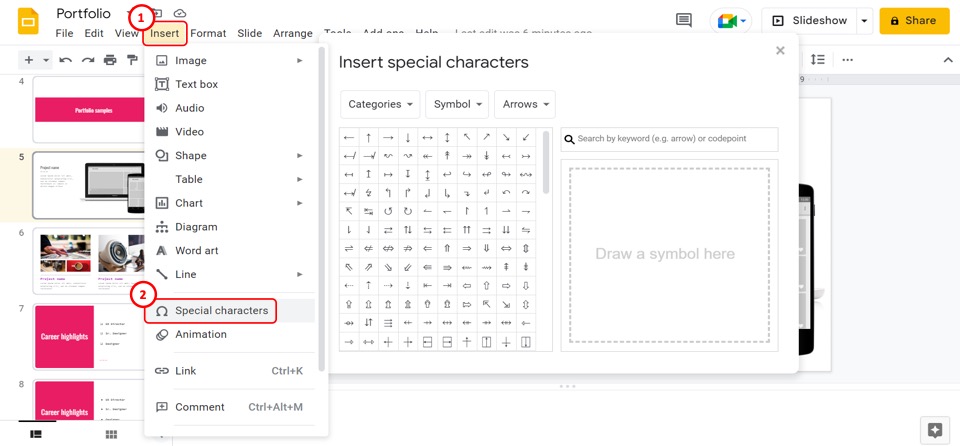
In the dropdown menu under the “Insert” tab in the menu bar, click on the “Special characters” option. This will open the “Insert special characters” dialog box.
Step-3: Click on the search box
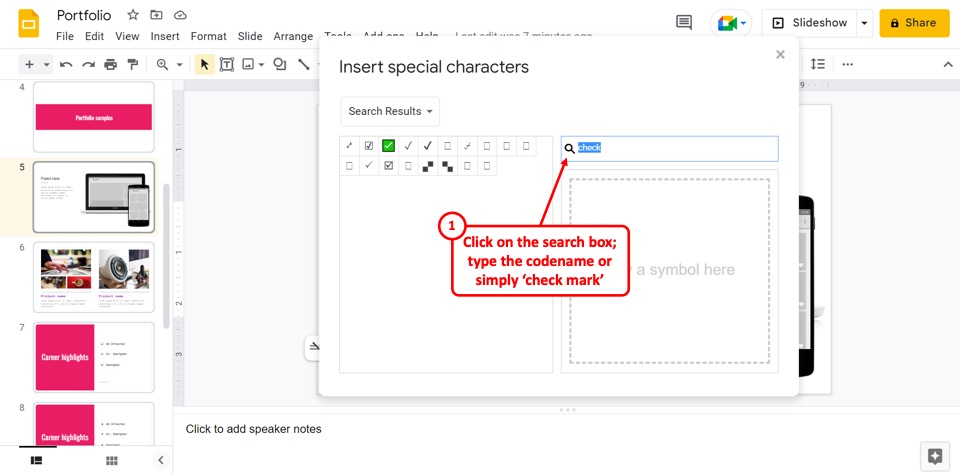
In the right column of the “Insert special characters” dialog box, click on the search box. Then type in the codepoint for the check mark that you want to add to the text box. You can also type in “check mark” to look for all the available check mark designs in Google Slides.
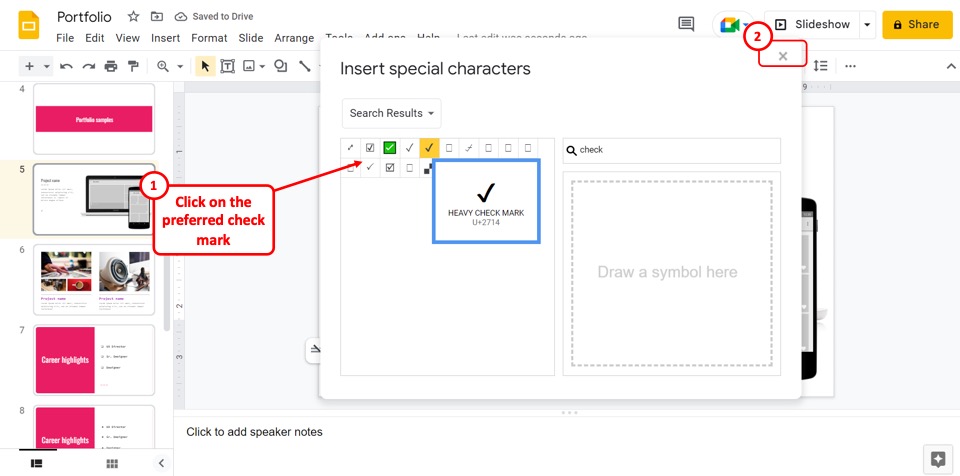
Step-4: Click on your preferred check mark
Finally, all you have to do is click on the preferred check mark from the left column of the “Insert special characters” dialog box to insert the check mark into the selected text box.
Step-5: Click on the “Close” option
Now you can close the “Insert special characters” dialog box to continue editing the presentation. To close the “Insert special characters” dialog box, all you have to do is click on the “Close” option which is the “X” icon on the right side at the top of the dialog box (shown in the image above).
4.1 How to Check Items Off a Checklist in Google-Slides?
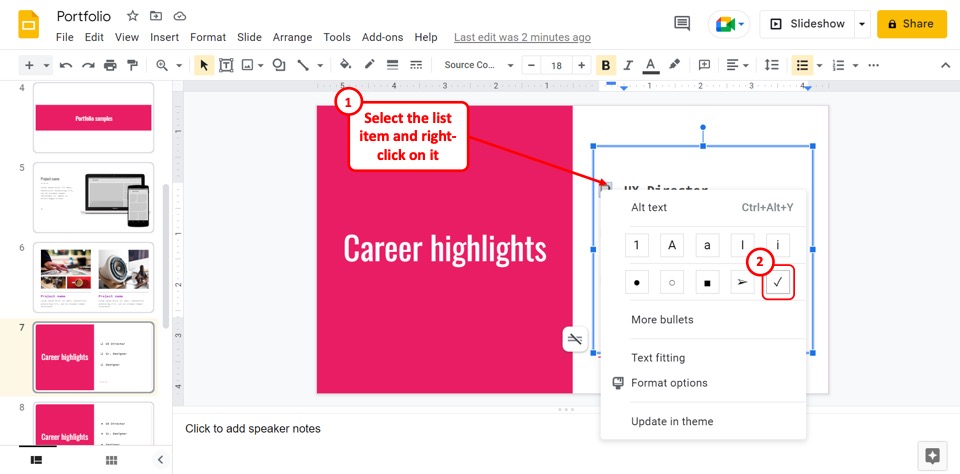
In Google Slides, you can check items off any type of list. All you have to do is select the list item that you want to check off. Then you have to “Right Click” on the list item. In the pop-up menu, click on the “Check mark” icon to check off that selected list item.
Credit to wayhomestudio (on Freepik) for the featured image of this article (further edited).