![How to Insert Timer Into Google Slides? [An EASY Way!]](https://artofpresentations.com/wp-content/uploads/2021/12/Featured-Image-How-to-Insert-a-Timer-in-Google-Slides.webp)
Whether you want to allow your audience a few seconds to answer a quiz question, or whether you want to let your audience know the time left for the break to end, having a ticking timer on Google Slides is a great way to do that!
But, Google Slides doesn’t provide the option to add a timer by default. So, how do you insert a timer in Google Slides?
To insert a timer in Google Slides, you can add a video that contains a countdown timer. Alternatively, you can also use the “Slide Timer” extension. Using the extension allows cusotmization of text formatting, and a few additional features which are not available when using a video!
This article will provide you with more insights on adding a timer in Google Slides. We will be discussing a few different methods. You will get the step-by-step process along with the images so you too can add it to your presentation!
So, let’s get started!
1. How to Insert a Timer in Google Slides?
I’ve captured all the steps in a video format as well. If you wish to learn by watching a video instead of reading this article, you can do so by clicking on the play button on the video below –
If you prefer learning through reading, you can continue to do so by going through the steps in the rest of the article!
When you need to give your audience time to complete an action such as think of an answer, writing a solution, responding to a question, or perhaps even ensuring that people come back on time after a break, it is good to have a timer displayed on the screen.
This will make sure that everyone is aware of the time left to finish the task required!
Although Google Slides doesn’t offer a direct option to add a timer in the presentation, there are multiple ways to insert a timer in Google Slides.
In this article, we shall take a look at two different methods.
1a. Method 1 – Inserting a Video
The first method includes inserting a video that has a timer. You can use any video for this purpose. The easiest way to find such a video is through YouTube.
One thing to keep in mind is that when you add a YouTube video to the presentation, you will need to make sure that your computer is connected to the internet for the video to work when you are giving the presentation.
For safety purposes, you can perhaps download the video and upload it to the presentation to make sure it works. However, for the purpose of this example, I’ll show you how to add a timer by inserting a video in Google Slides.
Let’s take a look at the steps one-by-one:
Step-1: Search for a Video with a Timer on YouTube
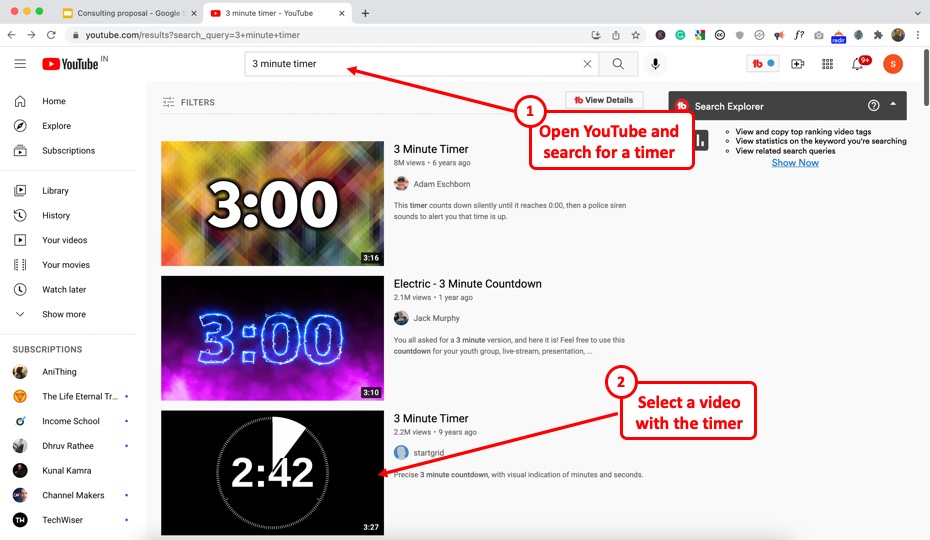
There are a ton of different video options available on YouTube for a timer video. Simply type in the duration of the timer that you want in the search bar.
For the sake of this example, I’ve gone with a 3 minuter timer.
From the options that appear in the search, go with single color background (ideally black). You’ll get to know why, in a minute!
Step-2: Copy the Video URL
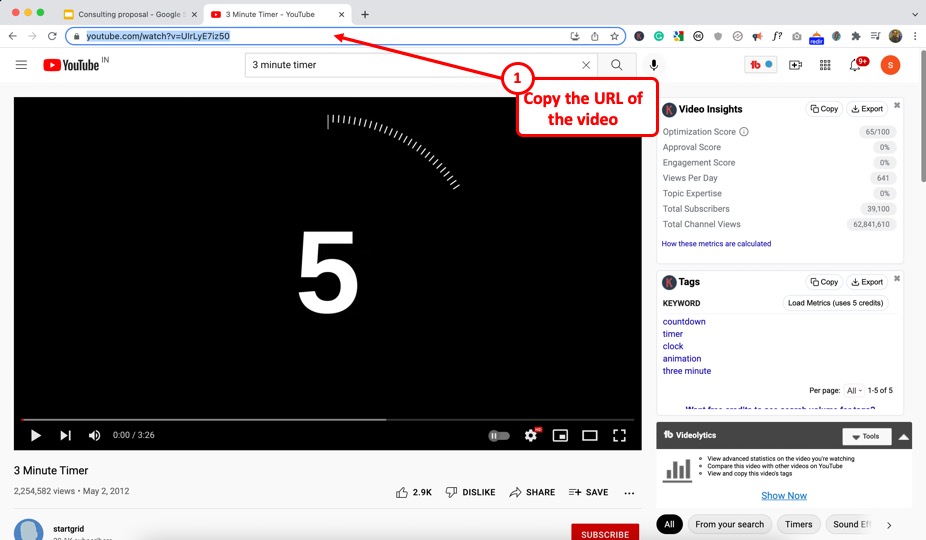
Once you have chosen a video, open it by clicking on it.
Then, click on the address bar. Select the URL and copy it using the “Ctrl+C” options. You can also right-click on it and click on “Copy“.
Step-3: Click on the Option to Insert a Video

Now, go back to your Google Slides presentation. Open the slide where you want to insert the timer.
Then, click on the “Insert” tab in the menu bar and select the “Video” option from the “Insert” menu. This will prompt an “Insert video” dialog box.
Step-4: Insert the Video in your Presentation
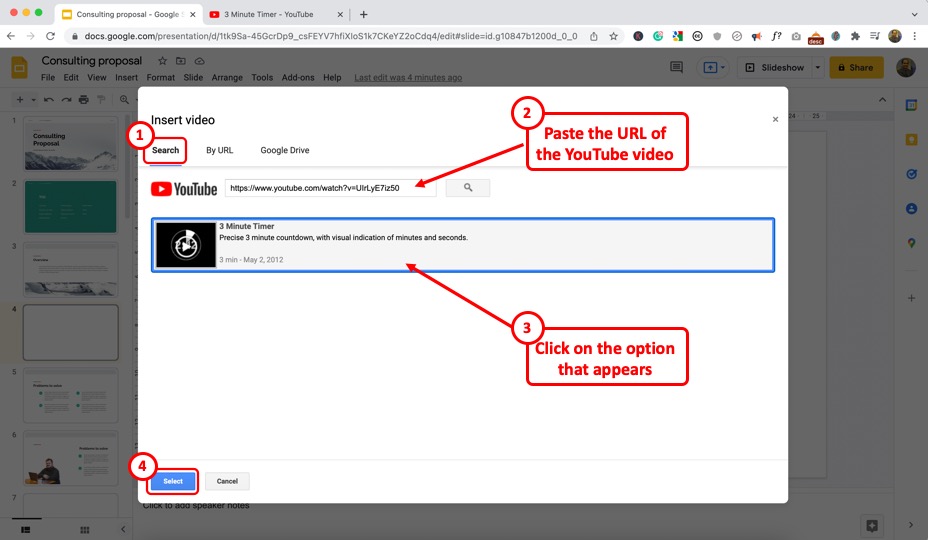
The next step is to insert the video. Click on the “Search” tab first. Here, in the search bar, paste the URL (link) that we copied in step 2 and hit enter.
You can also search for a term instead of pasting the link. So, for instance, instead of going on YouTube to find a video, you can also use the search bar here to do the same. But, I usually get much better results faster when I search it on YouTube and paste the link here.
Once you have the video appear below, click on it to select it. Then, click on “Select” to insert it on your slide.
You can also upload a video at this point by clicking on the “Google Drive” option. That option will allow you to add a video that you may have either downloaded or perhaps received from your colleague.
Step-5: Adjust the Playback Settings
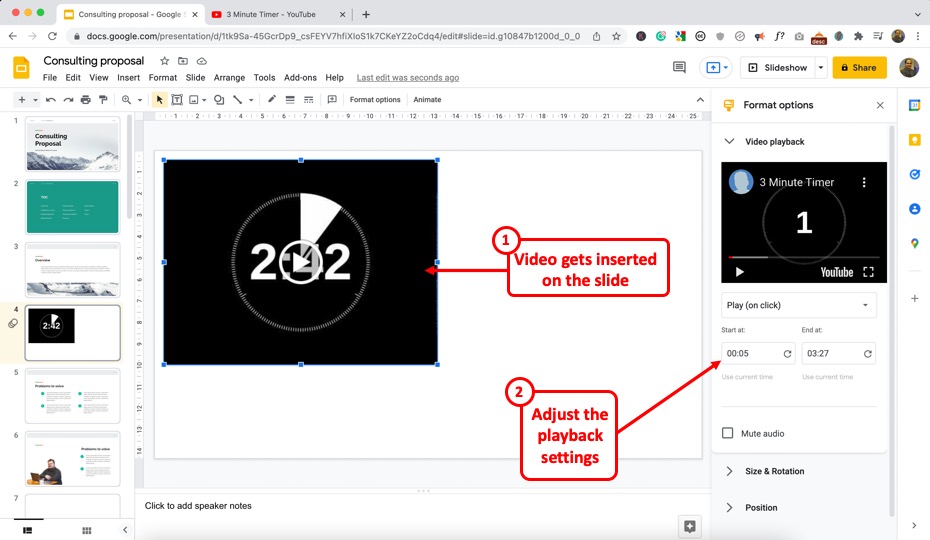
Now, the next step is to adjust the playback settings for the video.
When you insert the video on the slide, the “Format” panel on the right should automatically appear. If it doesn’t, simply right-click on the video, and click on the “Format” option.
Here, you can adjust the starting and ending point of the video along with tweaks to a few additional settings.
Step-6: Adjust the Video and Slide Background
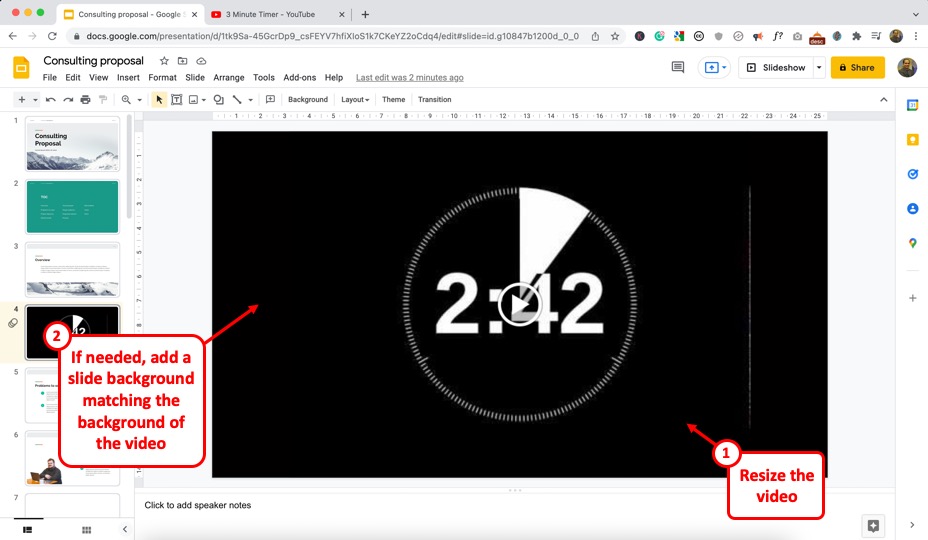
Now, the last thing that I recommend you do is first, make the video as big as possible such that it fits the slide on the top and the bottom.
This will display the video on the complete slide during the slideshow mode.
If there is still some blank space left on the slide, then you can choose to change the slide background to match the background of the video (just the way I’ve done it in the image above).
This is where choosing a video with a monotone background (as mentioned in step 1) comes in handy!
If you are unable to find the color for your slide back in the default options provided that match with the background of the video, you can use the eyedropper tool for color matching in Google Slides.
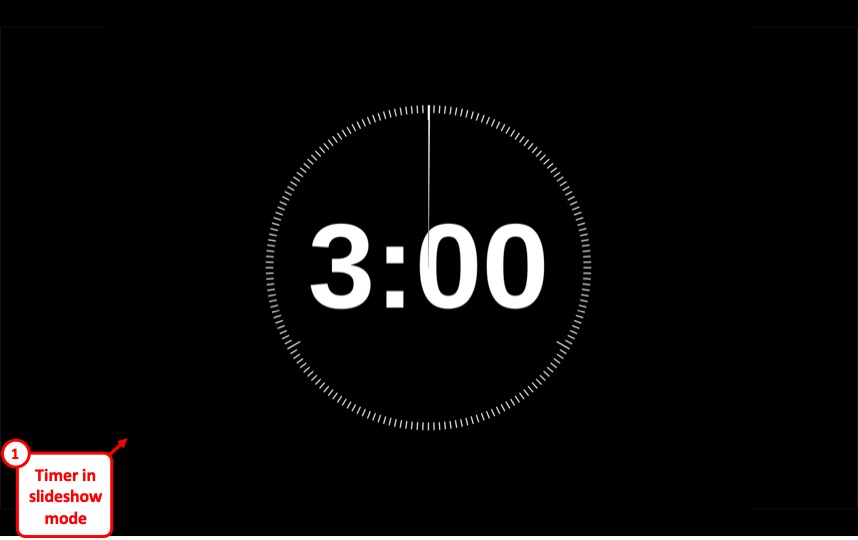
Once you’ve made the changes, simply enter the presentation in the “Slideshow” mode and watch the timer tick!
Method 2 – Using the Slides Timer Extension
If you don’t want to add a video to your presentation or if you want more customization to the way the text looks for the timers, and make a few changes to it, you can use the “Slides Timer” extension.
The “Slides Timer” extension has been designed by ClayCodes; a third-party open-source creator.
The Slides Timer extension comes as a Google Chrome browser extension rather than an “Add-on” item.
Through this add-on, all you need to do is type in a simple text-based code and it will convert the code into a function. We shall take a look at the
To add the extension, you have to first click here to find the Slides Timer extension in the Chrome Web Store.
Then follow the 3 quick steps.
Step-1: Click on “Add to Chrome”
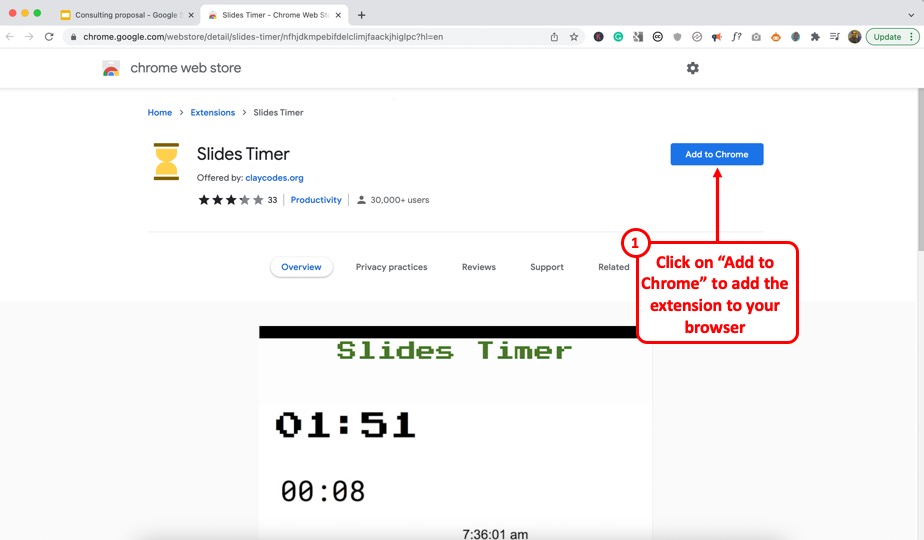
The first step is to click on the “Add to Chrome” button located on the right side of the screen. This will prompt a dialog box.
Step-2: Click on the “Add Extension” button
In the dialog box, click on the “Add Extension” button to allow access to the extension. You will now see another dialog box notifying that the Slide Timer extension has been added.
Step-3: Click on the “Slides Timer” extension

Now all you have to do is open the Google Slides presentation. Then click on the “Extensions” icon which looks like a puzzle piece beside the browser “Search bar”. In the “Extensions” dialog box, click on the “Slides Timer” extension to access a tutorial.
How to Use the Slides Timer Extension?
The Slides Timer extension has various features that you can use. You can create a timer, stopwatch, clock, etc.
Countdown
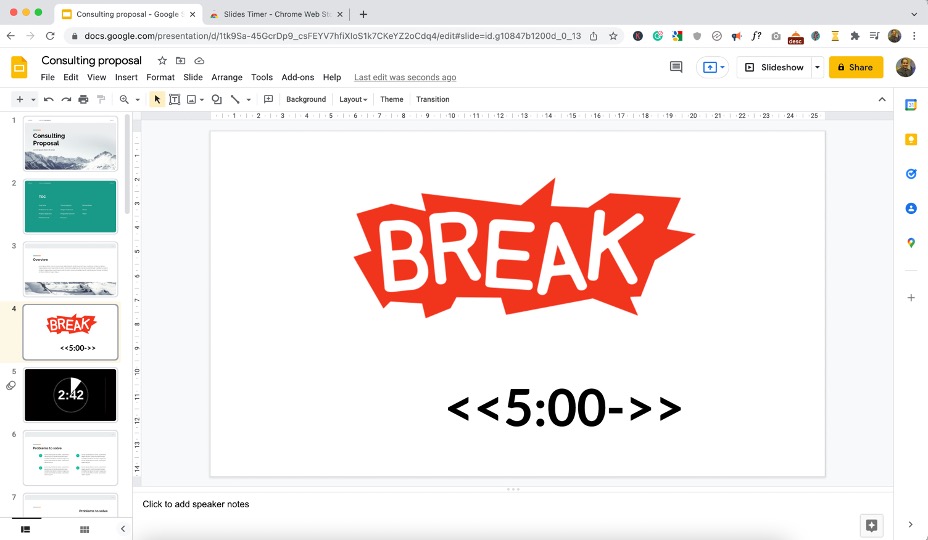
To create a countdown timer, you have to first click on the “Text box” icon in the toolbar located right under the menu bar.
In the text box, type in “<<“preferred time”->>”. For example, for a five-minute countdown, type in “<<5:00->>” in the text box.
Next, click on the “Slideshow” or “Present” option and the text will be automatically converted to a countdown timer.

Count Up
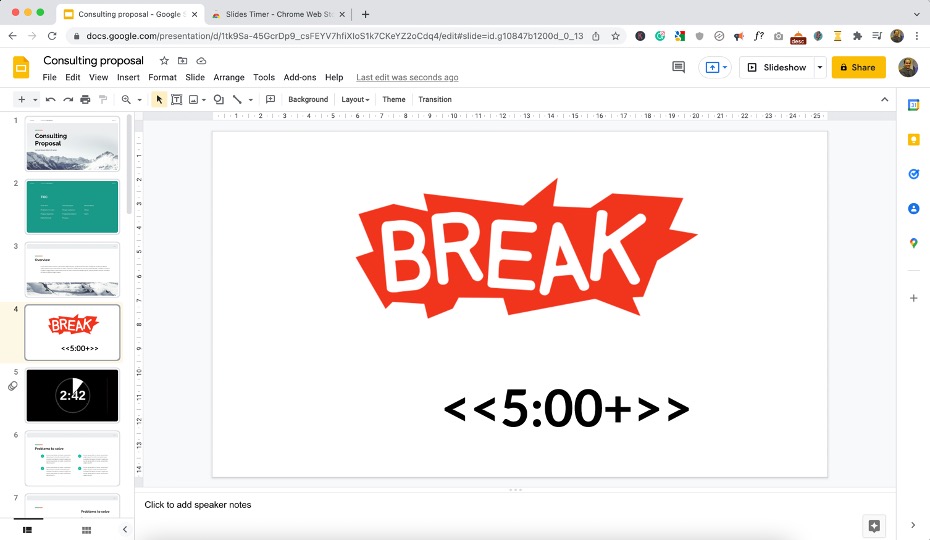
To create a count-up timer or a stopwatch, type in “<<“preferred time”+>>” in a text box in the slide where you want to add the timer.
For example, if you want the stopwatch to start at zero seconds, type in “<<00:00+>>”. It will be automatically turned into a stopwatch on the “Present” screen.

In the example above, I’ve started my stopwatch from “5:00”. You can see the stopwatch counting up in the slideshow mode in the image above.
Time
You can also display the current time in the local time zone using the Slides Timer extension. To do so, insert a text box in the preferred slide and type in “<<time>>”. In the “Present” screen, this will show the time in the AM/PM format.
Date
To add the current date in your Google Slides presentation slide, insert a text box and type in “<<date>>”. In the “Present” screen, this will turn into “mm/dd/yyyy” format date. This will always show the current date when you present without any manual adjustment.
Move to Next Slide
With Slides Timer, you can also add a timer that automatically moves to the next slide when time is up. For example, you can create a countdown trigger that moves to the next slide after 2 minutes. All you have to do is insert a text box and type in “<<02:00-+>>”.
2. How to Time Your Slides to Autoplay in Google Slides?
Google Slides does provide you with an option to time the slides such that you can set it on “Autoplay” and let the slides automatically keep changing!
This is a great option especially when you are at an event, and you just want put the presentation on the screen, set it, and forget it!
This topic actually deserves an entire article! Thus, I’ve written a separate post to cover the nuances of this topic in great detail in a step-by-step manner. Check out my other article on this topic here!
Credit to benzoix (on Freepik) for the featured image of this article (further edited)