
If you are new to Google Slides, a common issue that you may face is the ability to wrap text around images and other objects. Wrapping text in Google Slides just doesn’t work the way it does in some of the other common presentation applications! So, what can you do?
Google Slides doesn’t provide an option to wrap text (yet). However, you can adjust the size of the image and the text box such that it creates an effect similar to that of wrapping text in Google Slides.
If this seems confusing to you, make sure you read along as I have provided an in-depth step-by-step process on how to achieve the wrap text like effect in Google Slides!
A Quick Note Before We Begin – if you want to make jaw-dropping presentations, I would recommend using one of these Presentation Designs. The best part is – it is only $16.5 a month, but you get to download and use as many presentation designs as you like! I personally use it from time-to-time, and it makes my task of making beautiful presentations really quick and easy!
What is Text Wrapping?
You probably are already aware of what is meant by “Text Wrapping” as you are on this page reading this article! You can skip this section if you already know the meaning of text wrapping.
But, for those who need a bit of understanding about wrap text, here’s what you need to know!
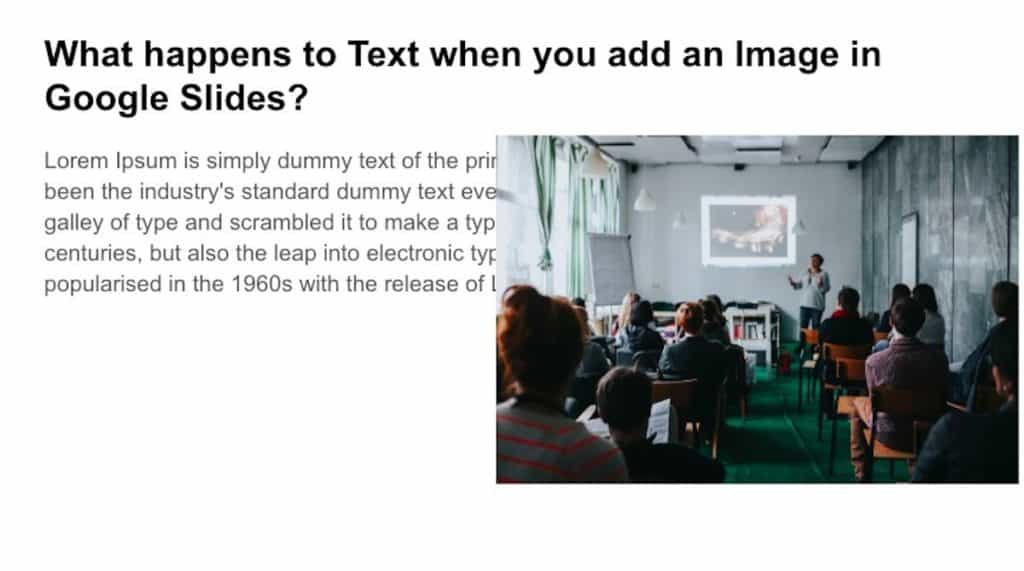
So, what does text wrapping mean? Well, when you add an image to a presentation or a document, the image is usually set to be in-line with the text. This means Google Slides considers an image the same as text and treat it the same way!
As a result, the text gets hidden by the image that is added to the slide.
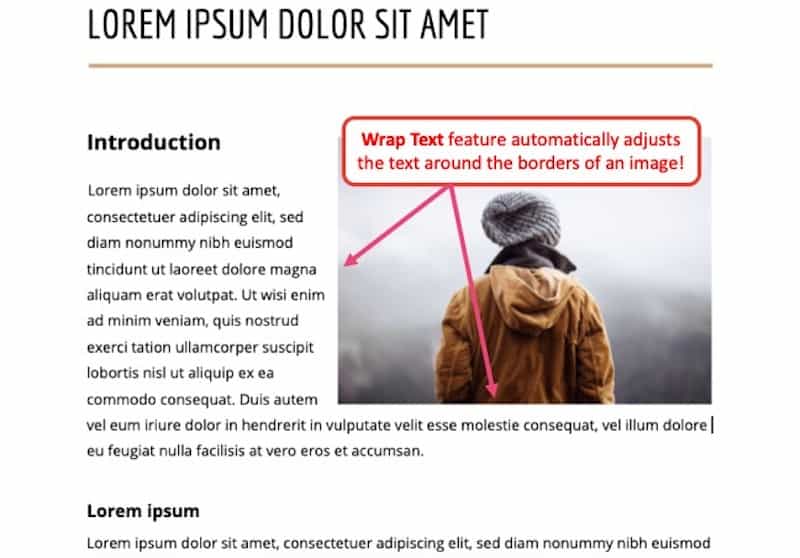
The “Wrap Text” feature ensures that the text is not interrupted by an image or any other object that is added to the slide. Instead, “Wrap Text” feature automatically adjusts and fits the text around the edges of an image.
Thus, whenever you add images or charts, or any other graphics, the wrap text feature ensures that both the graphic and the text are visible and the text is not cut off. This is the best way to place your texts and images together.
How to Wrap Text in Google Slides?
As you may have figured by know, Google Slides doesn’t provide its users with the feature to wrap text around shapes, objects or images.
Thus, as described above, the image ends up overshadowing the text and often the text is not visible.
Fortunately, there is a way to you can easily circumvent this problem. Here’s what you need to do to wrap text in Google Slides –
1. First, open the document that needs to be edited and simply click on “Text Box”. The text box option can also be found under Insert Menu.
2. Next, add the relevant text and identify the part of the slide where an image or a graphic needs to be added.
3. In the next step, simply add the graphic element (I’m going to add an image for this example). Resize the image to the correct size and move it to the desired location on the slide.
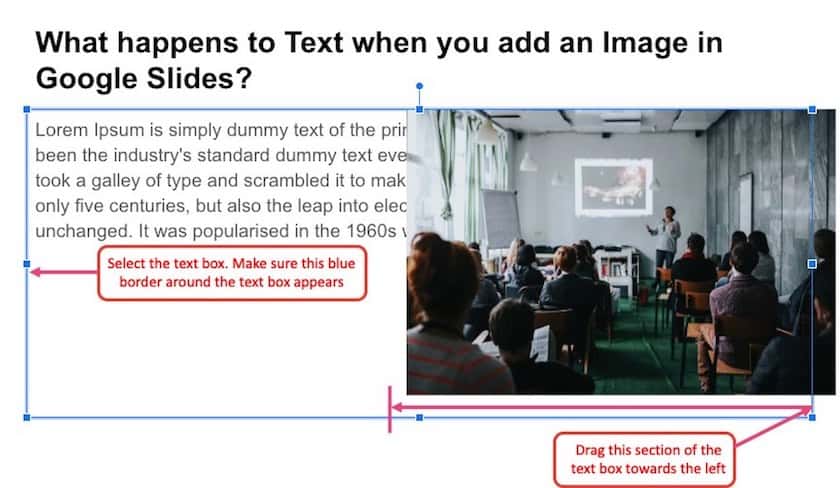
4. Now select the text box until the blue border appears. Then, drag the blue border towards the edge of the image (or as per the desired length).
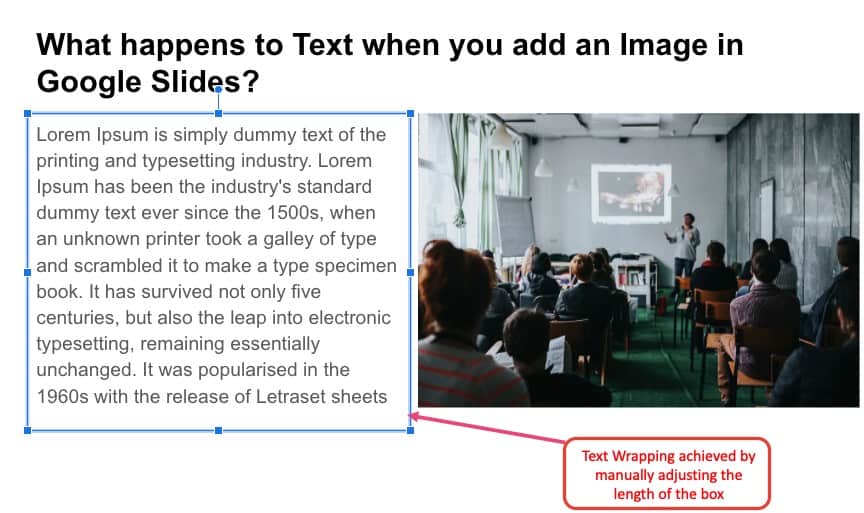
5. Finally, you’ll see that your text has wrapped the image perfectly.
The only difference to this and the Wrap text feature is that here you are wrapping the text manually where as the wrap text feature does it automatically for you.
How to Wrap Text Around an Image in Google Slides?
As there is no other option for wrapping text in Google Slides, the process for wrapping text around an image in Google Slides works just the same way it does for any other element. The process for wrapping the text around an image remains the same as the one mentioned above. However, just mentioning the steps in case you skipped over the previous section.
The steps involved in wrapping a text are as follows –
- Firstly, open the document that needs to be edited and simply click on “Text Box”. The text box option can also be found under Insert.
- Secondly, decide where you would like to place the text box and place the cursor there.
- Once you have added the text box in the right place, type and add the text that needs to be on display.
- You can also easily resize your text by clicking on the blue line that’s appeared at the edges of the text box and simply dragging it. Make sure you keep an eye for any red line as it appears when your image is about to be overlapped by the text.
- Finally, you’ll see that your text has wrapped the image perfectly.
For a visual explanation, I would request you to go through the steps mentioned in the previous section.
There are some additional optional steps to improve the effects of text wrapping for the text box. Let’s understand those steps as well –
- Firstly, make sure to select the text box you had placed earlier.
- Then click on the format option on the Menu Bar.
- Under Format, you’ll find “Align & Indent”.
- Click on Justified.
These steps will help you modify the text box’s alignment so that the text aligns fully to the edge of the image (just as it would in a typically wrap text manner)
How to Curve Text in Google Slides?
Sometimes, we also feel the need to curve the text. But how exactly does one do that?
There is no direct way to Curve Text in Google Slides. You can use Microsoft PowerPoint to curve the text and then copy and paste it as an image in Google Slides. Alternatively, you can also use online tools such as MockoFUN to achieve the desired results.
We wrote a detailed blog post on how to Curve Text in Google Slides giving a step-by-step understanding. Make sure you check it out and give it a read!
How to Outline Text in Google Slides?
Outline text in Google slides helps you achieve a dramatic look for your text. For this, the WordArt function is considered to be the right option as it provides you with additional options other than just color and size. The steps that you need to follow to outline text in Google slides is given below-
- Firstly, click on the Insert option and select drawing.
- Select Word art one you have gone to Actions and a window will appear.
- In the appeared window, enter your text. If you want to increase the lines, you can press Shift + Enter to do so.
- Now, the control panel will provide you with the option ‘Fill color’. Once you click on it, you’ll be able to choose your desired color.
- So if you want to change the outline color, simply click on border color and choose the color you desire.
- Finally, place and rotate your text according to your preference.
Final Thoughts
Once you get to learn the applications of different features, you can be done with your presentation more quickly with an outcome you longed for. Knowing how to do what in Google Slides helps you achieve your vision regarding your presentation. So, it is important to get a grip on certain features like- how to wrap text in Google Slides, how to curve text in it, etc.
In this article, I have focused on providing you with enough information to help you understand the importance and steps of wrapping text in Google Slides.
I hope you have already gone through the entire article and have found this article informative and also hope it was of great help to you and will help you with making your presentations more powerful.