![How to Choose a Microphone for Presentation [Complete Guide!]](https://artofpresentations.com/wp-content/uploads/2021/08/Featured-Image-How-to-Choose-a-Microhpone-for-Presentations-Optimized.jpg)
Using a microphone is absolutely essential when delivering a presentation. But having a bad microphone can ruin your presentation no matter how well you’ve prepared for it. If you are an event organizer, it is all the more important to have a good microphone in your event kit for presentations.
In this article, I’ll help you understand what you should be looking for when you are buying a microphone for presentations. I will also help you understand different types of microphones so that you can choose the one that fits your needs perfectly!
So, let’s get started!
Types of Microphones Used for Presentations
There are a variety of different types of microphones that can be used for presentations or public speaking events. It is important that we understand these microphone types before looking at the next options.
- Handheld Microphone
- Lapel or Lavalier Microphone
- Over-the-ear Microphone
- Desktop Gooseneck-type of Microphone
Each microphone type has its own advantages and limitations.
In case you’re well versed with all these types of microphones, feel free to skip to the next section. However, if you have no clue, I’d highly recommend you to read this section first.
Handheld Microphone

Handheld microphones are the most traditional type of device that you may instantly recognize at any event. It is one of the most common microphones seen at events, including speaker events, conferences, and corporate forums.
One of the key reasons why handheld microphones are so common is due to the excellent performance you get out of such devices. They have the biggest area for the mouthpiece to capture your voice clearly. Plus, they are no-nonsense easy to handle devices.
Related Article – 5 Best Wireless Handheld Microphones for Presentation!
Handheld microphones work great especially when you have multiple speakers, or speakers coming for a very short interval like 2-5 minutes (during a pitch day for instance), or when you want to pass the mic around the audience for questions.
This article is mainly going to focus on handheld microphones for recommendations. However, it is important to know the other microphone types as well, as you may sometimes need a combination of multiple types of microphones for your event.
Lapel or Lavalier Mic
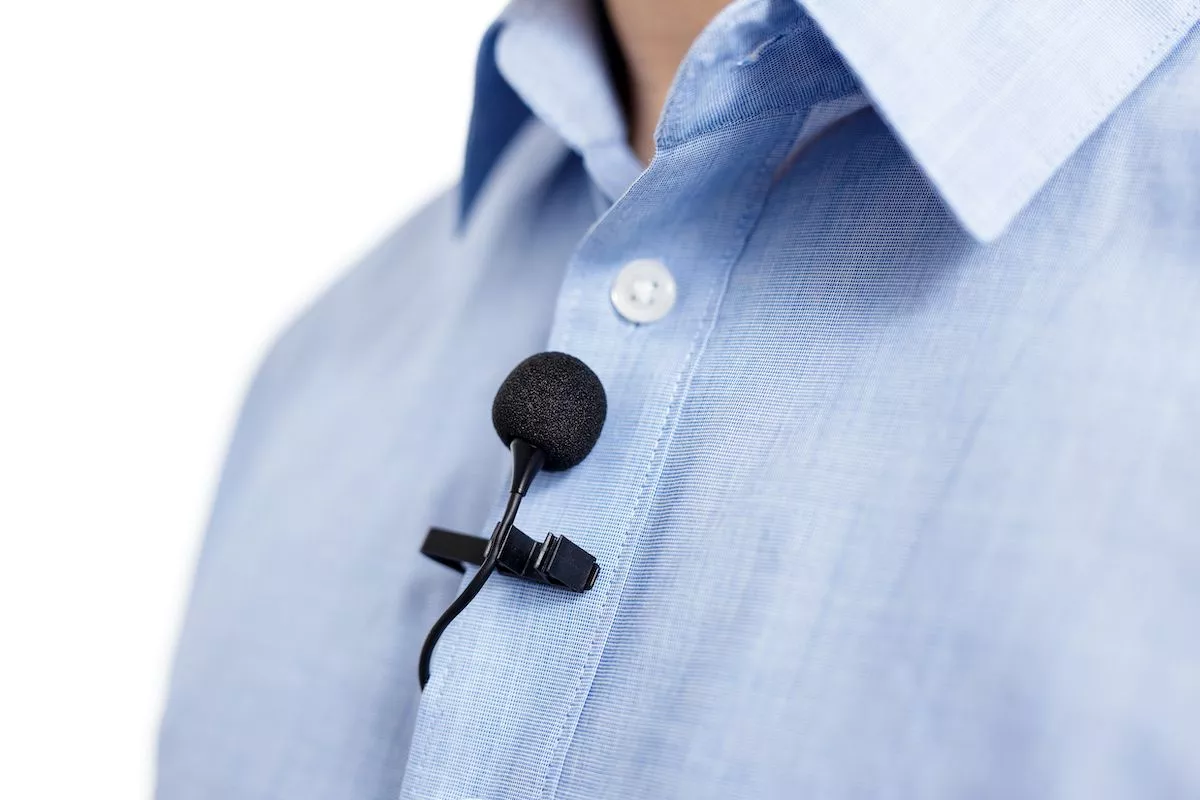
Another common type of microphone that you often see at events is the lavalier mic. It is also known as lapel mic or clip-on mic.
As the name suggests, this type of mic is usually clipped onto the clothing of the speaker. It is usually clipped either to the collar of the shirt, inside of the shirt, or the strap of the blouse.
Although this mic provides great mobility and movement, and a hands-free experience to the speaker, it does have a few downsides.
One of the limitations of a lavalier mic is that it is slightly away from the mouth of the speaker. This can affect the sound quality a bit.
Another problem often faced is that since it is clipped onto the clothing, it often brushes to the clothes or hair of the speaker, and can feel like the mic may be giving some static output. However, in reality, the extra noise can be due to the rubbing of the mic with clothing.
Lastly, this type of device also usually requires some time to be put on a speaker.
Overall, the advantages of a lavalier mic outweigh the limitations.
Over-the-ear Microphone
Another common microphone type is the countryman-style over-the-ear microphone.
They were first introduced and made famous by the Countryman brand. This type of microphone is worn over the ear instead of being clipped onto the clothing. Unlike the lavalier mic, these are much closer to the mouth of the speaker. So they also tend to capture the voice quite clearly.
Over-the-ear microphones are great since they are almost always invisible on the speaker. These types of mics are often preferred by companies at their corporate events for their speakers.
This type of microphone also has its own drawback. It is often a bit difficult to adjust if the speaker has a lot of hair. Plus, if you’re using the single over-the-ear strap, it is a bit difficult to hold the microphone in its place.
Fortunately, choosing the right device can help overcome the challenges usually encountered with this type of microphone.
Desktop Gooseneck-type Microphone

The last type of microphone that you should know is the gooseneck microphone.
This type of microphone is similar to the handheld microphone in function. However, unlike the handheld mic, the gooseneck-type mic is stationed on the desk instead of having to hold it in a hand.
These types of microphones are usually used when there is a podium for the speaker on the stage. It is a great option when the speaker is not required to move around on the stage.
The desktop gooseneck-type microphone is usually used in government offices and large auditoriums where each member of the audience is also a speaker.
While being attached to the desk, these types of microphones also provide a hands-free experience to the speaker.
Choosing a Microphone for Presentations
There are a ton of options when choosing a microphone for events and presentations. If you perhaps want to identify more options (than what is recommended above in this article) or if you simply want to know how to choose your own option, you may want to consider the factors mentioned below.
[Please note – the list of the factors mentioned below is not exhaustive but it will help you shortlist your options quite quickly]
- Wired vs. Wireless
- Handheld vs. Hands Free
- Frequency Band
- Operating Range
- Battery Life
- Sound Quality
- Analog vs Digital
- Features
- Brand
- Price
Wired vs. Wireless
So the first thing that you need to decide is the function of the microphone.
Wired microphones are the ones that use a wire running from the microphone and connect directly into the audio system. Wired microphones can work great if you have a fixed place for a speaker to present; perhaps a podium on the stage. Even so, running wires are a perfect recipe for tripping and the system breakage unless the wires are taped and hidden properly.
Wireless microphones, on the other hand, connect digitally to the audio system. It doesn’t need a wire running from the mic to the audio system (although it does use a wire!).
Oftentimes, people confuse wireless microphones with a device that operates on Bluetooth or wi-fi. But, that’s not how it works! The mouthpiece of the microphone is usually connected to a transmitter which sends radio waves to the receiver. The frequency band used for the transmission of the radio waves is either VHF or UHF (more on this later).
A couple of final things (without getting too technical) that you need to know here are these. Since transmission happens through radio waves, interruption by walls or other people can cause interference. Plus the range of the microphone is also limited by distance. So, check for the range or the signal capacity of the microphone before making a purchase.
Handheld vs. Hands Free
Another factor that you may want to consider while making your purchase is whether or not the speakers will need to use their hands (either for gesture or for operating another device) during their presentation.
A handheld microphone will need to be held in one hand while the presenter is speaking (as the name suggests), whereas the hands-free microphone will allow the speaker to move around on stage and provide a better presentation experience overall.
If you are unsure about which one to choose, always go with a hands-free microphone as it only provides more mobility and flexibility to the speaker over the handheld one.
This doesn’t mean you may not need a handheld microphone. As I mentioned earlier in the article, a handheld mic is extremely handy (pun intended!) when you want to pass the mic around in the audience for questions after the presentation.
So, you may choose a combination of handheld and hands-free for the event; hands-free for the speaker, and handheld for the audience.
Frequency Band
There are various types of frequency bands that are used. Very High Frequency (VHF) and Ultra High Frequency (UHF) Range are usually the most common.
The VHF microphones usually operate in the range of 174 MHz to 216 MHz. This also happens to be the transmission range of TV channels (channel 7 – 13). As a result, the chances of interference when using these microphones are much higher. However, for most indoor settings, this usually is not a problem.
UHF (400 MHz and upwards) is the most reliable because it gives the strongest performance and a higher operating range as the microphones can transmit over long distances using this band. But, microphones using UHF are also usually more expensive.
Some microphones will also operate in the 2.4GHz frequency range. This is the same range that is used for WiFi internet operations. So, although there are chances of interference, the good thing about these types of microphones is that they are usually free from TV interference. They also typically tend to have a much smaller operating range.
You may wonder why all these technicalities are important? Well, there are regulations in place laid by the Federal Communications Commission (FCC) that prohibit certain transmission frequencies from being used for operating microphones. Failure to comply with these regulations can result in fines and even criminal penalties!
Operating Range
The range of a microphone is basically the distance of the transmitter from the receiver in which a microphone continues to operate without any signal breakages. It is usually measured in feet or meters. The operating range of a microphone can vary from 100 feet to 1000 feet!
Most manufacturers will mention a specific range on the box of the packaging. However, this range is usually tested in ideal conditions. So, you rarely ever get the same range from a microphone that is mentioned on the box!
As a general rule of thumb, go for a microphone that has the capacity of twice the actual range requirement for your event.
Since presentations usually take place on a stage, the operating range of a microphone is usually not too high as the console and the stage are usually at a fixed distance. A typical range you would want from a microphone for presentation and public speaking events would be about 100 feet.
That said, do keep in mind that at some events, you may also want to consider the fact that microphones may be required to move around in the audience during the Q&A session. Make sure you factor this distance in your requirement.
Battery Life
Although this may not be a major factor for a lot of people, the battery life can affect your running cost of the microphone.
In general, most microphones provide a battery life of approximately 4 hours to 14 hours of operation on a single charge. Some microphones can provide a much longer operation duration of up to 20 hours on a single charge! After this, you may want to recharge or replace your batteries.
If you are purchasing the microphones for a one-off event in a month, then the battery life of the microphone shouldn’t be much of a consideration. However, if the purpose of purchasing a microphone is for frequent usage, you may want to consider a mic that lasts longer on a single charge as this can add to the operating costs over time!
Sound Quality
It is quite obvious that you need to choose a microphone that produces the best quality sound in order to ensure that the audience members can hear what the presenter is saying.
But, high quality comes at a cost. Some of the mid-range microphones that cost about $650 to $850 such as the Sennheiser EW 100 provide an excellent sound quality capturing the sound quite clearly and providing a crisp output.
On the contrary, budget microphones that come in the $125 to $250 range such as Innopow Wireless Microphone System provide a sound quality that is decent but not as amazing as the Sennheiser and Shure systems.
However, the truth is that most people will not be able to make out the difference between the sound quality of the two microphones unless they are compared together at the same time.
That said, the sound quality of the microphones on a budget can be a hit or miss and you really need to test it out before buying. The higher-end microphones are virtually guaranteed to provide a great sound output.
If you want to save some time and the effort of trying it out for yourself, check out our recommendations for the best microphones for presentation by clicking on the links.
Analog vs Digital Wireless Microphone
Another thing to consider when purchasing a microphone is whether the system is analog or digital.
Most analog wireless microphones use a process called companding. In this process, the audio signal is compressed before being transmitted and then expanded at the receiver. This is usually done to deal with the limited capacity of the wireless channels.
The process of companding can cause degradation of the signal and, as a result, can lead to poorer sound quality. Frequency interference is another big concern for analog microphones.
Digital microphones, on the other hand, convert the signal into digits of zeros and ones before transmitting it to the receiver. As a result, the compressing and expanding of sound is not required. This usually results in a higher quality sound. Plus, the chances of interference is also greatly reduced.
It is important to note that the more expensive analog wireless microphone systems usually have the capability to match with those of the digital microphone systems both in terms of sound quality and resistance to interference.
That said, digital microphones are also usually more expensive. If it boils down to two options where the cost is identical, I would recommend going with the digital microphone system over the analog in this scenario.
Features
When choosing a microphone, you will notice that most come packed with features that are often hard to understand for beginners.
It is often difficult to understand whether the cost differential is worth the difference in features of a particular microphone as compared to the other.
Here’s what I would recommend you to keep in mind when checking out features in a microphone (especially for presentation purposes).
- Automatic Frequency Selection – This is a feature that is offered by a few microphone systems. This feature basically allows you to sync your mic with the receiver with just a push of a button. Furthermore, in most cases, the system automatically determines the best frequency for your microphone.
This is a great feature to have in your microphone especially if you are a beginner and you don’t know much about operating a microphone system. - Separate Mute and a Power Button – This might go unnoticed for a lot of people. Having a separate button allows you to avoid accidentally turning off the microphone when the speaker in fact wants to mute the microphone.
Turning off the microphone is not a big problem except it can take some time to sync it with the receiver when you turn it back on. Plus, it also causes a great deal of confusion in the speaker’s mind as they are often not used to operating the microphone.
- Backlit Display – You don’t necessarily need to have a display on your mic, but it does enhance the ease of operation. If you do decide to go with the mic that has a display, then make sure that it has a backlit display.
If the mic is being used at close door events when the lighting is dimmed for viewing the presentation, it is often difficult to read the display. Likewise, if the presentation is in the open during broad daylight when the sun is too bright, it can be a problem to read too.
Going with a display that has a light can solve this challenge.
One thing to note is that you don’t need to have all the features that I’ve listed above. Choose the ones that are important to you, and your event needs.
Use the points mentioned above as a filtering mechanism to help you decide which microphone to choose.
Brand
Another factor that you may want to consider is the brand of the microphone. Most branded microphones will usually provide a solid build quality and sound quality, however, they may also come at a much higher price!
If you wish to choose a branded product, I would highly recommend sticking with either Shure, Sennheiser, or Audio Technica. These brands are well-known for their products and quality.
That said, some of the lesser-known brands do provide a good value for money as they usually provide extra features with decent sound quality at a fairly good price as a tradeoff! Just that, you will need to be a bit careful when choosing a non-branded microphone system as it can be a bit of a hit or a miss!
Cost
The cost of the microphone system is something that is entirely dependent on your budget.
Most decent microphones can cost as little as $150 and go up to as high as over $1000! There are usually plenty of options that are available in all ranges both branded and non-branded.
I would highly recommend fixing a budget first and then work backward using some of the factors that I’ve mentioned above.
Credit to wayhomestudio on Freepik for the featured image of this article (further edited)