
Image is an essential part of any presentation to make it more engaging and interactive. But sometimes, you cannot add desired images to your slides just because Google Slides doesn’t support the type in which you have saved the images.
So, what do you do when the “Unsupported Image Type” error pops up?
To fix this error, first, open the folder you have saved your image to in “File Explorer” and then click “File name extensions” in the “Show/Hide” section of the “View” tab. Then right click on the image and choose “Rename” from the menu to change the file extension after the “.” in the image name.
You can also add the unsupported image by uploading it to Google Drive and then adding it to the slides through the “insert” menu. In this article, you will also learn about how to replace an image in Google Slides.
Below, find out the detailed steps to have more hands-on help!
1. Why Does Google Slides Give the “Unsupported Image Type” Error? What Does It Mean?
The “Unsupported Image Type” error in Google Slides shows that the application is unable to upload an image to insert into the slide. The error is most likely to occur when you try to insert an image file that is not supported by Google Slides.
To avoid the “Unsupported Image Type” error, make sure that the file type of the image that you want to insert is supported by Google Slides.
2. What Types of Image Formats are Supported by Google Slides?
Google Slides allows you to insert the major image file types. You can insert all the most widely used image types. Google Slides supports the following image formats.
2a .jpg and .jpeg
The “Joint Photographic Experts Group (JPEG)” file is a standard image format for containing compressed image data. Compared to other formats, JPEG has a much smaller file size. The JPEG image files can be found in both “.jpeg” and “.jpg” formats.
2b .png
The “Portable Network Graphics (PNG)” is an image file format that supports lossless data compression. PNG images retain the original image quality. The PNG images have a “.png” extension.
2c .gif
The “Graphics Interchange Format (GIF)” is a bitmap image format containing the extension “.gif”. The GIF format is mostly used for animations and still images.
2d .bmp
The “Bitmap” images contain the “.bmp” extension. It is the most common image format available. It is supported by all applications.
2e .tif and .tiff
The “Tag Image File Format (TIFF)” is an image file format that stores raster graphics images. The TIFF image format is popular among graphic artists and photographers. These images have the “.tiff” or the “.tif” extension.
2f .svg
The “Scalable Vector Graphics (SVG)” is used for vector-based graphics. It is the most common file format for illustrated images. The SVG images contain the “.svg” extension.
3. How to Fix the Unsupported Image Type Error?
You can fix the unsupported image type error in a few ways. There are numerous websites available that you can use to change the image file format for free. If changing the file type does not work, you can try to upload the image to your Google Drive first.
3.1 Method 1 – Change the File Type
You can simply change the image format by changing the file extension using the “Rename” option in Windows. To do so, follow the 4 simple steps.
Step-1: Click on the “View” tab
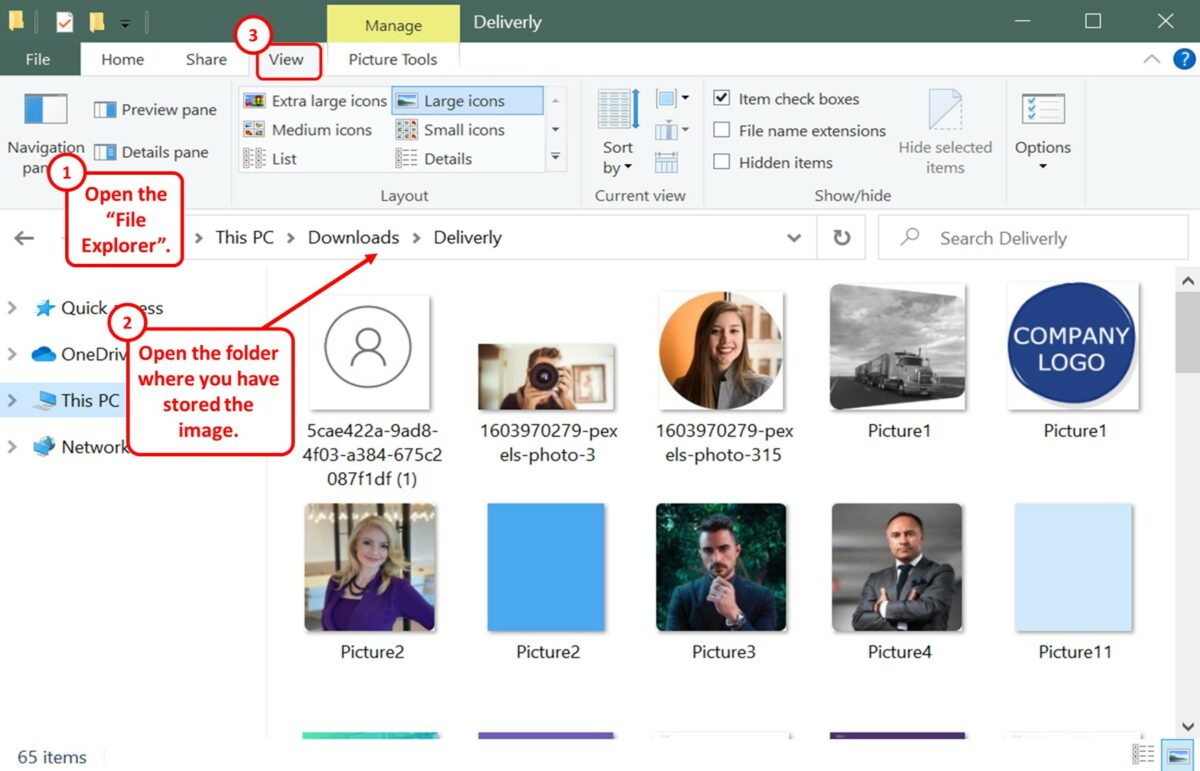
The first step is to open “File Explorer” on your computer. In the “File Explorer” window, open the folder containing the image that you want to insert to Google Slides. At the top of the window, click on the “View” tab.
Step-2: Click on the “File name extensions” option
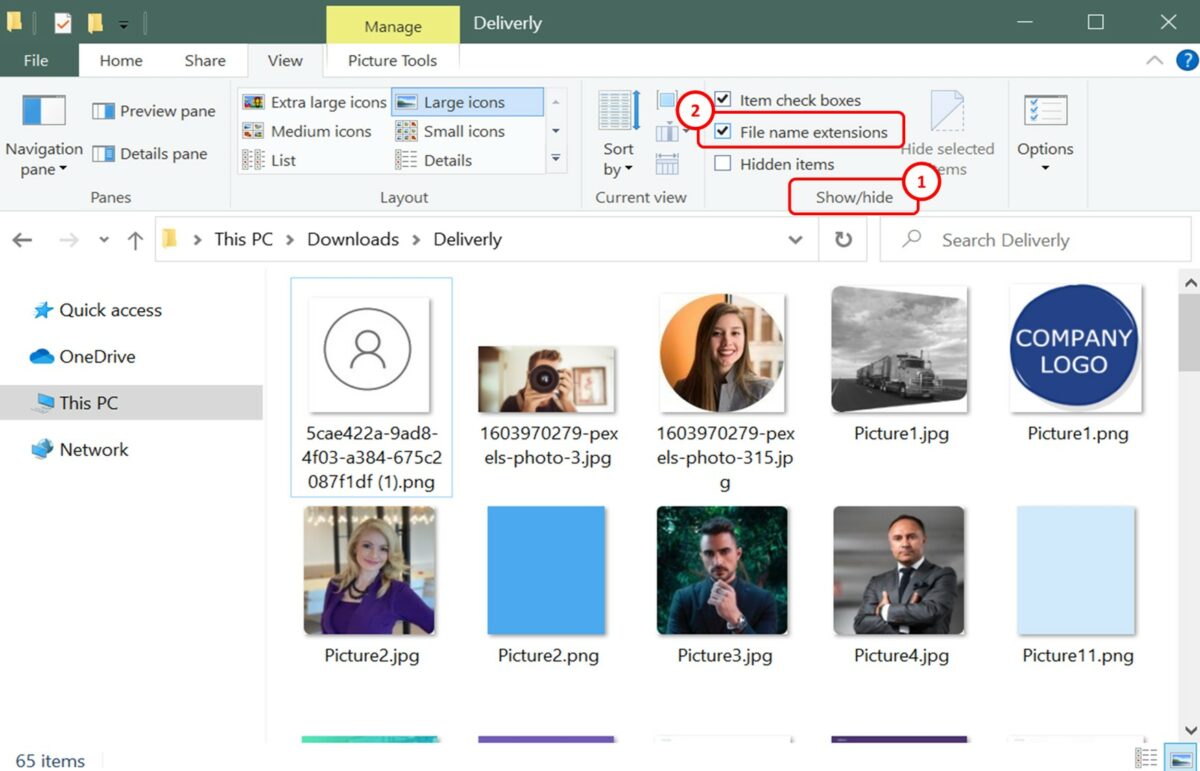
In the “Show/hide” section under the “View” tab, click on the “File name extensions” option. A check mark will appear and you will be able to see the extensions with each file name.
Step-3: Click on the “Rename” option
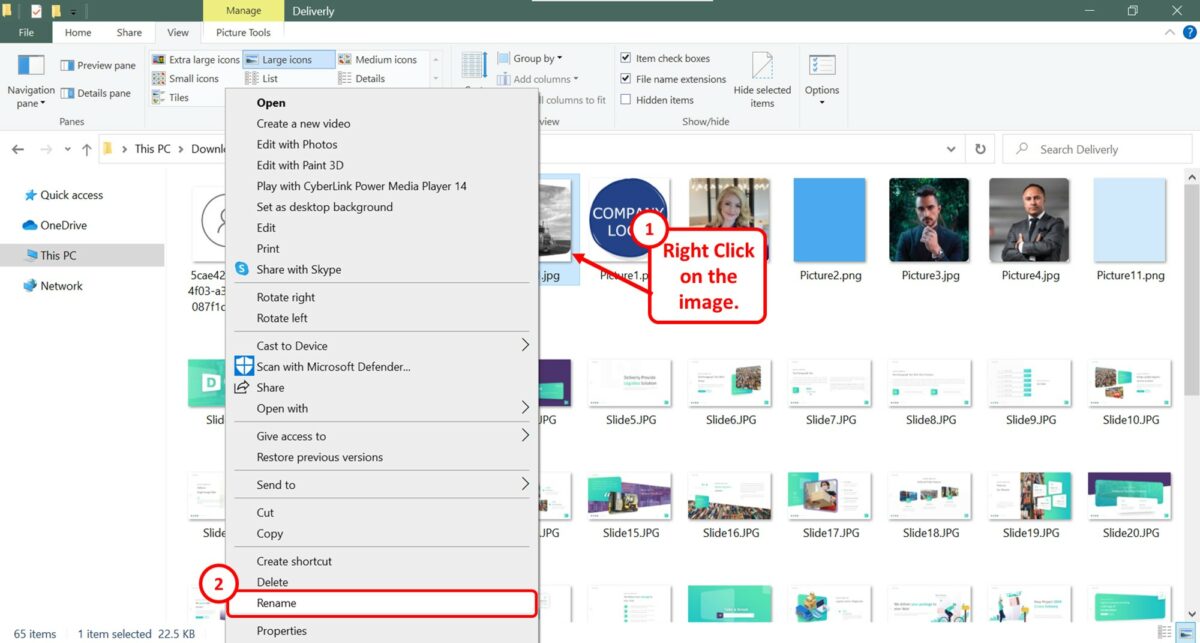
The next step is to “Right Click” on the image that you want to change the format. In the right-click menu, click on the “Rename” option.
Step-4: Change the file extension
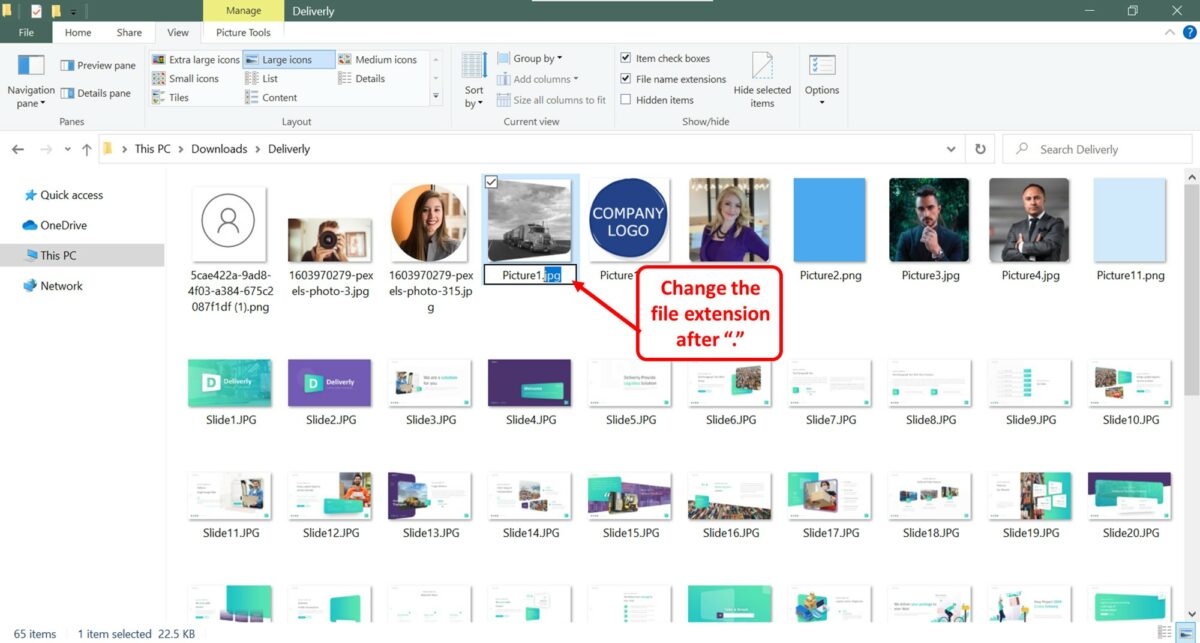
Now all you have to do is change the file extension. The image file extension is the part of the image name after the “.”. Refer to section 2 for a list of all the supported image file types in Google Slides.
3.2 Method 2 – Upload the Image to Google Drive
The “Unsupported Image Type” error may sometimes occur due to a technical glitch. If you see the error when inserting a picture that is supported by Google Slides, you can upload the image in Google Drive first to avoid the error. All you have to do is follow the 4 quick steps.
Step-1: Upload the image to Google Drive
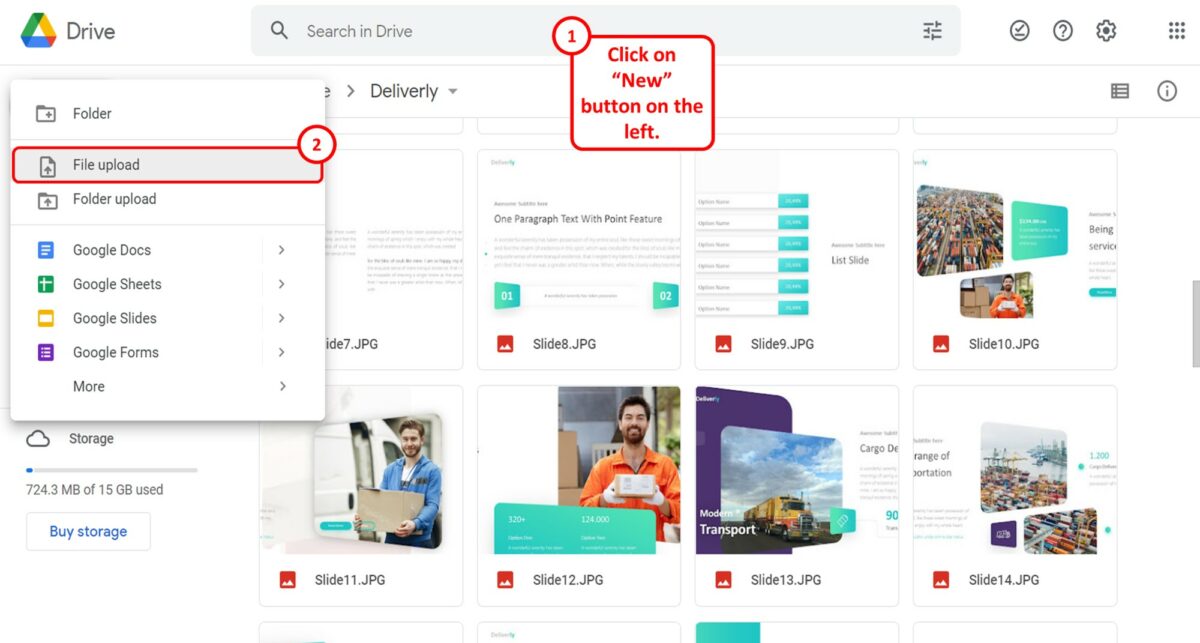
The first step is to upload the image into Google Drive. To do so, click on the “New” button on the left column in Google Drive. In the dropdown menu, click on the “File upload” option. Then select the image that you want to insert into Google Slides.
Step-2: Click on the “Insert” menu
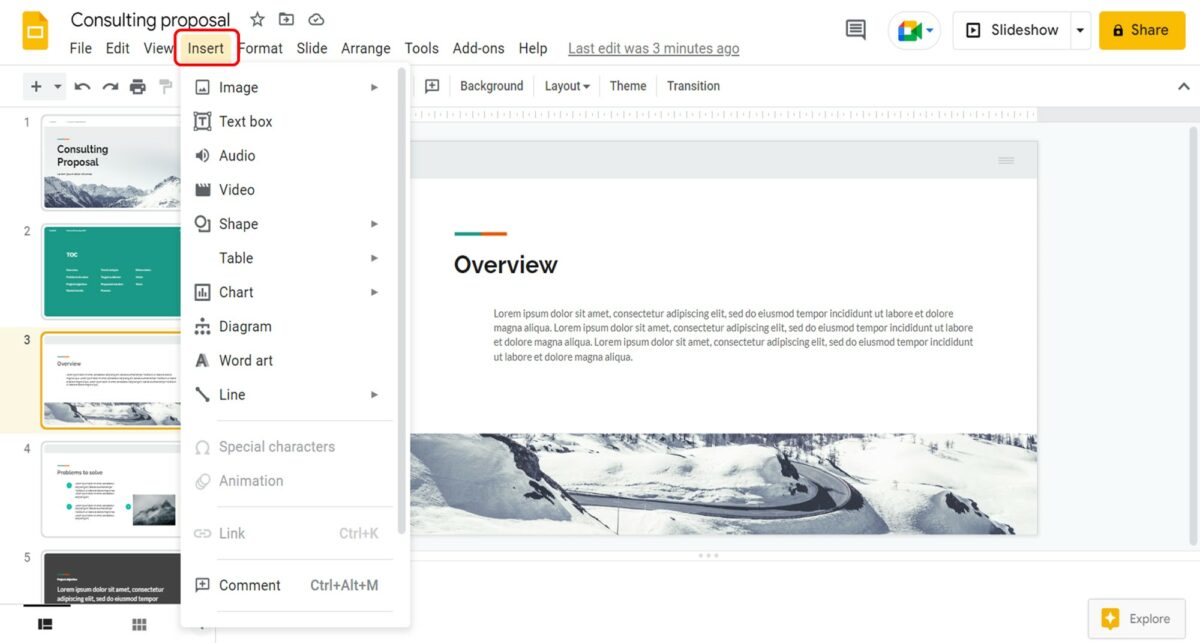
The next step is to open Google Slides. In the menu bar at the top of the screen, click on the “Insert” menu. This will open the “Insert” dropdown menu.
Step-3: Click on the “Drive” option
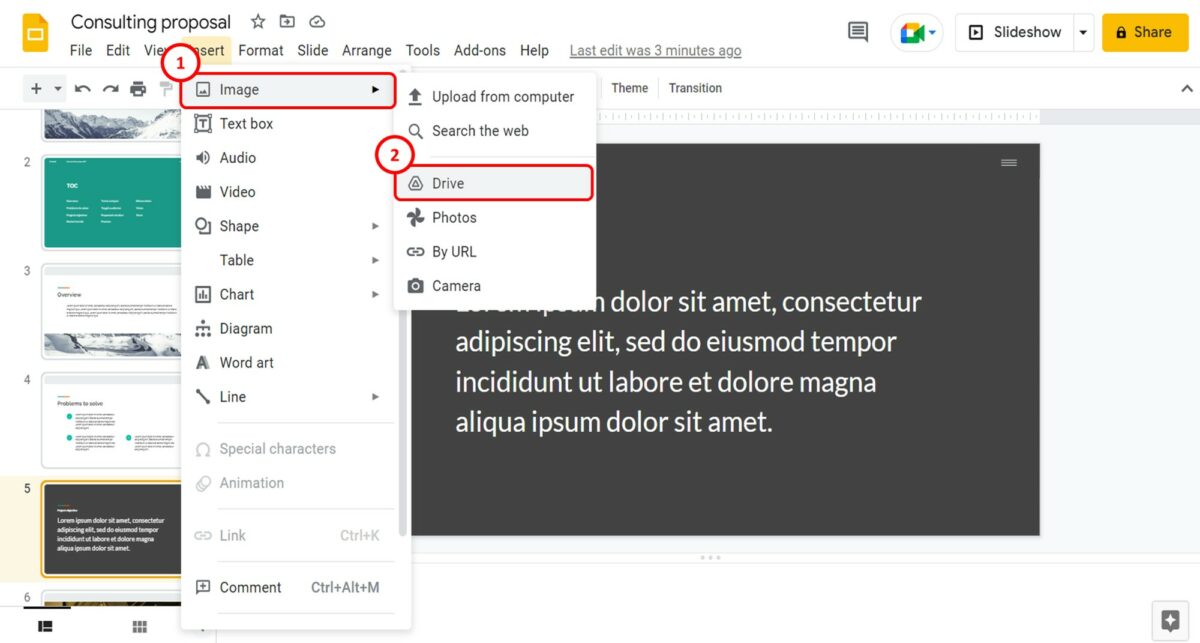
In the pop-up menu by the “Image” option in the “Insert” menu, click on the “Drive” option. This will open a sidebar on the right side of the screen.
Step-4: Click on the “Insert” option
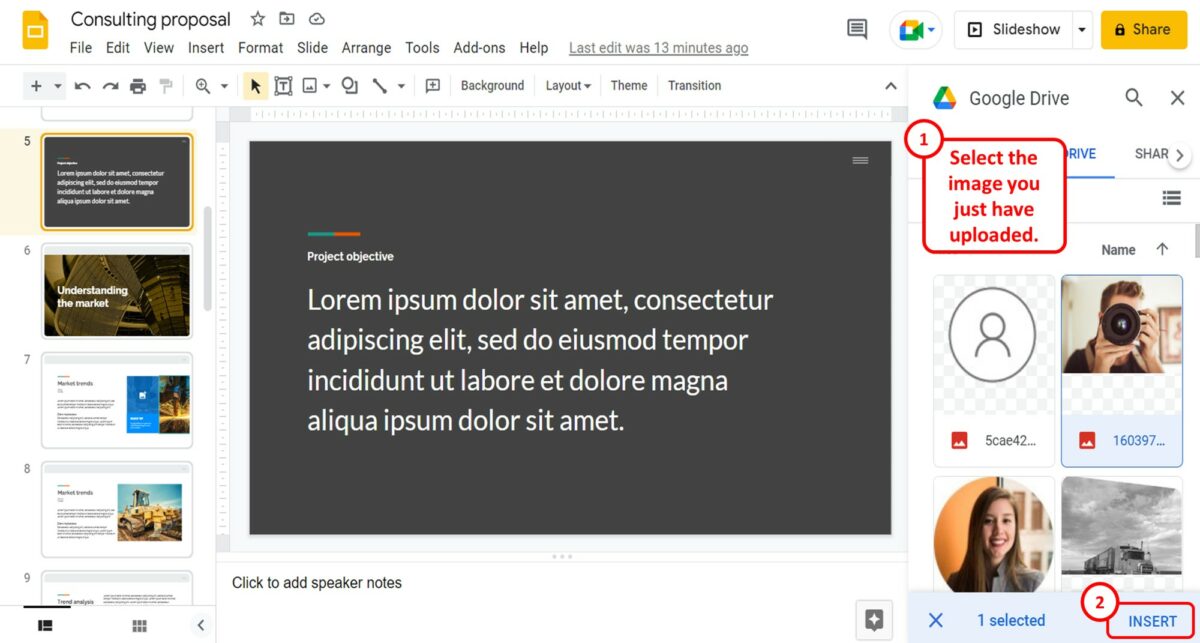
In the “Google Drive” sidebar, select the image that you just uploaded to Google Drive. Then all you have to do is click on the “Insert” option at the bottom of the sidebar to insert the image into the open slide.
4. How to Change Format of an Image for Google Slides?
In Google Slides, there is no option to change the file type of an inserted image. If you need to change the file type of an image, you have to do it before inserting it into Google Slides. To change the image format, you can use any free image converter website available on the internet.
You can also follow the steps mentioned in section 3.1 to change the image file type manually on your Windows 10 device.
5. How to Replace an Image in Google Slides?
In Google Slides, you can use the “Replace image” feature to easily change an image inserted into the presentation slide. There are multiple ways you can replace an image in Google Slides.
5.1 Method-1: Using the “Right Click” method

To replace an image using the “Right Click” method, you have to first “Right Click” on the image that you want to replace. In the right-click menu, click on the “Replace image” option.
Then all you have to do is select the image source from the pop-up menu by the “Replace image” option to replace the selected image.
5.2 Method-2: Using the toolbar
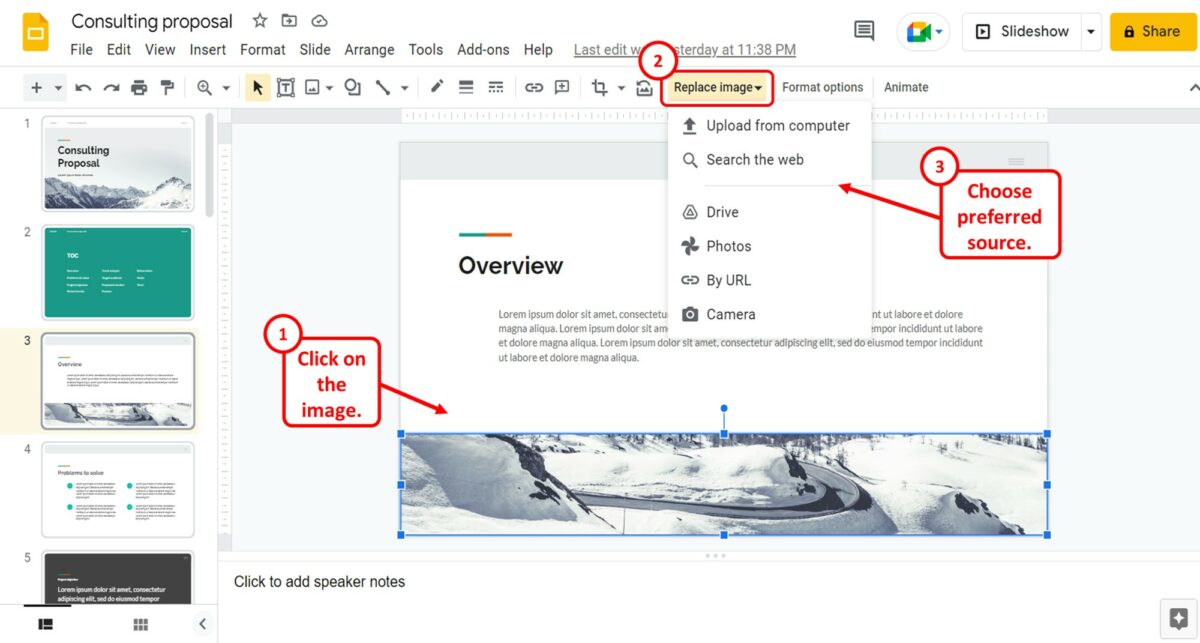
To replace an image in Google Slides using the toolbar, you have to first click on the image to select it. In the toolbar located under the menu bar at the top of the screen, click on the “Replace image” option. Then select the image source from the dropdown menu to replace the image with a new one.
5.3 Method-3: Using the “Format” menu
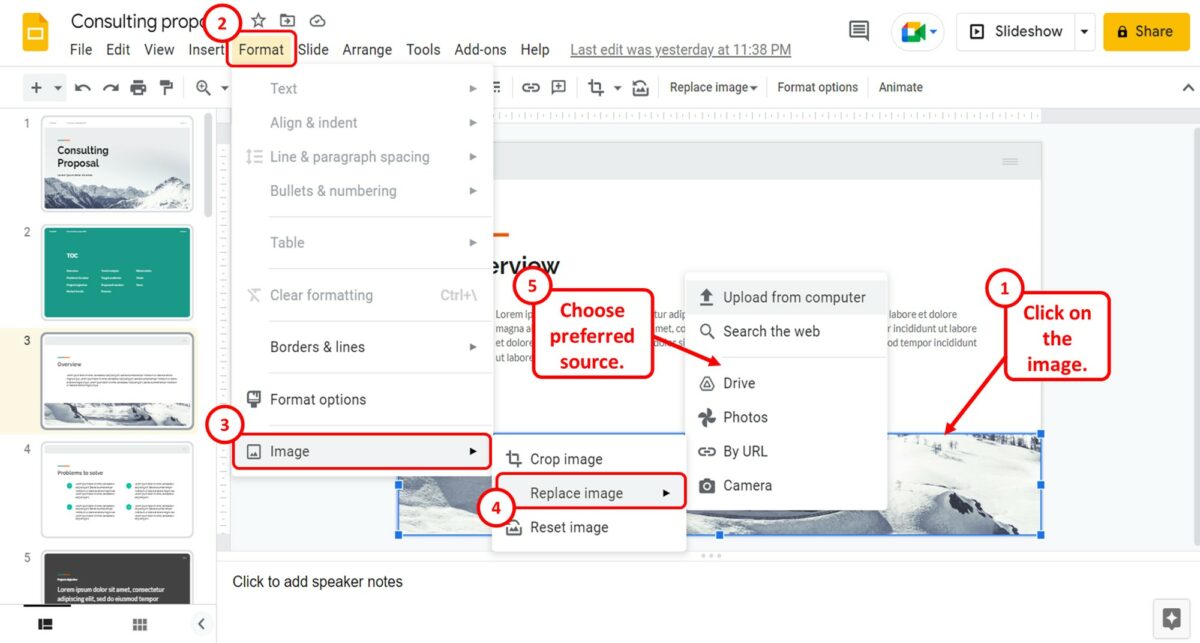
To replace an image using the “Format” menu, you have to first select the picture that you want to replace. In the menu bar, click on the “Insert” menu. In the “Insert” menu, click on the “Image” option.
Then you have to click on the “Replace image” option in the pop-up menu by the “Image” option. Finally, you can select the image source to insert a new image to replace the existing one on the slide.