
It is annoying when you want to play a video during your presentation speech but PowerPoint just refuses to play the video! The video may either fail to work or display just the audio/video. There are actually several reasons why this could happen!
So, in this article, we will take a closer look at the various issues related to playing video in PowerPoint, and I will also provide you with a few quick solutions to each of the issues.
So, without further adieu, let’s get started!
1. Video Not Playing in Presentation Mode
Although Microsoft PowerPoint is one of the powerful presentation tools out there, it is not perfect. There may be more than a few reasons why video is not playing in the presentation mode of your PowerPoint.
The most common problem that users face is that the format of the media file is either not supported by PowerPoint, or the media file might have missing fragments, or the file may have a syncing issue, or the media file may just be corrupted.
In the following subsection, I will explain the possible solutions to a corrupted media file in your PowerPoint presentation.
1a. PowerPoint Video Cannot Play Media Error
There are two possible solutions to a corrupted file. You can either optimize the media compatibility or clear the temporary data on your Windows operating system. Both of the solutions are described below.
Optimizing media compatibility
Follow the simple steps given below to optimize the compatibility of the video file with your PowerPoint presentation.
Step-1: Go to “Info”
The first step of the process is to go to the “Info” section located in the “File” tab, which is the first tab in the ribbon of your PowerPoint window.
Step-2: Click on ‘Check Compatibility’
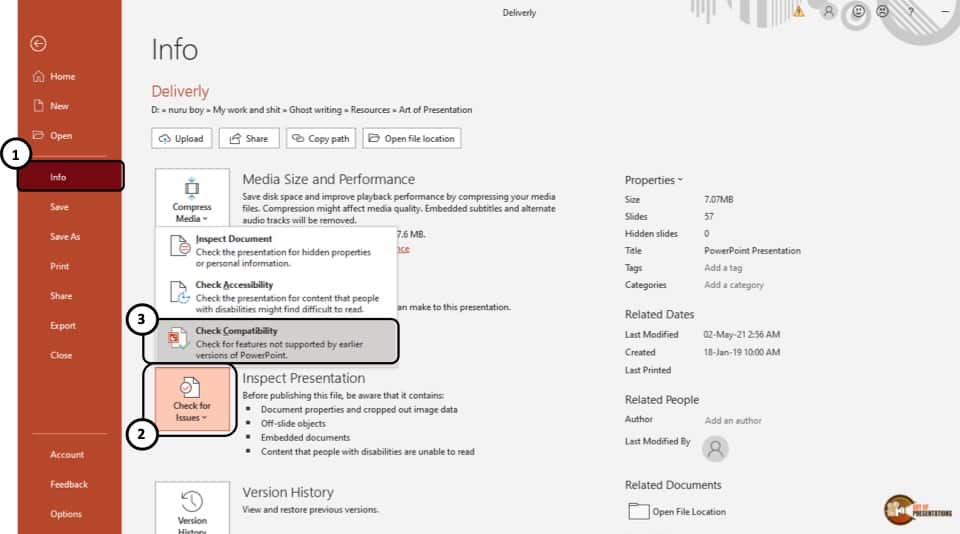
The next step is to click on the “Check for issues” button and select the “Check compatibility” option from the drop-down menu.
Step-3: Click on the “Ok” button
After you have selected the “Check compatibility” option, Microsoft PowerPoint will automatically detect the media files, report to you the issue with your video file, and try to fix it.
To finish optimizing the media file, click on the “Ok” button and the issue should be resolved.
Clearing the temporary files
Microsoft PowerPoint may fail to play your video files if there are too many temporary files on your Windows operating system. To clear these temporary files, follow the easy steps described below.
Step-1: Launch the “Run Prompt”
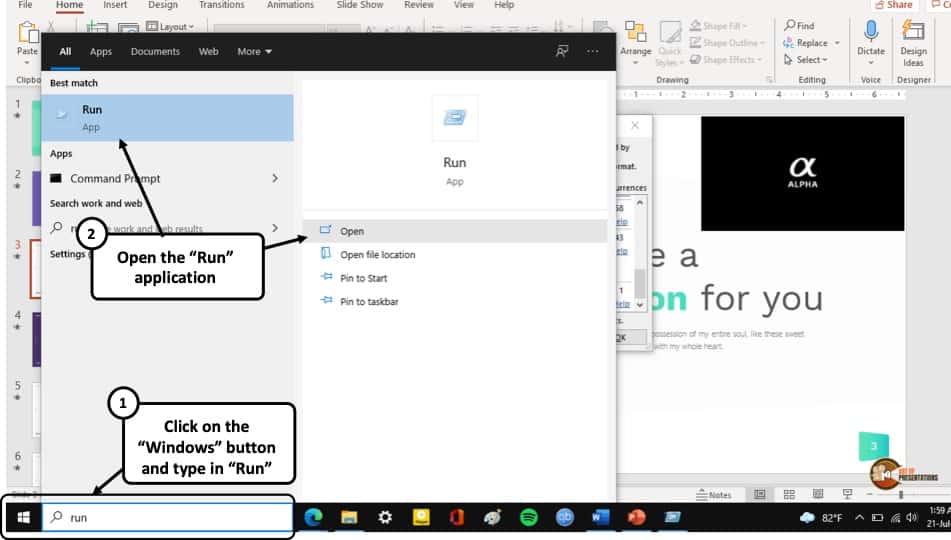
To being, go to the “Start” menu of your computer and launch the “Run Prompt”
Step-2: Type in the “%temp%” command
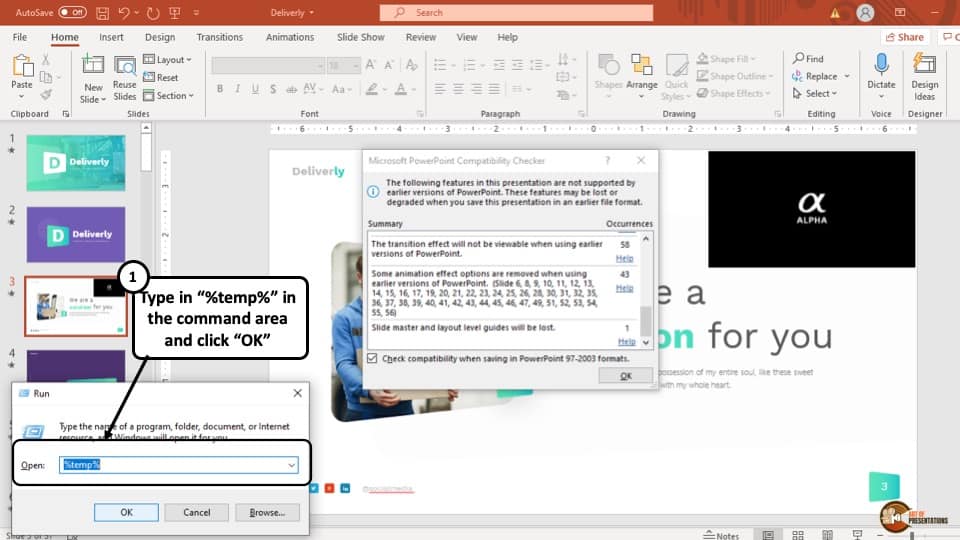
After you have launched the “Run Prompt”, type “%temp%” in the search box and hit the “Ok” button.
Step-3: Delete all the files
Once you have clicked on the “Ok” button, a new folder will open on your screen. This folder contains all the temporary files that are present on your computer.
Select all the files and delete them. Skip the files that are still in use and the video should be good to go.
2. YouTube Video Not Playing in PowerPoint
There are several reasons why a YouTube video may not play in your PowerPoint presentation. Some of the reasons why this may happen and possible solutions to them are given below.
1. The link used to embed the YouTube video was a shared link and not an embedded link. If you have entered the link that is used to share the video, then the video will not play in your PowerPoint presentation. To fix this issue, insert the embedded link of the YouTube video instead of the shared link.
2. The YouTube video that you embedded in your Presentation may not be available anymore. In order to avoid this issue, do not use videos that are in “Private viewing only” settings.
3. The embedded file may be in an unsupported format. Most versions of Microsoft PowerPoint supports “.wmv” files. Hence, videos that are in a different format may not play in your PowerPoint presentation. Make sure the video file is in the right format.
3. Video Only Plays Audio in PowerPoint
Sometimes, the video file only plays the audio of the video file in Microsoft PowerPoint.
This may happen either because the inserted video file is not supported by the PowerPoint software, or the file is too large. Another reason might be that the file is corrupted, or the Windows operating system is missing some necessary codecs.
Following are 3 possible solutions to these problems.
Solution 1 – Convert the video file
To convert the video file, follow the simple steps given below.
Step-1: Go to the “Info” section
The first step is to go to the “Info” section of the “File” tab which is located at the right-most corner of the ribbon of your PowerPoint presentation.
Step-2: Click on the “Media Size and Performance” option
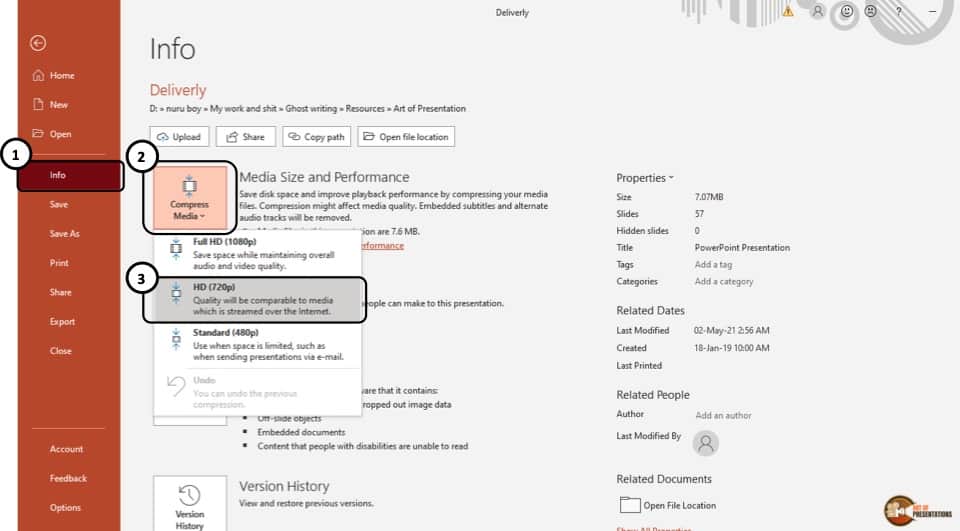
The second step is to click on the “Media Size and Performance” option which is the first option in the “Info” section
Step-3: Click on the “HD (720)” button
After clicking on the “Media size and performance” option, a drop-down menu will appear. From that drop-down menu, click on the “HD (720)” option.
This will compress the size of the video and convert it to a supported format.
Solution 2 – Clear temporary files
Like the previous issue, sometimes your computer may be working on too many temporary files, due to which the video file in your PowerPoint presentation may not be functioning properly.
Simply follow the steps described earlier in this article and delete all the temporary files operating in your Windows operating system.
Solution 3 – Install missing codecs
Right out of the box, Windows does not support every media codecs. It is possible that the video file in your PowerPoint presentation is only playing audio because some of the codecs in your Windows are missing.
To fix this issue, you can download a codec pack from the internet. Some of the best Codec packs are,
1. K-Lite Codec Pack
2. Media Player Codec Pack
3. X- Codec pack
4. Audio of the Video Doesn’t Work in PowerPoint
If the audio of the video in your PowerPoint presentation is not working, try all the solutions mentioned in the above section. If it still doesn’t work, then maybe the PowerPoint software is muted in your computer.
To make sure the audio of your PowerPoint is not muted, turn on the video in your presentation and follow the simple steps described below.
Step-1: “Right-click” on the “speaker/headphone” button
At first, you have to “Right-click” on the “Speaker/Headphone” volume button in the taskbar of your computer. It is the right-most button on the taskbar and its icon looks like a handheld speakerphone (as showcased in the image below)
Step-2: Select the “Open Volume Mixer” option
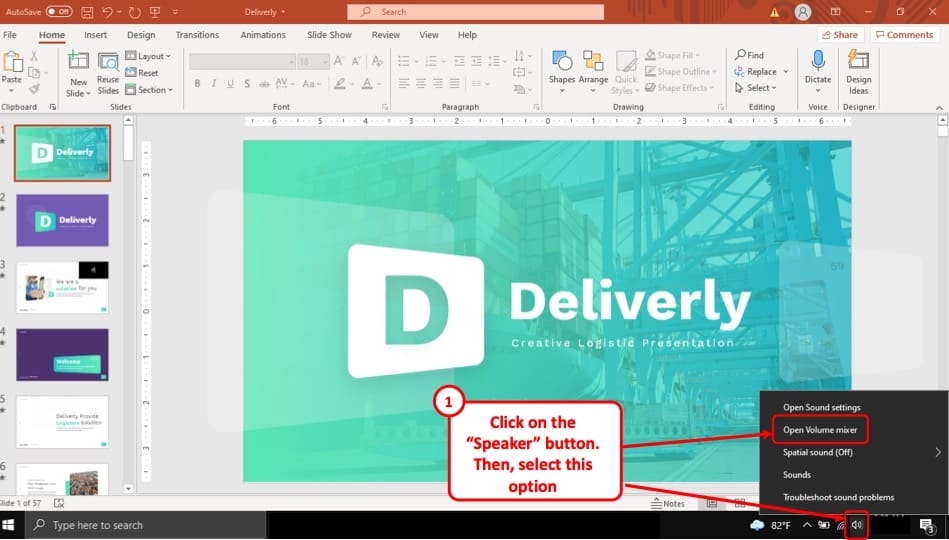
After you have opened the “Speaker/Headphone” menu from your taskbar, click on the “Open Volume Mixer” option which is the second option in the menu.
Step-3: Click on the volume icon under the PowerPoint section
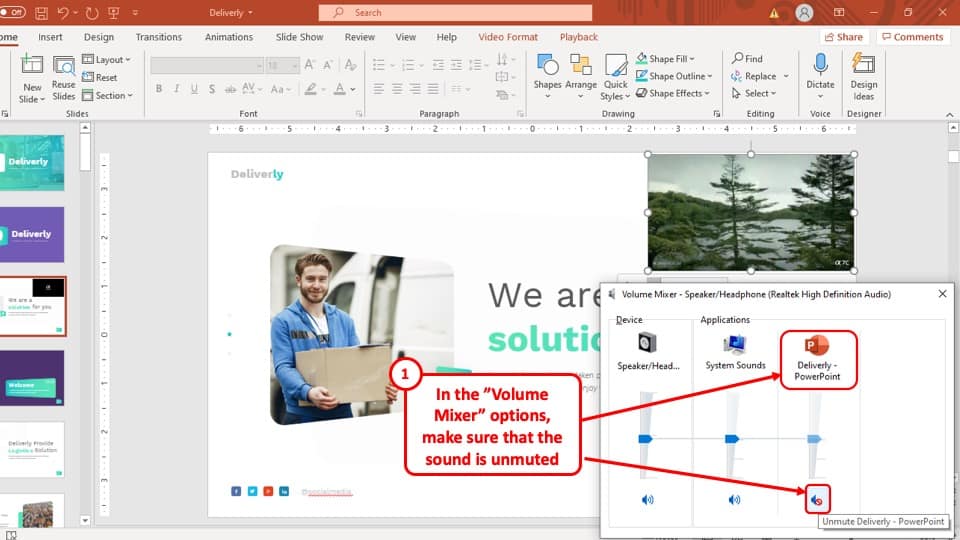
Once you have selected the “Open Volume Mixer” option, a pop-up window will appear on the bottom right corner of your screen.
Click on the small volume icon with a red cross over it, which will unmute the PowerPoint software on your computer.
5. Video Doesn’t Play Automatically
To play a video file in your PowerPoint presentation automatically, you have to change the playback settings of the video file.
This might sound a little difficult but the whole process is described in 2 simple steps below.
Step-1: Go to the “Playback” tab
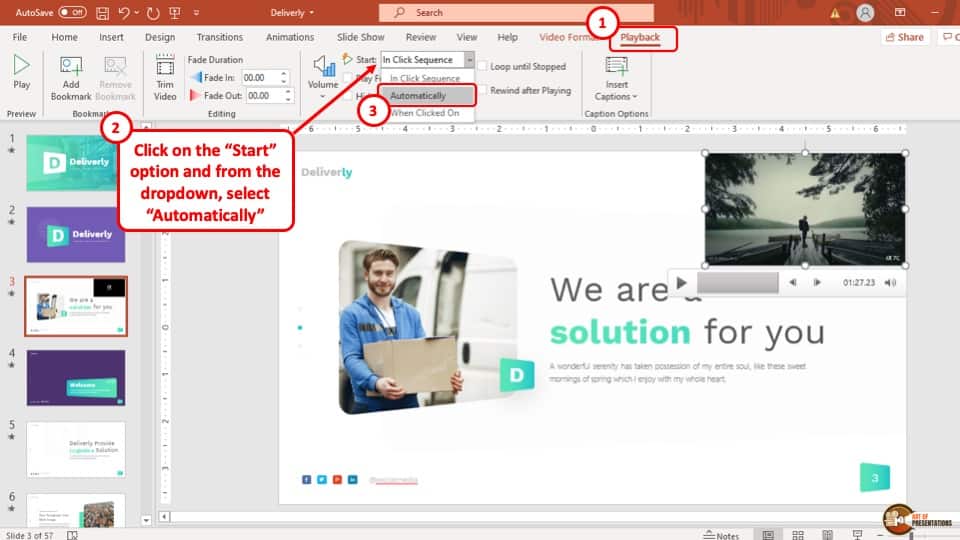
At first, turn on the video in your PowerPoint presentation. This will allow you to access the “Playback” tab which appears on the ribbon when a media file is played.
Step-2: Select the “Automatically” option
Now, select the “Automatically” option which is located in the “Start” drop-down menu of the “Video Options” section in the “Playback” tab.
The video should now play automatically when the slide is opened.
6. PowerPoint Export to Video Not Working
To fix videos not exporting in your PowerPoint presentation, you may have to optimize the media file using the method mentioned earlier in this article.
You might also have to update your PowerPoint software if it is outdated or repair it if needed. To learn more on how to update Microsoft PowerPoint, you can read one of our articles on this topic by clicking here.
I will discuss the process of repairing PowerPoint below:
Step-1: Go to “Add or remove programs”
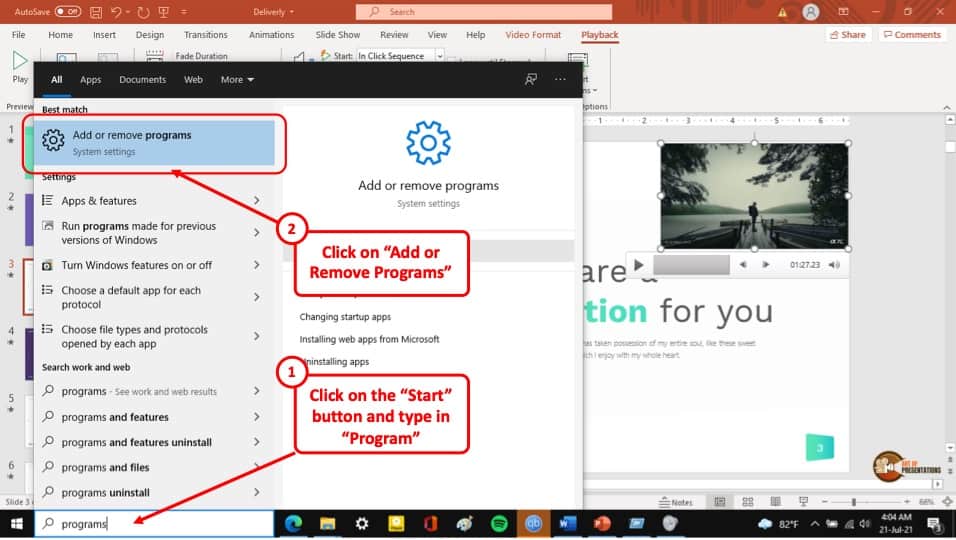
The first step is to go to the “Start” menu of your computer and launch the “Add or remove programs” tool.
Step-2: Click on the “Advanced Options” button
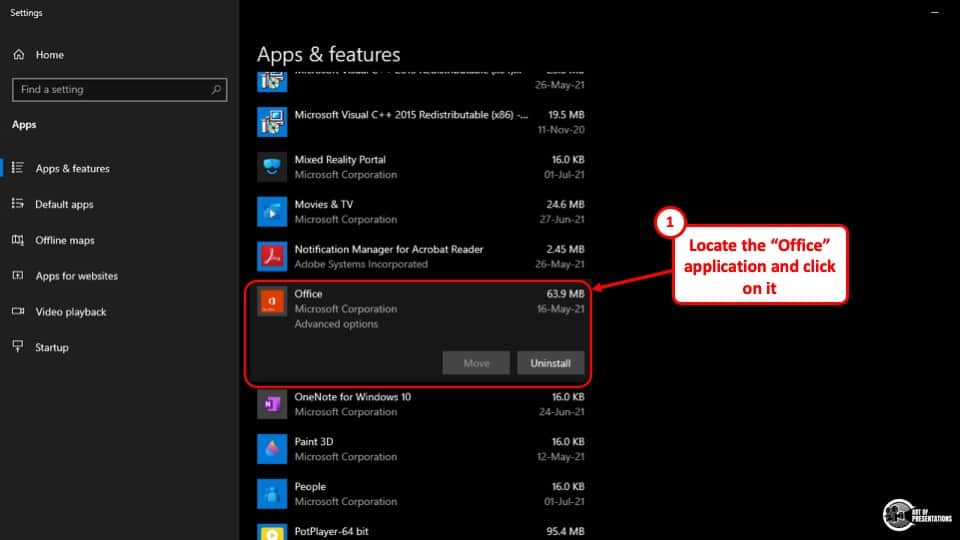
The second step is to find your Microsoft Office program and select the “Advanced options” button.
Step-3: Select the “Repair” option
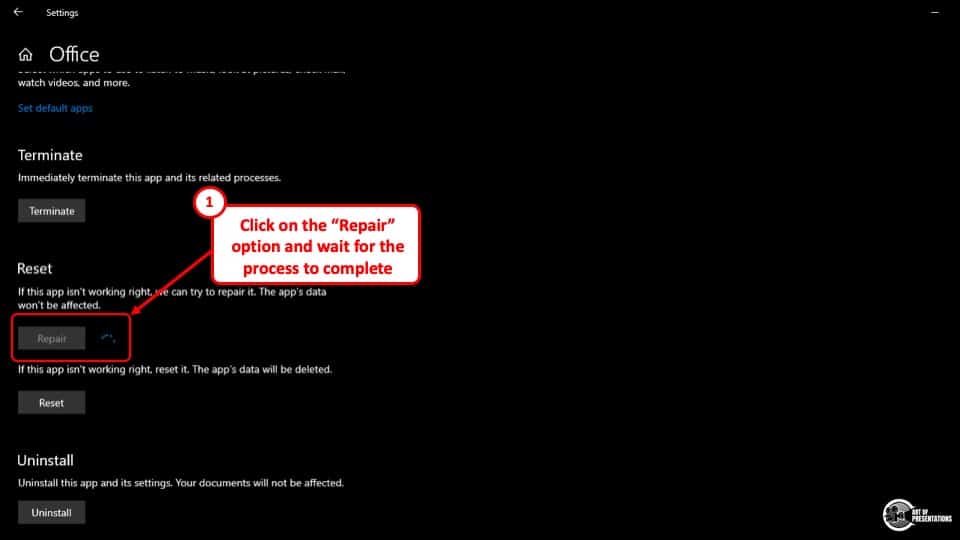
After you click on the “Advanced Options” button, you will be taken to a new window. From that window, under “Reset” select the “Repair” option.
Once the scanning and repairing are complete a tick mark will appear beside the “Repair” option, which will indicate that the repairing is complete.
7. How to Change Video Source in PowerPoint?
Unfortunately, there is no direct way to change the path of the source of a video in your PowerPoint presentation.
You can use a macro to fix this problem but honestly, it is easiest to simply re-attach the video to your PowerPoint presentation.
To change the video source in your PowerPoint presentation, delete the initial video, move the video file to the same folder as the PowerPoint presentation and insert the video again and the source of the video will change accordingly.
Credit to Benzoix (on Freepik) for the featured image of this article (further edited)