![How to Fade Picture in PowerPoint? [Here’s How to Do It!]](https://artofpresentations.com/wp-content/uploads/2023/03/Featured-Image-3-1.jpg)
Fading a picture in PowerPoint can help you to create a subtle transition effect between different slides or to draw attention to specific parts of an image. With PowerPoint’s built-in tools, it’s easy to apply a fade effect to your pictures.
To fade a picture in PowerPoint, go to the “Picture Format” tab. Click on “Picture Transparency Options” in the dropdown menu of the “Transparency” option. Type in your preferred amount in the “Transparency” box or drag the “Transparency” slider to the right to fade the selected image.
In this article, we’ll also explain how to fade a background picture as well as how to apply the fade effect or fade the edges only to help you achieve a professional-looking result. Let’s go through the step-by-step instructions below:
1. How to Fade Picture in PowerPoint?
In Microsoft PowerPoint, you can easily fade a picture by increasing its transparency. All you have to do is follow the 3 quick steps.
Step-1: Click on the “Picture Format” tab

The first step is to select the picture on a slide that you want to fade. Then click on the “Picture Format” tab which is the last option in the menu ribbon located at the top of the screen.
Step-2: Click on the “Transparency” option

In the “Adjust” group of the “Picture Format” menu, click on the “Transparency” option. Then click on the “Picture Transparency Options” option in the dropdown menu under the “Transparency” option.
Step-3: Click on the “Transparency” box

In the “Format Picture” sidebar on the right side of the screen, click on the “Transparency” box in the “Picture Transparency” section. You can now type in your preferred transparency amount in the “Transparency” box. Alternatively, you can drag the “Transparency” slider to the right to fade the selected image.
2. How to Fade a Background Image in PowerPoint?
The “Transparency” option in Microsoft PowerPoint allows you to adjust the transparency of any image or shape inserted into a slide. You can use the “Transparency” feature to fade a background image in a PowerPoint presentation slide. To do so, follow the 2 simple steps.
Step-1: Click on the “Format Background” option

In the Microsoft PowerPoint presentation, open the slide where you want to fade the background image. “Right Click” anywhere on the slide. Then click on the “Format Background” option in the right-click menu. This will open a sidebar.
Step-2: Drag the “Transparency” slider

In the “Format Background” sidebar on the right side of the screen, all you have to do is drag the “Transparency” slider to the right to fade the background image in the open slide. Alternatively, you can click on the “Transparency” box and type in your preferred transparency amount.
3. How to Fade Out an Image Using Animation in PowerPoint?
In Microsoft PowerPoint, you can use the “Fade” animation to make an image disappear by fading out of the slide. To fade out an image using the “Animations” menu, follow the 3 easy steps.
Step-1: Click on the “Animations” tab

The first step is to select the image that you want to fade out. Then click on the “Animations” tab in the menu ribbon located at the top of the screen.
Step-2: Click on the “More Exit Effects” option

In the “Animation” group of the “Animations” menu, click on the “More” option. Then click on the “More Exit Effects” option at the bottom of the dropdown menu under the “Animation” option.
Step-3: Click on the “Fade” option

In the “Change Exit Effect” dialog box, click on the “Fade” option in the “Subtle” section. Then all you have to do is click on the “OK” button at the bottom of the dialog box to make the selected image fade out.
4. How to Create a Fade Effect on an Image in PowerPoint?
To create a fade effect on an image in Microsoft PowerPoint, you have to use the “Transparency” feature. All you have to do is follow the 9 simple steps.
Step-1: Click on the “Insert” tab

In the PowerPoint presentation file, open the slide where you want to add a fade effect to an image. Then click on the “Insert” tab in the menu ribbon to open the “Insert” menu.
Step-2: Click on the “Shapes” option

In the “Illustrations” group of the “Insert” menu, click on the “Shapes” option. Then click on the “Rectangle” option in the “Rectangles” section of the dropdown menu under the “Shapes” option.
Step-3: Draw the rectangle

The next step is to draw the rectangle shape on the slide. Make sure that the shape is over the image so that it covers more than half of the image.
Step-4: Click on the “Shape Format” tab
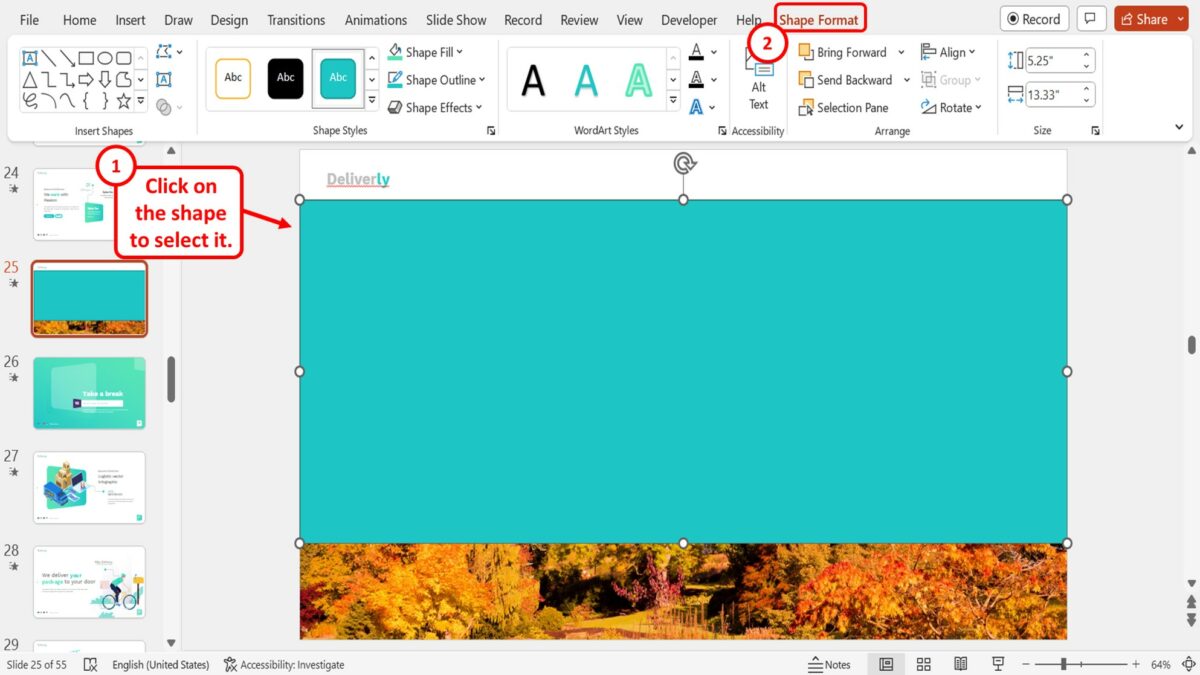
Now you have to click on the shape to select it. Then click on the “Shape Format” tab in the menu ribbon located at the top of the screen.
Step-5: Click on the “No Outline” option
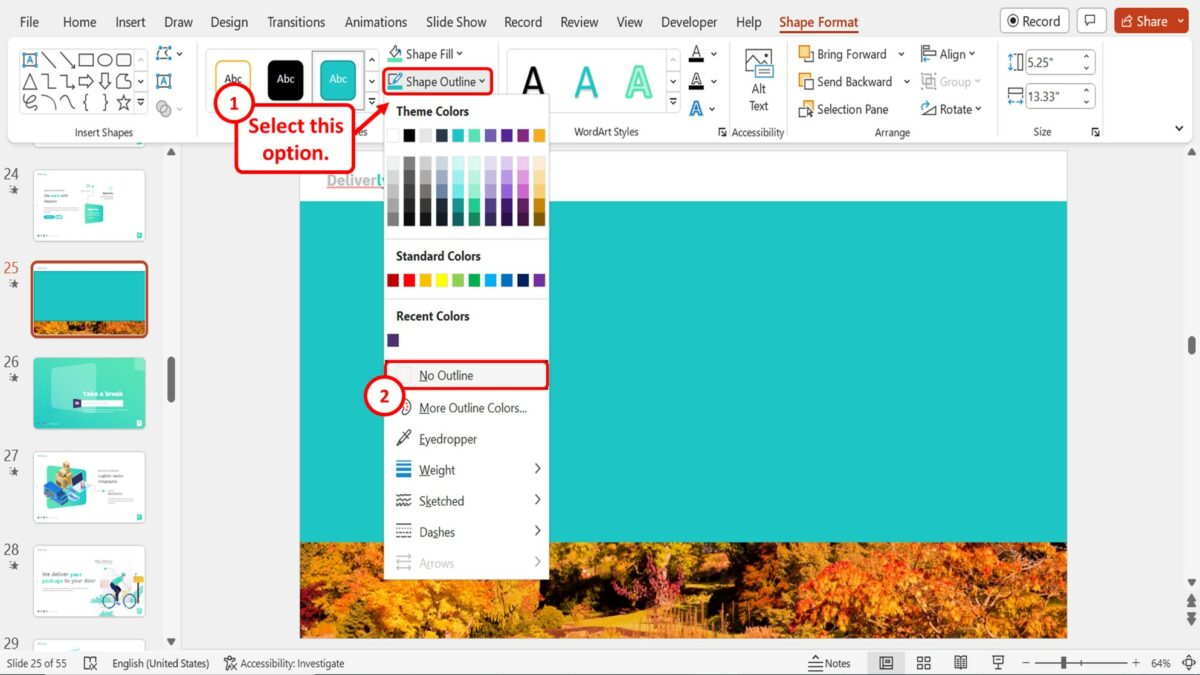
In the “Shape Styles” group of the “Shape Format” menu, click on the “Shape Outline” option. Then click on the “No Outline” option in the dropdown menu under the “Shape Outline” option.
Step-6: Click on the “Shape Fill” option
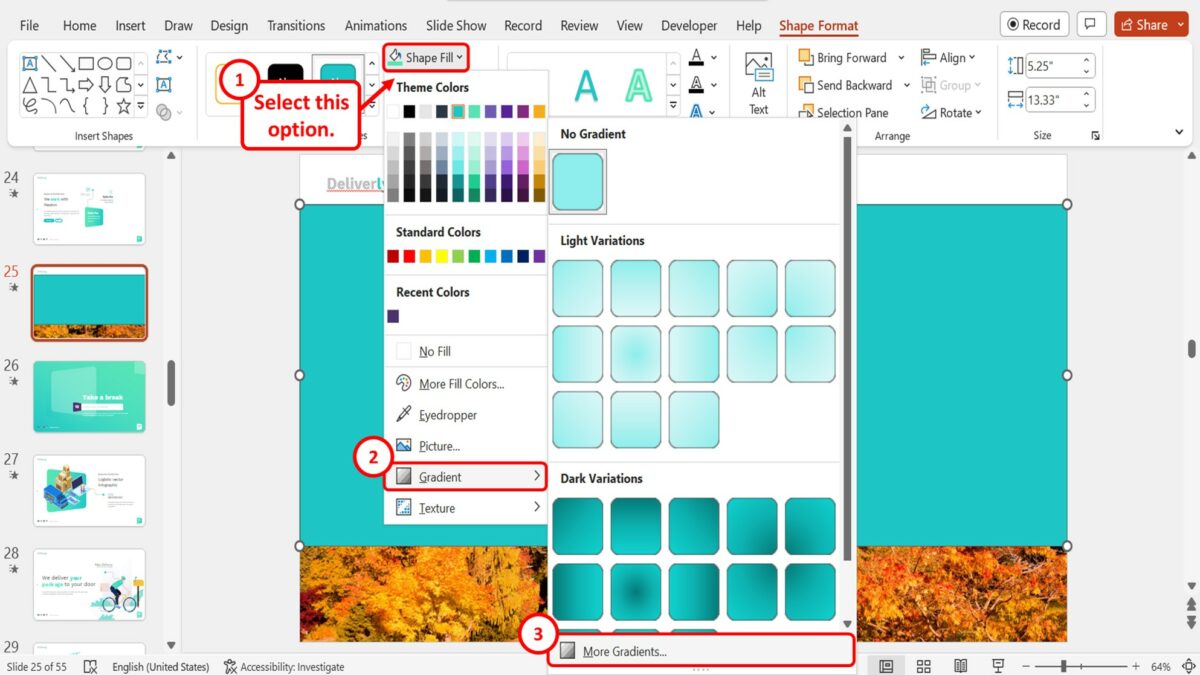
The next step is to click on the “Shape Fill” option above the “Shape Outline” option in the “Shape Format” menu. In the dropdown menu under the “Shape Fill” option, click on the “Gradient” option. Then click on the “More Gradients” option at the bottom of the pop-up menu by the “Gradient” option.
Step-7: Click on the “Gradient Fill” option

In the “Format Shape” sidebar on the right side of the screen, click on the “Gradient fill” option in the “Fill” section.
Step-8: Click on the “Transparency” box

In the “Gradient stops” section of the “Format Shape” sidebar, click on the first gradient stop. Then click on the “Transparency” box. Type in “0%” in the “Transparency” box. Alternatively, you can drag the “Transparency” slider all the way to the left.
Step-9: Click on the second “Gradient Stop”

The next step is to click on the second gradient stop in the “Gradient Stops” section of the “Format Shape” sidebar. Then click on the “Transparency” box and type in “100%”. Alternatively, you can drag the “Transparency” slider all the way to the right to create the fade effect to the image on the slide.
5. How to Fade Picture Edges in Powerpoint
The “Soft Edges” feature in Microsoft PowerPoint fades all four edges of a selected image automatically. To fade the picture edges in PowerPoint, follow the 2 easy steps.
Step-1: Click on the “Format Picture” option

The first step is to right-click on the image that you want to fade the edges. Then click on the “Format Picture” option in the right-click menu.
Step-2: Click on the “Soft Edges” option

In the “Format Picture” sidebar on the right side of the screen, click on the “Soft Edges” option. Then all you have to do is drag the “Size” slider to the right to fade the edges of the selected image on the slide.