
Let’s face it – colors make our presentations pop! But, using the wrong colors can often give an amateur look to our presentation. And, sometimes, it is not even about using a color scheme! We may get the inspiration of the perfect color combination from some website, a video that we see on the web, an image, or even another presentation!
But how do you incorporate those colors into your presentation? This is where the eyedropper tool in PowerPoint comes in handy to match colors!
To use the eyedropper tool in PowerPoint, first, select the shape. Then, click on the “Home” tab, and click on the “Shape Fill” option. From the dropdown, click on the “Eyedropper” option. Now, hover the cursor over the color that you wish to copy from the screen and click on it to apply the color.
In this article, we will learn a bit more about using the eyedropper tool in PowerPoint. We’ll get to know what exactly is the eyedropper tool, how to use it, and how to extract colors from an image, from a graphic, and from outside the presentation! That, and much more!
In short, by the end of this article, you will have mastered everything there is to know about using the eyedropper tool in PowerPoint!
So, let’s get started!
1. What is the Eyedropper Tool in PowerPoint?
See a color you like? No problem! Simply use the eyedropper tool in PowerPoint to use the same color in your presentation!
The “Eyedropper” tool in PowerPoint is a feature that allows you to extract and match colors from shapes, images, infographics, videos, or any other element inside or outside your presentation and apply the color to the objects on your slides (such as a shape, text, shape border, table, etc).
What makes the “Eyedropper” tool really powerful is that you can even use it to extract colors from outside the presentation! So, if you see a website using a color scheme that you like, or perhaps see a presentation template on the web, you can use the eyedropper tool to get the colors!
One thing to note is that the eyedropper tool only copies a single color at a time. But, you can always use the tool multiple times.
The best part is, PowerPoint will show up to 10 of the previously extracted colors using the eyedropper tool! So, you don’t have to keep enabling the eyedropper every time you wish to apply the color.
But, we’ll get to all of that in a moment. Let’s first start with how to locate the eyedropper tool in PowerPoint!
2. Where to Find the Eyedropper in PowerPoint?
You can find the eyedropper tool when using the color option for any shape, text, or element in PowerPoint.
However, depending on whether you are using PowerPoint on a PC or a Mac, the process to locate the eyedropper tool can vary slightly.
Nevertheless, let’s take a look at how to locate the tool in PowerPoint on both Mac and PC.
2.1 Locating the Eyedropper Tool in PowerPoint on PC

When using PowerPoint on Windows, you can locate the “Eyedropper” tool under any color fill option.
For instance, if you want to use the eyedropper tool for a shape, then select the shape and click on the “Shape Fill” option. From the dropdown, you can click the “Eyedropper” option to use it.
Likewise, you can also find the eyedropper tool in the “Shape Format” menu that appears when a shape is selected.
Another method to locate the eyedropper tool is through the “Format Options” pane while formatting shapes in PowerPoint. When you open the format shape options, click on the “Fill” option, and from the dropdown that appears, you can choose the “Eyedropper” tool.
2.2 Finding the Eyedropper Tool in PowerPoint on Mac
Locating the eyedropper tool in PowerPoint on Mac requires an extra step since the option is not available by default in the shape fill dropdown.
Here’s what you need to do –
Step 1 – Click on the “Shape Fill” option
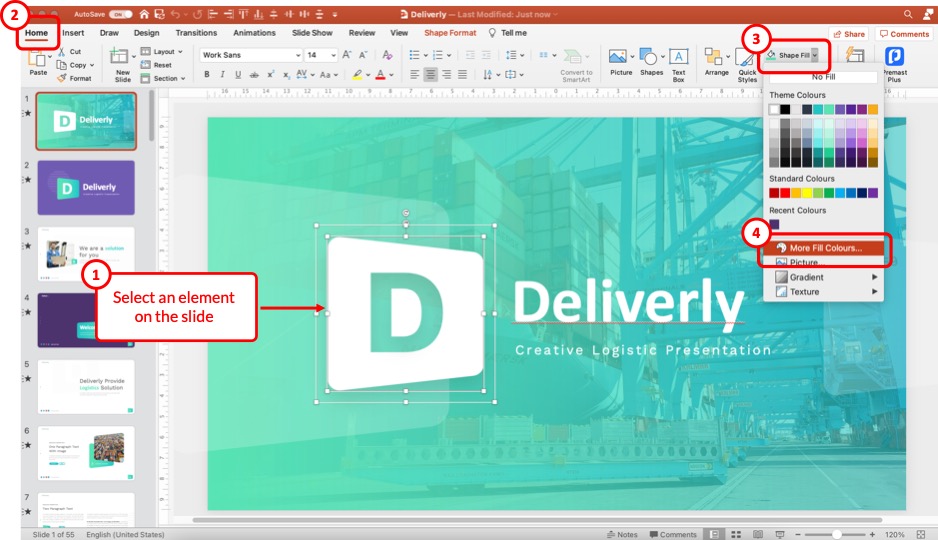
First, select the shape or an element present on the slide. Then, click on the “Home” tab in PowerPoint. You can also click on the “Shape Format” tab. Next, locate the “Shape Fill” option and click on it.
From the dropdown, click on the “More Fill Colors” option. This will now open a pop-up window.
Step 2 – Click on the “Eyedropper” Tool
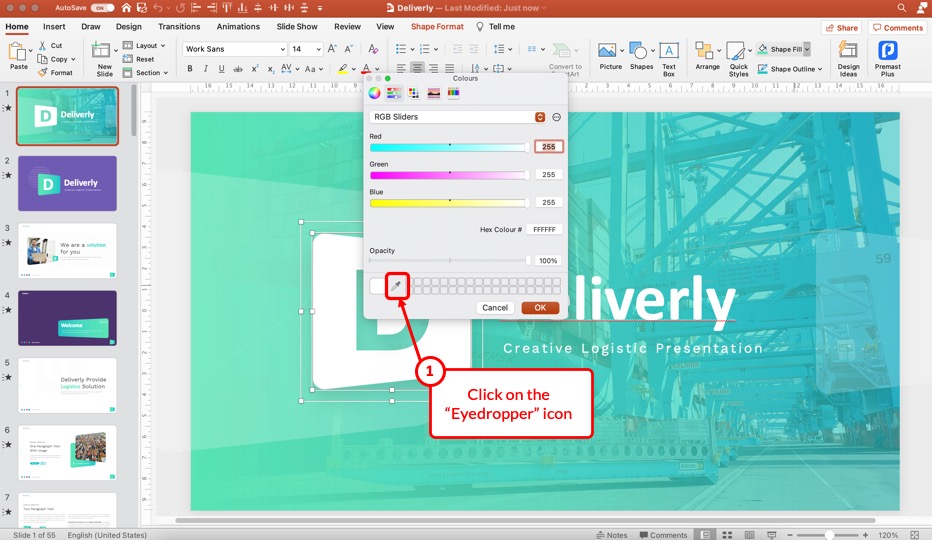
In the next step, simply locate the eyedropper tool and click on it to use it.
Furthermore, just as you can on a PC, you can also locate the eyedropper tool from the “shape format” pane on a Mac.
3. How to Use the Eyedropper Tool in PowerPoint?
Now that we have understood how to locate the eyedropper tool, let us understand how to use the eyedropper tool in PowerPoint –
To use the eyedropper tool in PowerPoint, first, select the shape. Then, click on the “Home” tab, and click on the “Shape Fill” option. From the dropdown that appears, click on the “Eyedropper” tool. Finally, hover over the color that you wish to copy and apply to the shape, and click “OK”.
Here’s a step-by-step process that you can follow –
Step-1: Select the preferred objects
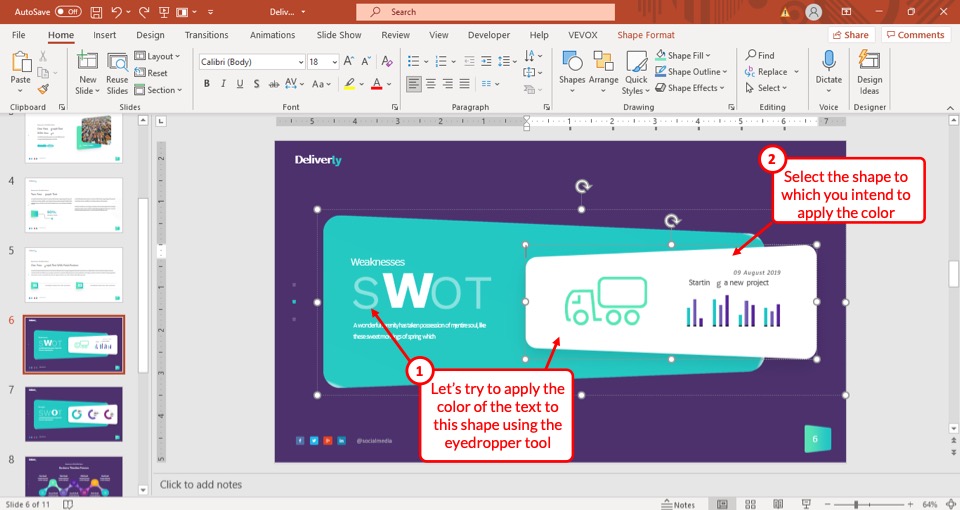
The first step of the process is to select the object that you are trying to change the color for.
If you want to choose multiple objects, simply hold the control key (or command key on Mac) and select them by clicking on each object one by one.
Make sure to select only those shapes to which you intend to apply the color. Don’t select the object that has the intended color.
Step-2: Click on the “Shape Fill” button
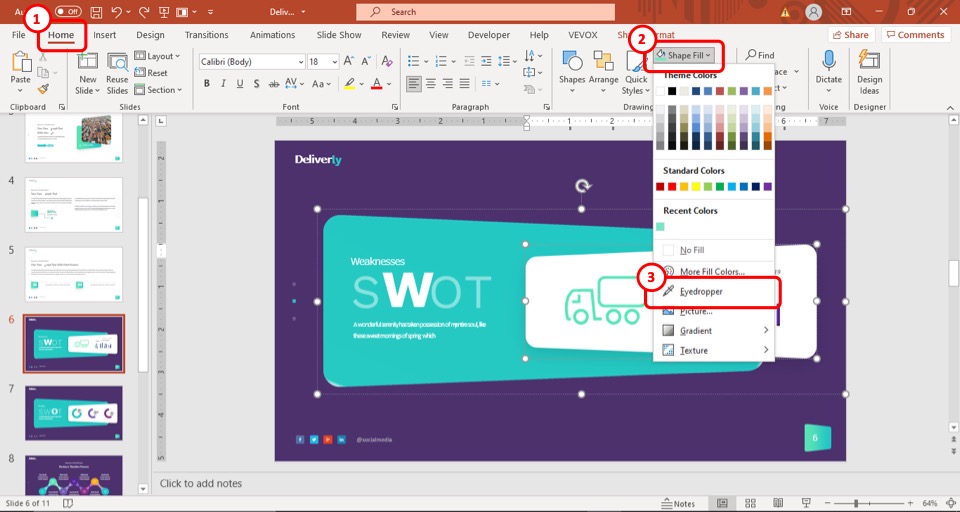
After you have selected your desired shapes or objects, click on the “Shape Fill” button. It is the first option to the right of the “Drawing” section, which is located in the “Home” tab. This will open a drop-down menu.
Step-3: Select the “Eyedropper” option
After you have opened the drop-down menu, select the “Eyedropper” option which is the 4th option from the bottom in that dropdown menu (as shown in the image in step 2).
This will change the cursor of your computer and make it appear as an eyedropper icon.
Step-4: Select your preferred color from the slide
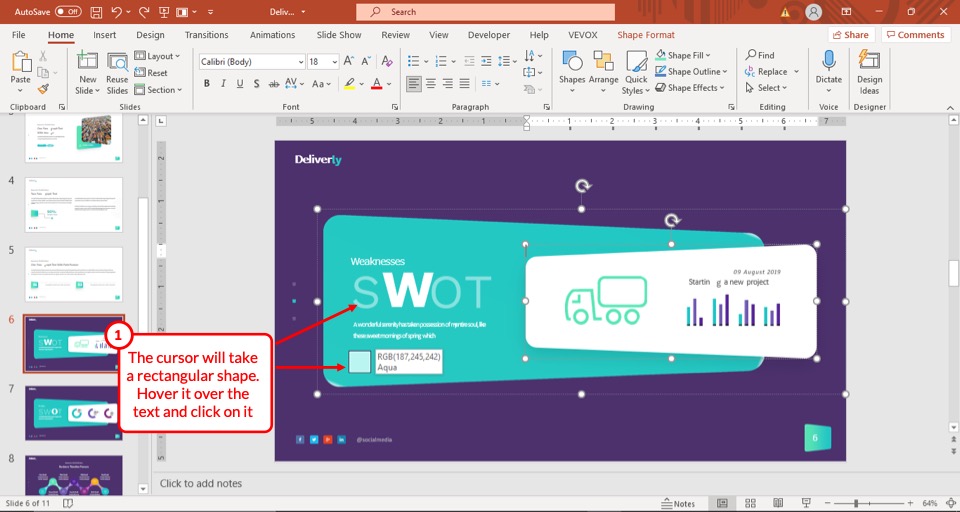
After you have selected the “Eyedropper” option, the cursor of your computer will change to the icon of a small eyedropper.
Simply hover over the color in the slide that you want the selected objects to match. The cursor will also show the RGB codes of the target color.
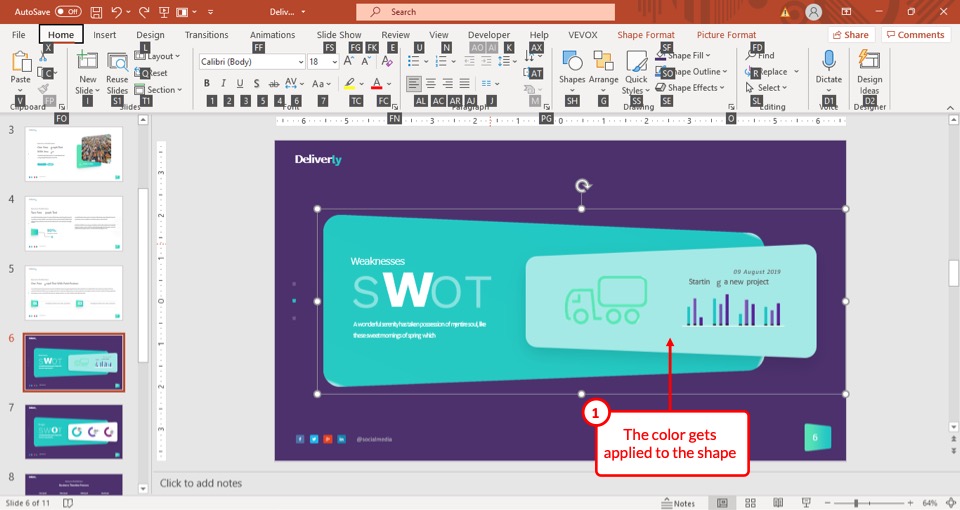
To apply the color, simply click on the object on the slide that contains the intended color and the objects will change colors accordingly.
3.1 Shortcut for Eyedropper in PowerPoint
If you are using PowerPoint on Mac, unfortunately, you don’t have an option to use a shortcut.
Likewise, there is no direct shortcut even for PowerPoint on PC. However, PowerPoint allows you to access almost all the options present in nearly all the ribbons (or menu) using hotkeys.
So, here’s how to access the eyedropper tool in PowerPoint on Windows using shortcut keys –
You can use the “Alt” key on your keyboard to access the “Eyedropper” tool. To do this press and hold the “Alt” key.
When block letters appear on the ribbon of your PowerPoint, on your keyboard, press the “H” button to access the “Home” tab, then the “S” button to access the “Drawing” section.
Then, press the “F” key to access the “Shape Fill” option and then the “E” button to select the “Eyedropper” tool.
4. How to Copy Color from a Picture in PowerPoint using Eyedropper?
As you may now be aware, you can use the eyedropper tool to match colors even from an image!
To copy a color from an image in PowerPoint, all you have to do is to select the object you want to change the color of. Then, select the “Eyedropper” tool from the “Shape Fill” option. Hover over the target image until you find the right color and click on it to apply to the shape.
In fact, the color of the text in the featured image (present at the top of this page) of this article has also been matched from one part of the image using the eyedropper tool!
So, let’s understand how to use the eyedropper tool to copy color from a picture.
Step 1 – Open the “Eyedropper” tool in PowerPoint
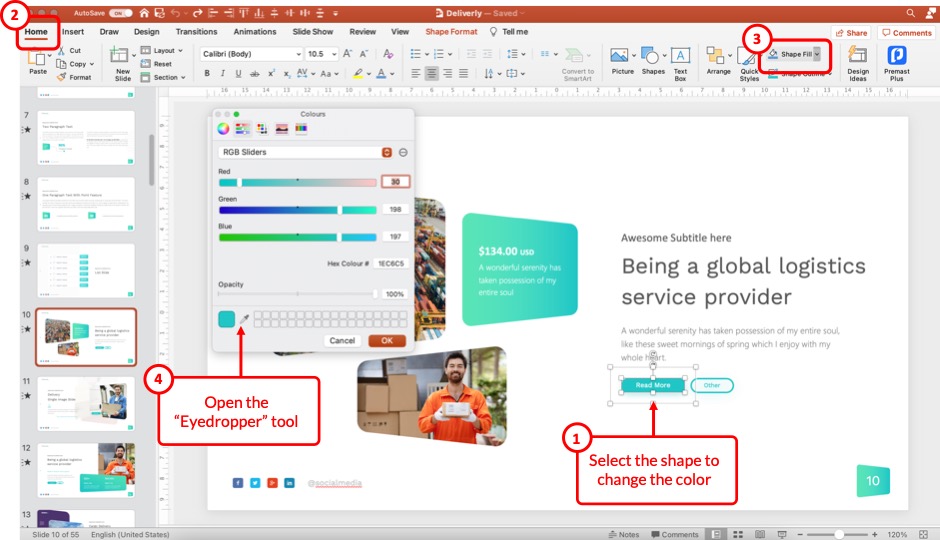
First, select the shape to which you wish to apply the color.
Then, click on the “Home” tab. Next, click on the “Shape Fill” option and open the “Eyedropper” tool. For Mac users, click on the “More Color Options” and then click on the “Eyedropper” icon (as shown in the image above).
Step 2 – Select the Color from the Image
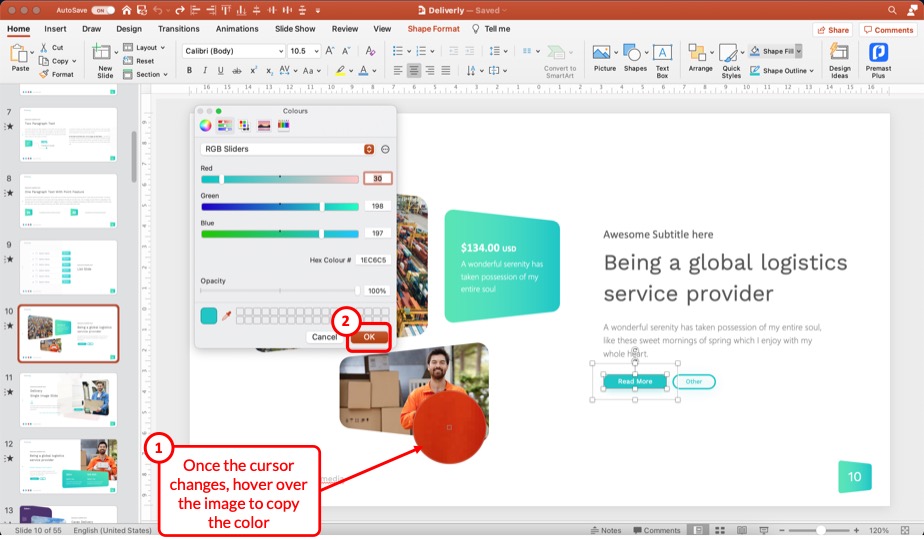
Once the cursor changes its shape and becomes larger, hover over the part of the image that contains the color you wish to copy. Simply click on it and press the “OK” button to apply.
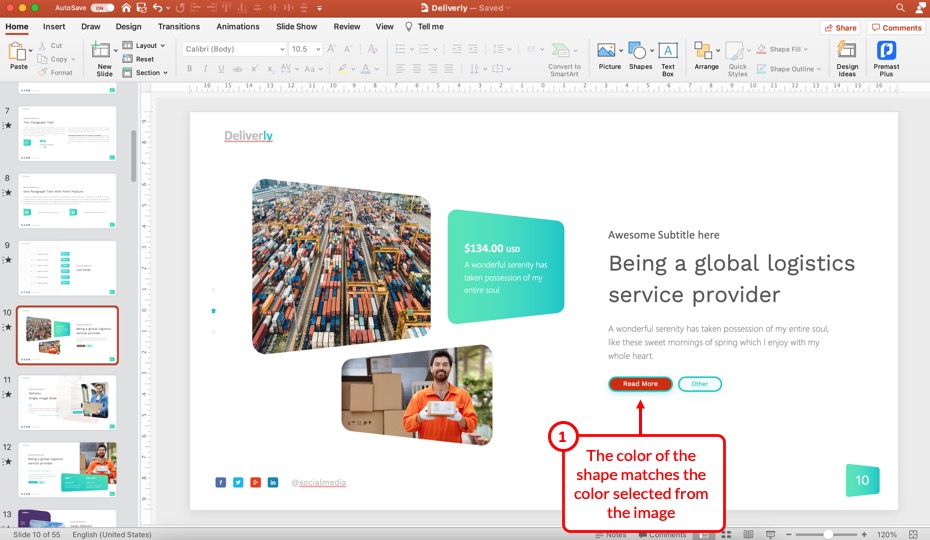
You will notice that the color of the shape changes to the color selected from the image.
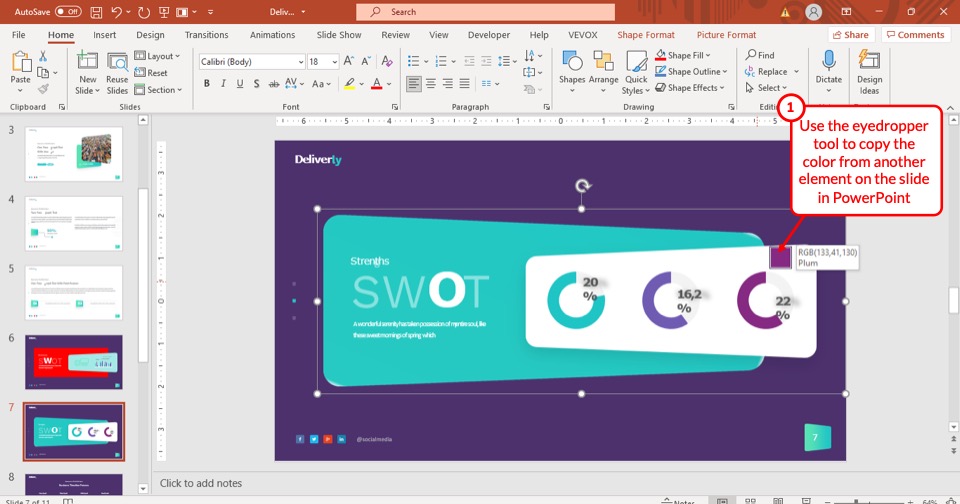
5. How to Copy Color from Another Element in PowerPoint using Eyedropper?
The process of copying a color from another element is the same as copying a color from an image.
That said, here are the steps to follow when matching the color from another element using the eyedropper tool in PowerPoint –
- Select the shape you wish to change the color
- Click on the “Home” tab
- Then, click on the “Shape Format” button
- From the dropdown, click on the “Eyedropper” tool
- Hover over another element on the slide that contains the desired color
- Click on the color to apply it to the selected shape.
Enabling the eyedropper option will vary for Mac users (as highlighted earlier in the article). Simply follow the steps mentioned previously in the article if you are using PowerPoint on Mac.
6. How to Copy Color of Objects Outside of PowerPoint Using Eyedropper?
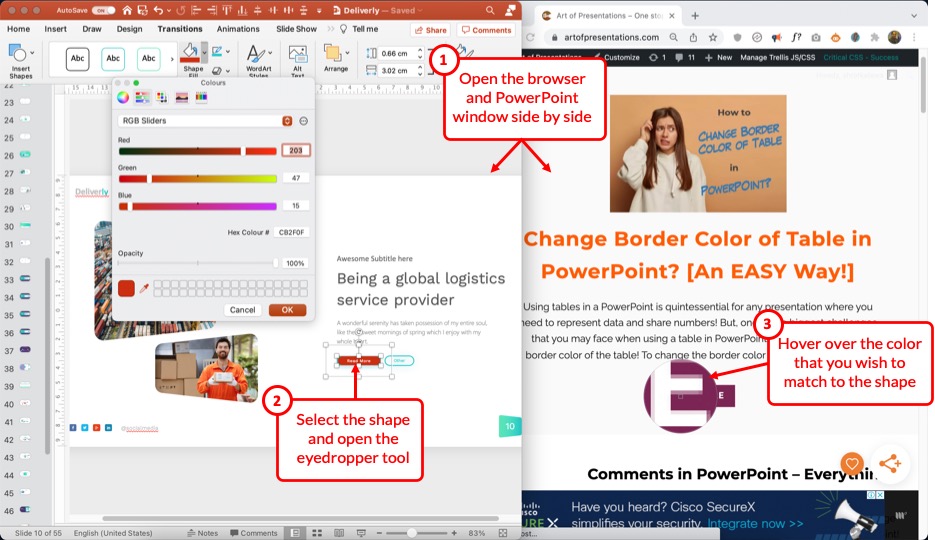
To copy a color from outside PowerPoint, first, open both the application windows side by side.
In the above example, I’ve shown how to match color from my own website using a web browser.
Once you have both the windows open together, follow the steps mentioned below –
- First, select the shape.
- Then, click on the “Shape Fill” option and click on the “Eyedropper” option.
- Hover the cursor over the part of the site that contains the color that you wish to copy.
- Click on the color to apply it to the selected shape.
- The color of the shape will change according to the matched color.
7. Using Eyedropper for Matching Text Color
Changing the color of the text is an essential part of being able to format text in PowerPoint!
To use the Eyedropper tool to match text color in your presentation, follow the simple steps described below.
Step-1: Select the text
The first step of the process is to select the text that you want to change the color of. Simply double-click anywhere on the text to select the entire paragraph.
Step-2: Select the Eyedropper tool
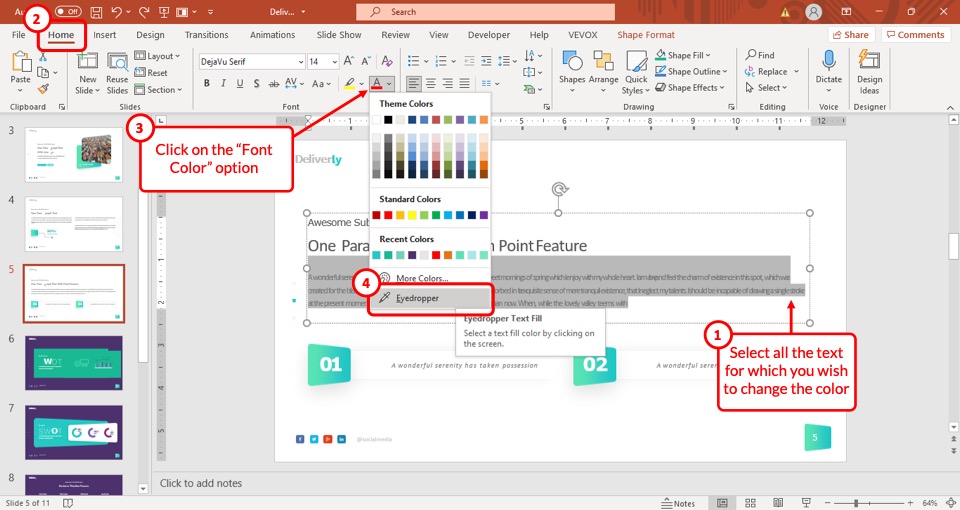
After you have selected the texts, simply click on the “Font colors” button which is located in the “Text” section of the “Home” tab.
This will open a drop-down menu. Now, from the drop-down menu, select the “Eyedropper” tool.
Step-3: Select your preferred color
After you select the “Eyedropper” tool, the cursor of your computer will change. Now, simply click on the color that you want your text to change to.
Once you’ve selected your preferred color the text will change accordingly.
8. How to Identify Color Codes of a Color using Eyedropper in PowerPoint?
Using the color codes can be a great way to apply the exact color to the shape or other elements present on the slide. In fact, if you know the exact codes, you don’t even need the eyedropper tool. You can directly enter the color codes to apply the exact colors.
However, the problem in most cases is that there is no way to know the exact color code let alone apply or match the color.
Now that we have seen how you can match the shape color to any other color on your screen, let’s take a look at how to extract the color codes using the eyedropper tool in PowerPoint. Once identified, you can actually save them in a document separately to use the color over and over again.
This way, you can even use the same colors when you don’t have or want to use the eyedropper tool in the future.
To identify color codes of color in PowerPoint using the Eyedropper tool you can either identify the RGB color codes or the HEX color code. These are the most widely used codes for a color.
Let’s take a look at how to extract both the codes using the eyedropper tool.
8.1 Extracting the RGB Color Codes using Eyedropper
In order to see the RGB color codes of the color that has been selected using the “Eyedropper” tool, first, apply the color to the shape.
Once you have matched the color of the shape using the eyedropper tool follow the steps mentioned below –
Step-1: Select the “More Fill Colors” option
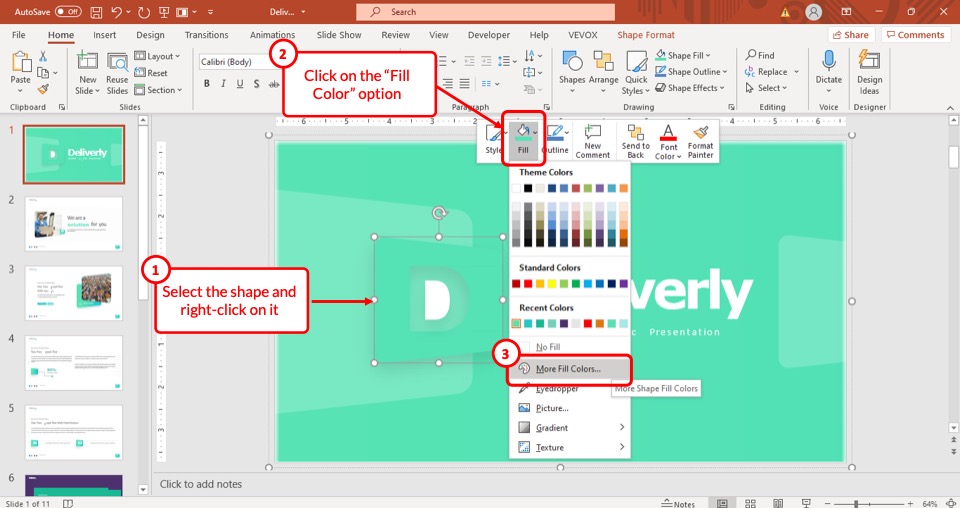
Once you have selected the color and the object has changed accordingly, “Right-click” on the object and click on the “Fill” button. This will open a drop-down window.
From the drop-down window, select the “More Fill Colors” option. This will open a pop-up window.
Step-2: View and Copy the RGB color code
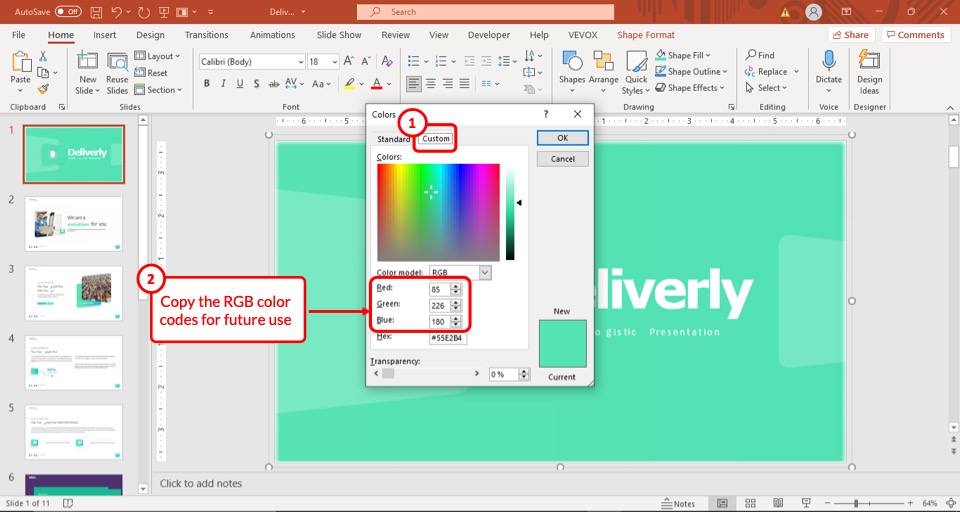
Once the pop-up window appears on your screen, you will be able to extract the RGB code located at the bottom of the “Colors” pop-up window in the “Custom” tab.
8.2 Extracting the HEX Color Codes using the Eyedropper in PowerPoint?
To extract the HEX color code using the “Eyedropper” tool, simply select the color and apply it to the shape. Then, open the “Fill Color” of the shape by right-clicking on it (as shown in step 1 of the previous process).
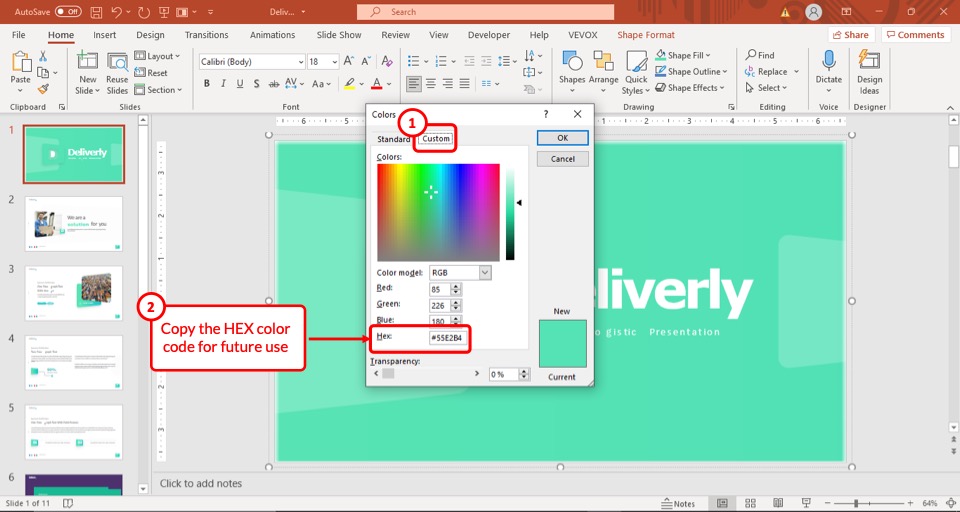
Then, from the “custom” tab, click on the “HEX” color field. Highlight the code and copy it. Paste it to a document for future use.
One thing to note is that if you wish to apply a particular color using the color codes, follow the exact same process highlighted above. However, instead of copying the color code, simply paste the color code and press “OK”.
Credit to Nakaridore (on Freepik) for the featured image of this article (further edited).