![How to Curve Text in Google Slides? [The EASY Way!]](https://artofpresentations.com/wp-content/uploads/2022/11/Featured-Image-2.jpg)
Text is as important as any image in your presentation because it carries all the necessary information. from introducing sections to explain concepts, and from showing data to complementing the visuals. So, it is necessary to make it look appealing and useful.
In Google Slides, you can edit the text as you like but it hasn’t introduced any in-app feature to curve the text yet. So, you can use Powerpoint for this purpose and then copy/paste the text into Google Slides.
To curve text in Google Slides using Powerpoint, first, select the text and click on “Text Effects” under WordArt Styles” group in the “Shape Format” menu. Click on “Transform” and choose your preferred curve style. Then copy the curved text and paste it into selected slide of Google Slides.
In this article, you will also learn the way of bringing the text into a circle, rotating or flipping text vertically, and wrapping the text around an image or object.
So, let’s begin with this step-by-step guide!
1. Can You Curve Text in Google Slides?
In Google Slides, you cannot curve text. Unfortunately, there is no feature in Google Slides that allows you to do that. However, you can curve a text in Microsoft PowerPoint and then paste the curved text into Google Slides.
2. How to Curve Text in Google Slides Using PowerPoint?
To curve a text in Google Slides, you have to first do it in PowerPoint before pasting it into a Google Slides slide. To curve a text using PowerPoint, follow the 5 simple steps.
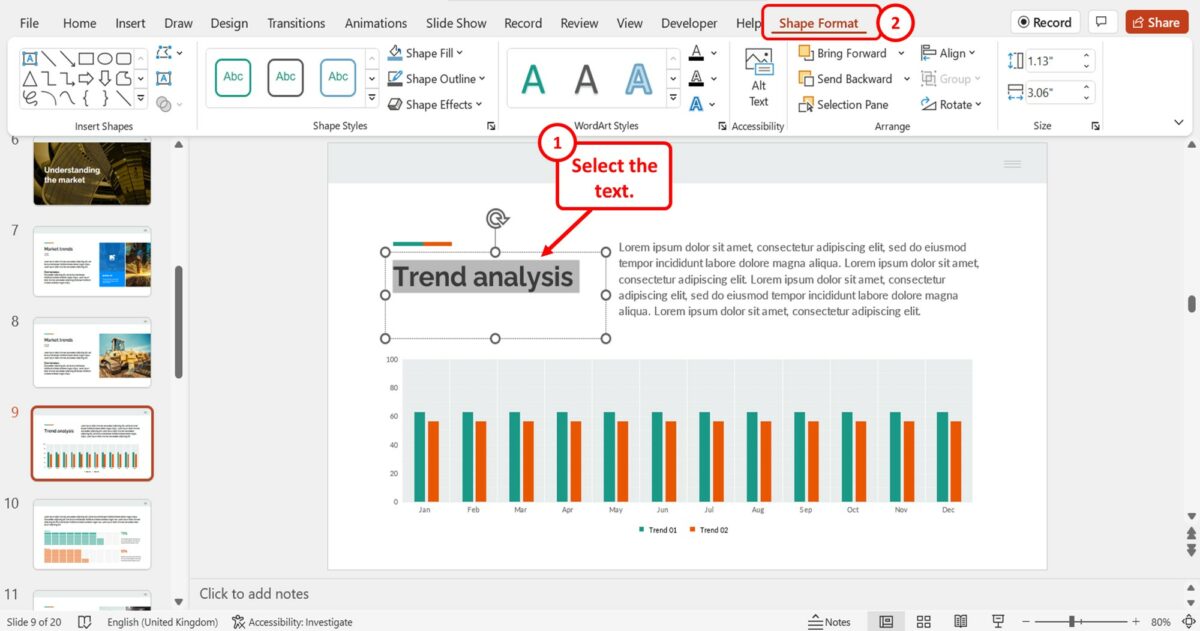
Step-1: Click on the “Shape Format” tab
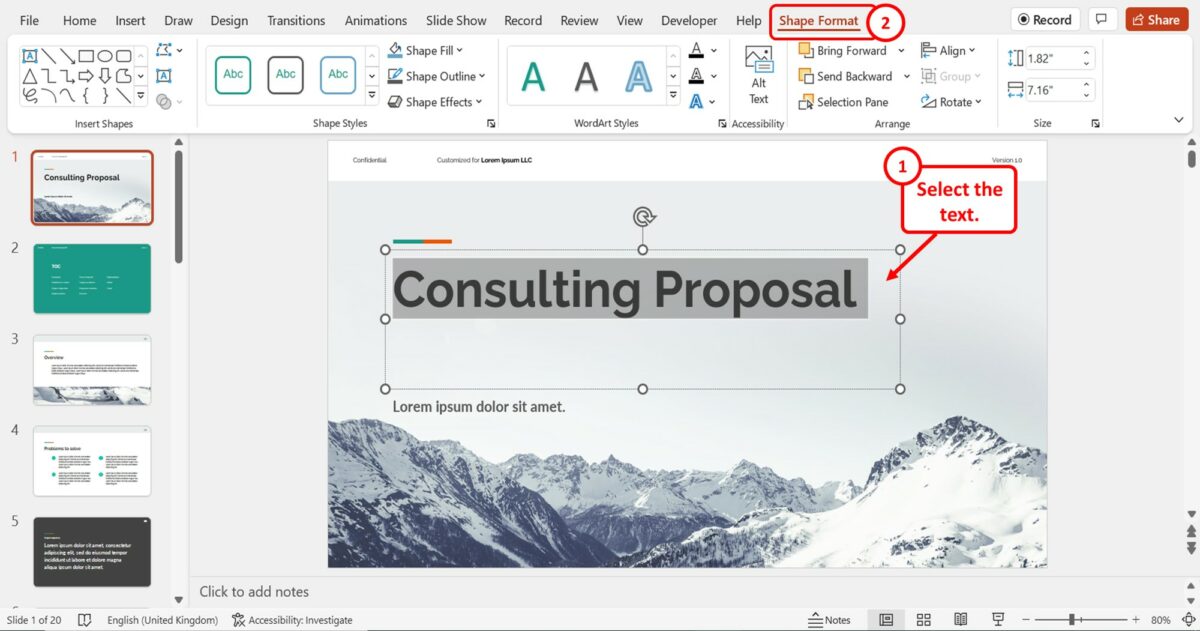
In the Microsoft PowerPoint slide, you have to first select the text that you want to curve. Then click on the “Shape Format” tab in the menu ribbon at the top of the screen.
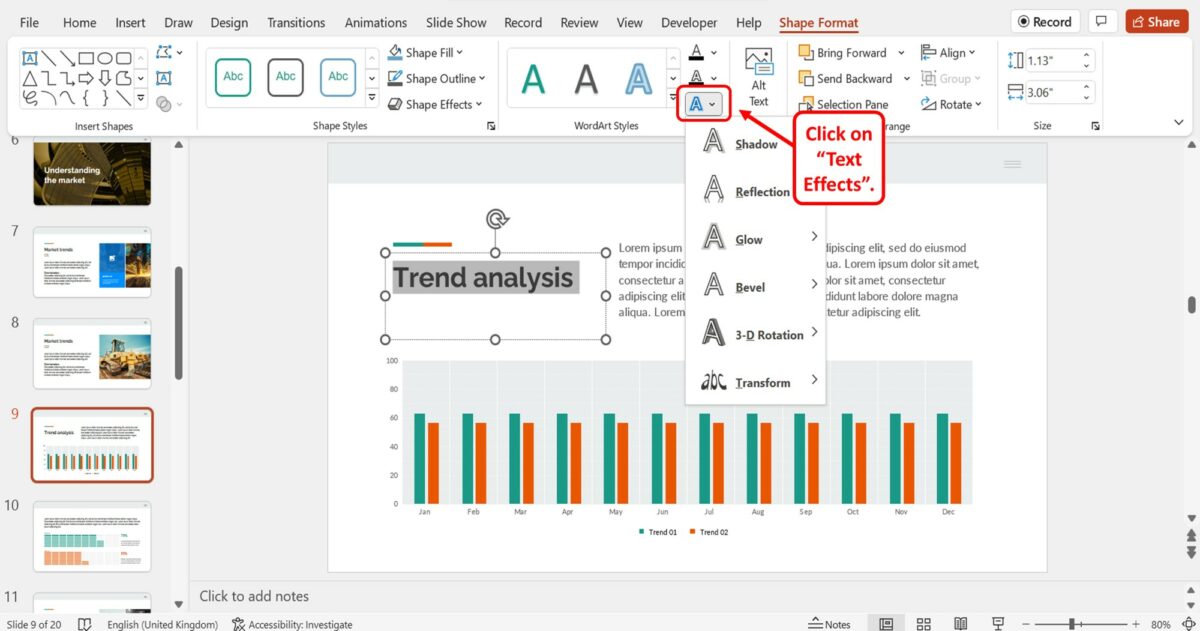
Step-2: Click on the “Text Effects” option
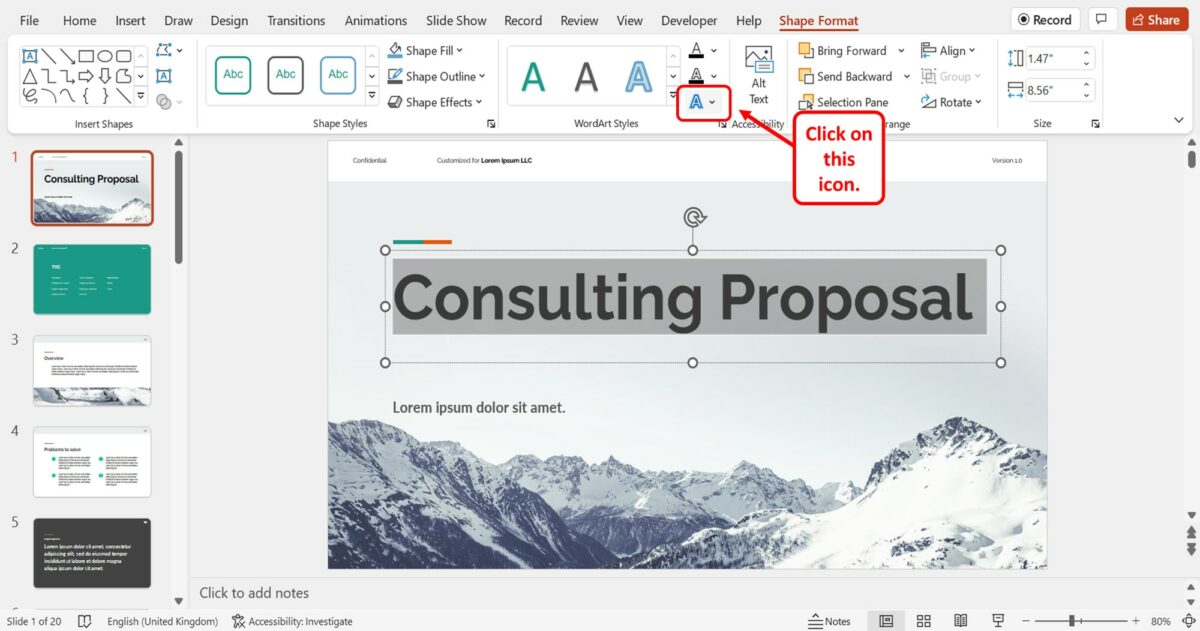
The next step is to click on the “Text Effects” option. It is the blue “A” icon at the bottom of the “WordArt Styles” group in the “Shape Format” menu.
Step-3: Click on the “Transform” option
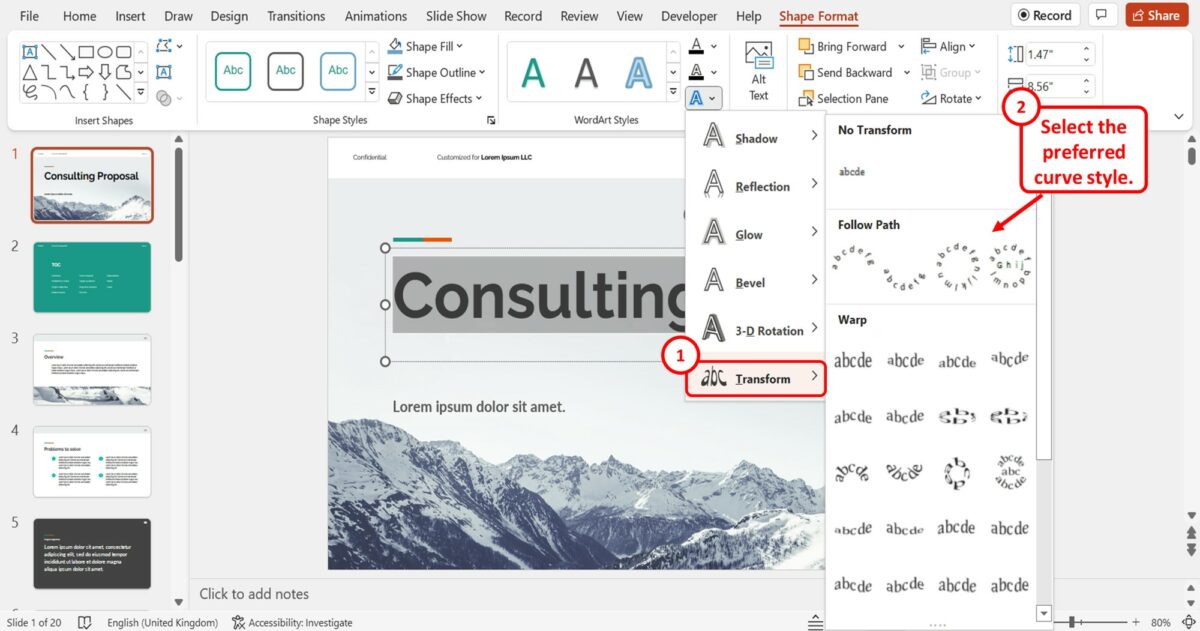
In the dropdown list under the “Text Effects” option, click on the “Transform” option. This will open a pop-up list where you can select your preferred curve style for the selected text.
Step-4: Copy the curved text
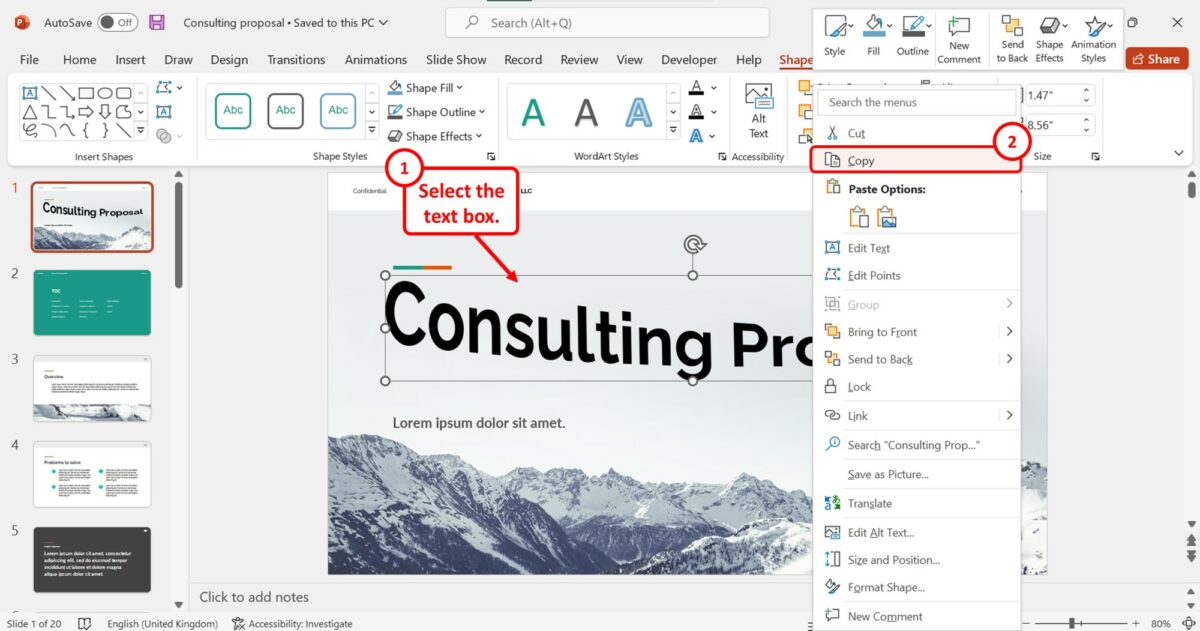
The next step is to copy the curved text from the Microsoft PowerPoint presentation. You have to first select the text box and “Right Click” on it. Then select the “Copy” option in the right-click menu.
Step-5: Paste the curved text into Google Slides
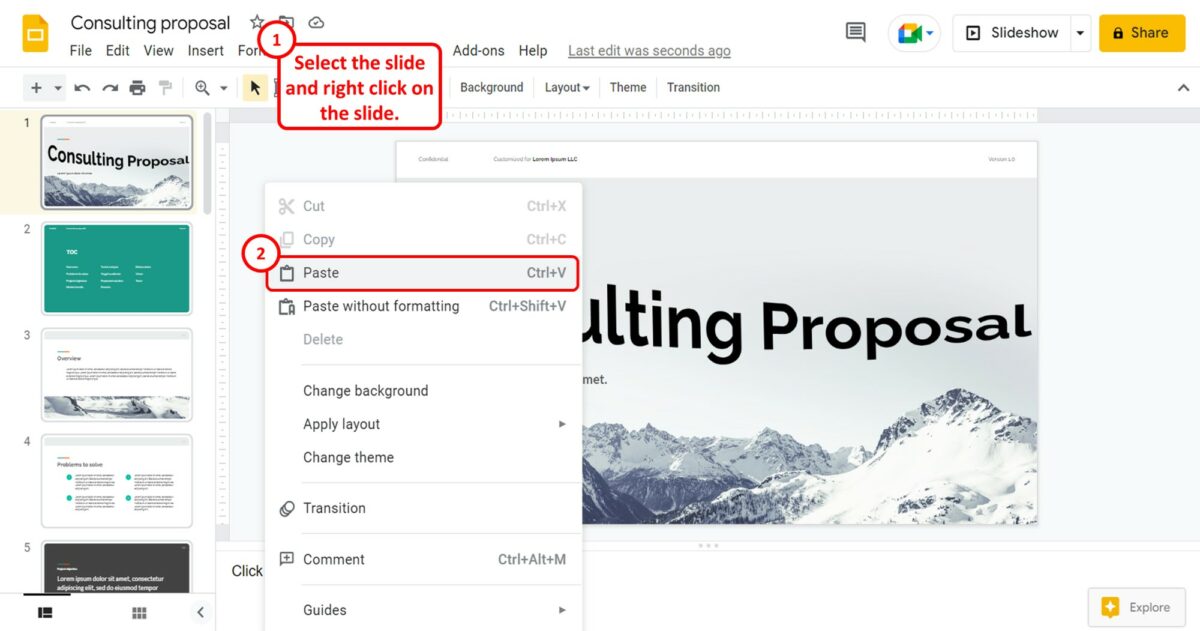
Finally, you can paste the curved text into the Google Slides presentation. All you have to do is open the Google Slides slide where you want to add the curved text. “Right Click” on the slide and select the “Paste” option from the right-click menu to insert the curved text.
3. How to Curve Text into a Circle in Google Slides?
To curve text into a circle in Google Slides, you have to first create the curved text in Microsoft PowerPoint. Once you have curved a text into a circle in PowerPoint, you can paste it into the Google Slides presentation. You can learn more about how to curve text into a circle in my other article.
To curve text in a circle in PowerPoint, follow the 4 easy steps.
Step-1: Click on the “Shape Format” menu
In the PowerPoint slide, you have to first select the text that you want to curve into a circle. Then click on the “Shape Format” tab in the menu ribbon located at the top of the screen.
Step-2: Click on the “Text Effects” option
The next step is to click on the “Text Effects” option. It is the blue “A” icon at the bottom of the right column in the “WordArt Styles” group in the “Shape Format” menu. This will open a dropdown list.
Step-3: Click on the “Circle” option
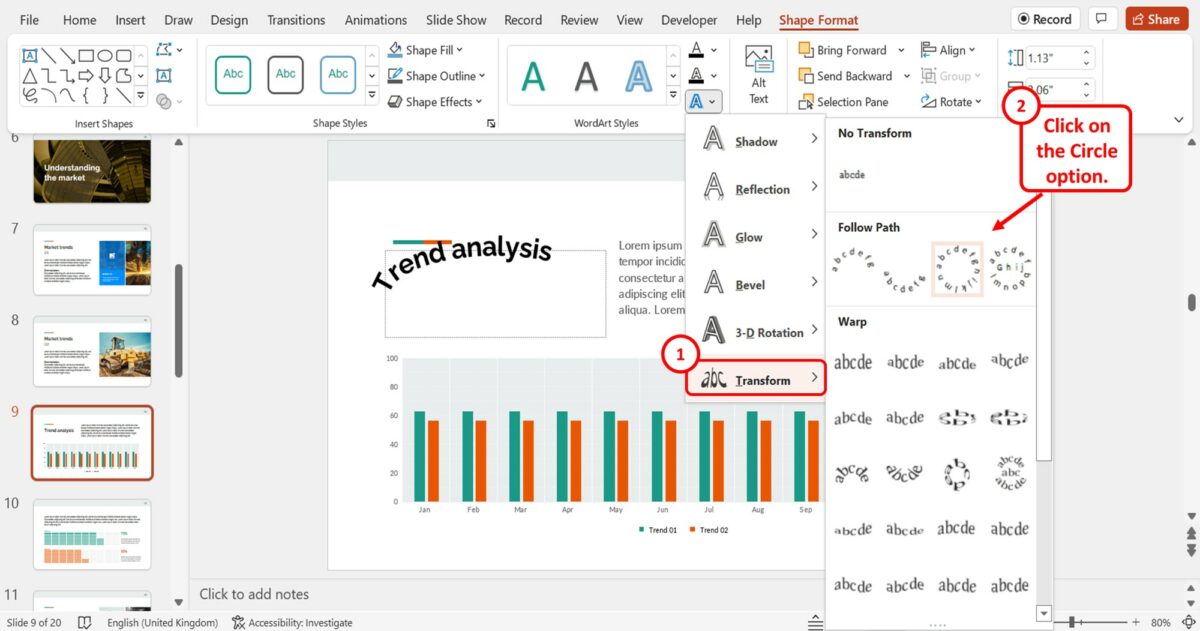
In the dropdown list under the “Text Effects” option, click on the “Transform” option. Then all you have to do is click on the “Circle” option in the “Follow Path” section of the pop-up menu by the “Transform” option.
Step-4: Adjust the text box

Finally, you have to adjust the text box to make the text inside curve into a perfect circle. You can resize the text box to curve the text into a circle.
4. How to Rotate Text in Google Slides?
Using the “Format” tab in Google Slides, you can rotate the text in a text box. You can also customize the angle and direction of the rotation. To rotate the text, follow the 4 easy steps.
Step-1: Click on the “Format” menu
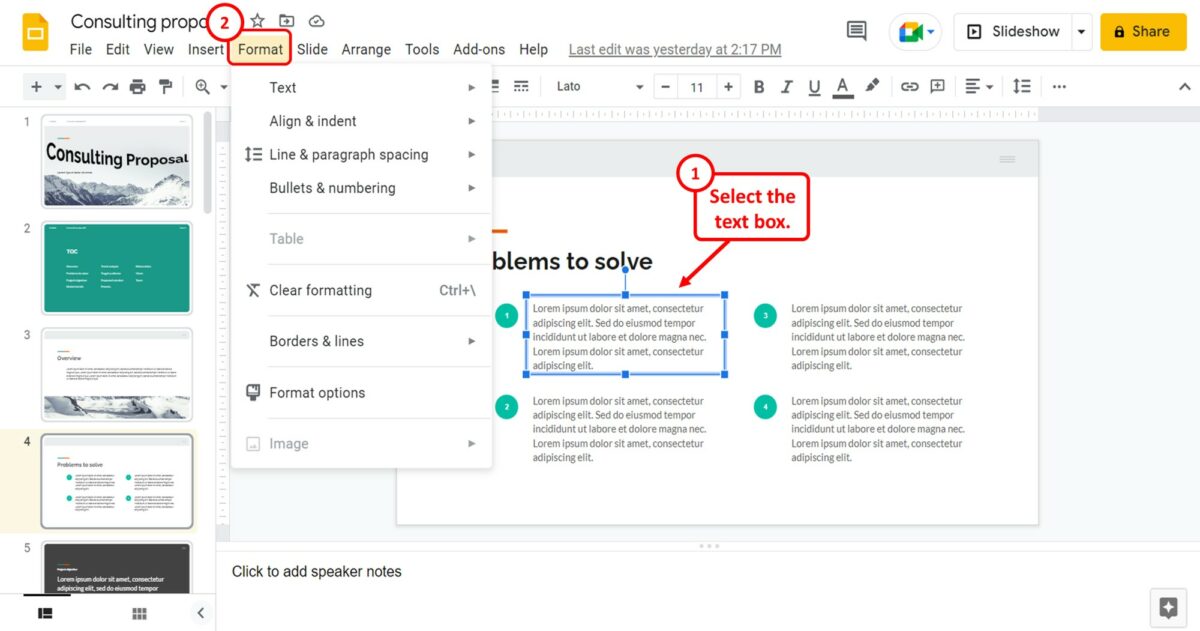
In the open slide, you have to first select the text box that you want to rotate. Then click on the “Format” menu in the menu bar at the top of the screen.
Step-2: Click on the “Format options” option
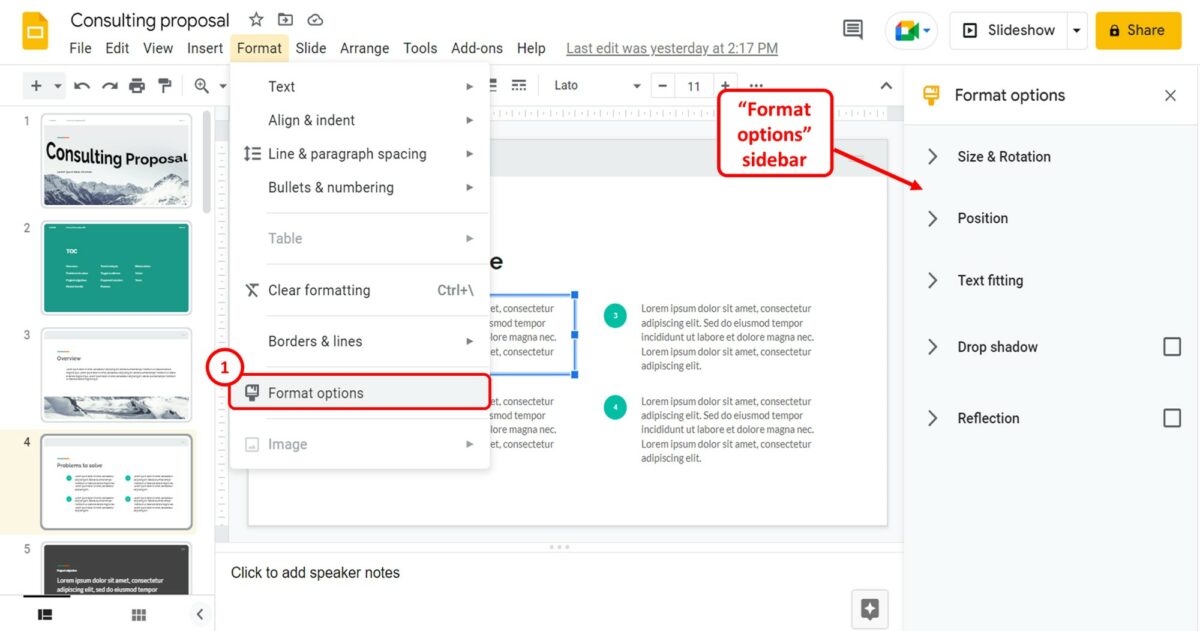
In the “Format” dropdown menu, click on the “Format options” option. This will open the “Format options” sidebar on the right side of the screen.
Step-3: Click on the “Size and Rotation” option
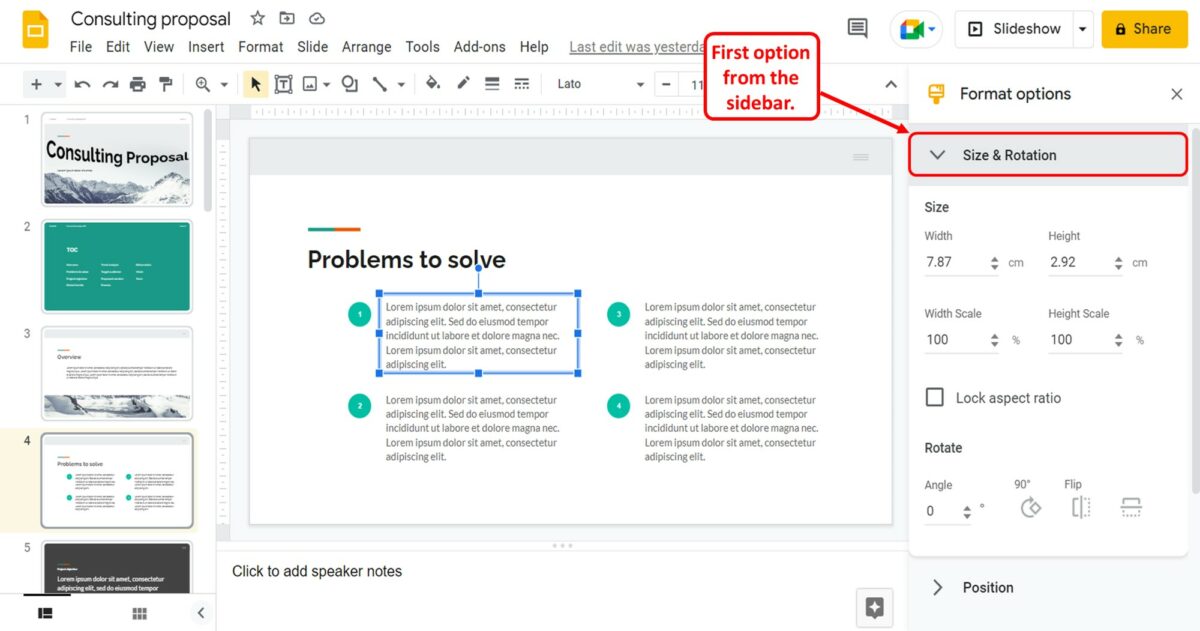
The next step is to click on the “Size and Rotation” option which is the first section in the “Format options” sidebar on the right side of the screen.
Step-4: Click on the “Angle” box
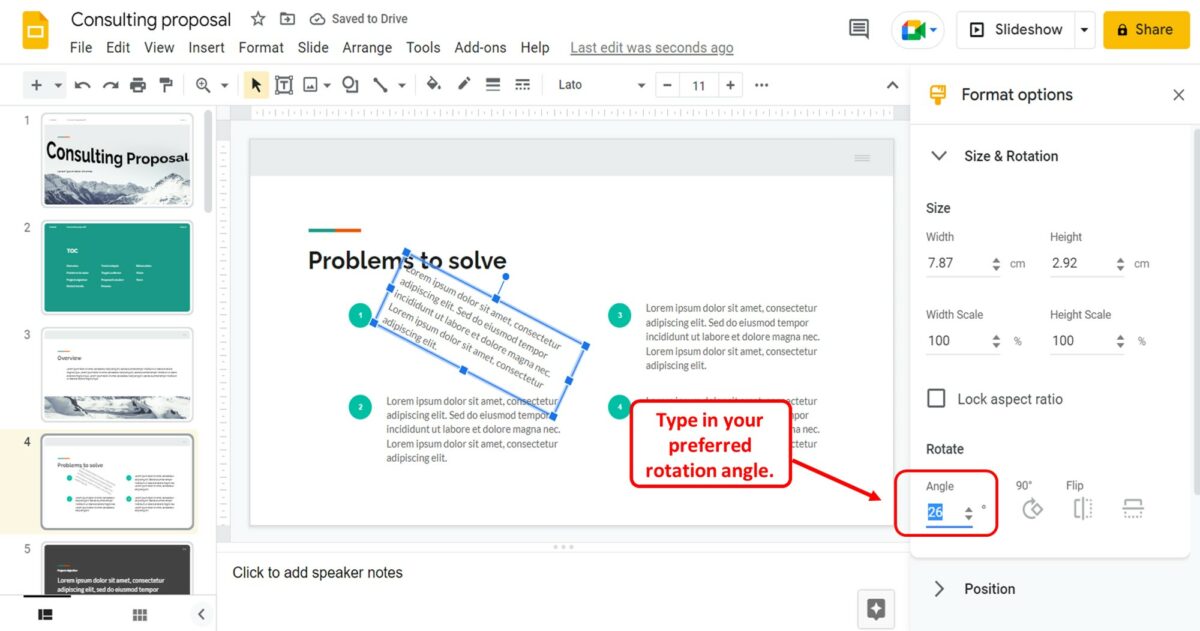
Finally, you can click on the “Angle” box in the “Rotate” section at the bottom of the “Size and Rotation” section. You can type in your preferred rotation angle for the selected text box.
5. How to Flip Text Vertically in Google Slides?
In Google Slides, you can easily make a text upside down using the “Flip vertically” feature. All you have to do is follow the 2 quick steps.
Step-1: Click on the “Arrange” menu
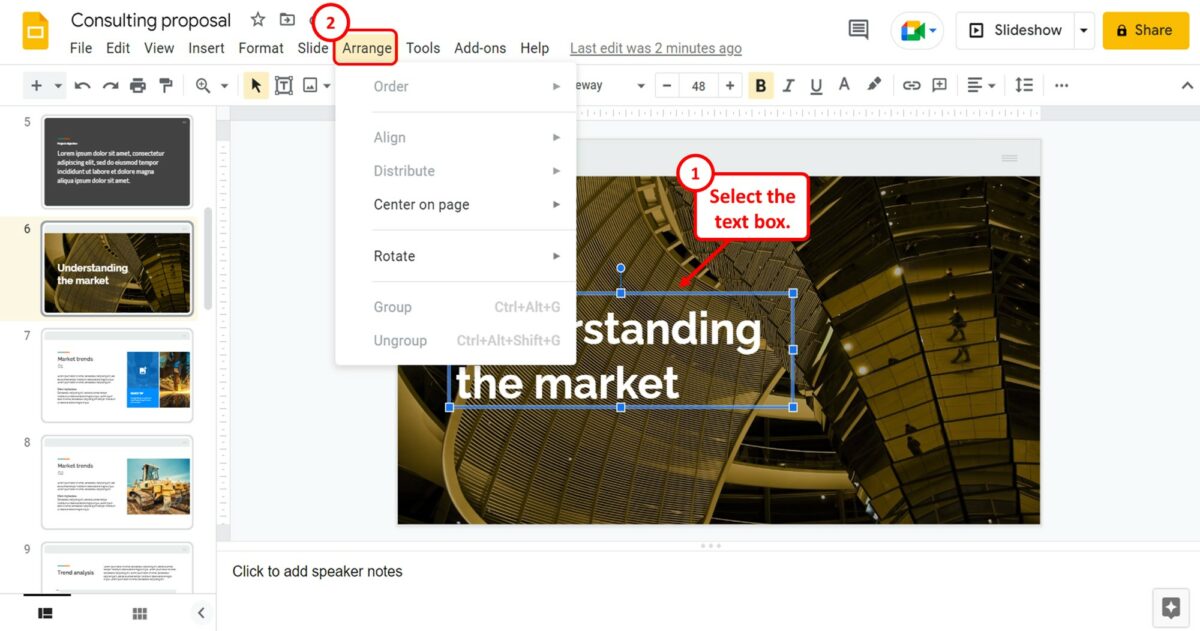
The first step is to select the text that you want to flip vertically. In the menu bar located at the top of the screen, click on the “Arrange” menu.
Step-2: Click on the “Flip vertically” option
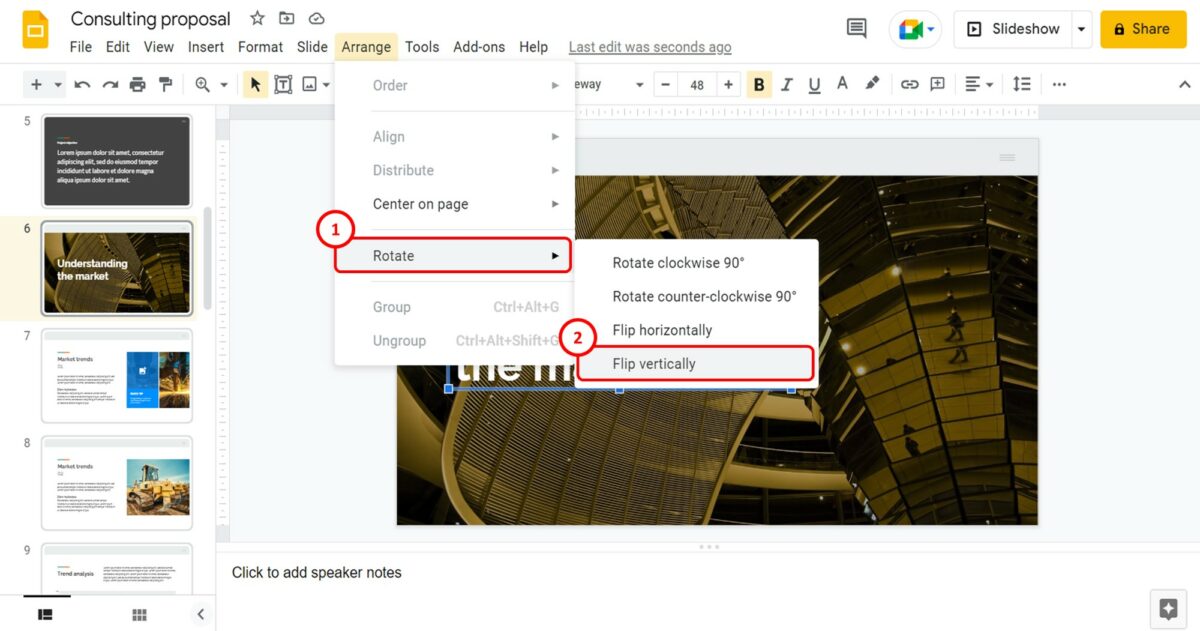
In the dropdown menu under the “Arrange” tab, click on the “Rotate” option. This will open a pop-up menu by the “Rotate” option. Click on the “Flip vertically” option at the bottom of the pop-up menu to flip the text upside down.
6. How to Wrap Text in Google Slides?
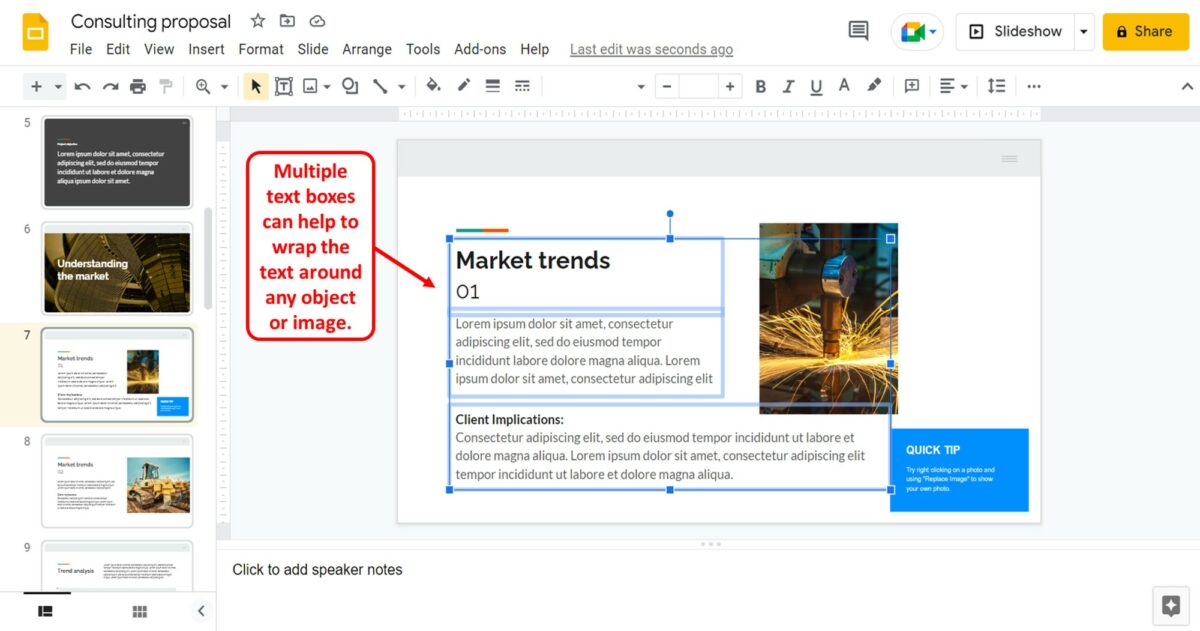
In Google Slides, there is no feature to wrap text. Since you can only insert text in a text box or a placeholder, it is a separate element from the slide that you can move and resize.
Thus, to wrap text around another object like an image or a shape, you can simply use multiple text boxes of different sizes.
7. How to Remove Curved Text in Google Slides?
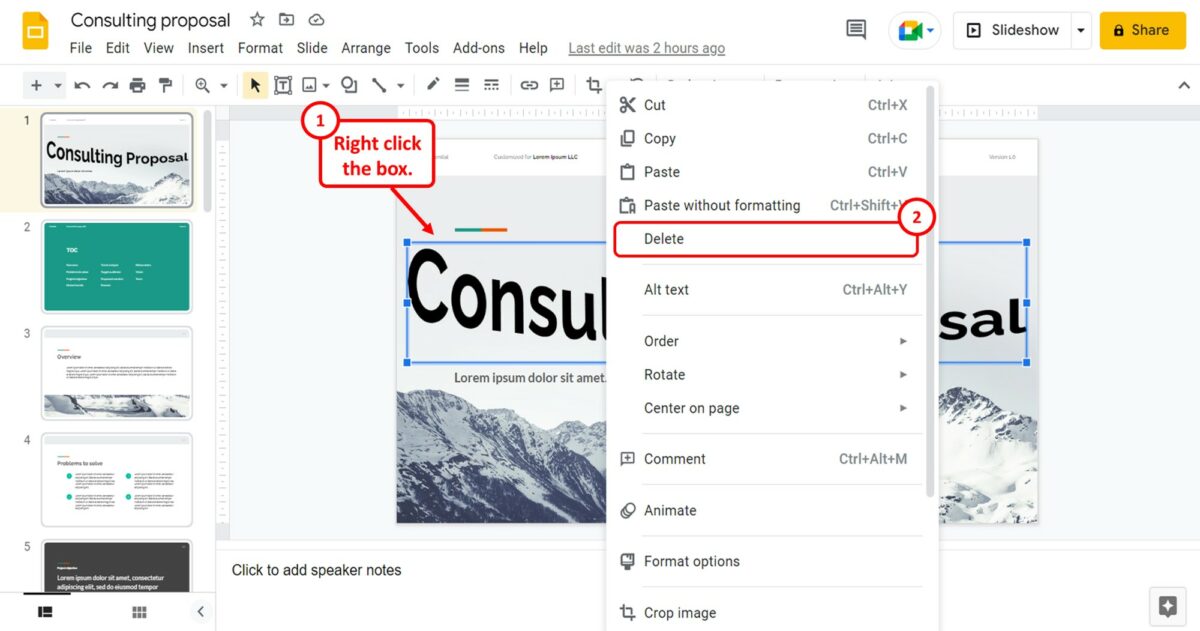
A curved text from Microsoft PowerPoint is pasted as an image in Google Slides. To remove the curved text, you have to simply delete the image. To do so, “Right Click” on the curved text. Then click on the “Delete” option in the right-click menu to remove the curved text.