![How to Crop an Image in Google Slides? [An EASY Guide!]](https://artofpresentations.com/wp-content/uploads/2022/11/Featured-Image-5.jpg)
As they say, an image is worth more than a thousand words. That’s why, most of us like to use less text and more images while creating a presentations. But not every image you choose needs to be presented as it is. Sometimes, you want to cut some part of that image just to make it more engaging and to the point. But, how exactly do you crop an image in Google Slides?
To crop an image in Google Slides, first, insert the image by choosing your preferred image source in the “Image” option of the “Insert” tab. Then, “Right-click” on the image and choose “Crop image” from the menu. Drag the corner of the image sideways or inward to finally crop it.
You can also use the “Crop” icon in the toolbar or “Double-click” the image to crop the unwanted parts of the image.
This article will also help you to learn about resizing a cropped image or adjusting the image in the cropped area. Besides, making the image fit to the slides and masking the image into a circle will be a bonus to your knowledge.
That, and much more. So, let’s get started!
1. How to Crop a Picture in Google Slides?
The “Crop image” option in Google Slides allows you to quickly crop an image added to the presentation slide. By cropping an image, you can remove any part of the inserted picture that you do not want to show in the presentation. To crop an image on a slide, all you have to do is follow the 3 simple steps.
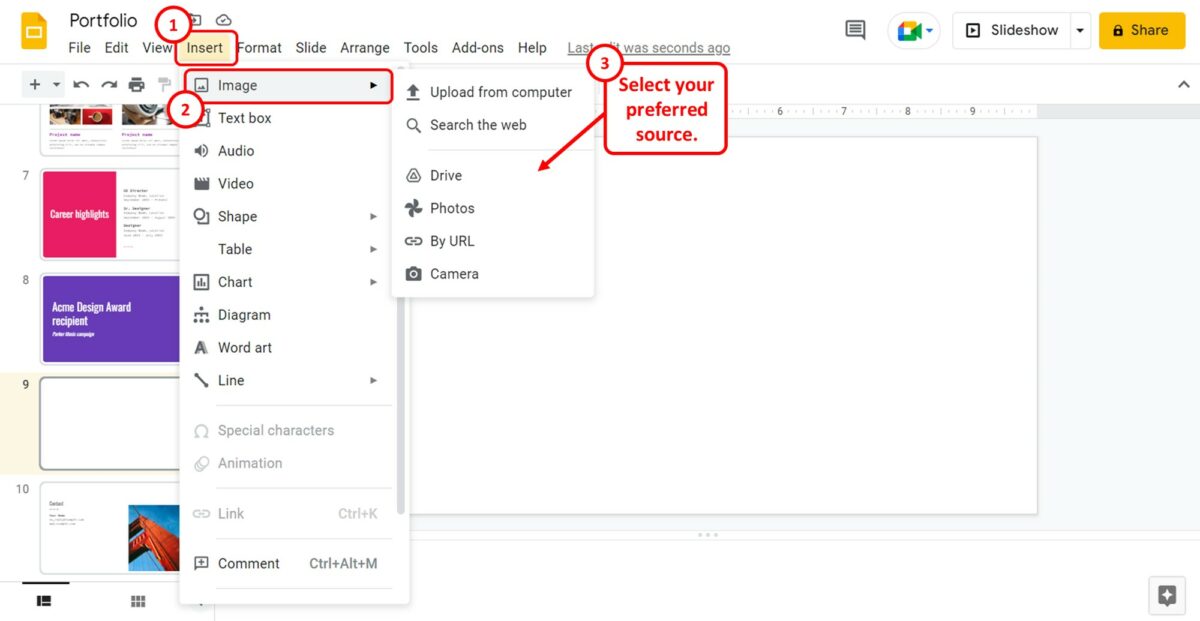
Step-1: Insert an image
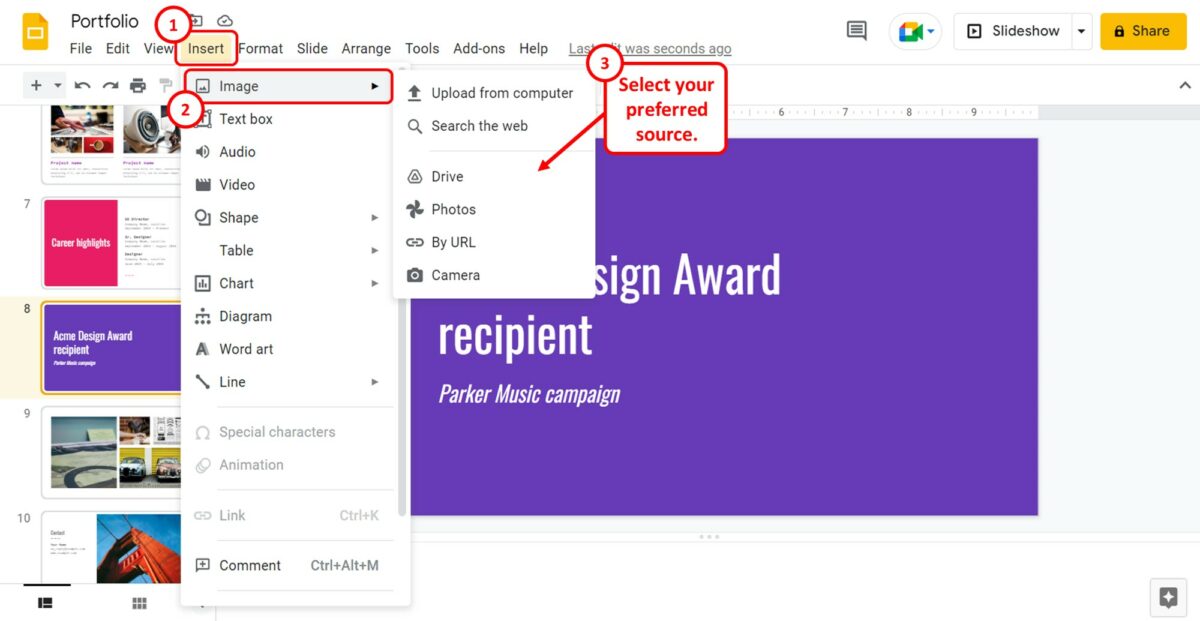
The first step is to insert an image into the Google Slides slide. To do so, click on the “Insert” tab in the menu bar at the top of the screen. In the “Insert” menu, click on the “Image” option.
You can read my article here to learn how to insert a picture in Google Slides from different sources.
Step-2: Click on the “Crop image” option
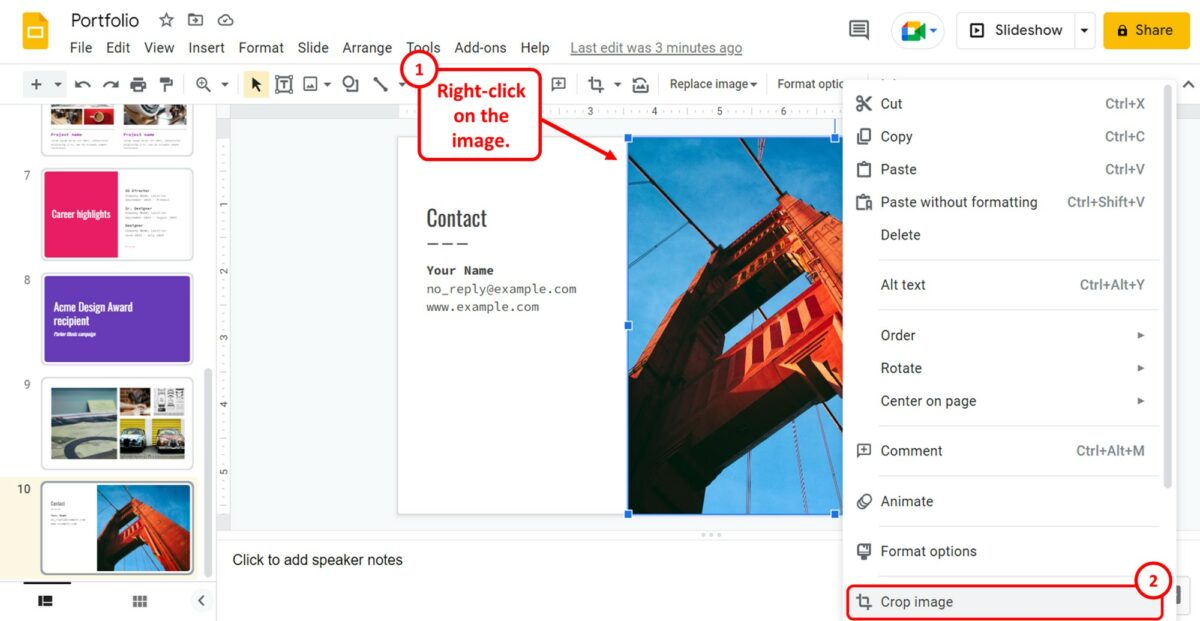
The next step is to “Right Click” on the image that you want to crop. In the right-click menu, click on the “Crop image” option.
Alternatively, you can click on the “Crop” icon in the toolbar under the menu bar located at the top of the screen. You can also “Double Click” a picture in a slide to crop it.
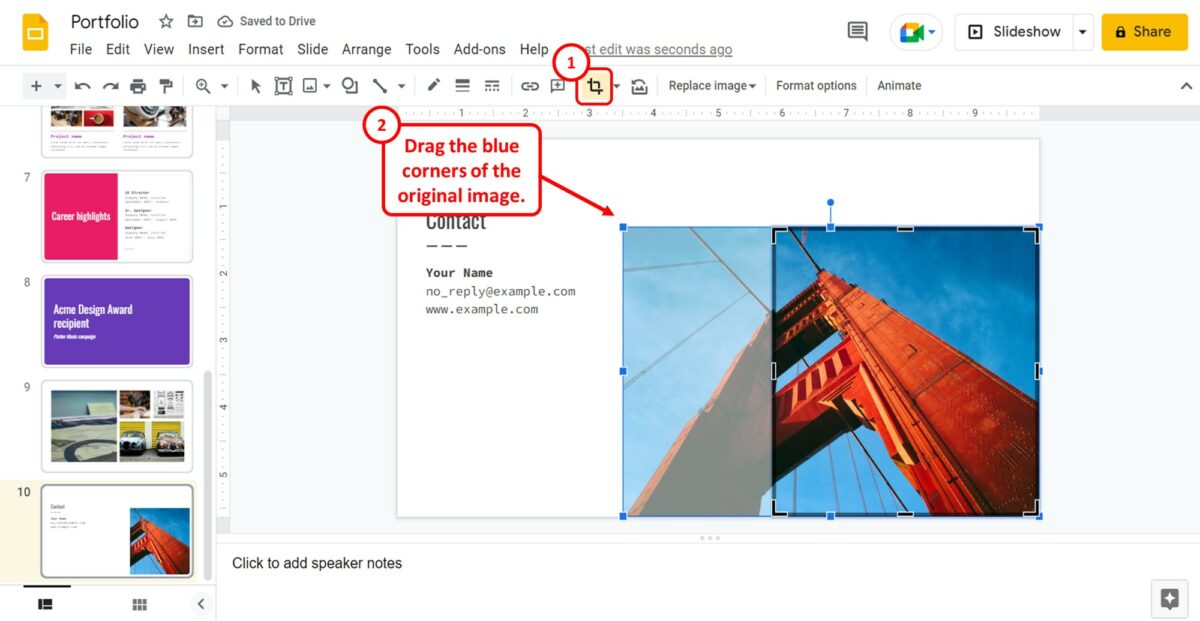
Step-3: Drag the corners
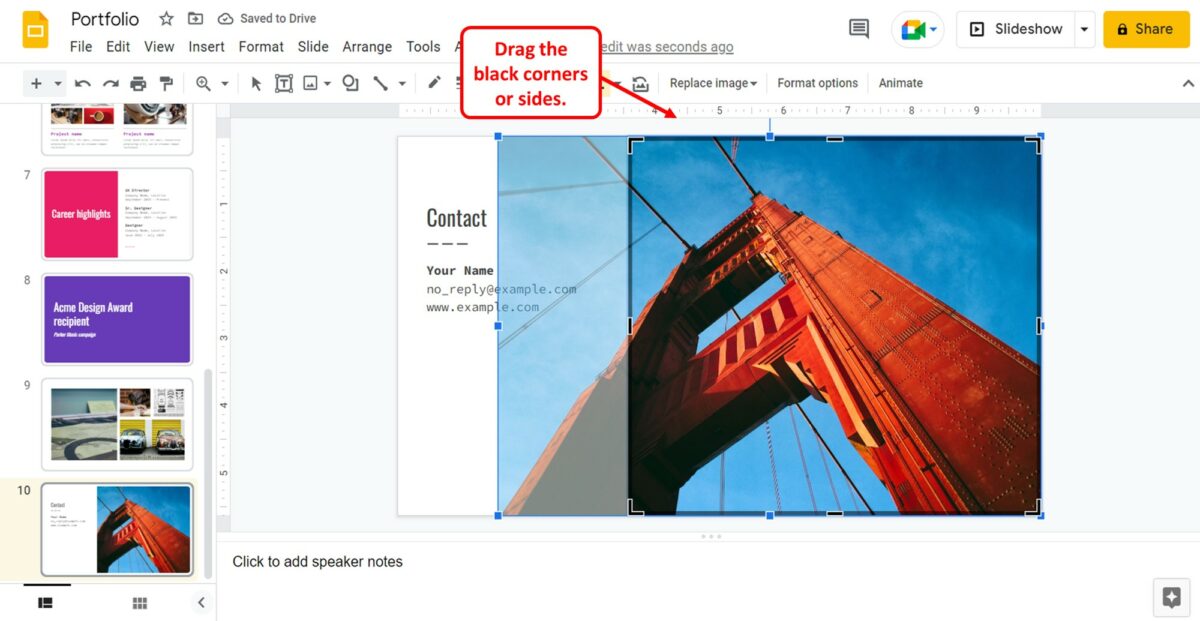
To crop the image, drag the black corners of the clear part of the image. You can also drag the sides to crop the image. The blurred part of the image will be cropped out in the presentation.
1.1 How to Adjust the Image in the Cropped Area?
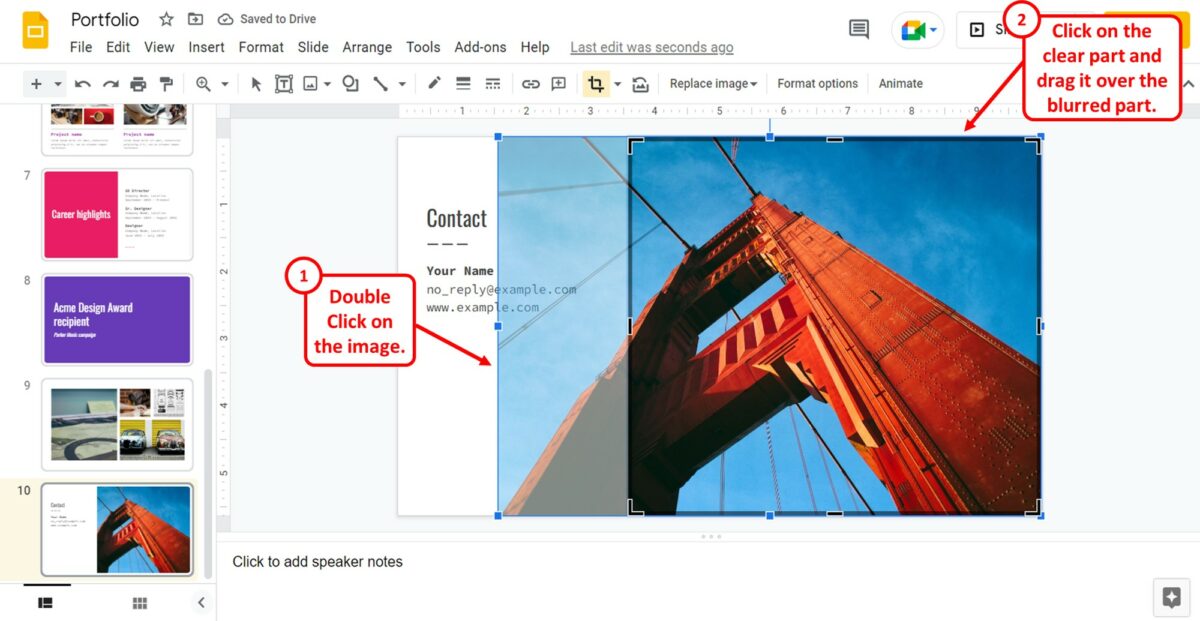
To adjust the image in the cropped area, you have to first access the uncropped image. To do so, “Double Click” the image on the slide. Then all you have to do is click on the clear part of the image and drag it over the blurred part.
You can place the clear part on your preferred part of the image. The rest of the image will be cropped out.
1.2 How to Resize Cropped Images in Google Slides?
To resize cropped images in Google Slides, you have to adjust the size of the original uncropped image.
First, you have to click on the “Crop” option in the toolbar to get the uncropped image. Then you have to drag the corners of the original image corners instead of the cropped image corners. The corners of the original image have small blue squares.
2. How to Make Image Fit to Slide in Google Slides?
In Google Slides, there is no option to autofit an image to the slide. However, you can move and resize an inserted image to fit to the slide. All you have to do is follow the 2 easy steps.
Step-1: Click on the “Insert” tab
The first step is to insert the image into the presentation slide. To do so, click on the “Insert” menu in the menu bar at the top of the screen. Then click on the “Image” option in the “Insert” menu to insert a picture into the slide.
Step-2: Drag the image corners
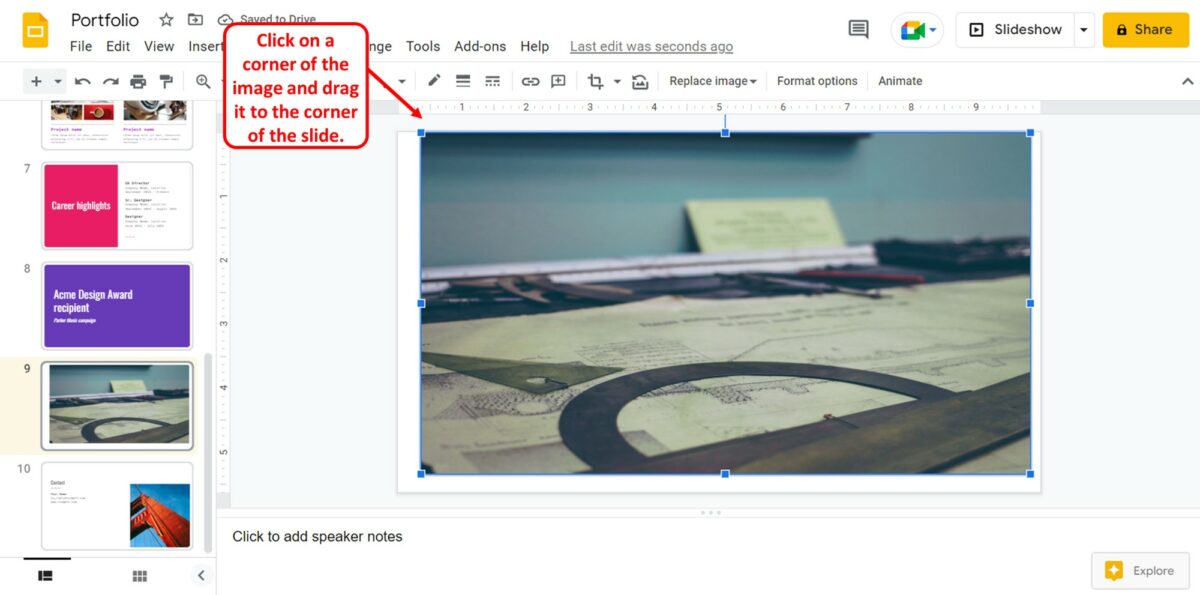
The next step is to move the image to fit to the slide. Click on a corner of the image and drag it to the corner of the slide. You will see a red line appear at the edge of the slide to indicate that the image is resized to fit to the slide.
3. How to Mask Image into a Circle in Google Slides?
The “Mask image” option in Google Slides allows you to add any shape to a picture inserted into the presentation slide. You can insert the picture into any of the pre-designed shapes available in Google Slides. To mask an image into a circle, follow the 3 simple steps.
Step-1: Click on the “Mask image” option
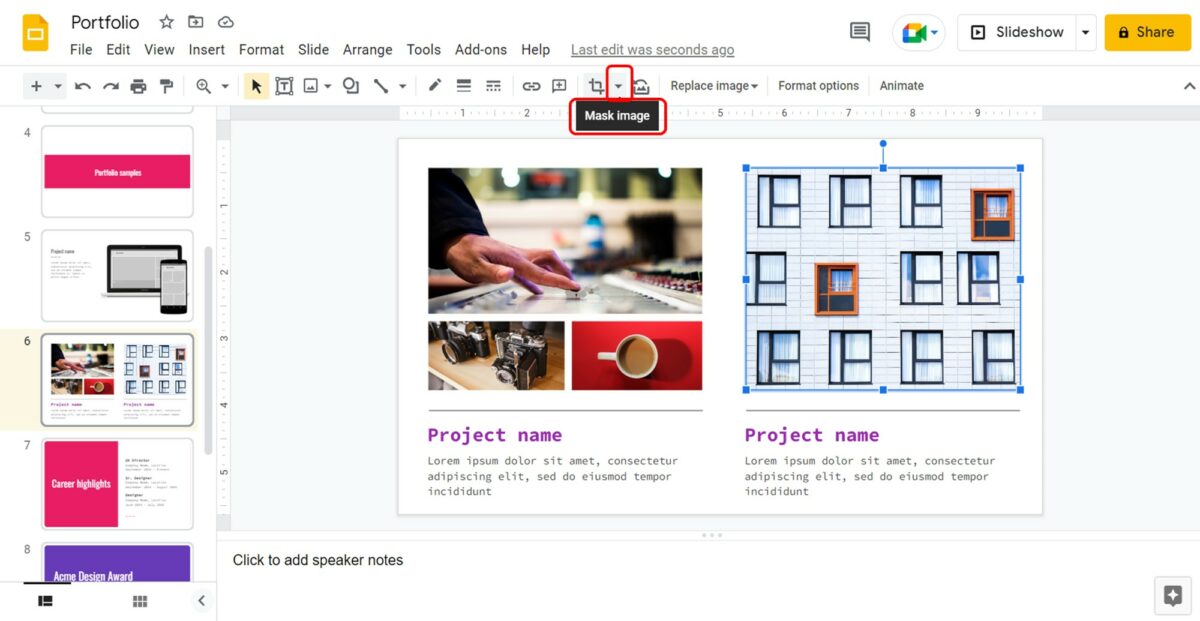
In the open slide, click on the image that you want to mask into a circle. Then click on the “Mask image” icon which is the down arrow by the “Crop” option in the toolbar located at the top of the screen.
Step-2: Click on the “Oval” option
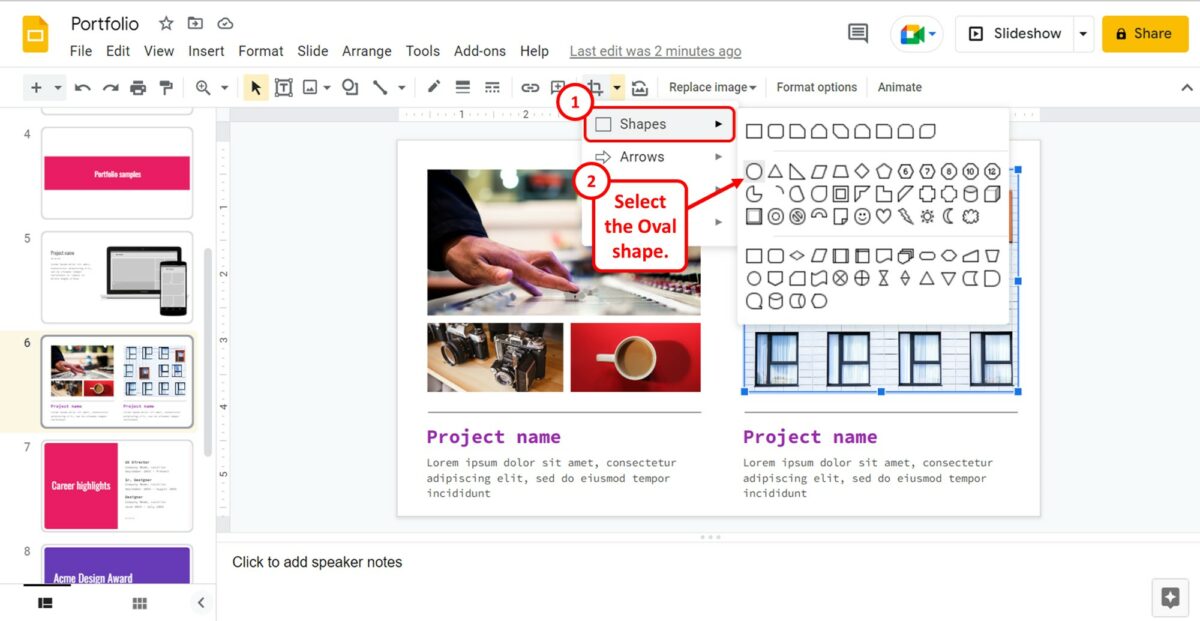
The next step is to click on the “Shapes” option in the dropdown menu under the “Mask image” option. From the pop-up list by the “Shapes” option, click on the “Oval” shape.
Step-3: Adjust the shape to a circle
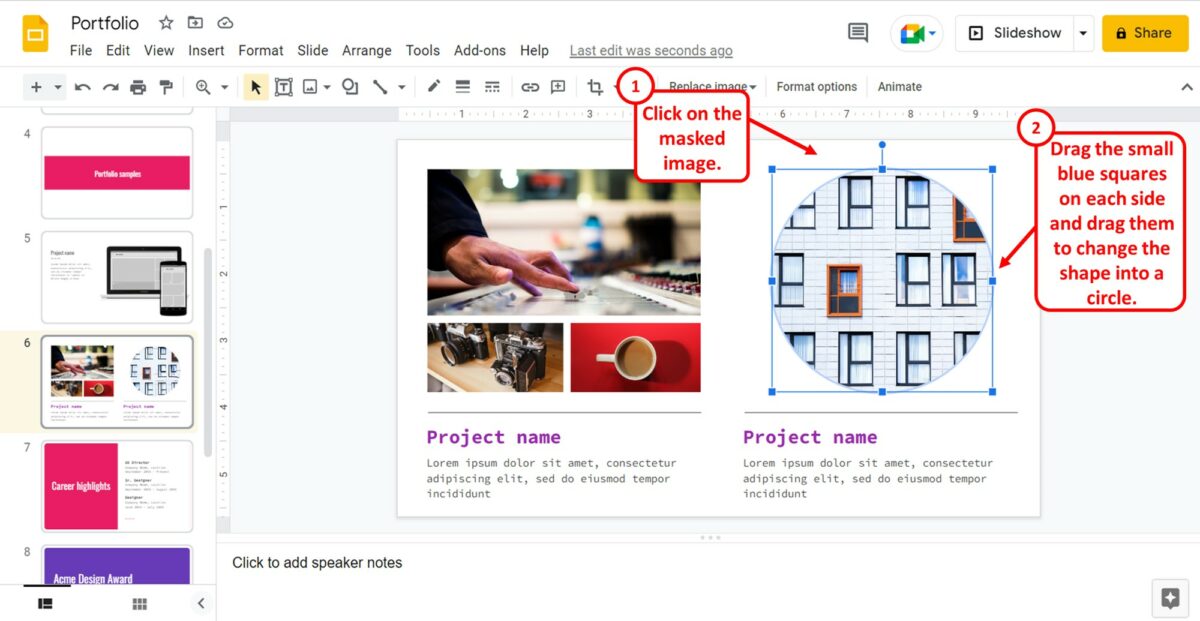
Now all you have to do is adjust the oval shape into a circle. To do so, click on the image masked into the oval shape. Then click on the small blue squares on each side of the image and drag them to change the shape into a circle.
4. How to Crop an Image into Any Shape in Google Slides?
In Google Slides, there are numerous preset shapes available. You can insert an image into any of those shapes. To crop an image into any shape, follow the 2 quick steps.
Step-1: Click on the “Mask image” option
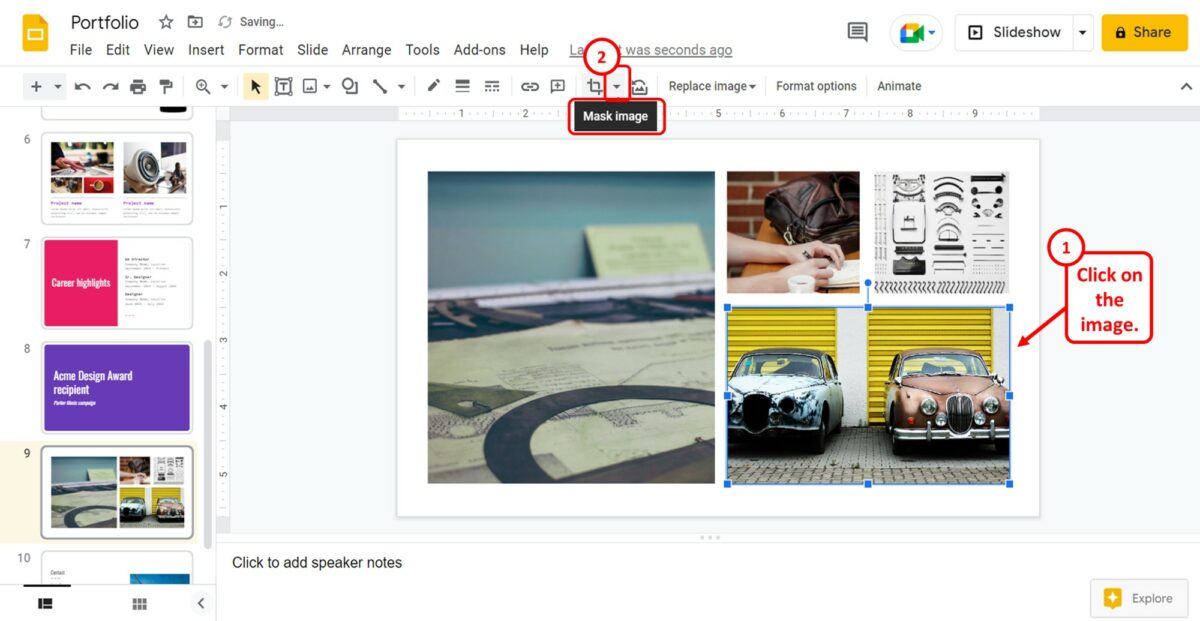
The first step is to click on the image that you want to crop. Then click on the “Mask image” option. It is the down arrow option beside the “Crop” option in the toolbar under the menu bar located at the top of the screen.
Step-2: Click on your preferred shape
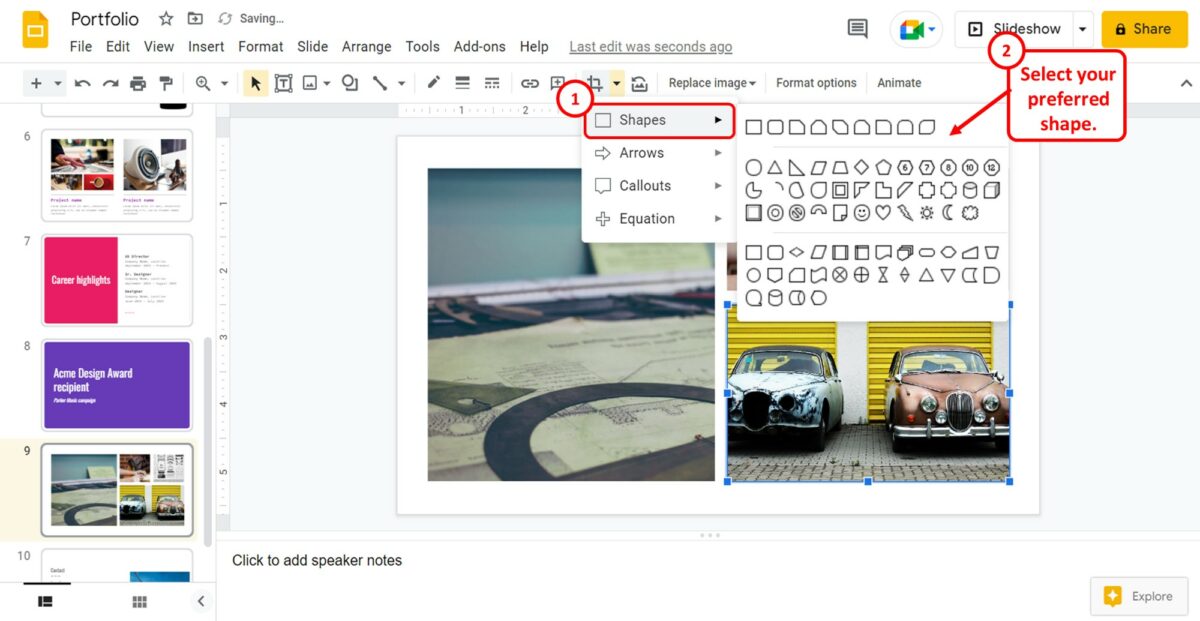
In the dropdown menu under the “Mask Image” option, click on the type of shape that you want to crop the image into. The available options are “Shapes”, “Arrows”, “Callouts” and “Equations”.
Then all you have to do is select your preferred shape from the pop-up list to crop the selected picture into that shape.
5. How to Crop the Background of an Image in Google Slides? [Link to Existing Article
In Google Slides, you cannot crop the background of an image. Unlike Microsoft PowerPoint, there is no feature that allows you to remove the background of an image in Google Slides.
To crop the background of an image, you can use other third-party software before inserting the picture into your presentation slide. Read my other article for a step-by-step guide to removing the image background in Google Slides.