![How to Change Shape Color in PowerPoint? [Complete Guide!]](https://artofpresentations.com/wp-content/uploads/2022/03/Featured-Image-How-to-Change-Shape-Color-in-PowerPoint.webp)
If you use PowerPoint to make your presentations, chances are that you need to know how to change the shape color no matter the type of presentations you make. Knowing how to change shape color in PowerPoint is one of the most basic skills that you will need to master!
To change color of a shape in PowerPoint, first, select the shape and click on the “Shape Format” tab. Next, click on the “Shape Fill” option and choose a color that you desire from the dropdown that appears. To add a custom color, click on the “More Fill Color” option or use the “Eyedropper tool”.
In this article, we shall understand how to change shape color and shape outline color. Plus, you will get to know how to apply any custom color to the shape and outline using the eyedropper tool!
So, let’s get started!
1. How to Add or Insert Shapes in PowerPoint?
Let’s first start with the basics. In order to change the color of the shape, you will first need to know how to insert a shape in PowerPoint.
The “Insert” tab in PowerPoint allows you to add various objects including shapes to your presentation slides. To add or insert shapes in a PowerPoint slide, follow the 2 simple steps.
Step-1: Click on the “Insert” tab
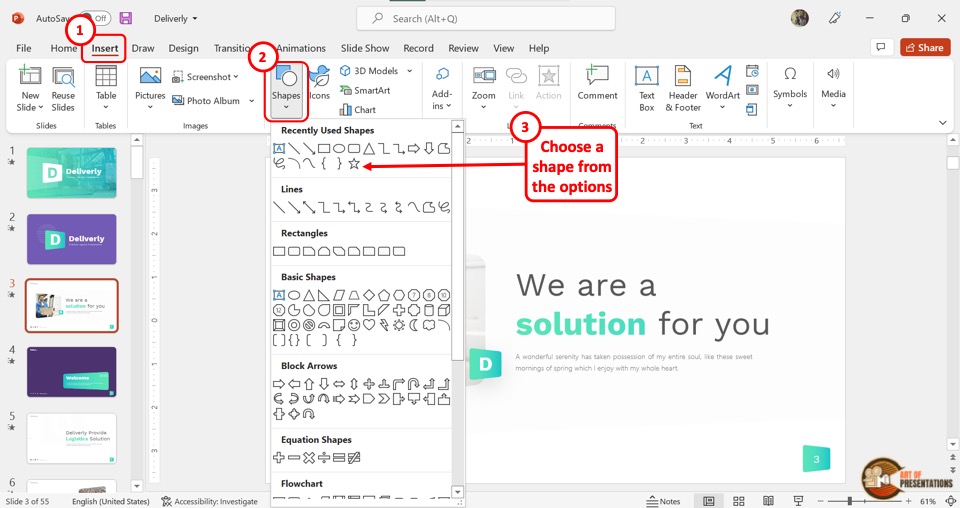
In the menu ribbon located at the top of the screen, click on the “Insert” tab. Then click on the “Shapes” option in the “Illustrations” group of the “Insert” menu.
Step-2: Add the shape to the slide
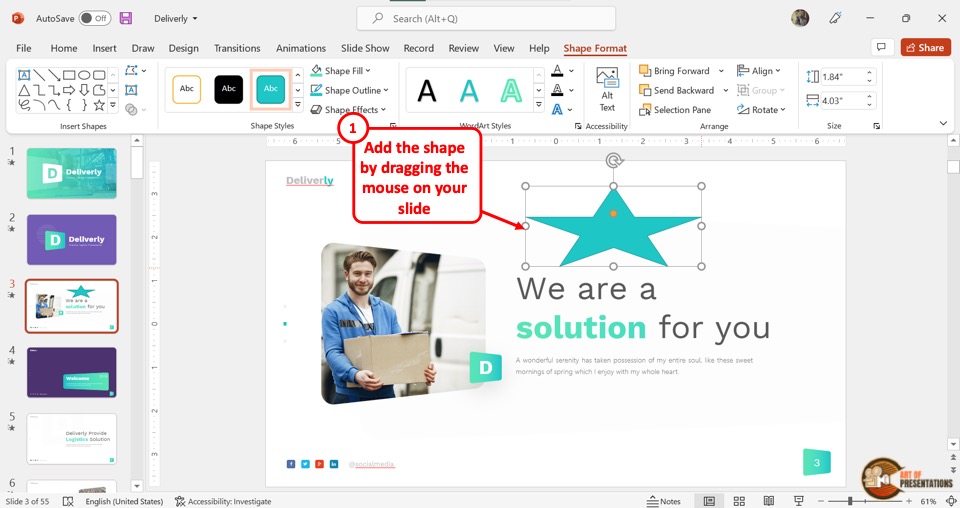
In the dropdown list under the “Shapes” option, click on the shape you want to add to the slide. Then you have to drag the pointer over the slide to draw the selected shape.
2. Add Color to Shape in PowerPoint
Once you have added a shape inside your PowerPoint presentation slide, you can add color to the shape. All you have to do is follow the easy steps mentioned below –
Step-1: Click on the “Shape Format” tab
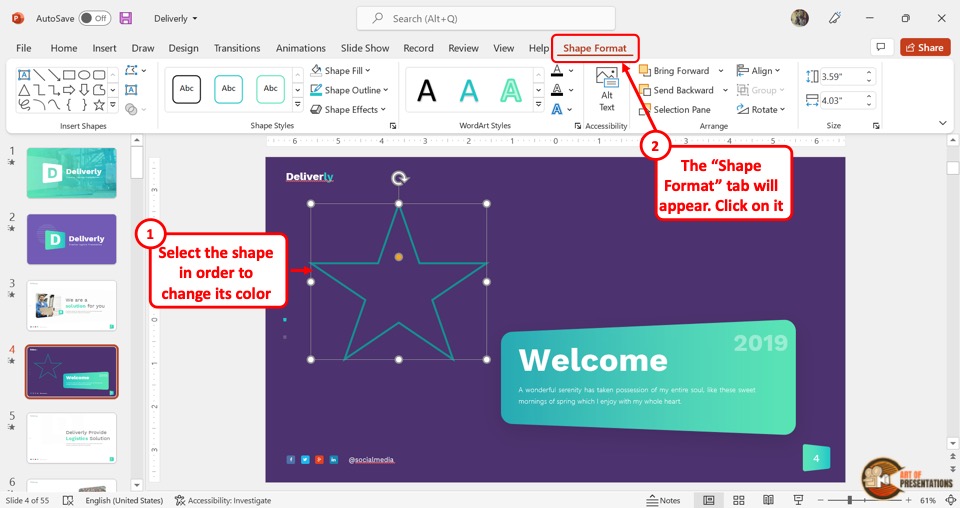
The first step is to select the shape inserted in the slide. Once you select the shape for which you intend to change the color, the conditional “Shape Format” tab will appear.
Then click on the “Shape Format” tab as shown in the image above.
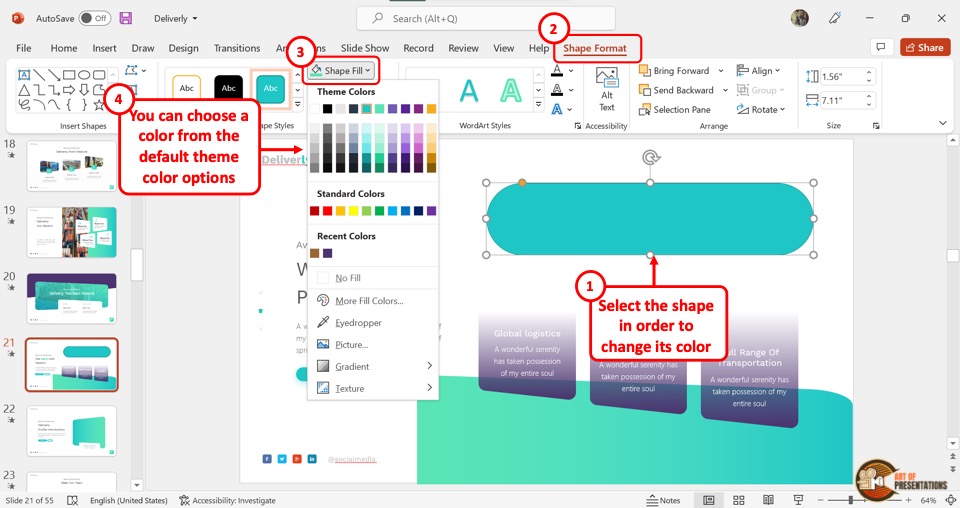
Step-2: Click on “Shape Fill”
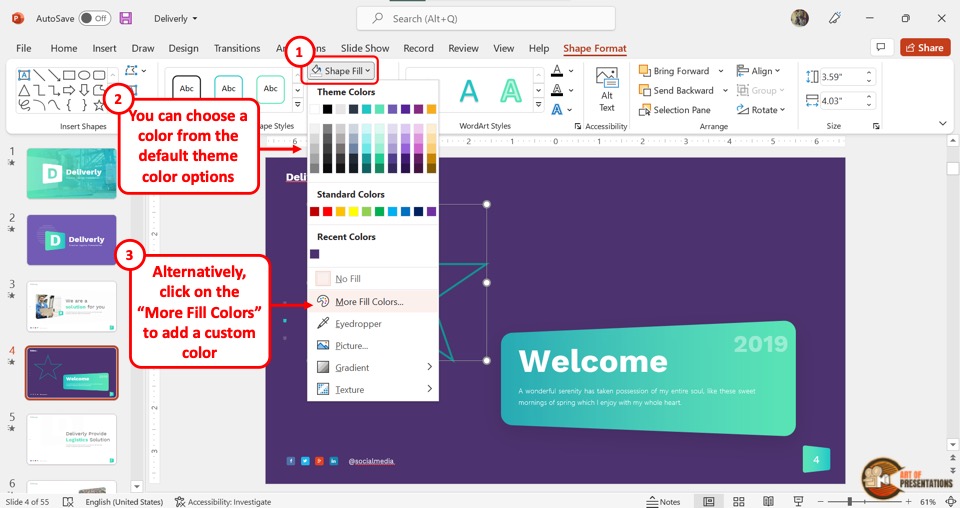
In the “Shape Styles” group of the “Shape Format” tab, click on the “Shape Fill” option. You can now click on your preferred color from the dropdown list.
You will see two sections here i.e. “Theme Colors” and “Standard Colors”. The theme colors change as per the theme whereas the standard colors remain constant irrespective of the theme or the theme colors.
This is perhaps a topic for another article, but long story short, simply choose a color from the options that you see in front of you.
If you don’t like any of the default color options available, you can also click on the “More Fill Colors” option.
Step-3: Select your preferred color
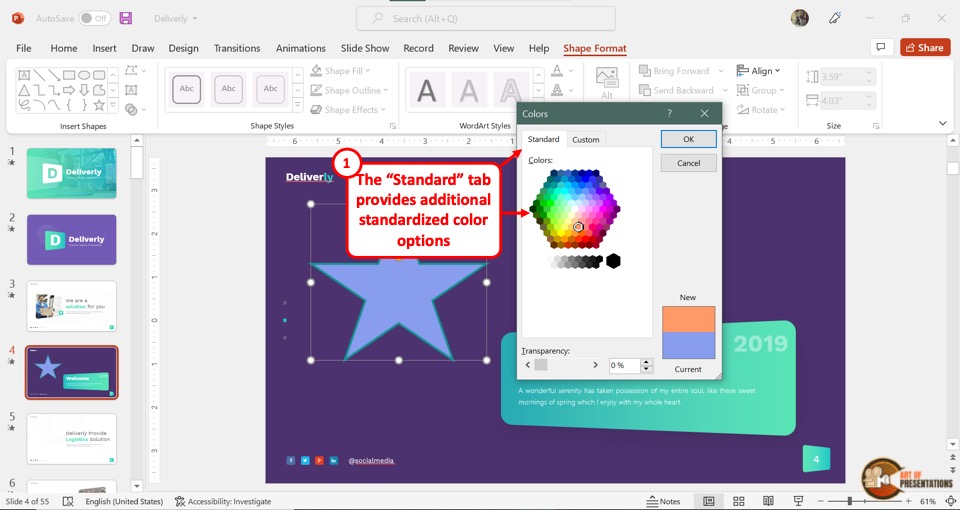
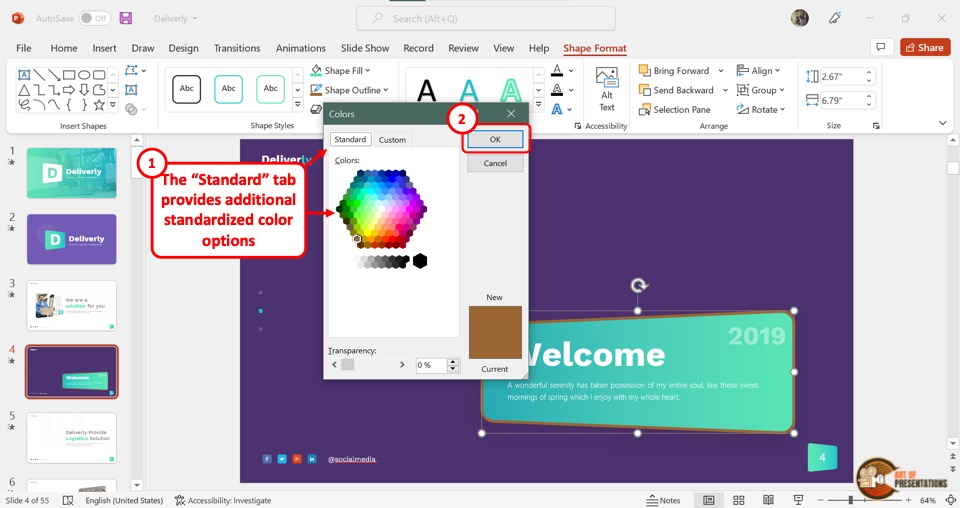
Clicking on the “More Fill Colors” option will launch the “Colors” dialog box.
Here, you can select a standard color from the “Standard” tab or customize the color in the “Custom” tab of the dialog box.
The standard tab will show you additional color options. However, these are standard colors. Meaning, although you get more color options than the default shades we just saw, you still cannot customize and choose a specific color that perhaps matches a brand.
For that, you first need to click on the “Custom” tab.
Step-4: Choose a Color and Click “OK”

If you want to add a very specific color using the HEX or RGB color codes, you can do so using the “Custom” tab.
First, click on the “Custom” tab. Then, enter the color values in the field provided. Once you’ve created the custom color, all you have to do is click on the “OK” button at the right column of the “Colors” dialog box to add the selected color to the shape.
3. How to Change Shape Fill Color in PowerPoint?
The process to change the shape fill color in PowerPoint is the same as adding a color to a shape in PowerPoint.
Make sure that you select the shape first and click on the “Shape Format” tab. Then, click on the “Shape Fill” option and choose a different color from the dropdown that appears.
Simply follow the process outlined in the previous section of this article in order to understand the steps in further detail.
4. How to Change the Shape Color in PowerPoint Using VBA?
Besides the standard commands, you can use the VBA or Visual Basic for Applications option to customize the shape colors in your PowerPoint presentation.
Using the VBA is helpful especially when standard commands wont work (as you will find out in the next section of the article). For instance, when you want to change color of a shape if a mouse hovers over a shape, you can’t do that using any standard process.
Alternativley, what if you want to change the color of all shapes in your presentation in one shot! In such scenarios, using the VBA to change color of your shape is quite helpful.
To use the VBA option, follow the steps mentioned below –
Step-1: Click on the “Visual Basic” option
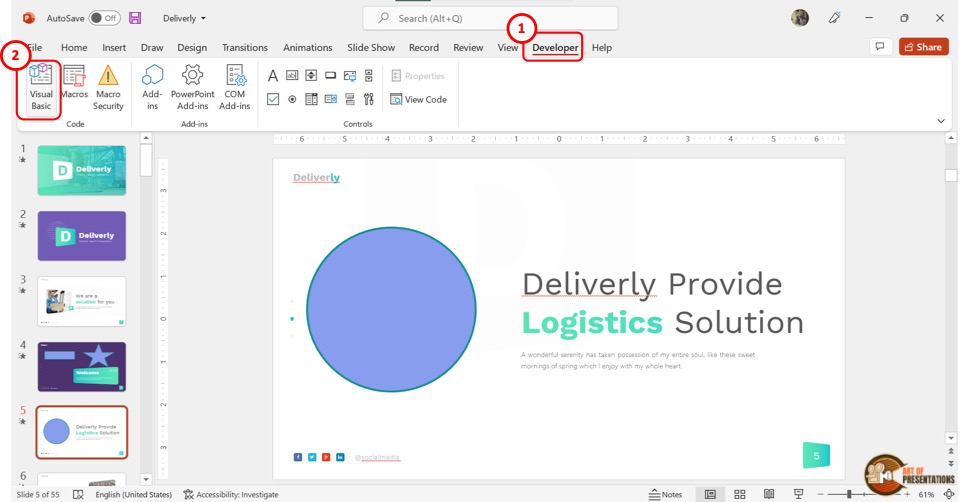
In the menu ribbon at the top of the screen, click on the “Developer” tab. Then click on the “Visual Basic” option which is the first icon in the “Code” group of the “Developer” tab.
Also Read – How to Enable the Developer Tab in PowerPoint [Step-by-Step Guide!]
Alternatively, you can press the “Alt+F11” keys on your keyboard to launch the “Microsoft Visual Basic for Applications” window.
Step-2: Click on the “Module” option
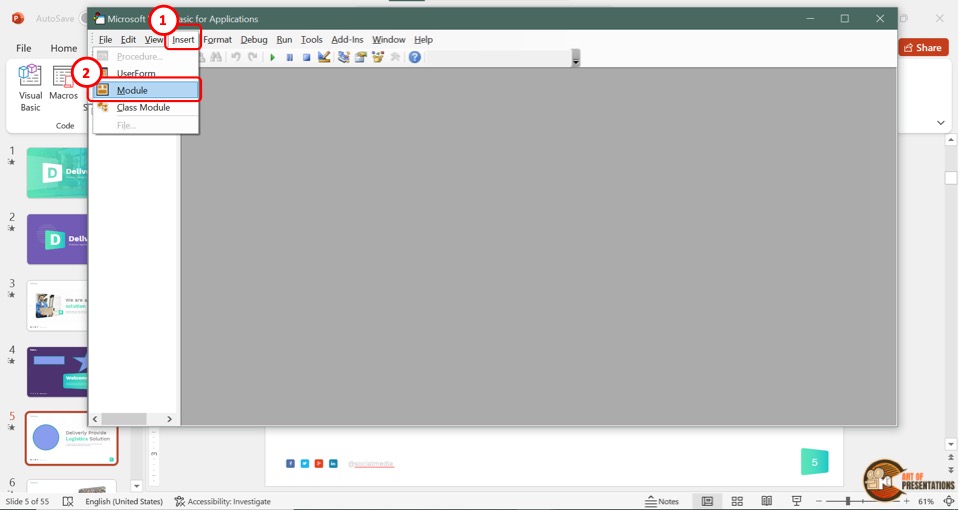
In the “Microsoft Visual Basic for Applications” window, click on the “Insert” tab. Then click on the “Module” option from the dropdown menu under the “Insert” tab.
Step-3: Add your Macro Code
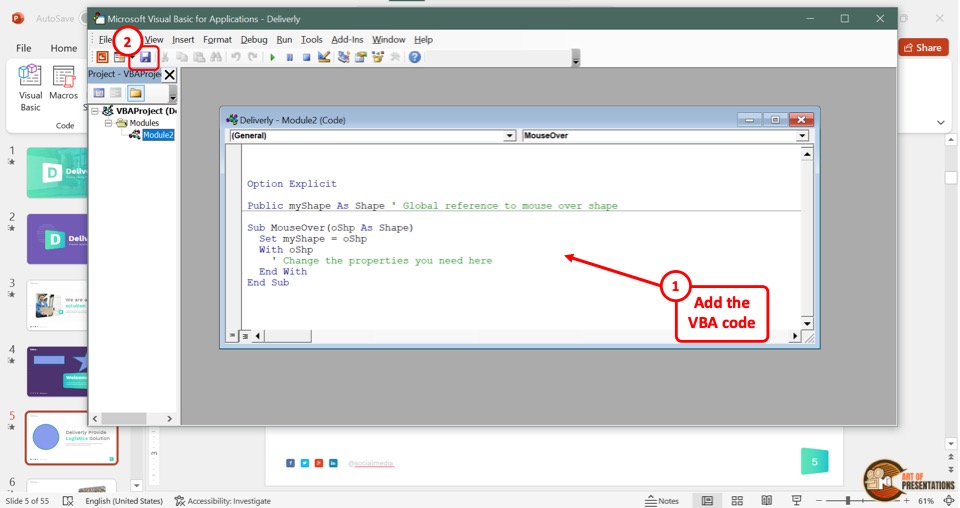
In the module you created, type in your own macro code (hint – check out the next two sections to get some macro references). You can also paste a macro code from other sources. Then click on the “Save” button in the toolbar of the VBA window.
Alternatively, you can press the “Ctrl+S” keys on your keyboard.
Step-4: Click on the “Run Macro” option
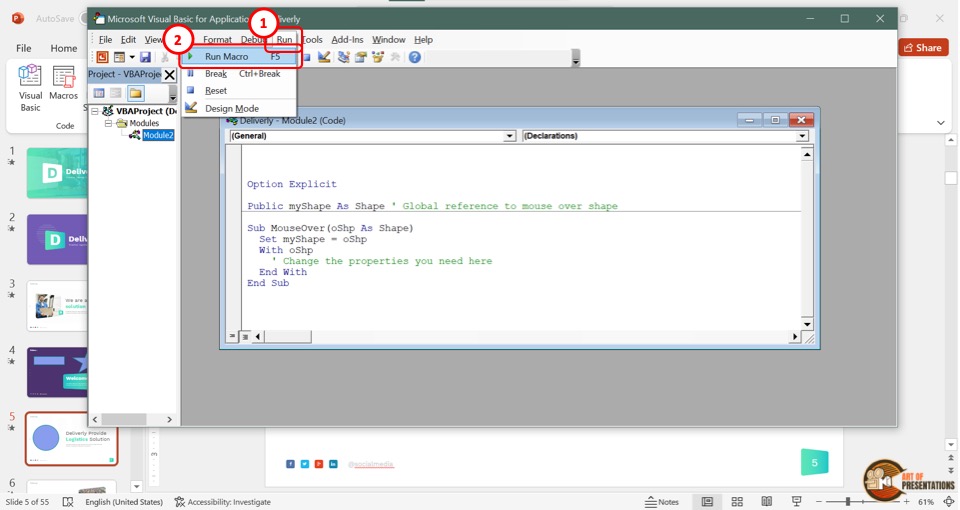
The final step is to run the VBA code. To do so, click on the “Run” tab. Then click on the “Run Macro” option from the dropdown menu. You can alternatively press the “F5” key on your keyboard.
5. How to Change Shape Color on a Click in PowerPoint?
Using the VBA feature in PowerPoint, you can add shapes in slides that change color when clicked on during the presentation.
To do so, you have to create a macro following the steps mentioned in section 4 of this article (previous section).
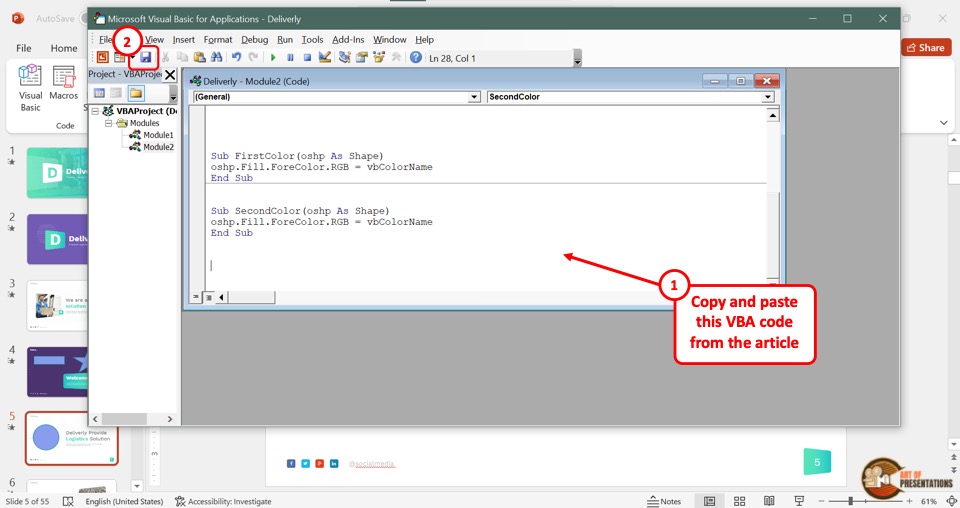
For step 3, simply copy and paste the code from below into the macro.
Sub FirstColor(oshp As Shape)
oshp.Fill.ForeColor.RGB = vbColorName
End Sub
Sub SecondColor(oshp As Shape)
oshp.Fill.ForeColor.RGB = vbColorName
End Sub
In the “ColorName” of the code, type in your preferred colors. Then press the “F5” key on your keyboard to run the VBA code.
6. How to Change Color of a Shape With Mouse Hover in PowerPoint?
In Microsoft PowerPoint, you can also create shapes that change color with mouse hover without even clicking. To do so, you have to first add two shapes stacked together with two different colors.
Then follow the steps mentioned in section 4 for each shape separately.
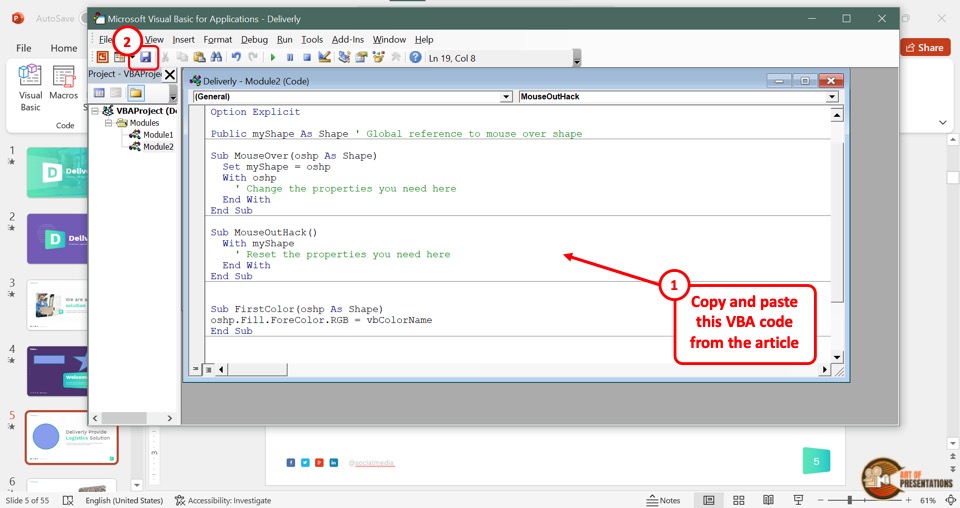
For the first shape, enter the following code in the third step:
Option Explicit
Public myShape As Shape ‘ Global reference to mouse over shape
Sub MouseOver(oshp As Shape)
Set myShape = oshp
With oshp
‘ Change the properties you need here
End With
End Sub
For the second shape, enter the following code in the module:
Sub MouseOutHack()
With myShape
‘ Reset the properties you need here
End With
End Sub
When you run the macro, this will make the shape change colors when you hover the mouse over it.
7. How to Change the Default Shape Color in PowerPoint?
Microsoft PowerPoint allows you to change the default shape for your copy of the software. You can use the “Set as Default Shape” feature to change the default color of the shape.
Here’s what you need to do –
Step-1: Click on the “Insert” tab
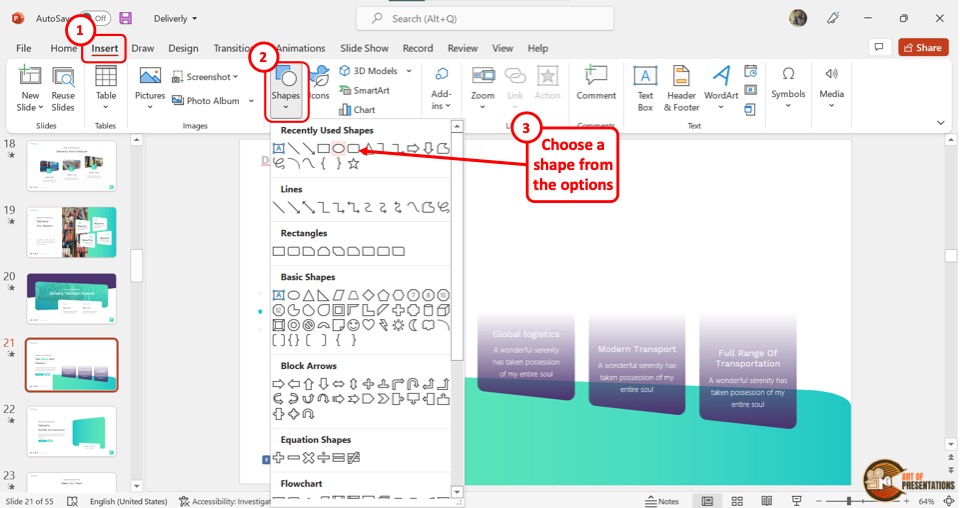
The first step is to add a new shape to the slide. To do so, click on the “Insert” tab in the menu ribbon. In the “Insert” menu, click on the “Shapes” option to open a dropdown list.
Click on your preferred shape from the dropdown list to add it to the slide.
Step-2: Click on the “Shape Fill” option
Now click on the “Shape Fill” option in the “Shape Styles” group of the “Shape Format” tab. From the dropdown menu under “Shape Fill”, select the color that you want as default for all shapes.
Step-3: Click on “Set as Default Shape”
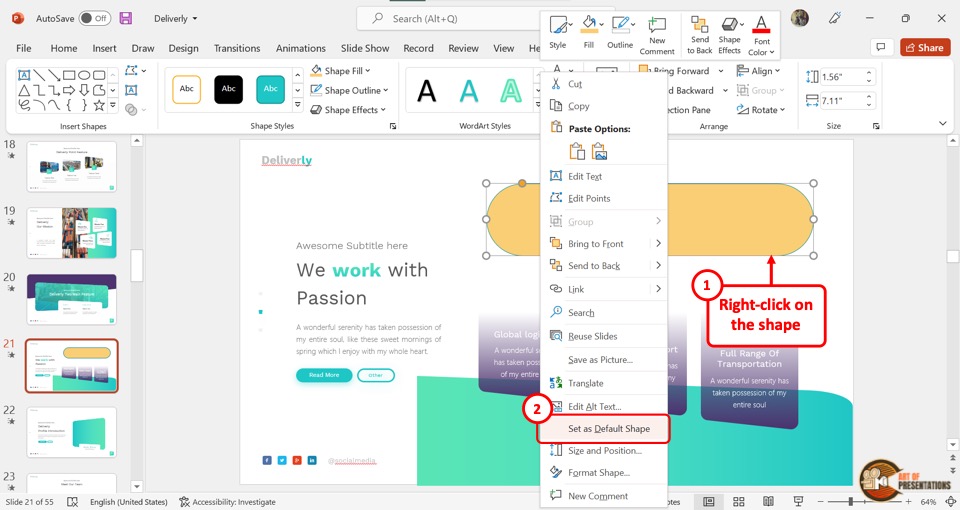
You have to now “Right Click” on the shape with the changed fill color. In the right-click menu, click on the “Set as Default Shape” option to save the new color as the default shape color.
8. Add Color to Shape Outline in PowerPoint
Adding a color to a shape outline has a similar process to that of changing the shape fill color.
To add or change the color of shape outline in PowerPoint, first, select the shape. Then, click on the contextual “Shape Format” tab. From the ribbon, click on the “Shape Outline” option, and choose a color for the outline from the dropdown that appears.
Here’s a visual guide of the steps that you need to follow –
Step-1: Click on the “Shape Format” tab
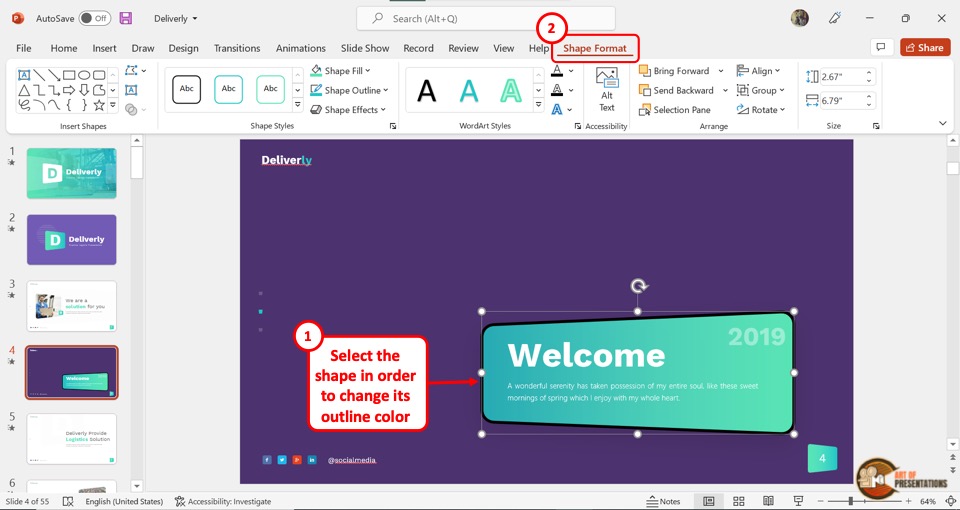
In the open slide, click on the shape to access the tool tabs. Then click on the “Shape Format” tab in the menu ribbon.
Step-2: Click on the “Shape Outline” option
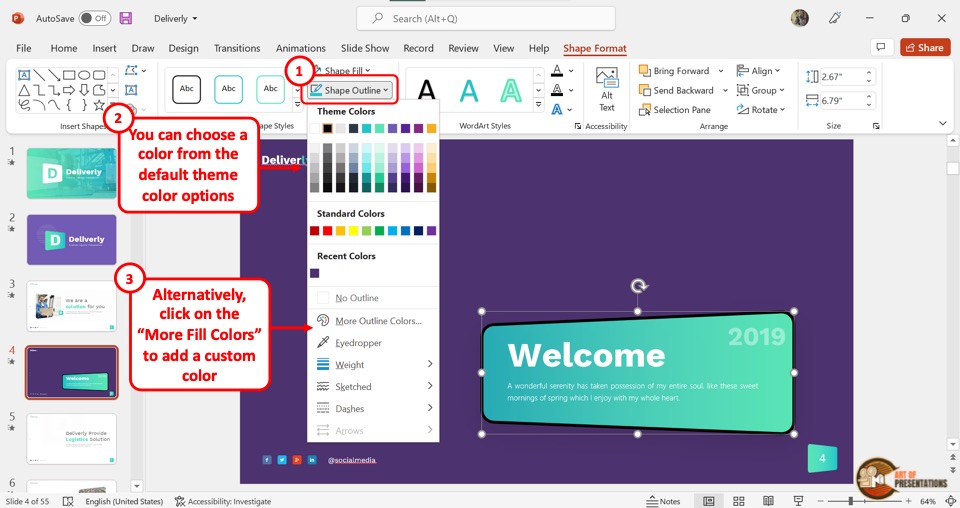
In the “Shape Styles” group of the “Shape Format” menu, click on the “Shape Outline” option. Then click on the “More Outline Colors” option from the dropdown menu to launch the “Colors” dialog box.
Step-3: Click on the “OK” button
In the “Colors” dialog box, click on the “Standard” tab to select a standard color. You can also click on the “Custom” tab to customize the outline color.
Then click on the “OK” button to add the selected color to the shape outline.
9. How to Change the Color of Shape Outline in PowerPoint?
In Microsoft PowerPoint, the simple process for adding and changing outline colors of the shapes is completely similar. To change the outline color of a shape, follow the steps for adding the shape outline color discussed in section 8.
10. How to Partially Fill a Shape in PowerPoint?
In Microsoft PowerPoint, there are no features available to partially fill a shape in PowerPoint. To do it, you have to first insert two shapes side by side. Then follow the 3 quick steps:
Step-1: Click on “Fill”
“Right Click” on the first shape and click on the “Fill” option from the pop-up menu. Then select your preferred color for the shape.
Step-2: Click on the “No Fill” option
Now “Right Click” on the second shape and click on the “Fill” option from the pop-up menu. In the “Fill” dropdown list, click on the “No Fill” option.
Step-3: Click on “Outline”
Now all you have to do is click on the “Outline” option from the pop-up menu and select the “No Outline” option for the first shape. Repeat the step for the second shape to make it look like a partially filled shape.
Credit to pch.vector (on Freepik) for the featured image of this article (further edited).