![How to Change Picture Color in PowerPoint? [Full Tutorial!]](https://artofpresentations.com/wp-content/uploads/2022/10/Featured-Image.jpg)
PowerPoint provides a great way to make graphics look custom-made and professional. Whether you need to make your picture more on-brand or just want it to look attractive, you can easily adjust the color intensity and tone in PowerPoint. It allows adding multiple color effects to your pictures according to any of your theme’s colors or business elements.
To change the picture color in PowerPoint, first, right-click on the picture. From the options, click on “Format Picture”. Adjust the picture color, tone, saturation, and correction from the “Format Picture” pane that appears on the right. You can also use the “Picture Format” tab for more options.
You can also change the color of a black-and-white picture, add picture transparency, and remove the background color of your pictures as well as there’s also an option to “reset” if you want all of your changes reverted at any point.
Are you ready to dive into a step-by-step guide on changing picture color in PowerPoint? In this tutorial, we have covered EVERYTHING required to change the picture color in PowerPoint and a diverse range of using PowerPoint picture editor tools.
Let’s get started!
1. Change Color Saturation of Picture in PowerPoint
In Microsoft PowerPoint, you can change the picture saturation to control the amount of color in a picture. To change the color saturation of a picture, follow the 3 easy steps.
Step-1: Click on the “Format Picture” option
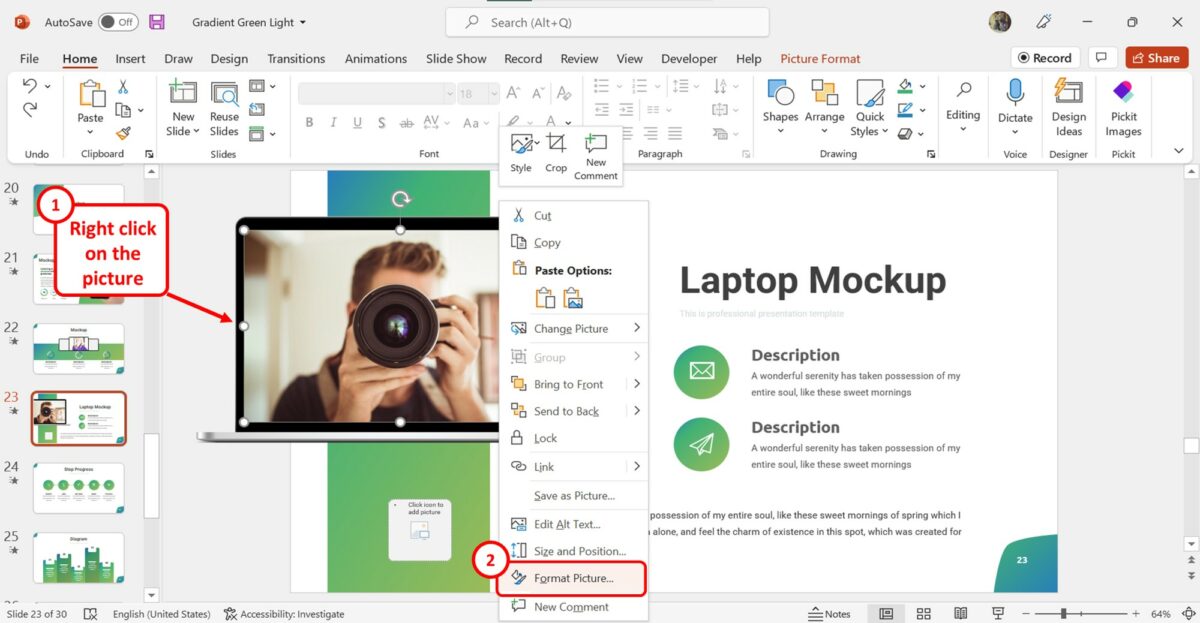
In the open slide, you have to first “Right Click” on the picture that you want to change the saturation for. Then click on the “Format Picture” option in the right-click menu. This will open the “Format Picture” sidebar.
Step-2: Click on the “Picture Color” option

In the “Format Picture” sidebar on the left side of the screen, click on the “Picture” option which is the last icon at the top. Then click on the “Picture Color” option in the sidebar.
Step-3: Click on the “Saturation” box
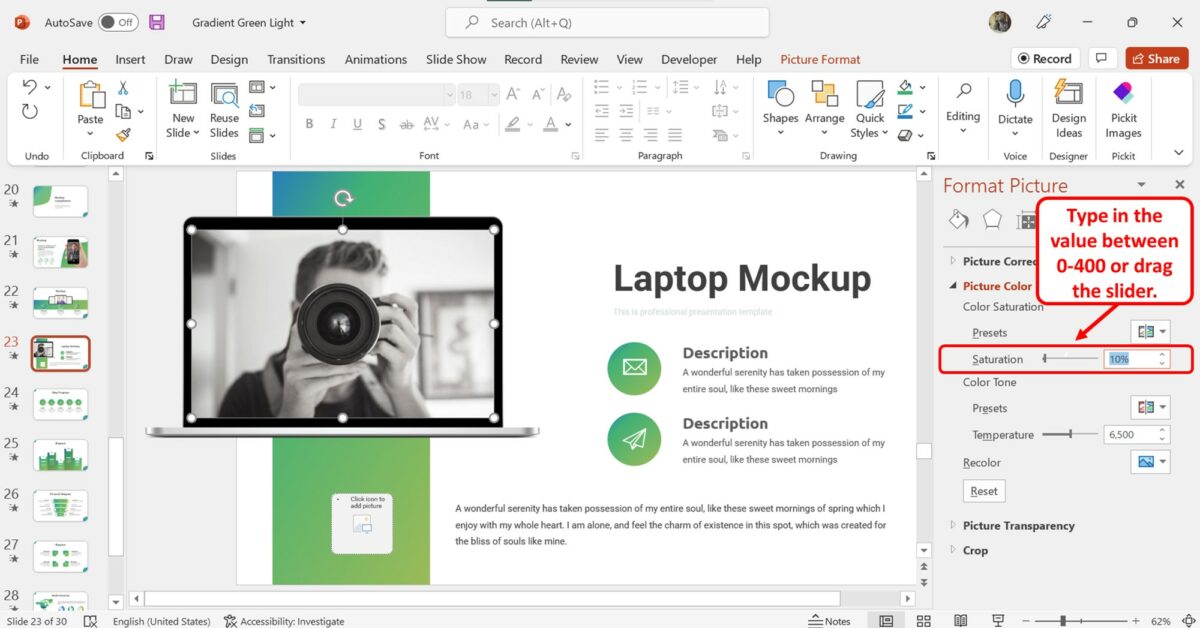
Under the “Picture Color” section in the “Format Picture” sidebar, click on the “Saturation” box. Then type in a value between “0” and “400” in the box. You can also drag the slider to the right to increase the saturation of the selected picture in PowerPoint.
2. Change Color Tone of a Picture in PowerPoint
In Microsoft PowerPoint, the color tone of a picture is easily adjustable. You can change the color tone of a selected image using the “Picture Color” feature. All you have to do is follow the 4 quick steps.
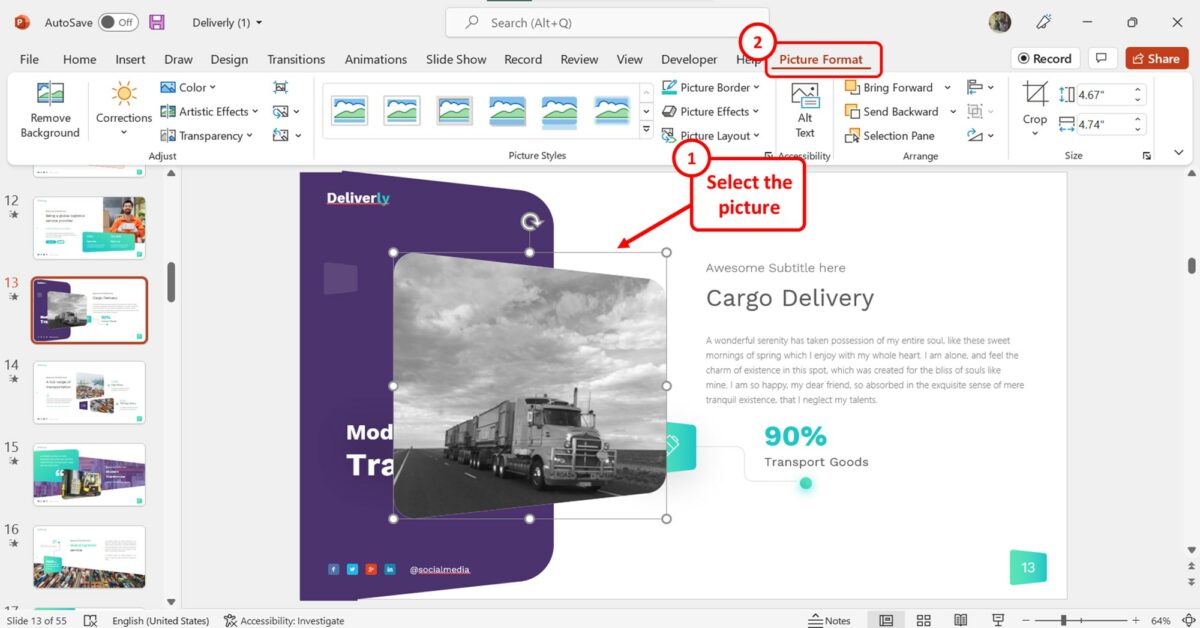
Step-1: Click on the “Picture Format” tab
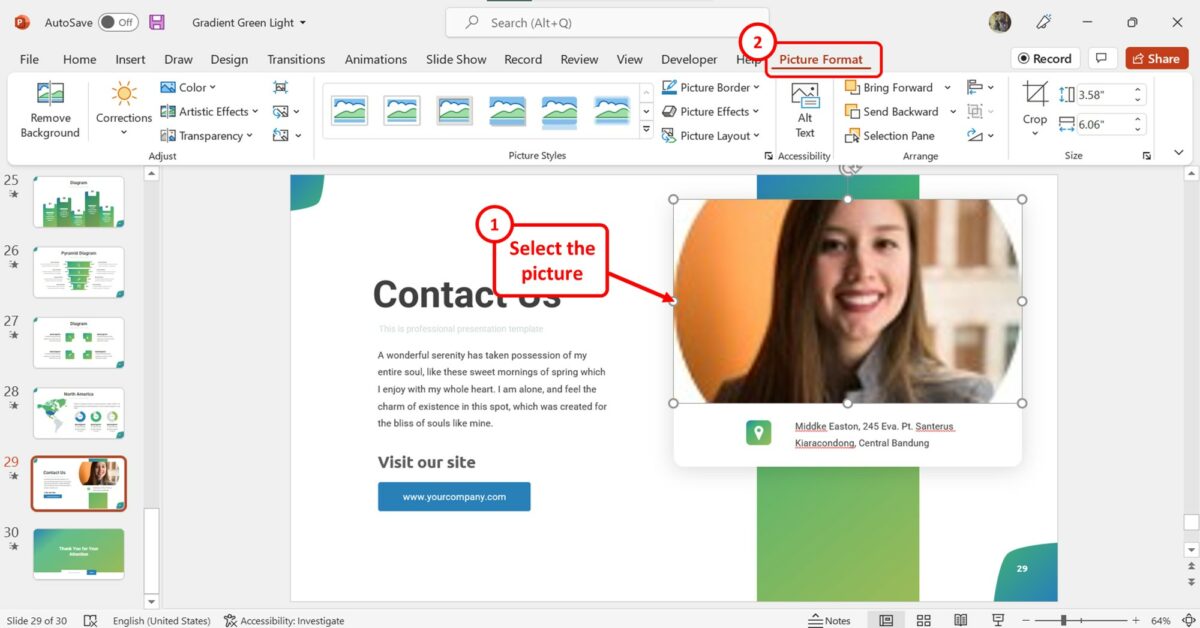
The first step is to select the picture on the slide. Then click on the “Picture Format” tab in the menu ribbon located at the top of the screen.
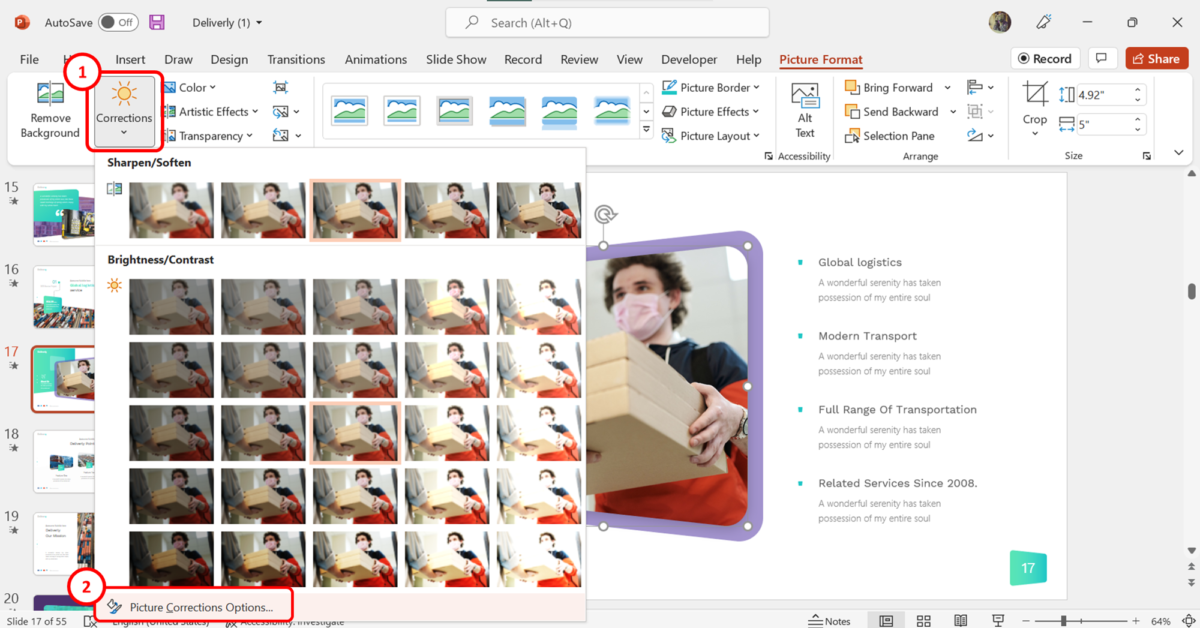
Step-2: Click on “Picture Corrections Options”
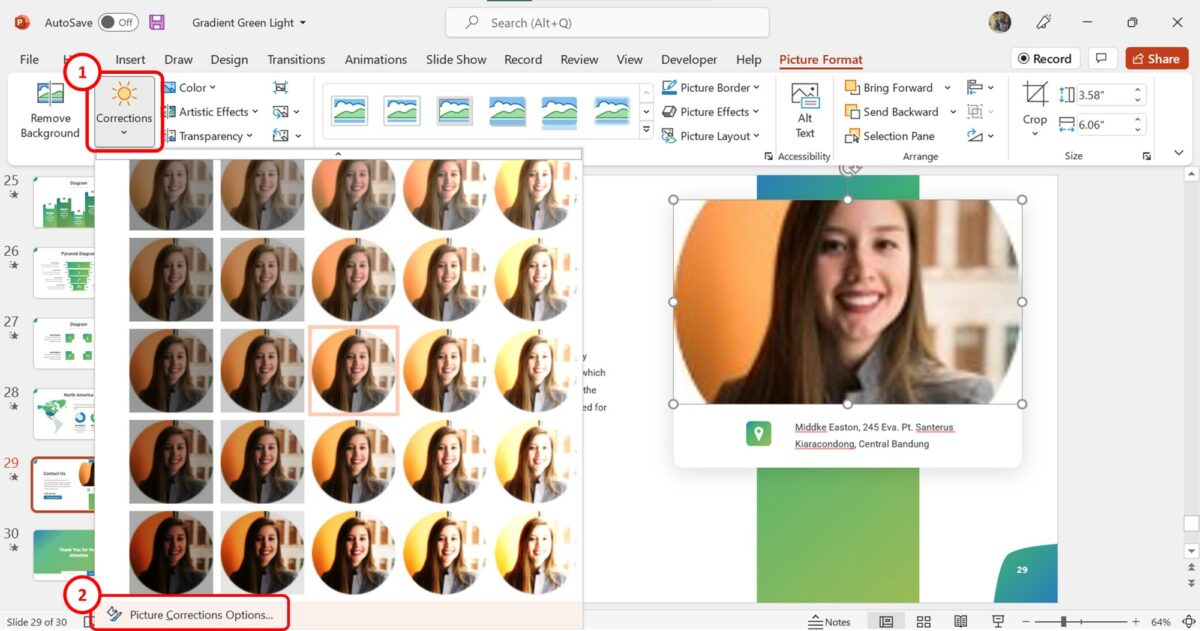
In the “Picture Format” tab, click on the “Corrections” option. Then click on “Picture Corrections Options” at the bottom of the dropdown menu under the “Corrections” option. This will open the “Format Picture” sidebar.
Step-3: Click on the “Picture Color” option

The next step is to click on the “Picture Color” option in the “Format Picture” sidebar on the left side of the screen. This will expand the options to customize the picture color.
Step-4: Click on the “Temperature” box
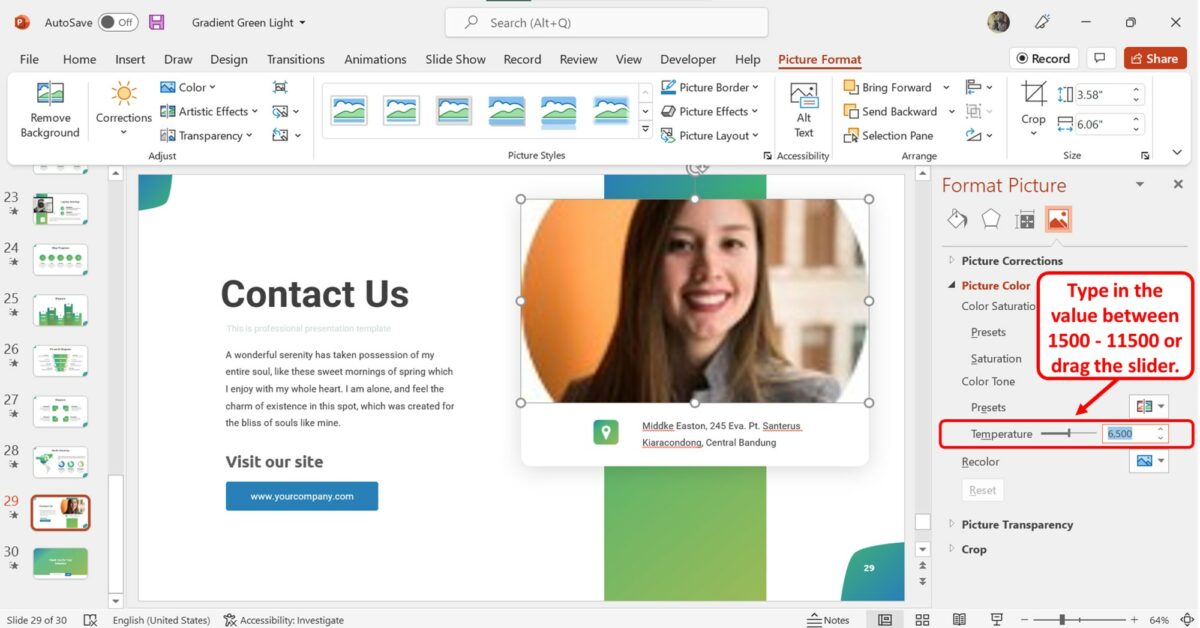
Under the “Picture Color” section, click on the “Temperature” box and enter a value between “1500” to “11500” to change the color tone of the selected picture. You can also drag the “Temperature” slider to adjust the color tone.
3. Recolor Picture Options in PowerPoint
The “Recolor” option is Microsoft PowerPoint will recolor a selected image on a slide. You can choose a preset or even use a custom color to recolor a picture. To use the “Recolor” feature, follow the 3 easy steps.
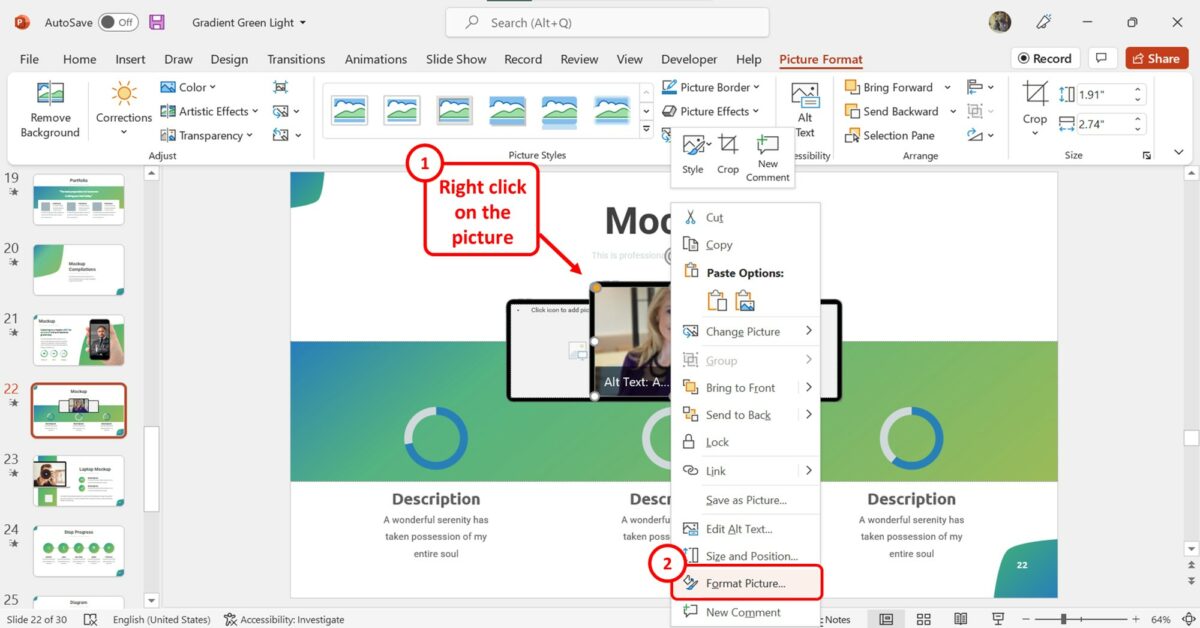
Step-1: Click on the “Format Picture” tab
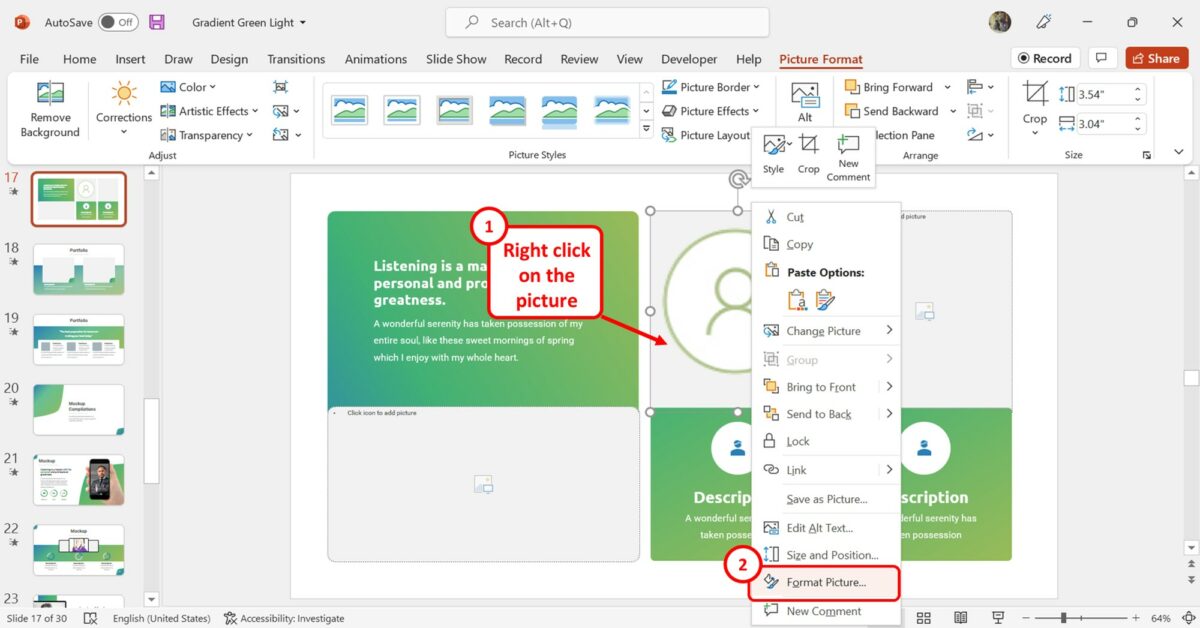
The first step is to “Right Click” on the picture that you want to recolor. Then click on the “Format Picture” option from the right-click menu to access the “Format Picture” sidebar.
Step-2: Click on the “Picture” icon
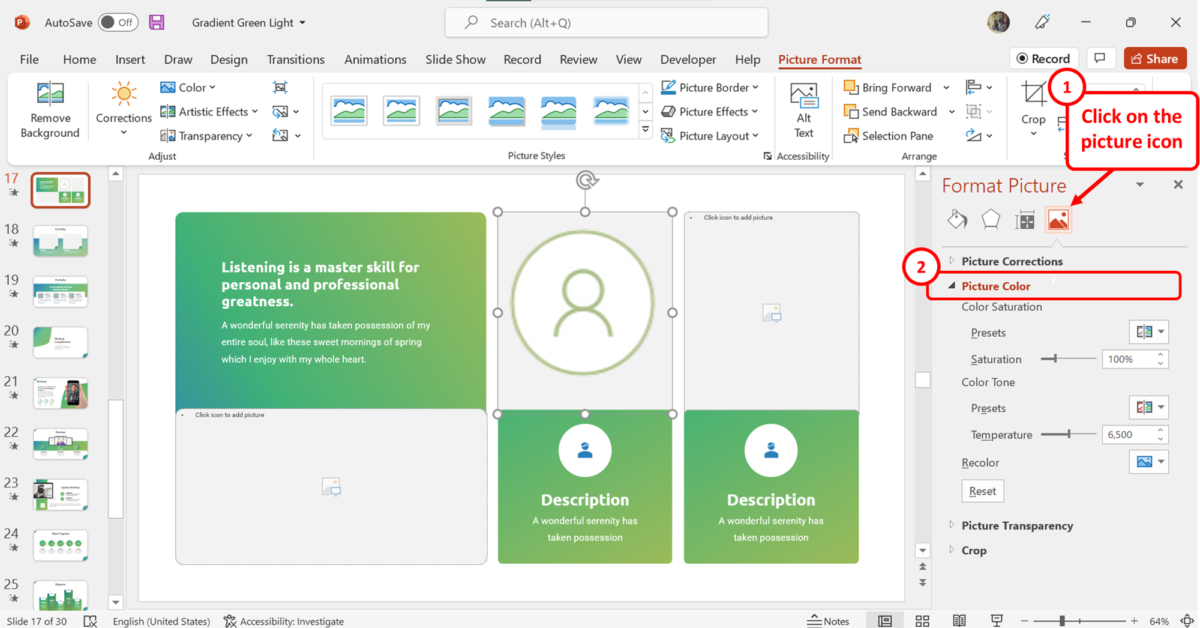
The next step is to click on the “Picture” option. It is the fourth icon at the top of the “Format Picture” sidebar on the right side of the screen. Then click on the “Picture Color” option.
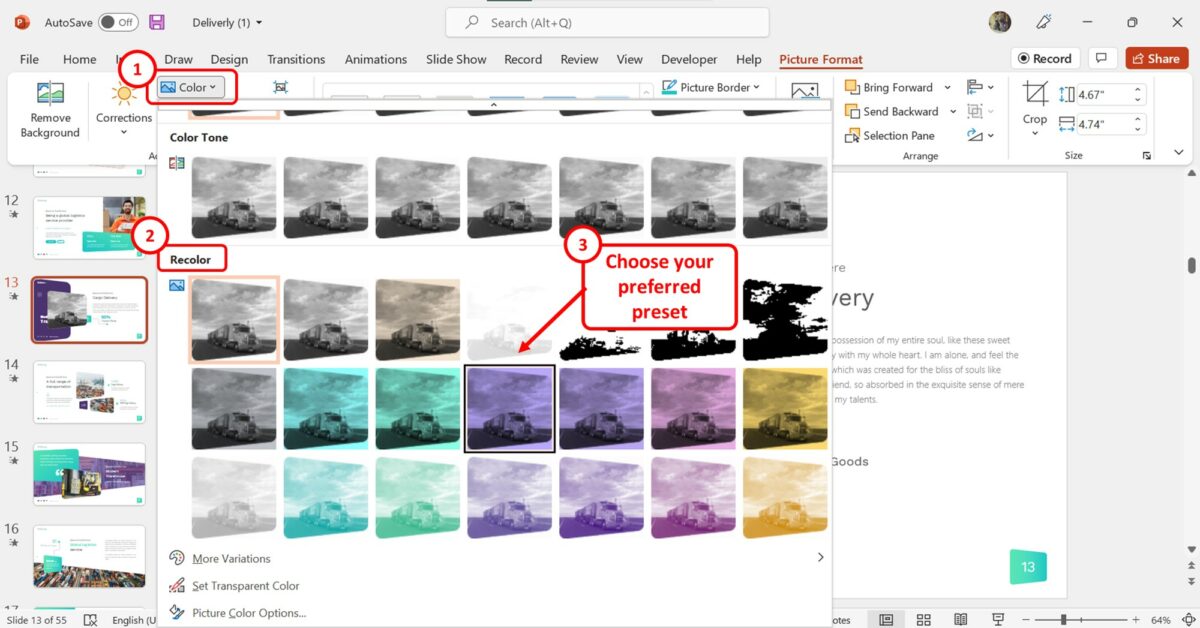
Step-3: Click on the “Recolor” option
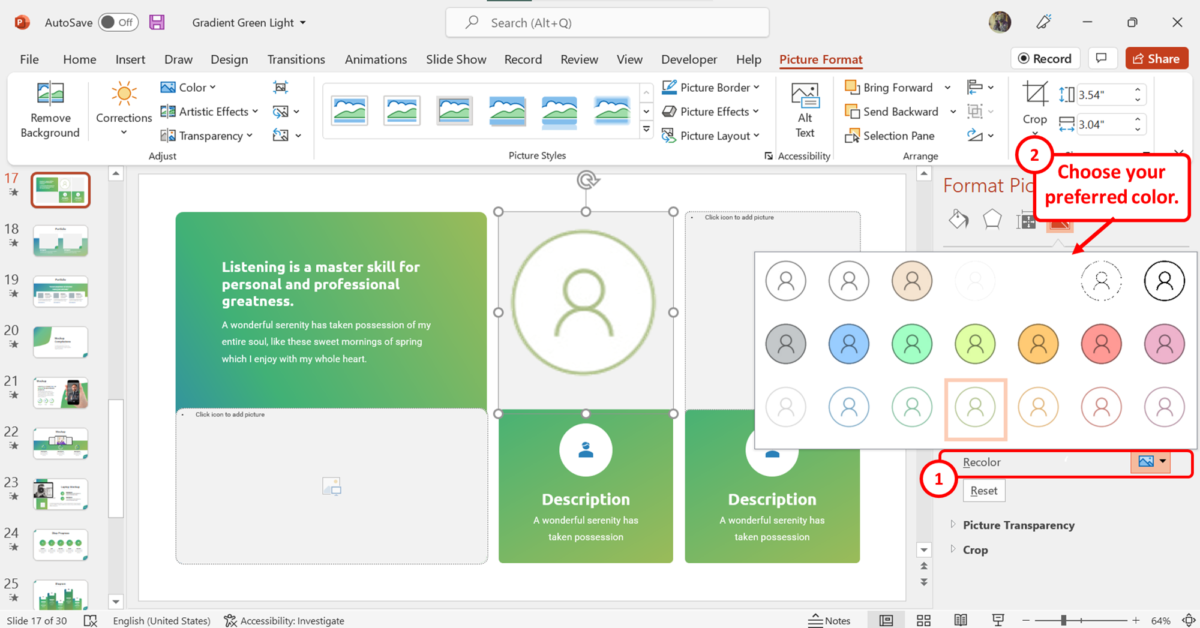
Under the “Picture Color” section of the “Format Picture” sidebar, click on the “Recolor” option. Now you can choose your preferred color from the pop-up menu to recolor the selected picture.
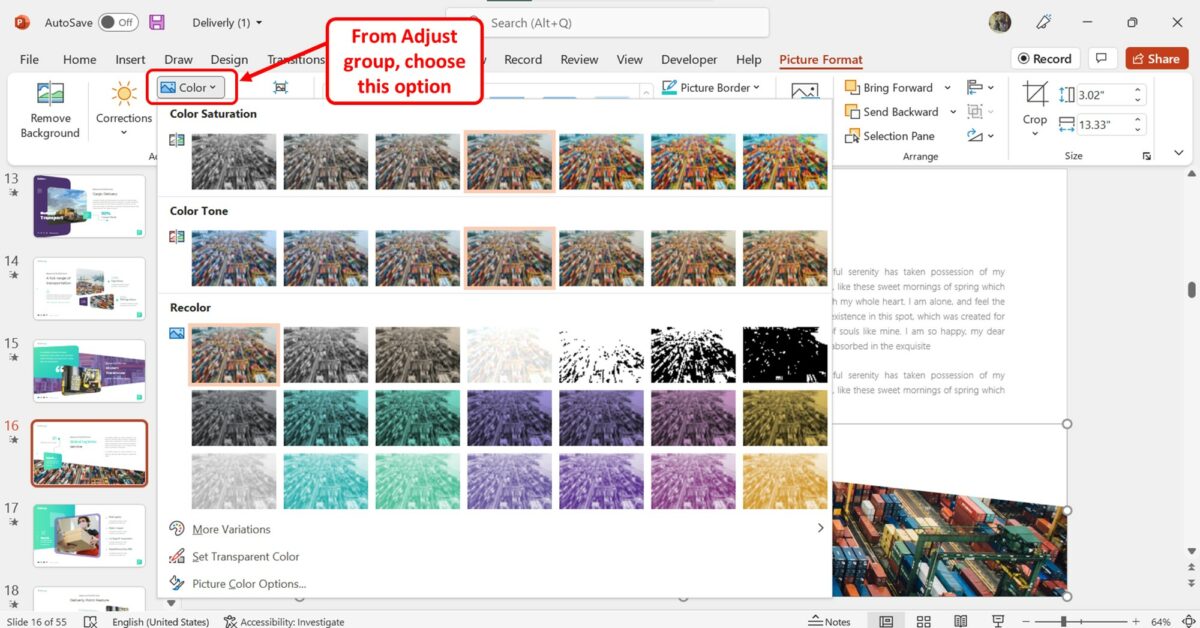
4. More Color Variations in PowerPoint
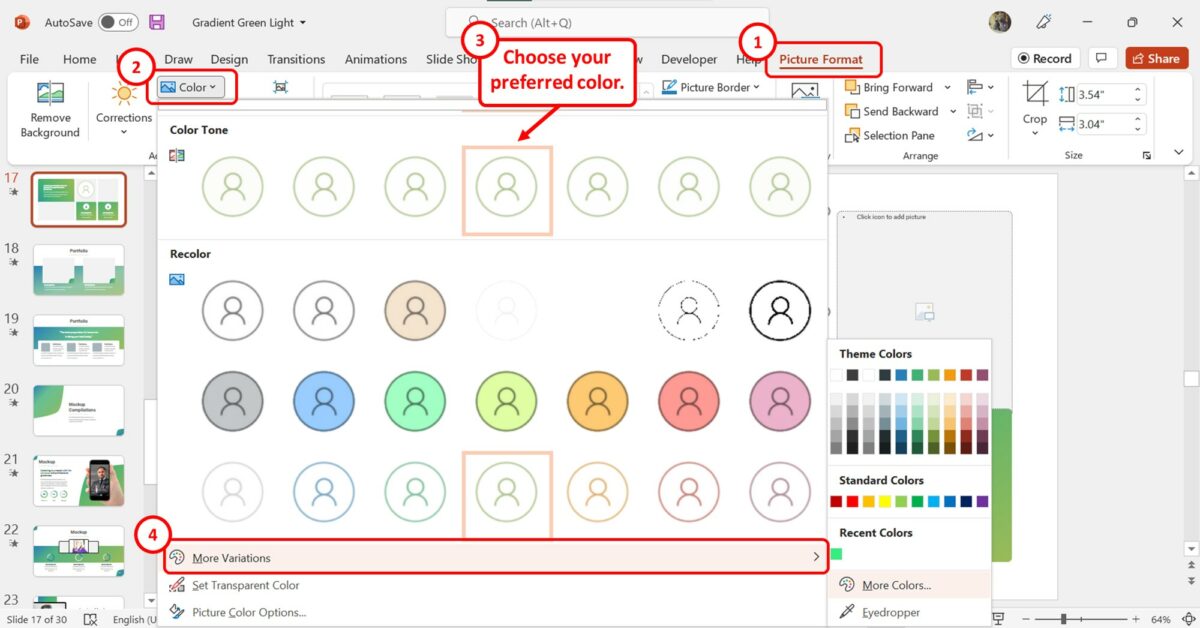
The “More Variations” option in the “Picture Format” tab in PowerPoint allows you to select a theme color or a custom color to recolor a picture on the presentation slide.
To access the “More Variations” option, you have to click on the “Color” feature in the “Picture Format” tab. Point at the “More Variations” option at the bottom of the dropdown menu to open a secondary menu containing more color variations for recoloring the image.
5. Customize Brightness and Contrast of Image in PowerPoint
In Microsoft PowerPoint, you can edit an image after inserting it into a slide. You can customize the brightness and the contrast settings of a picture using the “Picture Corrections” tool available in both the “Picture Format” tab and the “Format Picture” sidebar.
5.1 Using Picture Corrections Option
The “Picture Corrections” option in Microsoft PowerPoint allows you to quickly adjust the brightness or the contrast of a picture inserted into the slide. To learn more about picture corrections in PowerPoint, read my article here. To customize the brightness or the contrast of a picture, follow the 3 quick steps.
Step-1: Click on the “Picture Format” tab
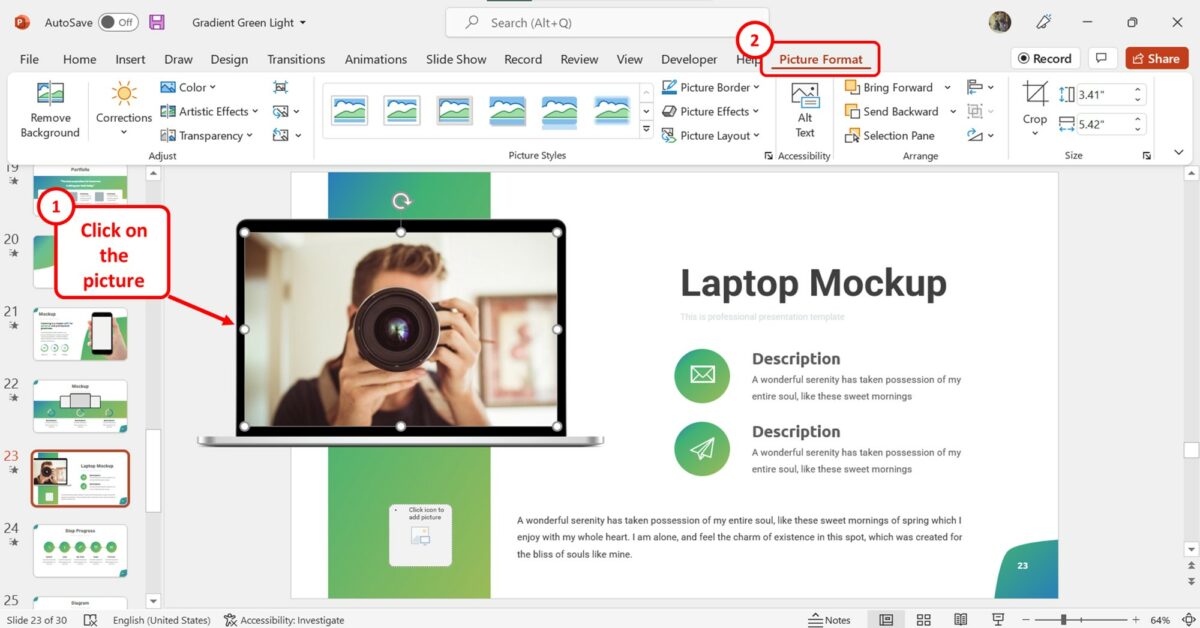
The first step is to click on the picture on the slide. Then click on the “Picture Format” tab in the menu ribbon.
Step-2: Click on the “Corrections” button
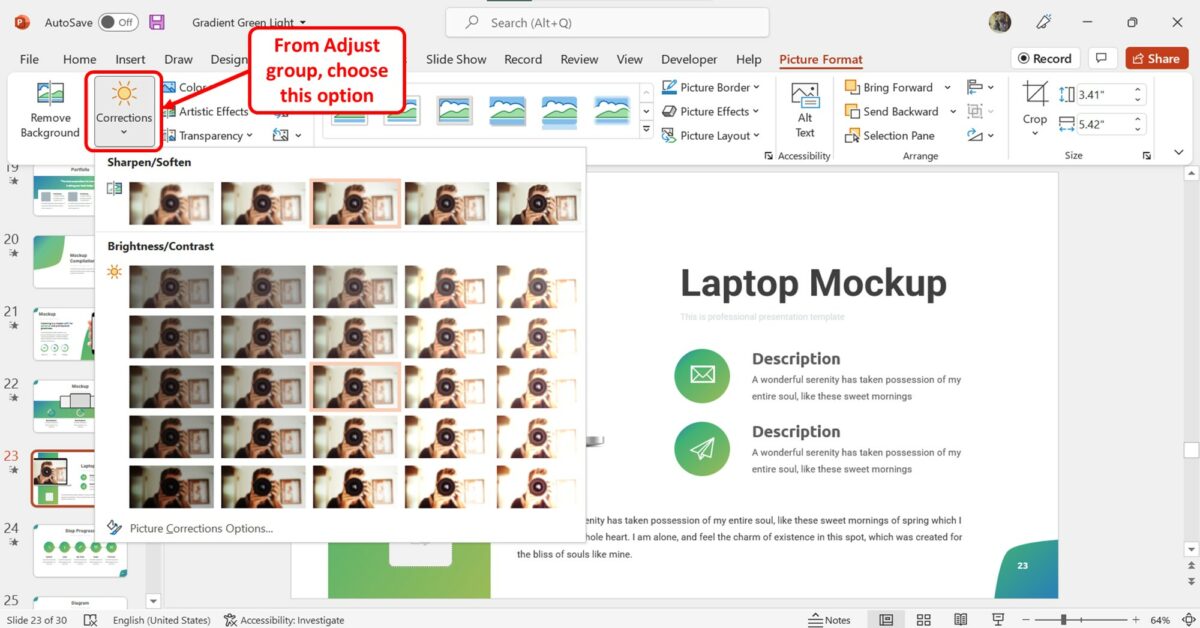
In the “Adjust” group of the “Picture Format” tab, click on the “Corrections” option. This will open a dropdown menu containing the preset brightness and contrast customization options.
Step-3: Click on your preferred brightness or contrast preset

In the dropdown menu under the “Corrections” option, hover your pointer over the presets in the “Brightness/Contrast” section to see the custom brightness and contrast preview. Then click on your preferred preset.
5.2 Using Format Picture Panel
In Microsoft PowerPoint, you can also customize the brightness or the contrast of an image manually in the “Format Picture” panel. You can click here to read my article about the “Format Picture” feature in PowerPoint. To control image brightness and contrast manually, follow the 4 quick steps.
Step-1: Click on the “Format Picture” option
The first step is to “Right Click” on the image for which you want to customize the brightness or contrast. Then click on the “Format Picture” option in the right-click menu.
Step-2: Click on the “Picture” icon
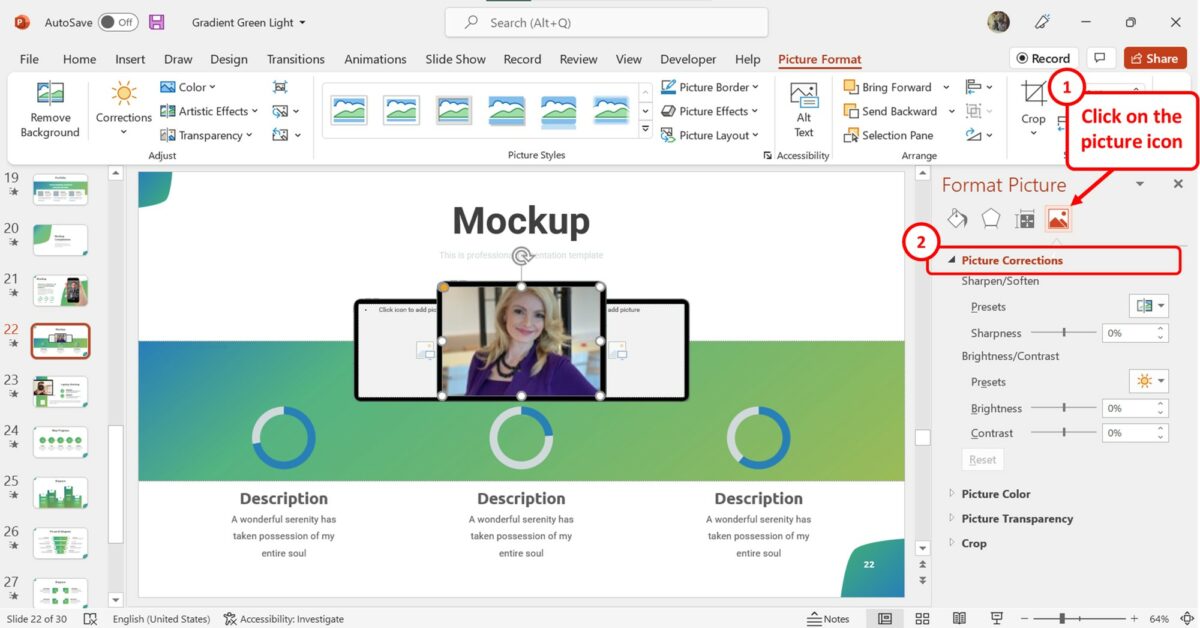
In the “Format Picture” sidebar at the right side of the screen, click on the “Picture” option which is the last icon at the top. Then click on “Picture Corrections” to expand the picture correction options.
Step-3: Click on the “Brightness” box
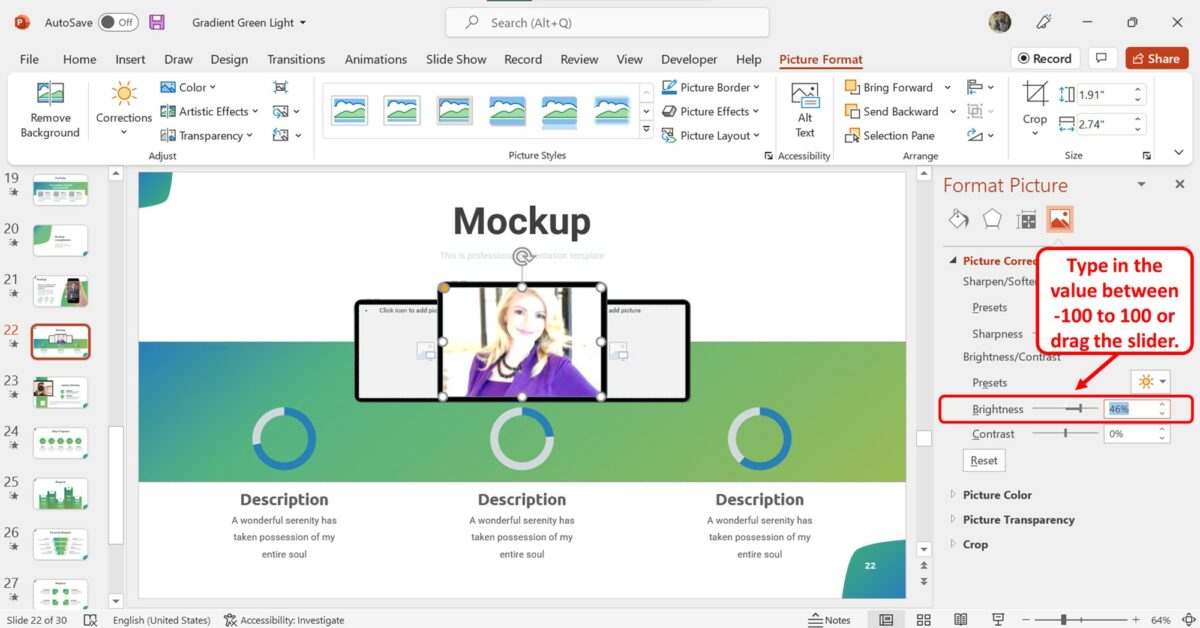
In the “Picture Corrections” section of the “Format Picture” sidebar, click on the “Brightness” box. Now you can type in any value between “-100” to “100” to customize the brightness. You can also drag the “Brightness” slider to adjust the brightness of the picture.
Step-4: Click on the “Contrast” box
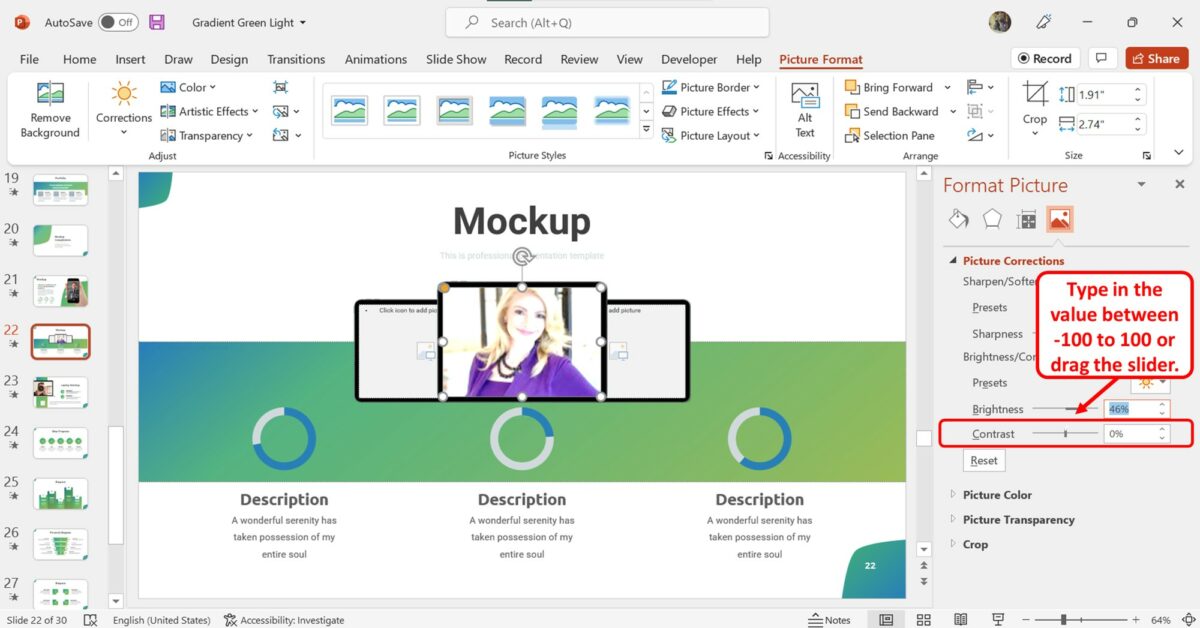
Similarly, you can adjust the contrast of the picture. Click on the “Contrast” box in the “Format Picture” sidebar and type in a contrast value between “-100” to “100”. You can also drag the slider to adjust the contrast.
6. Using Set Transparent Color Option to Remove White Background from Image
In Microsoft PowerPoint, you can remove the unnecessary white background in your picture after inserting it into a slide. To learn about all the tools you can use to remove the background, you can read my article here. To remove the white background using the “Set Transparent Color” feature, follow the 3 simple steps.
Step-1: Click on the “Picture Format” tab

In the open slide, you have to first select the picture with white background. Then click on the “Picture Format” tab in the menu ribbon located at the top of the screen.
Step-2: Click on the “Set Transparent Color” option
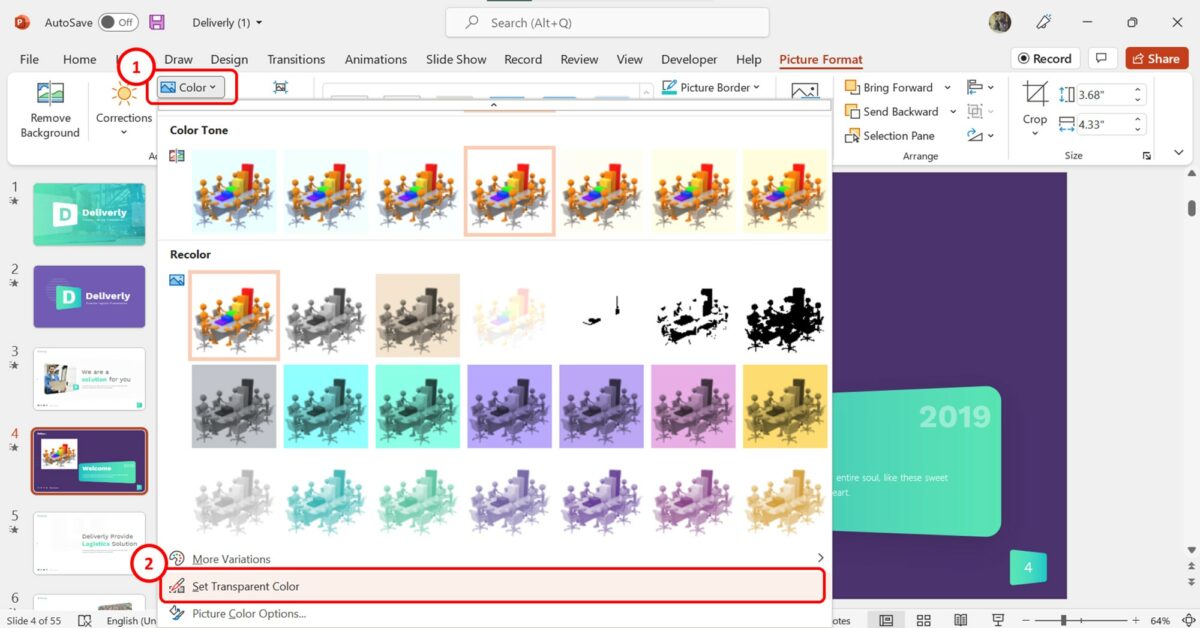
In the “Adjust” group of the “Picture Format” tab, click on the “Color” option. Then click on the “Set Transparent Color” option at the bottom of the dialog box under the “Color” option.
Step-3: Click on the white background

Now all you have to do is click on the white part of the selected image on the slide to remove the white background.
7. Add Picture Transparency in PowerPoint
The “Transparency” option in PowerPoint helps you adjust the transparency of a picture after inserting it into the slide. You can read more about the “Transparency” feature in PowerPoint in my article here. To add picture transparency, follow the 3 easy steps.
Step-1: Click on the “Format Picture” option

The first step is to “Right Click” on the picture on the slide. Then click on the “Format Picture” option at the bottom of the dropdown menu.
Step-2: Click on “Picture Transparency”

In the “Format Picture” sidebar on the right side of the screen, click on the “Picture” option which is the last icon at the top. Then click on the “Picture Transparency” option.
Step-3: Click on the “Transparency” box

Now all you have to do is click on the “Transparency” box under the “Picture Transparency” section of the “Format Picture” sidebar. You can enter a transparency value in the box. You can also drag the “Transparency” slider to add transparency to the picture.
8. How to Change Picture Color to White in PowerPoint?
Using the “More Variations” option in PowerPoint, you can recolor a picture. To change the color of a picture to white, follow the 3 quick steps.
Step-1: Click on the “Picture Format” tab

The first step is to select the image on the slide. Then click on the “Picture Format” tab in the menu ribbon located at the top of the screen.
Step-2: Click on the “Color” option
The next step is to click on the “Color” option. It is located at the top in the “Adjust” group of the “Picture Format” tab.
Step-3: Click on the “White” color
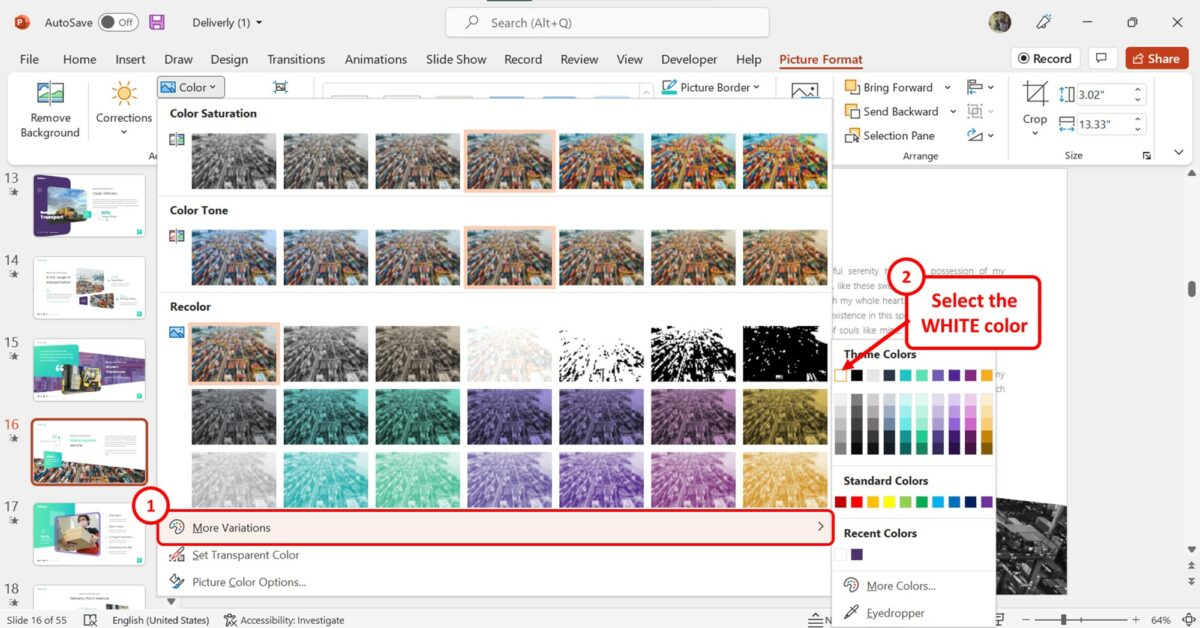
At the bottom of the dropdown menu under the “Color” option, click on the “More Variations” option. Then click on the “White” color which is the first color under the “Theme Colors” section.
9. How to Change a Color Picture to Black and White in PowerPoint?
In Microsoft PowerPoint, you can change the color of a picture into Black and White using different presets. All you have to do is follow the 2 quick steps.
Step-1: Click on the “Picture Format” tab

In the slide, click on the picture to access the contextual tabs. Then click on the “Picture Format” tab in the menu ribbon.
Step-2: Click on the “Grayscale” option

The next step is to select a black-and-white preset. Click on the “Color” option in the “Picture Format” tab. In the “Recolor” section of the dropdown menu, click on your preferred preset. The available black and white options are “Grayscale”, “Black and White: 25%”, “Black and White: 50%”, and “Black and White: 75%”.
10. How to Add Color to a Black and White Picture in PowerPoint?
In Microsoft PowerPoint, you can use the “Reset” option to add color to a black-and-white picture when the picture was not grayscale when inserted. To add a monochrome color to a black-and-white picture inserted in PowerPoint, follow the 2 simple steps.
Step-1: Click on the “Picture Format” tab
The first step is to access the contextual tabs. To do so, click on the black and white picture inserted into the slide. Then click on the “Picture Format” contextual tab in the menu ribbon located at the top of the screen.
Step-2: Click on the “Color” option
The next step is to recolor the grayscale image. Click on the “Color” option in the “Adjust” group of the “Picture Format” tab. In the “Recolor” section of the dropdown menu under the “Color” option, click on your preferred color to add it to the black and white picture.
11. How to Change Background Color of Picture in PowerPoint?
In Microsoft PowerPoint, there is no available feature to change the background color of a picture inserted into the slides. You can only remove a picture background in PowerPoint. To change the background color, you can use other applications available online. Then insert the image with the changed background color into the PowerPoint slide.
12. How to Reset Picture in PowerPoint?
The “Reset” option in Microsoft PowerPoint will clear any formatting applied to a picture. You can reset all formatting, or a selected part of the picture formatting using the “Reset” button. To reset all formatting, follow the 2 quick steps.
Step-1: Click on the “Picture Format” tab
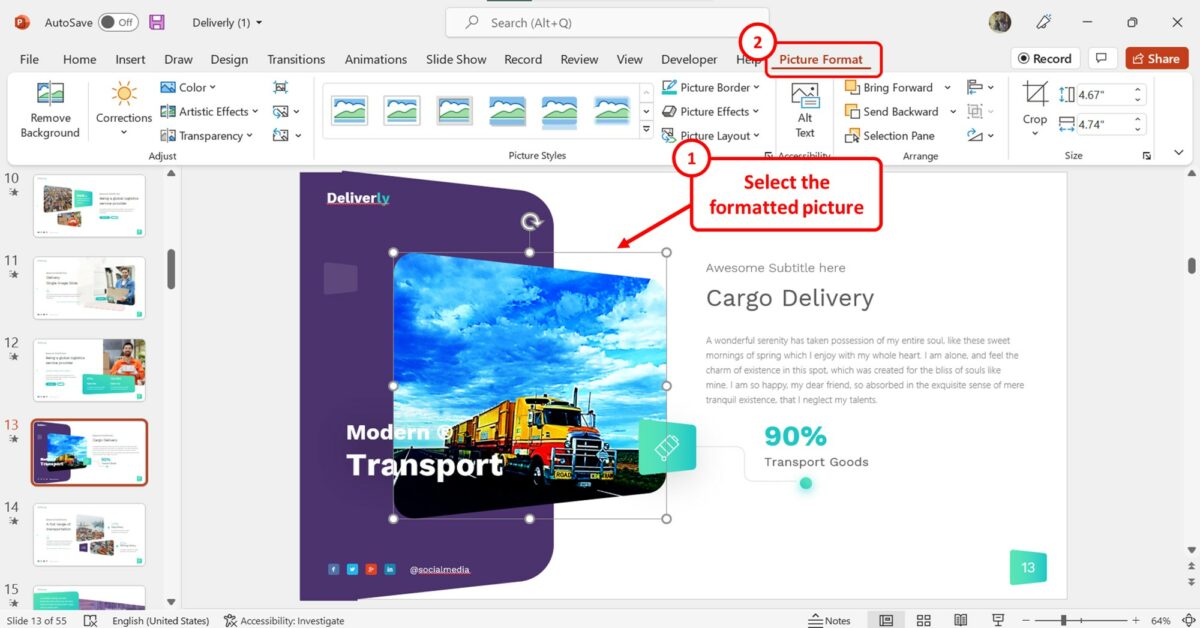
The first step is to click on the formatted picture in the PowerPoint slide. Then click on the “Picture Format” tab in the menu ribbon.
Step-2: Click on the “Reset Picture” option

The next step is to click on the “Reset” option. It is the bottom icon in the “Adjust” group of the “Picture Format” tab. Then click on the “Reset Picture” option in the dropdown menu to reset all formatting.
12.1 How to Reset Picture Color in PowerPoint?
To reset only the picture color to the original in PowerPoint, follow the 3 easy steps.
Step-1: Click on the “Format Picture” option

The first step is to “Right Click” on the picture. Then click on the “Format Picture” option at the bottom of the right-click menu.
Step-2: Click on the “Picture Color” option
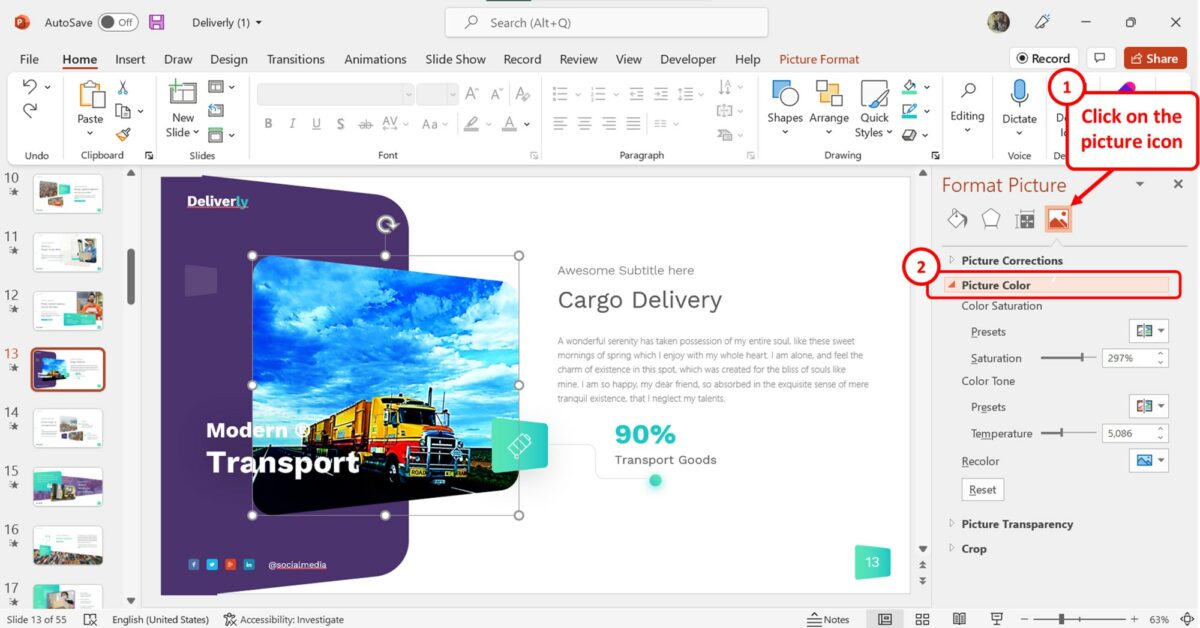
At the top of the “Format Picture” sidebar, click on the last icon which is the “Picture” option. Then click on the “Picture Color” option.
Step-3: Click on the “Reset” button
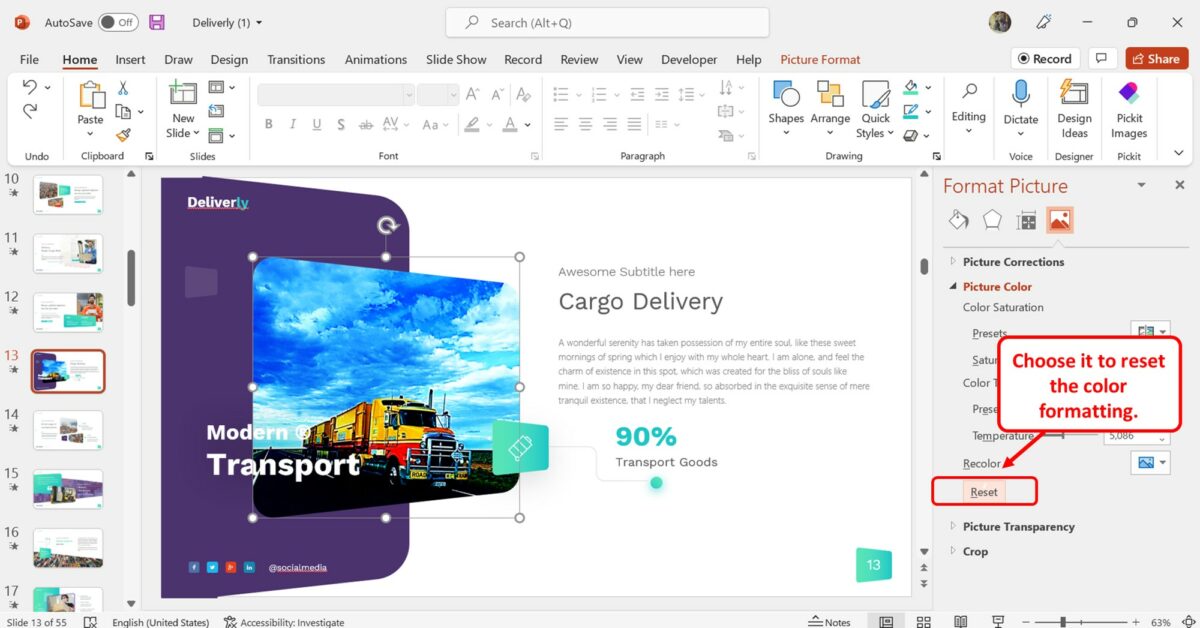
Under the “Picture Color” section of the “Format Picture” sidebar, click on the “Reset” button to reset the color formatting of the picture.
12.2 How to Reset Picture Corrections in PowerPoint?
In PowerPoint, you can reset only the picture corrections made to an inserted image. All you have to do is follow the 3 simple steps.
Step-1: Click on the “Picture Format” tab
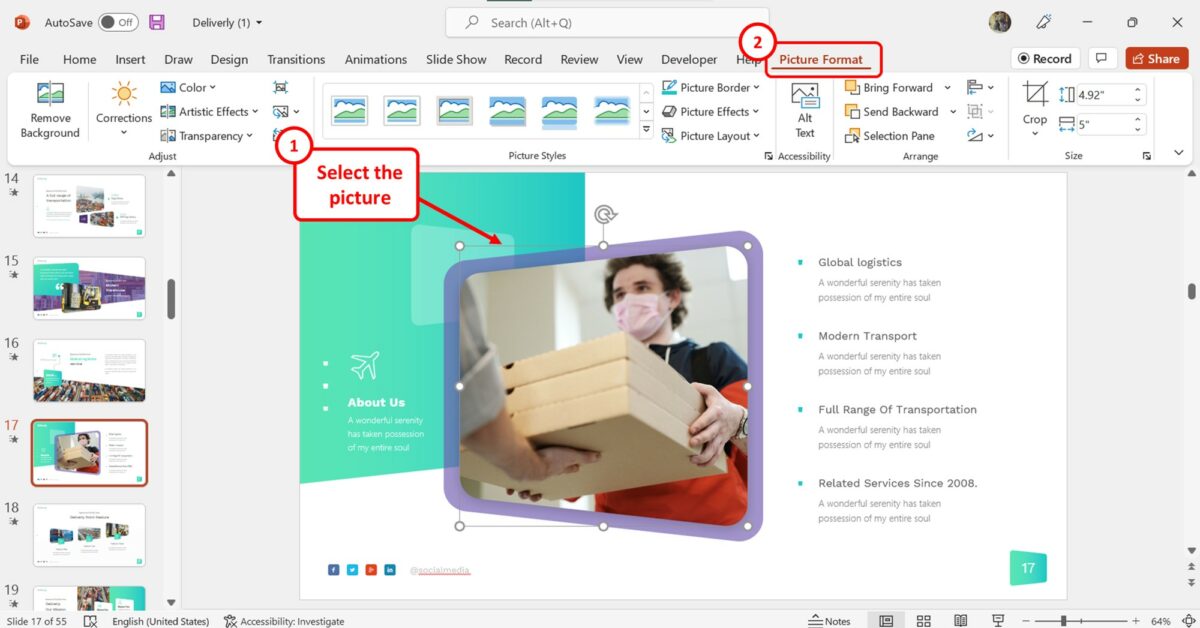
You have to first click on the picture on the slide. Then click on the “Picture Format” tab in the menu ribbon.
Step-2: Click on “Picture Corrections Options”
Now click on the “Corrections” button in the “Picture Format” tab. At the bottom of the dropdown menu, click on “Picture Corrections Options” to open the “Format Picture” sidebar.
Step-3: Click on the “Reset” button
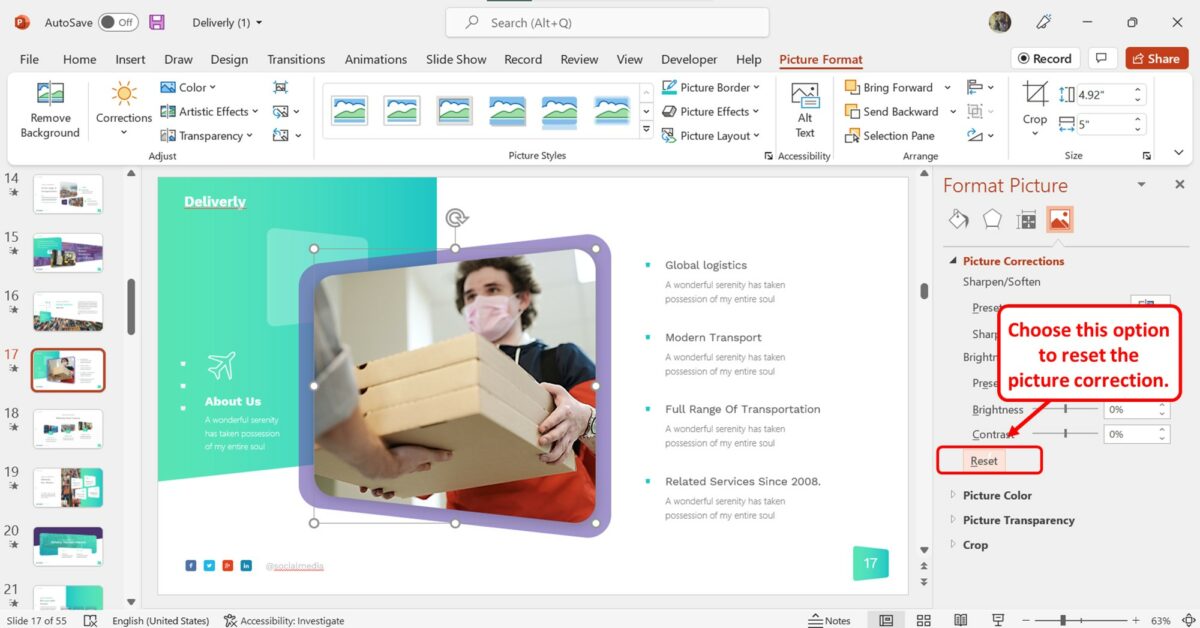
Under the “Picture Corrections” section of the “Format Picture” sidebar, click on the “Reset” button to reset only the picture corrections made to the selected image.