![How to Add Text Effects on Google Slides? [Become a PRO!]](https://artofpresentations.com/wp-content/uploads/2021/03/Featured-Image-Add-Text-Effects-on-Google-Slides.jpg)
Google Slides has a range of unique text effects and features that include changing the color of the text, highlighting the text, or even adding a drop shadow to make the text stand out! Adding these special effects to certain important texts in your slide can help you better grab your viewer’s attention. But, how does one add text effects on Google Slides?
To add text effects in Google Slides, first, highlight the text by double-clicking on it. Then, right-click and select “Format Options” to add effects like drop shadow, reflection, etc. To add color effect to text, use the text color tool represented with the “A” icon on the toolbar.
Although adding these text effects in Google Slides is perhaps easier than you think, it can be a bit of a challenge especially if you are new to Google Slides! So, in this article, I will share with you how you can add fancy text effects in Google Slides in a step-by-step manner.
So, let’s get started!
A Quick Note Before We Begin – if you want to make jaw-dropping presentations, I would recommend using one of these Presentation Designs. The best part is – it is only $16.5 a month, but you get to download and use as many presentation designs as you like! I personally use it from time-to-time, and it makes my task of making beautiful presentations really quick and easy!
How to Highlight Text in Google Slides?
Highlighting of the text in your slides can help you draw attention to a specific part of your slides immediately. One way of highlighting a text is by using a bold font type face. But, that is quite common. If you want to stand out from the crowd, you can choose to highlight the text with a background color!
Here is a step-by-step guide on how to highlight text in Google Slides –
Step-1: Select and Highlight the Text
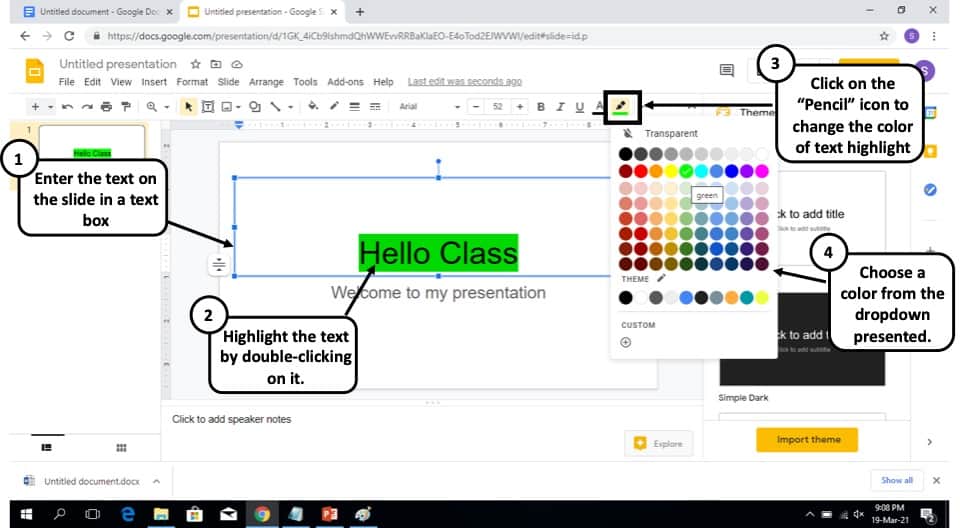
First, you have to open Google slides and go to the slide containing the text you want to highlight. After you open the particular slide, you have to select the text you want to highlight using your cursor.
Step-2: Change the “Highlight Text” Color
After selecting the text, click on the “pencil” icon at the top right corner and choose your desired color to highlight the text.
Following these two simple steps, you can easily highlight any text on Google slides. However, is it the only way to catch your audience’s attention on a particular point? Definitely not; Google slides has a bunch of other ways to do so.
How to Add Shadow to Text in Google Slides?
If you want a certain part of your text in the google slide to stand out from the rest without highlighting them, adding shadows to the text is what you want. For adding the shadow effect to your text, follow these steps:
Step-1: Highlight the Text
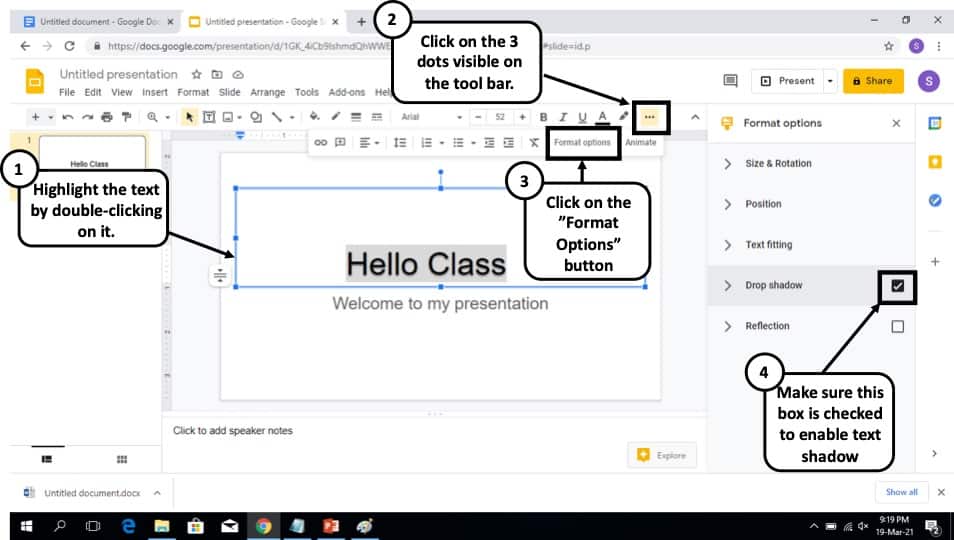
Open the slide and select the text you want to add shadow to, using your cursor.
Step-2: Open the Format Options Panel
Now click on the “three dots” icon on the upper right corner of your screen. Then click on “format options” from the dropdown menu that opens up.
Step-3: Enable Drop Shadow for Highlighted Text
Now, a new window will appear on the right side with the option “Drop Shadow.” Select that by checking the box or simply clicking on “Drop Shadow“, and you have successfully added a shadow to your text.
Highlighting and adding shadow on Google slides are pretty easy and can be done with just a few clicks. But what about changing the color of your text?
How to Change Color of Text in Google Slides?
If you are looking for a way to visually guide your audience towards a specific portion of text in your Google Slides, while giving a presentation, then changing the color of the text would be the perfect suit.
You can change the color of your text in Google Slides by following these easy steps:
Step-1: Highlight the Text to Change Color
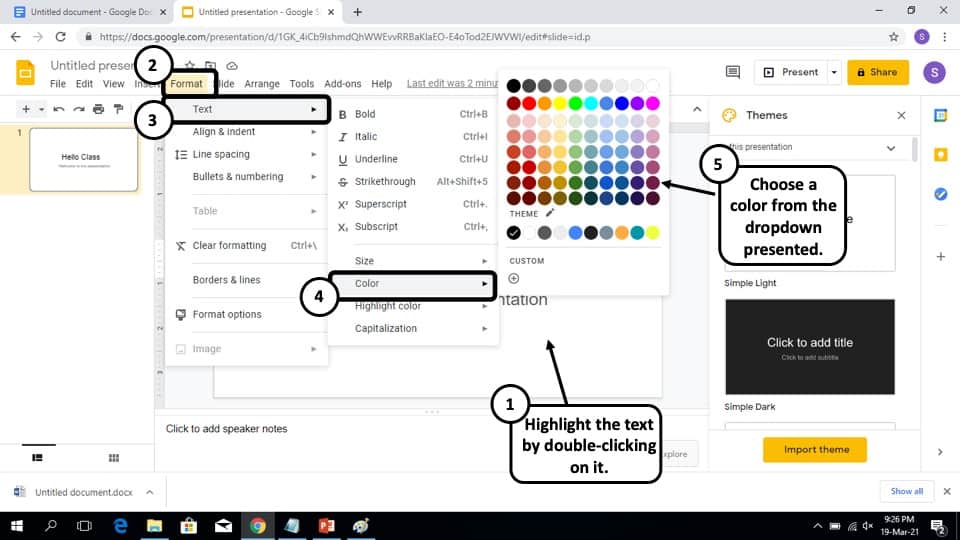
Open the slide, and using your cursor, select the text you want to add color to.
Step-2: Open the Color Settings from the “Format” Menu
Now from the toolbar, click on the “Format” option. A dropdown menu will appear. From that menu, click on “Text“. Then, in the next menu options, click on “Color“.
Step-3: Choose the Color for Your Text
Clicking on the “Color” option will open a box containing a variety of colors. Select the color of your preference, and you will notice that the color of your text will be changed accordingly.
This is how you can assign a specific color to any text on your slide, using Google Slides.
In the next section, I will be taking this a step further and discuss how to add a gradient color or a transition between two colors to your text to make even fancier.
How to Add Gradient Color to Text in Google Slides?
You might sometimes want to add gradient color to your text in google slides. Google slides offer you this feature too!
For adding gradient color to your text, follow the simple steps given below:
Step-1: Insert Word Art
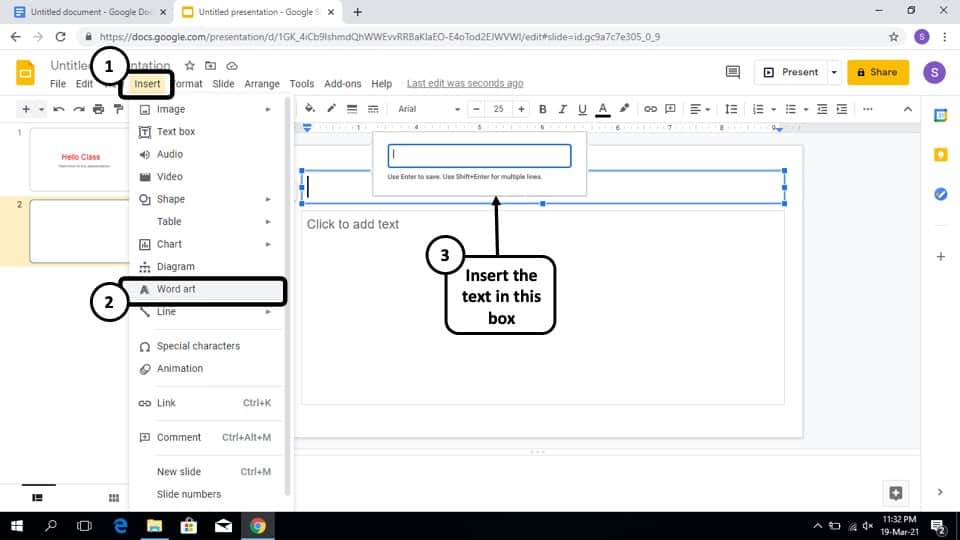
Open the slide and select the “Insert” option from the toolbar, using your cursor. From the drop-down menu, select “Word art.”
Step-2: Insert the Text for the Word Art
This will pop up a text bar for you to type on. In the text bar, write down the text you want in gradient color and hit enter.
Step-3: Choose a Gradient Color to Apply
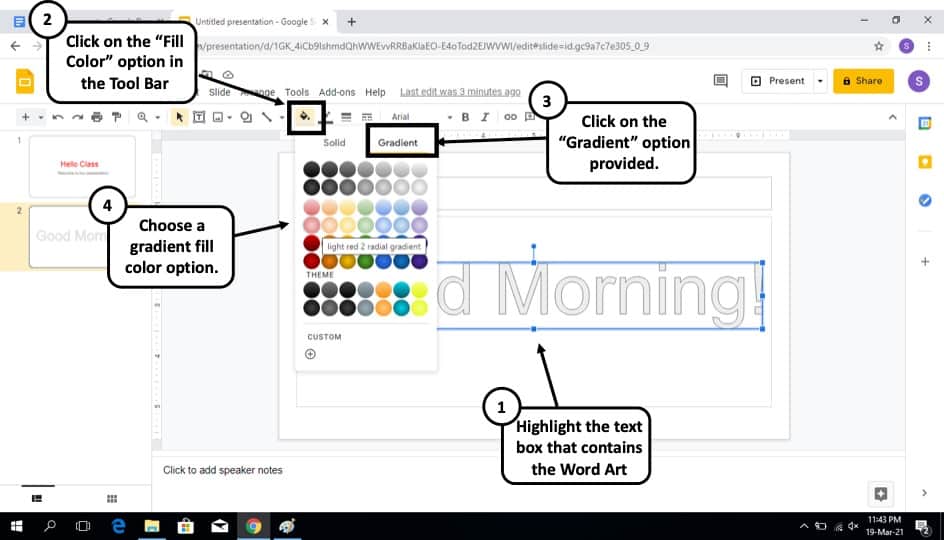
Then click on the “fill color” icon. Now select “Gradient” and choose your desired gradient color from the chart, and your work is done!
How to Make Text Glow on Google Slides?
If you don’t want to make your presentation slide monotonic by using the same features repeatedly, Google Slides has a feature to make your texts glow! Just follow the easy steps below:
Step-1: Insert Word Art
Open the slide and select the “Insert” option from the toolbar, using your cursor. From the drop-down menu, select “Word art.” like before.
Step-2: Insert the Text for the Word Art
In the text box, write down the text you want in glowing color and hit enter. For this example, we shall be using a simple “Good Morning!” message as an example.
Step-3: Apply a Text Color Fill
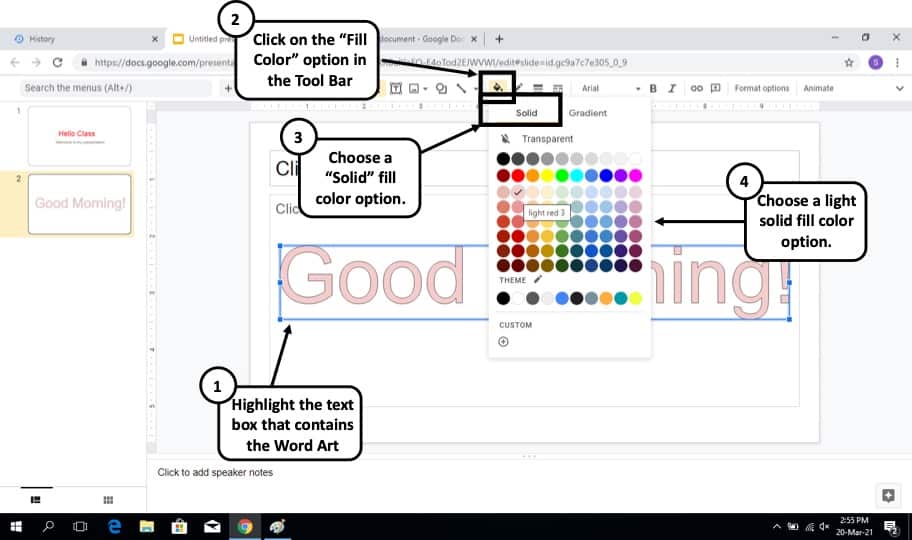
Now go to the toolbar at the top of your screen and select the “Fill color” option. Choose a color of your choice. Remember to go with a lighter shade as that is what works best for the glow effect.
Step-4: Apply a Darker Color to the Text Border
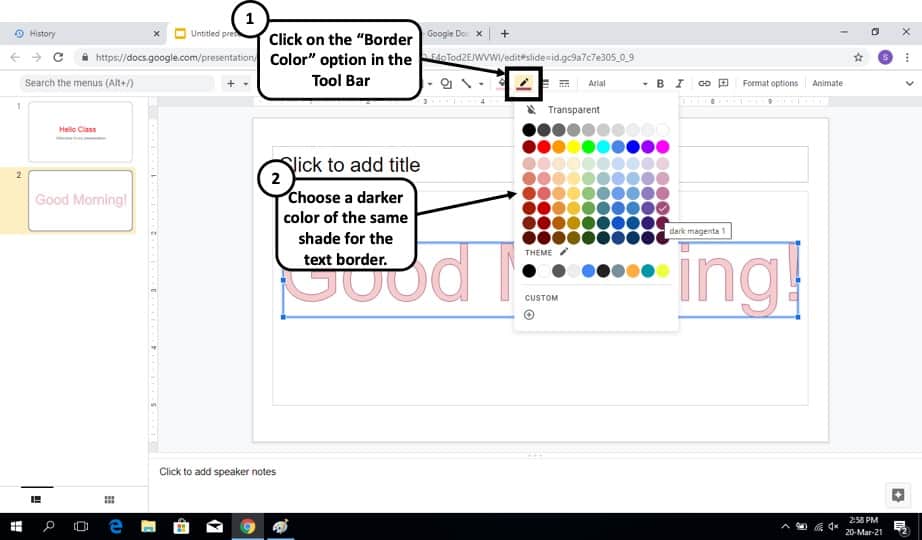
Click on the “Border color” icon, which is right next to the “Fill color” icon, and from the color chart, chose the color of your preference, but it should be the darker shade of the color you chose earlier.
Step-5: Adjust the Weight of the Border
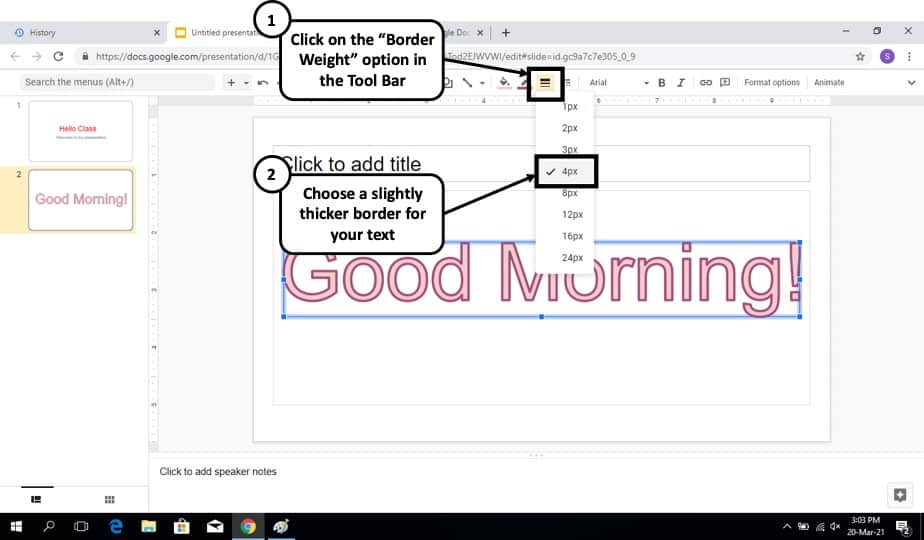
Go to the “Border Weight” option right next to the “Border color” icon, and choose your preferred measure. And you have made your text glowing!
Step-6: Add a Drop Shadow to the Word Art
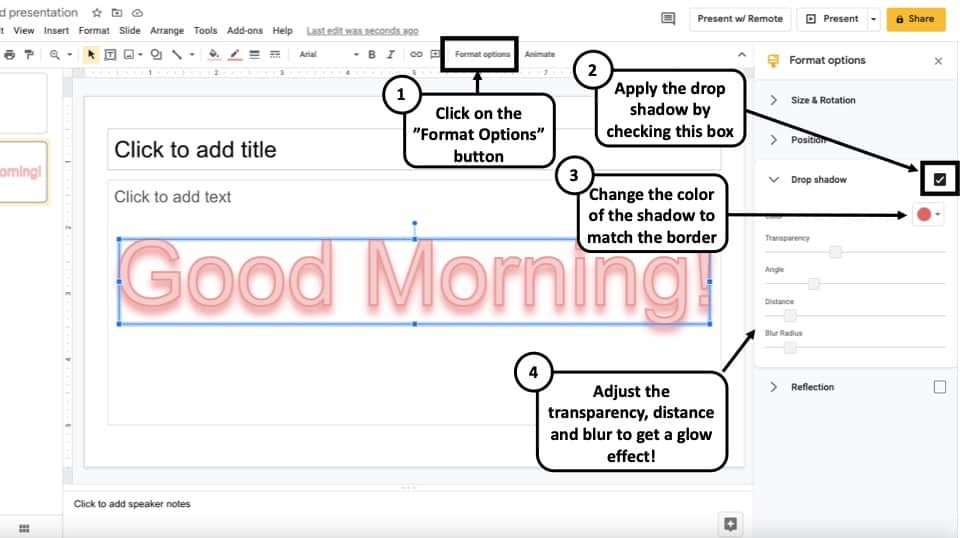
Now, as a last step, click on the “Format Options”. A new window will open up on the right side of your screen. From this window, enable “Drop Shadow“.
Make sure that you adjust the color of the shadow to match the “Text Color” or the “Border Color” to get the best effect.
As a last step, adjust the transparency, shadow distance, and the shadow blur settings as per your convenience to get a good glow effect on the text!
This is how you can make your text glow using Google slides.
How to Make Rainbow Colored Text in Google Slides?
If you’re looking for something vibrant to make your presentation slides look more cheerful and fun, you can try changing the color of some texts to rainbow color. Just follow these easy steps:
Step-1: Insert the Word Art on the Slide
After opening the slide, go to the “Insert” option on the toolbar at the top and select the “Word art” option.
Step-2: Add the Text for the Word Art
Type the text that you want in rainbow color and hit “enter.”
Step-3: Choose the Custom Gradient Fill Color Option
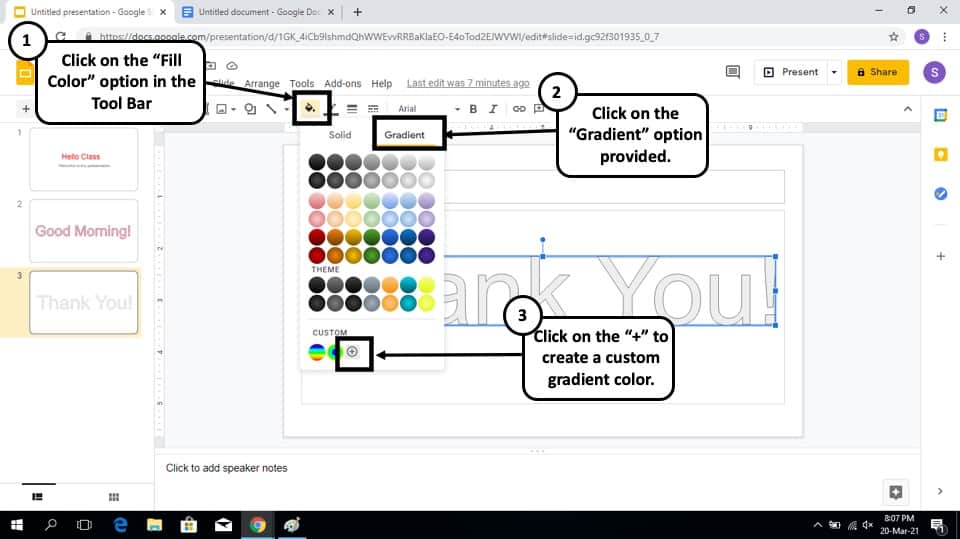
Now click on the “Fill color” icon and select gradient, where you’ll find the “Custom” option at the bottom. Click on the “plus” icon inside the custom option.
Step-4: Add Custom Rainbow Gradients
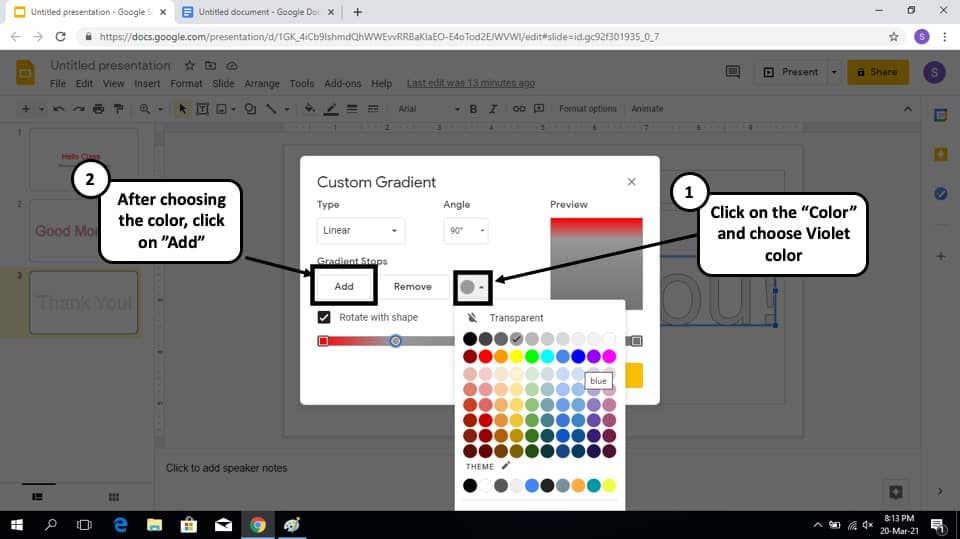
Now, you can customize the gradient into rainbow color. By clicking the “Add” option, you will be able to to add your gradient stops. Now for each stop, select a color of your choice to make your custom rainbow gradient. Here, I have selected violet, indigo, blue, green, yellow, orange, and red to resemble a real-life rainbow.
Step-5: Adjust the Custom Gradient Distance
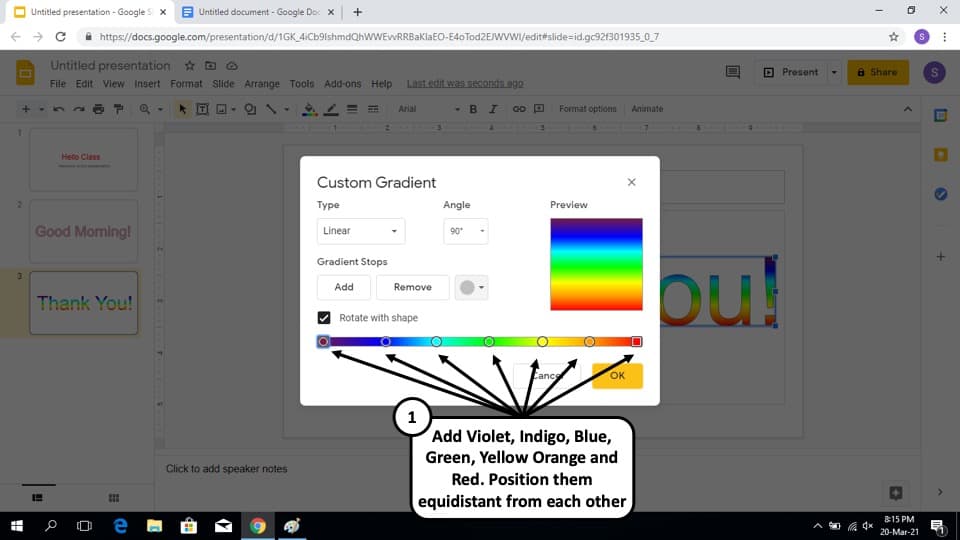
Repeat the step 5 until you have all the 7 colors of the rainbow added as a gradient. Try to keep the newly added gradients at an equidistant as possible.
Step-6: Apply the Gradient Rainbow Fill
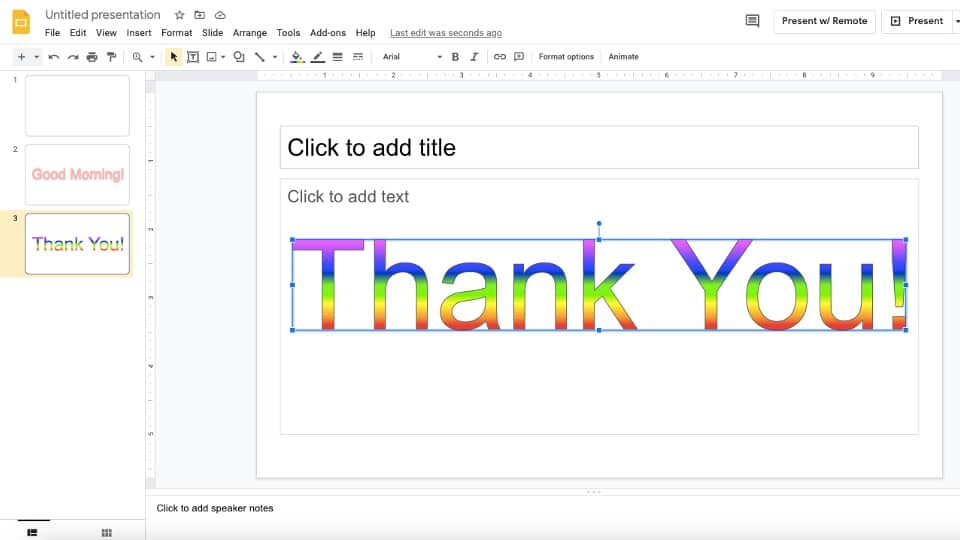
After adding all the color stops, hit the “OK” option. Now the text will appear in rainbow color!
More Related Topics
- How to Fix Almost Anything on Google Slides! [A Comprehensive Troubleshooting Guide]
- Do Presentation Clickers Work with Google Slides? [Interesting Read!]
- How to Curve Text in Google Slides? Always Use THIS Trick!
- How to Use the Eyedropper Tool in Google Slides? [Even When This Tool Doesn’t Exist!]
- 17 Pros and Cons of Google Slides! [Should You Even Use it?]
Credit for Featured Image to Cookie_Studio